Rick, your first five attachments, if they are pictures, weren't done properly and seem to lead to a dead end. If the pictures are on your computer, you can try again either of two ways. One is just clicking the Insert Image icon and then choosing upload image.
-
Happy National Sunglasses Day! ☀️🕶️😎
You are using an out of date browser. It may not display this or other websites correctly.
You should upgrade or use an alternative browser.
You should upgrade or use an alternative browser.
First Build: 17'-6" J. Winters "Yukon"
- Thread starter RickR
- Start date
Thanks Glenn. Here they are, in order. I am not savvy enough to reinsert them in the original post. I'm sure it is right in front of me, but I can not figure out how to edit. I composed the post in fits and starts, over 3 days, first figuring out the photo thing on day 1. Day 2 I wrote a bit more and added photos. Day 1 photos were still there. Day 3 all photos were replaced with links, I added the last photo and posted. Well, that didn't work. Note to self: don't take so long to post.


Thanks Glenn. Here they are, in order. I am not savvy enough to reinsert them in the original post. I'm sure it is right in front of me, but I can not figure out how to edit.
Rick, I edited your message to put all the five photos where they belong. There's an edit link at the bottom of every message you post, but permission to edit had been limited to 12 hours after posting for all registered members. I just increased the editing time to 48 hours.
Thank you Glenn!Rick, I edited your message to put all the five photos where they belong. There's an edit link at the bottom of every message you post, but permission to edit had been limited to 12 hours after posting for all registered members. I just increased the editing time to 48 hours.
Noting your pics, of adding an extra layer.
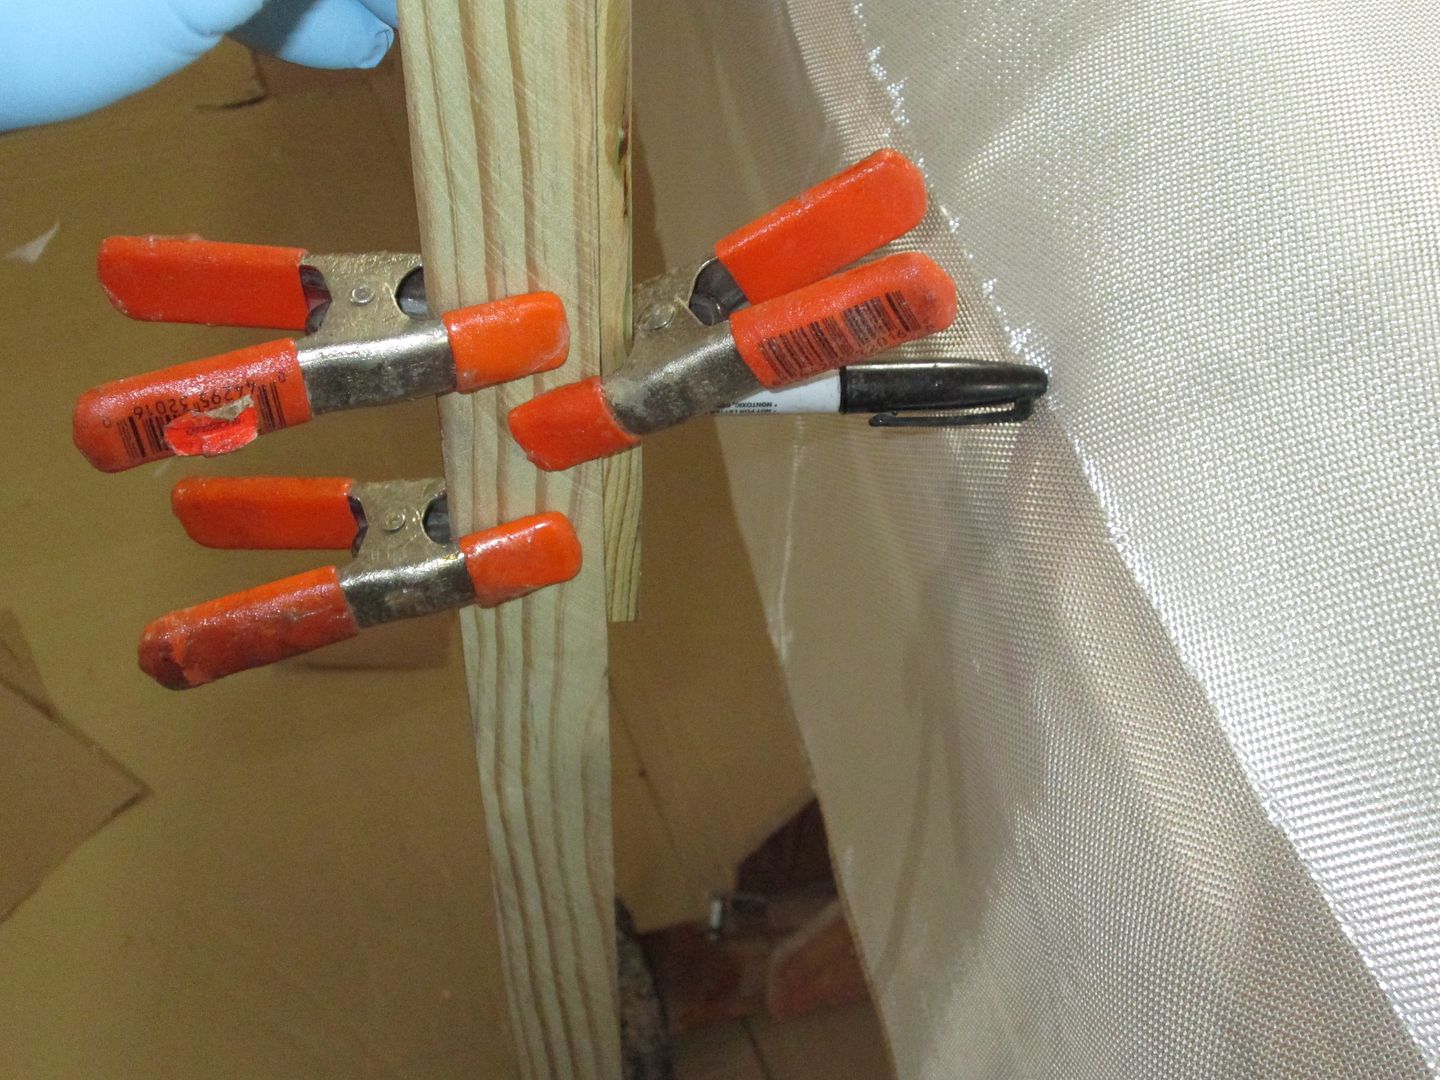
I just trim my cloth and wet out. Feathering the edges is easy with a carbide scraper the next day. When the hull is done and varnished, you can't see where it is. A trick I use to mark where to trim the the cloth line. With a Magic marker clamped to a stick. I reference it off the floor, and make small dots, on the cloth, all around the canoe. Then with scissors I trim the cloth. No masking tape needed.
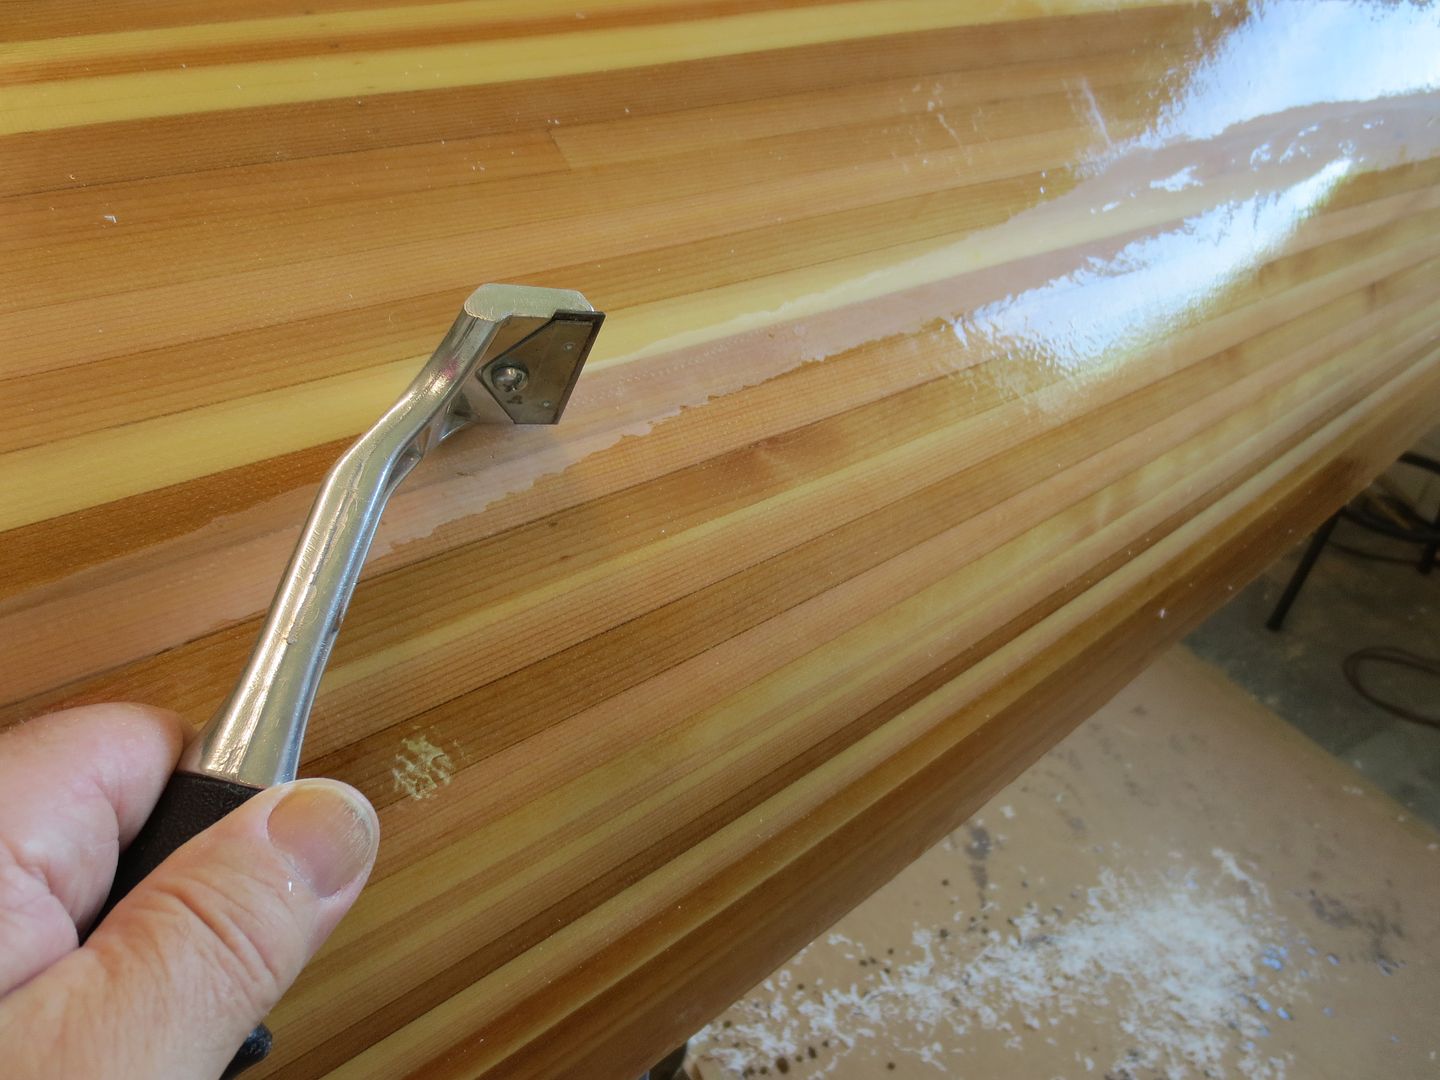
I just trim my cloth and wet out. Feathering the edges is easy with a carbide scraper the next day. When the hull is done and varnished, you can't see where it is. A trick I use to mark where to trim the the cloth line. With a Magic marker clamped to a stick. I reference it off the floor, and make small dots, on the cloth, all around the canoe. Then with scissors I trim the cloth. No masking tape needed.
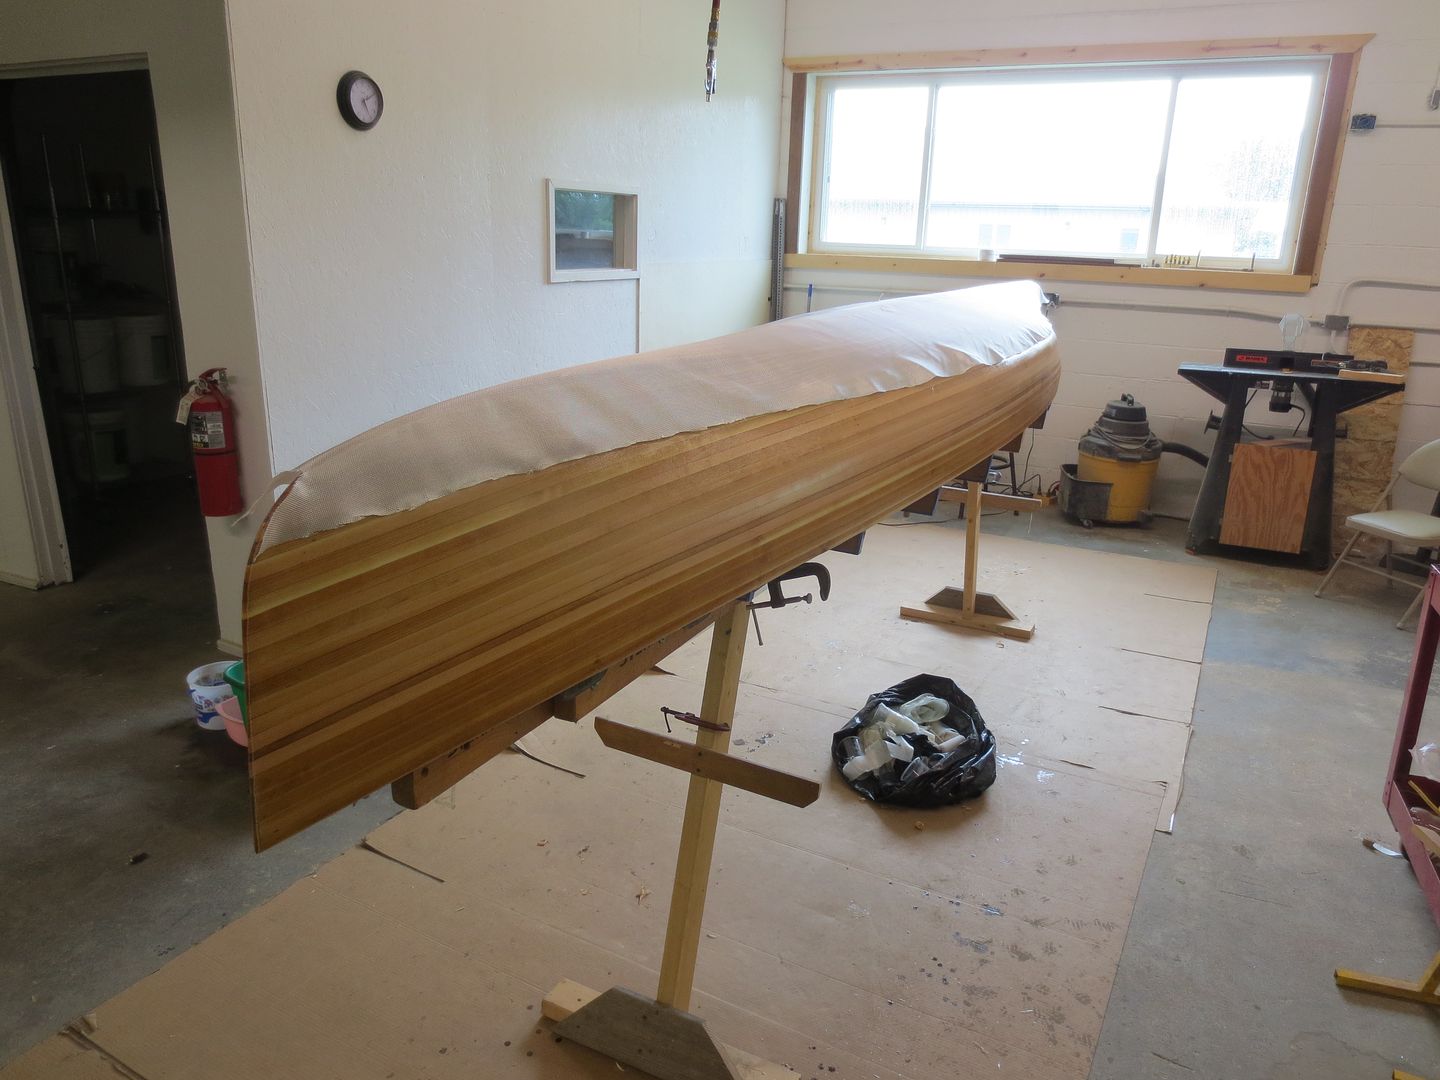
I'm still slow poking along. If I live long enough I'll finish this canoe!
I added two bias cut layers (4 inches and 2 inches wide with ends staggered) of 6 ounce S glass from just above the water line back 3-4 feet at each stem.

After deciding on rabbeted gunnels I cut down the shear 1/4 inch to stay true to plan. I'm not sure that was really necessary but it went quickly with a laminate trimmer with a custom base.

Three weeks went by after exterior glassing before I got back to the boat. I sanded the outside while it was still solidly on the forms. Karen and I enjoyed the "Big Flip".

I was glad I decided to build a fitted cradle because it turns out working on the inside requires a fair amount of elbow grease.

I've been following "CanoeCraft" mostly, and followed the recommendation to scrape the interior before sanding. I was surprised how well that worked. The inside was faster to prep than the outside. It's much easier when the goal is just to get everything smooth and not also faire.

I'm ready now for interior glass. It looks like this Tuesday temperatures will be favorable, in the mid 70's. I'm contemplating wether to go with one piece of glass, or break out the stems separately. Any advise those of you with more experience have for this first timer would be welcomed!
I added two bias cut layers (4 inches and 2 inches wide with ends staggered) of 6 ounce S glass from just above the water line back 3-4 feet at each stem.
After deciding on rabbeted gunnels I cut down the shear 1/4 inch to stay true to plan. I'm not sure that was really necessary but it went quickly with a laminate trimmer with a custom base.
Three weeks went by after exterior glassing before I got back to the boat. I sanded the outside while it was still solidly on the forms. Karen and I enjoyed the "Big Flip".
I was glad I decided to build a fitted cradle because it turns out working on the inside requires a fair amount of elbow grease.
I've been following "CanoeCraft" mostly, and followed the recommendation to scrape the interior before sanding. I was surprised how well that worked. The inside was faster to prep than the outside. It's much easier when the goal is just to get everything smooth and not also faire.
I'm ready now for interior glass. It looks like this Tuesday temperatures will be favorable, in the mid 70's. I'm contemplating wether to go with one piece of glass, or break out the stems separately. Any advise those of you with more experience have for this first timer would be welcomed!
Inner stems can be a pain to glass around.
Be sure you are happy with the rest of the glass and it meets your approval, then tend to glassing the inner stems . It's easy to spend too much time on them.
A few people cut the inside glass short, then come back later and finish the stems. Overlap the edges by at least 2". This is a good option, especially if this is your first canoe. If you place the overlaps right few people will ever see them.
Hull looks great by the way !
Did you check the width of your hull at the center ? It appears to spread some ?
Jim
lol, that's why I named my first build "A Slow Boat to Nowhere".I'm still slow poking along. If I live long enough I'll finish this canoe!
I always roll my inside glass side to side, with about a three inch overlap. I just find it quicker and easier, not as pretty as one sheet, but a lot easier to work out wrinkles, etc. For the area around the stems, I will usually cut independent pieces for each side and put them on either first or last. I don't bother covering the top of the stem with glass, just work the glass into the bottom edge and up the side of the stem, then sand the edge down. Coat the top of the unglassed stem with epoxy and varnish, good to go.
I'm quite excited to see this one on the water. The Dumoine I built was a very large canoe, held a ton of stuff, this one should be a high capacity tripper. As I was looking at your pics, I was thinking "I wonder what this canoe would be like stretched out to 20 feet?".
I'm quite excited to see this one on the water. The Dumoine I built was a very large canoe, held a ton of stuff, this one should be a high capacity tripper. As I was looking at your pics, I was thinking "I wonder what this canoe would be like stretched out to 20 feet?".
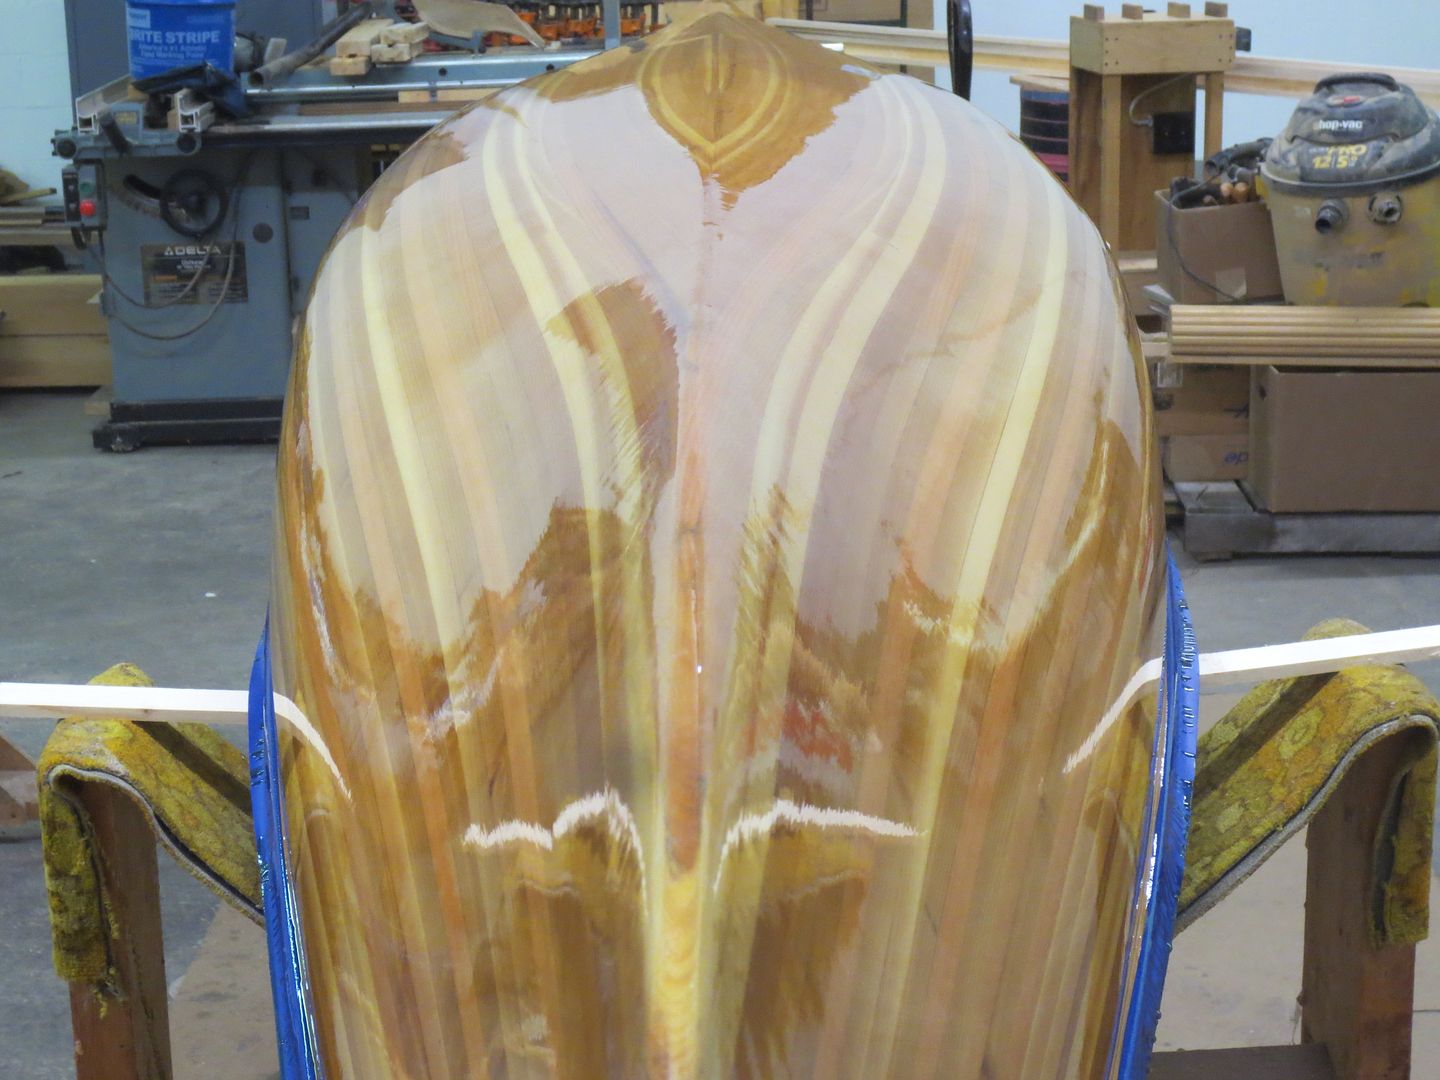
Jim, Thank you. The hull is actually nestled in the cradle pretty much true to dimension. I think sometimes camera angles make things look weird.
Al, my goals for this project were to learn some new skills and hopefully get a nice canoe. I decided early on to not worry about time, and to focus on doing solid work and it would take what it takes. That being said, I thought for sure I'd finish up within a year. This isn't the first time I've blown an estimate by 2X!
Thanks Mem. Yours and Jim's advise makes me think there's not much profit in going for a single piece of glass. I never thought of rolling the glass from side to side, but it makes sense that doing so would be more forgiving. I think we'll experiment a bit in seeing how the fabric settles into this particular hull, but multiple pieces it will be.
Your project is looking great! I love the look of those rabbeted stems; that's a clean look. Way less clutter in your shop than mine too!
>.< you are doing such a good job and having so much fun at it, it makes me want to start a canoe .... great work
Brian
Brian
We had a nice day in the low 70's and glassed the interior. Karen and I binge watched episode 22, "Sheathing the Hull Interior", of the Canoecraft Workshop Series on YouTube. After 3 consecutive viewings we decided to go with 2 pieces of S-Glass. The major piece went from the stern to 8 inches shy of the bow interior stem.

We started at the bow, painting epoxy on the bare wood, and then wetting out the cloth when we hit it. We finished at the stern, fussing and fooling around the interior stem. Karen kept saying "Leave it alone. It looks fine. You're just going to mess it up.". I guess I listened to her in time, because we're satisfied with the end result.

I did point out to her that we always practice new techniques on my end of the boat, and her end always looks better! The minor piece of glass at the bow went well, and was a lot less pressured. We did apply a light 2nd squeegee coat of epoxy also.
So now it's on to gunnels. I've mocked up a few options, and have settled on this.

I plan to scupper the inner gunnels. My original vision was to taper the inner and outer gunnels at the stem ends. That's an elegant and graceful look that I like. But the tapered stem ends provide a 1and 3/8 inch footprint to land on, and that leads to an 11/16 inch in wale width for the in wales to define a point at the bow and stern. Somehow the "point" thing is driving my thought process. I may taper the out wales. More mock ups in store!
As always, any thoughts, suggestions, or criticisms are very much appreciated. This project is turning out better than I'd hoped, due in large part to your advise and support.
Rick
We started at the bow, painting epoxy on the bare wood, and then wetting out the cloth when we hit it. We finished at the stern, fussing and fooling around the interior stem. Karen kept saying "Leave it alone. It looks fine. You're just going to mess it up.". I guess I listened to her in time, because we're satisfied with the end result.
I did point out to her that we always practice new techniques on my end of the boat, and her end always looks better! The minor piece of glass at the bow went well, and was a lot less pressured. We did apply a light 2nd squeegee coat of epoxy also.
So now it's on to gunnels. I've mocked up a few options, and have settled on this.
I plan to scupper the inner gunnels. My original vision was to taper the inner and outer gunnels at the stem ends. That's an elegant and graceful look that I like. But the tapered stem ends provide a 1and 3/8 inch footprint to land on, and that leads to an 11/16 inch in wale width for the in wales to define a point at the bow and stern. Somehow the "point" thing is driving my thought process. I may taper the out wales. More mock ups in store!
As always, any thoughts, suggestions, or criticisms are very much appreciated. This project is turning out better than I'd hoped, due in large part to your advise and support.
Rick
Looks great ! The glassing around those stems looks very nice !
I too cap my hull with the outwhales. One thing I learned was to round over the gunnels on the bottom side before attaching. It can be difficult to router them later after they are installed.
Those Spring clamps are cool !")
I'm wishing I was building something !
Keep it up ! Tell Karen she is doing nice work ! Seems like women have the "Touch" when laying out cloth !
Jim
I too cap my hull with the outwhales. One thing I learned was to round over the gunnels on the bottom side before attaching. It can be difficult to router them later after they are installed.
Those Spring clamps are cool !
I'm wishing I was building something !
Keep it up ! Tell Karen she is doing nice work ! Seems like women have the "Touch" when laying out cloth !
Jim
We glued on the last of the wales yesterday. Temperatures have suddenly turned seasonal and we've settled for daytime highs in the 50's and nighttime lows in the 40's. West System says minimum temperature for 207 hardener is 60 degrees F. Maybe I should stop reading the instructions.
I scored a beautiful 21 foot clear ash board and was able to mill everything full length with matching grain. It makes me really sad to think we're losing our ash to the Emerald Ash Borer. Ash is such a useful wood.
There was more than enough hull thickness variation at the shear for me to think it was going to be a major project to properly fit a rabbeted out wale to an installed in wale. I decided to glue on the out wales first. My "Jimmy" clamps worked well for that, with the addition of a 3/4 inch spacer block.

I like the look of the corners that the drill press method of cutting in scuppers produces, so used that method to rough them out.


Fitting the in wales to the stems was interesting. I ended up using a scrap piece of in wale to confirm angle and bevel, and then clamped it in place to guide my saw for the "freehand" cut.

It was a a straightforward matter to plane the rabbeted out wales flush with the inner surface of the hull and then glue the in wales in place. The "Jimmy" clamps were perfect for that also, with no spacer block needed.

I'm close to putting this project to bed (again!) for the winter. I'll be interested to check the weight, as soon as I dare remove the clamps!
I scored a beautiful 21 foot clear ash board and was able to mill everything full length with matching grain. It makes me really sad to think we're losing our ash to the Emerald Ash Borer. Ash is such a useful wood.
There was more than enough hull thickness variation at the shear for me to think it was going to be a major project to properly fit a rabbeted out wale to an installed in wale. I decided to glue on the out wales first. My "Jimmy" clamps worked well for that, with the addition of a 3/4 inch spacer block.
I like the look of the corners that the drill press method of cutting in scuppers produces, so used that method to rough them out.
Fitting the in wales to the stems was interesting. I ended up using a scrap piece of in wale to confirm angle and bevel, and then clamped it in place to guide my saw for the "freehand" cut.
It was a a straightforward matter to plane the rabbeted out wales flush with the inner surface of the hull and then glue the in wales in place. The "Jimmy" clamps were perfect for that also, with no spacer block needed.
I'm close to putting this project to bed (again!) for the winter. I'll be interested to check the weight, as soon as I dare remove the clamps!
That's coming along nicely! I definitely like the scuppered inwales.
I'm coming to Jericho, VT this coming weekend to visit my son. If you'd like to show off your work, please text me. I'll share my phone number via private message.
Pat
I'm coming to Jericho, VT this coming weekend to visit my son. If you'd like to show off your work, please text me. I'll share my phone number via private message.
Pat
Thanks Pat. The inwales were a welcome change of pace after all of the fiberglass work. I used the Golden Ratio to size them. Layout was a little fiddly. I allowed 6 inches at the center carry thwart, and 4 inches at the bow and stern thwarts and seat bolt locations. Then the question was how long to make the scuppers and how to space them for each section. For example, there was 49.5 inches between the front bow seat strut location and the bow stem. After fooling with it some I ended up dividing that by 6 to get 8.25 inches. Dividing 8.25 by the Golden Ratio (1.618) results in 5.1 inches, which I chose to be the scupper length. 8.25 minus 5.1 equals 3.15 inches, which became space between scuppers. I had to repeat this process for each inwale section. Scupper length and space dimensions vary subtly between sections, but the proportions are constant throughout.
Whoa! I didn't really intend to get so deep into the weeds there. I've used the Golden Ratio a lot in my day job carpenter life. It's a really useful proportioning tool.
This photo is taken between the bow seat and bow.

Thank you Jim. I did not router those corners before install and need to soften them by hand in place. I didn't take time to set up the router table when I was milling. I've always assumed deck plates, but now I'm not so sure. The ends look pretty simple and solid to my eye now. If I go for it they'll be fairly small, simple, and definitely ash. I have the winter to think about it. It's getting to be pretty cool in the canoe shop!
Rick
Whoa! I didn't really intend to get so deep into the weeds there. I've used the Golden Ratio a lot in my day job carpenter life. It's a really useful proportioning tool.
This photo is taken between the bow seat and bow.
Thank you Jim. I did not router those corners before install and need to soften them by hand in place. I didn't take time to set up the router table when I was milling. I've always assumed deck plates, but now I'm not so sure. The ends look pretty simple and solid to my eye now. If I go for it they'll be fairly small, simple, and definitely ash. I have the winter to think about it. It's getting to be pretty cool in the canoe shop!
Rick
Really nice work Rick! I like the scuppered gunwales. I have always wanted to try it but just can't bring myself to do it. Maybe someday I'll get the courage to give it a try!
dougd
dougd
Super nice work! I have built a few without decks, just added grab handles, but a small deck will give it a finished look. Did you get to the weighing part yet?
Similar threads
- Replies
- 42
- Views
- 3K
- Replies
- 170
- Views
- 13K
- Replies
- 14
- Views
- 2K
- Replies
- 90
- Views
- 14K