• Happy "Killer Rabbit" Attacks President Carter in His Paddle Boat (1979)! 🚣🏼‍♂️🐇

First Build: 17'-6" J. Winters "Yukon"

Ah yes, the weights. Although I haven't focused on weight at all in this build, I have been curious where it might end up.

After the "Big Flip" 37 pounds

Ready for interior glass 35

After interior glass 41

Now, gunwales installed 48.5 pounds
 
You've left me in the weeds with scupper dimensions and golden ratios, but the gunnels are indeed a thing of beauty. Deck decisions will be interesting. make a few mock up inserts to see how they look?
 
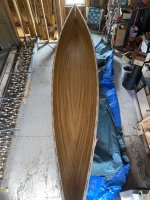
Has anyone else ever dropped a year and a half on a canoe build? I did. 2022 was a good year, but not for our boat build. Home stretch now though. I have some time to work and a deadline. We’re planning fall trips in September and October.

I decided to install Gilpatrick style low line attachment holes using 3/4 inch copper water pipe. We had one low water river trip where it seemed we pulled the canoe downstream more than we paddled it. Enough water to float the boat and our gear, but not with us in it. When that happens again it will be nice to pull just above the waterline.
 

Attachments

  • IMG_1418.jpeg
    IMG_1418.jpeg
    106.9 KB · Views: 18
  • IMG_1419.jpeg
    IMG_1419.jpeg
    113.6 KB · Views: 16
  • IMG_1420.jpeg
    IMG_1420.jpeg
    110.7 KB · Views: 16
  • IMG_1421.jpeg
    IMG_1421.jpeg
    102.5 KB · Views: 15
Looks great !
I'm assuming you glassed around the inside, of the copper.

If I was planning on dragging much ? I'd add an extra layer of cloth up to about the 3" waterline, on the hull.
4 oz S-glass would be my choice.


Jim
 
Thanks Jim!

There's no glass on the interior surfaces where the copper pipe passes through. The interior fiberglass (6 oz. S-glass) stops a couple inches short of the vertical portion of the interior stems. There's 2 coats of epoxy on the wood there, the wet-out and 1 fill coat. I was a little nervous drilling holes in the hull, but a fresh spade bit with spurs did the trick. I painted on as much epoxy as the hole perimeter would absorb, then thickened it with colloidal silica and installed the pipe which I'd cleaned and roughed up with sandpaper. I think I got a good fill of the small free space around the pipe.

We did add a 6 oz. S-glass football layer to the 4 inch waterline on top of a 6 oz. E-glass base layer on the exterior.

Rick
 
Has anyone else ever dropped a year and a half on a canoe build? I did.
Not me but it took me about 5 years to get started.

Great to see you back on the project, especially as you're so close to being done.

Looks great and we'll be watching for the first, fully-loaded and ready to launch, picture from the fall trip!
 
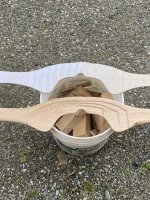
I still need to make a carry thwart and 2 regular thwarts. I’m working on those while I varnish the interior. A few years ago I tried to improve a commercial flat carry yoke using an angle grinder with a flap, sanding disk. I had nothing to copy. With no clear picture of the end zone it turned into an exercise in chasing my tail, although I think I did add some value. Ashes Stillwater Boats offers a free download of a carry yoke with nicely drawn profiles. After 2 trips to Staples (check scale before you hit “print “) I had a plan. I free hand routed in 3 contour lines at 1/8 inch steps. These provided known grounds to carve to. Then I put the beaver to it. IMG_1444.jpeg
 
Your yoke is looking good! I like the process, but I have to ask.... what's the beaver. Maybe a flap-disc sander on an angle grinder? I see some oddball shapes for carry yokes sometimes but that particular one looks like it will be quite good, especially that vertebrae cutout. Nice job.
 
Thanks Patrick. I used a couple of gouges, mallet and 40 grit sandpaper. That worked well and afforded me more control than an angle grinder with flap disk.
 

Attachments

  • IMG_1468.jpeg
    IMG_1468.jpeg
    125.3 KB · Views: 4
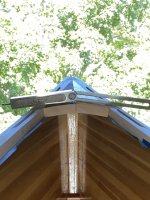
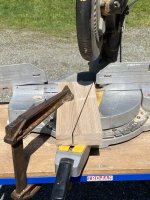
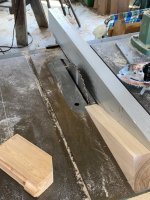
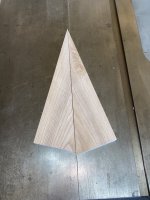
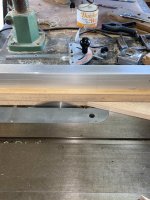
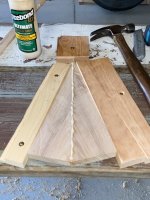
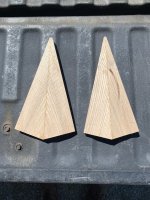
We decided to install small, simple decks. I had a 8/4 scrap of ash which presented the opportunity to book match the grain. One of the great things about this project has been the chance to learn and try new techniques. I’ve never book matched anything. I made mockups of both bow and stern decks (asymmetrical hull, so very different) to confirm scale, proportion, and angles. I find mockups are always worth the time. They allow the chance to fine tune design and process. IMG_1475.jpegIMG_1474.jpegIMG_1470.jpegIMG_1471.jpegIMG_1472.jpegIMG_1473.jpegIMG_1476.jpeg
 
The interior is varnished now with 2 coats of Epifanes high gloss followed by 1 coat of Epifanes matte. Each coat was applied full strength (no thinner added). I’m happy with how it came out, but not delighted, if you know what I mean. I’ve never varnished anything bigger than a snowshoe and I found it a challenge to properly advance a wet edge without lap marks. I used a 4 inch roller to apply and a 3 inch foam brush to tip with. Finishing with a matte coat is very helpful!

Looking forward to varnishing the exterior with 3 coats of Epifanes high gloss, I’m wondering about adding some thinner to extend amateur working time? Is this a good idea and if so, how much thinner? Would I need a 4th coat because of a slower build with thinner?

Rick IMG_1498.jpeg
 
I'm sure that Epifanes has instructions on thinning. Off the top of my head I remember reading "thin no more than 10%" on various coating cans. A fourth coat won't hurt.
 
There is a thinning schedule on the Epiphanes website ... I am not surprised full strength gave you some lap issues. The schedule is something like 50% over bare wood and get progressively stronger to 15% at the end (look it up, don't take these numbers as gospel). Also, make sure you use the right thinner, it matters. The point above, I believe when you look up the thinning schedule, you always thin this product at least a little, this should help with the issue at the lap area.

Since you are going over epoxy, you will only use the least thinned version, I almost always use ~15% to build and then adjust the final coat for the environmental conditions, if they are going to help the varnish dry quicker, I thin a little extra.

You are using the same application technique I do, use the roller to get it spread (slow enought to minimize buubles) then tipping off with a brush, I find the key is to not waste any time, get it on, get it tipped and move on, don't play with it ... the longer it gets to sit, the better it will level. Don't try and get a large area done at one time, I usually try for about a 2 square foot area at a time ... that is about a roller "load".

For the final exterior coat, you can thin it a bit more to get a little more leveling time, if you are still having issues. I suspect though that using the 15% (or so) thinning and not trying to complete too large of blocks at a time, will help with the lap issues.

Good luck

Brian
 
Thank you John and Brian. I had read the instructions on the can which I interpreted to mean thinning is not required for application on an impervious surface. I'll pick up some Epifanes thinner and start with a 15% thinned coat and adjust from there. I bet I'll notice a big difference. I really appreciate the advice!

Rick
 
I decided to try the suggestion in “CanoeCraft” to profile away the top flat surface of the thwarts. I used a spokeshave, but rasps could also work. I was amazed at the visual and tactile difference. It was a fun, simple and satisfying process.

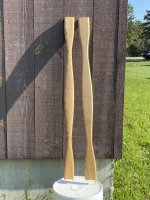
The photo shows the profiled top surface of the stern thwart on the left, and the flat bottom surface of the bow thwart on the right for comparison.

IMG_1523.jpeg
 
Back
Top