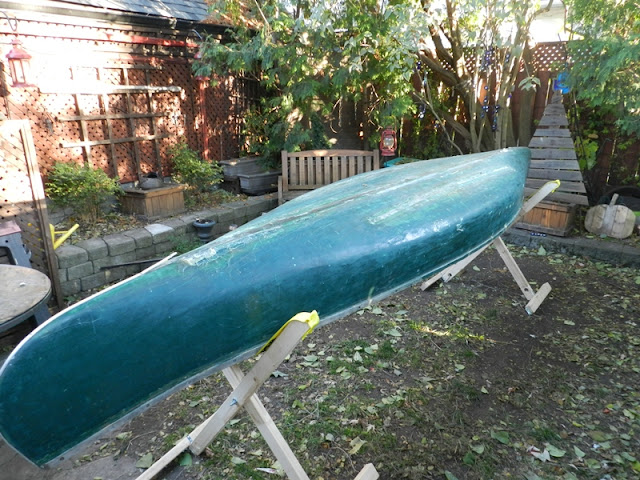
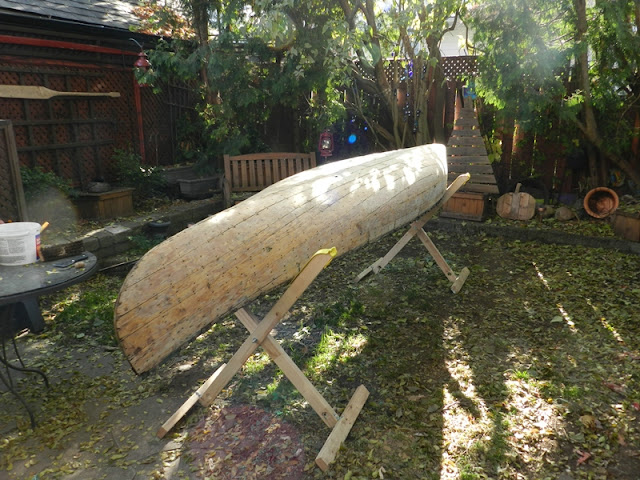
Picked up a new boat that seems a perfect candidate for a restoration.
Seller was a lovely senior (in her 70s) just north of Peterborough, Ontario. She was the neighbour and caretaker of the original sole owner, who passed away this year at 93. A few years ago she was given the canoe by him and she intended to do a full restoration but had given up on the project. She stated he picked up the canoe in Peterborough directly from the canoe factory sometime in the mid-to-late fifties and that he fiberglassed it himself sometime in the late 1960s.
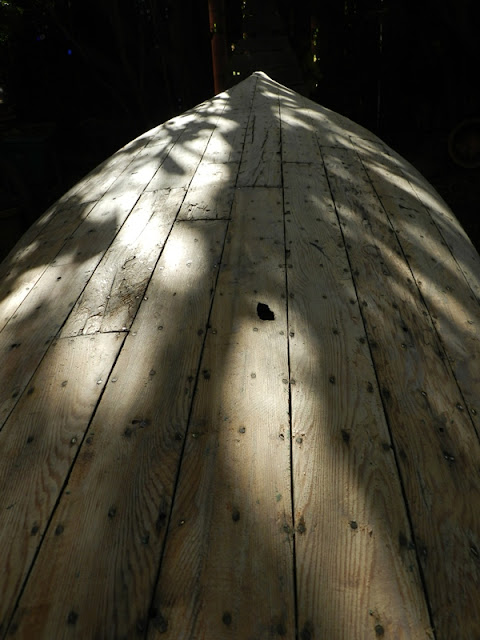
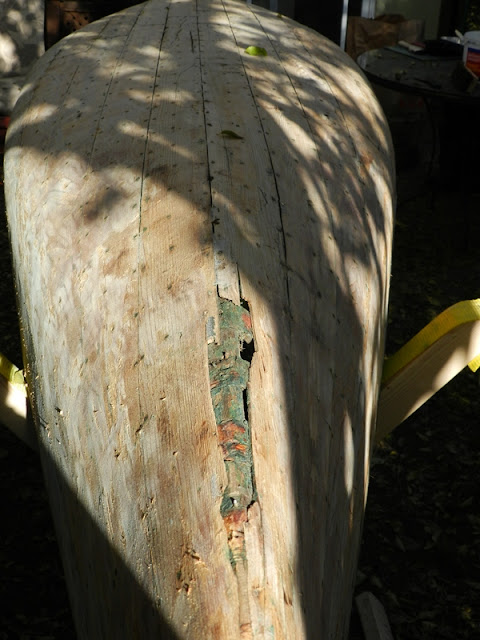
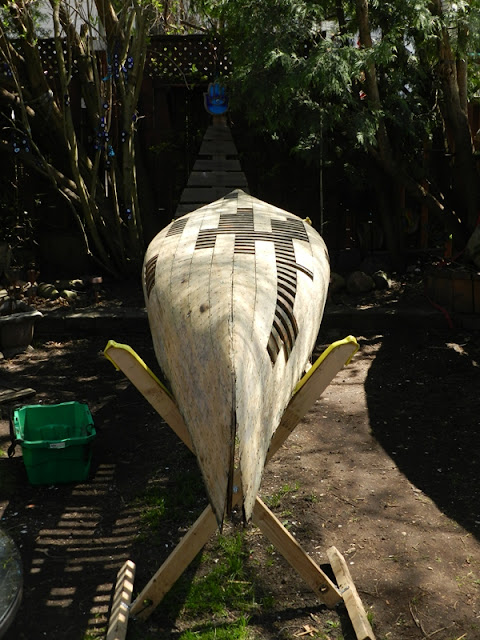
The bottom of the hull has three keels covered in more sloppily applied glass. When I saw the triple keels I asked if he by chance was a fur trapper. Recalled a post on Dick Persson's old blog about how some local Peterborough trappers would add three keels to protect the hull from the damage caused dragging over beaver dams and/or winter ice during trapping season. She excitedly confirmed that he actively trapped beaver well into his 70s and that his estate was still sorting out some of his old stuff, including his old traps.

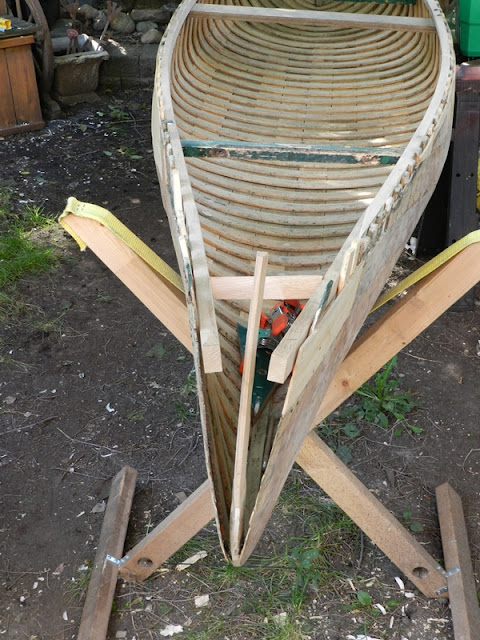
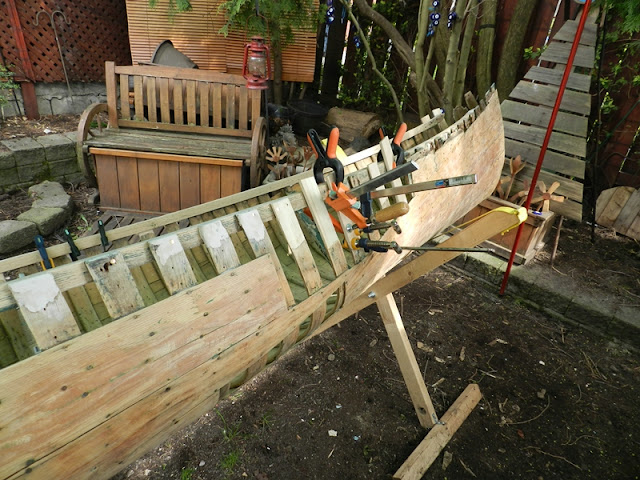
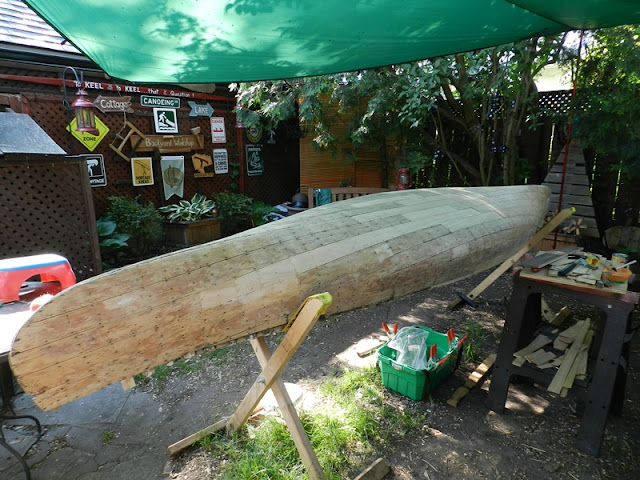
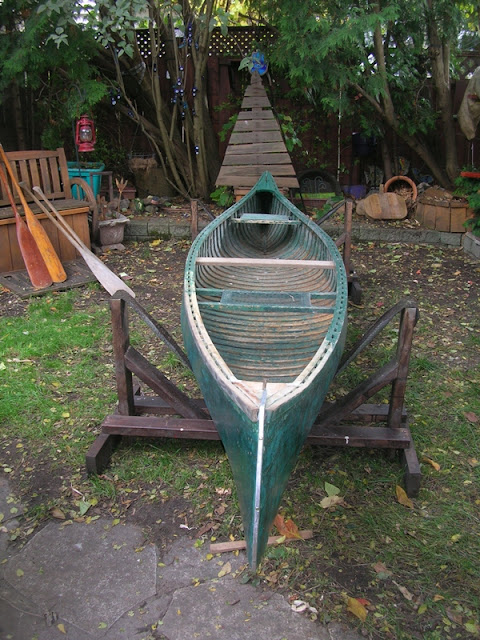
Dimensions and build look very much like a Peterbough Mermaid. It seems to identical in shape and dimensions as the Chestnut Playmate restored last year. It's a just over 14' long, quite narrow (30" beam) with a 12" depth. Ribs are the narrow "pleasure" style (1-1/2" spaced 1 1/2" apart). Unlike my existing boat, this one has squarish ash outwales that were never rounded off or spliced. One end looks to have had the inwale tips scarfed with non matching wood, possible oak. The seat caning has long since disappeared but the original holes are there. He covered the stern seat with a board and the bow seat with some sort of rigid metal mesh. Presumably it was better for usage in the colder temps and wouldn't have become brittle like cane. Center thwart is gone and replaced with just a plank.
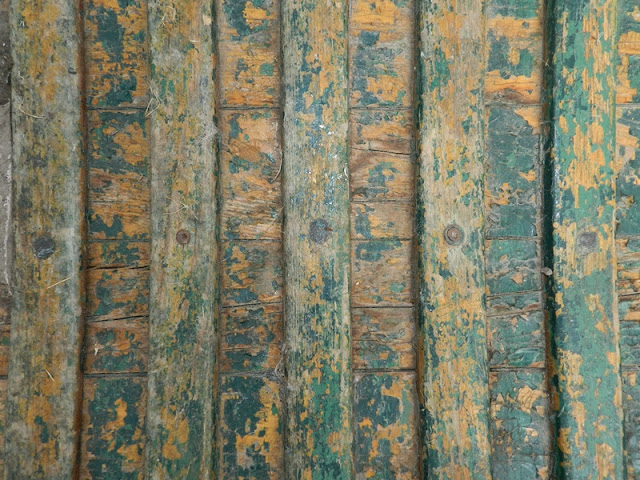
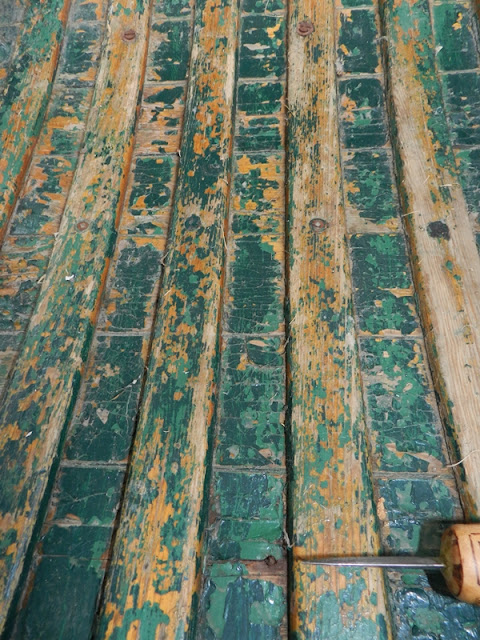
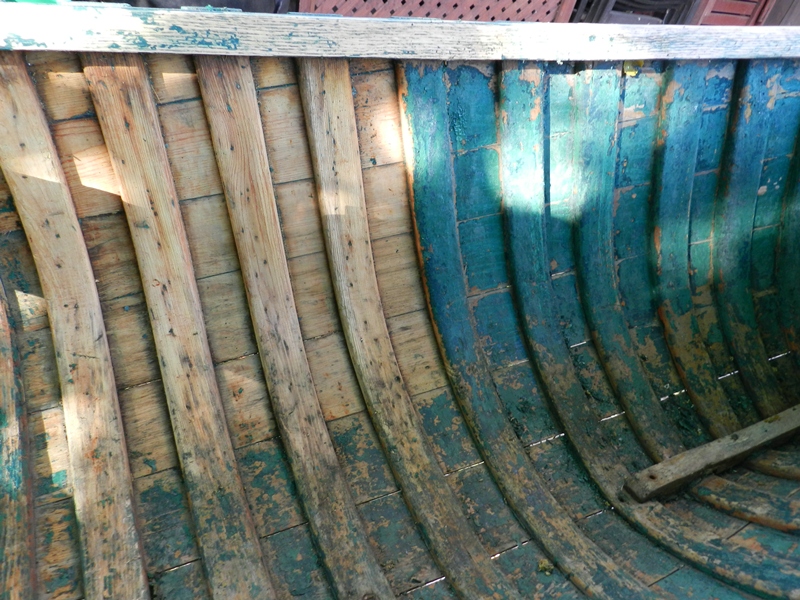
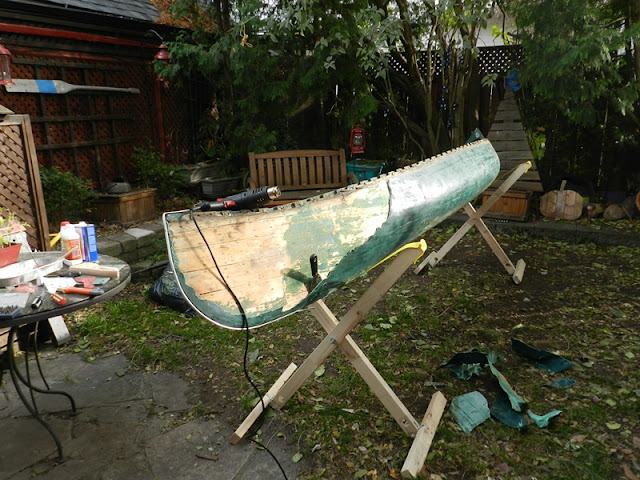
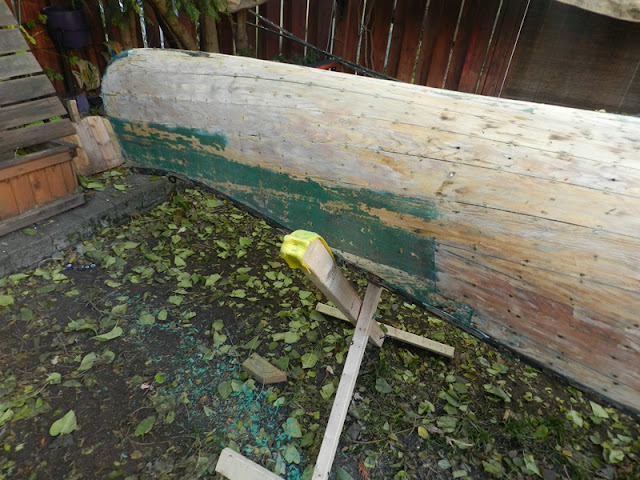
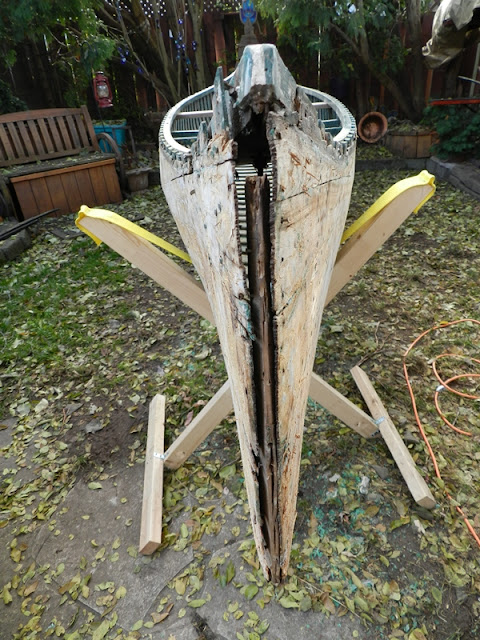
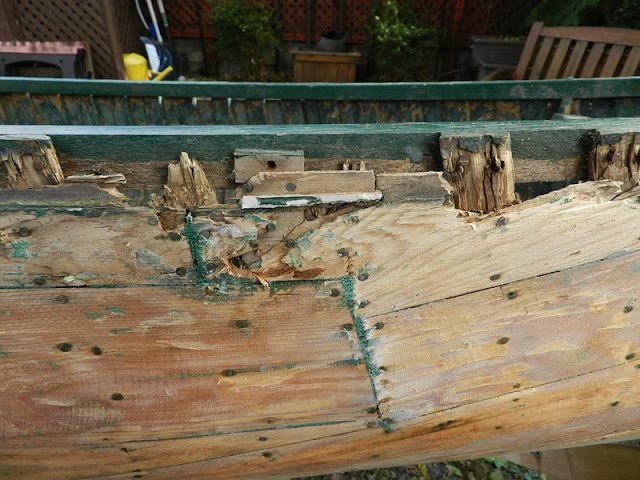
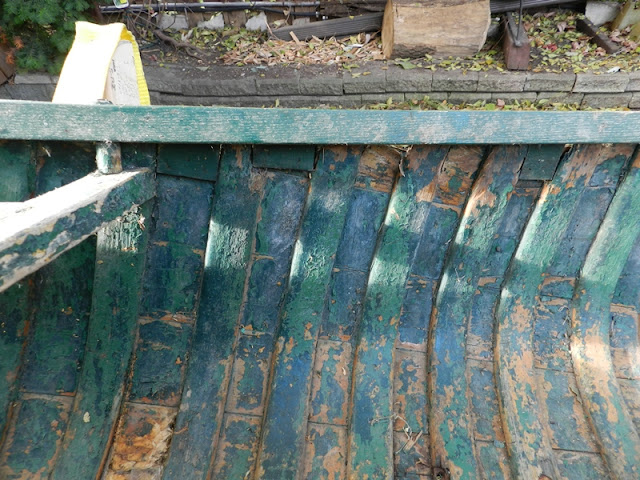
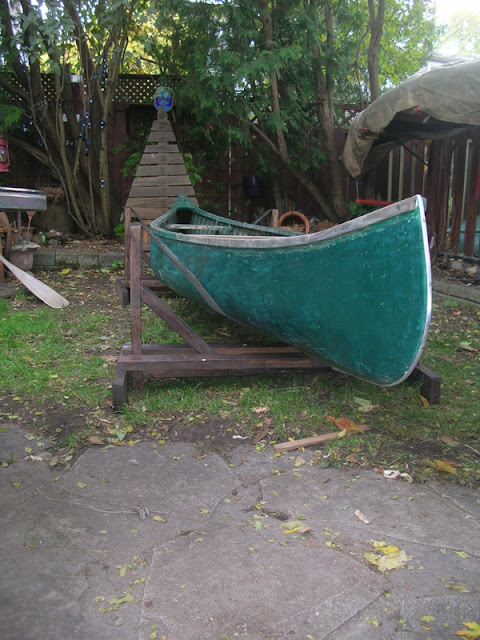
As you can see, even the interior was coated with green paint at one point. It looks to have been applied directly over the cracking varnish. The good news is these surface coats are easily flaking off and should be simple enough to remove with chemical stripper. The lady I obtained it from said she started sanding one end as part of her restoration. She revealed the replaced deck but also sanded the stem piece. Unfortunately she seemed to have coarsely sanded off most of the model number + serial number combo that would have confirmed Peterborough construction. All I can gather right now is a "59" that has survived her efforts.

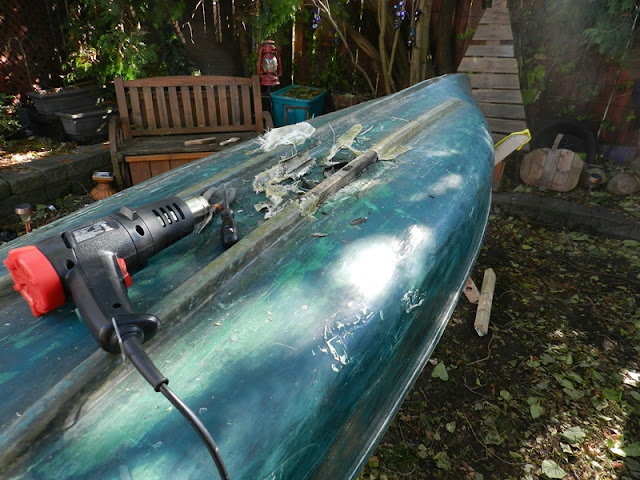
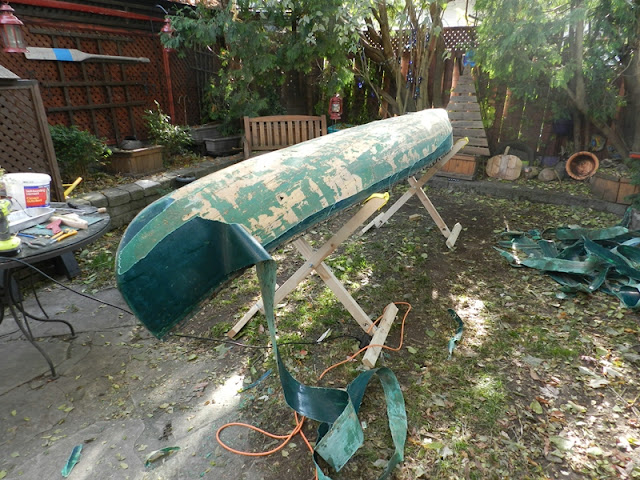
Once I told her about the Wooden Canoe Heritage Association, our local chapter and my intention to work neighbourhood high school kids to help with the restoration, she graciously threw in 4 vintage paddles, including two very old ones that were heavily used by the original owner. You can see them in the background of the 2nd & 3rd pics. Hoping that by replacing the glassed hull with canvas, getting rid of the triple keels, and perhaps replacing the stern seat with a thwart, I can cut the weight down significantly. Won't be used for trapping anymore but will hopefully have a second life as a nice little solo tripping boat.
Seller was a lovely senior (in her 70s) just north of Peterborough, Ontario. She was the neighbour and caretaker of the original sole owner, who passed away this year at 93. A few years ago she was given the canoe by him and she intended to do a full restoration but had given up on the project. She stated he picked up the canoe in Peterborough directly from the canoe factory sometime in the mid-to-late fifties and that he fiberglassed it himself sometime in the late 1960s.
The bottom of the hull has three keels covered in more sloppily applied glass. When I saw the triple keels I asked if he by chance was a fur trapper. Recalled a post on Dick Persson's old blog about how some local Peterborough trappers would add three keels to protect the hull from the damage caused dragging over beaver dams and/or winter ice during trapping season. She excitedly confirmed that he actively trapped beaver well into his 70s and that his estate was still sorting out some of his old stuff, including his old traps.
Dimensions and build look very much like a Peterbough Mermaid. It seems to identical in shape and dimensions as the Chestnut Playmate restored last year. It's a just over 14' long, quite narrow (30" beam) with a 12" depth. Ribs are the narrow "pleasure" style (1-1/2" spaced 1 1/2" apart). Unlike my existing boat, this one has squarish ash outwales that were never rounded off or spliced. One end looks to have had the inwale tips scarfed with non matching wood, possible oak. The seat caning has long since disappeared but the original holes are there. He covered the stern seat with a board and the bow seat with some sort of rigid metal mesh. Presumably it was better for usage in the colder temps and wouldn't have become brittle like cane. Center thwart is gone and replaced with just a plank.
As you can see, even the interior was coated with green paint at one point. It looks to have been applied directly over the cracking varnish. The good news is these surface coats are easily flaking off and should be simple enough to remove with chemical stripper. The lady I obtained it from said she started sanding one end as part of her restoration. She revealed the replaced deck but also sanded the stem piece. Unfortunately she seemed to have coarsely sanded off most of the model number + serial number combo that would have confirmed Peterborough construction. All I can gather right now is a "59" that has survived her efforts.
Once I told her about the Wooden Canoe Heritage Association, our local chapter and my intention to work neighbourhood high school kids to help with the restoration, she graciously threw in 4 vintage paddles, including two very old ones that were heavily used by the original owner. You can see them in the background of the 2nd & 3rd pics. Hoping that by replacing the glassed hull with canvas, getting rid of the triple keels, and perhaps replacing the stern seat with a thwart, I can cut the weight down significantly. Won't be used for trapping anymore but will hopefully have a second life as a nice little solo tripping boat.