• Happy Marine Mammal Rescue Day! 🐳🐬🦭🦦

Light Weight Solo Tripper Build

Hey Alan, did you use aluminium gunwales on one of your builds? If so, where did you get them?

Yes I did. It worked fine in the end but I wouldn't do it again. Lots of work.

All aluminum gunwales I could find at the time were meant for composite hulls, which are very thin. So the gap to slip over the hull is too thin to fit over the wood strips.

The Bell (at that time) gunwales were a two piece with inners and outers. Even they were designed for thin hulls so I had to modify the already skinny inners to fit on the stripper. What I did was put an abrasive blade in my table saw and run them through. It was a bit of a mess and a standard blade probably would have cut the aluminum fine but I didn't know that then. It left a very ratty edge that took a lot of cleaning up but in the end they went on and worked fine.

And that's also the reason I had to buy new deck caps for my Magic. Because I took the caps off the Magic and put them on the stripper.

I don't know if they still use that style gunwale or not. If you could find an aluminum gunwale designed to go over royalex or the new Royalex replacement (I'm blanking on the name) it might fit over the cedar hull. Your best bet is to get them from a dealer since gunwales are very expensive to ship but they get them shipped for free when they take delivery of boats.

Alan
 
Didn't take long to take off the clamps and cleanup the gunnels today.

For the first outer I just let it hang out from the end a bit, given the curve sometimes it is nice to have a bit of length to attach a cord to help it bend a bit more.

The first outer is on and the epoxy has set overnight, the top looks a bit messy, but that will get dealt with shortly

IMG_2025.jpg

I am going to use a simple overlap at the ends, similar to how a stemless strip would be applied. Most of the end will be shaped away and then a cap will be added, covering most of this area.

IMG_2027.jpg

IMG_2030.jpg

Excess squeeze out on the top is shaved away with a carbide scraper, if you do it the next day while the epoxy is still green, this is a fast and simple operation. Don't be too fussy, just get most of it, so when w come back later with a plane, it won't gunk up the shoe too badly.

IMG_2032.jpg

Apply the second outer, next day you have new gunnels applied

IMG_2037.jpg

Cleanup the squeeze out and trim the gunnel end just like last one, then use a plane to get the gunnel tops smooth, again, don't get fussy, just get them close ... sanding and finishing are yet to come.

IMG_2036.jpg

At this point the ends are quite extended and pointed, it is pretty common, that carrying the sheer line forward misses the sharp turn at the end and gives this (or worse) type of extended end. I like to just pick a point ~1/2" or so out and shape to fit. Do this in conjunction with how you plan to finish the decks and end part, there is no need to bother with that part now, deal with it when you do the decks.

IMG_2039.jpg

As far as the how the inner gunnels terminate, I don't get too fussy as it all gets covered with the deck cap. Here you can see they are cut a little short, also note that the small gap between the outer gunnels get packed with epoxy .... prevents any water getting in there and make shaping easier knowing it is all solid. Since a deck cap is going on, this whole area is going to be sanded flat and will not have the gunnel curve ... it will transition to the gunnel curve just after the deck ends

IMG_2041.jpg

A note about carving away the 1/4" from the sheer and how the stem area of the sheer, get treated. The stems where left long when the initial weights were done, there was a good chunk of the stem area that was also carved away to make the gunnels and sheer fair.

The gunnels were weighed, inners @ 256g x 2, outers @ 303g x 2, for a total of 1.1 kg (2.5 lbs), plus whatever the epoxy weighs.

With all the material that got removed from the sheer and the stems, plus whatever was removed during the smoothing of the gunnel tops, the boat lost 200 grams in weight ... so the boat now weighs 10.8 kgs (23.8 lbs) and the gunnels are installed.

However you look at it, ~2.5 lbs for suitable gunnels is pretty good, by the time they get rounded and sanded, they will be less, but I will also be putting a double epoxy coat on them to seal them, plus I will have a couple of small "addin" pieces for the thwarts and handles, but that should be a very small value, overall that should be close to the final weight.

So we are still on schedule to make the final 30 pound goal.


Brian
 

Attachments

  • IMG_2032.jpg
    IMG_2032.jpg
    109.7 KB · Views: 2
Last edited:
Thank you for a most excellent tutorial on glued gunnel installation. You made it look easy, but I know it's not. I'm intrigued by the concept that smaller, glued gunnels can substitute for traditionally sized, screw attached ones, without loss in strength but with weight savings. Well done!
 
Thank you Rick for the kind words.

Just to be clear.. i am not saying that smaller glued gunnels are as strong as a set of full 3/4" x 3/4" gunnels, rather that the 3/4" x 3/4" are way stronger (overbuilt) than required for the job. I have these smaller ones on my last Freedom Solo and my son uses that one, he is ~6'4" and somewhere over 300 lbs .... the cleated seat works perfect and the gunnels are more than stiff enough for purpose. Additionally, on the racks the boat is fully stable at highway speeds.

If you take your time and plan out the operation, it really is not that difficult, the trick is in planning, using the tools and tricks you have to get it done. Every shop is different, most builders have their "bag O tricks" ... I try and show how I do things, what I expect as a result, then leave it to folks to adapt using their stuff, there are a lot of ways to accomplish the same task, once you know what the goal is.

Brian
 
Brian, I thought I would wait until the morning to read through your post in its entirety since I am working from home (2nd shift), however I had to take a break and sink my teeth into this great info. Thank you for your message and I just finished reading through your process. I did see your post pop up earlier but I had already installed one inner and both decks. I decided on the deck to be housed between the hull and not as a top cap. I am not 1/4” below the shear line but rather 1/8”. I used mostly spring clamps and a few c-clamps. Fired up the pellet stove in the shop and should probably go take a look and see how it looks. I appreciate your knowledge and the fact that you are sharing it with all of us. I certainly will employ many of your methods in the next build. I really like the chamfer concept without having to scupper. I am not adding scuppers so the chamfer would have been great. Adding this info to my “Bag-O-Tricks”!! Thanks Brian!
 
Great Photos of the process Brian !

Are you going to leave the point on the outwhales ? I've trimmed mine back, so they don't aren''t easily banged up, as I'm hard on mine !

The pic that shows the glassing of the inside stem. That is one of the reasons I prefer Stemless construction. It seems to be a tough spot to get the glass tucked in and seal everything !
It looks like you did a nice job !

Looking forward to how you do the decks, if at all !

Jim
 
Thanks Jim, I learned that it oft times better to work out a complete path of how you are going to do something, before you start doing stuff. Like leaving the gunnels square until I have all the thwarts and stuff fitted .... I did a round over early on a previous build and it was the a pita to start trying to add little strips... so now stuff stays rough till I am at that point.

Those nose points are just the strips following the sheer, they will get completely shaped and will extend only about 1/4" -1/2" past the lip ... they will be dealt with when I am ready to get at the decks. The decks were actually not part of the original plan, but I had an idea and it looks like they may turn out cool and I am a bit under the weight budget, so they are currently a go.

The stem glass stuff will get cleaned up soon, along with the ending of the inner glass ... there is actually 2 pieces of glass at the end, I put one in at the front and just overlapped the main piece over top, so it is glassed all the way to the front. The stems are fully epoxy sealed, there is no doubt in my mind (but I am planning on trying stemless, maybe next).

I just realized that the seat needs steam bending and drying, so have stopped current deck/thwart/gunnel stuff to get that done, so I can let it dry while I do this other inside stuff.


Brian
 
Been working on the build details, thwarts, seat and yoke components.

When I pulled out my forms and jigs for the seat and yoke, I decided they were a bit old and needed to be upgraded, so I redid the forms for the seat and yokes. I also had an idea for decks (which I wasn't going to add) and decided I wanted to chase it a bit, so I have been a little delinquent on posting.

So this post will cover off the deck design and install.

First I started doodling (we have all been there) and I came up with some concepts I liked

ACtC-3ddj79PqDbXVeNrqUNckqeJkL-m4U-KNUDqN5Cm4VNWUc2Lyce6iBkSFwD7Pj66aGZSDRUr6vJN1V8O2QpqzcMOXd094hO_xDhC4rGnYZWTZOYTaPuWilTPVF1nOqYLSAn4932Ukb29qlydCeTrlkcf=w1426-h1069-no?authuser=0.jpg - Click image for larger version  Name:	ACtC-3ddj79PqDbXVeNrqUNckqeJkL-m4U-KNUDqN5Cm4VNWUc2Lyce6iBkSFwD7Pj66aGZSDRUr6vJN1V8O2QpqzcMOXd094hO_xDhC4rGnYZWTZOYTaPuWilTPVF1nOqYLSAn4932Ukb29qlydCeTrlkcf=w1426-h1069-no?authuser=0.jpg Views:	0 Size:	392.1 KB ID:	111174

then I refined it a bit to be scale and include the idea of it actually fitting the space and transferred that shape to a template

ACtC-3cQ9h2cP4JgeKjz6q69pcF_KZETqmQJmazRS7cDvs-LjZ9Mg2uFQ3UhmZfPdNHkqP5LaYeaBcZAdNK0zn2Zg96T_FdfQdNaIsWraHHVutw571TkdElRKKByX9dbQ5h4f5JNdjTatpTzI9vXEbhC0t0z=w802-h1069-no?authuser=0.jpg - Click image for larger version  Name:	ACtC-3cQ9h2cP4JgeKjz6q69pcF_KZETqmQJmazRS7cDvs-LjZ9Mg2uFQ3UhmZfPdNHkqP5LaYeaBcZAdNK0zn2Zg96T_FdfQdNaIsWraHHVutw571TkdElRKKByX9dbQ5h4f5JNdjTatpTzI9vXEbhC0t0z=w802-h1069-no?authuser=0.jpg Views:	0 Size:	280.1 KB ID:	111175

I made up the piece using 1.5 " piece of WRC cedar stock I had in the shed

ACtC-3dL8OIPgsW6zaWW7KWqyCJsUJwm0H_Qod6zVnvt3mdycMAOVCJgusZ1iyWFY9GwRIEGn-P6hoIA3QpKAZgseoPVtckBwv2vgBQUYBNhvHk7OmMYetqY7q1bK5QZaFkx6gTB34OWaTjNtSHLejhUxZr2=w802-h1069-no?authuser=0.jpg - Click image for larger version  Name:	ACtC-3dL8OIPgsW6zaWW7KWqyCJsUJwm0H_Qod6zVnvt3mdycMAOVCJgusZ1iyWFY9GwRIEGn-P6hoIA3QpKAZgseoPVtckBwv2vgBQUYBNhvHk7OmMYetqY7q1bK5QZaFkx6gTB34OWaTjNtSHLejhUxZr2=w802-h1069-no?authuser=0.jpg Views:	0 Size:	227.2 KB ID:	111176

I knew I would be laminating up about 3" of strips, so I actually made up templates in 1" increments, so I could create a new press plate for each batch of strips. For those that this makes little sense to ... I offer this explanation, as you add strips, the actually curves from the original piece change slightly. At about 1" it becomes noticeable, so I create a new piece at about 1" increments, if I laminate that far. I also find trying to glue many strips thicker than about 1" at a time, becomes increasingly harder, so I just do it in several smaller batches. These were the templates that I made, there was a press plate made for each one

ACtC-3dqSYCaG7q9aGzTUD9limpW2Xyg1SnjZyTTbaiBOGa5OkoglG7BhWvAYiUIJIFCqc67a_EbyR9Fo9yAtocuK8OPUNX5UNMFWrTo-BEuw9WN_li1Eh9IV2ZTJsmptcCTrsymuxv82X7XniL9Hnrx7L7b=w802-h1069-no?authuser=0.jpg - Click image for larger version  Name:	ACtC-3dqSYCaG7q9aGzTUD9limpW2Xyg1SnjZyTTbaiBOGa5OkoglG7BhWvAYiUIJIFCqc67a_EbyR9Fo9yAtocuK8OPUNX5UNMFWrTo-BEuw9WN_li1Eh9IV2ZTJsmptcCTrsymuxv82X7XniL9Hnrx7L7b=w802-h1069-no?authuser=0.jpg Views:	0 Size:	316.0 KB ID:	111202

So first batch of strips in the steamer

ACtC-3dqSYCaG7q9aGzTUD9limpW2Xyg1SnjZyTTbaiBOGa5OkoglG7BhWvAYiUIJIFCqc67a_EbyR9Fo9yAtocuK8OPUNX5UNMFWrTo-BEuw9WN_li1Eh9IV2ZTJsmptcCTrsymuxv82X7XniL9Hnrx7L7b=w802-h1069-no?authuser=0.jpg - Click image for larger version  Name:	ACtC-3dqSYCaG7q9aGzTUD9limpW2Xyg1SnjZyTTbaiBOGa5OkoglG7BhWvAYiUIJIFCqc67a_EbyR9Fo9yAtocuK8OPUNX5UNMFWrTo-BEuw9WN_li1Eh9IV2ZTJsmptcCTrsymuxv82X7XniL9Hnrx7L7b=w802-h1069-no?authuser=0.jpg Views:	0 Size:	316.0 KB ID:	111202

And then into the form, you can see that the press plate is labeled as "+ 1", meaning is good to 1" .... there is also a 2" and a 2.5"

ACtC-3dqSYCaG7q9aGzTUD9limpW2Xyg1SnjZyTTbaiBOGa5OkoglG7BhWvAYiUIJIFCqc67a_EbyR9Fo9yAtocuK8OPUNX5UNMFWrTo-BEuw9WN_li1Eh9IV2ZTJsmptcCTrsymuxv82X7XniL9Hnrx7L7b=w802-h1069-no?authuser=0.jpg - Click image for larger version  Name:	ACtC-3dqSYCaG7q9aGzTUD9limpW2Xyg1SnjZyTTbaiBOGa5OkoglG7BhWvAYiUIJIFCqc67a_EbyR9Fo9yAtocuK8OPUNX5UNMFWrTo-BEuw9WN_li1Eh9IV2ZTJsmptcCTrsymuxv82X7XniL9Hnrx7L7b=w802-h1069-no?authuser=0.jpg Views:	0 Size:	316.0 KB ID:	111202

As I went through the process I made a couple of changes, first I started soaking the strips for a few minutes before steaming. Although you think of steam as being wet, it is actually fairly dry, soaking the WRC and NWC seems to help them retain heat and bend a lot easier. Second change was to add some top rails to the form to hold the strips flat, that helped with aligning the glue up.

ACtC-3dqSYCaG7q9aGzTUD9limpW2Xyg1SnjZyTTbaiBOGa5OkoglG7BhWvAYiUIJIFCqc67a_EbyR9Fo9yAtocuK8OPUNX5UNMFWrTo-BEuw9WN_li1Eh9IV2ZTJsmptcCTrsymuxv82X7XniL9Hnrx7L7b=w802-h1069-no?authuser=0.jpg - Click image for larger version  Name:	ACtC-3dqSYCaG7q9aGzTUD9limpW2Xyg1SnjZyTTbaiBOGa5OkoglG7BhWvAYiUIJIFCqc67a_EbyR9Fo9yAtocuK8OPUNX5UNMFWrTo-BEuw9WN_li1Eh9IV2ZTJsmptcCTrsymuxv82X7XniL9Hnrx7L7b=w802-h1069-no?authuser=0.jpg Views:	0 Size:	316.0 KB ID:	111202

Eventually all the strips were steamed and glued in place. The regime for the strips was steam and set for a day, open and dry for a day, then glue up. This took some time, but was done in parallel with other stuff, so was just one of the things to get done on any given day. This pic is one stack away from done

ACtC-3dqSYCaG7q9aGzTUD9limpW2Xyg1SnjZyTTbaiBOGa5OkoglG7BhWvAYiUIJIFCqc67a_EbyR9Fo9yAtocuK8OPUNX5UNMFWrTo-BEuw9WN_li1Eh9IV2ZTJsmptcCTrsymuxv82X7XniL9Hnrx7L7b=w802-h1069-no?authuser=0.jpg - Click image for larger version  Name:	ACtC-3dqSYCaG7q9aGzTUD9limpW2Xyg1SnjZyTTbaiBOGa5OkoglG7BhWvAYiUIJIFCqc67a_EbyR9Fo9yAtocuK8OPUNX5UNMFWrTo-BEuw9WN_li1Eh9IV2ZTJsmptcCTrsymuxv82X7XniL9Hnrx7L7b=w802-h1069-no?authuser=0.jpg Views:	0 Size:	316.0 KB ID:	111202

and after a quick cleanup and planing

ACtC-3dqSYCaG7q9aGzTUD9limpW2Xyg1SnjZyTTbaiBOGa5OkoglG7BhWvAYiUIJIFCqc67a_EbyR9Fo9yAtocuK8OPUNX5UNMFWrTo-BEuw9WN_li1Eh9IV2ZTJsmptcCTrsymuxv82X7XniL9Hnrx7L7b=w802-h1069-no?authuser=0.jpg - Click image for larger version  Name:	ACtC-3dqSYCaG7q9aGzTUD9limpW2Xyg1SnjZyTTbaiBOGa5OkoglG7BhWvAYiUIJIFCqc67a_EbyR9Fo9yAtocuK8OPUNX5UNMFWrTo-BEuw9WN_li1Eh9IV2ZTJsmptcCTrsymuxv82X7XniL9Hnrx7L7b=w802-h1069-no?authuser=0.jpg Views:	0 Size:	316.0 KB ID:	111202

So now to start the actual creation of the decks, I drew a line from the middle of the first strips at the top and aligned it so it intersected the middle, then I "eyeballed" that line on the saw, held my breath and made the cut. Now ... I use a radial arm saw, so that cut is a lot easier (IMO) than on a table saw, but they both deck center cuts worked out

ACtC-3dqSYCaG7q9aGzTUD9limpW2Xyg1SnjZyTTbaiBOGa5OkoglG7BhWvAYiUIJIFCqc67a_EbyR9Fo9yAtocuK8OPUNX5UNMFWrTo-BEuw9WN_li1Eh9IV2ZTJsmptcCTrsymuxv82X7XniL9Hnrx7L7b=w802-h1069-no?authuser=0.jpg - Click image for larger version  Name:	ACtC-3dqSYCaG7q9aGzTUD9limpW2Xyg1SnjZyTTbaiBOGa5OkoglG7BhWvAYiUIJIFCqc67a_EbyR9Fo9yAtocuK8OPUNX5UNMFWrTo-BEuw9WN_li1Eh9IV2ZTJsmptcCTrsymuxv82X7XniL9Hnrx7L7b=w802-h1069-no?authuser=0.jpg Views:	0 Size:	316.0 KB ID:	111202

The block is no longer rectangular, because I cut one side to match the "strips line", so i just ripped the piece using the strip side cut as the guide to make the sides parallel again. I have a jig I made up to allow me to rip thick boards ... not as a saw mill, but as in "butterflying" boards or "resawing", which is what I do now. Unfortunately, given the dust and excitement of slicing and dicing wood, I never took shots of the sequence, so we fast forward to the glueup of the "butterflied" pieces.

ACtC-3dqSYCaG7q9aGzTUD9limpW2Xyg1SnjZyTTbaiBOGa5OkoglG7BhWvAYiUIJIFCqc67a_EbyR9Fo9yAtocuK8OPUNX5UNMFWrTo-BEuw9WN_li1Eh9IV2ZTJsmptcCTrsymuxv82X7XniL9Hnrx7L7b=w802-h1069-no?authuser=0.jpg - Click image for larger version  Name:	ACtC-3dqSYCaG7q9aGzTUD9limpW2Xyg1SnjZyTTbaiBOGa5OkoglG7BhWvAYiUIJIFCqc67a_EbyR9Fo9yAtocuK8OPUNX5UNMFWrTo-BEuw9WN_li1Eh9IV2ZTJsmptcCTrsymuxv82X7XniL9Hnrx7L7b=w802-h1069-no?authuser=0.jpg Views:	0 Size:	316.0 KB ID:	111202

In this shot of the glueup, which is using epoxy ... I have 2 tubs mixed, one dark, one just cabosil, which is transparent/translucent. The translucent is used to actually glue the 2 pieces together, the darker is just being used as filler for any areas that look like they small gaps.

ACtC-3dqSYCaG7q9aGzTUD9limpW2Xyg1SnjZyTTbaiBOGa5OkoglG7BhWvAYiUIJIFCqc67a_EbyR9Fo9yAtocuK8OPUNX5UNMFWrTo-BEuw9WN_li1Eh9IV2ZTJsmptcCTrsymuxv82X7XniL9Hnrx7L7b=w802-h1069-no?authuser=0.jpg - Click image for larger version  Name:	ACtC-3dqSYCaG7q9aGzTUD9limpW2Xyg1SnjZyTTbaiBOGa5OkoglG7BhWvAYiUIJIFCqc67a_EbyR9Fo9yAtocuK8OPUNX5UNMFWrTo-BEuw9WN_li1Eh9IV2ZTJsmptcCTrsymuxv82X7XniL9Hnrx7L7b=w802-h1069-no?authuser=0.jpg Views:	0 Size:	316.0 KB ID:	111202

The final product gets planed down to .5" , simply to save weight ... remember, I wasn't even going to do decks to save weight, but I just liked this idea and decided I would pay the weight penalty

ACtC-3dqSYCaG7q9aGzTUD9limpW2Xyg1SnjZyTTbaiBOGa5OkoglG7BhWvAYiUIJIFCqc67a_EbyR9Fo9yAtocuK8OPUNX5UNMFWrTo-BEuw9WN_li1Eh9IV2ZTJsmptcCTrsymuxv82X7XniL9Hnrx7L7b=w802-h1069-no?authuser=0.jpg - Click image for larger version  Name:	ACtC-3dqSYCaG7q9aGzTUD9limpW2Xyg1SnjZyTTbaiBOGa5OkoglG7BhWvAYiUIJIFCqc67a_EbyR9Fo9yAtocuK8OPUNX5UNMFWrTo-BEuw9WN_li1Eh9IV2ZTJsmptcCTrsymuxv82X7XniL9Hnrx7L7b=w802-h1069-no?authuser=0.jpg Views:	0 Size:	316.0 KB ID:	111202

Before going any further with the deck blanks, the stem/bow areas need to be prepared to receive them. This is what the rough bow/stern stem areas look like

ACtC-3dqSYCaG7q9aGzTUD9limpW2Xyg1SnjZyTTbaiBOGa5OkoglG7BhWvAYiUIJIFCqc67a_EbyR9Fo9yAtocuK8OPUNX5UNMFWrTo-BEuw9WN_li1Eh9IV2ZTJsmptcCTrsymuxv82X7XniL9Hnrx7L7b=w802-h1069-no?authuser=0.jpg - Click image for larger version  Name:	ACtC-3dqSYCaG7q9aGzTUD9limpW2Xyg1SnjZyTTbaiBOGa5OkoglG7BhWvAYiUIJIFCqc67a_EbyR9Fo9yAtocuK8OPUNX5UNMFWrTo-BEuw9WN_li1Eh9IV2ZTJsmptcCTrsymuxv82X7XniL9Hnrx7L7b=w802-h1069-no?authuser=0.jpg Views:	0 Size:	316.0 KB ID:	111202

The bow/stern need to be made flat and level to receive the blanks, I have a flat piece of 3/4" baltic birch with 60 grit paper glued to it, just fro this purpose

ACtC-3dqSYCaG7q9aGzTUD9limpW2Xyg1SnjZyTTbaiBOGa5OkoglG7BhWvAYiUIJIFCqc67a_EbyR9Fo9yAtocuK8OPUNX5UNMFWrTo-BEuw9WN_li1Eh9IV2ZTJsmptcCTrsymuxv82X7XniL9Hnrx7L7b=w802-h1069-no?authuser=0.jpg - Click image for larger version  Name:	ACtC-3dqSYCaG7q9aGzTUD9limpW2Xyg1SnjZyTTbaiBOGa5OkoglG7BhWvAYiUIJIFCqc67a_EbyR9Fo9yAtocuK8OPUNX5UNMFWrTo-BEuw9WN_li1Eh9IV2ZTJsmptcCTrsymuxv82X7XniL9Hnrx7L7b=w802-h1069-no?authuser=0.jpg Views:	0 Size:	316.0 KB ID:	111202

ACtC-3dqSYCaG7q9aGzTUD9limpW2Xyg1SnjZyTTbaiBOGa5OkoglG7BhWvAYiUIJIFCqc67a_EbyR9Fo9yAtocuK8OPUNX5UNMFWrTo-BEuw9WN_li1Eh9IV2ZTJsmptcCTrsymuxv82X7XniL9Hnrx7L7b=w802-h1069-no?authuser=0.jpg - Click image for larger version  Name:	ACtC-3dqSYCaG7q9aGzTUD9limpW2Xyg1SnjZyTTbaiBOGa5OkoglG7BhWvAYiUIJIFCqc67a_EbyR9Fo9yAtocuK8OPUNX5UNMFWrTo-BEuw9WN_li1Eh9IV2ZTJsmptcCTrsymuxv82X7XniL9Hnrx7L7b=w802-h1069-no?authuser=0.jpg Views:	0 Size:	316.0 KB ID:	111202

and the finished product

ACtC-3dqSYCaG7q9aGzTUD9limpW2Xyg1SnjZyTTbaiBOGa5OkoglG7BhWvAYiUIJIFCqc67a_EbyR9Fo9yAtocuK8OPUNX5UNMFWrTo-BEuw9WN_li1Eh9IV2ZTJsmptcCTrsymuxv82X7XniL9Hnrx7L7b=w802-h1069-no?authuser=0.jpg - Click image for larger version  Name:	ACtC-3dqSYCaG7q9aGzTUD9limpW2Xyg1SnjZyTTbaiBOGa5OkoglG7BhWvAYiUIJIFCqc67a_EbyR9Fo9yAtocuK8OPUNX5UNMFWrTo-BEuw9WN_li1Eh9IV2ZTJsmptcCTrsymuxv82X7XniL9Hnrx7L7b=w802-h1069-no?authuser=0.jpg Views:	0 Size:	316.0 KB ID:	111202

and to answer the question about those long noses, you can see here how much gets lopped off, then it will be sculpted to continue the same line from the stem, the placement of the deck is marked with pencil marks, so when it comes time to install, you have something to align with ...

ACtC-3dqSYCaG7q9aGzTUD9limpW2Xyg1SnjZyTTbaiBOGa5OkoglG7BhWvAYiUIJIFCqc67a_EbyR9Fo9yAtocuK8OPUNX5UNMFWrTo-BEuw9WN_li1Eh9IV2ZTJsmptcCTrsymuxv82X7XniL9Hnrx7L7b=w802-h1069-no?authuser=0.jpg - Click image for larger version  Name:	ACtC-3dqSYCaG7q9aGzTUD9limpW2Xyg1SnjZyTTbaiBOGa5OkoglG7BhWvAYiUIJIFCqc67a_EbyR9Fo9yAtocuK8OPUNX5UNMFWrTo-BEuw9WN_li1Eh9IV2ZTJsmptcCTrsymuxv82X7XniL9Hnrx7L7b=w802-h1069-no?authuser=0.jpg Views:	0 Size:	316.0 KB ID:	111202

While the blank was on the boat and aligned, I drew lines from the bottom, onto the blank, turned it over and did a rough cut with the jig saw, followed by a sanding to the line on the sander. Also a skirt of painters tape and plastic is added to keep any flying epoxy off the hull.

ACtC-3dqSYCaG7q9aGzTUD9limpW2Xyg1SnjZyTTbaiBOGa5OkoglG7BhWvAYiUIJIFCqc67a_EbyR9Fo9yAtocuK8OPUNX5UNMFWrTo-BEuw9WN_li1Eh9IV2ZTJsmptcCTrsymuxv82X7XniL9Hnrx7L7b=w802-h1069-no?authuser=0.jpg - Click image for larger version  Name:	ACtC-3dqSYCaG7q9aGzTUD9limpW2Xyg1SnjZyTTbaiBOGa5OkoglG7BhWvAYiUIJIFCqc67a_EbyR9Fo9yAtocuK8OPUNX5UNMFWrTo-BEuw9WN_li1Eh9IV2ZTJsmptcCTrsymuxv82X7XniL9Hnrx7L7b=w802-h1069-no?authuser=0.jpg Views:	0 Size:	316.0 KB ID:	111202

The bottom of the blanks get 2 oz glass, sized about 1 " extra all around ... the rotary cutter makes this a simple task

ACtC-3dqSYCaG7q9aGzTUD9limpW2Xyg1SnjZyTTbaiBOGa5OkoglG7BhWvAYiUIJIFCqc67a_EbyR9Fo9yAtocuK8OPUNX5UNMFWrTo-BEuw9WN_li1Eh9IV2ZTJsmptcCTrsymuxv82X7XniL9Hnrx7L7b=w802-h1069-no?authuser=0.jpg - Click image for larger version  Name:	ACtC-3dqSYCaG7q9aGzTUD9limpW2Xyg1SnjZyTTbaiBOGa5OkoglG7BhWvAYiUIJIFCqc67a_EbyR9Fo9yAtocuK8OPUNX5UNMFWrTo-BEuw9WN_li1Eh9IV2ZTJsmptcCTrsymuxv82X7XniL9Hnrx7L7b=w802-h1069-no?authuser=0.jpg Views:	0 Size:	316.0 KB ID:	111202

The stem area is saturated with unthickened epoxy, then the remainder is thickened with cabosil and wood flour to a dark colour and applied in a 1/4" line/bead around the outer stem area.
The deck is lowered carefully and lightly clamped in place to cure. Once everything is settled, lift the cloth lightly and use your finger to remove most of the squeeze out, this can save a lot of work in cleanup.

ACtC-3dqSYCaG7q9aGzTUD9limpW2Xyg1SnjZyTTbaiBOGa5OkoglG7BhWvAYiUIJIFCqc67a_EbyR9Fo9yAtocuK8OPUNX5UNMFWrTo-BEuw9WN_li1Eh9IV2ZTJsmptcCTrsymuxv82X7XniL9Hnrx7L7b=w802-h1069-no?authuser=0.jpg - Click image for larger version  Name:	ACtC-3dqSYCaG7q9aGzTUD9limpW2Xyg1SnjZyTTbaiBOGa5OkoglG7BhWvAYiUIJIFCqc67a_EbyR9Fo9yAtocuK8OPUNX5UNMFWrTo-BEuw9WN_li1Eh9IV2ZTJsmptcCTrsymuxv82X7XniL9Hnrx7L7b=w802-h1069-no?authuser=0.jpg Views:	0 Size:	316.0 KB ID:	111202

ACtC-3dqSYCaG7q9aGzTUD9limpW2Xyg1SnjZyTTbaiBOGa5OkoglG7BhWvAYiUIJIFCqc67a_EbyR9Fo9yAtocuK8OPUNX5UNMFWrTo-BEuw9WN_li1Eh9IV2ZTJsmptcCTrsymuxv82X7XniL9Hnrx7L7b=w802-h1069-no?authuser=0.jpg - Click image for larger version  Name:	ACtC-3dqSYCaG7q9aGzTUD9limpW2Xyg1SnjZyTTbaiBOGa5OkoglG7BhWvAYiUIJIFCqc67a_EbyR9Fo9yAtocuK8OPUNX5UNMFWrTo-BEuw9WN_li1Eh9IV2ZTJsmptcCTrsymuxv82X7XniL9Hnrx7L7b=w802-h1069-no?authuser=0.jpg Views:	0 Size:	316.0 KB ID:	111202

Once cured, excess cloth is trimmed and the angle of the sheer/gunnel is carried on to the deck ... i am using a couple of Italian rasps and the sanding stick I made earlier, the 36 grit side of the stick works really well for bulk removal.

ACtC-3dqSYCaG7q9aGzTUD9limpW2Xyg1SnjZyTTbaiBOGa5OkoglG7BhWvAYiUIJIFCqc67a_EbyR9Fo9yAtocuK8OPUNX5UNMFWrTo-BEuw9WN_li1Eh9IV2ZTJsmptcCTrsymuxv82X7XniL9Hnrx7L7b=w802-h1069-no?authuser=0.jpg - Click image for larger version  Name:	ACtC-3dqSYCaG7q9aGzTUD9limpW2Xyg1SnjZyTTbaiBOGa5OkoglG7BhWvAYiUIJIFCqc67a_EbyR9Fo9yAtocuK8OPUNX5UNMFWrTo-BEuw9WN_li1Eh9IV2ZTJsmptcCTrsymuxv82X7XniL9Hnrx7L7b=w802-h1069-no?authuser=0.jpg Views:	0 Size:	316.0 KB ID:	111202

Measured the distance from the sheer top to the deck top, and drew a pair of lines that distance in, then cut/carved/rasped the edge to that line. this technique is straight from paddle making techniques, making a series of flat contours, that get rounded eventually

ACtC-3dqSYCaG7q9aGzTUD9limpW2Xyg1SnjZyTTbaiBOGa5OkoglG7BhWvAYiUIJIFCqc67a_EbyR9Fo9yAtocuK8OPUNX5UNMFWrTo-BEuw9WN_li1Eh9IV2ZTJsmptcCTrsymuxv82X7XniL9Hnrx7L7b=w802-h1069-no?authuser=0.jpg - Click image for larger version  Name:	ACtC-3dqSYCaG7q9aGzTUD9limpW2Xyg1SnjZyTTbaiBOGa5OkoglG7BhWvAYiUIJIFCqc67a_EbyR9Fo9yAtocuK8OPUNX5UNMFWrTo-BEuw9WN_li1Eh9IV2ZTJsmptcCTrsymuxv82X7XniL9Hnrx7L7b=w802-h1069-no?authuser=0.jpg Views:	0 Size:	316.0 KB ID:	111202

When I finished that, I hand sanded the end smooth and this is what it looked like

ACtC-3dqSYCaG7q9aGzTUD9limpW2Xyg1SnjZyTTbaiBOGa5OkoglG7BhWvAYiUIJIFCqc67a_EbyR9Fo9yAtocuK8OPUNX5UNMFWrTo-BEuw9WN_li1Eh9IV2ZTJsmptcCTrsymuxv82X7XniL9Hnrx7L7b=w802-h1069-no?authuser=0.jpg - Click image for larger version  Name:	ACtC-3dqSYCaG7q9aGzTUD9limpW2Xyg1SnjZyTTbaiBOGa5OkoglG7BhWvAYiUIJIFCqc67a_EbyR9Fo9yAtocuK8OPUNX5UNMFWrTo-BEuw9WN_li1Eh9IV2ZTJsmptcCTrsymuxv82X7XniL9Hnrx7L7b=w802-h1069-no?authuser=0.jpg Views:	0 Size:	316.0 KB ID:	111202

More 2 oz glass, a little excess, i want to run over the sheer

ACtC-3dqSYCaG7q9aGzTUD9limpW2Xyg1SnjZyTTbaiBOGa5OkoglG7BhWvAYiUIJIFCqc67a_EbyR9Fo9yAtocuK8OPUNX5UNMFWrTo-BEuw9WN_li1Eh9IV2ZTJsmptcCTrsymuxv82X7XniL9Hnrx7L7b=w802-h1069-no?authuser=0.jpg - Click image for larger version  Name:	ACtC-3dqSYCaG7q9aGzTUD9limpW2Xyg1SnjZyTTbaiBOGa5OkoglG7BhWvAYiUIJIFCqc67a_EbyR9Fo9yAtocuK8OPUNX5UNMFWrTo-BEuw9WN_li1Eh9IV2ZTJsmptcCTrsymuxv82X7XniL9Hnrx7L7b=w802-h1069-no?authuser=0.jpg Views:	0 Size:	316.0 KB ID:	111202

First coat of epoxy

ACtC-3dqSYCaG7q9aGzTUD9limpW2Xyg1SnjZyTTbaiBOGa5OkoglG7BhWvAYiUIJIFCqc67a_EbyR9Fo9yAtocuK8OPUNX5UNMFWrTo-BEuw9WN_li1Eh9IV2ZTJsmptcCTrsymuxv82X7XniL9Hnrx7L7b=w802-h1069-no?authuser=0.jpg - Click image for larger version  Name:	ACtC-3dqSYCaG7q9aGzTUD9limpW2Xyg1SnjZyTTbaiBOGa5OkoglG7BhWvAYiUIJIFCqc67a_EbyR9Fo9yAtocuK8OPUNX5UNMFWrTo-BEuw9WN_li1Eh9IV2ZTJsmptcCTrsymuxv82X7XniL9Hnrx7L7b=w802-h1069-no?authuser=0.jpg Views:	0 Size:	316.0 KB ID:	111202

I continued with the normal 3 coats of epoxy (total), trimmed the edges and ended up with the final look

ACtC-3dqSYCaG7q9aGzTUD9limpW2Xyg1SnjZyTTbaiBOGa5OkoglG7BhWvAYiUIJIFCqc67a_EbyR9Fo9yAtocuK8OPUNX5UNMFWrTo-BEuw9WN_li1Eh9IV2ZTJsmptcCTrsymuxv82X7XniL9Hnrx7L7b=w802-h1069-no?authuser=0.jpg - Click image for larger version  Name:	ACtC-3dqSYCaG7q9aGzTUD9limpW2Xyg1SnjZyTTbaiBOGa5OkoglG7BhWvAYiUIJIFCqc67a_EbyR9Fo9yAtocuK8OPUNX5UNMFWrTo-BEuw9WN_li1Eh9IV2ZTJsmptcCTrsymuxv82X7XniL9Hnrx7L7b=w802-h1069-no?authuser=0.jpg Views:	0 Size:	316.0 KB ID:	111202

ACtC-3dqSYCaG7q9aGzTUD9limpW2Xyg1SnjZyTTbaiBOGa5OkoglG7BhWvAYiUIJIFCqc67a_EbyR9Fo9yAtocuK8OPUNX5UNMFWrTo-BEuw9WN_li1Eh9IV2ZTJsmptcCTrsymuxv82X7XniL9Hnrx7L7b=w802-h1069-no?authuser=0.jpg - Click image for larger version  Name:	ACtC-3dqSYCaG7q9aGzTUD9limpW2Xyg1SnjZyTTbaiBOGa5OkoglG7BhWvAYiUIJIFCqc67a_EbyR9Fo9yAtocuK8OPUNX5UNMFWrTo-BEuw9WN_li1Eh9IV2ZTJsmptcCTrsymuxv82X7XniL9Hnrx7L7b=w802-h1069-no?authuser=0.jpg Views:	0 Size:	316.0 KB ID:	111202

Pretty happy with how they turned out. The blanks weighed 6 oz before carving, and I figured I carved away about 30% of that, so final weight with glass is some where around 5 oz each ...

Seat and thwarts tomorrow ... time to push a little

Brian
 
Last edited:
This is turning out as a very nice build!

Some things that I appreciate so far:

- Strip Hold Down: Looks like it worked very well, I'll definitely keep this in mind for ideas next time I get a chance at a build.
- Thin Strip/1/4 bead kickouts? Good to know that I should watch for that...
- Very nice job on the glasswork. My skills are not there yet. Target to shoot for.


I'm liking the simple accents. I tend to go a little more...ornate, maybe I can learn from this one.

Love the deck build! It's nice to see a bent lamination that turned out well.
 
Sailaman63 ... concur on simple accents to compliment the canoe, in this case the simple accent helps break up the NWC without drawing the attention away from the canoe, which is after all the star of the show.

Mrindy ... in line with the above line, it is the one place I can sort of "get busy" without detracting from the side view of the canoe ... the challenge is to get the look without the weight. And thank you

RB ... thank you for the kind words


Brian
 
And final coat, only 2 coats, I want a textured finish ....


Brian


How you sand inside if there is only 2 coats and weave showing? or does varnish stick to unsanded epoxy? (I'm new to this epoxy stuff as my previous canoe was polyester.)
 
Hi Hautamak,

Only using 2 coats of epoxy will leave behind a textured surface but the weave will be fully buried, just not smooth. The purpose of the 3rd epoxy coat is to further bury the glass and give a smooth surface. On the inside, a smooth surface can quickly become slick/slippery, so leaving it a bit rough gives some additional traction. As far as strength, as I understand it, the initial coat provides almost all of the strength, and the subsequent coats provide some epoxy depth above the glass weave, which in turn gives room for power sanding and fairing.

As far as varnish goes, a light hand sanding (I use 120 grit on a foam piece) will give enough abrasion for the varnish to fully adhere. The light sanding won't come anywhere near the actual cloth, as there is 2 layers of epoxy covering it, it will just rough up the texture and knock off anything that is too rough. Depending on the epoxy you used and the curing conditions, if there is any chance of amine blush, prewash the interior with soap and water prior to sanding ... if you don't the varnish will likely not setup/dry.

Another point about varnishing, I will apply 2-3 coats of high gloss epiphanes for UV protection and end with a coat of matte to kill all the shine. If the inside is left glossy a lot of reflection from the sun will end up in the drivers eyes. I use these boats for wilderness camping, so things like surface grip and sunlight reflected in my eyes are considerations ... if the end project will end up hanging as art, then obviously the finish may be different.

Brian
 
There are several operations going on in parallel at this point in the build, but I will break them out into discreet steps to make it easier to follow.

This post will cover off laying out where the seat, thwarts and hand holds will be installed and the basic install itself .... plus a bit about the construction of them.

First step is to figure out where the "center of balance" is on the boat. Since this isn't a symmetrical hull, that won't be in the middle, in fact, for most boats it likely won't be exactly in the center lengthwise due to inconsistencies in the build IMO.

I have a "balance stick" cut so it just fits under the gunnels side-to-side at "about" the middle with a bit of clearance

ACtC-3e_lmtA1jhn5DxbGhcyDnNRsL3Suc3UEbS0t2RjSaLxYBwoLBp8eeUI8UHi_g4iBKbM_vzOfgQL0V6HGh4FkjdIvikx1FzxeYcfbqUmBjxdWYGC5HBPTZaz6cJY3rWoh6Z8YqNJvLU8hJp7gJhKNr0G=w1426-h1069-no?authuser=0.jpg - Click image for larger version  Name:	ACtC-3e_lmtA1jhn5DxbGhcyDnNRsL3Suc3UEbS0t2RjSaLxYBwoLBp8eeUI8UHi_g4iBKbM_vzOfgQL0V6HGh4FkjdIvikx1FzxeYcfbqUmBjxdWYGC5HBPTZaz6cJY3rWoh6Z8YqNJvLU8hJp7gJhKNr0G=w1426-h1069-no?authuser=0.jpg Views:	103 Size:	397.2 KB ID:	111411

I lift the boat by the stick and see if it is balanced ... moving it back or forward until it does balance. At this point I make a mark on the gunnel of one side, where the stick is placed.

Next, I want to make sure I get a second mark square to the first mark and I do this with a simple pendulum. Hook a length of non-stretchy cord around the tip pf the deck end and pull it taunt to the first mark, then swing it over to the opposite gunnel and make a mark.

ACtC-3dyhJDro9Y0AaIrEZ45Ke102l7SyUqejWa0ajJQwaWrn2lokaLep2XaZklEo5shi4iMO5zYDPM2STpUA8Y3IUEyy2HiCrMEki2rSWq4ZxI8ug_5XWAt8eN8OBsVo4OY90sY2P2VKjgW-G8OPKGlHXhb=w802-h1069-no?authuser=0.jpg - Click image for larger version  Name:	ACtC-3dyhJDro9Y0AaIrEZ45Ke102l7SyUqejWa0ajJQwaWrn2lokaLep2XaZklEo5shi4iMO5zYDPM2STpUA8Y3IUEyy2HiCrMEki2rSWq4ZxI8ug_5XWAt8eN8OBsVo4OY90sY2P2VKjgW-G8OPKGlHXhb=w802-h1069-no?authuser=0.jpg Views:	101 Size:	145.2 KB ID:	111412

Line the balance stick up with each mark and see if the boat balances ... move it fore and aft as required, keeping about equidistant from the marks you have made. Once it is balanced, make a new mark on one side and then use the string to make the second mark. Check the new marks and hopefully you are done at that point, you have determined and marked the center of balance for the boat.

You will be adding a seat and thwarts, which will impact this center, if want to do this determination with those items placed in "about" the right locations, it will make the point better. In my case, I know where the seat is going (aft of center) and that I will be adding footbraces (fore of center) and these will just about perfectly cancel out ... the thwarts and handles are pretty light and will have minimal impact on the overall balance point.

The layout points for the seat/thwarts/yoke are all relative to the balance point you just marked, the center of the yoke obviously goes through the balance point, the seat front edge is located 4"-6" (6" for me) aft of the center and the rear thwart is 7" aft of the trailing seat edge. The front thwart is located 30" forward of the center balance.

These locations can be marked on the gunnels or add tape and mark the tape ...

Obviously if you have plans that give you specific locations, it is best to use those, but for a 15'-16' foot solo, there will be little difference in the location points IMO.

There is a rationale for these locations (not a rule) ... for the seat, most people will hunch forward when seated, this moves there center forward about 6", so moving the seat back a bit locates the heaviest load over the balance point. Th rear thwart gets leaned back on from time to time (at least I do) and keeping it back about 7" is about right, far enough back that it doesn't hit you when you are paddling, far enough forward that you get a little support if you lean back. The forward thwart is placed to be in the area where your feet/ankles are ... so that it doesn't interfere with entry/exit or moving your legs around.

Here you can see the start of the layout for the rear thwart, the tape is marking the seat location, the stick is near the balance point, you can just see the tape underneath the rough thwart, that marks its location

ACtC-3dAuu7tsstTJ8WqfyluW94dxJmXXDA6Yh8HO3FXfOjeeV38Suh54A4Bei3aGqGJO7_uOt9WMgsYaZdOBCh4ig7trnhV-wxA_UYsfrLCWdImcPoH-_eGoo9kU1_Jude6TH_cKq7yZyJTFTehg9ZUcaDd=w802-h1069-no?authuser=0.jpg

In parallel I have been doing the seat, yoke, handle and thwart lamination ... so some of the pics have other stuff ... when doing epoxy work I like to make the batch go as far as I can each time.

Thwart layup is just strips glued up with epoxy, in this pic you can see a piece of pine added in, this is to keep the lamination "straight", I have found at times a lamination can bend a bit if it doesn't have straight edge to hold it .. sometimes. This is actually an "after" shot, the epoxy has set and I removed the end clamps, it's just to show the layup.

A note on the "lamination" I am using, it is cherry and white cedar ... the idea is to use the white cedar as a filler between cherry pieces to give a bit of bulk and keep weight as low as reasonable.

ACtC-3e_lmtA1jhn5DxbGhcyDnNRsL3Suc3UEbS0t2RjSaLxYBwoLBp8eeUI8UHi_g4iBKbM_vzOfgQL0V6HGh4FkjdIvikx1FzxeYcfbqUmBjxdWYGC5HBPTZaz6cJY3rWoh6Z8YqNJvLU8hJp7gJhKNr0G=w1426-h1069-no?authuser=0.jpg - Click image for larger version  Name:	ACtC-3e_lmtA1jhn5DxbGhcyDnNRsL3Suc3UEbS0t2RjSaLxYBwoLBp8eeUI8UHi_g4iBKbM_vzOfgQL0V6HGh4FkjdIvikx1FzxeYcfbqUmBjxdWYGC5HBPTZaz6cJY3rWoh6Z8YqNJvLU8hJp7gJhKNr0G=w1426-h1069-no?authuser=0.jpg Views:	103 Size:	397.2 KB ID:	111411

I did a few layups at the same time, this is some pieces for the yoke (left - will cover later), then seat struts (again, later) and the aft and fore thwart. I did an extra piece of the yoke lamination to use as handles.

This is where I ran into a bit of a snag with the thwarts ... I sized them to be as light as possible and still be strong enough (my judgement) and they did meet that criteria, but when I placed them on the boat ... they just weren't proportioned right, they looked "skimpy", too skimpy

ACtC-3e_lmtA1jhn5DxbGhcyDnNRsL3Suc3UEbS0t2RjSaLxYBwoLBp8eeUI8UHi_g4iBKbM_vzOfgQL0V6HGh4FkjdIvikx1FzxeYcfbqUmBjxdWYGC5HBPTZaz6cJY3rWoh6Z8YqNJvLU8hJp7gJhKNr0G=w1426-h1069-no?authuser=0.jpg - Click image for larger version  Name:	ACtC-3e_lmtA1jhn5DxbGhcyDnNRsL3Suc3UEbS0t2RjSaLxYBwoLBp8eeUI8UHi_g4iBKbM_vzOfgQL0V6HGh4FkjdIvikx1FzxeYcfbqUmBjxdWYGC5HBPTZaz6cJY3rWoh6Z8YqNJvLU8hJp7gJhKNr0G=w1426-h1069-no?authuser=0.jpg Views:	103 Size:	397.2 KB ID:	111411

Sooo, back I went to new strips

ACtC-3e_lmtA1jhn5DxbGhcyDnNRsL3Suc3UEbS0t2RjSaLxYBwoLBp8eeUI8UHi_g4iBKbM_vzOfgQL0V6HGh4FkjdIvikx1FzxeYcfbqUmBjxdWYGC5HBPTZaz6cJY3rWoh6Z8YqNJvLU8hJp7gJhKNr0G=w1426-h1069-no?authuser=0.jpg - Click image for larger version  Name:	ACtC-3e_lmtA1jhn5DxbGhcyDnNRsL3Suc3UEbS0t2RjSaLxYBwoLBp8eeUI8UHi_g4iBKbM_vzOfgQL0V6HGh4FkjdIvikx1FzxeYcfbqUmBjxdWYGC5HBPTZaz6cJY3rWoh6Z8YqNJvLU8hJp7gJhKNr0G=w1426-h1069-no?authuser=0.jpg Views:	103 Size:	397.2 KB ID:	111411

New glue up being marked out

ACtC-3e_lmtA1jhn5DxbGhcyDnNRsL3Suc3UEbS0t2RjSaLxYBwoLBp8eeUI8UHi_g4iBKbM_vzOfgQL0V6HGh4FkjdIvikx1FzxeYcfbqUmBjxdWYGC5HBPTZaz6cJY3rWoh6Z8YqNJvLU8hJp7gJhKNr0G=w1426-h1069-no?authuser=0.jpg - Click image for larger version  Name:	ACtC-3e_lmtA1jhn5DxbGhcyDnNRsL3Suc3UEbS0t2RjSaLxYBwoLBp8eeUI8UHi_g4iBKbM_vzOfgQL0V6HGh4FkjdIvikx1FzxeYcfbqUmBjxdWYGC5HBPTZaz6cJY3rWoh6Z8YqNJvLU8hJp7gJhKNr0G=w1426-h1069-no?authuser=0.jpg Views:	103 Size:	397.2 KB ID:	111411

And a look at new versus old

ACtC-3e_lmtA1jhn5DxbGhcyDnNRsL3Suc3UEbS0t2RjSaLxYBwoLBp8eeUI8UHi_g4iBKbM_vzOfgQL0V6HGh4FkjdIvikx1FzxeYcfbqUmBjxdWYGC5HBPTZaz6cJY3rWoh6Z8YqNJvLU8hJp7gJhKNr0G=w1426-h1069-no?authuser=0.jpg - Click image for larger version  Name:	ACtC-3e_lmtA1jhn5DxbGhcyDnNRsL3Suc3UEbS0t2RjSaLxYBwoLBp8eeUI8UHi_g4iBKbM_vzOfgQL0V6HGh4FkjdIvikx1FzxeYcfbqUmBjxdWYGC5HBPTZaz6cJY3rWoh6Z8YqNJvLU8hJp7gJhKNr0G=w1426-h1069-no?authuser=0.jpg Views:	103 Size:	397.2 KB ID:	111411

Now that things are laid out and we know where everything is going, attachment will be done via 10-24 x 1.5" carriage bolts ... so that brings up the issue of limited gunnel real estate at the attachment points, which I did expect, although it could be done as is, I prefer to place "add ons" at the mounting points to give me more real estate and a stronger attachment point.

I took small pieces of the spare outer gunnel I made, and created "add ons" for the thwarts and handles, you can see those on the previous picture

They are marked with a centerline, placed on the mounting area, the bottom aligned to the flat, leaving about 1/4" overhang at the top. Once lined up, a pencil line is drawn so that it can be aligned once epoxy is added.

ACtC-3e_lmtA1jhn5DxbGhcyDnNRsL3Suc3UEbS0t2RjSaLxYBwoLBp8eeUI8UHi_g4iBKbM_vzOfgQL0V6HGh4FkjdIvikx1FzxeYcfbqUmBjxdWYGC5HBPTZaz6cJY3rWoh6Z8YqNJvLU8hJp7gJhKNr0G=w1426-h1069-no?authuser=0.jpg - Click image for larger version  Name:	ACtC-3e_lmtA1jhn5DxbGhcyDnNRsL3Suc3UEbS0t2RjSaLxYBwoLBp8eeUI8UHi_g4iBKbM_vzOfgQL0V6HGh4FkjdIvikx1FzxeYcfbqUmBjxdWYGC5HBPTZaz6cJY3rWoh6Z8YqNJvLU8hJp7gJhKNr0G=w1426-h1069-no?authuser=0.jpg Views:	103 Size:	397.2 KB ID:	111411

To mount, just saturate the gunnel area and the add on piece, then add thickened epoxy, I like to put that on the gunnel side ... align the add on and clamp, I just use 1 or 2 spring clamps

ACtC-3e_lmtA1jhn5DxbGhcyDnNRsL3Suc3UEbS0t2RjSaLxYBwoLBp8eeUI8UHi_g4iBKbM_vzOfgQL0V6HGh4FkjdIvikx1FzxeYcfbqUmBjxdWYGC5HBPTZaz6cJY3rWoh6Z8YqNJvLU8hJp7gJhKNr0G=w1426-h1069-no?authuser=0.jpg - Click image for larger version  Name:	ACtC-3e_lmtA1jhn5DxbGhcyDnNRsL3Suc3UEbS0t2RjSaLxYBwoLBp8eeUI8UHi_g4iBKbM_vzOfgQL0V6HGh4FkjdIvikx1FzxeYcfbqUmBjxdWYGC5HBPTZaz6cJY3rWoh6Z8YqNJvLU8hJp7gJhKNr0G=w1426-h1069-no?authuser=0.jpg Views:	103 Size:	397.2 KB ID:	111411

The above pic is after I have cleaned up the squeeze out, you want to get any excess off the joint while it is still liquid-ish ... I use a finger (gloved) followed by a paper towel.

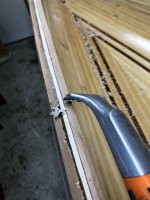
Next day, I use a plane to take them just down to the gunnel

ACtC-3e_lmtA1jhn5DxbGhcyDnNRsL3Suc3UEbS0t2RjSaLxYBwoLBp8eeUI8UHi_g4iBKbM_vzOfgQL0V6HGh4FkjdIvikx1FzxeYcfbqUmBjxdWYGC5HBPTZaz6cJY3rWoh6Z8YqNJvLU8hJp7gJhKNr0G=w1426-h1069-no?authuser=0.jpg - Click image for larger version  Name:	ACtC-3e_lmtA1jhn5DxbGhcyDnNRsL3Suc3UEbS0t2RjSaLxYBwoLBp8eeUI8UHi_g4iBKbM_vzOfgQL0V6HGh4FkjdIvikx1FzxeYcfbqUmBjxdWYGC5HBPTZaz6cJY3rWoh6Z8YqNJvLU8hJp7gJhKNr0G=w1426-h1069-no?authuser=0.jpg Views:	103 Size:	397.2 KB ID:	111411

and a quick sand to make them match ... sanding was for demo, I don't usually do that until later when I do the gunnel prep

ACtC-3e_lmtA1jhn5DxbGhcyDnNRsL3Suc3UEbS0t2RjSaLxYBwoLBp8eeUI8UHi_g4iBKbM_vzOfgQL0V6HGh4FkjdIvikx1FzxeYcfbqUmBjxdWYGC5HBPTZaz6cJY3rWoh6Z8YqNJvLU8hJp7gJhKNr0G=w1426-h1069-no?authuser=0.jpg - Click image for larger version  Name:	ACtC-3e_lmtA1jhn5DxbGhcyDnNRsL3Suc3UEbS0t2RjSaLxYBwoLBp8eeUI8UHi_g4iBKbM_vzOfgQL0V6HGh4FkjdIvikx1FzxeYcfbqUmBjxdWYGC5HBPTZaz6cJY3rWoh6Z8YqNJvLU8hJp7gJhKNr0G=w1426-h1069-no?authuser=0.jpg Views:	103 Size:	397.2 KB ID:	111411

The handles are a cherry-white cedar-cherry laminate to match the rest fo the trim, here they are ready to install

ACtC-3e_lmtA1jhn5DxbGhcyDnNRsL3Suc3UEbS0t2RjSaLxYBwoLBp8eeUI8UHi_g4iBKbM_vzOfgQL0V6HGh4FkjdIvikx1FzxeYcfbqUmBjxdWYGC5HBPTZaz6cJY3rWoh6Z8YqNJvLU8hJp7gJhKNr0G=w1426-h1069-no?authuser=0.jpg - Click image for larger version  Name:	ACtC-3e_lmtA1jhn5DxbGhcyDnNRsL3Suc3UEbS0t2RjSaLxYBwoLBp8eeUI8UHi_g4iBKbM_vzOfgQL0V6HGh4FkjdIvikx1FzxeYcfbqUmBjxdWYGC5HBPTZaz6cJY3rWoh6Z8YqNJvLU8hJp7gJhKNr0G=w1426-h1069-no?authuser=0.jpg Views:	103 Size:	397.2 KB ID:	111411

and how the handle fits the hull ... I moved them back about 5" from the decks.

ACtC-3e_lmtA1jhn5DxbGhcyDnNRsL3Suc3UEbS0t2RjSaLxYBwoLBp8eeUI8UHi_g4iBKbM_vzOfgQL0V6HGh4FkjdIvikx1FzxeYcfbqUmBjxdWYGC5HBPTZaz6cJY3rWoh6Z8YqNJvLU8hJp7gJhKNr0G=w1426-h1069-no?authuser=0.jpg - Click image for larger version  Name:	ACtC-3e_lmtA1jhn5DxbGhcyDnNRsL3Suc3UEbS0t2RjSaLxYBwoLBp8eeUI8UHi_g4iBKbM_vzOfgQL0V6HGh4FkjdIvikx1FzxeYcfbqUmBjxdWYGC5HBPTZaz6cJY3rWoh6Z8YqNJvLU8hJp7gJhKNr0G=w1426-h1069-no?authuser=0.jpg Views:	103 Size:	397.2 KB ID:	111411

So ... this covers laying out the trim pieces, making the trim pieces, adding the "add ons" for mounting and a comparison of thwarts as imagined and then as built when imagination doesn't work out too well in reality. I am not ready to start drilling holes and mounting stuff yet, for one the carriage bolts are on order, not in my hand and also because i don't like to do anything to the gunnels (like drilling, round over etc) until I have all my pieces fitted and accounted for ... since i have the seat made but it is being fitted and the yoke is designed, but I am waiting on a cutter, i will leave gunnel finishing and trim install until those jobs are done.


Brian
 
Last edited:
I also use the maroon Scotchbrite after a light sanding as the Scotchbrite is quite flexible and can scratch even the low areas of the weave.
Jim

I have to make a run to Home Depot when I get ready to varnish, i will keep this tip in mind and look for some, thank you

Brian
 
I can tell you are enjoying this part of the build ! It looks great !

Are you able to keep the weights where you want ?

Jim
 
Everything's looking great!

I agree with your decision to scale up the thwarts. You have a good eye. It's interesting that on a build where low weight is a primary goal, it doesn't "rule the roost". It's all a balance!

I once worked with a good carpenter who was fond of saying "it's only a mistake if you refuse to fix it". It takes discipline to do that though. Well done!

Rick
 
Hi Jim ... I really do like this part of the build, it is bringing all the final loose ends together ... the end is in sight. Weight should still be on target, even with the new thwarts and decks I wasn'y going to add, if not, then close.

Hi Rick, thank you and you are correct, it is all a matter of balance .... and your carpenter friend is a wise man.


Brian
 
Back
Top