• Happy Scream Day! 😱

Light Weight Solo Tripper Build

This post will cover off some of the finishing steps as we move to final fit and varnishing.

Normally, I would have completed the yoke by now and started finishing the gunnels ... but I "had an idea" and the router bit I ordered and require, is taking forever to get here, so the yoke is on hold and we move on with the seat and cleats.

The seat is actually in 2 parts, the seat and the cleats ...

First up is to get some rough cherry and rip some strips, they are shorter and the radial works just fine and is about the simplest setup I have for shorter strips. These have been marked before cutting and are assembled back in the same order as they were cut .... this eliminates the cutting irregularities that can occur when making multiple passes (such as strips)

ACtC-3ddU-78Teye5-mC_WsSV5hWjA8OYPNfE0taEEBNhP13VbuDnU2QcOZO8a5c2toy4_ZQwCNmyIvYGwhAs4nCjFAZv9_m7k5q5k_FbjzD5LsQZ0QXtKgkZi8Gp1FAUEc2mnSiaozvFkDelC-VZLfGryLO=w802-h1069-no?authuser=0.jpg

Hauled out the forms for the solo seat and decided they are 7 years old and I can do better now. The seat is comprised of 2 bent struts and 2 spacers, that are just solid material. the bent struts are steam bent, then epoxied using the same forms

ACtC-3fNZXXpJlP__ZswMnrRv1tuBotFerzOgnIovUNdo-jjBye4AFKjWDjVvl_pVqNRjtwQ7_ZJdgv8tvBr9v3MYZ7N37gqC5VgCQ3xgtACBHBHm3S9Zfiycf71x2PwnnRwHrAhTixubiQYgsQlvEQ17iS8=w802-h1069-no?authuser=0.jpg

Made up the new template, front strut drops 2" and the rear drops 1"

ACtC-3dBMci0R4Yup4EH4Iwp7bmBZ4RZvibKw2aDgNIUUitq4XmtrrefNpU-toh_SWP0_FxFZ32vV1AAHoL_8Ul23VqHjOpn5rJ4OkhG3LW_RJ021Gi7NHB9UhMifIKWcsIB9gGZUUb9P7cVB4Cqy0oJR_XH=w802-h1069-no?authuser=0.jpg

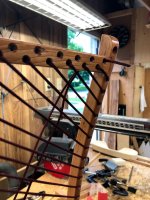
Rough cut with a jig saw and sanding to line on vertical sander

ACtC-3epSq4m4Y-kvPDAQRn6kWr_16BZM4PgyjkUzocwBDYOWz2_s96HKDWjwKrMInIhC_h64XqzbEOmPn4FmcYPNqDYQsPaFDgxZ5d2C8pG6XaFz2uFY31kYdloqki1fPbpJKXh9UFdY8Ywx07CKlaoD2HZ=w802-h1069-no?authuser=0.jpg

First side marked and rough cut, it will now be sanded to the line

ACtC-3euM8v_5r-1aHZMROtW_Phfya-Wa5HtqtJHX3LwnwwWMhB3MySeMesS4ty0sPB5EZPPH73fuU3tZH7cEH17zRu_j0WjpiUR6D3FLTPzPN0qEDvsi9fdUynNNInqiy8LZRcbtLxyqFxk7TiPNB_G-c5e=w802-h1069-no?authuser=0.jpg

New 2 x 4 , line is offset the width of the strips ( 1.125" ) to the mating form

ACtC-3cAeVXRQl0gFEnG3a186T7_o6Ww-ZDSVBDOiJFFJdkuZYiR3VyLUHOUTmqyTbhip99ld-wcxt18FvvVru3az18r3uCrn7R626HRD77a1A4c8GYQvl5Db4IndUctvYUn8jjXugugCgz3TJnAejcM00iQ=w802-h1069-no?authuser=0.jpg

Mating form shape drawn in

ACtC-3c-5G1AhAEND4llU4xsEyMcYuT99vWVZx6OV7YZo_imb0dgfICgSM6fNRJ5b6iYL5WbRHx8qVMDp8f3IVZv6r16_Pywl1ctrwxs3W6Chlw8xB5_Qj-4aUAL8Llq5yU662OBP8U3mFuhvHBC5-kJ2fh4=w802-h1069-no?authuser=0.jpg

2 halves joined and they fit very well, the reason I used 2 separate pieces to make the forms was to have a little more meat for clamping .. just splitting a single leaves one a bit thin and I didn't have a 2 x 6 on hand. It doesn't look like they fit exactly and this was the point of using the offset to do the second part, they shouldn't fit, close but not exact. When the 1.125" of strips are added they will be a perfect match for the job.

ACtC-3fJEU4KBf4ZhdAfdRKOiV6TySLoOWwrKBqYBSwhDc3UL5r3nzO1WR8QnE0JHpQmWaLIvEjx6ZMmQDaWHJ46BnRfrSdis12jqWC6p5WJuS7-Yzz9dbZJDvaBfFPg_tTvx5v0MBx0t8vhDTcnOWr0EKEm=w802-h1069-no?authuser=0.jpg

Assembled into a clamping form, the center line is marked on both halves, small blocks are added to keep the form aligned (they tend to wander otherwise).

ACtC-3e20vrOSY4rLA9kQoa8_3KUJZK_b9JU4tsE7l_kwPWQvo-4_b63JTryzjb31Zk0X4Ce45dtkprjs0X64MQjnyXBIGkAP3lb5L5esbmBddFJ4VM7TK1BORXpluzYMQ4T5IZ1m4LNBiGfWo1BG1X5ieAJ=w802-h1069-no?authuser=0.jpg

Strip stack is assembled and a 1/8" hole drilled in one end

ACtC-3dknQ0O8bxYAWtjcFkPtDb0ElMlw6aFDrfvCLkGvaKGxpW-adb42XaTUeVQQvGBzskGeO69lpGO-0AoXMxORV_LzUMk4Cp7nDRAahcPIozwnQda2O2PYnTTyoM9fHta6mWOz0MecsujajB6kIYmlYMw=w802-h1069-no?authuser=0.jpg

and then loaded into the steamer

ACtC-3dtMerXBSkIPCIO7RU_kwLfMDfAsvVcaBAu6mT9lJ2WaT7zDjO21MO__6m4QIzJMQaEtZTCyZITDMmzhBzyrNHip_JFYtLr_JnsJg-Sa2avYxhp6KZ5p9xHHPF-4b6GZ1r-pOoT881scf9bYHzPwLlr=w802-h1069-no?authuser=0.jpg

When they are medium rare, they are quickly loaded and clamped up, the form also allows a quick clampup, since you get on the order of 30 seconds to get the operation done, with the first 15 seconds being "prime" for bending, it is important to have your setup be quick and easy

ACtC-3dTB_IRLfB-XxBVu7souq5yGbk72Tg9SfSPT86baIfjFM7ZYCIxAZx3bXxI33GOrAf8m0sbupO38aM3FwB0f6KV85s6u2EzWrexDBcEtbNzQNEd2cvl1_zbzPg1Mzj_lJHuCMR49pZQjs-elHMvA_WD=w802-h1069-no?authuser=0.jpg

They sit for a day in the mold, then it is opened and the strips allowed to dry for a day. Then it is the epoxy regime, saturate with unthickened, butter with thickened, then clamp up .... gently. Just make sure all of the gaps are closed up, you don't need to overdo this ... you want to leave enough epoxy in the joint.

ACtC-3dJaFRWQv2emMlRy5tM6pWEtP7vbHjLDmml9_yyQ7qhPGJpzs-IUNCNiJVOgGdR9fILHxzkXm99e5yG4znICV9riVk5reV7dzRgptYzbbg3YtxRWQnKW1zzFIgBdLd03p4Q9hXXNwY0hxZP1kckBezE=w1426-h1069-no?authuser=0.jpg

The centerline is transferred to the glue up as well

ACtC-3cyOXsEzaoaBD1bd3EKRtMq1bHbr_ZR-XmQaEPsRynK-ucbJOHg4bMp0Lh6wHY2BUUZpwd81SZ6Qml_AhBnDu2uSC1STb9k1qaZTWiP09p53aqj8yyz_AgHCVvnhkHP1q1-vg0qsYhIJc8wDGnVmetW=w1426-h1069-no?authuser=0.jpg

A point about the glue up, you can see that I like to tint the epoxy dark ... your choice is to try and hide the joint with a good match to colour or you can contrast with a whole different colour. If you try and use colourless or neutral (just cabosil) you get a black line that shifts with the light, that is the joint shadow as light enters the joint. The "close" colour match is tough at the best of times, so I prefer to just go with higher contrast and use the joint as a "feature".

I point this out to make the point that there are options in the joinery, selective use of contrasting epoxy joints can be quite visually pleasing IMO

A note on the form, you will also see an extra strut in the middle of the form, I added that because the middle strips wanted to shift and I needed a surface to push down on to keep them aligned.
ACtC-3c4g3vKZzSOF5gwLDis5erLzADGlzcRsAzX9rI9dFXbGo3K6-_gb0AJN6i-dq5gBkcymbElqfgsV8MCtgatwnnTGRDTDaW_FOyKNPQ8vuDkhahR2yUthzWkeNQcj5IZGAyebKLjcYKI7TsNWtbMg8e5=w1426-h1069-no?authuser=0.jpg

Struts get scraped and a quick pass through the planer to make it flat on both sides, here a "cleaned up" strut goes back in the form to re establish that centerline

ACtC-3cy0N1j8x0F6sShvYxbYfmeeK_RnBsXo1kejYOGFdqdUzSmc1F9D65rn5Coqlp_OcJPVlSfaGqztNZuVozhte1b6IPLc_gpVZc0bG7TbqfyvnuKovDzqclByyv8qJoKd_jeD4hqJdHT1qdpJNURXxUW=w802-h1069-no?authuser=0.jpg

The sides of the seat where cut from some rough 1" cherry and left rough to keep the piece full width. They were sized to be slightly thicker than the struts, since the seat struts are not the same shape, the sides need to be shaped some, so leaving a little extra allows fitting as we move forward.

A mortise is made about 3" in from the ends of the struts, all laid out from this center line that was established in the mold. The mortises are 3/8" deep and slightly angled to fit the seat bend at that point.

Here you can see the bottom view of the initial setup with squares and the pilot screw holes, that allow for temporary assembly. You can see that the extra bit at each joint and that it isn't an equal amount along the piece.

The screws are not going to be the permanent fastener. I use them as an easy clamping and alignment tools for fitting and epoxy glue up, then i bore out the holes and add dowels as the final step.

ACtC-3fvIo2GYWcuTIxX8cDKyfMGTgV3nN7kWX2zjT4nuFPMRjjdI75TgY9bIiYpLpEpK16MNPLB3sZeuTkWZASgPyHbiN0SfWToOcaaZh3VWoVJoRPDx5x_E0MOgZJBCZZFTSqkQGsVqj14vmA0TA-9opOB=w1426-h1069-no?authuser=0.jpg

This a "top up" view once it has been assembled with the screws, again the extra bit and it isn't equal along it's length

ACtC-3cYuhQP49GyBeABNxrKCBveGghv9zvdYbI_cbgRRqsuR5bpqrQ-oZ00zB-eUAhFKMNnvW2zikShxysmJr6cTi4LNf6h9_GdFkVIejIPt5Ffrju0xXupjtczWP5Ju06OrE_Bt0300qqM8iKWB6eK4w37=w1426-h1069-no?authuser=0.jpg

A closeup of the extra bit, the area to be removed is marked with a pencil, at both sides

ACtC-3enljh__f_NWPDm6WDwi6-6p1yMVJDIRuqK_7Ca6t2dZWBciWGtIq6HyJIolowL6QKiP6RBl73sAy_6pvUylTewpAn8ThR7yjzB2CNrgLu3nNX5XEYBXYFFmZZonZBFep0wmpSpp2bszzXcuGPmrmpS=w1426-h1069-no?authuser=0.jpg

The side piece is removed, the pencil mark side to side is joined .... this gives a very clear picture of what needs to be removed to make the fit work

ACtC-3fEgDF8-_Vojp6bwuzItSw3aYfaZL-u8OzvuhHqEOK-Q9b627PIyBVguWCuVjveIjWRD3svcgi8P9xn8ST5UYVx-5YKkOI37JgW1qzZ3uQtVefY_49FvRTeO1j0jFvENCmYdZQhHJy7f7R4HPGrE6a8=w1426-h1069-no?authuser=0.jpg

While the piece is free, an arc is scribed to remove some material from the bottom. The piece was made wider to accommodate the weaving and the arc will add a nice look while reducing the weight

ACtC-3doOkFBE-Wlb3a-b-UIXmmPJmTNi82RBFcAZ3_QPYMgTmu9gipFQvKVynDDxbeEok-A-xH_LJI5sKWh_r9f8W3nP5qzIsqVZS8RzUjVRd-VmRHGfCauyoQA2m41chyo9igqjmvb8mBJKXecMsIajduO=w802-h1069-no?authuser=0.jpg

The adjustments bring the sides very close to fitting

ACtC-3dF8gEUbBBSVyIjHjyAhgfsLFar1wgxfisGUUUMAdcvHwhiXCVTkwvzWbhx9VVWBBM2j9ARDVffcPejlHXdaEEJNVQTICEF8r2d1HD3dnf8cBf_LGmu_j_GI--gy0IpyjiHe5nj9-6fva72kFosxcsp=w1426-h1069-no?authuser=0.jpg

A bit of trimming and sanding and they fit nicely

ACtC-3emnViV_uWD6DDkIgPkyY-yUXNHeZil8-SpR39lZskEMRRzgO1k1HRRPLW0U0y3RPIYMPugw3RaQgKZAR7pIuVyfZ0wqOIWQznbGwqTVDcfWoZB7DgQV9yhl6aE41cWAaQPLa9R4MUdbyJYyczTTxy-=w1426-h1069-no?authuser=0.jpg

ACtC-3exwRxjS462YSs5YpbaOyFawpOOlyOaj_PYy-UZVBhbm0hz69SToAgbPtlfBB77CAT0Aj6bSOjgKJWuFI_tOpah5U7RyVaPMYGTotxaKhMFGGE_wIHlRpyqcE3mM58xVPn1VXUzJaBI2Fb1UeH1Wju4=w1426-h1069-no?authuser=0.jpg

The seat is ready for assembly, I like to continue with the screws as it gives me a very simple clamping system. HOWEVER, if you do this ... make sure you wax the screws ... if you don't the screws will end up epoxied in and there will no way to remove them.

ACtC-3cwZHkeG9Hgf_107xFQQ98mwDnBObWlKTqDu9Xq5vESAka-iF2HdnfQ3iaXNjb6NIYl_3WnxJoBlXedyDThuTPz5lgfmYXq5ZRMErs7fskmtt_LnP1ZlJgELjRTJ8TcJGm1-46ATvUqObAOLXfUD8S_=w802-h1069-no?authuser=0.jpg

Saturated joints

ACtC-3dxPZDrjmM-pEPjV1RFLU4z6LTJmTUyK_on1d9SPkYXCIyVw233OqOUdgfWEasU1f-IAQm1xZsb7m3eux2-y061AK1OW8OLE48z7XqpzzvP_GgrEZrtMxqB31T9ORR51r2F8UQEQpptCtcrL1PZAnuT=w802-h1069-no?authuser=0.jpg

ACtC-3fdAanp2gmD_uUWGD228dXJhyPMFunjSZrcJurZZqqQ3XVvvBMk9SxOOOYjkAKr1yfsEIXyq3eYzyK4fH2Y_Ywvg-TOD2Knc2NZtF3SJL4PMDweXkqiJDqiaTrHbUnMJq2K_SGs0uehazxBfoo5pMle=w802-h1069-no?authuser=0.jpg

Thicken and tint the remaining epoxy, I used some walnut, cherry and the cabosil to lighten it a bit, assemble with the WAXED screws and snug them up till the joints are just snug. Use a gloved finger or a paper towel to remove the "squeeze out", it is a lot easier to do this now than later. It will leave you with a joint that just needs a little cleanup.

ACtC-3d4sXhJ7RSCh4K3XbHlWjj2EZgY5h9omzGhDSMtTpFHORAcaYcmk4SYydVQjKwJ1tcWk3c2Eaqn36tA84egn593d-OmV5gKIrT46b8NTRJcJ4CVKF21dUtreAqsQcipIk3MSwyAj4G1HEizP6efrn_Q=w802-h1069-no?authuser=0.jpg

Once the epoxy is cured (usually next day for me), cleanup the joints and do a light sanding.

ACtC-3egvUrGx-B3grg9B6bs1nytqcy6t967Os2zZ34Vjxi3orSmuy5lQ9h7YJVFtNFFA40mzAsV6t75FsOmzwSXWGFzDOf3IVhCnRjXfl8gvhMALIewyemICbX8erslIOqk1dGWPYCf9WddNhC-WXoAcvn8=w1426-h1069-no?authuser=0.jpg

Remove the screws and bore holes for the dowels. I like to use forstner bits to get a clean edge, so a guide is needed to keep the bit from wandering due to the screw hole. I just use a piece of scrap strip and do as follows

ACtC-3cvhHvfytSR50w4yieHwCMqxw5LMwxbpf1Sh_Ccm6sTY2oyGE6E2b6loZHnsaGS1E6hv8lh17qDVv9cT_NWLa7IrZKOu3MPAZOTWBqC4qlyfVfzcmy5uVWBNnAZq_0Ml3gwun5CBD9Iez4ebD969keK=w802-h1069-no?authuser=0.jpg

ACtC-3eqUdnjk5moQ2v9tOSg9zwLIaCjWPqZCgjdJd6RhdN79KUWHIUBT_HocWXf1a9DgCk3M9hJ8IlN60-NhIhfmuePGn8Vb5hAJyAT18_oT1273Wsw8npQ3mohK06B7gWi0qnwRMW0cFT_0_t5q3A39QmG=w802-h1069-no?authuser=0.jpg

ACtC-3fEAtsQFJfA-g_28_Bvw1_fVB6FY6td8cXQmIhVEgMtzGuIaoAk_cZM71m6BP5QEA1yYMFBO_taC0hHSjc3TsNoJ4c_2Cvkrx2iP__bSDvtRdmVKyUbGR5Y9QyPYSWj0YbcKNx-o88RqgA4dfWFWqzL=w802-h1069-no?authuser=0.jpg

ACtC-3dV93rK03ZcjABgjmrNxtaJ_ddRzR92X9VeovKx9WgQOVuV5eo08m-0DzViRXgi7Mr5h4hBP10l4Uk3jEmc3KK7YS97dNz41wQAsbqu-thgqp5DGc2ep2jTh9aT3c1NoEthdjfbR4XtrdLTVtQUqMUs=w1426-h1069-no?authuser=0.jpg

Epoxy in the dowels, in this case I used 3/8" x 2" maple dowels

ACtC-3fkSdX9TmP5NHQTwE2yLx1ykLm6v6zri3osnDref6xrnxQqQ_VHhfM937H56Du6Sw0Eevy1VMZACpcyLeyj9VfWEbQotz8JZWH2wXc4R9wrnVFNnbURabwEhyk-pFT-89oGRIL470uFp4VkNOy39keF=w802-h1069-no?authuser=0.jpg

Trim and sand the next day

ACtC-3c84sqNE0mre9k8Ilof0J8fA2lzgcHdXyfqSLQoA1tut67_2EVDLimitpZU6zzLvEyB4sOI0I30l_KaiS2i5cN_E4OSLl9ALlFDDSCDvwot3WgDrxONzNqzdgBZzF2qiCSvjkHGcY1LCeD1VF52PQWg=w802-h1069-no?authuser=0.jpg

The basic seat frame is done, so now the cleats need to be made up to fit.

The seat location along the hull has already been established on the gunnels, I also know how far off the bottom I want the seat to sit, so I need to mark the location accurately side to side and mark out where the cleats will sit.

The gunnels are adjusted to be level, then a jig like this is positioned, tape is added in about the right location, so i can mark both sides with a reference location at the bow end of the seat, once this is done, I mark the stern end.

ACtC-3datTUG85JCpbiYTHUZYNQzDsySsL3ZqhjSKvkpmLDkTy3zZXODbK2HEbpiwWyndzPoB5uuBXANQfMC2ahR3nFH646NhQg1p2V1xfK7F1T_lB5FXig4hbNs5RrY1oOqriwlUmj_FgwEc59u29PRQ5fO=w802-h1069-no?authuser=0.jpg

Once you have a reference top line for the cleat, the rest is pretty easy to pencil in a the cleat foot print, then outline that in tape

ACtC-3dGZJP6OEOuhCMwSvj5vwvHFBiN-qNv3eANDI9S08GJb3w7dgywBhtClSpg3nacp1NCyp4gpv95DX3_lFLzLy_WSMIF_c7psXAP6zZShFLkM3uiA7YY-MQ7hfHutucxRNv3kzWnYIhXQAX0SumbtYwf=w802-h1069-no?authuser=0.jpg

The complete seat cleat has 3 pieces, a 2" x 14" x 7/16" base and 2 3" x 3" x 7/8" blocks, 7 if you count the 4 dowels

ACtC-3creGXN0u2-JbLZ1jLuSd5rq9lixWg6l7TzNsdV-SKpZWij4ChUwkubgiNUsnZSUZHAx32-XabnSGOlfCB_qG24TmFjCdfF00oLX-OSy9sFdH-k20AcIfDGsgxZYHkVAKR9UyZkTqYy0sKyvycJFHhr=w802-h1069-no?authuser=0.jpg

Mark up the center of each of the blocks, and draw in the triangular shape, use the completed seat frame to determine the centerline on the base for each of the blocks, leaving equal leftover at each end. You can do this empirically with the seat frame or by measuring, this is "in progress". The holes have screws holding from the back.

ACtC-3eISCFxRoOP9YwNuPN0vfUxqCfF05EU7cr2fCbaHCGJdFBGTiwvIPrKPy-U56_k6G0nDRRKWtSpTq5VbWrGtQJu-aE4ntDOdmqtcPkk_-rsUm1mb3B5ix1ujZj-R3-riNHgLYqwbMp8dk-kj4im6hki=w1426-h1069-no?authuser=0.jpg

The triangles can be cut on pretty much any saw, I freehanded them on my radial. Again for looks and to trim some weight, you can see arches drawn in on the base

ACtC-3fXG--NMARuguT0097DvbeL8gezr2VKQ8XiLJREmuOS957SjpjjQTsdZSX3xiRHj5ec8jsmHpg-8TtuM9E0wwtryctX5jJkfHG3VlTiKw-yyd2vc7c_U3w_X8_v8n_r39PODjhfbLmah1J08j5cX3Oy=w802-h1069-no?authuser=0.jpg

ACtC-3f0KRD9sndfL9dnH6b8LL53D3O2KIV1BIxdFtxkomLeSrpnnnrpVjlHle2N_UA9WQlrptF_iNxvBzvSKIu5C3Ao_Lf77wQIvciJtVzr14394zydP8ffTtEFjPRy4xmYIAWyGeOt0qBKAzlgHfOEiovv=w802-h1069-no?authuser=0.jpg

Ready for assembly

ACtC-3c0DY0x3MbGK4oIUY6eJtBgQ1IuXgLTElTM_qkg0CX0xMkrch0_5FkRSvdAeQMcQEgfAmsDS3o92kKjMtZPiZB9cu292ZnCq9CDg9f65zxRVZ7puu3gGWE0fJIjhQskoI3p9Xt8DE_VX5J2Ho84CgWa=w802-h1069-no?authuser=0.jpg

Epoxy up ..... first pic shows squeeze out, then clamping and finished, make sure to wipe up the joints once they are clamped. In this case, I removed the screws after about an hour, there was sufficient clamping and I had neglected to wax the screws ...

ACtC-3d-QaelCLyk-fBu4AWfvwMg4PoaqHk5ItH5CwCBL01qt_gii24orYh6-gXVKm60etZeXliqdinu0A1YVInE8dgooJhZJ-LU7EH7KnsaJDaWNonaMM9btqZ09GdzN4CCf8Dj-T3lvU2oFUxQaPfC0dSs=w802-h1069-no?authuser=0.jpg

ACtC-3d688obRuLlh4TN1R5_PAZcCOSurfw-N73KE4Jqz1zqM5NiUkjMDN-pOPHVofUqHXBrVf87qqPkwOc9l2d1ipd-PPVnOTQlhPgFeDePj91BcSrxbq-meOTFrxkm6Toy2mBLiijeCCBQXtNBQg5CSeY0=w802-h1069-no?authuser=0.jpg

ACtC-3cy432jE1WrcX2N4nVsZ-rSs8k9RjyGh-4ONyJ15i0TmFdThPSMP7UCzY3JWFwzu-Dwh2fYQBaUCC1gVLC9UV78V1olKDfOHJSLOK5B0UnhQg7LUh_W0HpLp7k72crZbtA37yWGBU6C4ZuSFQiNvlga=w802-h1069-no?authuser=0.jpg

At this point the cleats need to be fitted to the irregular shape of the boat ... they are flat, the boat isn't. This is not a process that is easy to explain, but basically, put the cleat in place, see where wood needs to be removed. Do a bit, fit a bit and in about 20 minutes, you will have a good fitting cleat. Don't try and do too much in one go, it is definitely a "do a little at a time" process. Once you have the fit done, make some alignment marks on the tape and cleat

Once you have the backs fitted, it's time to fix those screw holes, bore them out and epoxy in the dowels

ACtC-3fI4lugWbyEaQ1hRrlUZ_GO7JeNMJHyBGmxnmqRBE0QVJ83rNun3H0XTrDJYOhSMIw0tl5np8K-59Pc-dvAVl9liOdA602Z1B3HR72ESqC9DykSrjOZEHfe3hAuERyo3q8KfnkPRfnNthIXMDzADRcr=w1426-h1069-no?authuser=0.jpg

ACtC-3fQC8vY40VpUL_GpiQ2CPhQLzIKdOjp4DbsYTcBa3rZ89YlvJNKZGqN8unyr7WEqF8AhqmnbZCIP9iW4q18gcBbAheQIjMs6AEySP0wi5BcPFZUxcEA_ly4WkOFWKE-JXhts1jLVfg_lmDra46kgvC5=w802-h1069-no?authuser=0.jpg

ACtC-3eh_ReIN8rn9PtNtugJ_Qv5lZ05xmVGrKlV0UOM1aw-Ydkn7071oA_OiKsQw99hVZLWR9ujZVk-DJORpdb0YYRR8q5XAatL6OD8bhowxcs6pQCSY6UrFsXD_nkSjLdrzMs8dIhvu2AWqrRKK6Brcddq=w1426-h1069-no?authuser=0.jpg

Trim the dowels, and sand out the facing areas .... leave the fitted area alone, except to cleanup the dowel area.

ACtC-3dvNW1kkaBIt6CGVYDmhxryMRdtVlCxEYkKRPbsph7t1TWPmvybE_ID6xu_aGYmfJEHbvEnxdL_P6F5sao9tKIg_tSdSxOEJERu0ztghKsUgKHkhHWvQapQK619GmOrZZfdcOFgkhYk8SzgxyYpPrqY=w1426-h1069-no?authuser=0.jpg

Sand up the taped area on the boat, well, then wet out the boat and cleat backside ... keep adding epoxy to the cleat as required for a few minutes, then remove excess with brush. Thicken your epoxy and thickly butter the cleat back side and carefully position using those alignment marks.

You may need to get a little creative with the clamping.

ACtC-3dwrPUEWBRkNEdeYkzr0bh0lfcxqm081c4LdcTo-bO_oXkU3Bp6SkqA6j8zKLlOMFo80RdJw1aBJcKN-rV2qf8rtBuiEMHObvG0lyfIhXN6aAyUZikxNs_a-bmuXxEFEkF9W-xIIj0RfnoDgNUJ7yMd=w1426-h1069-no?authuser=0.jpg

ACtC-3eiKjFhJWmB0CU_iQhPyvOODnjDGhyo1F9RtImfPTdNBQ42uai0VjGkuU6KLpgS2Dm-DTB5TXEVpSc_krMkjNZ8kLbFqoj7kMfaEEm6LJ15OpQILOoKW8c9SKEYoe1sw0kJ6zVd-_mVRFQH-qFpKuHX=w1426-h1069-no?authuser=0.jpg

However you clamp, do a dry run first to make sure it will work, make provision for sliding, sometimes they want to, sometimes they don't. The above pictures are after about 2 hours. Once you have the cleat secured, cleanup all around and remove all the squeeze out you can, then go carefully around with a paper towel to get rid of the rest.

At about the 1 hour mark, the cleat shouldn't move and the epoxy will be well kicked, remove the surrounding tape ... if you leave it, the edge will be epoxied to the hull and you will have to clean it up .... if you haven't guessed yet, I don't like cleaning up epoxy if I don't have to.

And you now have an installed set of cleats

ACtC-3c6eKjomwXVk2_bFQ8ZVl67mNmElRlrnx5YxFBBQf2RMvCnUqoobyWrZPyUB85MZwG8CRdmm3_Cw6OU7mg4aKgTGxC6sNlNfhuOgp3aKh7OEzrj8N13B-Vazm1Hg7or2iJHylkhbW0fML7mBGZvK5Rz=w1426-h1069-no?authuser=0.jpg

The seat was placed in the boat and the bolt holes were bored through the seat strut to the matching cleat, drilling about 3/4" into the cleat. This ensures that the holes will line up .... well, I also sized the hole to the bolt and dropped a bolt in each hole as I went, so that insured they would line up.

ACtC-3cIJ2iyCPZGCfROMskE6SG3ukSnsKZJ5sxooKVqfifojIRdXSJhRInyMJHKp3_kxdBH7L3n6sxMRiIzSXYjkBN0h2V6xfhQxRHXP3UYcABRjALG79BM5_-eQUvtFg2w9kuvLSXs_XAAikU0-15GJ0bC=w1426-h1069-no?authuser=0.jpg

ACtC-3eIKKZNkrckGxYtFrAmDj2lczteQZVxzSO1_AI3nxp_ZeiB2Q1tRIBFGb6zlK1vlUMWvJE33F0DsDSF9YCfcxS1Pz0T200ZyX391giI52A6EkWkxSatvtDNdgIF32iaHfukXH1uGD3TUvUuz62qt1ck=w1426-h1069-no?authuser=0.jpg

Using this sort of cleat, in a lowered seat configuration and tumbleholm has a few issues, one of the most important is that it is very difficult to drill straight down through a cleat, so you are left with an angled hole with no exit.

Enter Helicoils or steel inserts

ACtC-3ccwYwZxWeLeZViBRglbKT90urk0MipEkmuznKZbsGWUUZ_lrOJlWZq4vIL0x0WLYbHZu_RiCuZ-dNd_IcMdY-R4cvECyzODOotULAwkzzvI-n6KYU2ku_8Hv1D_sv22EtyF2HppZ4EPmJ5YTq77DBO=w802-h1069-no?authuser=0.jpg

This is an insert kit, comprised of a drill bit, a tap, an insertion tool and of course the inserts themselves, the ones I am using are the purple/pink coloured ones. They are 12 mm M6-1 locking inserts ...

Step 1, use the tap to cut threads in the cleat hole

ACtC-3ft96hCuIxVIia6JLxD4hPRMngEq_X70PhzxmjA1n0BZpeGz8Z-Vw6C4M-03jMICXzsG4vEeTkf-vZ544rM9WWEH7GaEYelf_XEzLRhTIaOSao-aqv-CQBoSaQuYBX0bbiE7LytmuQzqpS-5JRwAO0R=w1426-h1069-no?authuser=0.jpg

Saturate the hole thread with epoxy, be careful here, you want the threads wet, but no more. Load the insertion tool with the insert and screw it into the threaded hole

ACtC-3d5JMnI-X7SMhFGK5JUKuSOfurD2flCXB_CgKkPj-Dh2FzdpGFMDGo83B_sSF1XiDkLQusG-aWIOsmXF5CTY6rqbo5o4OJFOuomzOmh67oTzTyl6G00_6sOFwYn_uq0xKIQNaOrN9w1msXMBIJusaH6=w1426-h1069-no?authuser=0.jpg

You now have a M6-1 threaded hole, that will lock the bolt when it gets turned in. If you look at the pic, you can see the "loc", it is the flat area which will bind on the bolt. You can still remove the bolt, but it won't loosen by itself.

The cleat is now sanded and a coat of epoxy added, careful not to add any epoxy to the threaded hole.

ACtC-3d2jFvWH4PJ8Mb0QBvEsIRNN9DAbDJa4iai0f_QJIJwLSyJnM3F8aRHtjCb_6oM5aAKuuCa5cbdrwoXG0Sp15VOFkmfmjxu5BYz-ZfWCANqLhNskJPDagCEvyYc6hRPIF_iIt39SHfzPhbliMBpKUne=w1426-h1069-no?authuser=0.jpg

At this point the seat frame is assembled, the cleats and bolting system is installed, the seat will be finished (sanding/varnish/weaving) and won't go back in the boat until after varnishing.

This is more than usual for a single post, I will break seat finishing into a separate post.

Brian
 
Thank you for that effort Brian. It is hard for me to stop and take pics when I’m on a roll so to speak. You are doing a fantastic job.
Jim
 
Yes, that's some mad skills there, further reinforcing my opinion of my own skills falling into the"wood butchery" category.
 
Brian

Are those 4 things glued to the inside, brackets for a foot brace ?
 
Jim ... you always notice the details (lol) ..... those studs are the next post and yes they are the mounting for the foot braces. The cleats and foot braces are installed at the same time to share the epoxy batches and layout tools.

They didn't get posted together, as the posts get too long and I try to do just a single topic in a post, to keep it clear.

Brian
 
The foot braces get installed at the same time as the seat cleats, so footbraces got completed yesterday ..... so a few pics

This is the pack, I bought the Sealect designs footbrace (3rd set) and the stud mount kit .... I am not an expert on where these rank, but they aren't terribly expensive, they aren't horribly heavy and they are very rugged .... since I like the previous ones, I see no reason to wander, they do the job (this not an add for the product, just what I am using)

ACtC-3ch-NDNiqop_7KmQzlFO0MnQC2GTG4GvKEOnrW7nQSH37UoC9kjjILGHetYsHDHmQhgb1zTbDVyxLQGNqU9UDqYcR4PYKYBzSkUuh0B_n68HECKQ13nxpt5uiXWIM3318l32b2v7EOwvCtebUA_BCBV=w802-h1069-no?authuser=0.jpg

Out of the packaging, the stud kit has a set of the 4 black retaining pieces, which I thought was duplication, if you look closely at the ends of the footbraces, you can see the retainers are bolted in with actual through the hull bolts.

ACtC-3cgvR5cOB-NyWLpnGg0W9lL799FHh39H5fhgUzVkAEdKYTkhvXx5YA0vSYDSBu9gnoL0Snhv9fAqEQnth_eC4Qb-Kksp5SZW7jiIYNq-d9cpM-kYCpclD_2wfVMxUyJI7lnyZyWMh7htFK5FREyNeGf=w802-h1069-no?authuser=0.jpg

There is actually a difference between the "through-the-hull" and stud mount retaining pieces ... you can see here that the "through-the-hul" are molded around the nut, while the stud mount use a flat retainer, to allow you to tighten the nut, rather than the bolt (as you do with TTH)

ACtC-3feXre9eK5SOqIL-stIS1FRf2uiOidRiXjkrlN3vSC0UnobBYKb8TO5Kb4bUsStk7GcGIK4kfqzgvkAK-hy1N9kss_t98BWrpKW8Q94_V3vR1EdGqwJeYxQJdtz2xGEdHpo0h73CE2kyeNyZ6HFlfLt=w802-h1069-no?authuser=0.jpg

First step get that shiny finish off of the studs, both sides .... near shot shiny, one farther back sanded

ACtC-3fEWLcmXYIh9VI7f_T7mXS0PhXGTyLSYPkzvABc49v4iaBS-ORWv81tcT3ehApp1CbY4J47pFAaK5KUkFDoZi3t3dXqG2L2nhchiNY97KTA_oI-NCRVEIFwHHiudrAg-Hg1xYCbpW_QRNr1upRssYv1=w802-h1069-no?authuser=0.jpg

I want these installed off the floor and out of the way, about the same area as the seat cleats, so the accent strip is a good guide. I measured forward of the seat 25.5" ( this distance puts my feet about mid range on the braces ) and put a mark om a piece of painters tape. Then I put the studs in the brace base and set it in position. Next the straight sides of the stud base was marked in pencil on the hull

ACtC-3fFF-_xYQqyhLudAJo-k9n7a77Y6JaIRJrlR66uw5KQB5xRgWOQOBA37_inQBHdspfVQk1OFLSBNneaIN1h_T4zocz4ZL3jGo2MDHXSDc6uscco_IQNhedAKGTK9FlOV0ttLM0ZgIZTRAfq3jnXdEP8=w1426-h1069-no?authuser=0.jpg
ACtC-3d_V4hBBQ-428FierIxFPzkQPrOhaL5t9ir4gDZ9jm5sFKbJOaAdd5P1ZBu7oaEtQif8hf92qxJ8wp8flOzc05V9v8cnDdb5_mjVMci4sTGEr1_FczKC9boWePHzxuyELTd7J8KIJDUjBxy-NZlH-Od=w1426-h1069-no?authuser=0.jpg

Next I put tape around the marks leaving about 3/4" clear all around

ACtC-3fKn6Z-Yo29k5A9xbcp4O-_GiFLDX4p_3FZSJ5_qtaW0Cel-KEVXR4M_nHil1XY66jyKMzpsqarxfWrwtUyV5tgjBXRjFjwn3nuxQlz78xDMzfwdz1u415WRGm6XV7CaFk5CfhjyWolfemdCz3WG35y=w1426-h1069-no?authuser=0.jpg

Sand the area bounded by the painters tape

ACtC-3c8rtwNzPTWUEWgiveUZzOJVky4bAaYKRjGPKfZe_b4mPsuEEwdZLco90c-1uoSB4fpI4j9uIM4loCFy0uynZWx8FYrN7x0wEG0dhYDuIGvlSzvy0QwFT3cU2GPr6LnF01CAQwUIOVND0FdI4Sci55f=w802-h1069-no?authuser=0.jpg

Put a small piece of tape on the stud landing pad on the foot brace base, the base is going to be used to hold the studs in position, guaranteeing alignment, but you don't want to chance it getting the stud and base stuck together

ACtC-3eBO2XQKstLSe4daufiSOLEBvyKsoAR0DNgV9Lc97aCk3LY3JiklISbqStpJDJ2xnAq3n_5mgGoSm8tw2ws4u8QvNhkOXlxSzdgIKaRbfV_UY1ZHQxzSIcHj60o3PWgSl5c0AmjUA2g0fEt1urlUqFh=w802-h1069-no?authuser=0.jpg

Mix up about an ounce of epoxy (2 if you feel insecure) wetout the hull, wet out the studs and place them in the bases. Thicken the epoxy with caobosil (ir whatever you use) and generously butter the backside of the stud, then carefully push into your alignment marks on the hull ..... Use your clamping system to hold it in place,mine was an oversize pool noodle section, which worked well enough that it will be my "go to" next time. Next I add a couple of my strip clamps, to push each end in well.

ACtC-3eoBhGNKYUDeQn70gd_N3Bchdvsv2gs9i-gDMGaL7f_v3wO48xDUJ7lZHtZAUlK1KFdGeRkcwuSDo-LoPasrlwUGWi-4nggUnHGyaU2-DIdz5brcLzyTzEJ0Bqnk1CIEamT5bMnk395-ibWCwZ_7INp=w802-h1069-no?authuser=0.jpg

At this point I also smooth the squeeze out at the edges and on the top of the stud with a little brush.

This is what it will look like next morning

ACtC-3clLJNu5gq2Hx3v1NDfzODIj-nAdOJcnBslRxsqKnEI0ggkk123R37deqTn9DweVmjYKKSuD-bDWGaVwik6F3peLX8HEUyDgy6RxgFSnwe-PgRh_WM2jTfauJbJnZdDl_V1b9kLurHAL6F5IXQ50Htt=w1426-h1069-no?authuser=0.jpg

Chisel out/off the overflow carefully and sand the area around the stud base to smooth it some, then sand to rough about 5 inches around the base, time to add a layer of glass to seal it all to the hull, the area looks like this

ACtC-3fC3Z2jXbGzE5JGoShvWmAXnrzcZsAiq2S_sCpWEYsN7AZT2Saa-D3_kdlzxRTZS_nYCq9cEJJI9izD8e7A46KDBOLkvJepetd6Sy_IwvbNFfkFp9H3zAxp9neSIWywsfKOhTtMAiOQq5bxz0_qrLrV=w1426-h1069-no?authuser=0.jpg

Add tape around the sanded area and cut 4 x 4" fiberglass pieces for the studs ... to fit it over the stud, just use a pencil/pen/pokything to round out the fiber in the center, don't cut it, just poke it and work your tool to make a big enough hole

ACtC-3e_jHx87MLolI4eXQFEUsrxzqxheX7evExb5h6IH9lThp8j3Nvw3OJ3zNUJ6JkOReNz14mcKUxuHhPBU8nE-GeMad8p4XObkkyU5QBkgyc6OYwngYk5gwvXfn-OuXSU7jfmMJLUKRxlEGpuumTHt7W6=w802-h1069-no?authuser=0.jpg

Mix up some epoxy, pour off about 1/2 oz and thicken it with cabosil, spread the thickened epoxy on the stud base to fill any of the holes that are not filled, also put a small fillet at the stud edge, to ease the transition to the hull

ACtC-3ebaFWrQQphDG5Djv893I-qUxVEsrIBToGo29uUOL94vFBbCxJDoJSHAxF4WjblFDEtgFQQEV-aHuIxhA3aIzyXLDCz1b83HS0k3muoyMdmtjiF7lC6vkXn0v8B1kuTLdr0sRFnYk5edVB7eleQ8TU-=w1426-h1069-no?authuser=0.jpg

Place a piece of cloth over the stud and then wet it out

ACtC-3cH6RphxcZvhavjG08IYmmLPRT3yuY_yEqS6gxJPwIV3_cbajeEHmAjilLScXBh2TcqCe_bfjJtT2c0SNsocbv2mcgp1adQ2fD5jA8pepDRJJFuKiws8dQEAgBpjUF4YhG6tZJ7D6snobmes3dxiJ2_=w1426-h1069-no?authuser=0.jpg

ACtC-3c_YFnLhCrCTAQc-uuH9Qe8c-HAGeyKmO7q3_oUxaCvolUtwAGnIrJ_XIEt_abSQMQYnBqw89Sqt14g2hrrCrDt0Rr-knwPW-qwNXhhT4sOOHQdEoGSUhmo3GHc_7EqpWStrp9_WNQUtgLKoByrAzcV=w1426-h1069-no?authuser=0.jpg

This one is what I think you should aim for

ACtC-3faAEpZjeOAoADVRD4eCx29M6NN7tiIqudxvenFEboVsKHwg_9t-LfBnfZE8EowuTCtsDNczEU30QdbDPuw5cVqXQrpnd1Bob4WCH5dPljUkIQaO7JR454YauggKjGSdTRbT6O3d6LwY7ubRiO5mnqT=w1426-h1069-no?authuser=0.jpg

but, like me, you may also get one like this

ACtC-3c1JURM-xR-wAN09hi0CK8yWql5M9yJ_l5DaqoFPiKfRqyIdHp6f8pbRryuM2jNXuABlaf3u0HZNazQVqcGAXnMNns5-wZc0DpTRqyi7vSGcJM0z0U8UYG9Pkz98TKlS4Q4SiD_HdKaYL5qg-7vtjeL=w1426-h1069-no?authuser=0.jpg

This is not a worry a) it is largely covered by the brace b) it will have no structural impact that is significant IMO

Feather the edge of this layer and sand to get it level and take off any high spots ... not too much, we want to preserve the glass texture (at least I do)

ACtC-3c-hH0gcIr8bfZOY2oJVmdwtjm3V1w2p-a4dXARhe4poNn8jTDqpPLvvRy5kHCktLrgRQdv8NpPoirQ-p1Hf4YVAESLEh5nqNd6fMEOvjizKuUuexl2BBxO517tmJgKTdycTKNoCqwy49qSU6FVJn7h=w1426-h1069-no?authuser=0.jpg

Do one more light coat of epoxy leaving a bit of the sanded area around the edges as a marker for your work

Next day you can mount the footbraces to check fit, here you can that and even the slight sanded areas I left (these will disappear when we sand for varnishing)

ACtC-3eRsWugGMP7qXfq1rQjvx5WpclLROJkmx9412mEEOpAu5Duez_9lIdQ7A1b_0S0pyFXTCpefX5ycK_6H3yvYhBCdaovyFv8ovSi0zk6MIDXny_XqN3z_1O-BHowWl1isZYZaaHmHLFCY6NzBDRcV0Vr=w1426-h1069-no?authuser=0.jpg

ACtC-3e7fHUJRGXJWQD1CJGgS-ASmCId8X-RBoEQ5d346bfZmfGWGg8y7OAFWblZLoFb8X5i4gO3FgPzLehbqpRXlVYfU6zpWemwdeViQGmieSYE2AlspxK00GpTtmne_yNGePB2LZzHJNE8J8yncdXhqVFY=w802-h1069-no?authuser=0.jpg


Each brace weighs350 grams (12.5 oz) and (for me) are mounted with the brace base starting at 25.5 inches forward of the seats leading edge. This puts my stretched leg around the middle of the brace, giving some flexibility for other paddlers.

And for Jim, those bolts on the bottom are for the seat mount and the pieces way up front are the thwarts and yoke pieces .... I am waiting on SS carriage bolts and that darn router bit I ordered and it is starting to impact progress .... at this stage you get a second wind and want to see it on the water .... patience grasshopper ....patience


Brian
 
Well, that's it! I'm giving up working on boats after reading/following this build and tell myself a plastic Dick's boat is good enough for me! This is an amazing build and thank you for all the detailed descriptions and pictures you've posted!

dougd
 
Thank you Doug, but getting ppl to build is the goal .... the posting is just to share ideas and get a few back .... I got my carriage bolts today and the router bit I was waiting on was delivered, so with any luck ... in about 3 weeks I may get on the water, if I can find any it's legal to access, lol


Brian
 
This is a fascinating build Brian. The decks alone have made me realize that I must learn more patience on my next build. You are a true artist and your canoe will shine bright. Your work detail is amazing and as Memequay stated earlier you have got some "Mad Skills". I am in the category of Memequay as well "Butcher" in comparison to this mind boggling woodcraft. I do like the cleat extensions that you installed and I will most likely be adopting this method to hang my seats. Great job Brian just amazing work!
 
Nice work, your boat is looking great. My thoughts on forming the seat rails were that you could just use the clamping pressure to get them to bend to the form shape. I'm guessing the flat spot on the ends needed the steam to make the bend? They turned out very well the way you did them. Can you venture a guess as to what your seat weight ended up being. Going from memory it seems my contoured seat from Ed's Canoe was a shade over 2 pounds alone.
 
WN ... you are spot on as to why I steam bent the seat struts, it is that little flat bit on the end, it is sharper than it looks and to try and get 1.125" of cherry to bend like that would require more pressure than I like to apply to an epoxy layup.

I will be posting the completed seat in a day or so, I will have weights then, just started weaving it tonight and hope to complete and weigh it tomorrow.


Brian
 
Looking forward to the webbing process. This is something I would like to try myself. You must be getting the itch to put your boat in the water, your making a lot of progress quickly.
 
Picking up from the seat post, that one ended at the seat being fitted and the initial bolt holes being drilled to align with the seat cleats.

Next step is to counter bore those holes to take the bolt and a small SS washer, this is done with a guide (just a spare strip with a hole bored in it) that gets aligned and clamped, then a Forstner bit is used to counter bore so the bolt extends ~5/8" - 3/4" from the bottom.

ACtC-3cqPBkck0ScPQIyVTsZ66UpWENeZKaefoA87Mi6_8hBLtWJ_LzuxjHDJOtdWz1dOcdJc6vHH13FEjKYc5J7wLJjH3bYF_8Oqbcn-DkhZmZ4ituX172GnZKeONMYNEeN0KWTqVvvS0Ru5FvjGEbQDdvY=w802-h1069-no?authuser=0.jpg

ACtC-3dH4jkT_wqdizp3NaLL-VBqlFt1CR-1Jo_7EcheTM1aWHop68J4ePb1SCSiDmQxLHibpy8UwJ7g8HoC5ekEN2CWFY-lHVYJSd6kX1Dmv5y-ijjTExi14JrTZm2oX7WSuI4zV2rc1fyMjIv_nJvtSW_v=w802-h1069-no?authuser=0.jpg

Now if you messed up the initial hole centering, you end up with this

ACtC-3dyHJL78BWh_xFFLk-zUkqlUUfBG0qigXZXltHqD9Phxr0v1-e_-tOETHz8-Y4POia2lCqme84G6seiNPO6Ya1fWaNK6BIEPgoRc4cgHZA7MprBeiTlAX8YaPNfLcbKl8hDSNBSbvLp5OTaEONzYYzD=w802-h1069-no?authuser=0.jpg

So a few head scratches later, I decided I could just add a piece to the inside

ACtC-3fkRIurIVWz2PMlkK_v7juoMso23rN-zsvnRQcL6UkOnPy-Uk2kBR3HTvxCXIsyNT_oIi3bbpIxb6IGel2V76eugAuSckpNjUCksy1Ug6bCCTJIWDGjUIu9RJiAGUbIDZI3Gts5hDyoYBWN4IFcuK9Y=w802-h1069-no?authuser=0.jpg

Repeat the counter bore and get this, it will get shaped a bit and sanded when I do that, I won't mention it again, but you can check and see if you notice the fix, I am pretty sure it will just disappear

ACtC-3dc00FI4O2JBOInpPerkdTHFFDorDievJcwgoB_4STDmi14EZXFLY2UMH0Zvwo1C7acn1ue8qtQjc54mAOC-I7PYtA8YYJSOawKiqB7t3fR97B3s6xR_5ftWQ4zTZZk6_LKFuao86eZioEoEzV6ZKP9=w802-h1069-no?authuser=0.jpg

Now on to laying out the seat to receive the weaving. The pattern I use is 24 holes on the struts and 15 on the sides, with the side pattern 2 staggered rows. The holes are laid out on a strip, evenly spaced, which gets tedious. If not measured correctly, your eye picks out the variances, so I have to take the time.

ACtC-3fDHOdlY381RNCz8_IGaJfEZ-rWrHBuczVHvAhf5eBhkziLZP0bh4R7LMiinMxbY3wsDda1hWXdf8MG9dLbyZmxo8-h-AvxHkdokQ78mqkIhLUvqlxQdf7q8a1X5as6AUzJFCD_AoYqEqDNPwthzoi5=w802-h1069-no?authuser=0.jpg

and when the templates are done, you just clamp them in position and drill 1/16" holes as guides

ACtC-3chiCJoeii5neT8IdRYVYekrHAZdXzEtd7mUwvU2Wramxnp6L8SVD_1ngG938oHpi56_trI1co7IVRo5auHPetoYIuwf-uJa77qlm3DYfL6TiR2nv00vAo06wAbKowOWXi8CwYkXqtWIXYqYfyca6mG=w1426-h1069-no?authuser=0.jpg

ACtC-3fArYVx2dhotGJ8u9OUlJpGd64557OWYN0hLm5Isd34CQpYqBOCr0_qSovOES4fof60XiG7QdQE6gK38wG5f7q-TFWh3XNcWNLb6ayg14t2EjZQxW7YXyT6nxuQsCWTW9ql0PitXf4xFWmKAhFtubpl=w802-h1069-no?authuser=0.jpg

And if you make a second error, you just fix that as well with a couple cherry toothpicks (RickRs friend comment "It's not a mistake unless you refuse to fix it " keeps popping up)

ACtC-3dGYtxRLI3bn57GIB2uCsd-jCnpaTk2iAGKdc2XyzlCSl90xhooKL_Yc7U_TwEo30exG8BAVnLWeqJLB_wMeOErC1gIFU59U2ael6m04sBmrmU0prKZVIrVjjn-9A0FevBPa3mrIx7tOy-LB6qvK6_X=w802-h1069-no?authuser=0.jpg

The holes will end up as 1/4" so that is the next step, to make a holey seat

ACtC-3fSWIVkuhSuZ2KVeZ-TB0EFcDYjqapsdAgAzUgHMUH2nByeAYxuxKnLGj6Dvhjv8KeW1fnPP3jlgwn1O-VNnYWcWrsM_TKvGIMBbG57KI2s2OPWUeCBznpWu6RuRzj9xjduuYIMR6D4Q_n7nKSJngkC=w802-h1069-no?authuser=0.jpg

Once the 1/4" holes are done, a do a light chamfer to ease the transition for the rope, both front and back

ACtC-3fxIgO3P1Y9BX1bqwLUUFYEt93wsIwWZG-eR0sGvIYXWlGMcdswKuKLH0GU9DS9u9GgCa6iZ48s9YzGIZTWBOj16gOfglfXBbqQKke0oqeC1ci6d1T7oeig5raJxUDXxKTvRVFrWZQiRI5BNbE2Myzp=w802-h1069-no?authuser=0.jpg

ACtC-3fyi_AJmlz4xQVBvvapktQNsQ78qav_GuFjYChpwrnaENT6LQTz5QP0XK0Uhb7POgvijnQcnMXrvZrpYNQLV5jKHdP1k5TT4XSUlftfTWLmbmHV39lP7Gu2BJTIiFV11qt-8GqAoNDGc1yZgykBCpAB=w802-h1069-no?authuser=0.jpg

The tear out on some of the holes was more than I liked, if I do that again, I think I will start the holes with a Forstner bit to keep them cleaner, then continue with a twist bit.

Here it is sanded and ready for varnish. I like these finish bags, the varnish keeps forever in them and they are handy for dispensing. I use a Helmsman Exterior Spar Semi Gloss for the seat. 3 coats and we will be ready to weave

ACtC-3fR_I27S87YOERpLir_VMQ07LAFkOUA1x15SYeSJG6RnKVvNR6lVblk8xxwXLSbVi-kUtwv1Pn5oMq7lZ9NsZ4g9AsFl4yMDzqIb_iBV6JOnKxZFiGxt2OpGFoGZ5b1GCl48RDprgykF4KDZlIdBRL3=w802-h1069-no?authuser=0.jpg

and then when it is done, I have to pick what colour weaving ... this is the only issue I have of ordering online, I couldn't decide ahead of time, so I ordered 3 colours. This is 4 mm polyester exterior cord with a breaking strength of 350 pounds, it is $9 for a hundred foot length , there are lots of uses for rope like that, so it won't get wasted.

I ended up liking the burgundy for this

ACtC-3dGZ6c2OQn-roBYLDBBPhTazOJP2L83c2vHZNVCfX1WANyaFf-hQ9UX6mVjcSf4o9joN9mkIqvvCmW1xS5yEKqHZI6Fx5C4xWEDSAV522R5I4HxOu163dxGOJEh_x6eE-T_pAHTLsGkUm0Nz7JNMwtZ=w1426-h1069-no?authuser=0.jpg

The weaving pattern is broken into 3 sheets for me ... I worked it out, so that a single piece of rope does the whole seat ... each pattern is for a direction of weave. The markings on the pattern are ... straight lines are the line running on top of the seat, the arrows are the rope under the seat direction. For this I simply pick a corner to start, orient the seat, look at page 1 and move through 1 to 2 to 3 ..... there are a few choice words usually when I find out that the line didn't go where it was supposed to and it made me back up some. Oh ... the pattern doesn't have all the holes, it's job is to keep me going the right way .... and if you change the hole ratio, I strongly urge you to "dry run" the plan to make sure it all still works. WingNut, I don't usually do this much weaving detail, but you said you might try it, so I added it.

ACtC-3dEIFvlcC4uAOQi47AqVjtB9F2wpbfpdA2I56Szbj7XEggDmxJQ_APcILPZa6FAofOuqkIRxk9ktdRgJ6Ix_tz9ZsuLS7QZQlNGfnKRPIQmj3uAmm0MjfRKp5IV7tELA0Qyws00V9rycl4Azar5dAGW=w1426-h1069-no?authuser=0.jpg

Starting in the corner and the first few lines, pull it snug after each turn ... you don't need to reef on it, just snug it up each time and move on. It will all be planty tight when you finish up. That starting rope has a knot tied in one end, so it starts by coming from the bottom through to the top.

ACtC-3eANSywUouChAPQrm4R6qas_JTczwrXeq_pNZG6r1yNKVJIH80BZ7F3dz5fQqqiRR_4Uma40b-h2RbylKXVukT3RipKqRFAxnpKHIHtAwnfZN8Wa5wPj60tIQ8dmIdExyQf4Zxr3-xFD2H0fvCWKBh2=w802-h1069-no?authuser=0.jpg

ACtC-3d-1LO49t-KtwvO8St-mk5W7HMFqLqDgA7ZJI_dOZJCp4gylFa8gHVvg0Rxp9QcwGpRfyUUgccIHLd4zZgKFnYuxui56EHg_PBg_jCIjg68mCkbyarCMFfi2CkQmKK0ey4QfBAwvTTFz9Ts0WSmJAhA=w802-h1069-no?authuser=0.jpg

Transitioning to page 2 and then the first few lines

ACtC-3d7tU7AtCDS4_C7BLfQdZCCQQzTZ5EYeL7xzfTOH5nwBL7U8VC6aCy3Z71eWwoIla4yq0JC5CceqmgL_wsp0oPUscRB8lvYZEF93a5up-KiPwGb_0D-1ug7_spY-4fbDPAipe6XN_FpdHZxxwHfyC6B=w1426-h1069-no?authuser=0.jpg

ACtC-3dIzLqtmav-K70E7jj31_foJ5-5E2gqwpWBb-Go2cWuPIjfqe47hvvAQQrSpyJHGbSzfjFT58tabaIRthfeZHxq3o6BXcrpDlI6REJ280gRCeUIJ4-Qfa40F7m5myT4zTLJwgs9gAINABndlv6LVY-x=w1426-h1069-no?authuser=0.jpg

Transitioning to page 3 and then the first few lines

ACtC-3f2HJqb16WnbDOs9nUoz5i1SyBzT0dgB08x0QzzWgjhvIBntMMWcKQHO1rJnA5NT6AGF_7BWwylYAVOi5ytzvQEn9xmhyXNocA6TqUPEOLXqTBV-hqz5qhn4fYqjlmQDnLhRU58517Rrw8-oRp6Yyk7=w802-h1069-no?authuser=0.jpg

ACtC-3edtUQw33AYp54W7dMBFRTbIbwC1LDdXEDRpXMdSTa4GRSWFyFJf29vwW3AtWg0ByPasQ69BO0vCvFF3xplDrzlR7Xr5tZAgMDAilVjMIlD1poupLPKn_PyQvPwiIISLLaw04sSPFG2tor-hitqEYAk=w1426-h1069-no?authuser=0.jpg

At the end, you put in a tight knot, trim the end and melt it

ACtC-3fELOnscgafCgBJUzp6VyEDQnNcuIBAcbgUzEXfv4v6SZAEIkUVnAwakiB0XKOjxMkbf7TW97YXXlnKgbi3qbuZXSrgdEeJ9MQb4xe2V4APfPgZ5U31o20TXGSPYNaqmoVBLktXGYfQhI4y9zHzCE2h=w802-h1069-no?authuser=0.jpg

I like to add a drop of Goop to the knot, it flows in a bit and prevents it from loosening, but it is still pretty easy to pick it out if you need to get at it.

ACtC-3com-EhgXe8ektKPg9OJMnfeVnBIpYGVEoq3GaoES_8soODJb7aUGSDtjLVMnzNPHBgFqMQKZY9S61pWY2KcH3buoRPg5mKfo_A7FvXIy0qzUOs3OWU3rkRT8tOfLqzib0_wf1_mtagXJx-VwQdGi6l=w802-h1069-no?authuser=0.jpg

After about 2.5 hours you have a finished seat

ACtC-3da4Pv0Fz6irv_eI26se54loQ40A3jBrgX_i_mAtmeWypO4rjvroY5fmAJrIOZIKy89Fi8BkDBlOXxVNO-wRYacCjwd-dgl2W2C15Hxc6ZpQFCyKJzAXpTB4H2WKOPgDltADmy26O1jqJ1NcTucuCI5=w1426-h1069-no?authuser=0.jpg

One handy little tool, to help push the rope through is this piece of bent coat hanger wire, really helps

ACtC-3cWrz1ImfcjHOG09qBLGzwxCP1--IdZpkXnHfrr8Z8ZrFZ40yN5VEZDoaxNmJFGLSKIo06kgrsToeHeKdgKdNWAn9Cld1-JnsZ2iyTo4qn0nJK42w2m1Z5gp_NSd_TOkXdY95WThr11286SYBN1x0Q9=w1426-h1069-no?authuser=0.jpg

The final seat took 76' of the rope to complete, all one piece. The weight was 757 grams (27 oz) ... I forgot to weigh the cleats as I have been getting a bit excited, with the end near. Previous cleats weighed in at 440 grams (16 oz), but I am pretty sure these ones are a bit lighter than those, so I think the seat still qualifies as fairly light.

The 2 "fixes" pretty much disappear to the eye, unless you really look for them ...

On to the yoke, which is pretty close, varnishing is close.

Brian
 

Attachments

  • ACtC-3fd13D2FIviYO3EyMfhAcb2YBvhknNYxvFE9NHcQN44SGhCvGjwf3VawOi10ZWktDnNu-q4aVSVL85aeQrMJmRy7N...jpg
    ACtC-3fd13D2FIviYO3EyMfhAcb2YBvhknNYxvFE9NHcQN44SGhCvGjwf3VawOi10ZWktDnNu-q4aVSVL85aeQrMJmRy7N...jpg
    196.1 KB · Views: 0
Nice looking seat ! I really like the contour, and width.

Will you varnish the cord ?

Jim
 
Hi Jim, exterior cord, so no need to varnish it. It is also polyester, so little stretch, when sat in, it will give just a little, making it comfortable.

Brian
 
The yoke design has been in flux for the past couple of boats, trying to get it more convenient and lighter ... the last version weighed in at 591 g (1.3 lbs) and worked very well, but I wanted this one to be more convenient and possibly lighter.

I need to make up a few patterns to customize this to this boat, one for the actual shoulder rest

ACtC-3dFjkBM3JvDPZbDQIX76TdssxQpze3_LbZQufk01KHan-6SA75KzhKc3FXpo72E5WUKFl9yw9rVmv9p9lLIOaJGJu_-ud8OOKRhvvkjjUBNDiS0hOsw27sow2Jia9DlVkOzMRmmzL5rUM4CT6Kb35jO=w802-h1069-no?authuser=0.jpg - Click image for larger version  Name:	ACtC-3dFjkBM3JvDPZbDQIX76TdssxQpze3_LbZQufk01KHan-6SA75KzhKc3FXpo72E5WUKFl9yw9rVmv9p9lLIOaJGJu_-ud8OOKRhvvkjjUBNDiS0hOsw27sow2Jia9DlVkOzMRmmzL5rUM4CT6Kb35jO=w802-h1069-no?authuser=0.jpg Views:	0 Size:	277.5 KB ID:	112554

and one for the support rail bends

ACtC-3edEOa0z7Ln6eUcq7M1MzODJg47Br7vw47alBXaxtvkO0GmLjmG8W-qX3ldUn_4nJmGOCet042R_wlonOYettRSvPd82QiOUT8pgek3X6TaM8PH6q3SK2LUhOrCLGXAHfLsJlcLDVF8_MriKi62wzxA=w802-h1069-no?authuser=0.jpg - Click image for larger version  Name:	ACtC-3edEOa0z7Ln6eUcq7M1MzODJg47Br7vw47alBXaxtvkO0GmLjmG8W-qX3ldUn_4nJmGOCet042R_wlonOYettRSvPd82QiOUT8pgek3X6TaM8PH6q3SK2LUhOrCLGXAHfLsJlcLDVF8_MriKi62wzxA=w802-h1069-no?authuser=0.jpg Views:	0 Size:	282.6 KB ID:	112555

ACtC-3fi0Kqe7N8AvB6KThrj4LbLCeYDGLk53jCdb6tKzIceFaz6o-oI6IYzQaygYVqx5uuhEckrYBVwe-6FFSqI7CpmJzGMRI8y1UOoE026Ss-XXA9dQBRSDcYNleP8EPG9n34CY2Gq5fTBc-J-fh_sp_Z2=w802-h1069-no?authuser=0.jpg - Click image for larger version  Name:	ACtC-3fi0Kqe7N8AvB6KThrj4LbLCeYDGLk53jCdb6tKzIceFaz6o-oI6IYzQaygYVqx5uuhEckrYBVwe-6FFSqI7CpmJzGMRI8y1UOoE026Ss-XXA9dQBRSDcYNleP8EPG9n34CY2Gq5fTBc-J-fh_sp_Z2=w802-h1069-no?authuser=0.jpg Views:	0 Size:	297.6 KB ID:	112556

The support rail path through the shoulder block needs to be clear of the shape that needs to be cut out, but be as close as practical to the edges.

ACtC-3d-ErTu55hftUoO4PZwavmFaWzXKKQkKsRtmmBrj-ePma_zOxDg8xwTpLynNVKvWxvmFUWCzJTC7VPcL-IgVsZETMlQU7x9ZZOrQzBwX3wKKlBSfavm8GMDYqR8T9sBP8IHEdcdYVh_pRKEWq1Y6TUf=w802-h1069-no?authuser=0.jpg - Click image for larger version  Name:	ACtC-3d-ErTu55hftUoO4PZwavmFaWzXKKQkKsRtmmBrj-ePma_zOxDg8xwTpLynNVKvWxvmFUWCzJTC7VPcL-IgVsZETMlQU7x9ZZOrQzBwX3wKKlBSfavm8GMDYqR8T9sBP8IHEdcdYVh_pRKEWq1Y6TUf=w802-h1069-no?authuser=0.jpg Views:	0 Size:	266.9 KB ID:	112557

Once the rail layout is complete, the from to bend the rails is made.

ACtC-3cH6Kb4L0jmInLL27nZc5EKBUTVF1F0M6En_0TIet7qKg1lKpA752rlHIsvIMTJM2ncqp5WuPaiV2OoGwOOtdcI3ZH9T56obuWqssTsRwgXqmznQGjMboYVCz1SUhCW25yqlOrsOkGx2P9_QepKQW7k=w802-h1069-no?authuser=0.jpg - Click image for larger version  Name:	ACtC-3cH6Kb4L0jmInLL27nZc5EKBUTVF1F0M6En_0TIet7qKg1lKpA752rlHIsvIMTJM2ncqp5WuPaiV2OoGwOOtdcI3ZH9T56obuWqssTsRwgXqmznQGjMboYVCz1SUhCW25yqlOrsOkGx2P9_QepKQW7k=w802-h1069-no?authuser=0.jpg Views:	0 Size:	314.2 KB ID:	112558

ACtC-3cDEDDpacFpycnFH8N2NFVctNCGDy9ACgd9Y2yIg5jf1oM5F2X57kulvqH5QV8hBdxjDzgkl2EpOnhXgvDq0GeD3GEnV84izaon8p2B1g7-lyfItoxBitGLj1UW4v63HTcRyXeIZHwDuaaYEwlLiCE5=w802-h1069-no?authuser=0.jpg - Click image for larger version  Name:	ACtC-3cDEDDpacFpycnFH8N2NFVctNCGDy9ACgd9Y2yIg5jf1oM5F2X57kulvqH5QV8hBdxjDzgkl2EpOnhXgvDq0GeD3GEnV84izaon8p2B1g7-lyfItoxBitGLj1UW4v63HTcRyXeIZHwDuaaYEwlLiCE5=w802-h1069-no?authuser=0.jpg Views:	0 Size:	249.5 KB ID:	112559

Rails being epoxied up and then released. This work was all done at the same time with the thwarts/handles/seats and cleats. This was to make best use of time/materials when I made up epoxy, dragged out the planer/planes/sanding block ... you get the idea

ACtC-3febbZ_D1IAVWwsLXkRk35jEeeTnjSoAO8BO5Js_p5uWpZvXP2FNzm7HbTMBT90CCmJKzvTiWGlpoNjxXuk9yxpTbY6xslLHtY-yLLIJDlW0Dg4MtE_RCoafv9k7lgXRGAOhpQikDK1I1K3e4-JJhls=w1426-h1069-no?authuser=0.jpg - Click image for larger version  Name:	ACtC-3febbZ_D1IAVWwsLXkRk35jEeeTnjSoAO8BO5Js_p5uWpZvXP2FNzm7HbTMBT90CCmJKzvTiWGlpoNjxXuk9yxpTbY6xslLHtY-yLLIJDlW0Dg4MtE_RCoafv9k7lgXRGAOhpQikDK1I1K3e4-JJhls=w1426-h1069-no?authuser=0.jpg Views:	0 Size:	566.6 KB ID:	112560

ACtC-3eWta5FCZtSpv9oI4LH0BXlQhf0PponTgaj0b4_1z5yufzdrzaOLLyksSvDRQFS4k9_4eWCOqCISKbVbO_6Ekn7tV85T3yE1u__zwn1iFQBP8j9YR33eDES3--_uURowsSgYi6wcpJlvvVvwnnD5N4Q=w802-h1069-no?authuser=0.jpg - Click image for larger version  Name:	ACtC-3eWta5FCZtSpv9oI4LH0BXlQhf0PponTgaj0b4_1z5yufzdrzaOLLyksSvDRQFS4k9_4eWCOqCISKbVbO_6Ekn7tV85T3yE1u__zwn1iFQBP8j9YR33eDES3--_uURowsSgYi6wcpJlvvVvwnnD5N4Q=w802-h1069-no?authuser=0.jpg Views:	0 Size:	314.2 KB ID:	112561

I like to embed the support rails into the shoulder block for strength and weight reduction. So the bending form gets dismantled and becomes a router guide for the rails.

ACtC-3fEn6jRH8_4_zbO6WnJUKGWi4fWBcN0rQepuxyj-KeFNv5IQncitFqceF7b77xa3l5vb5jMAdRgjI3JkDC6O35_HCQBtm6jHGYBSakLpuFKvtlxX7bDJs0obBFb21DlxaK-Cil_FgAbPkBiGMbgXRrx=w1426-h1069-no?authuser=0.jpg - Click image for larger version  Name:	ACtC-3fEn6jRH8_4_zbO6WnJUKGWi4fWBcN0rQepuxyj-KeFNv5IQncitFqceF7b77xa3l5vb5jMAdRgjI3JkDC6O35_HCQBtm6jHGYBSakLpuFKvtlxX7bDJs0obBFb21DlxaK-Cil_FgAbPkBiGMbgXRrx=w1426-h1069-no?authuser=0.jpg Views:	0 Size:	460.2 KB ID:	112562

The completed shoulder block template with the support rail positions marked, with the bending form and rails in the background

ACtC-3ekYKnCEstG1c1XljaldWwl6yTcoC_Ch43Qxf6pQFEcMvdOnOF1n287BHWCUz7KUQKtCrQ4n36KSojzzkwfUXpbdOL5gY8NmetO-mR8ezUmWd3rksZmBo_qskxKjHs8WWcfFaEgtCqLKyFNDXA_EU9k=w1426-h1069-no?authuser=0.jpg - Click image for larger version  Name:	ACtC-3ekYKnCEstG1c1XljaldWwl6yTcoC_Ch43Qxf6pQFEcMvdOnOF1n287BHWCUz7KUQKtCrQ4n36KSojzzkwfUXpbdOL5gY8NmetO-mR8ezUmWd3rksZmBo_qskxKjHs8WWcfFaEgtCqLKyFNDXA_EU9k=w1426-h1069-no?authuser=0.jpg Views:	0 Size:	472.3 KB ID:	112563

The shoulder block template is cut out and sanded to shape. The pattern is traced on a nice piece of NWC and the rail exit points marked on the edges.

ACtC-3dKyAYiT4pgjWdQZdA_Ch7Ymu3W5fKhnKtSf4ewFaO6ncxicnvXPOEf78jkZ01NEchHb5-jLd1wFUu7bMBrx3XCfrVE8KWgezFdCQykPH0PNJtMqBW8QYpjWSDwC_icBPTeM_p362FAHYP6KNHysdnb=w1426-h1069-no?authuser=0.jpg - Click image for larger version  Name:	ACtC-3dKyAYiT4pgjWdQZdA_Ch7Ymu3W5fKhnKtSf4ewFaO6ncxicnvXPOEf78jkZ01NEchHb5-jLd1wFUu7bMBrx3XCfrVE8KWgezFdCQykPH0PNJtMqBW8QYpjWSDwC_icBPTeM_p362FAHYP6KNHysdnb=w1426-h1069-no?authuser=0.jpg Views:	0 Size:	570.0 KB ID:	112564

The NWC gets trimmed and the bending forms become router templates, screwed onto the shoulder blank

ACtC-3ck6CkrQRisy1-MpkwmplXt9gjqPNyZz6J3OyFOkoTTeDKogMLM1UJRNstwr0xYoI4177h-ancc4cc162gPMid9RBxBWfdf-JzW-hX6uPRjS_Fh2Fct4xXNsjPKTcouSu4lHQq7-XoRaIWcPFSYKAJ7=w802-h1069-no?authuser=0.jpg - Click image for larger version  Name:	ACtC-3ck6CkrQRisy1-MpkwmplXt9gjqPNyZz6J3OyFOkoTTeDKogMLM1UJRNstwr0xYoI4177h-ancc4cc162gPMid9RBxBWfdf-JzW-hX6uPRjS_Fh2Fct4xXNsjPKTcouSu4lHQq7-XoRaIWcPFSYKAJ7=w802-h1069-no?authuser=0.jpg Views:	0 Size:	259.9 KB ID:	112565

Locked down for routering ....

ACtC-3eaRMhl6dWoEYFEIReH3hZOmxDBeWoru0dgnjy4MQf9jBxwskiBuuF9OfC8QuCaZ8-TqOH73osEB1DViqMbMyv6lsdj0CMbT718dXiB7zuj6KS0uPqP_K5x36EdiraKX6bRJaqTIYsBGENigS4lndTY=w802-h1069-no?authuser=0.jpg - Click image for larger version  Name:	ACtC-3eaRMhl6dWoEYFEIReH3hZOmxDBeWoru0dgnjy4MQf9jBxwskiBuuF9OfC8QuCaZ8-TqOH73osEB1DViqMbMyv6lsdj0CMbT718dXiB7zuj6KS0uPqP_K5x36EdiraKX6bRJaqTIYsBGENigS4lndTY=w802-h1069-no?authuser=0.jpg Views:	0 Size:	247.2 KB ID:	112566

I used shallow cuts with a 3/8" top bearing template bit, to form a 3/8" x 3/8" slot in the shape of the support rails

ACtC-3eOeDz9DW1Gzuwd2BpMmL36QWmhUp5aokCvEsCYNMn7gBo5W9E2bOaQIe1GC4D49w0SGBLZHv_dPfk-LSUvA2VheU77UplpH0H1clLbkGZns9zfUcgFRfQe7hD-yrBhNYjSl-3h5XB-wEV7_kue5rXa=w802-h1069-no?authuser=0.jpg - Click image for larger version  Name:	ACtC-3eOeDz9DW1Gzuwd2BpMmL36QWmhUp5aokCvEsCYNMn7gBo5W9E2bOaQIe1GC4D49w0SGBLZHv_dPfk-LSUvA2VheU77UplpH0H1clLbkGZns9zfUcgFRfQe7hD-yrBhNYjSl-3h5XB-wEV7_kue5rXa=w802-h1069-no?authuser=0.jpg Views:	0 Size:	240.6 KB ID:	112567

I got lucky and the fit up went pretty well with a tight fit, the rails are set aside till later

ACtC-3d2egSt3CkDikj2GcHM-hXCP5RjkF3Hl23br_SBIz4YO1XmC8ZOv33GxFFIrRtrvRVI_noL8WPozIjsyM6DrwAtHjqgE6Rt_pEkwks-COewYnNkFATRZsTe8RYzuYzMDdXVIjuyhBl7cviyHO0lo3oC=w802-h1069-no?authuser=0.jpg - Click image for larger version  Name:	ACtC-3d2egSt3CkDikj2GcHM-hXCP5RjkF3Hl23br_SBIz4YO1XmC8ZOv33GxFFIrRtrvRVI_noL8WPozIjsyM6DrwAtHjqgE6Rt_pEkwks-COewYnNkFATRZsTe8RYzuYzMDdXVIjuyhBl7cviyHO0lo3oC=w802-h1069-no?authuser=0.jpg Views:	0 Size:	301.4 KB ID:	112568

The blank gets cut to shape (jigsaw outside the line, sanded to the line) and marked up for carving

ACtC-3flqUL3JZc38oiLxSg4kgm5-02GmchKDP5-Lnyt74iGjtH9W7xwWF2kEEbrjijbLKFAsswt7Ozraf3aMwfiVyG_C_66lj8PRf4uQKD9fl98tUbka2hRA9kPzIrxVQXCKv0xfGE6E52DcOUUuJM77Z6H=w1426-h1069-no?authuser=0.jpg - Click image for larger version  Name:	ACtC-3flqUL3JZc38oiLxSg4kgm5-02GmchKDP5-Lnyt74iGjtH9W7xwWF2kEEbrjijbLKFAsswt7Ozraf3aMwfiVyG_C_66lj8PRf4uQKD9fl98tUbka2hRA9kPzIrxVQXCKv0xfGE6E52DcOUUuJM77Z6H=w1426-h1069-no?authuser=0.jpg Views:	0 Size:	440.1 KB ID:	112569

For shaping the shoulder block I really like using a KutzAll blade on an angle grinder (background), very fast, very cool and makes it easy to get the wood removed

ACtC-3cdCT_2iy7bf02WIUXZCWWLqabvGlfyQBIkdneNfaAWDrok2fzZjseeJygzWQi34ygAbD-xXyRUt3mbVJYIOmVa_9cuaLIcZmbh3NSieUDnczLTr9_tIiloAlFaWtcmPsfK4SaylLh9bwQ4UxMssYXt=w1426-h1069-no?authuser=0.jpg - Click image for larger version  Name:	ACtC-3cdCT_2iy7bf02WIUXZCWWLqabvGlfyQBIkdneNfaAWDrok2fzZjseeJygzWQi34ygAbD-xXyRUt3mbVJYIOmVa_9cuaLIcZmbh3NSieUDnczLTr9_tIiloAlFaWtcmPsfK4SaylLh9bwQ4UxMssYXt=w1426-h1069-no?authuser=0.jpg Views:	0 Size:	531.9 KB ID:	112570

Rough shaped and sanded

ACtC-3ebnJfpGRCzS3IyhKu9hldZD_yDDklvaGV8h2qRrsFOeCpR--sGlJcTeEqUvOT-XL4X1xJggcRGm8yVZUPP4mFX6d694SPDu0y2EUUdM5UZ0ZVnaJPI2Dwg1oInTs9ZIWF8Q5ZVPbJN8_EbpPGhSPnm=w1426-h1069-no?authuser=0.jpg - Click image for larger version  Name:	ACtC-3ebnJfpGRCzS3IyhKu9hldZD_yDDklvaGV8h2qRrsFOeCpR--sGlJcTeEqUvOT-XL4X1xJggcRGm8yVZUPP4mFX6d694SPDu0y2EUUdM5UZ0ZVnaJPI2Dwg1oInTs9ZIWF8Q5ZVPbJN8_EbpPGhSPnm=w1426-h1069-no?authuser=0.jpg Views:	0 Size:	595.9 KB ID:	112571

ACtC-3f1Lsmb5YRImkTM3Jaf5H7oAFUrHVhslFm7EmVd-IXs_tjlFDt-orUMCVlUVR2WSzckgkDpIUQQAH6f1ENtaEvmrG1Vku2k9UqqGZwa_p4cy5wvc6M9ES81kz6y2rczaisHRDbGzFqoBYNm6LZD1cZc=w1426-h1069-no?authuser=0.jpg - Click image for larger version  Name:	ACtC-3f1Lsmb5YRImkTM3Jaf5H7oAFUrHVhslFm7EmVd-IXs_tjlFDt-orUMCVlUVR2WSzckgkDpIUQQAH6f1ENtaEvmrG1Vku2k9UqqGZwa_p4cy5wvc6M9ES81kz6y2rczaisHRDbGzFqoBYNm6LZD1cZc=w1426-h1069-no?authuser=0.jpg Views:	0 Size:	483.3 KB ID:	112572

Time to epoxy the pieces together

ACtC-3ckvITAuc8Dy2iEnb4ptKBOv9tjj9AzgI8j7Wg4LcQYAe2btg3gNRD2NUS8GueL9IJJPOlP6Ns6TT8kjBKwhjEA9IcI2P-hFB8qvQfMiyJgwPHyGtFGgfSDp_IpsOHR-EMuLyc5l3nKGJl4T5vRXx8v=w1426-h1069-no?authuser=0.jpg - Click image for larger version  Name:	ACtC-3ckvITAuc8Dy2iEnb4ptKBOv9tjj9AzgI8j7Wg4LcQYAe2btg3gNRD2NUS8GueL9IJJPOlP6Ns6TT8kjBKwhjEA9IcI2P-hFB8qvQfMiyJgwPHyGtFGgfSDp_IpsOHR-EMuLyc5l3nKGJl4T5vRXx8v=w1426-h1069-no?authuser=0.jpg Views:	0 Size:	584.5 KB ID:	112573

ACtC-3ckpDFQDgj3-_CtobpENlk2EQAHDBwahbSFRVCeuUIYhGCMT0-ctc7UWdapDhTzHW16lvc-j69HToft0vPj3R6k72tp_PZygNKwMDKfd7nNdvhBQZI-zUcd_z_DNIsUc19DdOsBMmPmc8grUu67rqiH=w1426-h1069-no?authuser=0.jpg - Click image for larger version  Name:	ACtC-3ckpDFQDgj3-_CtobpENlk2EQAHDBwahbSFRVCeuUIYhGCMT0-ctc7UWdapDhTzHW16lvc-j69HToft0vPj3R6k72tp_PZygNKwMDKfd7nNdvhBQZI-zUcd_z_DNIsUc19DdOsBMmPmc8grUu67rqiH=w1426-h1069-no?authuser=0.jpg Views:	0 Size:	539.5 KB ID:	112574

ACtC-3euKdTW863QPk1rbSwohgNvAfGJmgGcw_urz2A5-5ByYIj-j-pzSts9XdP_5bHiyBm3rO6ki_kkwH76g9d88302O53qU_cy0a-N7OQoKItq--Kc8W_Oc0Wv3mGoHH4H_8g0oe0LXiZMTHbOGt1RbWdL=w1426-h1069-no?authuser=0.jpg - Click image for larger version  Name:	ACtC-3euKdTW863QPk1rbSwohgNvAfGJmgGcw_urz2A5-5ByYIj-j-pzSts9XdP_5bHiyBm3rO6ki_kkwH76g9d88302O53qU_cy0a-N7OQoKItq--Kc8W_Oc0Wv3mGoHH4H_8g0oe0LXiZMTHbOGt1RbWdL=w1426-h1069-no?authuser=0.jpg Views:	0 Size:	593.9 KB ID:	112575

Loaded in the seat/thwarts/handles into the canoe to determine the final balance point, made adjustments and markups ... then added the "landing pad" for the yoke to the gunnels

ACtC-3dUU0eQ-bT-o8HPQq_FEKhLFqSSdDUxUhFuV7qoXBgKCmmyQ-v304Jkxa5pJkygmD271ESKCjY67xw3RVHzSwRdrtHJoYp7qX8MzTbAL3XZ7riuCj438DJUBW__dTKB8wB3RrQ0XDRhgZdfgsQll8xn=w1426-h1069-no?authuser=0.jpg - Click image for larger version  Name:	ACtC-3dUU0eQ-bT-o8HPQq_FEKhLFqSSdDUxUhFuV7qoXBgKCmmyQ-v304Jkxa5pJkygmD271ESKCjY67xw3RVHzSwRdrtHJoYp7qX8MzTbAL3XZ7riuCj438DJUBW__dTKB8wB3RrQ0XDRhgZdfgsQll8xn=w1426-h1069-no?authuser=0.jpg Views:	0 Size:	276.3 KB ID:	112576

ACtC-3cA8NVAzbbZZ4AnQPwboSp-PM2SE1T5YwPizGimW7sJXO1BjlJjuxEGh1jRPB1fQ1j0iwTT3aKht28llUS9fRlRgzHD8pwo09UoFpBDB_DuAZbVbBgFcAwyIylp-AI5ySgX3PwA57GSjFUNkk-VfEzF=w1426-h1069-no?authuser=0.jpg - Click image for larger version  Name:	ACtC-3cA8NVAzbbZZ4AnQPwboSp-PM2SE1T5YwPizGimW7sJXO1BjlJjuxEGh1jRPB1fQ1j0iwTT3aKht28llUS9fRlRgzHD8pwo09UoFpBDB_DuAZbVbBgFcAwyIylp-AI5ySgX3PwA57GSjFUNkk-VfEzF=w1426-h1069-no?authuser=0.jpg Views:	0 Size:	362.7 KB ID:	112577

The gunnel at the mount area has been allowed to just follow the natural curve, so it has quite an angle and I struggled with the idea of adding material to flatten it all out ... in the end I opted to just work with the angles. This keeps the whole mount lighter and simpler.

Cherry blocks are cut and positioned to the same angle as the gunnel landing pad and screws are used to old the alignment

ACtC-3dK_2pXjLsJD1EuD2cRzswA-H6OmaqP2y6cUhVDhSQx_lK_2R2nwk8CwowOSrOLQAyR1-XoZ0KsVSWRzcU-7wxdKzyxF2Ef2fd6u_PrzeX2dUbQ35IzzP9XuyyXNaM1tHqFLUSoNLdOkvtSiizfimqT=w1426-h1069-no?authuser=0.jpg - Click image for larger version  Name:	ACtC-3dK_2pXjLsJD1EuD2cRzswA-H6OmaqP2y6cUhVDhSQx_lK_2R2nwk8CwowOSrOLQAyR1-XoZ0KsVSWRzcU-7wxdKzyxF2Ef2fd6u_PrzeX2dUbQ35IzzP9XuyyXNaM1tHqFLUSoNLdOkvtSiizfimqT=w1426-h1069-no?authuser=0.jpg Views:	0 Size:	331.1 KB ID:	112578

ACtC-3d7dmfVbCQVB5nGxf1rCC_RKtShVSjdBwtKYaTUntbGHFl3V1tEDKHVviQv5dR9DgEYiEa2djpHzgv_hgwsDXKaWhXjBNA4mv0je21BKAXLcOyGLLVr9BDgMUAeVCHG-H7PviL2rRpl3L7UTCgby4jM=w1426-h1069-no?authuser=0.jpg - Click image for larger version  Name:	ACtC-3d7dmfVbCQVB5nGxf1rCC_RKtShVSjdBwtKYaTUntbGHFl3V1tEDKHVviQv5dR9DgEYiEa2djpHzgv_hgwsDXKaWhXjBNA4mv0je21BKAXLcOyGLLVr9BDgMUAeVCHG-H7PviL2rRpl3L7UTCgby4jM=w1426-h1069-no?authuser=0.jpg Views:	0 Size:	354.5 KB ID:	112579

then they get epoxied in place, I like to use the screws as a clamping/alignment technique (just remember to wax the screws)

ACtC-3f3QGHGYmKYYXTZ7Zf_U4nh0GCy6syzvmyxEKkRLB38KahVtmLHx9RVPK26uW3FFIWUmlpkrS4KEHH8amjqOUfF06-I_Hvt_hLdntrtJrXAYgk09SNMbvkqOOvGa9Ct7aPet_4SgxtMRet68HkvgJD6=w802-h1069-no?authuser=0.jpg - Click image for larger version  Name:	ACtC-3f3QGHGYmKYYXTZ7Zf_U4nh0GCy6syzvmyxEKkRLB38KahVtmLHx9RVPK26uW3FFIWUmlpkrS4KEHH8amjqOUfF06-I_Hvt_hLdntrtJrXAYgk09SNMbvkqOOvGa9Ct7aPet_4SgxtMRet68HkvgJD6=w802-h1069-no?authuser=0.jpg Views:	0 Size:	360.3 KB ID:	112580

ACtC-3e31nQfe-FSfVlydzLLxeJjzt96h-MmF35YennWCKRwLBEpAz50UccSm8kcCz780Ay4wJkqXbXDnX00sNX5giuuV43Rol5yCk5L36OCes8HB26fX0vQygOyp4y1J5FYz9nzcOTmqycweciRdA_cCzdn=w802-h1069-no?authuser=0.jpg - Click image for larger version  Name:	ACtC-3e31nQfe-FSfVlydzLLxeJjzt96h-MmF35YennWCKRwLBEpAz50UccSm8kcCz780Ay4wJkqXbXDnX00sNX5giuuV43Rol5yCk5L36OCes8HB26fX0vQygOyp4y1J5FYz9nzcOTmqycweciRdA_cCzdn=w802-h1069-no?authuser=0.jpg Views:	0 Size:	180.9 KB ID:	112581

As an experiment I have decided to use a magnetic hold down system on this version. It will incorporate 2 x 1/2" neodynium magnets with a cup/washer setup and a steel pin for lateral support.

I mark out a template for the placement of the 2 magnet assemblies (per side) and pin. The pin is made from a #10 x 2" wood screw, the head was cut off and about 3/8" of thread was left on the base, leaving a 3/8" pin with about 3/8" of thread.

ACtC-3ehesQCEC_jVU9D3NXfE3KlrOJYhAfmovv0AsgUIhyr9qE7PJNIMfVSpzf2JQY1AHZRc1lUxUILeGGPO3-sLUxUxDPdKUDscUeiZRC5-0Xp0B1gjiH3-pnvs0xtpyW-XSaN7HAED28ev86fPG_biTaX=w1426-h1069-no?authuser=0.jpg - Click image for larger version  Name:	ACtC-3ehesQCEC_jVU9D3NXfE3KlrOJYhAfmovv0AsgUIhyr9qE7PJNIMfVSpzf2JQY1AHZRc1lUxUILeGGPO3-sLUxUxDPdKUDscUeiZRC5-0Xp0B1gjiH3-pnvs0xtpyW-XSaN7HAED28ev86fPG_biTaX=w1426-h1069-no?authuser=0.jpg Views:	0 Size:	212.6 KB ID:	112582

Drill out the holes and test fit the pieces

ACtC-3dErUPDUDHJzlw_PefkA72-O_FplEW2TLLE07y6HC4C69dt0ydukOiZAHidxoVXxBfAPoUsNlyLndxw3anIGqzavwfi4wcYg6l8AFtNSUTDuNy12lA6oQoTI2hK0ULZTLumsI208TSs1DDzK8v2mQti=w802-h1069-no?authuser=0.jpg - Click image for larger version  Name:	ACtC-3dErUPDUDHJzlw_PefkA72-O_FplEW2TLLE07y6HC4C69dt0ydukOiZAHidxoVXxBfAPoUsNlyLndxw3anIGqzavwfi4wcYg6l8AFtNSUTDuNy12lA6oQoTI2hK0ULZTLumsI208TSs1DDzK8v2mQti=w802-h1069-no?authuser=0.jpg Views:	0 Size:	191.2 KB ID:	112583

ACtC-3e4XrPPgs9pGlhiqC0j64AU5nzyM2CIX3zJneddStJDxADCNVVRRxy7sy5adIe9Zg3xHOSwsQImNGrTZYFVmR7o4ZSPJu50WdjlzlLn-MCBzefmalq6qNoU69YbmY0eJrQU93eiXRyCuvI5Fgj08HY9=w802-h1069-no?authuser=0.jpg - Click image for larger version  Name:	ACtC-3e4XrPPgs9pGlhiqC0j64AU5nzyM2CIX3zJneddStJDxADCNVVRRxy7sy5adIe9Zg3xHOSwsQImNGrTZYFVmR7o4ZSPJu50WdjlzlLn-MCBzefmalq6qNoU69YbmY0eJrQU93eiXRyCuvI5Fgj08HY9=w802-h1069-no?authuser=0.jpg Views:	0 Size:	164.1 KB ID:	112584

All pieces were then epoxied in place, the shoulder block screws removed and 3/8" dowels added.

The completed assembly looks like this

ACtC-3c85YHZJJtYlw1A_m2ohP9iU1Y5YemsVAG53ASo4ddbrzz9MEf3KnCzL4uktX1n0gZ9RahwrI_3Wv62kgv6U2FP1WPk8xLXUh-KqwjfvnXEeUSOE_Cs1UMMixDDioLU_8HsCuZwSlUTojxfQeOx-g3k=w1426-h1069-no?authuser=0.jpg - Click image for larger version  Name:	ACtC-3c85YHZJJtYlw1A_m2ohP9iU1Y5YemsVAG53ASo4ddbrzz9MEf3KnCzL4uktX1n0gZ9RahwrI_3Wv62kgv6U2FP1WPk8xLXUh-KqwjfvnXEeUSOE_Cs1UMMixDDioLU_8HsCuZwSlUTojxfQeOx-g3k=w1426-h1069-no?authuser=0.jpg Views:	0 Size:	452.0 KB ID:	112585

and after final shaping and sanding, it is ready for varnish.

ACtC-3dNQJAAfonr9cItVwAqszALJMN5kmLCz-2k_HHbpb7B_P0E8PdCsGwXrPqdU9seBloMDZAzzuN-tsLTktER4n02QOA4Tq1Bd8IaXGDWu_1YN19Cpfme0ZyQaEasHXoxwrz68Vvq8VFh2c7A73-n_8lA=w1426-h1069-no?authuser=0.jpg - Click image for larger version  Name:	ACtC-3dNQJAAfonr9cItVwAqszALJMN5kmLCz-2k_HHbpb7B_P0E8PdCsGwXrPqdU9seBloMDZAzzuN-tsLTktER4n02QOA4Tq1Bd8IaXGDWu_1YN19Cpfme0ZyQaEasHXoxwrz68Vvq8VFh2c7A73-n_8lA=w1426-h1069-no?authuser=0.jpg Views:	0 Size:	340.7 KB ID:	112586

This attachment system was a gamble, the magnets provide about 20 pounds per side of "pull" which seems quite adequate to keep the yoke in place, while the pin maintains lateral stability, I ran it up and down the yard a few times and I think it is a go for infield trials.

It will allow me to simply put it on the boat and not worry about any attachment hardware, it just snaps into place. Additionally, a couple of landing pads somewhere in the bow or stern and I can just snap it there for storage out of the way, when under way.

With this complete and a coat of epoxy on the gunnels, i am ready to start varnishing, after the gunnels cure, in the meantime, I will finish up varnishing the trim pieces (yoke/thwarts/handles).

I did do some weights of the various pieces

Handles Bow 20g (.7 oz) each
Bow Thwart 95 g (3.4 oz)
Stern Thwart 155 g (5.5 oz)
Yoke 559 g (20 oz)

Putting these figures into my model, it looks like my 30 pound target may have slipped to just under 31 pound when the varnish goes on ... just about exactly the weight of those decks that weren't planned for ... oh well, I made the decision, so I get to carry the excess, lol


Brian
 
Last edited:
I really like the pin/magnet attachment. Simple, secure, and nothing to possibly forget. Very nicely done!
 
Just a quick update on the finishing regime ....

The gunnels get sanded to 220 grit, then 2 coats of epoxy with a sanding in between. While not strictly required and it is more work, I have found that the varnish seems to give a smoother finish if I have the epoxy precoat done.

ACtC-3elVvutT7r0c8pzkl2l-1X5S0JklRl6ER-nZPA4TSXPxfRLqdIcACFj8r5KvRo4E5ShDhJp8u4KUow2b79OoUC_-yi9DVE5qywimTHsbpKjlz3qhtpqvEpOYHzJEWThZsHSYkkq0hVfSOVQwUjHGFZj=w1426-h1069-no?authuser=0.jpg

ACtC-3e5N5m4o6Ej2EJ0uhWIWFfdDkcf2EwELQOkR1P7QGnaUnj2hR6LqXKKhWJRjSa3usD0acgRjsAlJjuKnNgLFVUce3qIxjX2OmMHsNWtJDqE3nJAeQyPZ73P7TKCMd_lzxFxsDV1-0JJuMglXjoofDHm=w1426-h1069-no?authuser=0.jpg

The epoxy is sanded down with 120 grit sandpaper by hand, I am just trying to knock down sharp pieces and get the surface rough enough for varnish. This a pic of sanding the epoxy down (with PPE of course)

ACtC-3fvxlLf06pdoXwiCT7jJarUj-VRGS5U69lu0r1NIk636AHAD8AUJ7T5zcj2bsH_fqMzPheLvAJZyVTO8ww5rA8ahuk637TmWuSCZlbOFofTJ6O7OEM0zMqvJakJDT-abLFSCuvzYP4kSo30TbI81NO0=w802-h1069-no?authuser=0.jpg

The first varnish coat decided that it would resist curing, a direct result of me being lazy and not washing the epoxy before sanding. It was/is almost certainly amine blush, there is only two things that can happen at this point, raise the temp and airflow and pray (to whatever deities suit you) OR sand the whole mess back down to epoxy and wash it well with soap and water.

I opt to try the heat (~85F) and blow method first .....

ACtC-3fLcbWb3Z7pTC6Lw1fQ4WScf-F4NRaUUoifelj6Xd52m2FDE7dnzLviyfq_DG2JP0yfA9NAr3dyfFar7jrMReuadlRJxxRRpVukcQtQ6PdRFmTdnu2qaTJaCoBMJRccWHh_ix8vdERN3cgl3sG8m8pn=w802-h1069-no?authuser=0.jpg

After 2 days it was actually all cured .... except 4 places, the four footbrace bolt areas that were added on. They where sticky and gummy and it was apparent that was not going to change. That area was a separate epoxy application, which just demonstrates it isn't necessarily the epoxy and more likely curing/mixing conditions that cause the blush.

The areas are taped off and sanded back to epoxy with 120 grit and washed well with soap and water

ACtC-3e7eThJt3a2VLdrYVeMqVo4ampfXVi7lmJ-ZUw2rEhs8FaRBAxK3sJsIsz2-M1SUnMUe9D5iChhFb5o090NUDeTa4Nsdrtx9szooSjdDLvvQOiJ4n0rDXKDEnoRXPE7So_iTDToAyhkA8g60cF4enff=w1426-h1069-no?authuser=0.jpg

Added 2 coats of varnish back (sanded 220 between) and left a small edge around the sanded area, so that I could tell where the new varnish ended

ACtC-3en02Hd9AW5jzMmC7t_3TtqJAUQJskflyiJreIjIa4IGgM-OvlHmtL4SftK8-V-vY9F8qFnL5DvoaPP-6dZoFXpfQ3NmUgfOziSY8YILzTZR4-yFXS5cj2oHsYqTFVsnZTR62fi38N1FcrnvgPiemds=w1426-h1069-no?authuser=0.jpg

The whole interior was then sanded out with 320 and the final gloss coat of varnish (#3) was applied

ACtC-3d4HtmJBZXDgM5DL3FdzmgTdARgdQ6H_1JO9P8BDo8KEoFtOv3WKDAzK06U2HVwPFhWKkrNZn23qcraYSkFVL7TxOMrldUPIA7BIVk7NWkCdarshBICauSRD1ROOm4-whrOiNmDnW76HUEregOsed_e=w802-h1069-no?authuser=0.jpg

Which turned out very well, and the area around the bolts just disappears. Leaving that sanded edge allows the two areas to blend easier I think

ACtC-3cgLJ_hj91ewjapW00zF3tg2GV7EvCwmDFtIciYVUzDizOztnJ2zHhyU42We97PCknPFAgkGHsZGkytswAzcS4BHaNu3JrklWPG8RSD4JJf9gZCMJGTgd_c4xleJ2o5stPVcSj0z8v_14ahvbRXW17O=w802-h1069-no?authuser=0.jpg

One last sand at 320 to add the low sheen varnish. I am adding this part so that those that worry about knocking the shine down can actually see what it means and how it looks. I do omit the cleats from this coat as I want them to shine, they are cherry, I think there might be a law about that somewhere

ACtC-3evUr-ZPtNvnGG4CY-XWU0ITh9-8SESjynMzpi2c78Cyc4QGQPZJZje7NgKvFbsKjulGRnyPeudPoVnbEAe7qhXkC5sUYKVSsehjVWGp8JLc5YQflqjCE5hbhVWWZAK_-Sx7Urb80u6dt8Mrrwj6k4L=w802-h1069-no?authuser=0.jpg

While I was doing the inside, I also prepped and finished the thwarts/handles and yoke ... same regime, sanded to 220, coat 1, sanded to 320, coat 2, sanded 320 coat 3

ACtC-3fGM4F6UTvCEsDouxcHp547s9PjDT_jnrZMTavG2XgoqqcaMbOL0XWXQp8-GuA7mfUZQCN2EMWJwF3ze5r644ne2GWVuliiFkynPkenm1gn_gHZon48HmNVRcHhnl70eQEa4MfQ-nOmjFVZaV7i0Jg0=w1426-h1069-no?authuser=0.jpg

I am firmly in the roll and tip application of varnish house, I use a narrow 4" foam roller, which allows me to get an nice, even coat of varnish, then I tip off that area with a 3" "Jen Brand" foam brush ... I also use the foam brush for any detail work like the gunnels, cleats and to get around the stem areas. I will usually do about 2-3 square feet at a go, which gets the varnish on quick and tipped before any skinning happens, giving the varnish maximum time to level and smooth out.

On to the exterior, water time is getting close.

Brian
 
Back
Top