• Happy Weed Appreciation Day! 🌱🌿🌻

A Stripper and a Composite Copy

Another non-builder question: Why does a staple gun save sanding? Could you explain a little more.
Yes.
An unpadded staple gun will drive a staple deep into the soft Cedar. After you pull the staple, which is hard to get at, the staple leaves a divot. Well to make a hull look good, you need to sand that divot out. Some will tell you that hot water will raise the grain. Fact is it won't.

A 1/4" thick hull with a 1/16" divot, leaves you with a lot of sanding and a thin hull.
Good Question Glenn.
 
My results with hot water were different:

free019.jpg


But to be fair, it raised the grain so much that I had to sand. It was just a quick wipe, though.
 
Well. With the forms set, the stems aligned, fish line stretched, so I can monitor the forms, as I go, The important taping of the forms. I'm ready to start stripping.
Setting strips on a couple of saw horses, I sort into pairs, Then pairs of pairs, as I'm in for a lot of Butt joining. There will be plenty of time between courses to sort. Plan to using stapleless, until the going gets tough around the bilge.
IMG_3650.JPG


Butt joining is made easy between the forms with bead and cove, a 2" spring clamp and a couple of foil wrapped pieces. Two Jimmy clamps on either side for insurance.

IMG_3669.JPG


My glue of choice is Elmers Max. Actually any glue will work. I was hoping to glue the hull, with just one 16 oz bottle. It didn't happen. Needed about 1/4th of another bottle. Sloppy on my part ! Pic is an 8 oz. The only pic I had of the Max.

IMG_0585_zpsju2ghf26.jpg


I had 4 or these slender tip glue bottles, sitting at various places on the strongback.

Take note of the strip the bottle is sitting on. It is nailed to the top of the forms, to maintain proper spacing, the full length of the hull.

IMG_3678.JPG


Now for the Work horses of my Stapleless system. The Jimmy clamp and the L brackets. Take note of the 1/4" plastic tubing Zip tied to the clamps and blocks. This protected the fragile coves, and worked well.

IMG_3668.JPG


I alternate the strip courses, so they interlock at the stems. By the way, this is a Stemless build. Such a time saver, and plenty strong ! A notch has to be filled so the strips can interlock.
IMG_1483_zps8wrs6bs1.jpg


IMG_3708.JPG

IMG_3705.JPG


I'm stripped up to the accent strip. It is made of Walnut, and Aspen. Aspen will remain white, while WRC turns dark or red, in time.
IMG_3712.JPG

IMG_3709.JPG


Note the Sight sticks are still in place. Once they become annoying, I remove them, as well as the strip at the top of the forms.

Below, the Jimmy clamps holding the accent strip together. The Walnut is not bead and coved, so I had to monitor the joints didn't slip out of place. The Real benefit of Bead and cove, is keeping strips in alignment !
Also another note I'll pass on. I later rounded the corners of the L brackets. This allowed me to use two clamps in the bilge area . Two is always stronger than one !

IMG_3714.JPG


Here I'm well into the bilge, and getting close to the football.
IMG_3721.JPG


Into the football. Two things to note in this pic. The Cardboard on the floor, and the tilted strongback. When stripping the football, I strip past center, on one side. Then cut the centerline, and go to the other side. Tilting makes stripping it a lot easier, it's easier to fit the strips, as you see the joints . The Card board keeps the floor clean from epoxy dripping. The comfort the Card board provides from standing on cement floors, is enough reason to use it ! When I drop something like staple guns or a plane? The Cardboard saves them.

Here you can see the rounded L brackets.

IMG_3743.JPG


Another great helper to my stripping process, is these Bungee cord clamps.
The Other Jim Dodd canoe builder, from Virgina Lazy river canoes , offered me the idea, for these simple, but great clamps. They have a neat, built in clamping system !
IMG_3798.JPG


Friction is the secret to the holding ability of these clamps. Note how a hole is drilled at an angle, so when it is hooked to the edge of the shear ? Friction keeps it from slipping. Great Idea Jim Dodd from Virgina !!!

IMG_3750.JPG


I zip tied plastic tubing to these as well. You can really get some tension on these. Just be careful they are under tension when in place, and you need to be carefull when you release the tension, to remove..

IMG_3749.JPG


More later !
I posted the wrong pic of my sorted strips. Here is the right one, I hope !
My results with hot water were different:

free019.jpg


But to be fair, it raised the grain so much that I had to sand. It was just a quick wipe, though.
Mine didn't raise that good. It was visible after I sanded. Better to correct the problem, than to deal with it later.
The padded stapler did it for me.
 
Last edited:
Here is more, ( I hope ).
A few pics showing my leg supports and how they are simply clamped to the forms for tilting.
IMG_3741.JPG

IMG_3745(1).JPG

Here is a pic of hull and strip sorting station.
IMG_3744(1).JPG

Stemless stem before final shaping and sanding
IMG_3807.JPG


The hull is sanded at this point.

IMG_3832.JPG
I lay 6 oz E-glass cloth, for the football and trim it. The use of a Magic marker clamped to a scrap strip, marking dots along the trim line. Then simply cut with a scissors, dot to dot fashion. and remove. This approximates the 3" water line. To which I want the extra layer to cover. This gives me plenty of extra strength, where the hull needs it the most. Also serves as an extra abrasion layer. For me this is essential for the waters I paddle in . It goes on top of the main layer, later.
IMG_3827.JPG

A full layer of 4 oz S-glass is laid. I am using 4 oz S-glass both inside and outside, on this build, hopefully to save weight. it is about twice the cost of 6 oz E-glass, that I normally use.
IMG_3834.JPG

Ready to glass.
I mark and prefill mix cups, to save me time, when glassing as I glass alone, it saves me precious time. I received a deal from a friend that was going out of business, on some MAS epoxy, and so this is what I'm using.
It handled very well, and produced a clear finish. I believe it is a little harder than my usual RAKA epoxy ( 127 resin & 350 non-blush hardener ).
IMG_3836.JPG

I use good quality, Cigar type foam rollers, for all my epoxy coating on a hull. This works very well for me ! My wrists don't handle squeegees very well, and I keep my hands cleaner with the rollers.
IMG_0325_zpslmepixrz.jpg

Hull is wetted out, trimmed, and ready for the extra layer over the football.
IMG_3842.JPG

I will trim the cloth on the stems before adding the football layer and bias strips ( 2 ).
IMG_3843.JPG


As I wet out the football layer, and bias strips ( First bias strip is the widest ). I will apply the first fill coat to the rest of the hull. I added three fill coats. I was up into the night to finish this. All within 24 hrs. Waiting to add fill coats lessens the quality of the bond, and clarity of the glass.
Done.
IMG_3846.JPG


Now to feather the edges of the extra football layer and bias strips. I do this as soon as I can, as this is easier when the epoxy is still green.
IMG_3856.JPG

My favorite tool for feathering is a Carbide paint scraper. I've never had to sharpen mine.
With the extra layer, and the two bias trips, I have four layers of cloth at the water line where the hull meet the water. This is where the most wear is found on a canoe.
IMG_3860.JPG

At this point, I'm done with the stripper, it will be covered in heat shrink Window film, to become the mold for a Kevlar copy.

IMG_3864.JPG


Warning more to come !
 
I just found this thread, so I'm behind, and will have to go back a few times to fully absorb it all. Gang ripping strips, using standard saw blades? Brilliant. Has anyone ever done this on a sawstop table saw? The safety cartridge typically has to match the blade pretty closely. Not sure my rep will give me advice on how to use a Jerry-rigged blade set-up. I could set up the other table saw for this, but the fence system on that one sucks.

Padded staple gun....Wish I had thought of that on my first build. I stapled a short piece of zip tie under each staple to make removal easier, and save sanding time. It didn't accomplish either.

Looking forward to going back and reading again. I really like how you're able to "just crank out" a few boats, just because you came on some materials. I can't see myself ever getting to that point. My wife asked me this morning: "have you started buying materials for another canoe this summer?" Wow. Green light.

Thanks again Jim, for the great information.
 
Question about glass choice. In looking at 4 oz. vs. 6 oz. and E-glass vs S-glass I found the information below. If S-glass is supposedly stronger, why use E-glass? Is it easier to form to the hull? I've only used S-glass cloth, and numerous other glass products for non-canoe building such as matt for boat repair, etc.

FYI the "E" in E-glass stands for "Electrical Grade" fiberglass as it was initially developed for electrical wire insulation but later was found to exhibit good reinforcement strength when coupled with a plastic resin.

The other main type of fiberglass used in surfboards is S-glass (or S-2 glass) and was developed for military and ballistic applications. S-glass has a much higher tensile strength and modulus than E-glass and is approximately 10% stiffer and 30% stronger.
 
Nice work as usual Jim. Looking forward to following along on the kevlar copy.

Kliff - the advantage to e-glass is that it wets out completely clear. With s-glass you can still see the weave. E-glass is also quite a bit cheaper, but is more than up to the task on most areas of the boat. My guess is that e-glass forms a little better to difficult areas, but I only use s-glass as a second layer on the football. I built my last 5 canoes with the following layup, 4 oz e-glass inside and out with a football of 4oz s-glass. The practical difference in the s-glass that I've seen is that compared to my earlier canoes with only e-glass is that it is a little stiffer, but most importantly, the canoes are significantly less subject to deep gouges and deformation of the wood core. My s-glass canoes glide right over most obstructions with little more than a scuff.

Mark
 
If S-glass is supposedly stronger, why use E-glass?

Kliff, for an empirical and graphical comparison of the characteristics of S-glass, E-glass, Kevlar and carbon, see the following post (#24):

 
Dogbrain, Mark has it down, exactly !

Trying to make this hull as light as I could, and having spent little for wood, and getting a great deal on epoxy ? I felt I could splurge a little on the higher priced S-glass. As Mark states S-glass is slightly more visible.

Boatman 53. I have photos downloaded for the Kevlar copy. Coming soon !
 
I just found this thread, so I'm behind, and will have to go back a few times to fully absorb it all. Gang ripping strips, using standard saw blades? Brilliant. Has anyone ever done this on a sawstop table saw? The safety cartridge typically has to match the blade pretty closely. Not sure my rep will give me advice on how to use a Jerry-rigged blade set-up. I could set up the other table saw for this, but the fence system on that one sucks.

Padded staple gun....Wish I had thought of that on my first build. I stapled a short piece of zip tie under each staple to make removal easier, and save sanding time. It didn't accomplish either.

Looking forward to going back and reading again. I really like how you're able to "just crank out" a few boats, just because you came on some materials. I can't see myself ever getting to that point. My wife asked me this morning: "have you started buying materials for another canoe this summer?" Wow. Green light.

Thanks again Jim, for the great information.
I'm glad you found this thread !

The stacked Diablo blades worked great ! Next time I will add a feather board, as I just used my hand this time. Not a safe practice for all the planks cut.
I can't comment on Saw stop. The Old Unisaw with the adjustable fence was perfect for this. Being able to slide it back, solved the issue of binding. Upgrading to a power feed would be cool, but for our applications at the shop ? Not necessary.

In the beginning, I would file down the anvils of my Stanley stapleguns, so they wouldn't drive the staples so deep. This worked temporarily. I found adding tape to the base a better move. I use Arrow staplers and they are holding up fine.

Yeah I was just going to start paddling more, and building less, then the materials started falling into my lap ! Ha !

Good luck with your build !

Jim
 
Wow, a stripper isn't in my future (unless I can no longer carry my w/c canoes), but I am continually impressed with your techniques and resulting wonderful canoes! Kudos to you.
 
I just found this thread, so I'm behind, and will have to go back a few times to fully absorb it all. Gang ripping strips, using standard saw blades? Brilliant. Has anyone ever done this on a sawstop table saw? The safety cartridge typically has to match the blade pretty closely. Not sure my rep will give me advice on how to use a Jerry-rigged blade set-up. I could set up the other table saw for this, but the fence system on that one sucks.
The over ride key on the Saw Stop may work for this scenario but I think it only serves to bypass the conductivity sensors...not sure if the sensors detect the width of the blade or just the distance between blade and brake. There are wider cartridges available for dado stacks but again I think more for more effective braking than for sensing width. Worth a try, Typically the circuitry will tell you if it won't cut before you cut.
 
Hey Jim,
Do you use a single layer of that window shrink film?
Or do you double up?
A single layer has worked fine. I worried that a pinhole might weep epoxy, but on the five I've done, no problems. The hulls easily lift off, without prying. I leave both ends open, but truly one end is enough, even with the tumblehomed hulls.

I hope to put more up on this tonight.

Jim
 
My sawstop will work with a circular saw blade when using the dado cartridge and getting as close to the blade as possible. I've used it with stacked blades in the same manner as Jim and it worked. No guarantee it will work on all of them as the cartridge is quite far from the blade.

Alan
 
Jim - really nice work (as usual). In terms of the composite copy, how much tumblehome is there in your hull? Is there a level of tumblehome that is just too much to make this workable when it comes to separating the copy from the cedar strip canoe?

I have a stripper hull hanging from my garage ceiling now that is waiting for gunnels and other final fittings when/if the weather warms up around here. It’s an Ashe’s solo trip that has a 30 inch waterline, growing to 33 inches at the max tumblehome point, and narrows down to 29 inches across the gunnels.

Do you (or others here who have done this) think this much tumblehome would give me a lot of grief in trying to get a composite copy off, assuming I leave both ends open as you are doing? Your project has got me seriously thinking about trying this before I finish things up on the stripper, but I have absolutely no experience here.

Thanks
Tony
 
As Promised, here is info on the Kevlar copy.

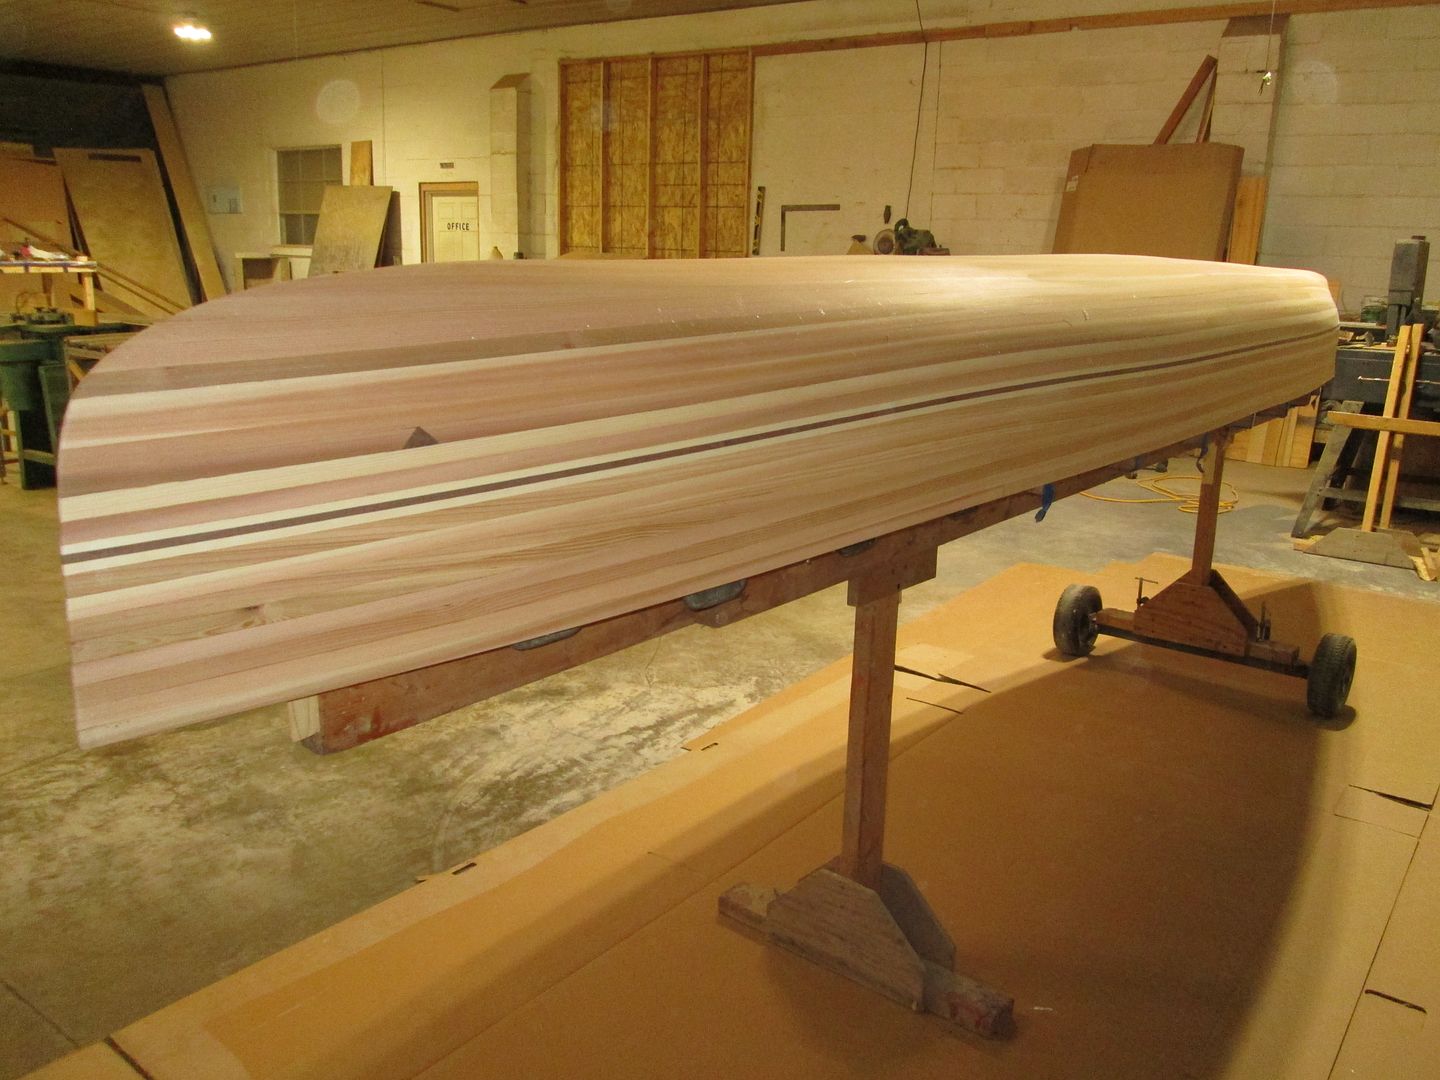
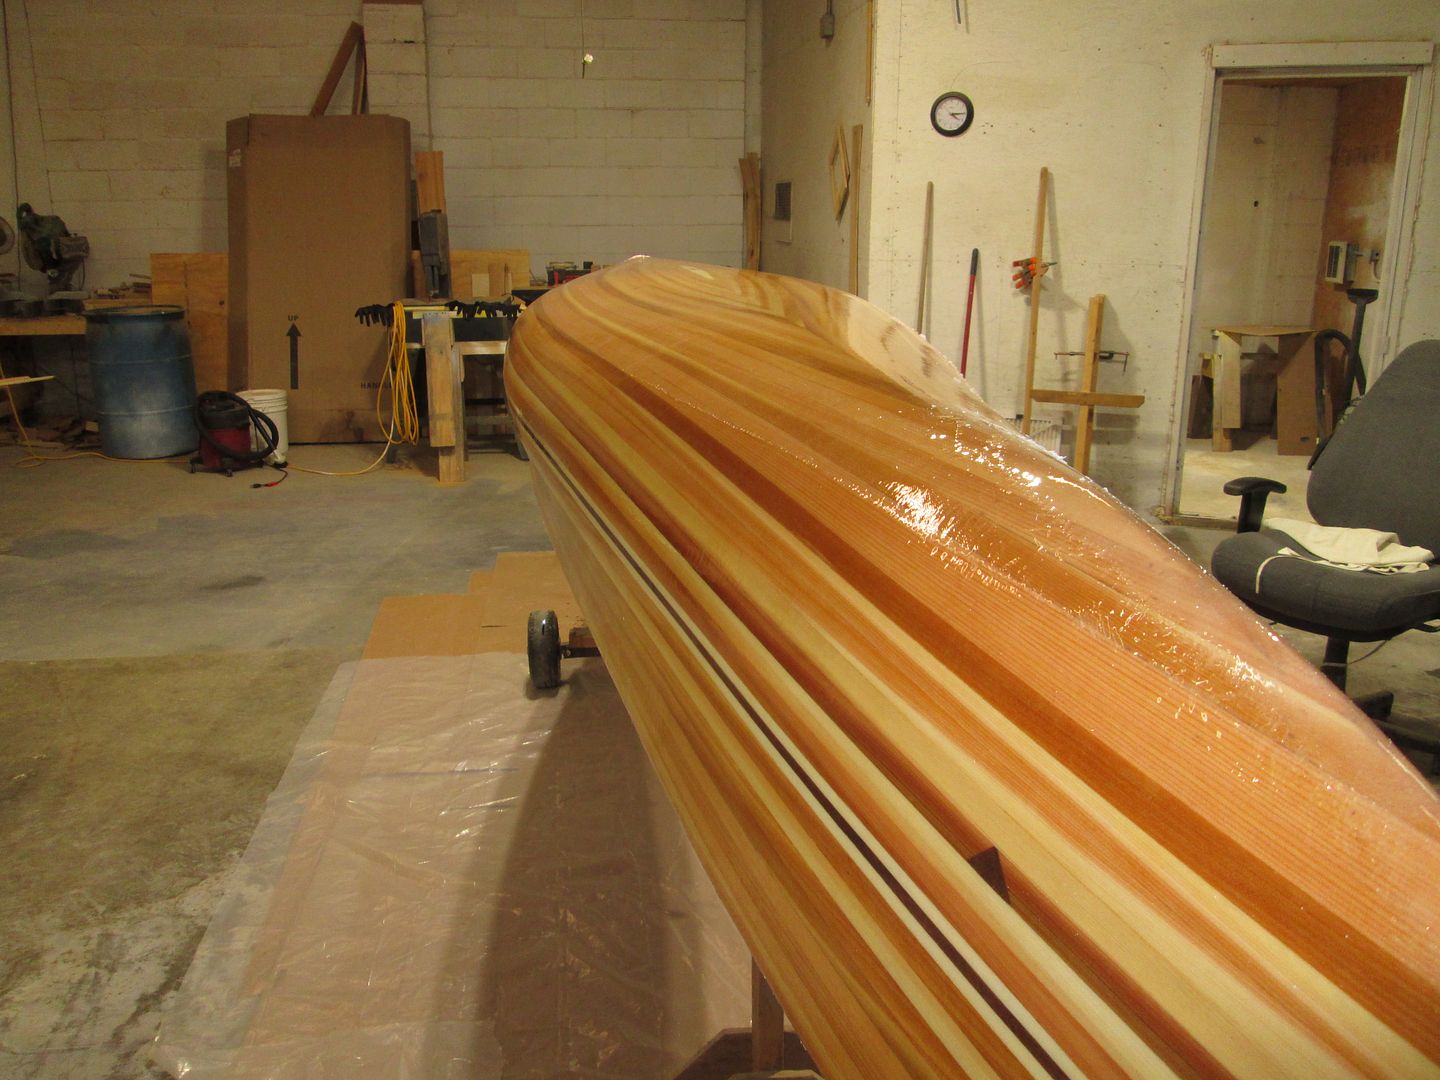
With the Stripper glassed, and ready to become the mold, I set about covering the mold with the Window heat shrink film.

Professional builders use Partal, or like product, as the release.
I resisted the use of Partal, a Poly Vinyl Acetate. It's use is basically to wax the mold to create a release between the mold and copy.
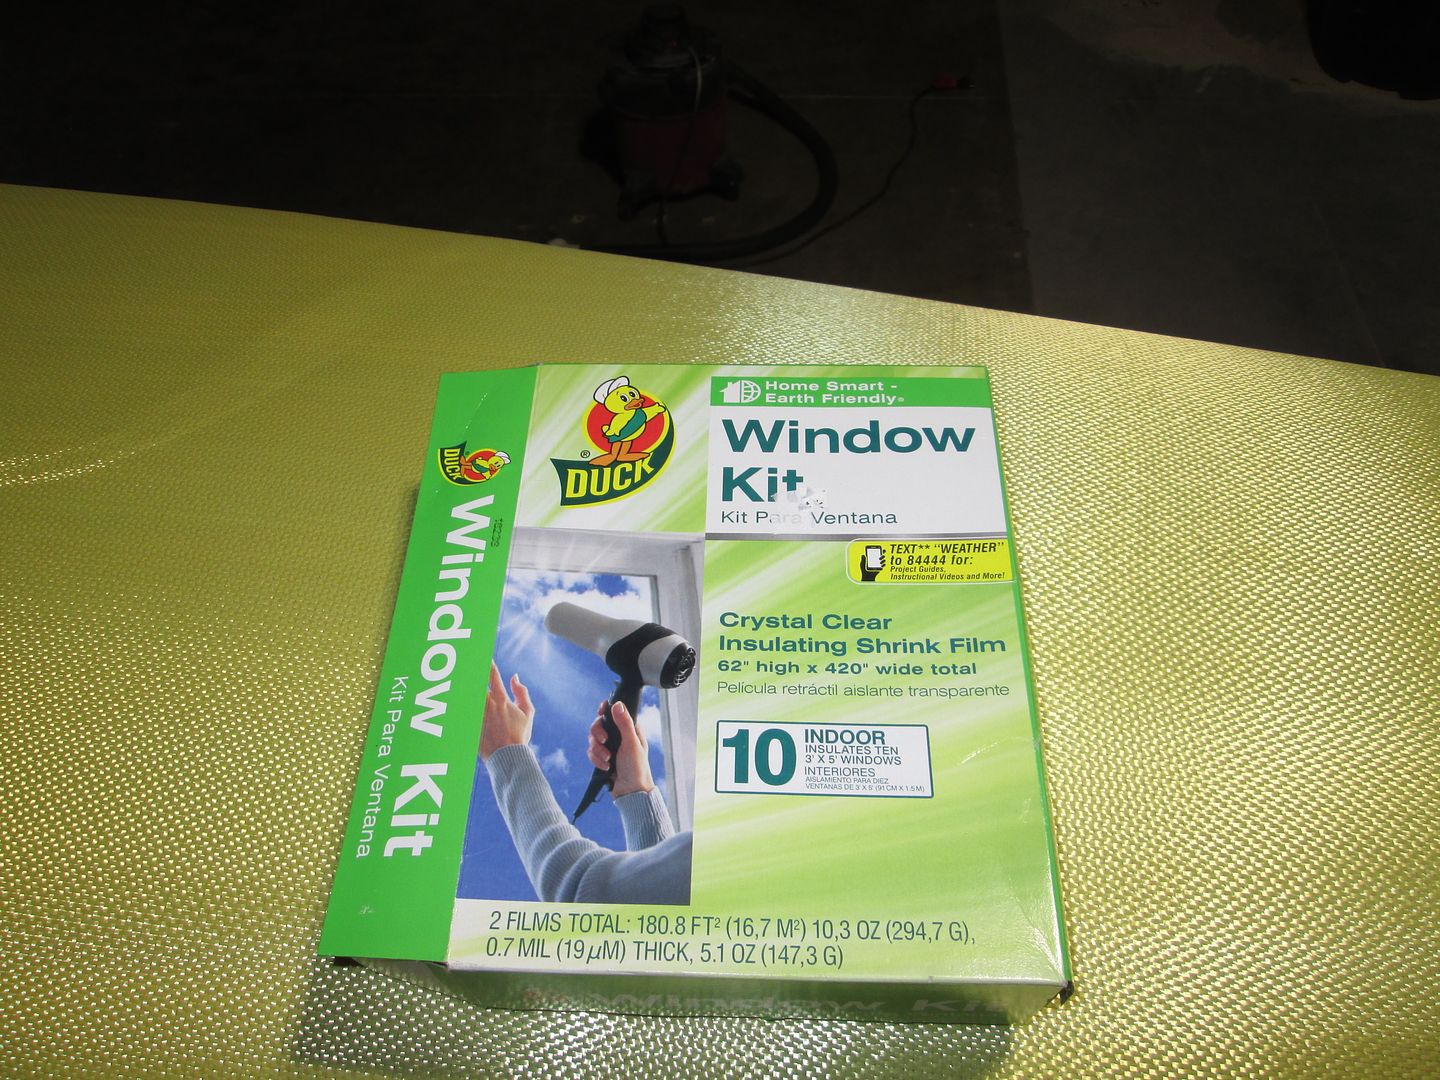
Fearing contamination, and problems down the road, cleaning it off my mold, I chose the Plastic heat shrink film.

For those thinking of using the film ? If your hull has little or no tumblehome? The window film is great.
Tumblehome creates it's own set of challenges. The Film does not stick to epoxy, but doesn't stick to the mold either.
So you have to be creative.
After this experience, and definitely on my next copy. I will sand and varnish the stripper, and go with Partal.
As I post more pics, I hope you can see why.
After applying the film, I started by laying out the Kevlar, and trimming it to match the hull, as close as possible. Anyone that has cut Kevlar, in this case 6 oz, knows it is a pain ! I purchased a pair of Blue handled scissors, as per Alan Gage's advise, From Express Composites https://www.bing.com/ck/a?!&&p=5b84...cGlkPVlOODczeDkyODkyNjg4Njg4Njc5OTkzNjQ&ntb=1

They worked well.

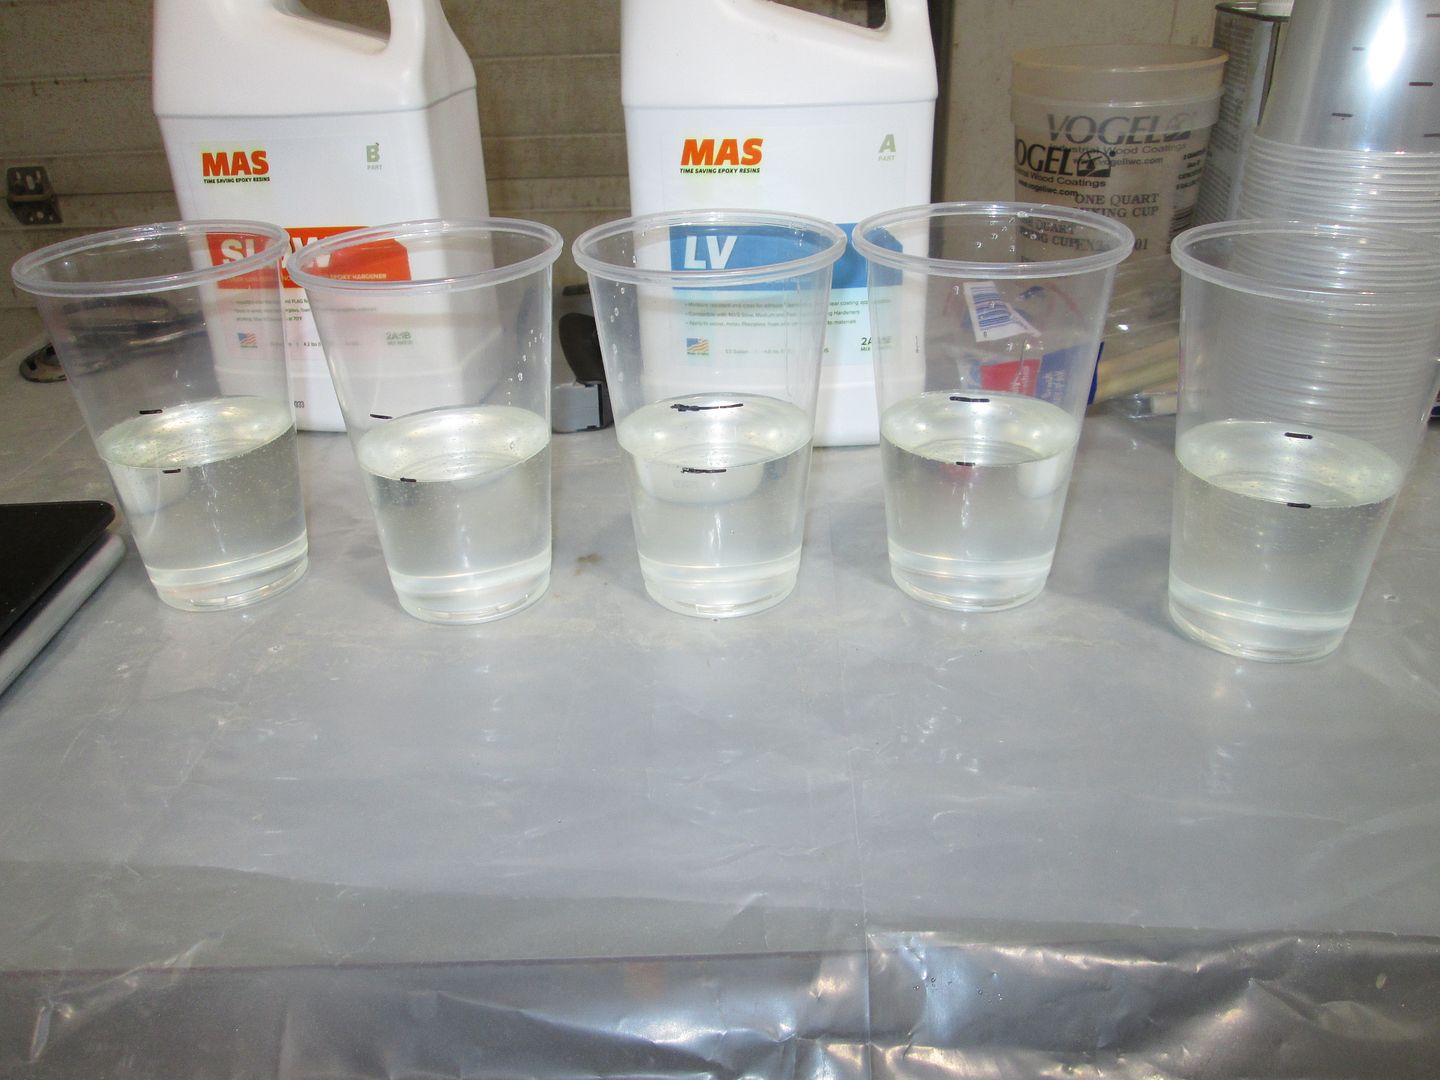
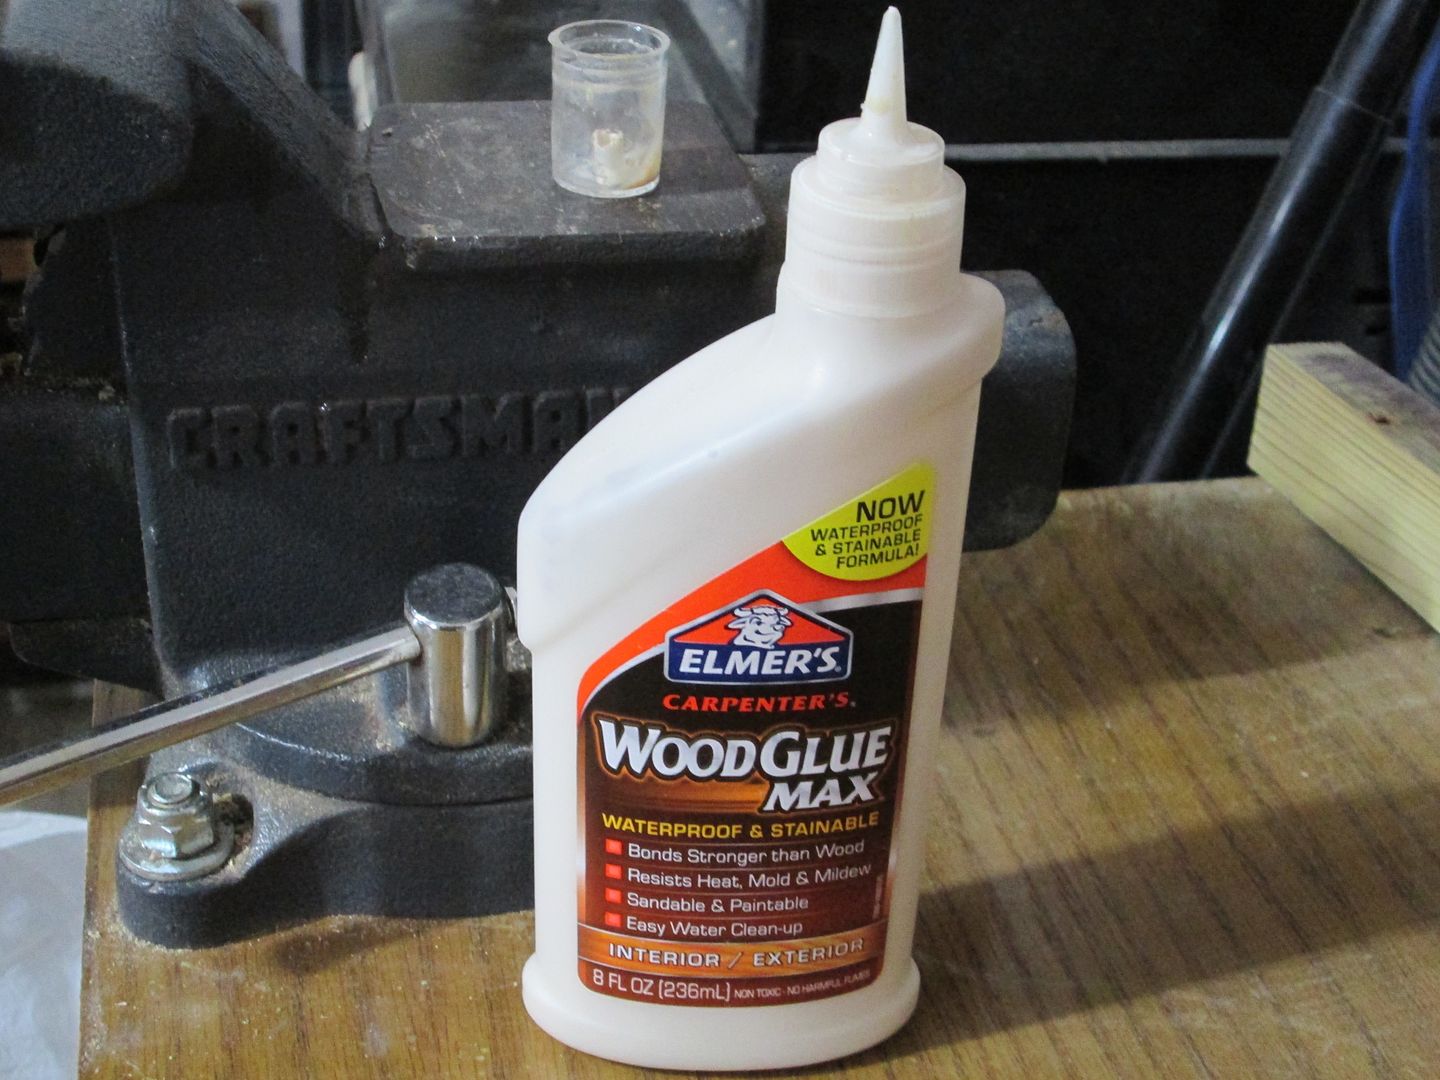
On the Stripper, I used MAS Epoxy. For the Kevlar copy, I'll be using RAKA 127 resin, and 350 Non blush hardener. Both epoxies handled the same in my view. The MAS cures a little harder and sands a little better.


IMG_3877_no31r2szF6uwPFC5oDDBxX.JPG

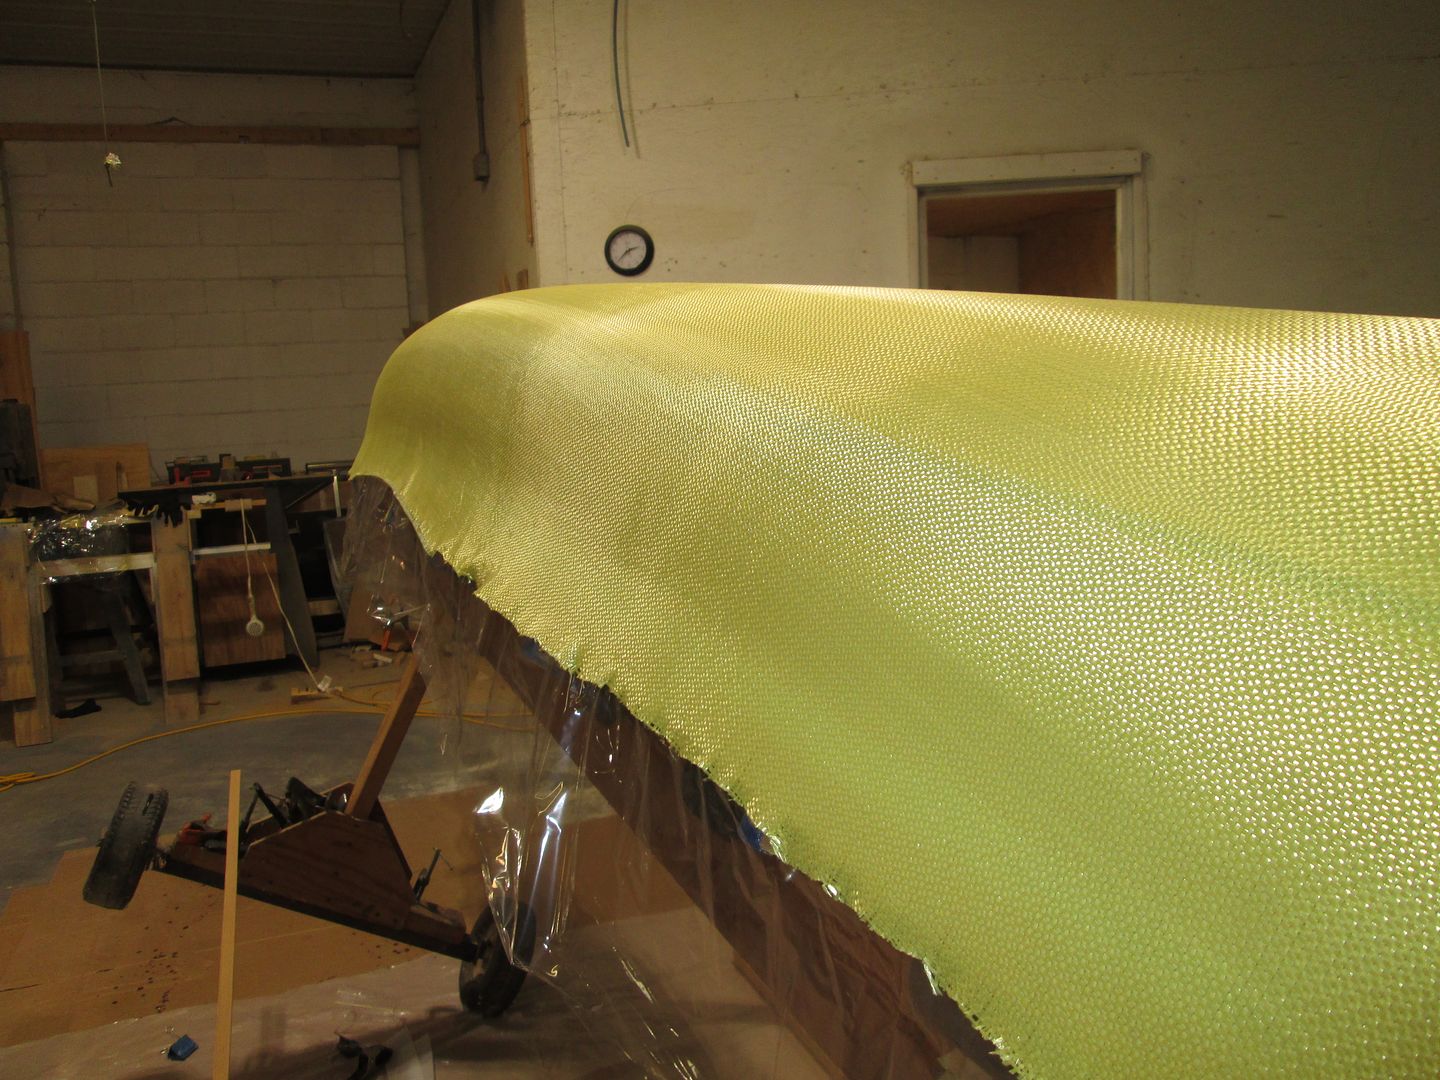
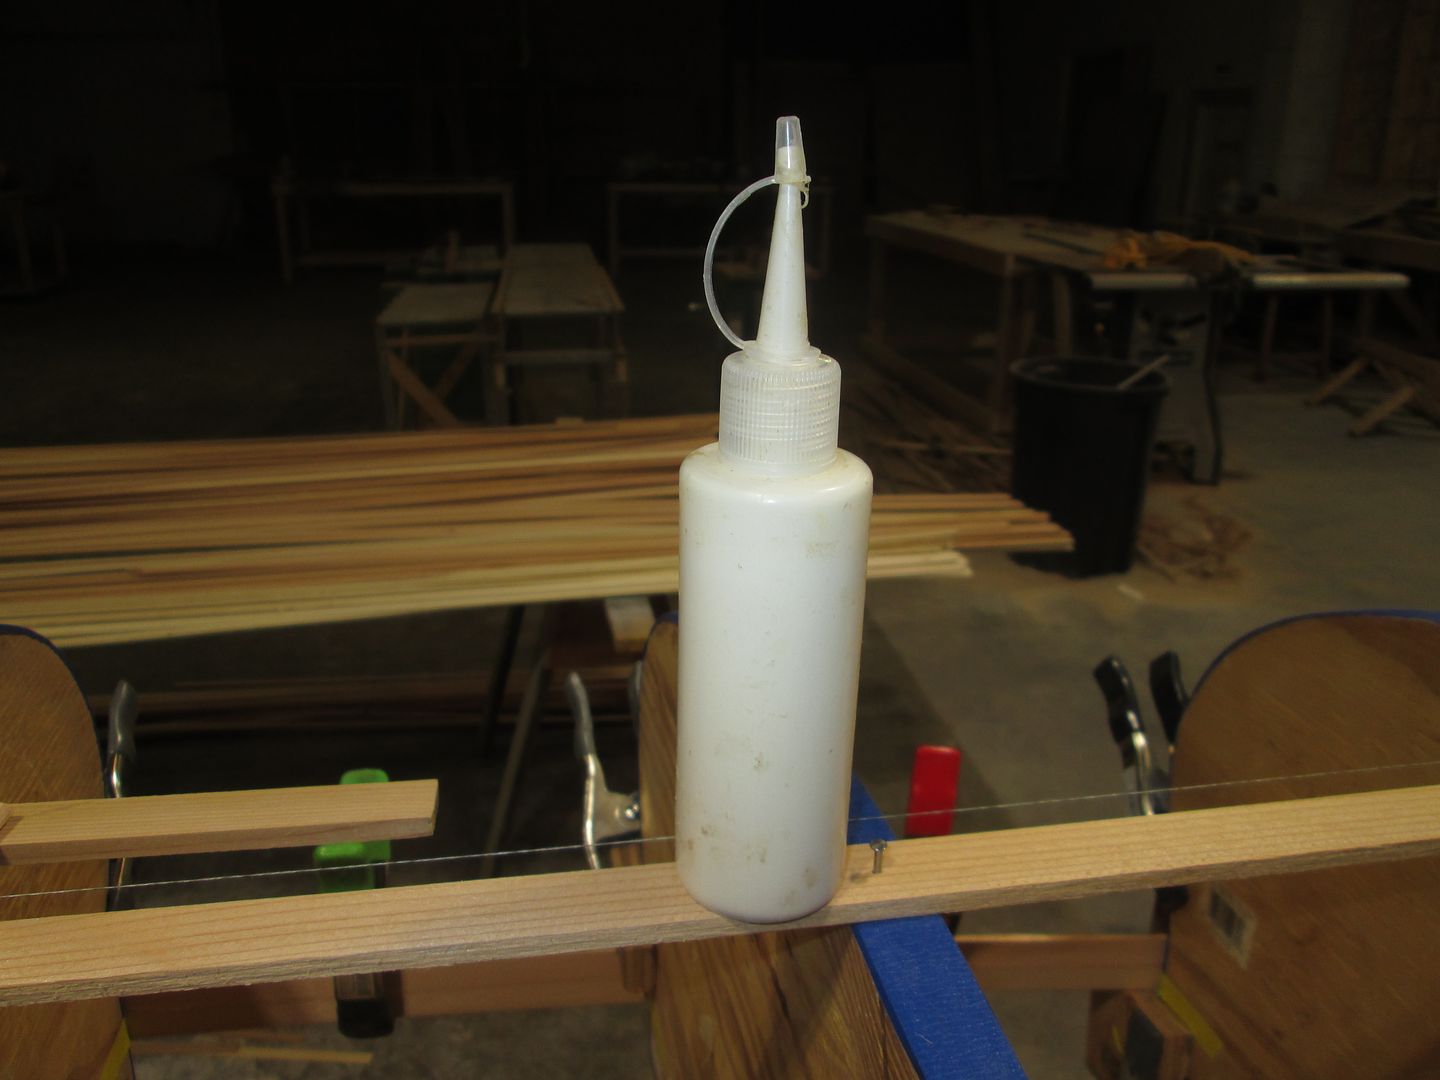
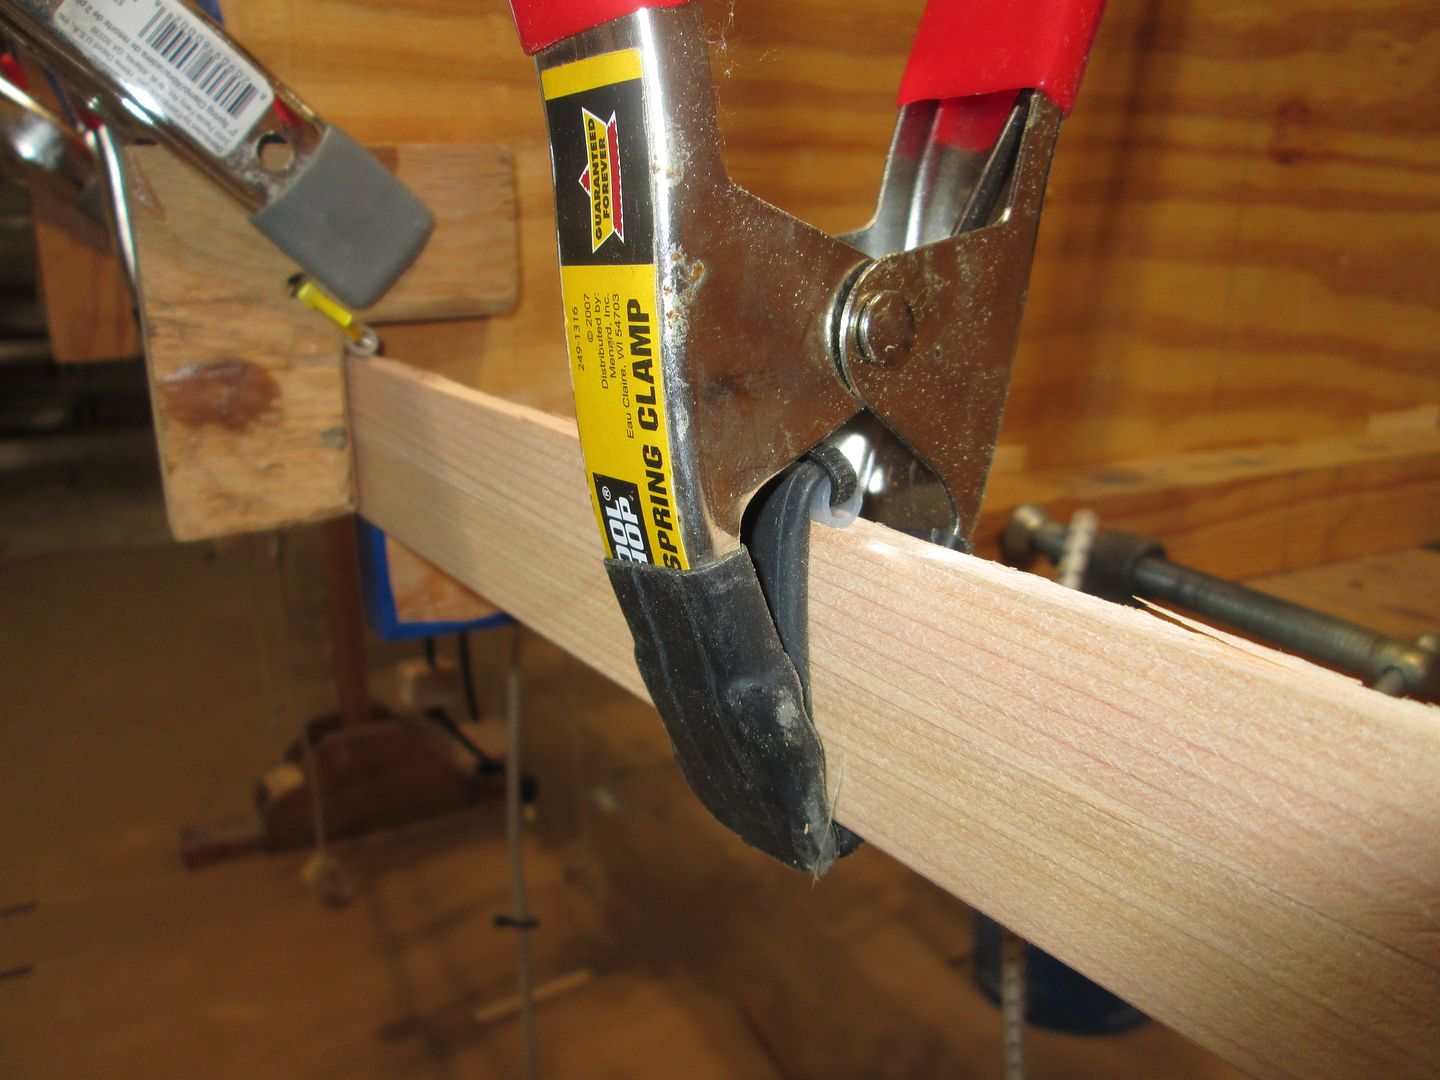
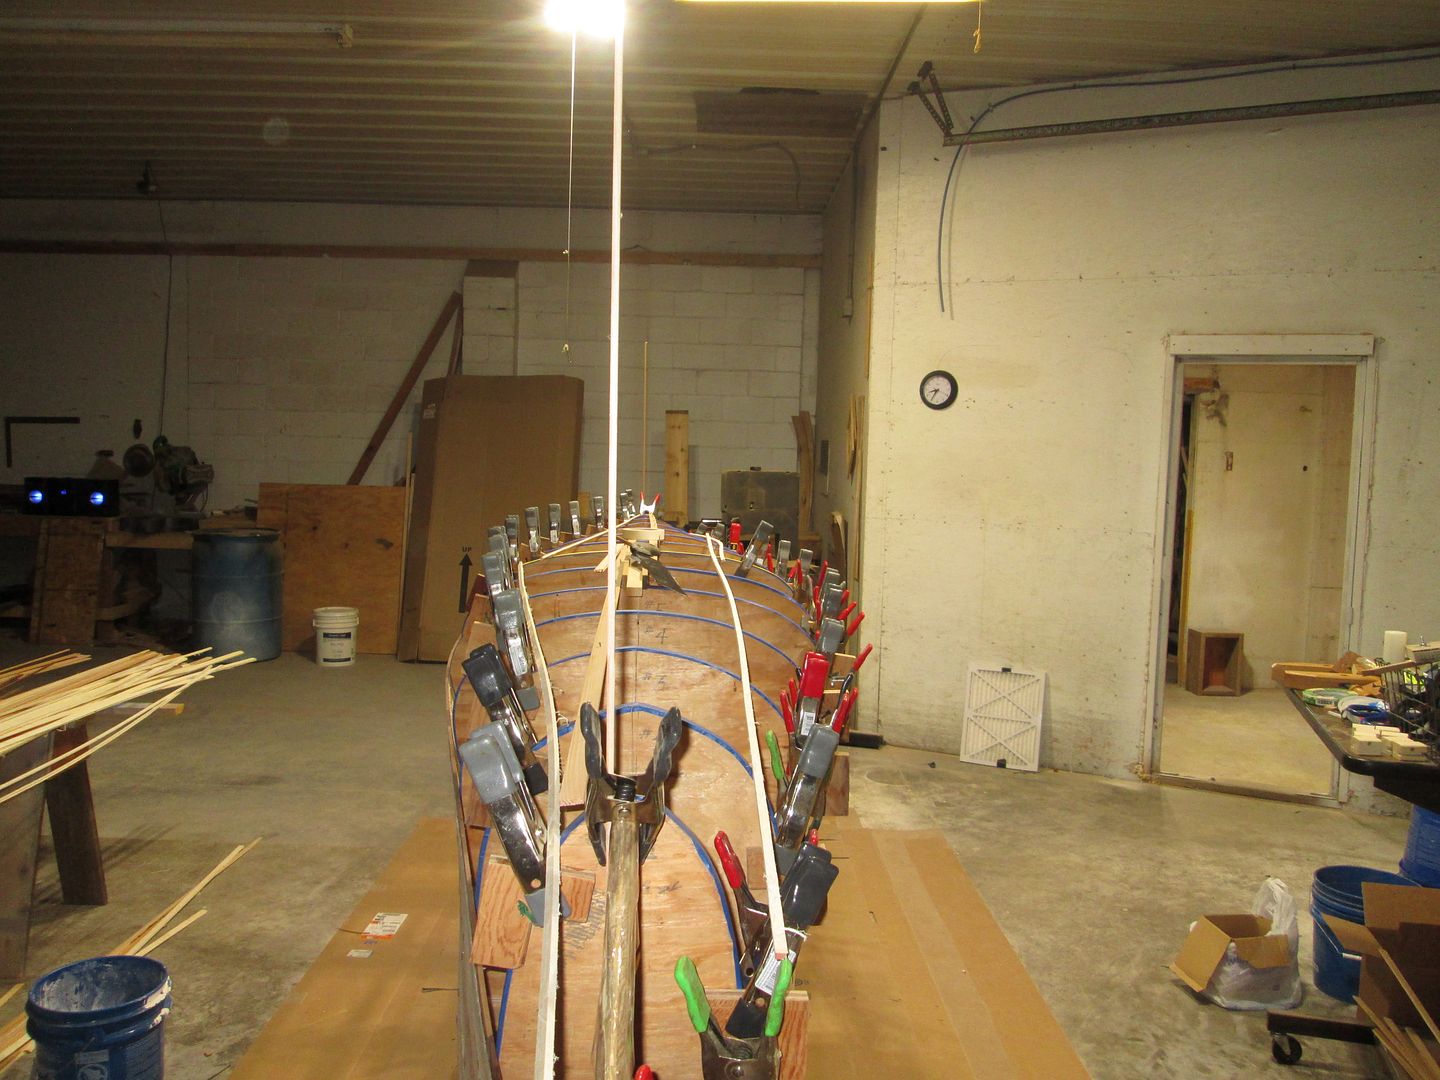
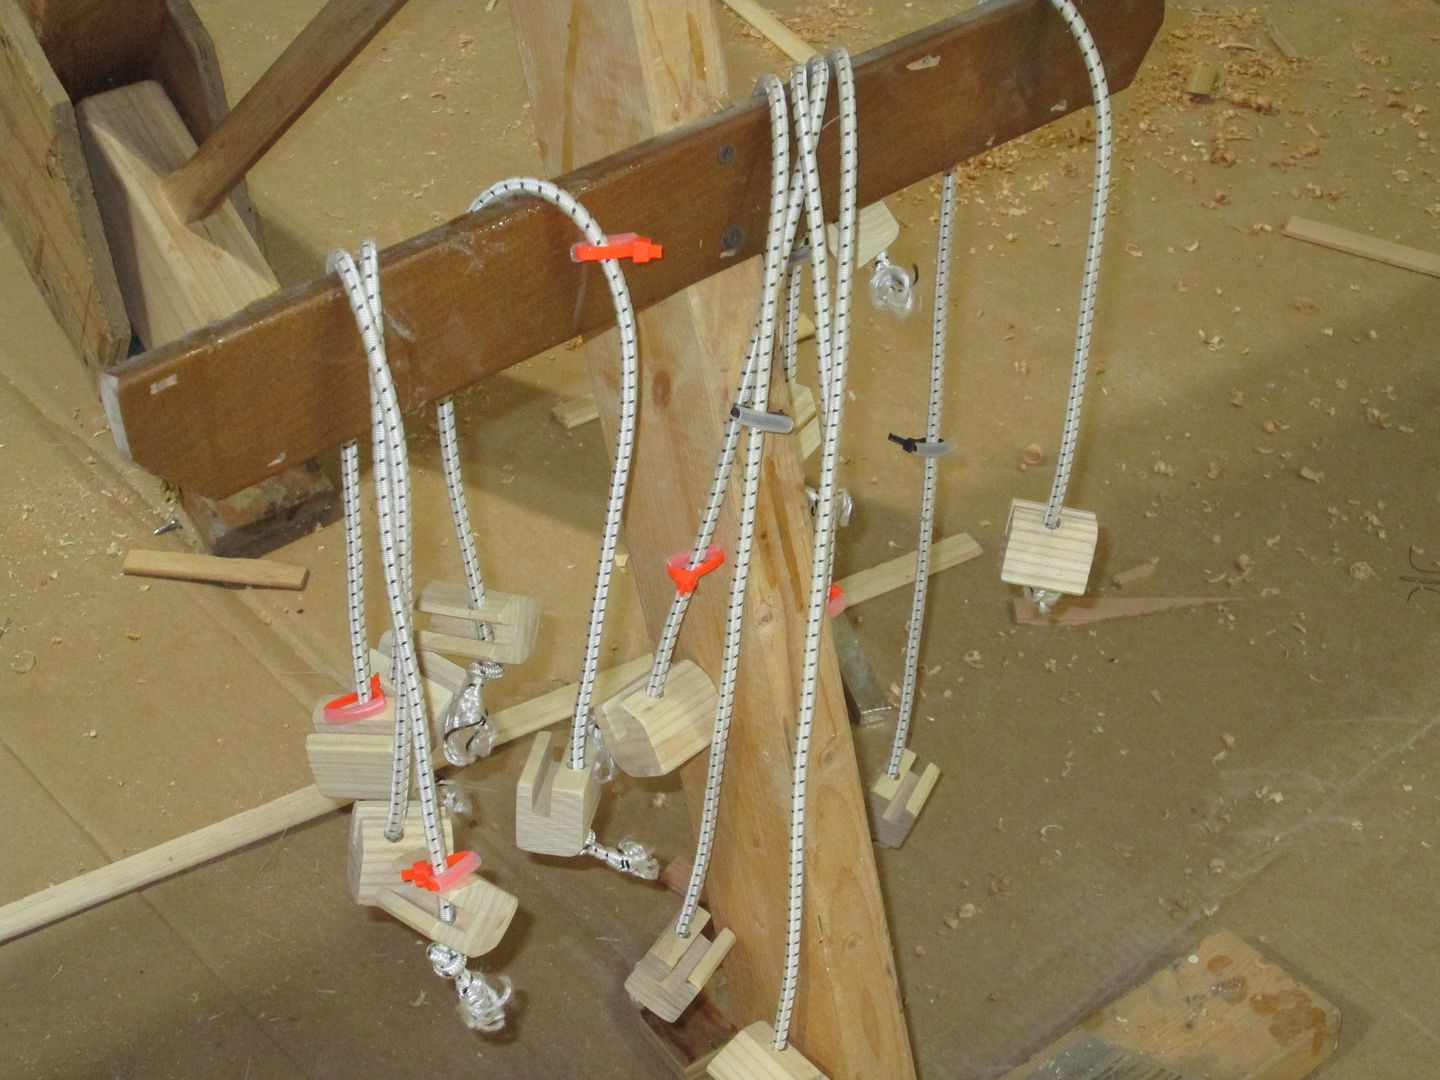
Here is where I I had to come up with an idea on how to keep the kevlar tight to the hull, while I added epoxy.
Gravity with help from some spring clamps.

With the cloth trimmed, and the mold tilted, gravity kept the cloth against the hull.
Another note here ! Partal would eliminate the need for tilting, as the epoxy saturated cloth would stick to the hull !

IMG_3875.JPG

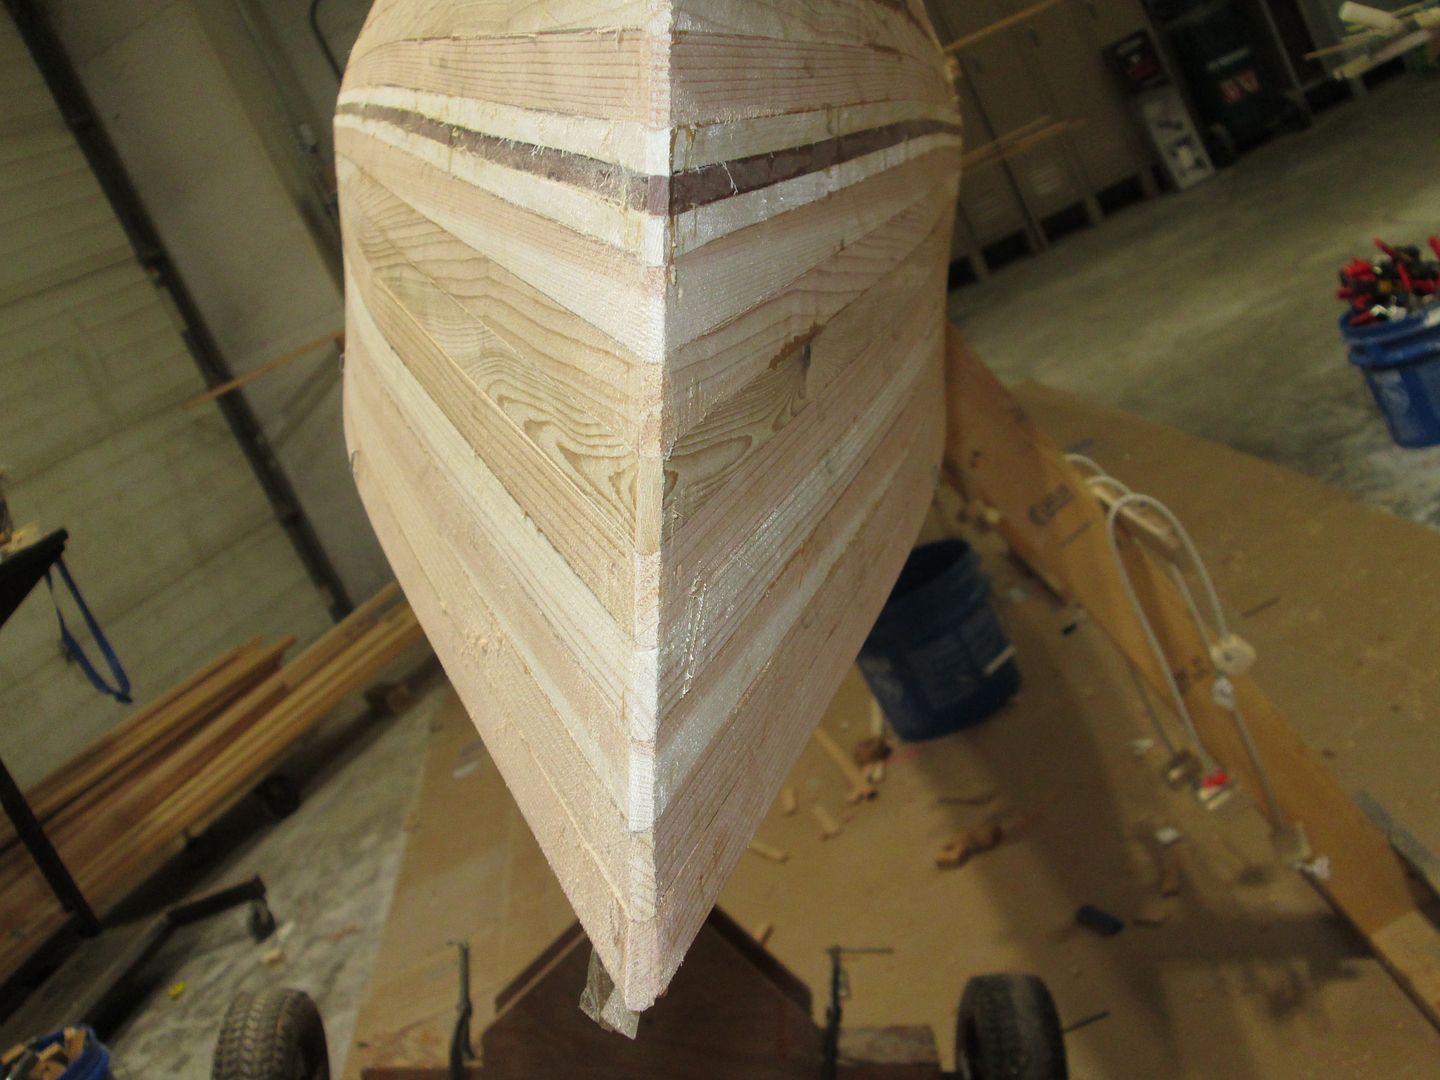
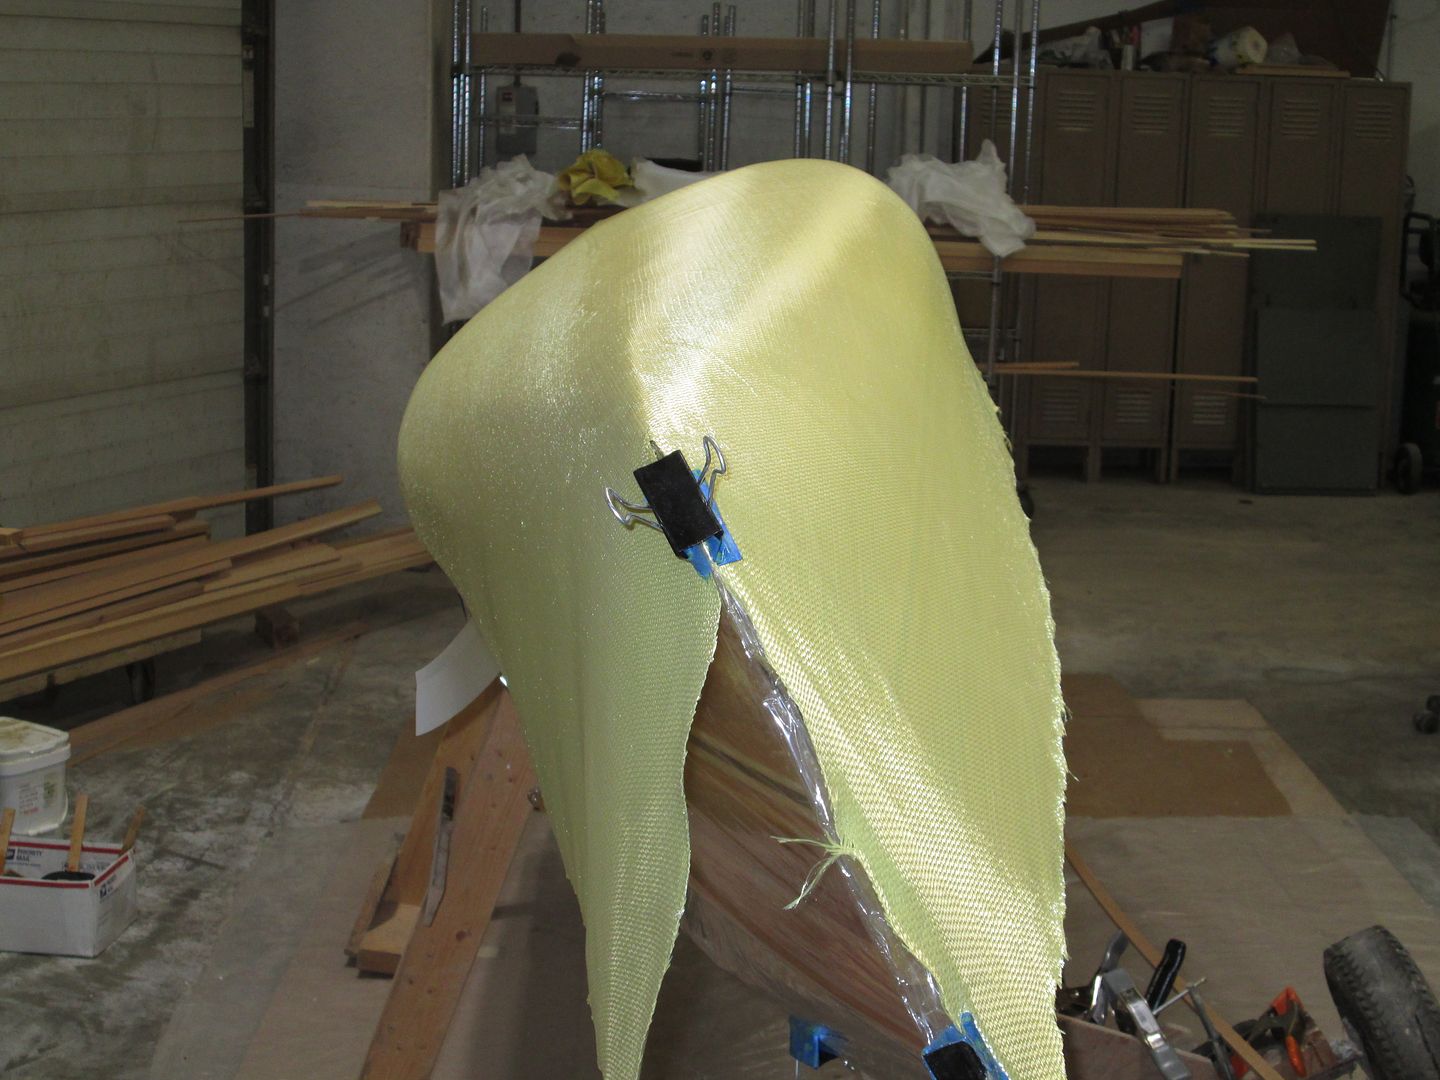
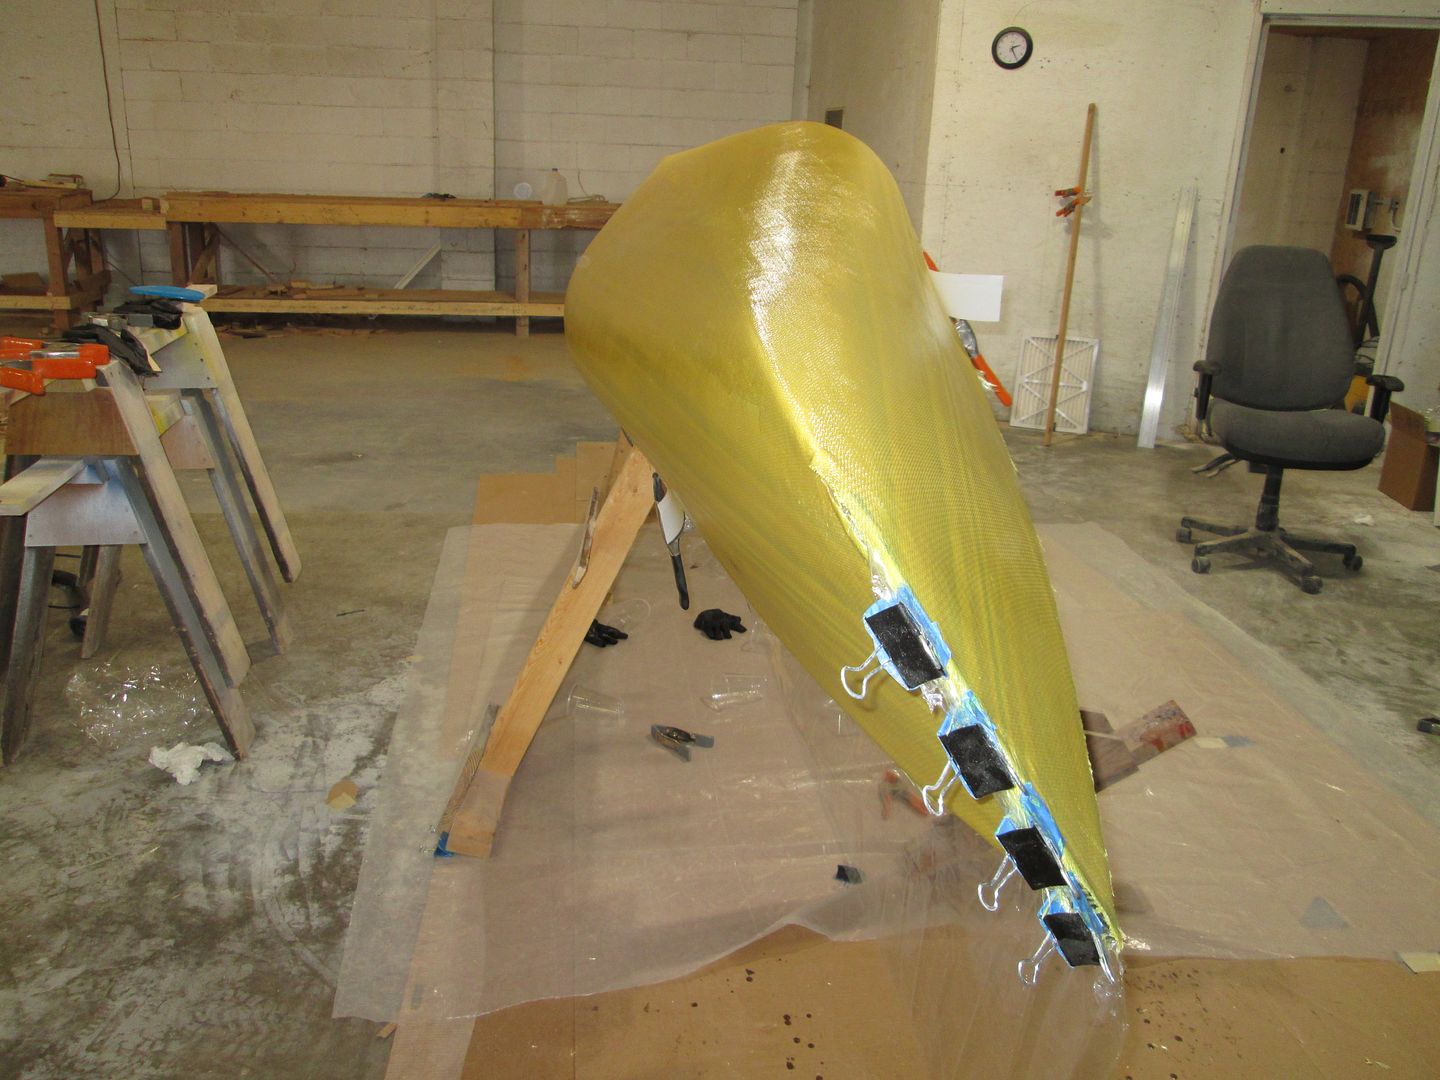
I used a couple of Binder clamps, covered in masking tape, to hold the cloth together at the stems. It's important to extend the Film on the hull, past the stems a little.

IMG_3874_tsLYR6JTWgHcxkTY4GTkBx.JPG


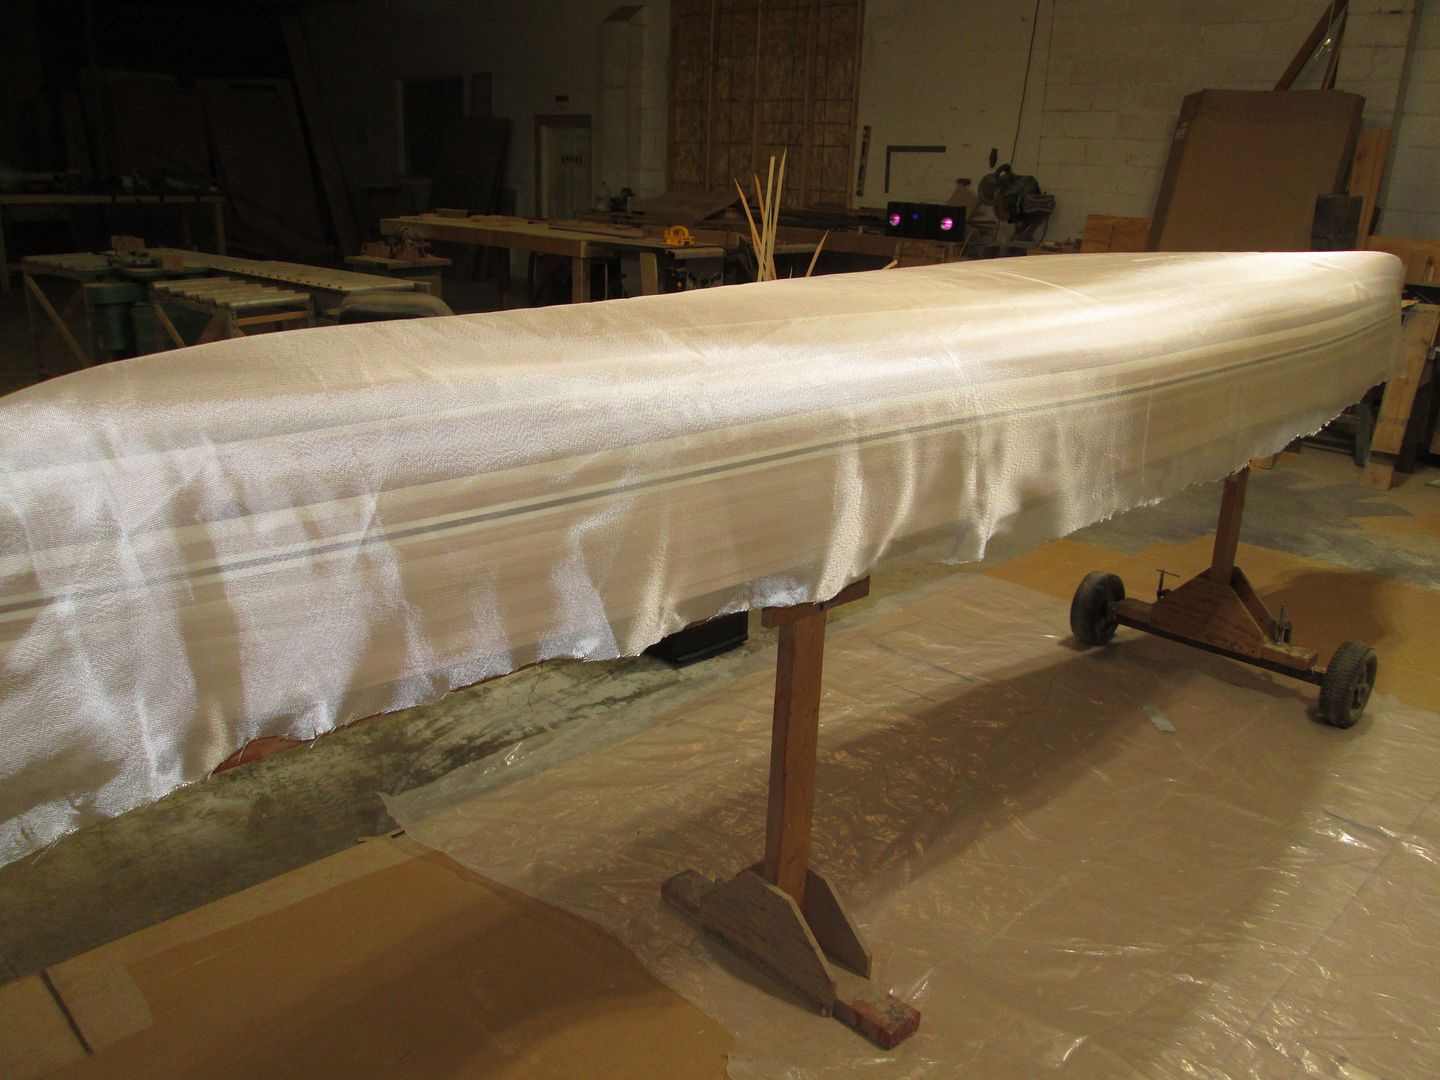
With the Kevlar trimmed, it was time to start adding resin.
I will only wet out one half of the hull. For reference, the East half.

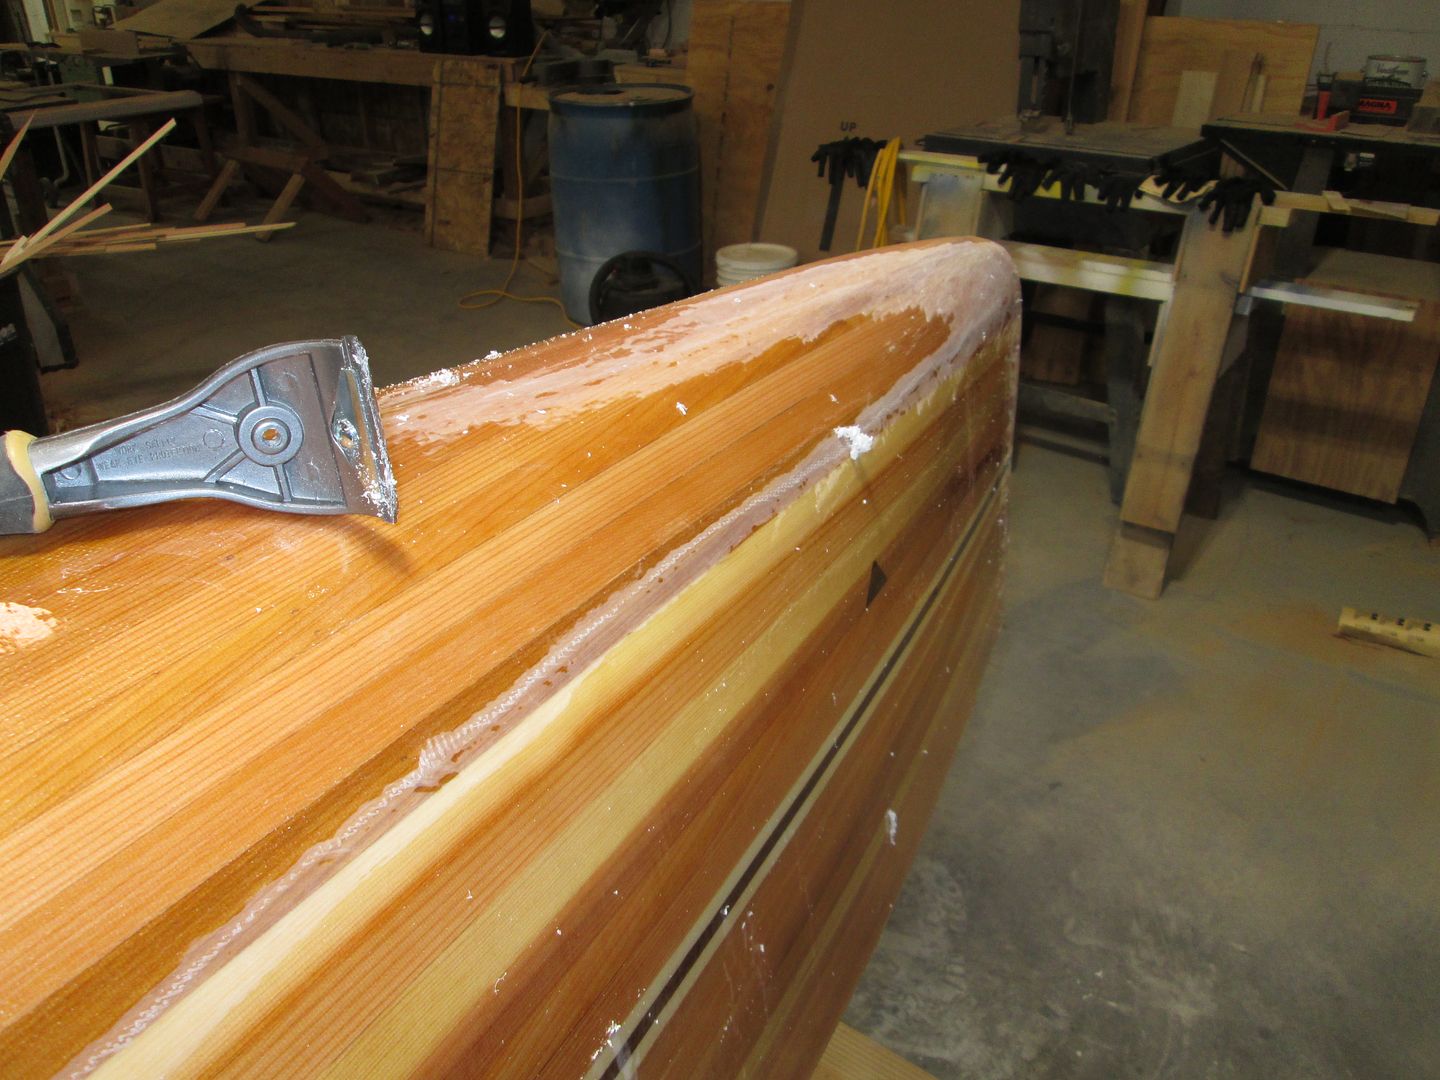
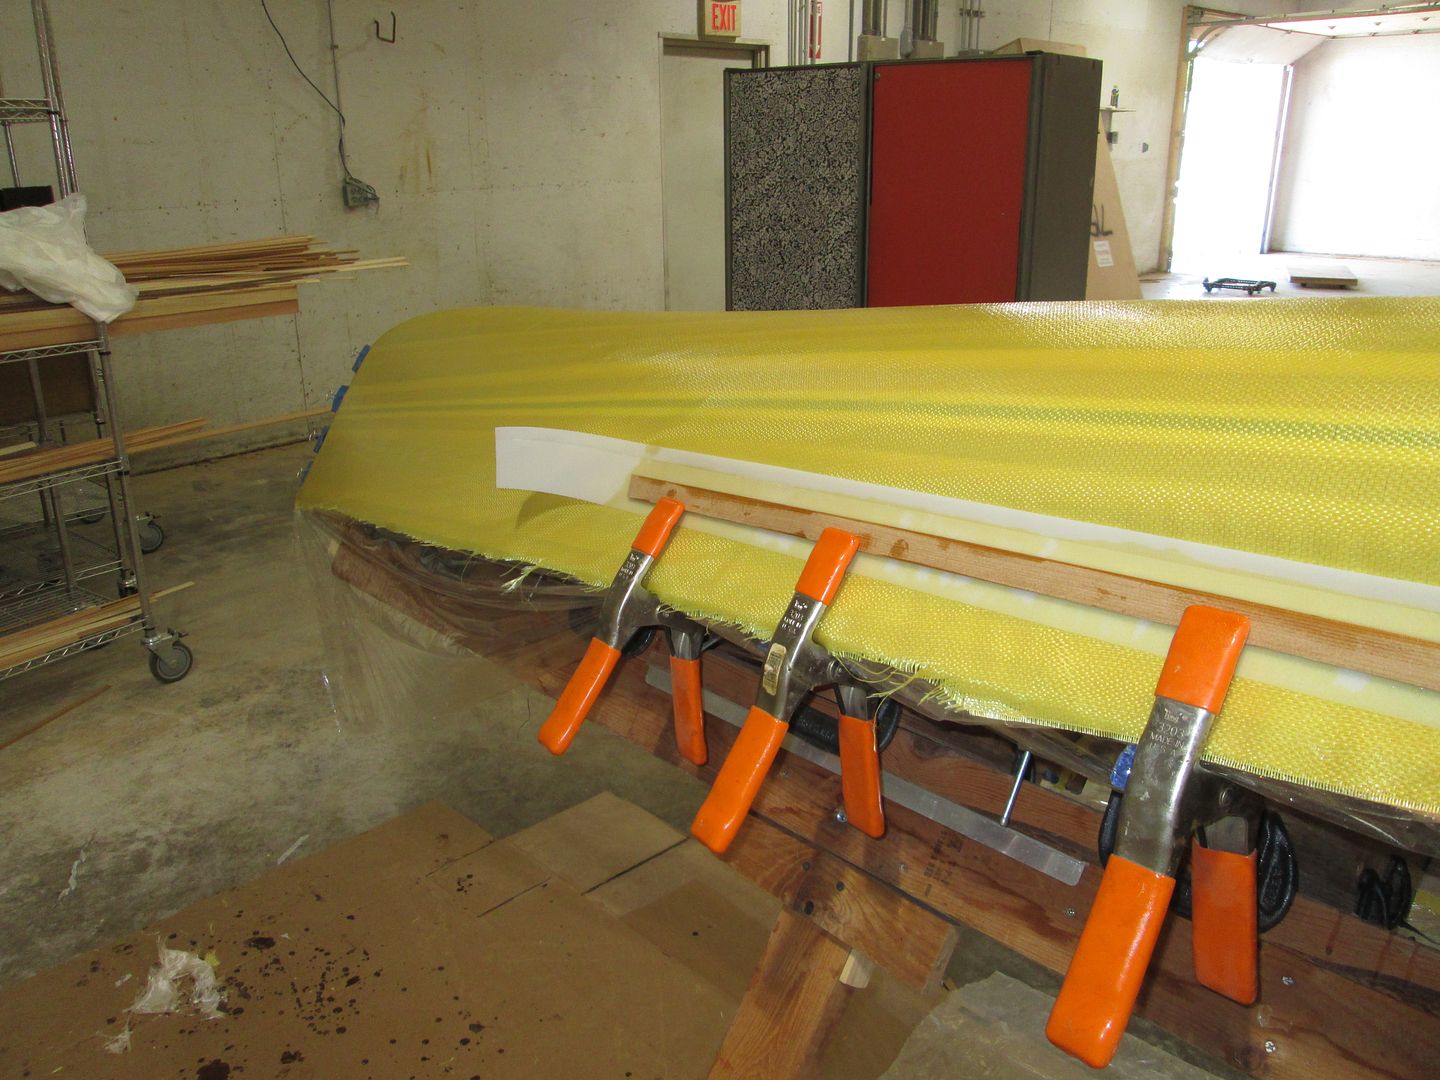
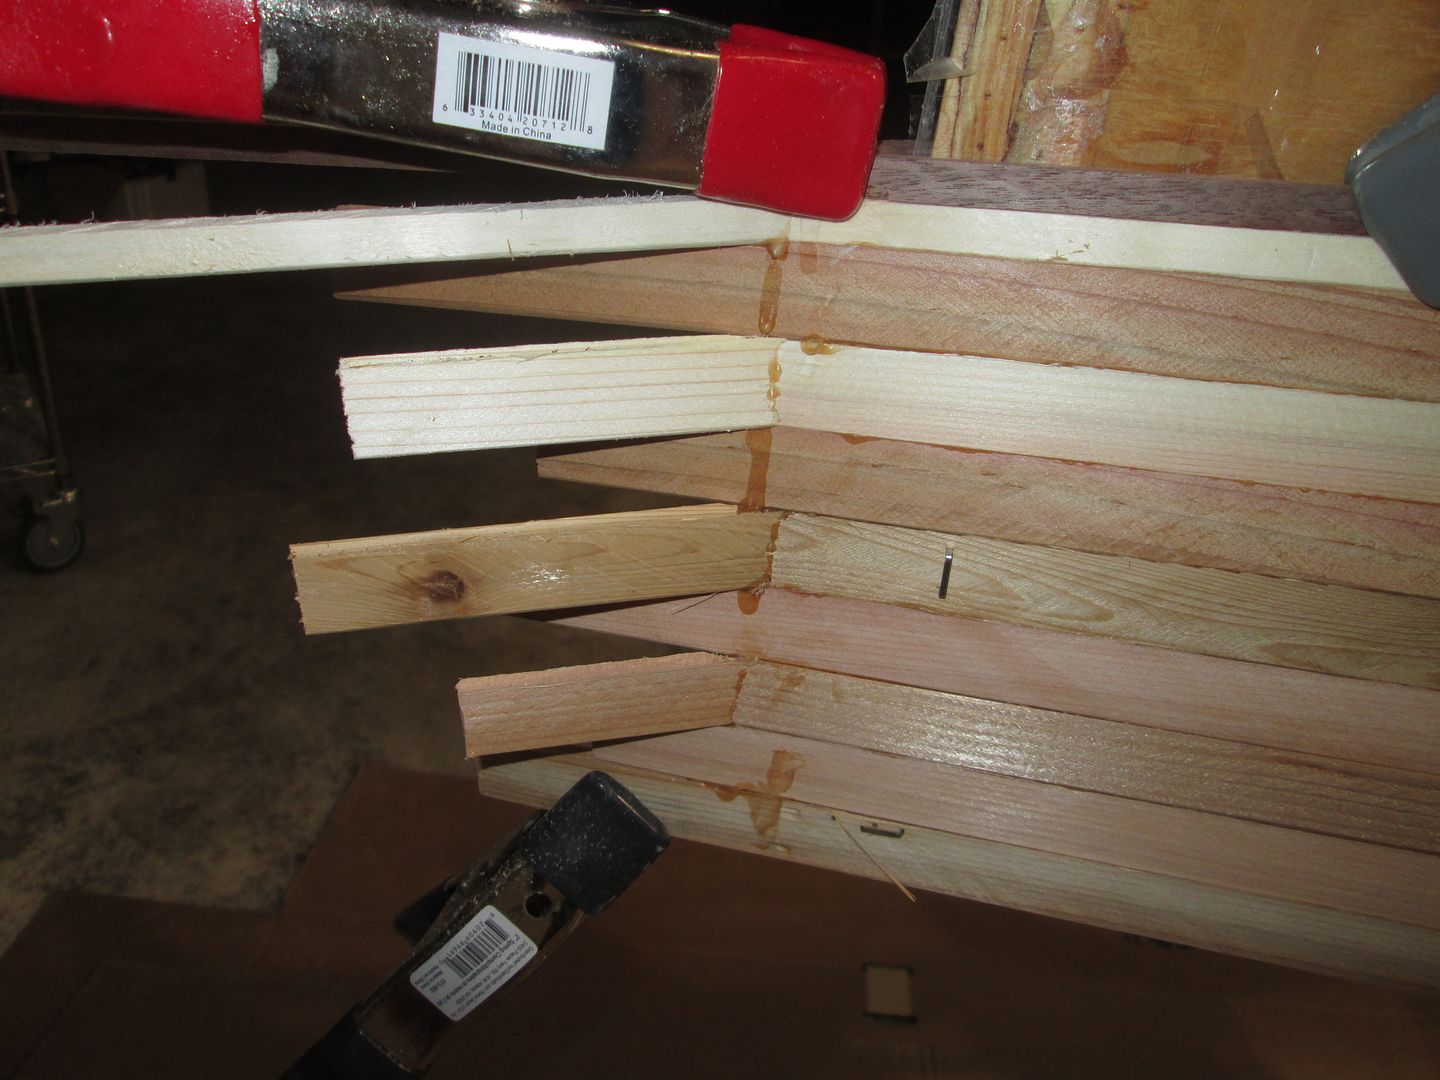
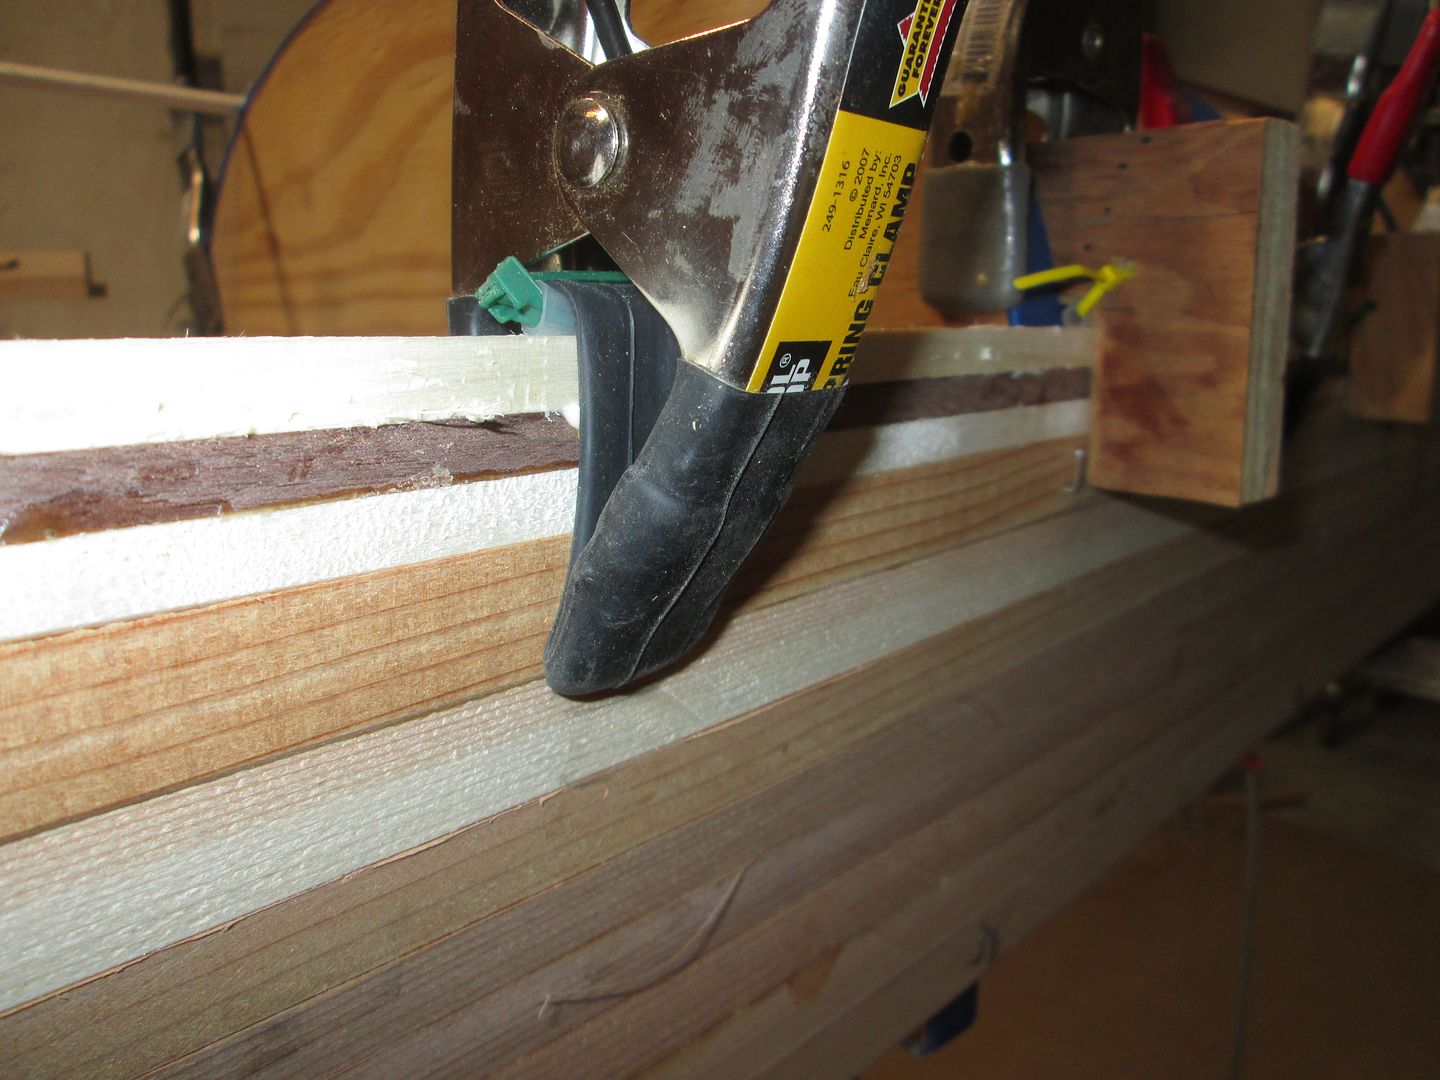
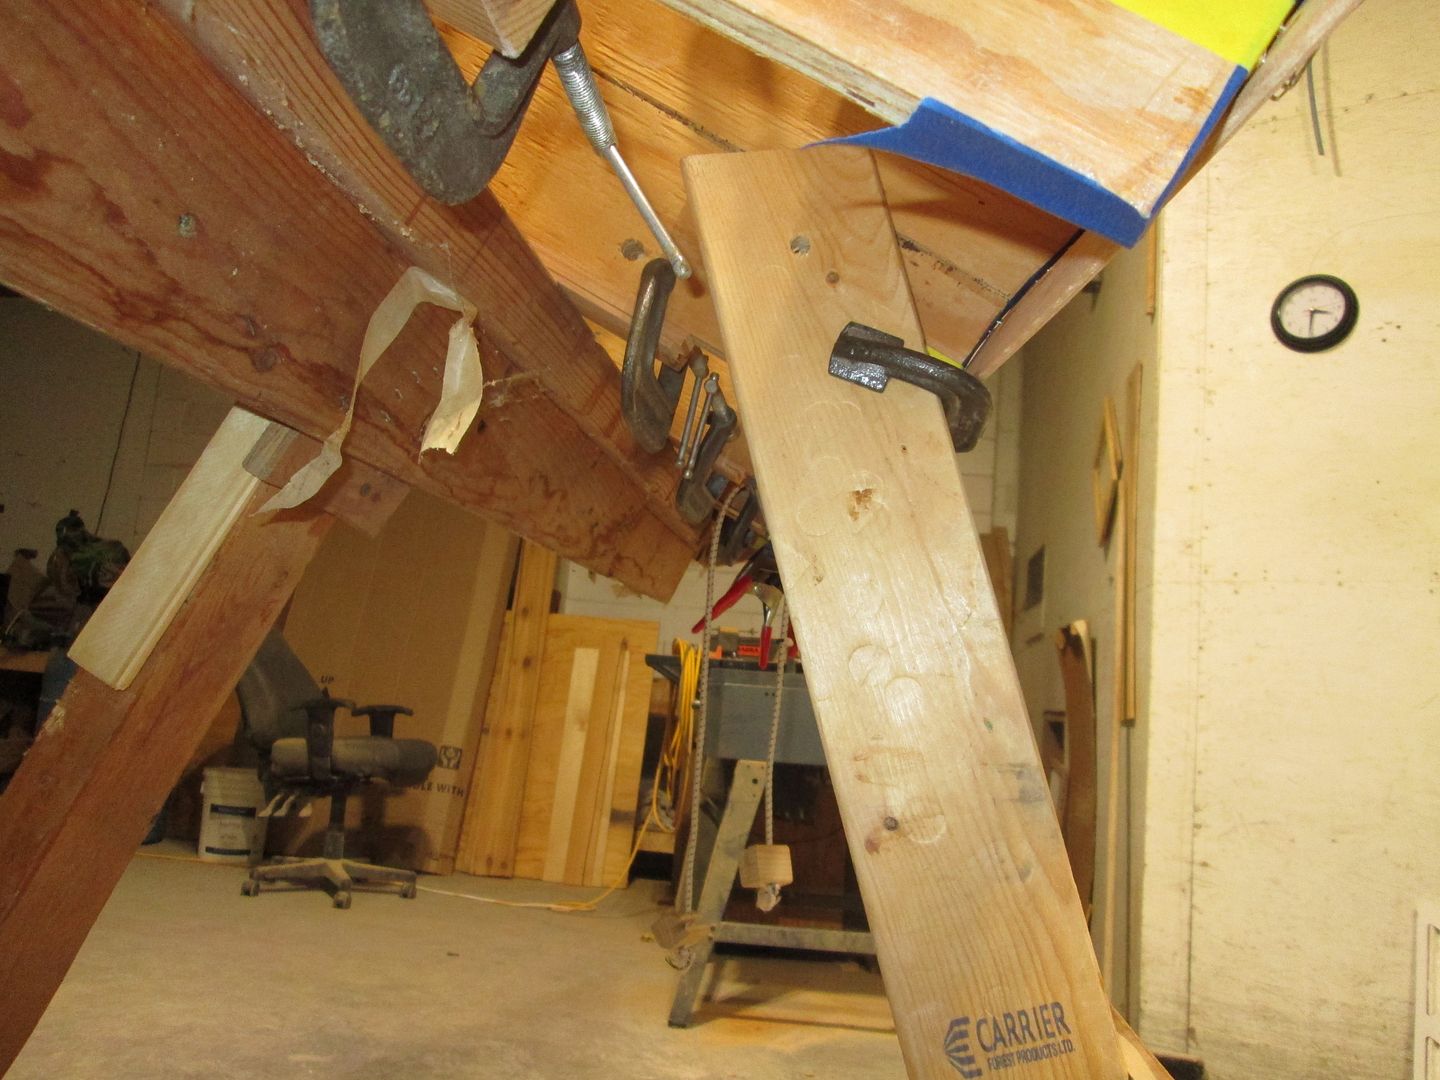
After the resin has set, on the East side, about six hours, I clamp plastic edging, and a strip of wood to hold the wetted cloth, tight to the hull, as I tilt the mold to the other side, to wet it out.
I wish I had taken more photos !
Here I'm ready to wet out the West side.

IMG_3885.JPG


Now some may worry about the bond between the two sides ? But I found no problems ! Remember I will be adding more layers to the outside, plus the insert and more layers.

Here the West sided is wetted, and left tilted, to cure over night.

IMG_3890.JPG

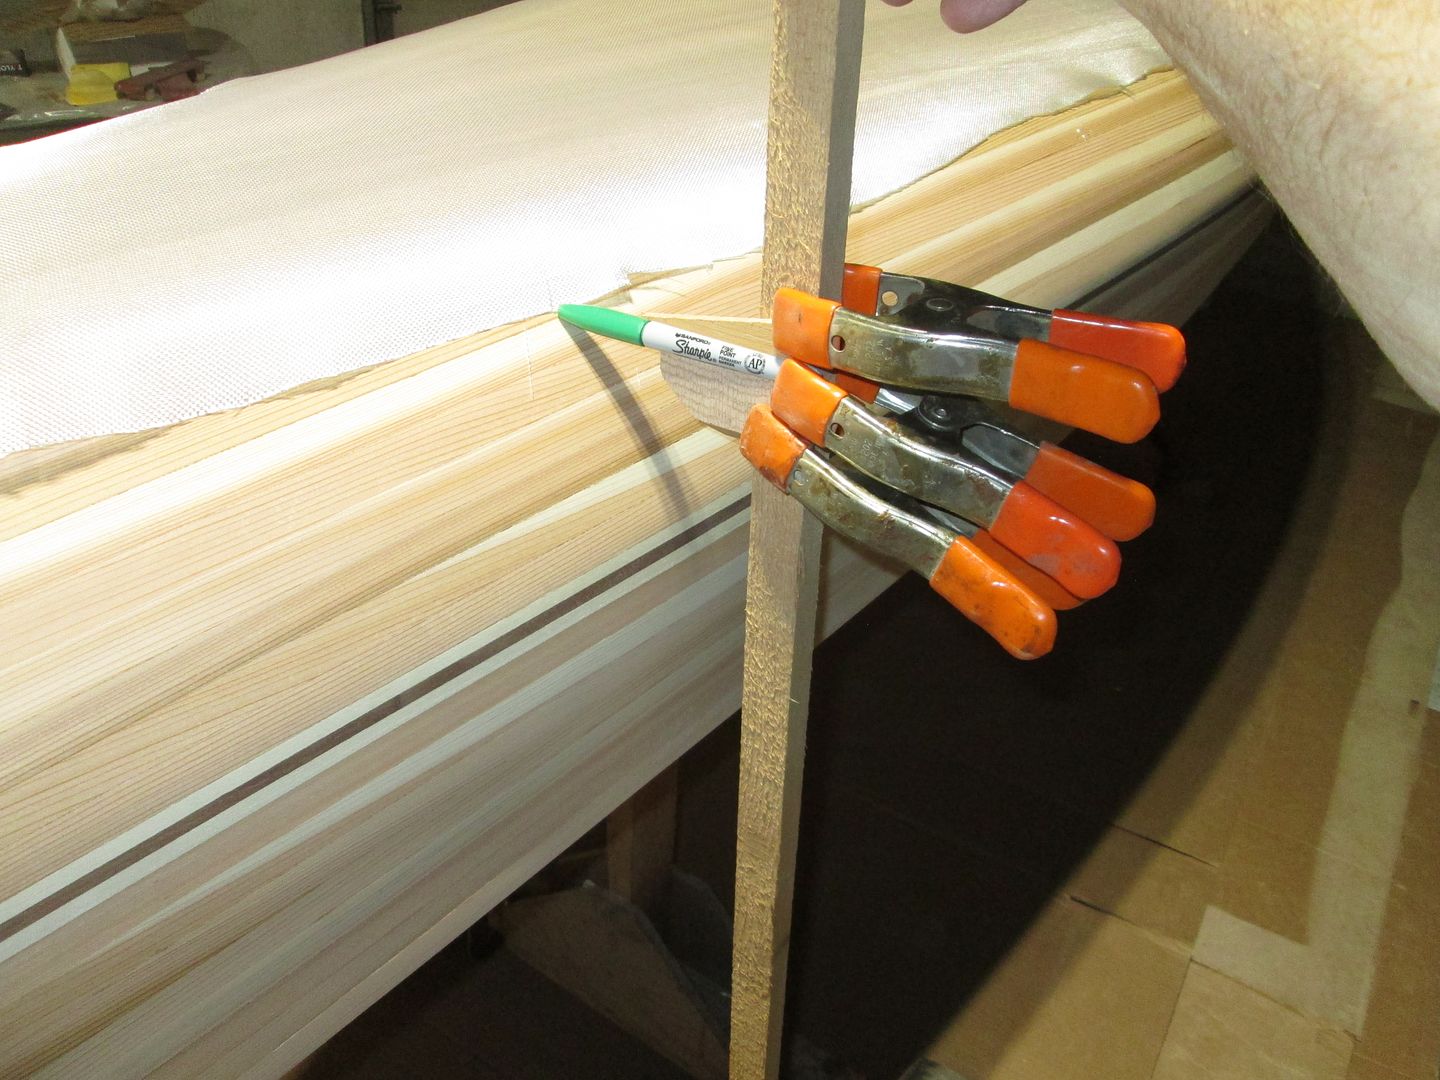
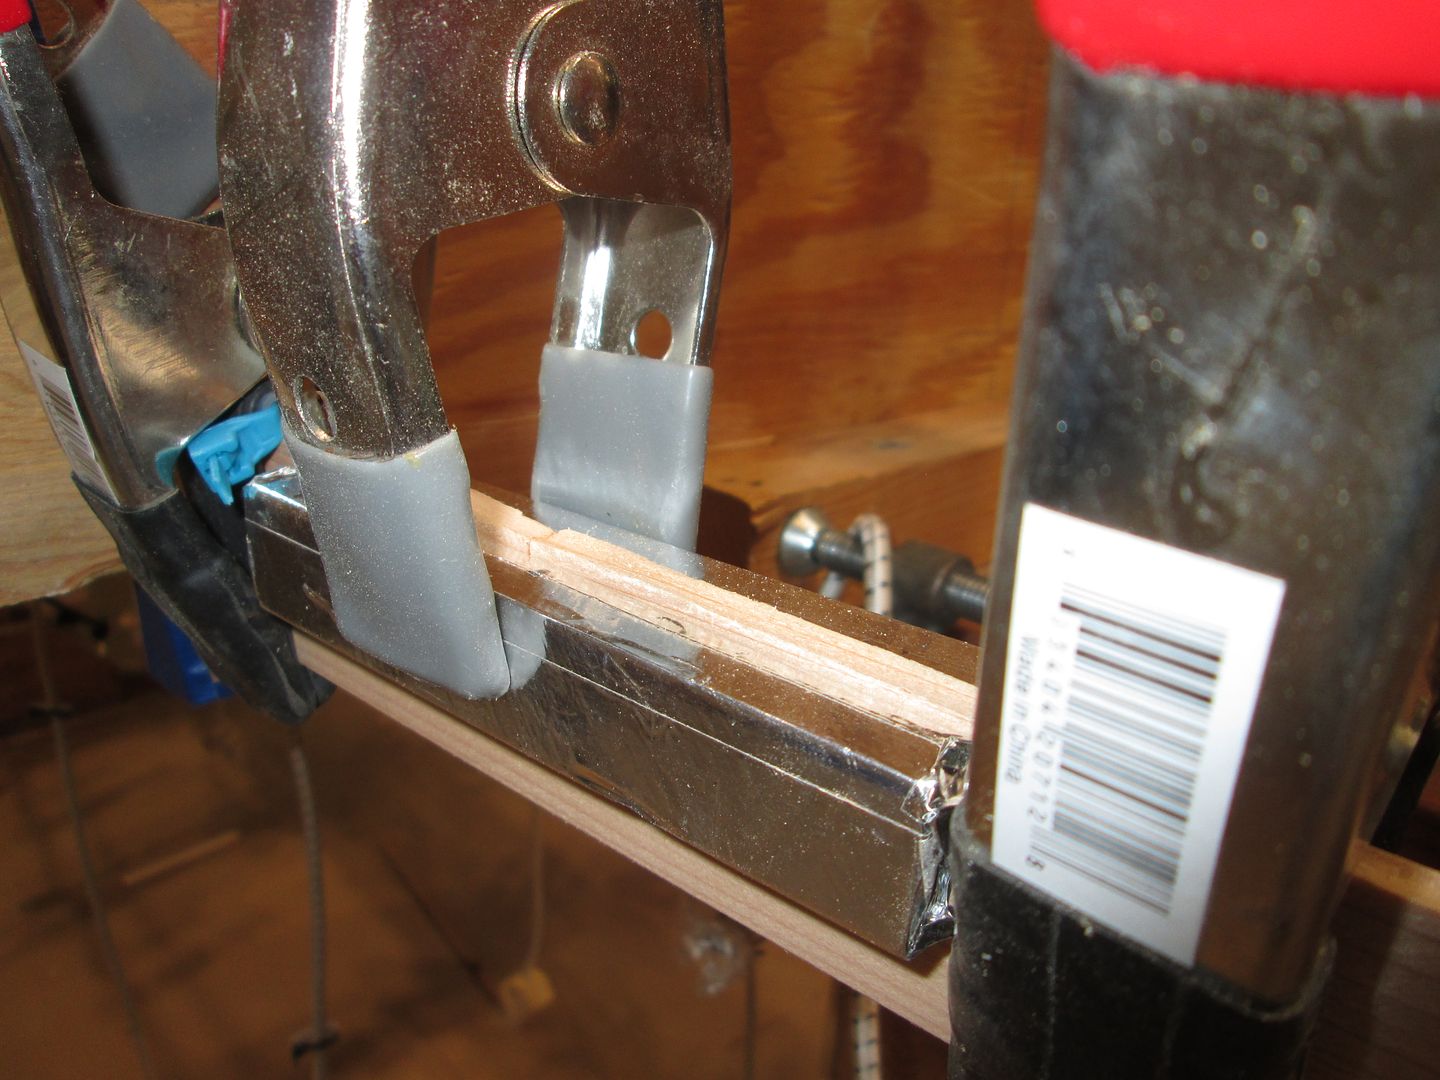
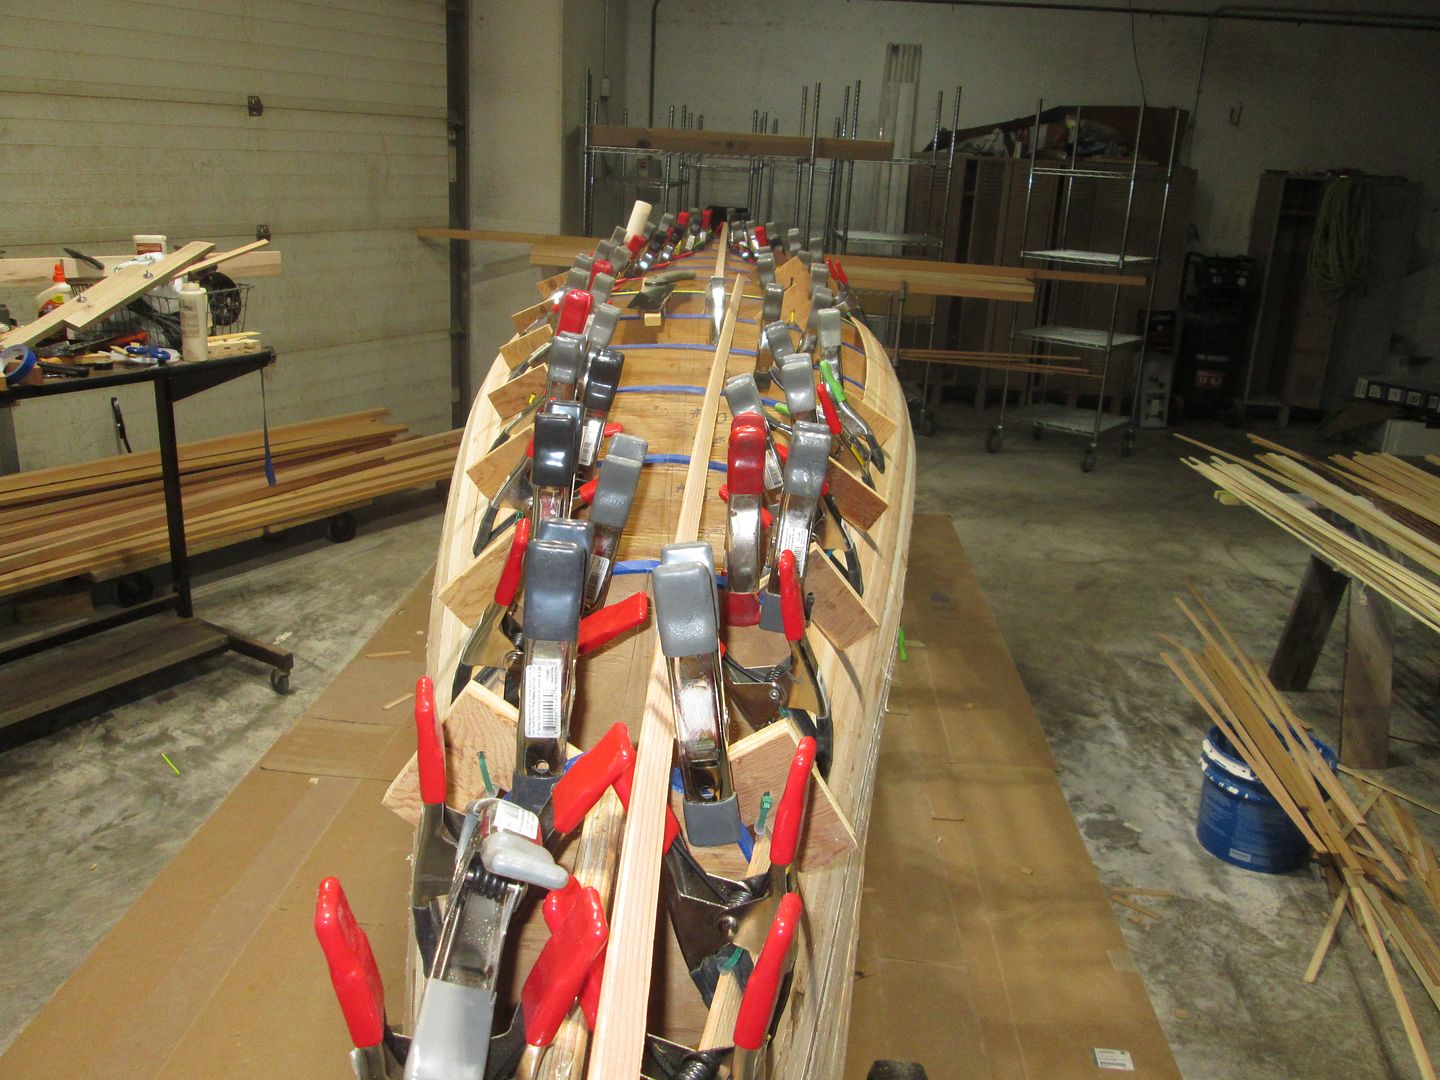
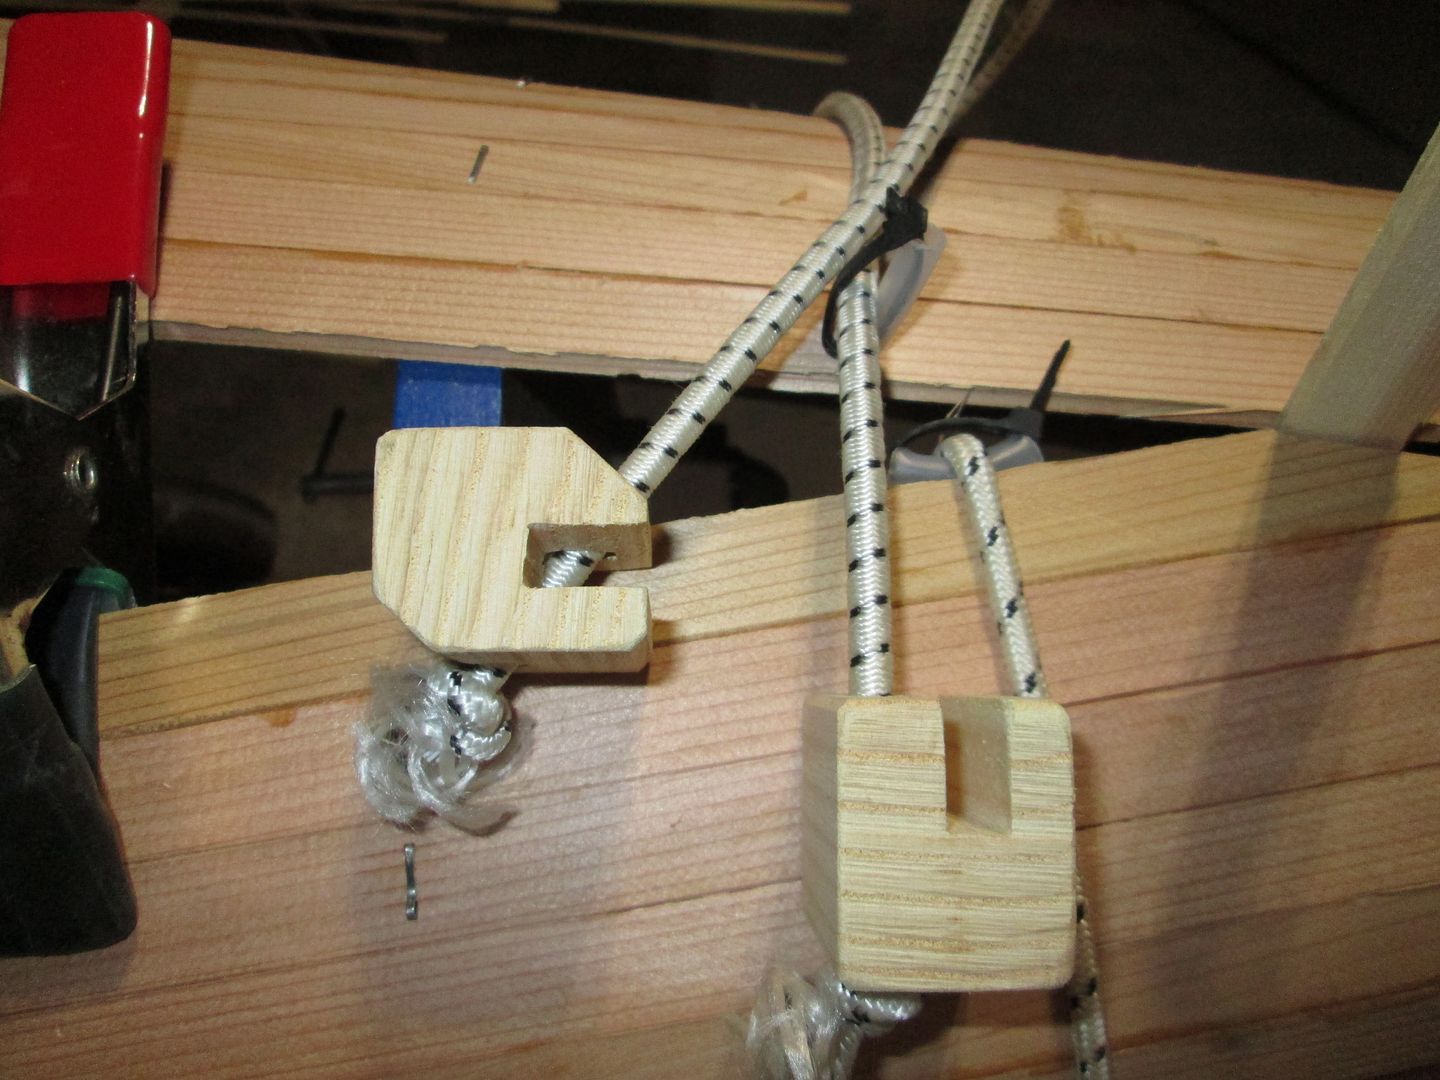
A pic of the clamps holding the Kevlar while the epoxy cures.

IMG_3886.JPG

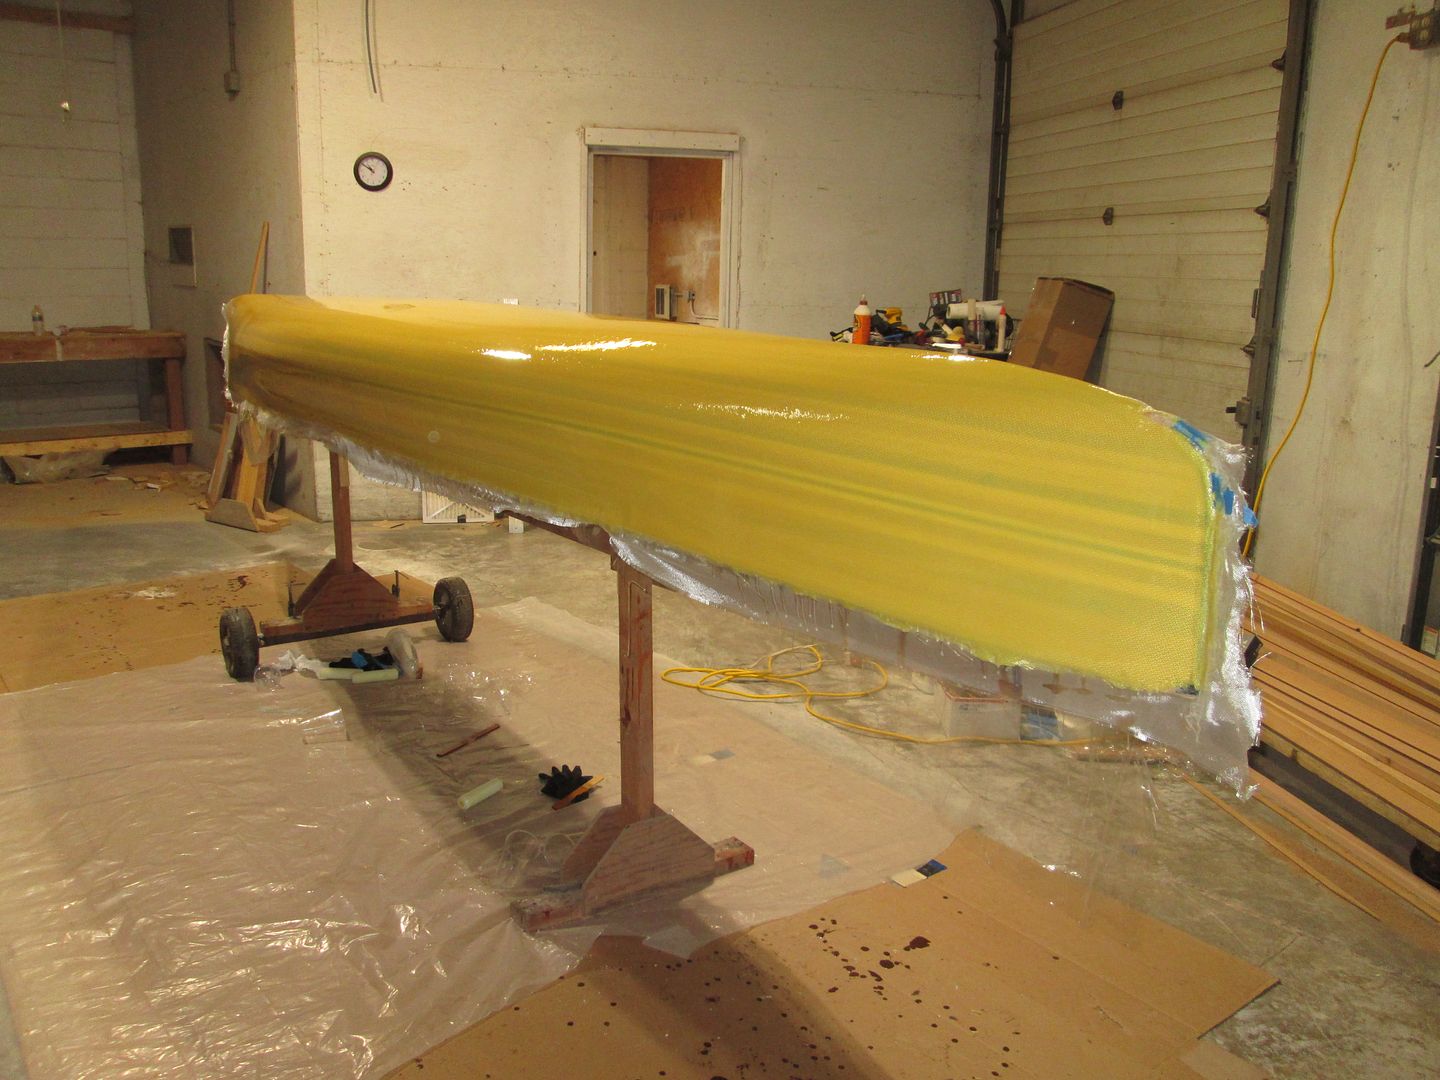
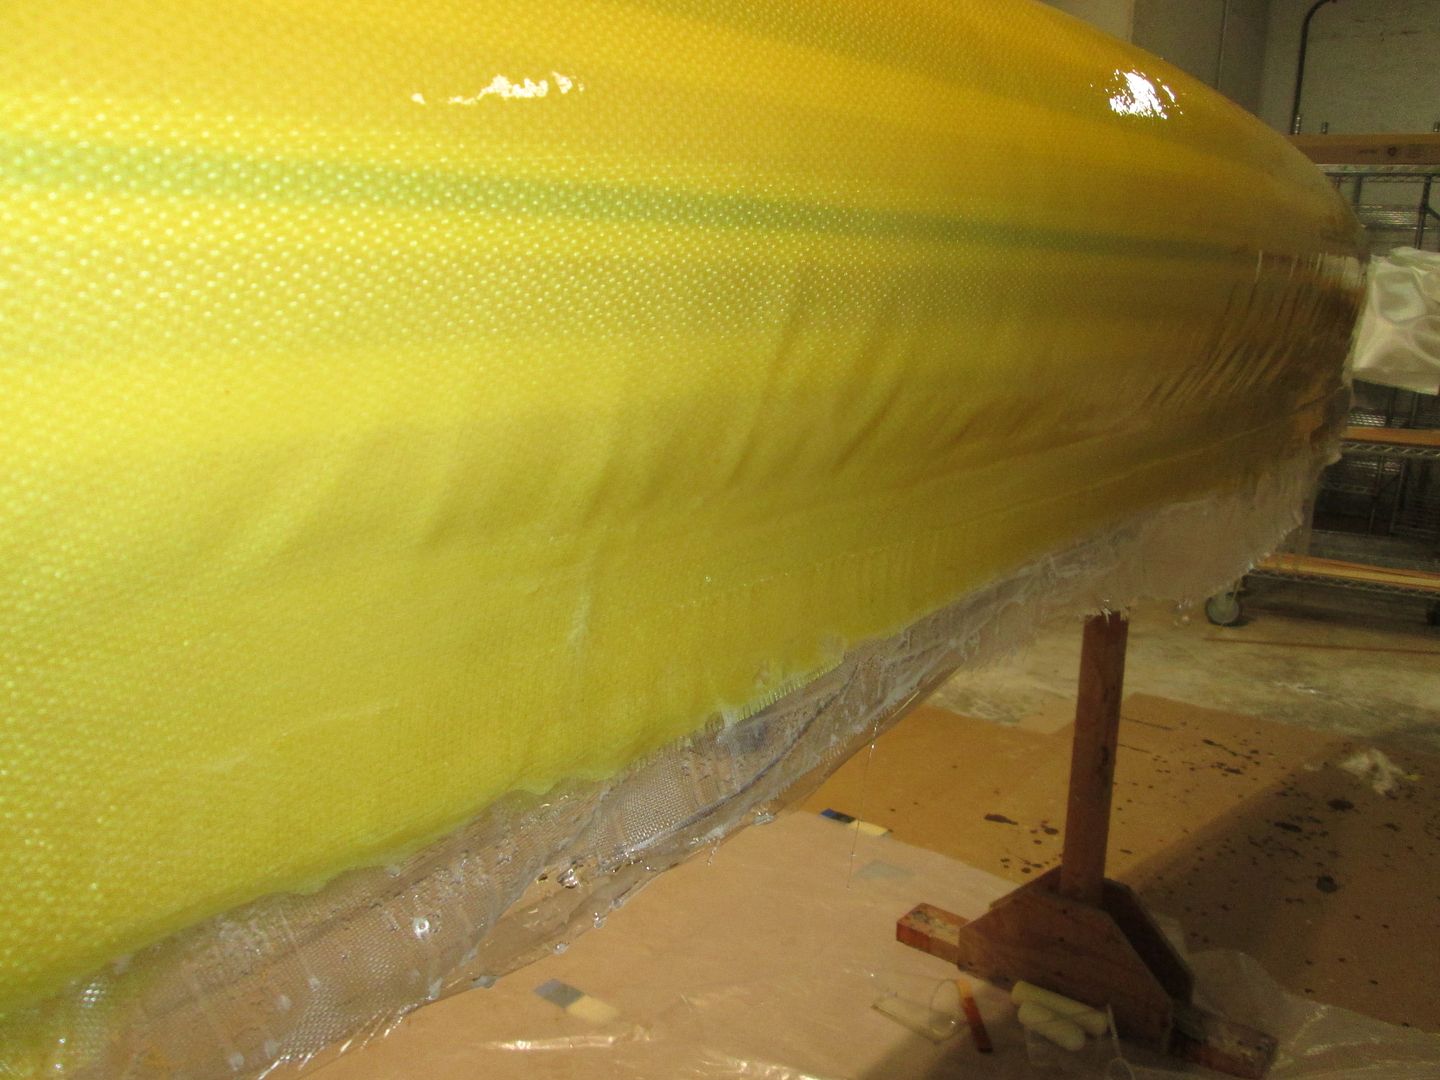
The next day, I set the mold back to level, The epoxy has cure sufficiently enough that the Kevlar stays relatively tight to the hull. At this point, I add a layer of 4 oz S-glass.

IMG_3897.JPG


Six hours after that, on goes a layer of 6 oz E-glass, just over the Football, up to about the 3" waterline. I know I should have used S-glass, but I didn't have enough.

IMG_3910.JPG


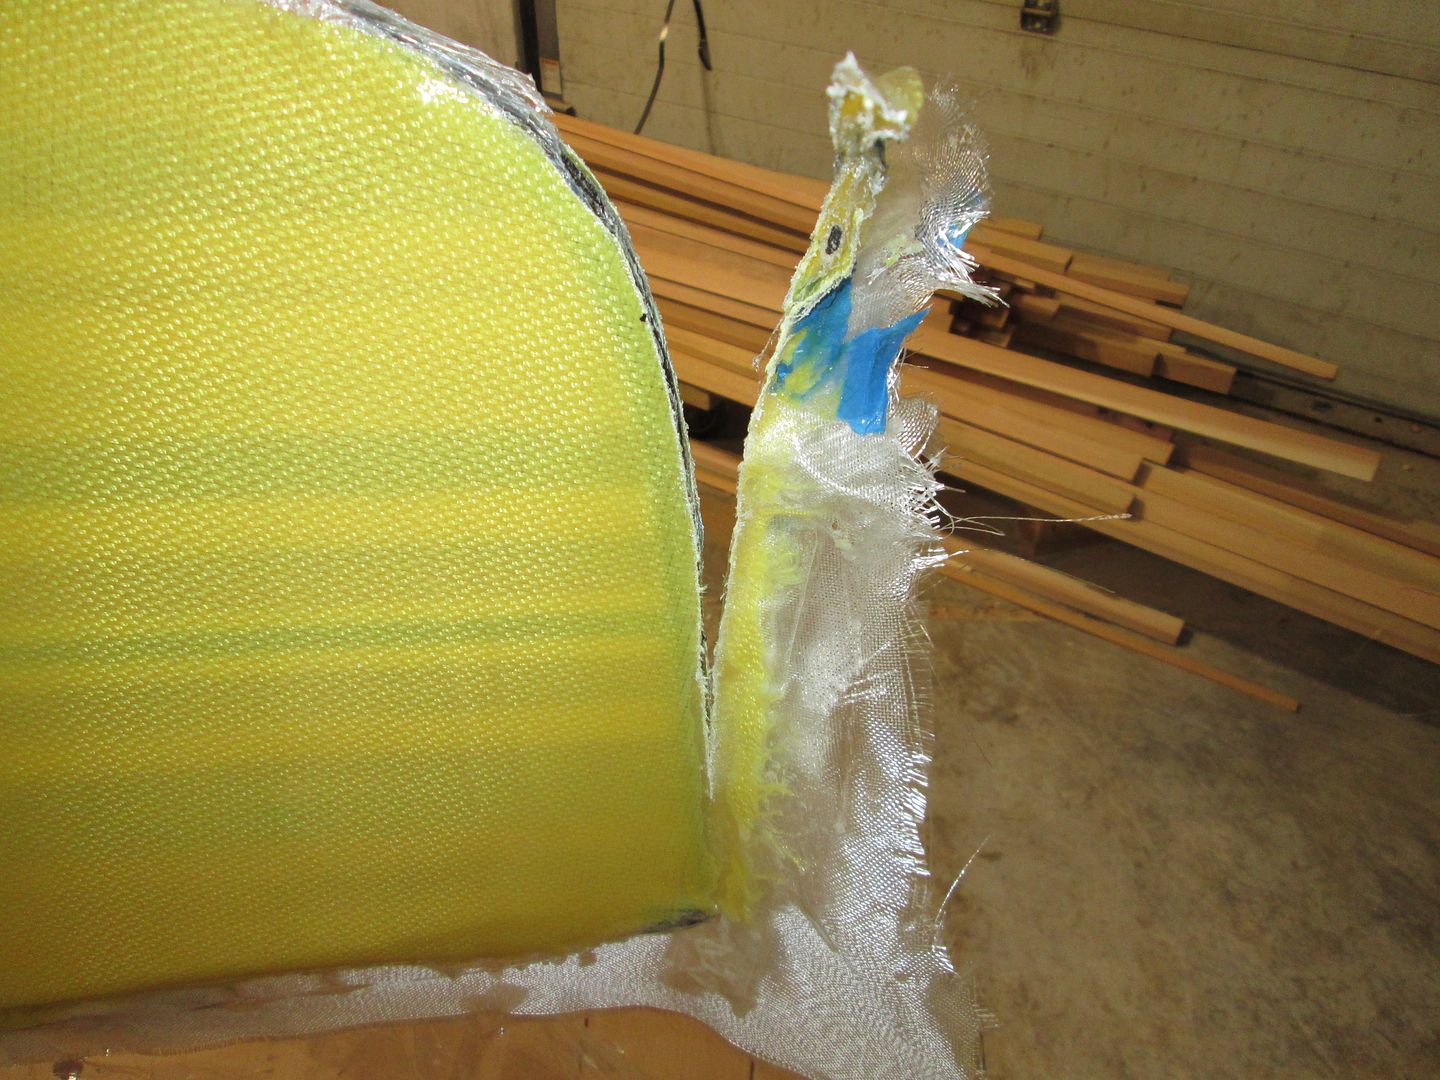
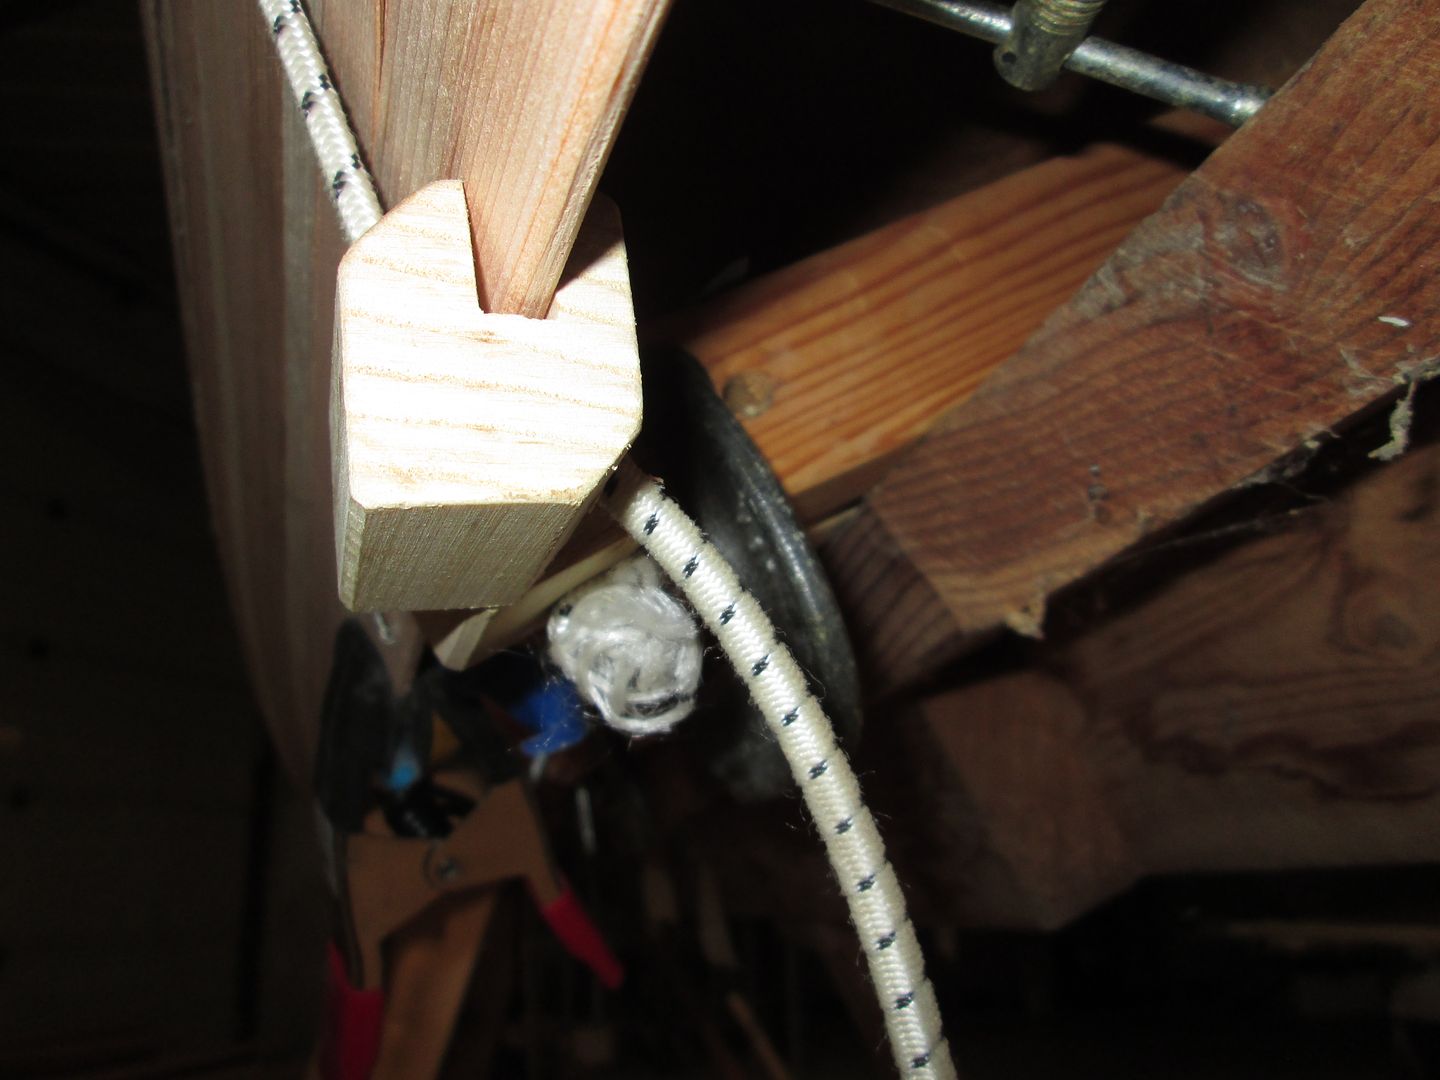
The clamps on the tumblehome.

IMG_3886.JPG


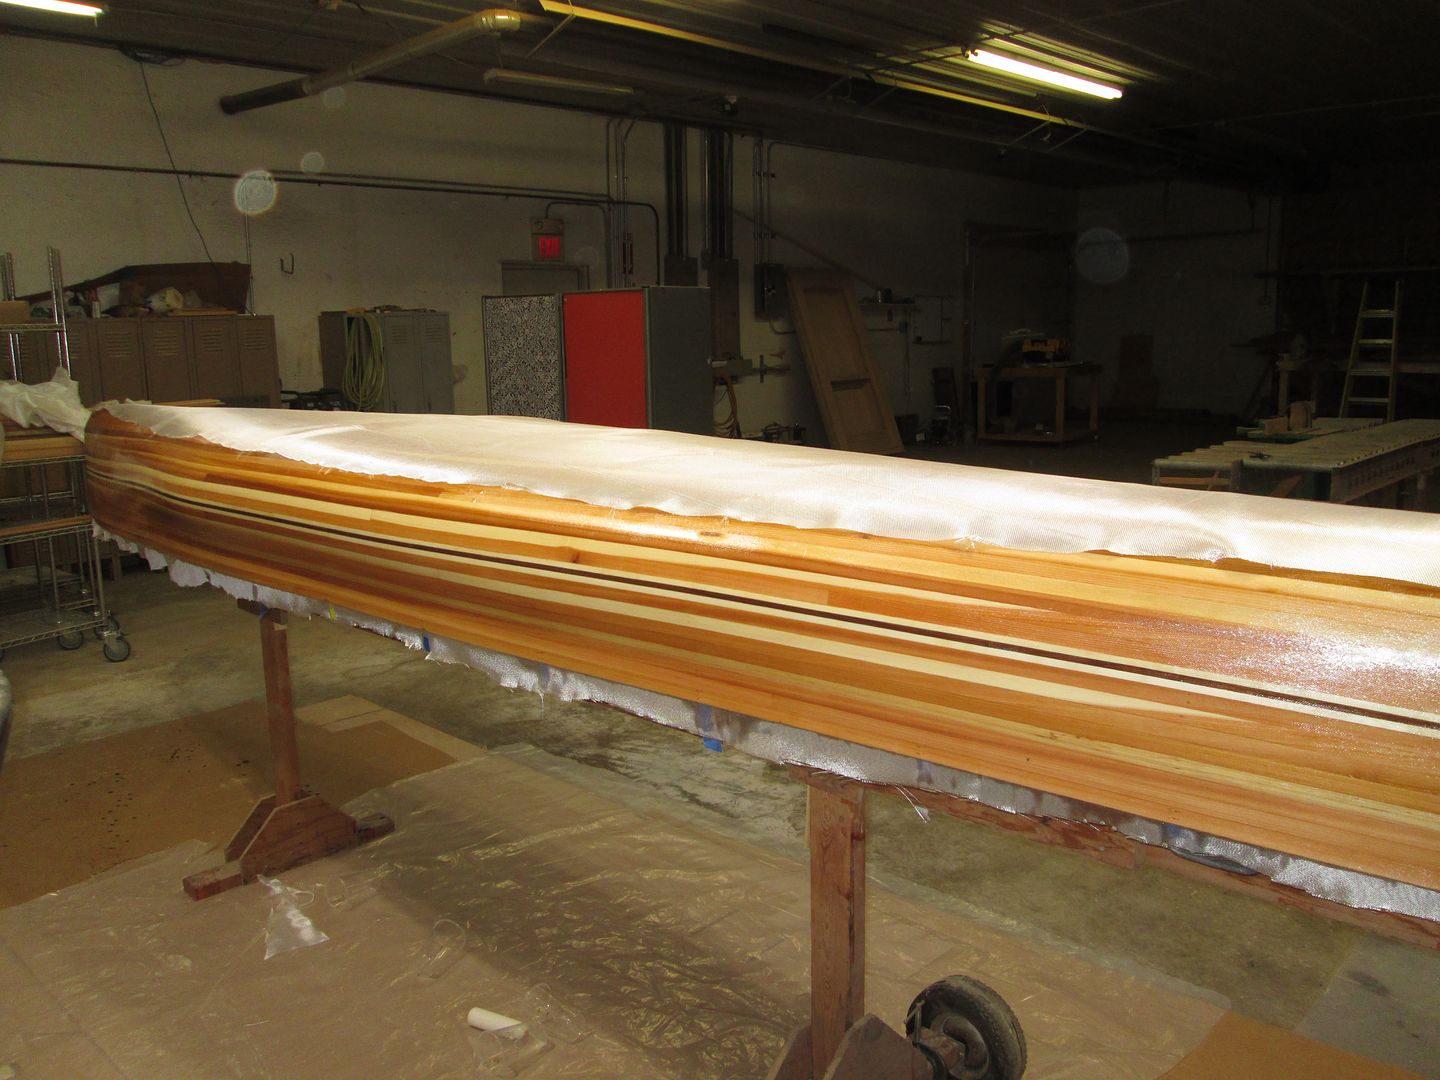
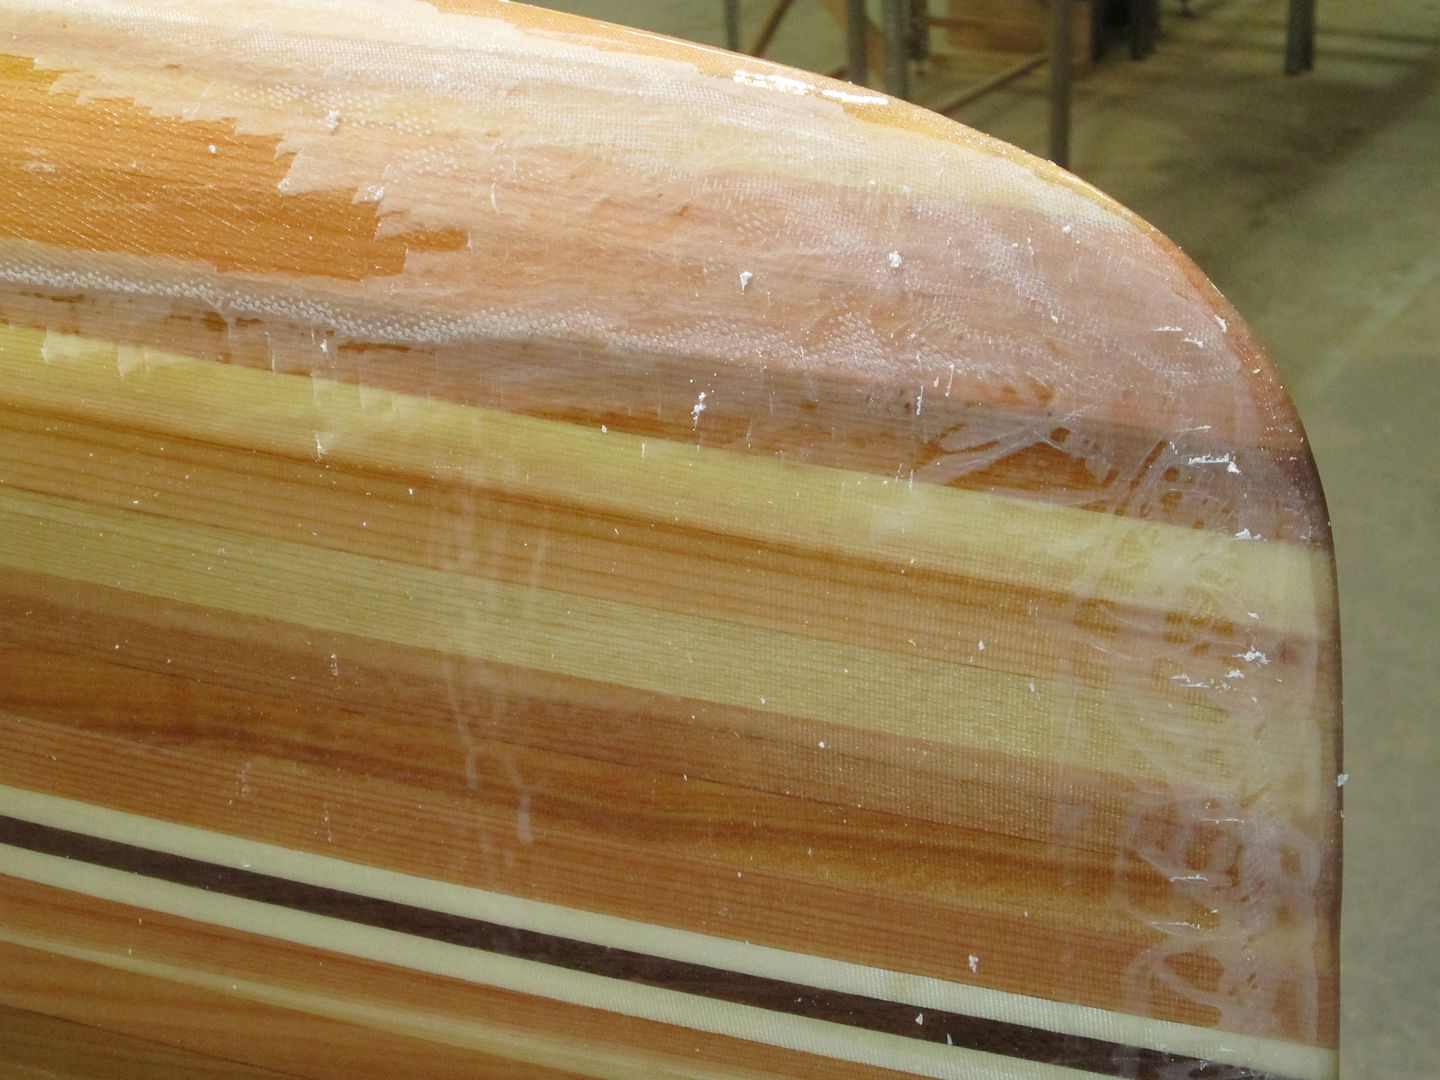
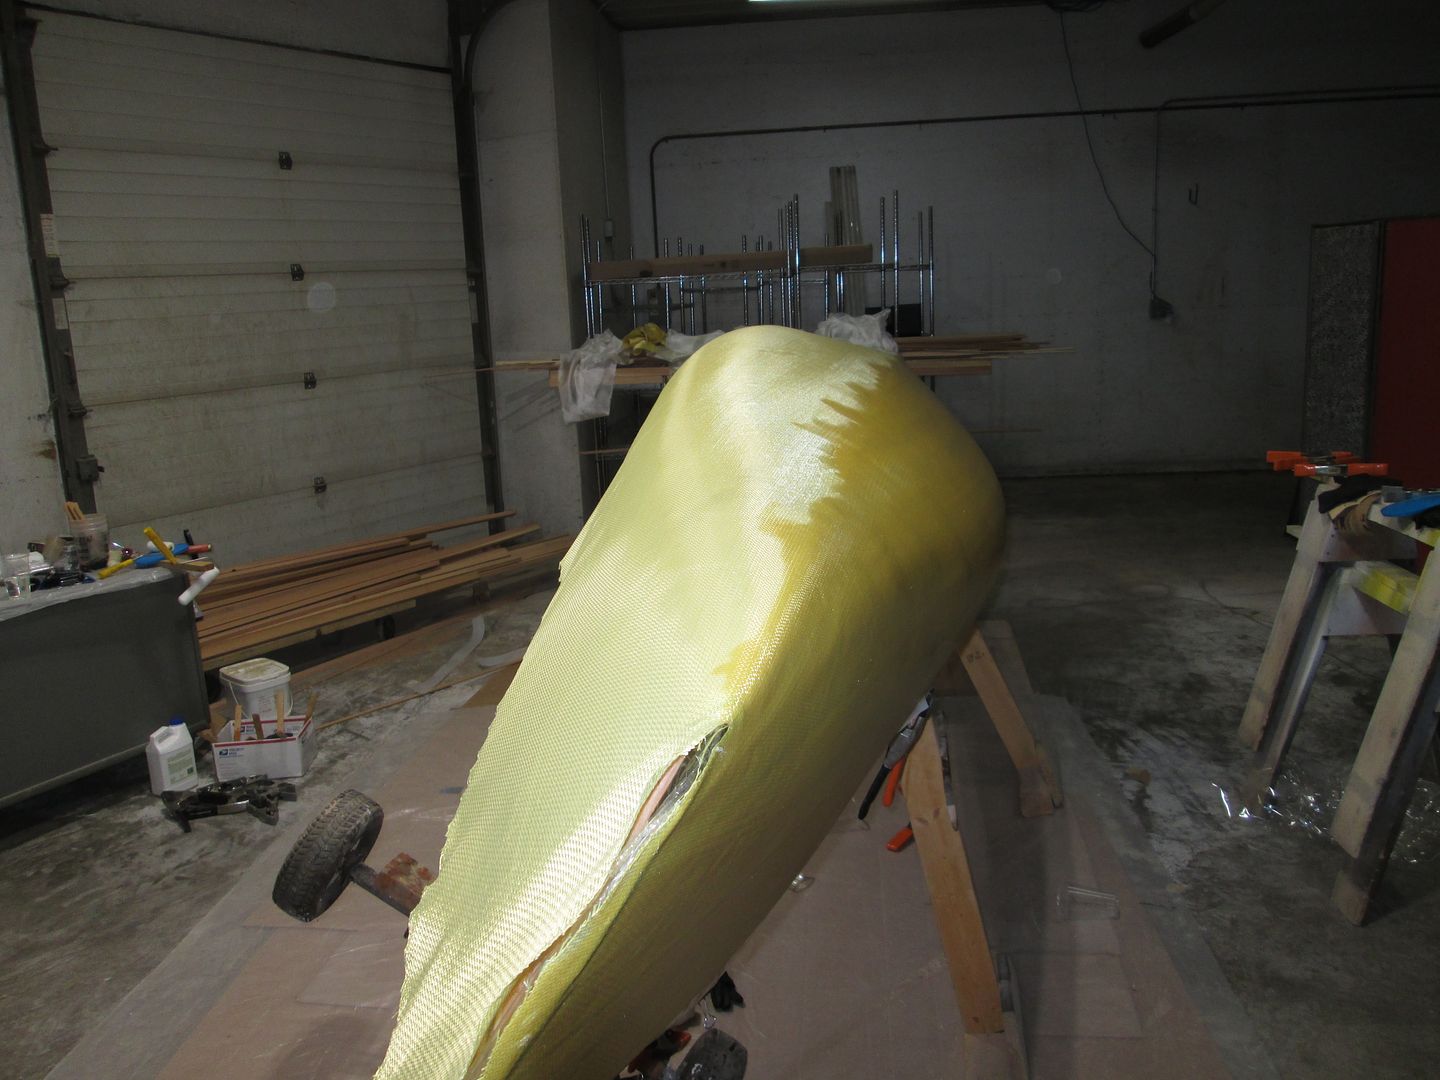
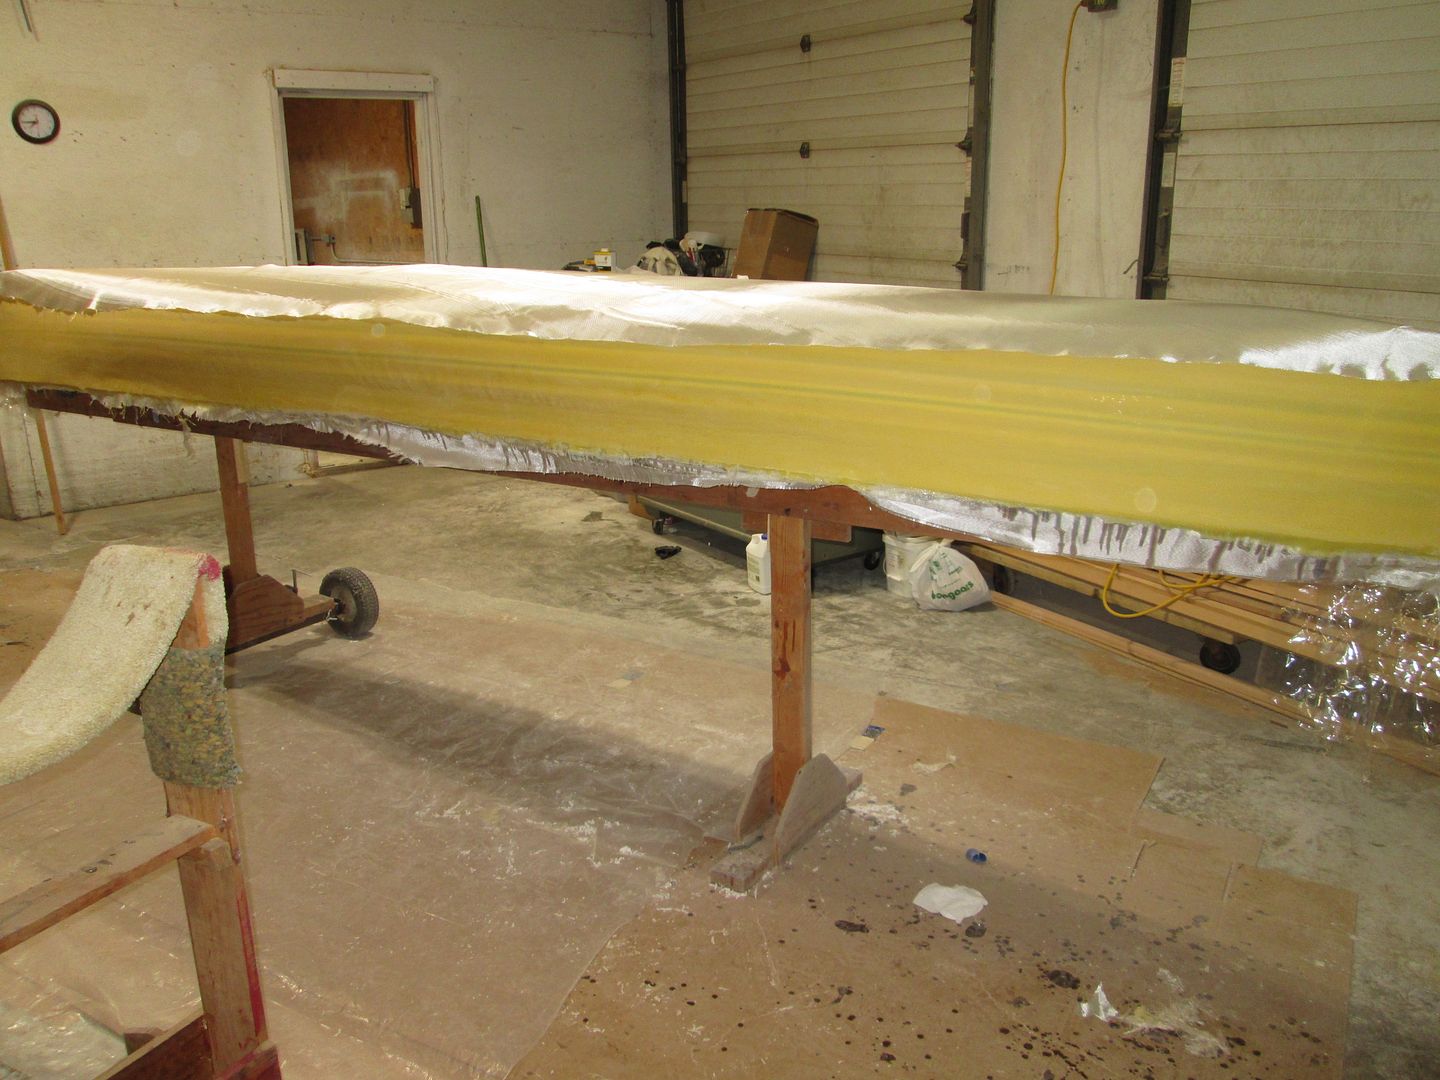
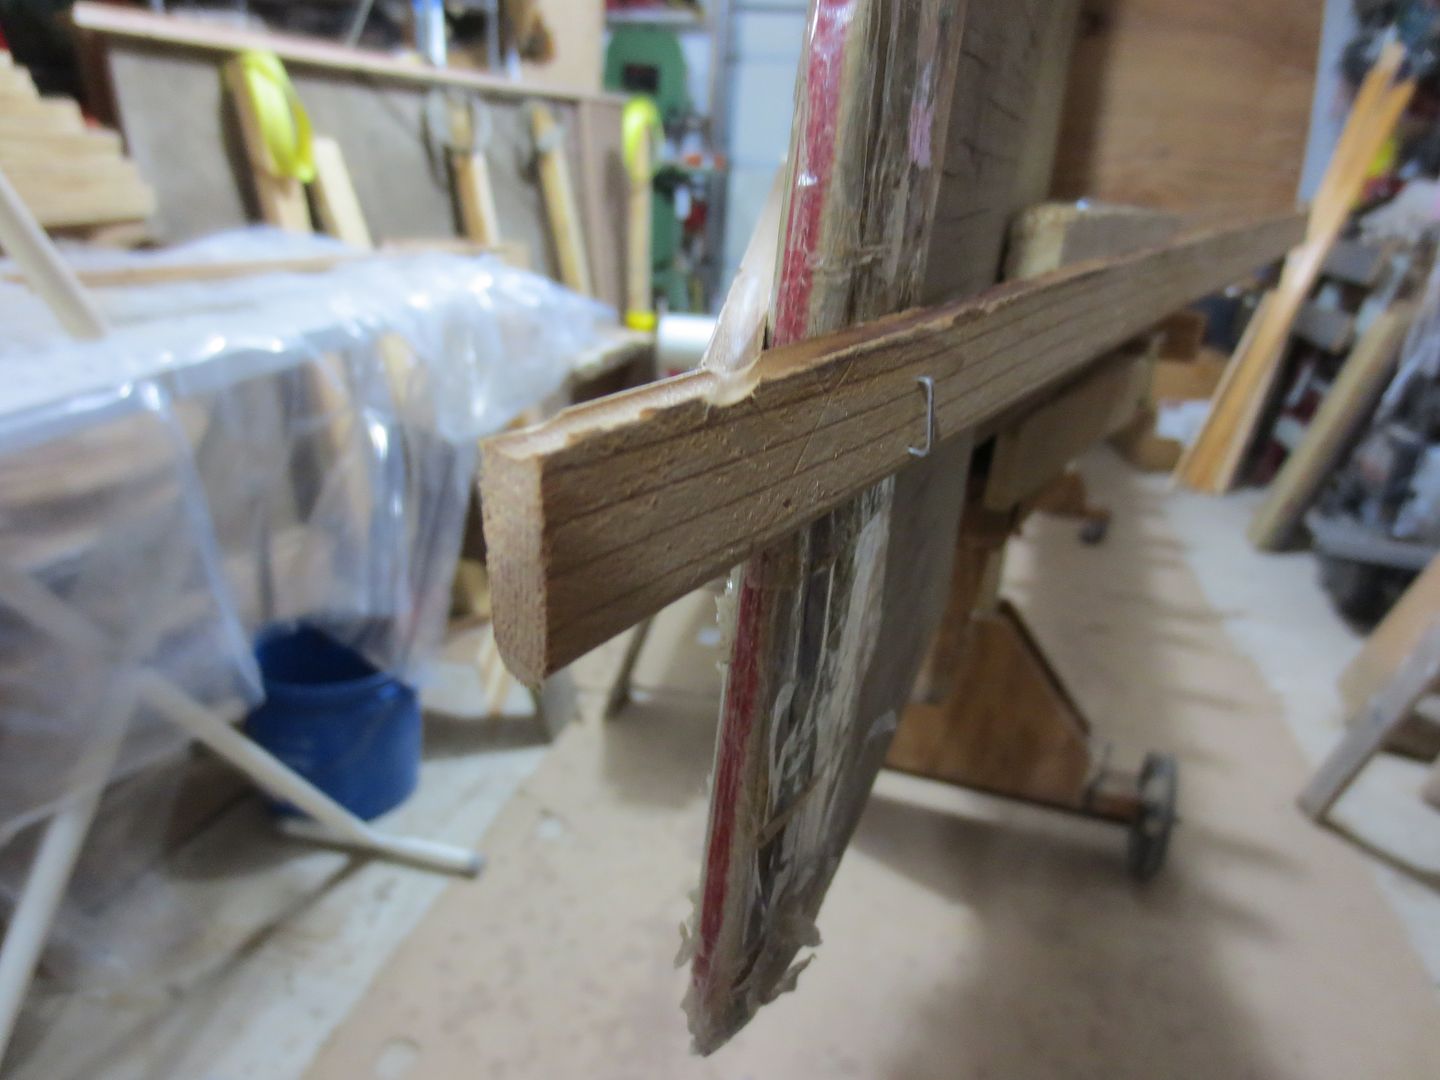
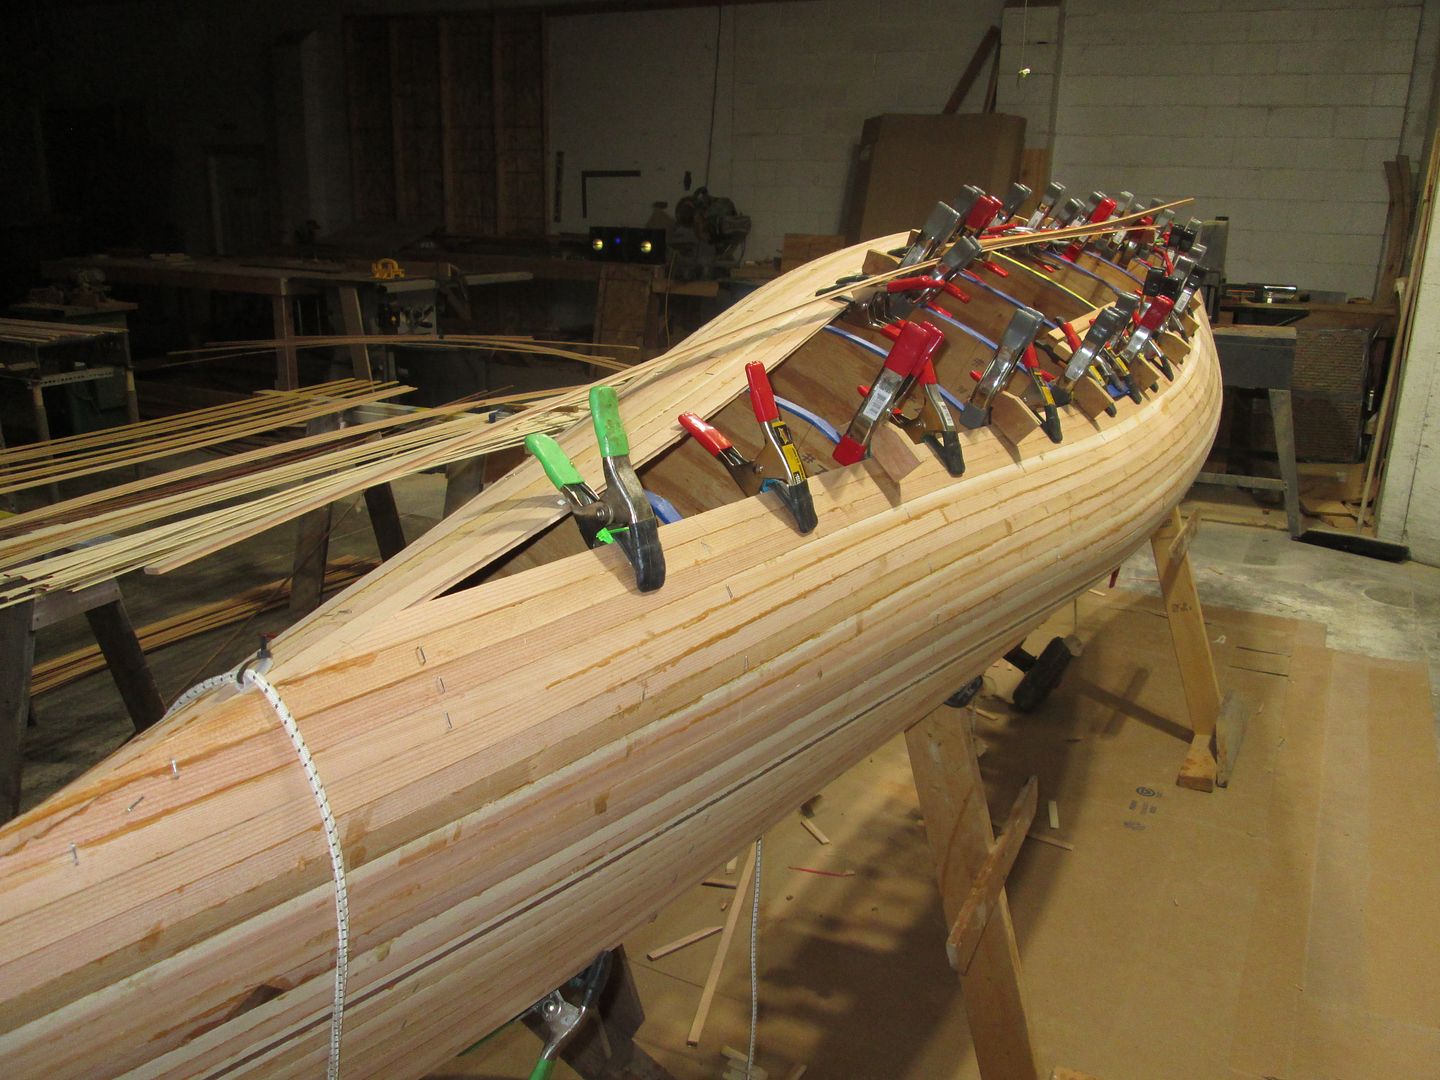
A pic of the problems related to the Heat shrink film I had hoped to overcome!
Less than perfect the hull will float when done. Next time !

IMG_3896.JPG


I will let everything cure at least a week. It end up longer than that, as other things at the shop deterred me.

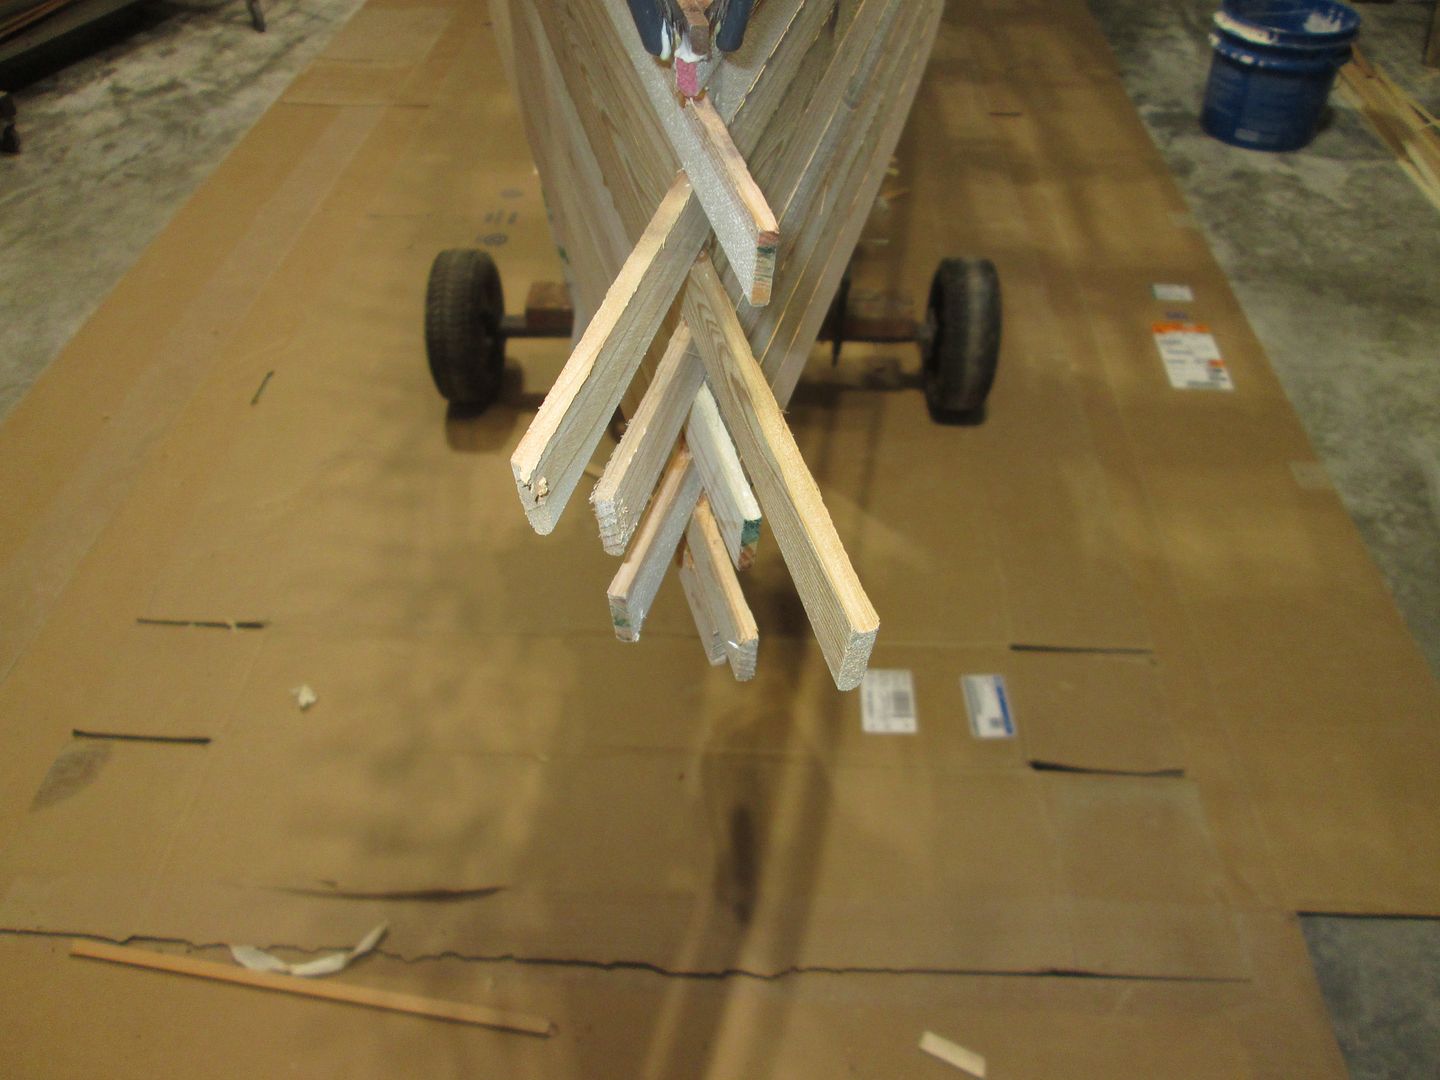
I trimmed the stems. Trimming Kevlar wetted out, is no easier than unwetted !

IMG_3902.JPG


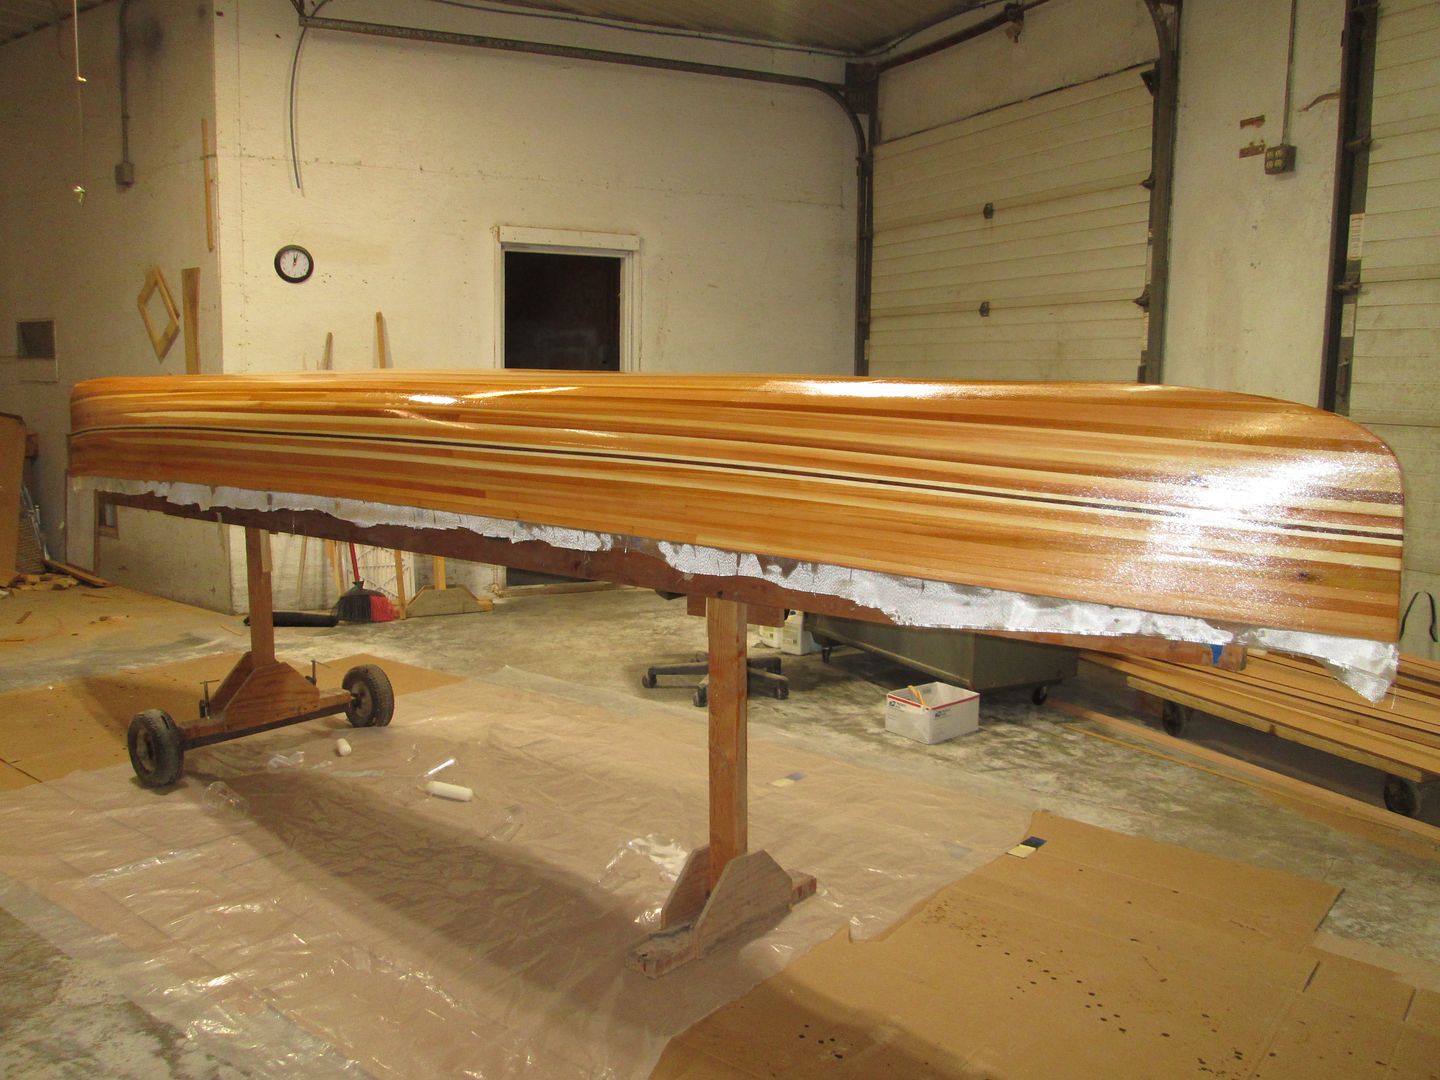
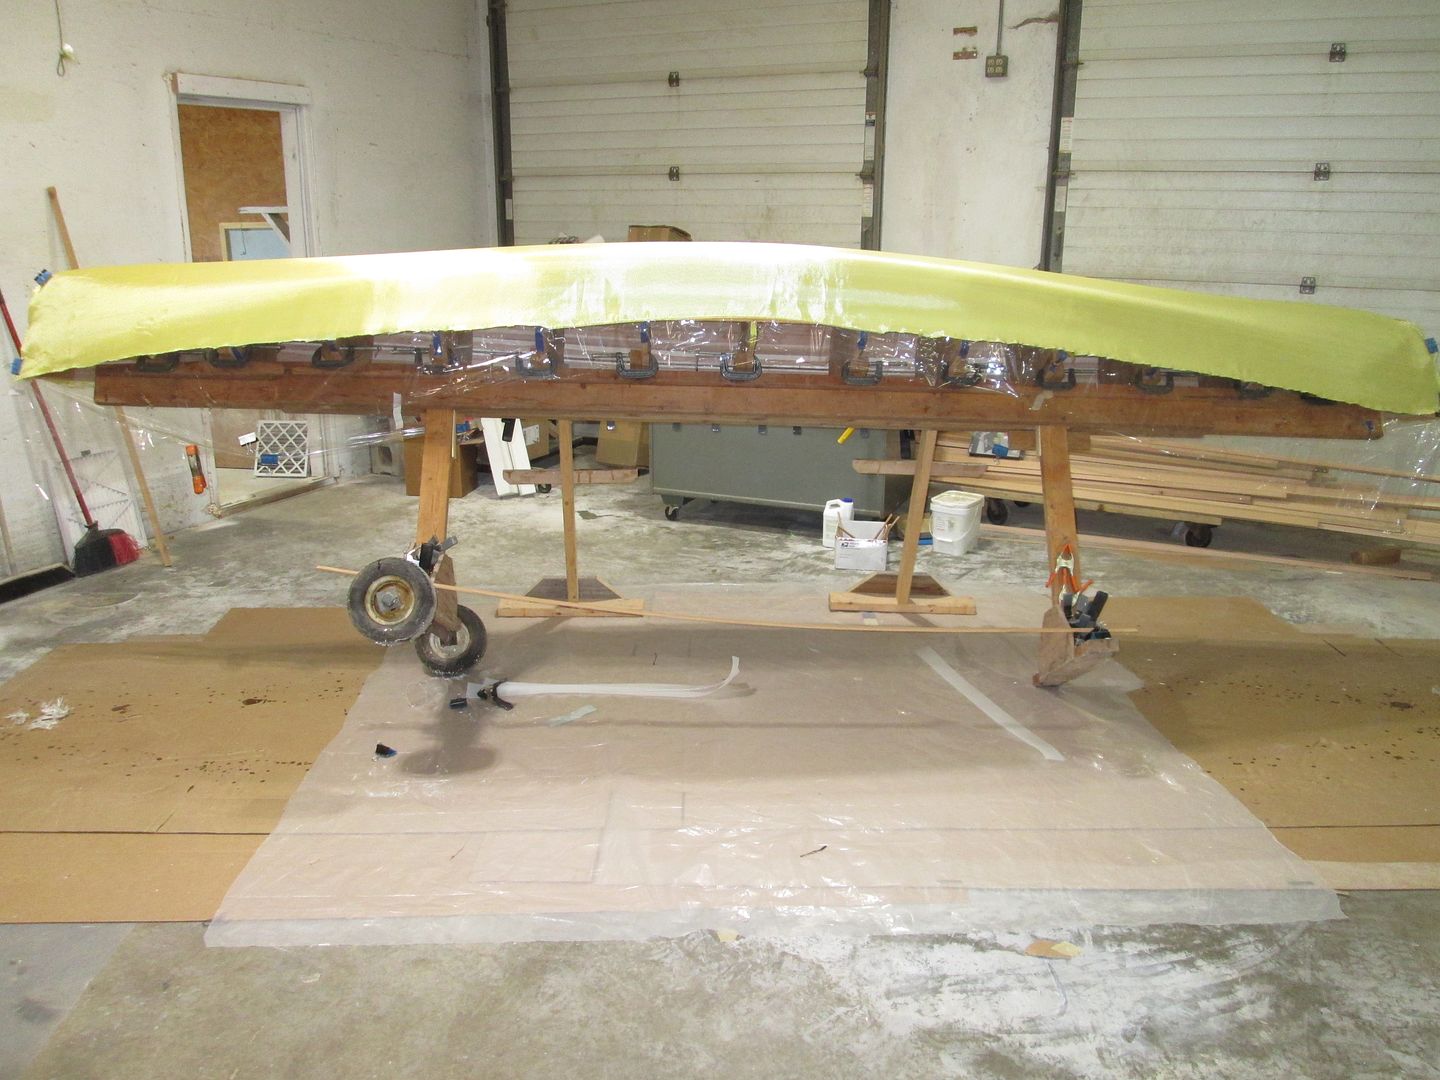
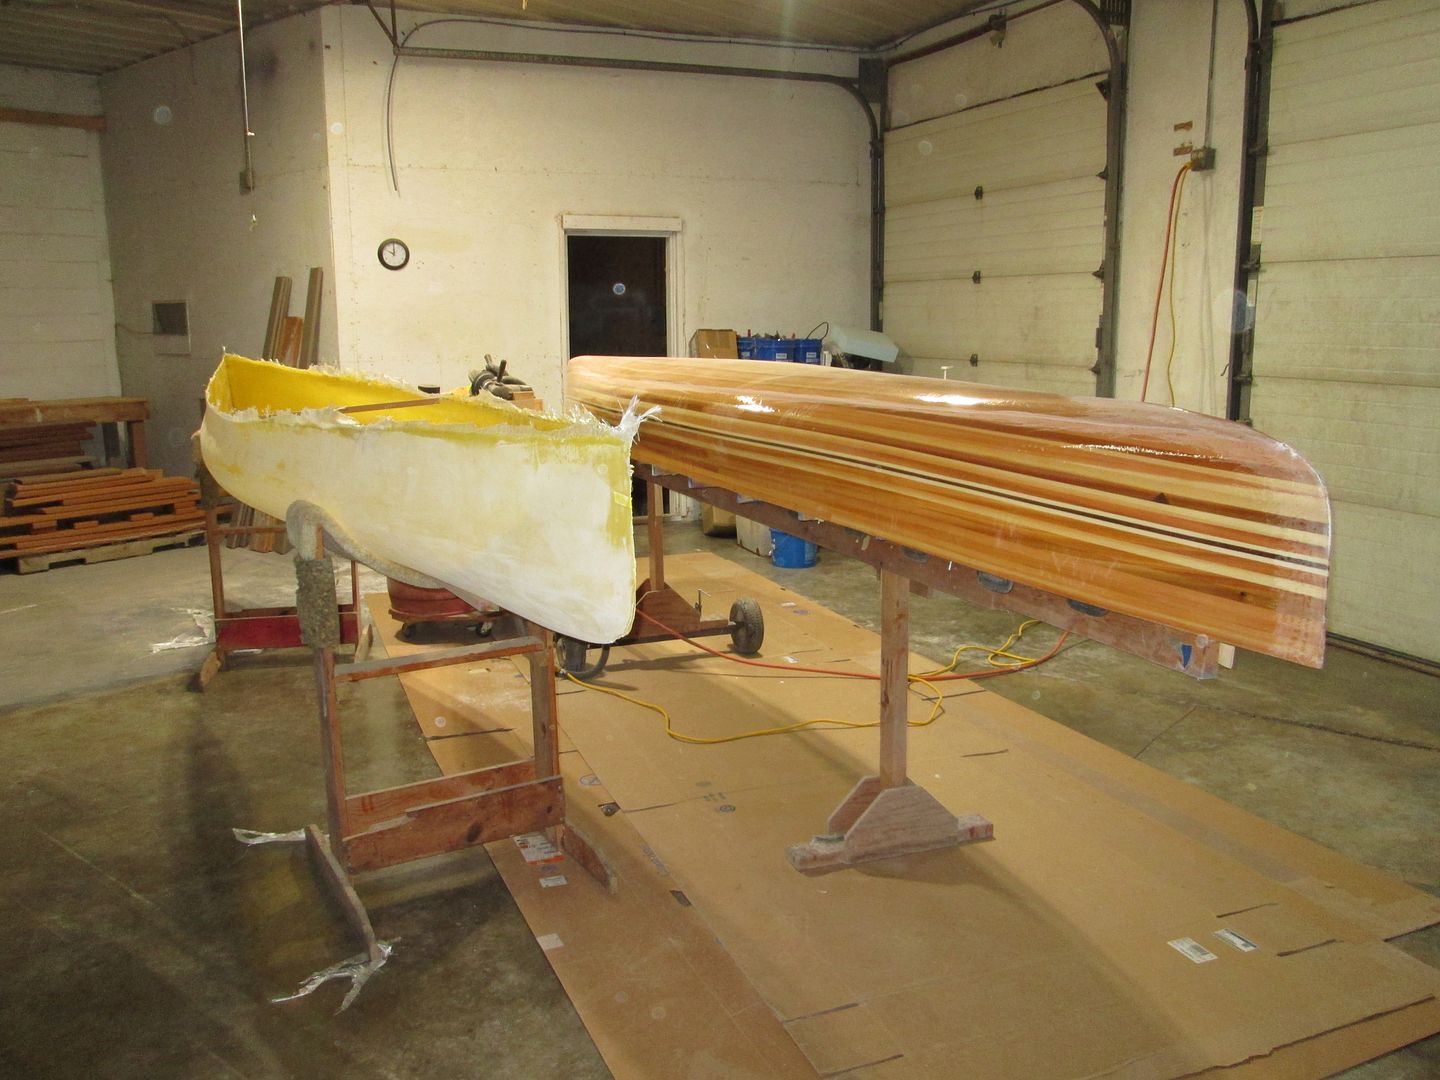
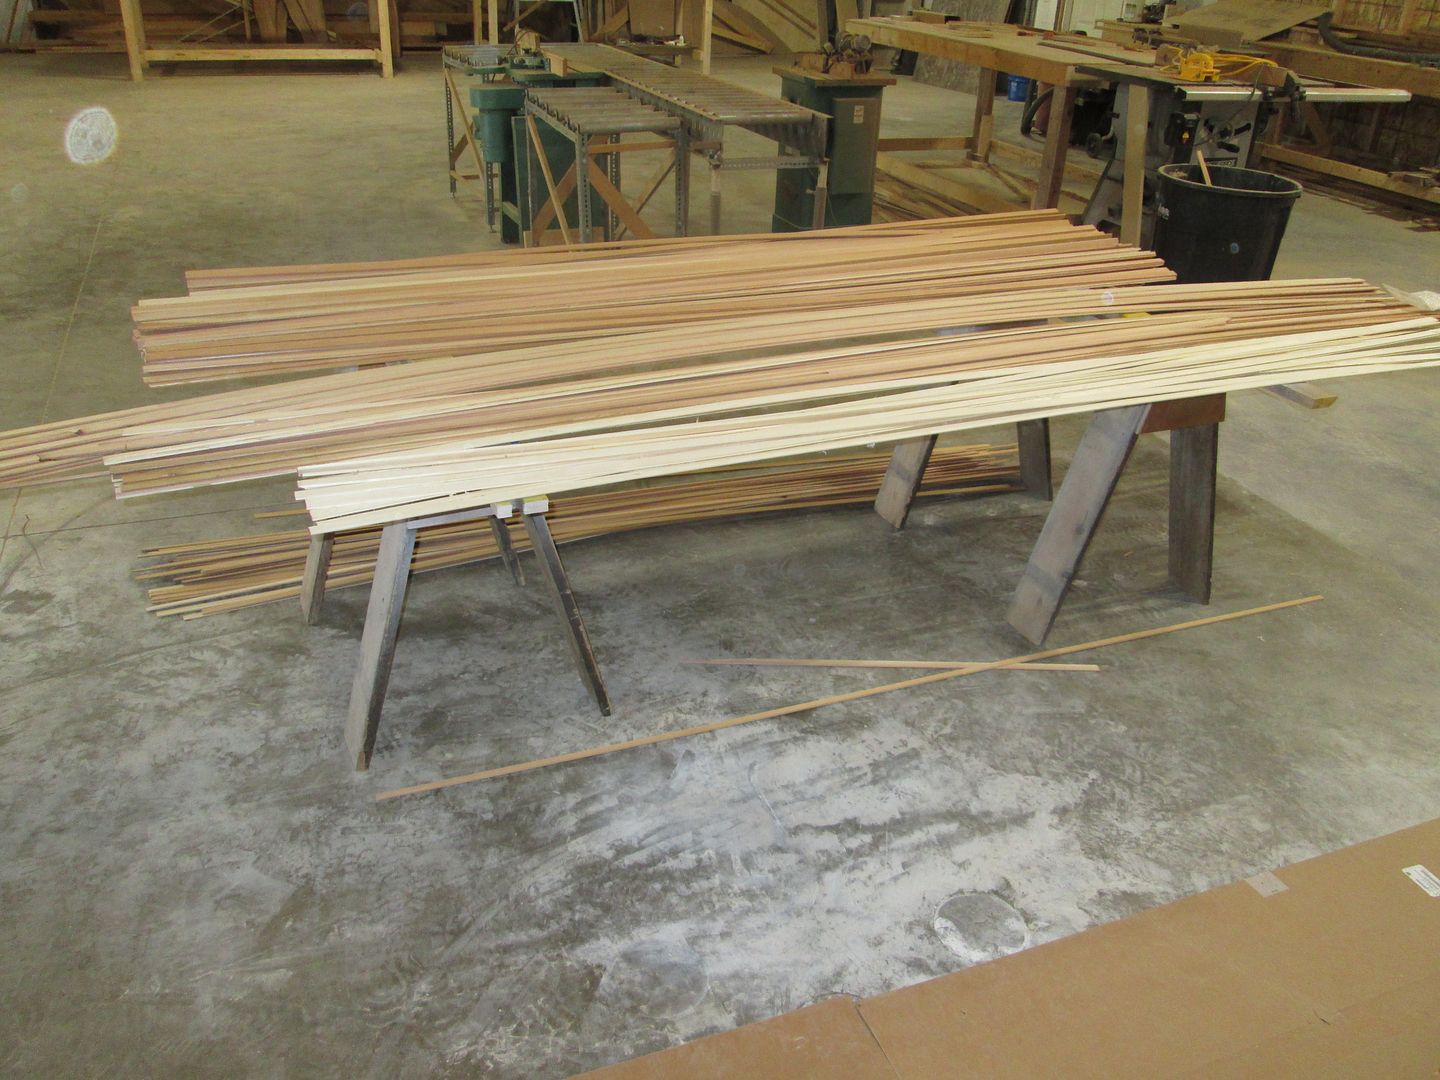
With plenty of cure time, the hull is easily lifted from the mold, and placed in the stands, next to the stripper. I now have two canoes.

I sanded the Kevlar, before removing from the mold. It's still quite flexible, and the mold makes it easier to sand.
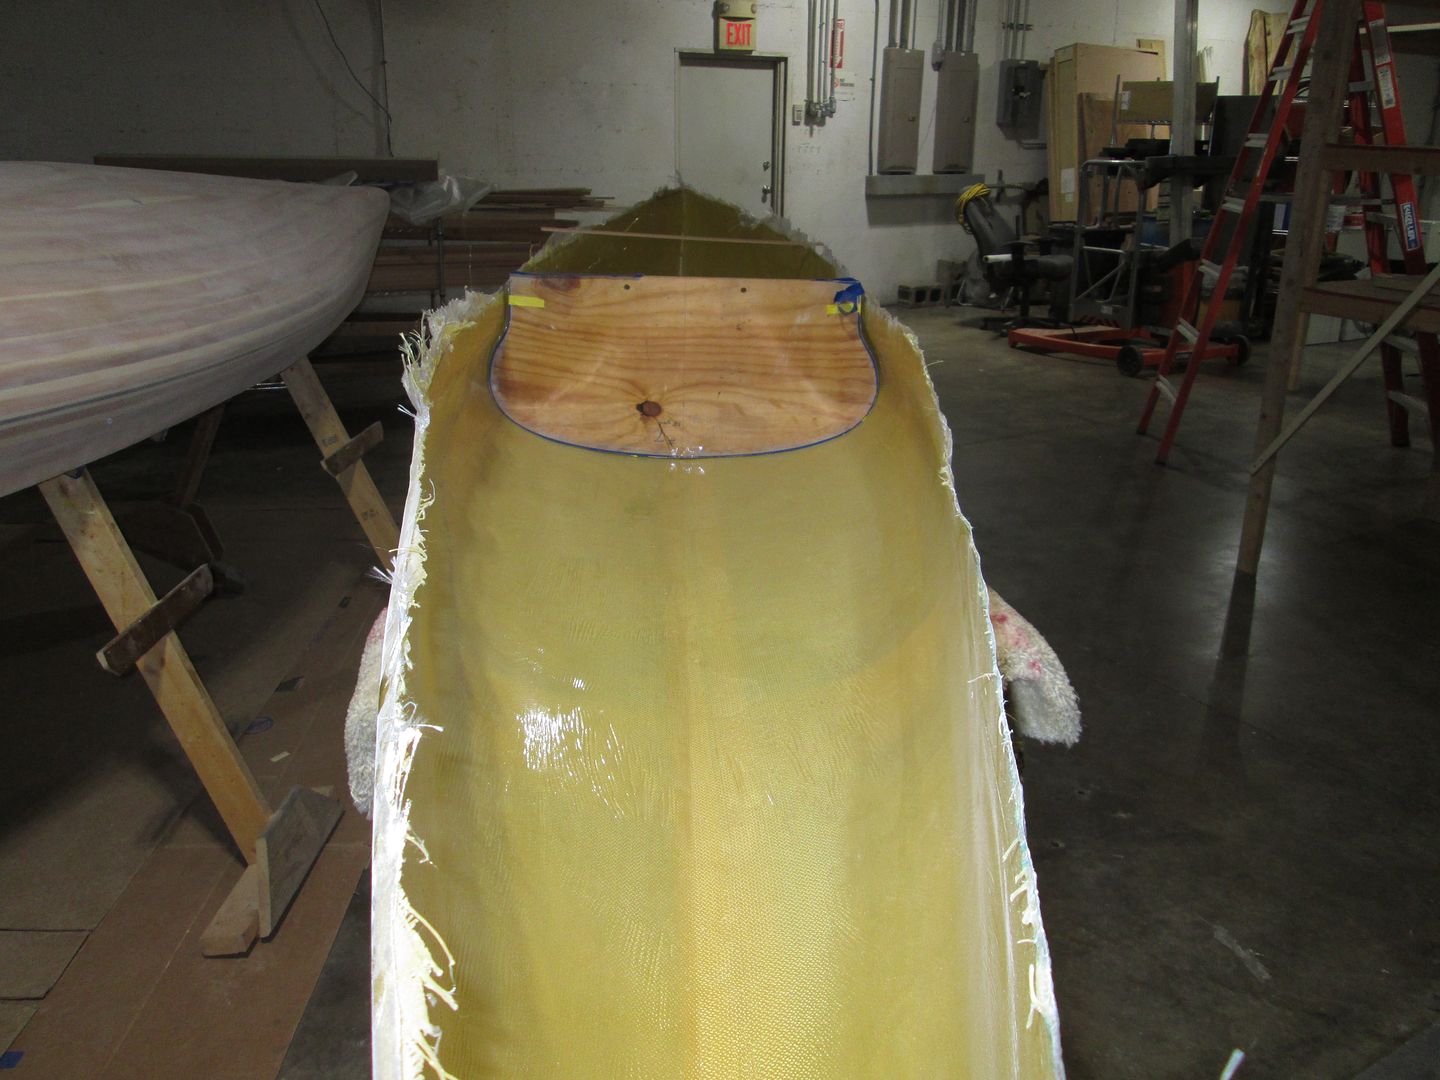
IMG_3913_qSr4TbhwW1AMixVyMbpwWB.JPG

Last pic for now
I strap in the center form, as I turn my attention back to the stripper.

IMG_3926.JPG


I will be adding an insert and more glass.
More on that later !

Jim
 
Back
Top