• Happy National Audubon Day! 🐣🐦🦅🕊️

Twig stove

Joined
Jan 3, 2015
Messages
1,413
Reaction score
875
Location
Mid coast, Maine
Getting ready for a trip and have been intrigued with twig stoves for about a year. Here is what I built.. I didn't want a big stove and I had this 3" diameter piece of stainless steel pipe that is 4" long so I thought I'd try it. What the heck it's just some time and a small amount of material. I didn't want it sitting on the ground and I needed to elevate to pot somehow so this is what I came up with. It also was an excuse to expand my skills with the milling machine, but s drill press and hacksaw would do just fine.

image_zpsg90hm0gz.jpeg


image_zps67nieuyd.jpeg


image_zpsefurwuhu.jpeg


image_zpsrhk7tseg.jpeg


Looks good to me, I'll try cooking something tomorrow.
Jim
 
Very nice. I really like my twig stove. I think you'll like yours too. Looks very sturdy in terms of both ground and pot support. Nice work.

Alan
 
Thanks Allen that's what I was thinking, I wanted the stability. In actual use I found it as tippy as if it was on the ground. It is a 3" pipe after all, with no real connection to the legs or top bars. Both wanted to tip if it the weight was off center.
Off to the hardware store, I've got a solution in mind that doesn't involve a total rebuild. More later.
Jim
 
Nice simple design. Very effective I imagine also. I have a propane single burner that I find is well worth the weight on a short trip. On longer trips like what Alan does, this would be mandatory.
Interesting how yours is such a simple concept but yet no one else has come up with it. Well done.

Christy
 
Thanks Chrisy but not totally my idea. This http://www.siegestoves.com/wood-gas_can_stove.htm was my inspiration. I had the pipe already and I wanted it small. Turns out the pipe is real close in size to a soup can. After trying mine out a bit I would imagine the Siege model might suffer from being a bit tippy also unless you go up to the larger can sizes, but that is speculation.
Jim
 
Nice job! I did quite a bit of fiddling with twig stoves a couple of years ago and for me I found no real advantage of a double wall stove on such a small scale, maybe if you get into the gallon can size it might start to make a difference but at the 3" or soup can size I found no real advantage. I did find that a row of holes maybe an inch or so down from the top did let some extra air on for secondary combustion it just wasn't "preheated" like the double wall versions.
 
I do like the idea/concept of the rocket stove with the double wall but that was more bulk and weight and didn't collapse down like a single wall. I think I'll use it a bit before I drill holes near the top. An inch down from the top is about half way to the lower holes. It's a work in progress. I know it works as is that's all the info I need for now.
So here is my redesign to deal with the tippyness that I discovered this morning. Just some simple wire clips to joint the top arms with the bottom.

image_zpssvng8rld.jpeg


image_zpsydqkxv47.jpeg


image_zpsuzr346au.jpeg


The wire joins everything into one cohesive unit. Now the stability takes full advantage of the 8" long feet. I used four wires as you see but in retrospect two would have been sufficient as long as they went from the lower leg assembly to the upper pot support assembly. The wires have a double bend in the leg holes so they are captured there and can not get lost.
Jim
 
Holy cow that thing is small. I know you said 3" pipe but it didn't register until I saw it in your hand.

Good idea on the wire. That was the first thing I thought of too when you said the top and base weren't firm. But mine wouldn't have looked nearly as nice as your double bent wire hooks.

Alan
 
No Title

Thought I'd show you my "Crown Royal" stick kit. 4" bean can on 4 bolts for stand-offs; alum. ties for pot stand; Stanley pot/lid and generic glacier cup from Wally's (lid fits cup perfectly); tuna can for cup stand on sterno. It all nests together and fits in the crown royal bag. Stick stove works great. I keep a piece of slate in the boat so I can make tea/coffee on the sterno fuel while I enjoy the sunset/sunrise from the middle of the lake.

Doc
 

Attachments

  • photo4903.jpg
    photo4903.jpg
    334.3 KB · Views: 0
  • photo4904.jpg
    photo4904.jpg
    400.8 KB · Views: 0
  • photo4905.jpg
    photo4905.jpg
    407.2 KB · Views: 0
  • photo4906.jpg
    photo4906.jpg
    413.6 KB · Views: 0
That is a SWEET project, Boatman! I was also fooled by the size until that last photo. Nice to have access to some big tools too...you keep posting pics and results and you'll have folks asking you to make up a small run of them (hint, hint)...

Doc, good deal on your repurposing and your mid-lake brew ups - never thought of that before!
 
Nice looking stove Boatman.

Would springs work instead of the wires? I think you could get away with much thinner material.

I managed to bring back a couple of sheets of 0.5mm titanium on a recent trip to the UK so will be cutting a few of my Nomad XTs to sell. Quite excited by the potential weight saving from the 0.7mm stainless steel version.

Doc. A piece of carbon felt would make a good insulation mat and could be tucked inside your stove.
 
Jim,
I think you,re on to something there with the 3" burner. Ideal for quick preparation of broths/beverages. Don't know about anything of greater solidity. Experiment and give a report.

Sweeper, I tried the kk but found that the coefficient between weight and energy input, to energy output was less than desirable. Kiss!
 
Excellent idea Voyager. Wish I'd thought of that.
 
Thanks for all the input and it's nice to see photos of others so please share them if you have them.
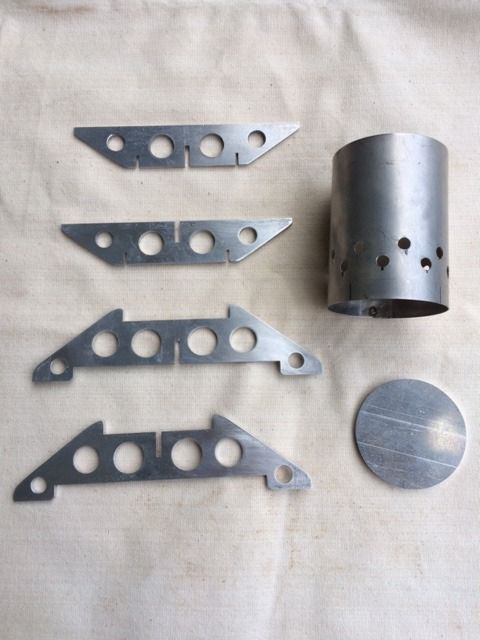
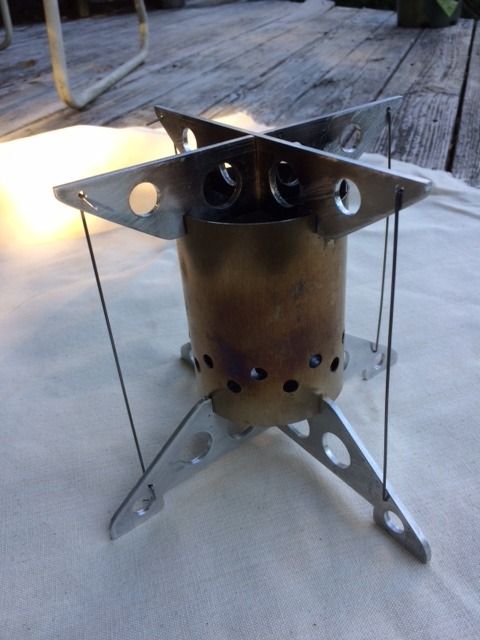
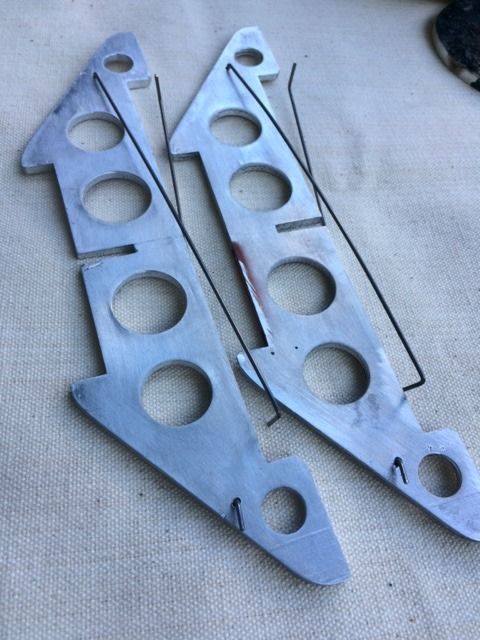
BV I thought of springs also as I know I've seen some short spring sections with long ends that could be turned into hooks. I didn't try them however as I thought the coiled part would be bulkier and still might have some tip to stability due to the stretch of the spring. The solid wires make it rock solid. I'm very pleased with them.
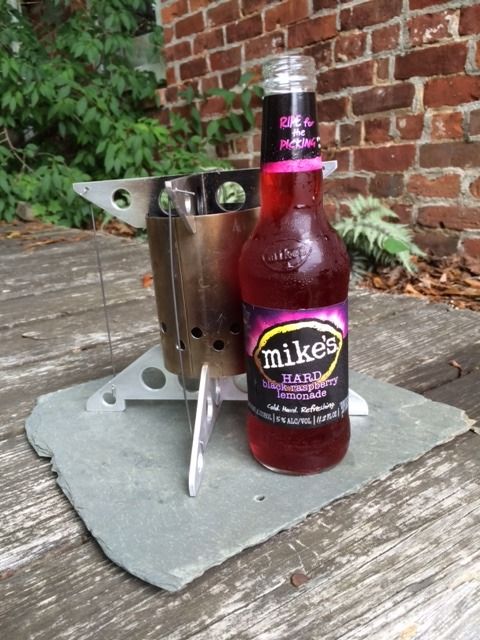
What's a Nomad XT?
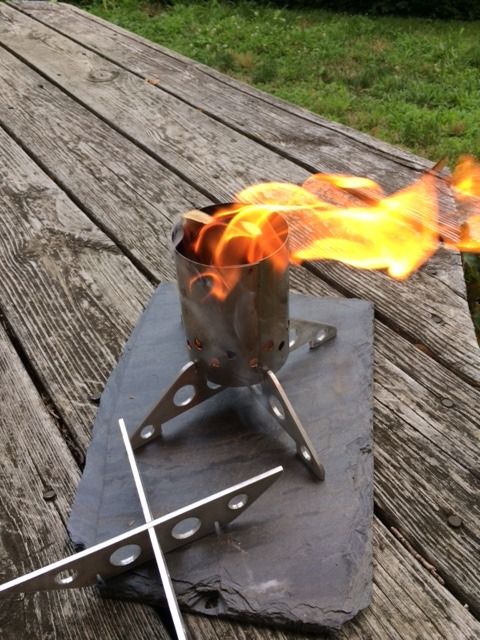
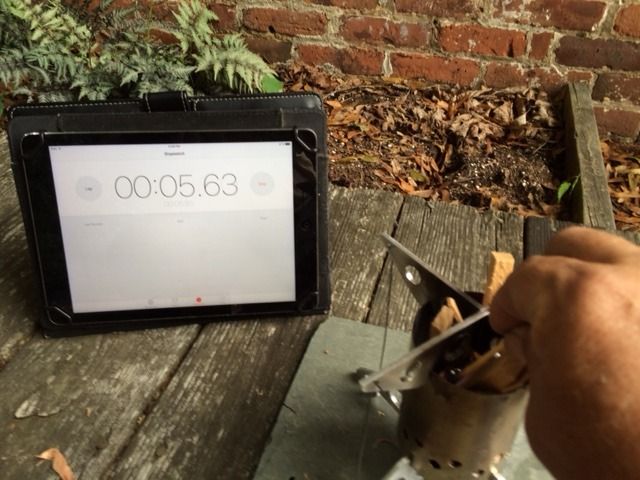
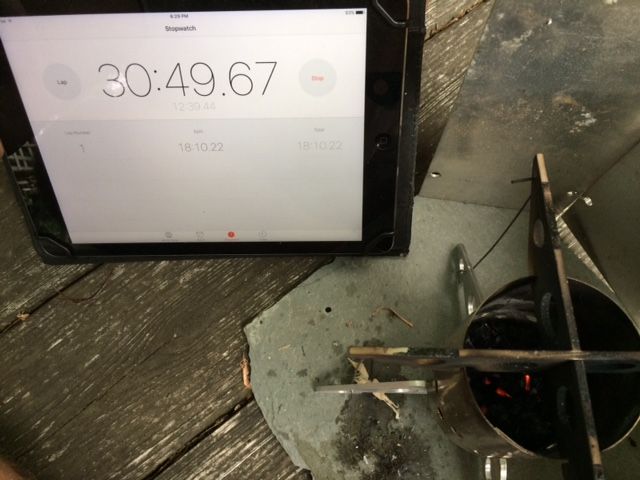
So I did a boil test tonight. First time using a twig stove so I didn't know what to expect. It took longer than I thought, but then again I 'was watching it'.
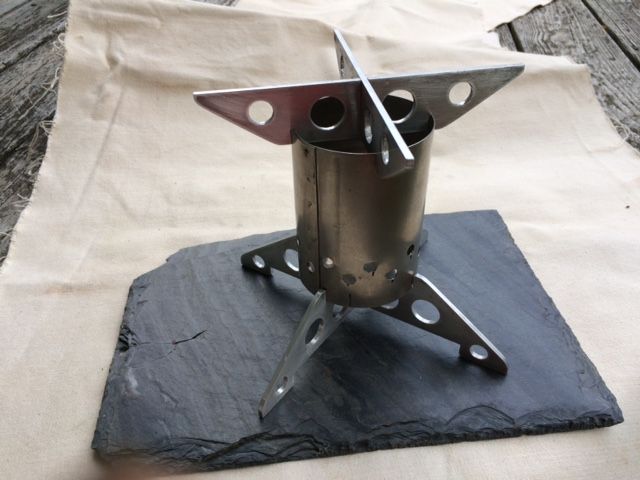
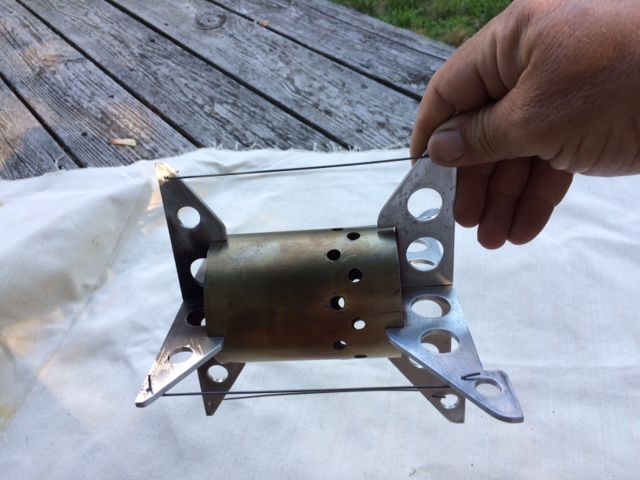
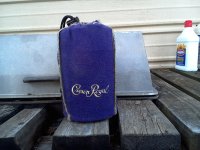
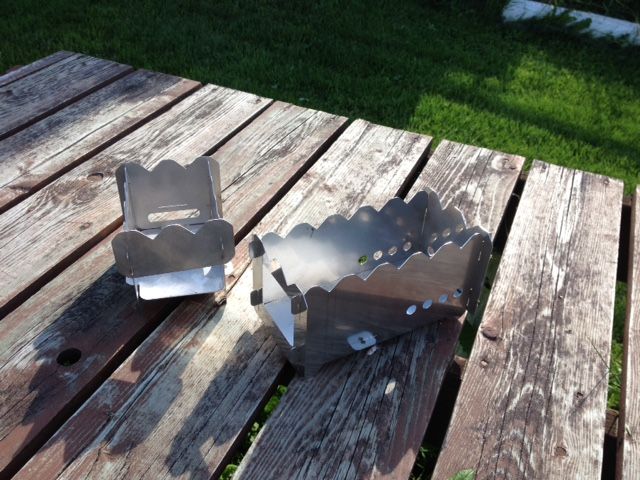
First another pic for scale instead of my big hand throwing it off.

image_zpsi4zxw02i.jpeg


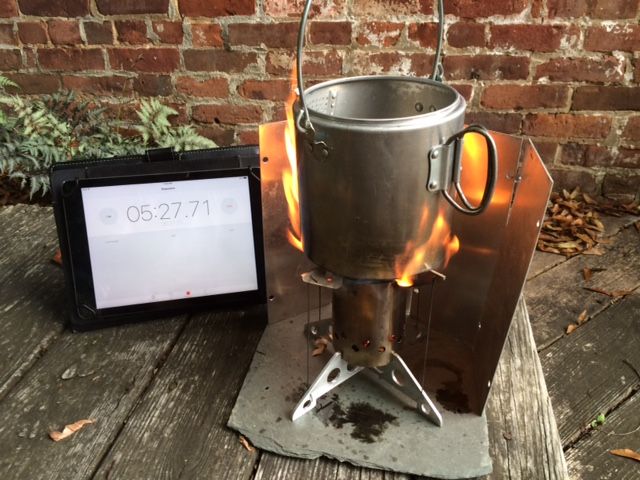
I started the timer just before I dropped the match in the top.

image_zpsbnodnm9h.jpeg


I put one quart into my two quart kettle. Tap water. Next time I think I would wait just a bit longer to put the pot on so the fire is really settled.

image_zpsh5vvctml.jpeg


At about 5 min in I decided to put up a wind screen as a front was moving through blowing the flame around.

image_zpsrz2eu0jz.jpeg


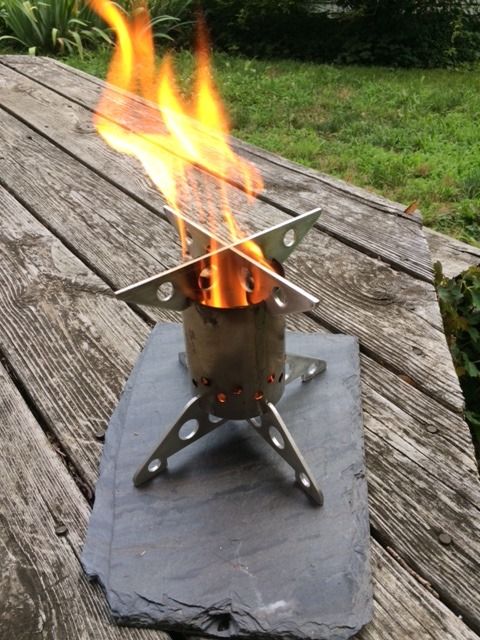
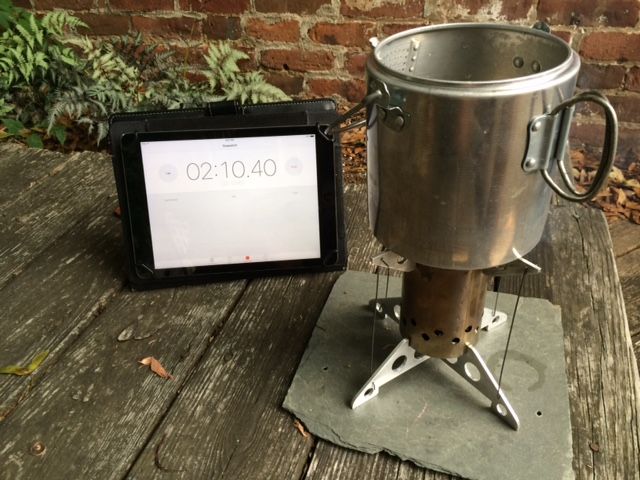
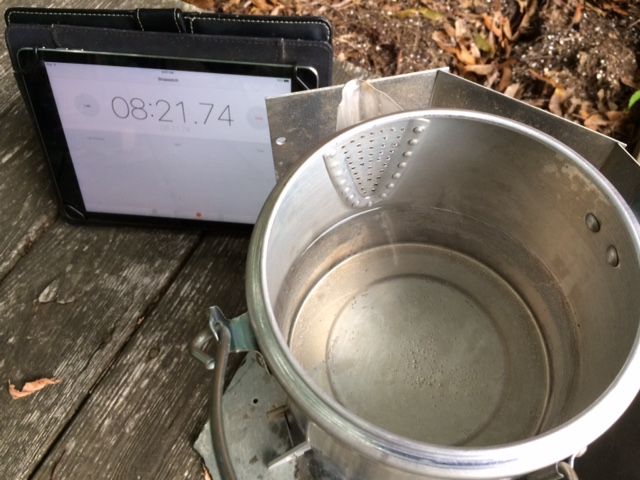
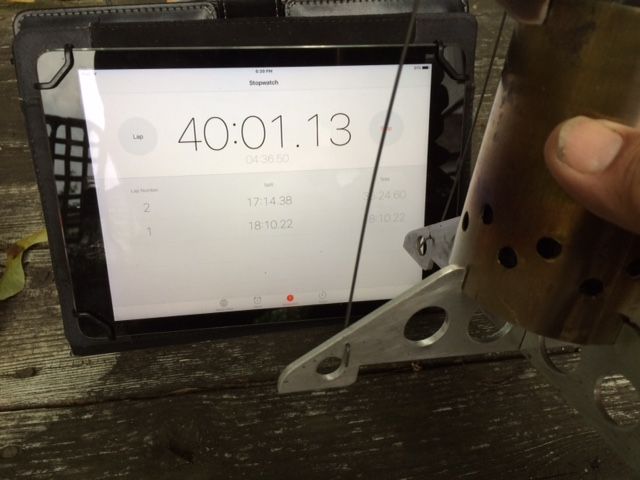
At about 8 min there were the small bubbles on the bottom and it was plenty hot for tea or hot chocolate.

image_zps5bncbfal.jpeg


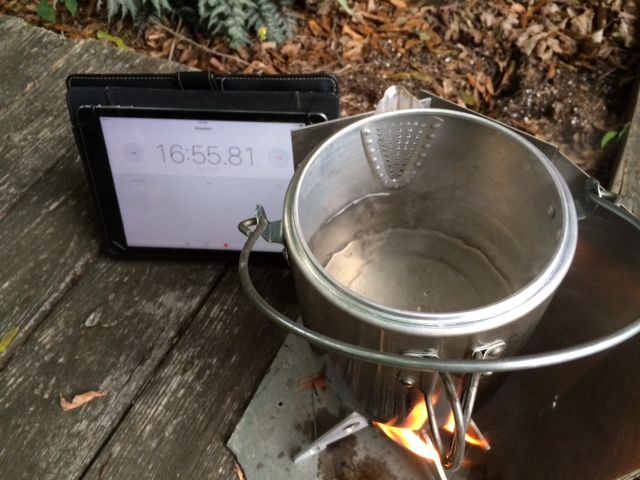
At about 17 min there was a rolling boil although it didn't photo well.

image_zps9fhkblxx.jpeg


At this point I took the pot off to let the flame die out. I probably could have not put in the last pieces of wood.

image_zps3bt4fk9j.jpeg


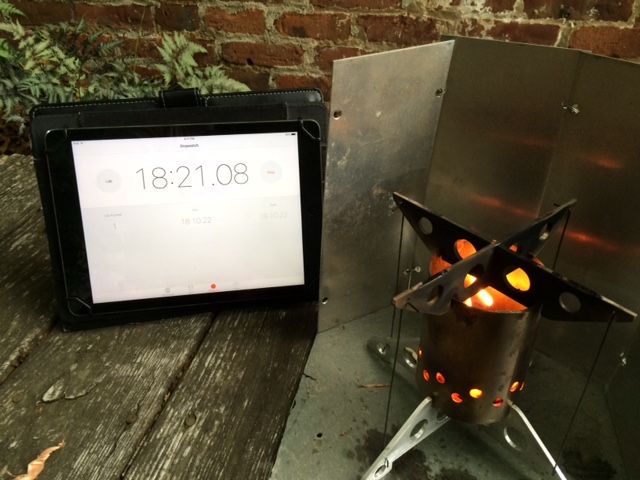
At about 30 min from the start the fire is almost out.

image_zps771yybfm.jpeg


Letting everything cool on there own it took 40 min till I could pick it up and handle everything to put it away. The last to cool were the legs. Version 2.0 will have the fire tube floor raised up off the legs. I've already started 2.0. One of them will end up with my daughter.

image_zpsncu4jibi.jpeg


So how does this compare with your experiences?
Jim
 
Jim,
I think if you cut a feeder port in the side so that you don't have to remove the pot from the stove to feed fuel into the fire, you'll increase efficiency. Also, a lid on the pot will decrease your boil time dramatically. That is a one good looking piece of kit! What kind of bottom, if any, does the tube have?
Doc
 
Jim,
I think if you cut a feeder port in the side so that you don't have to remove the pot from the stove to feed fuel into the fire, you'll increase efficiency.

I liked the big diamond feed hole in your stove, Doc. My littlebug Jr. has air holes on the bottom and people talk about feeding twigs through there but from my experience it's pretty useless in practice. Better to lift the pot and drop them in from the top. Your big hole up top makes sense though.

Alan
 
You are right Doc a lid would have helped I know that but I chose not to use it. Next test.
I didn't feel the moment it took to move the pot to add some wood was that big a deal. There is just not a lot of room for a feeder tube or slot as I've seen on some stoves. It was easy to just drop another stick in one of the four quadrants formed by the pot support. The tube is only 4" long. The bottom is just a 1/4" disc that drops down the tube and sits on top of the leg intersection. The next one will be a thinner disc and will be raised up off the legs so everything will cool faster. You can see the disc in one of the earlier pics.
Jim
 
Nomad and a Nomad XT

xt_1_zpspoxbe0un.jpg


A bit boring to look at in comparison to your design.

I was looking for some pictures of the XT in use but can't find one on this computer. The XT is just big enough to squeeze two 10cm pots on top. I sometimes use long sticks, gradually feeding them in as they burn
 
Back
Top