• Happy Cinco De Mayo! 🇲🇽🎸💃🪅🌶️

Small OT Penobscot Upgrade

Joined
Aug 20, 2013
Messages
427
Reaction score
179
Location
Eastern NC
Despite falsely accusing me of soiling his garage door and garbage barrel handles with epoxy, Mr. McCrea does have a good side to him.

Some time ago, during a shop day with him he gifted me a clever little idea for a better seat drops than what you typically see on Old Town Canoes.

Having to hang around today for a repair man to show up and do some work for me seemed a perfect time to tackle this little project.

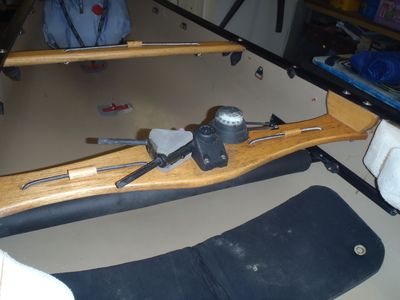
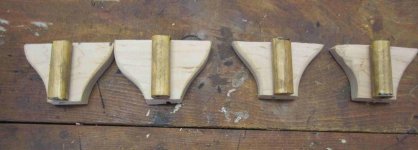
Here's a photo of the standard drilled dowel drop on top of the replacement mini-truss drops. The new drops look like they will seriously help inhibit seat sway.
Drops.jpg


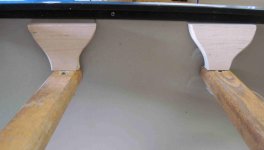
New drops laid in place. As crafted, they are a little too long for my preference. I like about 9.75 inches of seat clearance to more easily get my size 11s under the seat when I kneel. I'll need to take off 5cm to get the drop height I want. It took about 30 minutes of futzing around before I could figure out how to really secure the piece and get a electric scrolling saw on it. No table saw here at Slacker Boat Works.
Before Cut.jpg


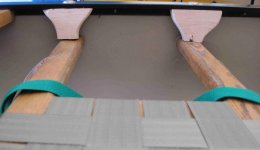
Trimmed and drilled. At Slacker Boat Works, we live with our mistakes. My first drilling attempt was done free hand with a slight angle applied to the shaft. That didn't work too well. The next 3 were drilled straight down using a drill press.

The error was larger than the photo shows. I drilled holes before trimming, so for that errant piece I trimmed the mistake end of the drop. The other three were trimmed on the gunwale face.
PostCut.JPG


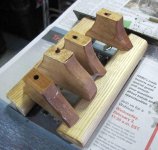
Spar urethane applied to all surfaces, pipe cleaner soaked in the spar urethane and slid thru the hole. 3 coats should be enough protection
SparVarnish.jpg

Thanks Mike!!
 
Looks good to me. I don't have a drill press so drilling those holes are always a hit and miss. I use ash shaped like those pieces holding your work off the newspaper in the last picture. I make and drill extras and then pick out the best of the lot. adds character to my work...ha:rolleyes:.
 
Glad to know I'm not the only one who struggles without a drill press. Thankfully my current drill has a small bull's eye type level bubble in it which I find very helpful. I'm still not always where I want to be but the hit or miss factor has been greatly reduced.

That's all for now. Take care and until next time...be well.

snapper

PS - Sorry but I forgot to say...great idea! Thanks for sharing.
 
Some time ago, during a shop day with him he gifted me a clever little idea for a better seat drops than what you typically see on Old Town Canoes.

The new drops look like they will seriously help inhibit seat sway.

We could have run the drill press through them while you were here, but I really didn’t want epoxy smeared on the shop equipment. And maybe finish sanded them. Slacker Boatworks needs to pick up a little 1x30 tabletop belt sander.

A couple of minutes with that little belt sander and a quick change from 120 to 220 grit does wonders, especially sanding concave curves. And anything else where you just need to take a wee bit off, or shape a little custom cant or angle; think seat drops, yokes, thwarts and seat frame ends. Refinishing battered blades on wood paddles. Pretty much any kind of sanding or custom shaping.

I seem to use those little sanders on every project, enough so that I’m too lazy to change belts and have a 1x30 and a 1x42 with different grits at the ready. For a custom drop seat drop length or inwale angle I just hit them with a tabletop belt sander to achieve the desired design.

Even as a sitter I want a touch of forward cant in my seat, to keep the seat frame pressure off my thighs and help prevent me from being pushed backwards off the seat against the foot brace. The back band provides some counter force, but I’d rather my spine be less taxed while paddling.

A cheap tabletop belt sander is $50, and I will wager that even in slacker mode you’ll use the heck out of it.

http://www.harborfreight.com/1-in-x-30-in-belt-sander-60543.html

OK, here in the Duckhead shop, add a 4x36 table top belt sander, RO sanders and sheet sanders, “detail” sanders and anything else that will get me to the best mechanically sanded finish before I move on to hand sanding. Gotta love sanding equipment.

While I enjoy hand sanding I’m not stupid, and if I can get 90% of the way there with power tools that is all the more time and effort I can spend on hand sanding the final finish.

About those seat drops. Some years ago I did a band saw cut and edge router production run, making a couple of dozen of those simple lazy S drops in two sizes, using dimensional lumber in 2 ½ and 3 ½ inch lengths. And since then have only installed full truss drops, so I have a box full of them as yet unused. I should probably hit the remaining stock with the drill press someday.

Those shaped drops are a nice intermediate compromise between flimsier drilled dowel or peg type drops and sturdier full truss drops. Full truss drops can sometimes be finicky to drill and install, especially when the bottom of the inwale edge is canted

The lazy S curve on those drops is a reverse image of the cut for the next drop, which satisfies my Scots no-wood-waste frugality, and also requires half as much band saw work, satisfying the lazy Irish portion of my genetics.

It would be much easier to just cut straight edge wedges \_/_\_/_\_/_\_/_\ from a board length, but the little repeatable curve is more aesthetically pleasing.

Out of curiosity were the replaced seat drops the canoe the originals? My Penobscot came with the even flimsier drilled dowel drops, and when I removed them to install truss drops after some years of hard use every machine screw was wobblygobbled on extraction.

Were any of the machine screws you removed from the Penobscot bent? That is something I have found on a lot of Old Town rebuilds, and is testament to those less sturdy dowel or peg hangers being tough on the machine screw straightness and strength. So far so good with those beefier individual drops at keeping the machine screws unwanked.

I think the worst of that machine screw wankage occurs when the seat shifts forward or aft in hard use; the bench seat can’t move that much from side to side, but twisting front to back is unimpeded with a narrow peg or dowel seat drop.

I have a small box full of OT’s drilled dowel seat drops removed from past rebuilds. Sanded clean and re-varnished they make nicely graspable toggles on thwart bungies, and it is faster and easier to shove a paddle blade under a front thwart keeper with a dowel spacer to dig beneath than dig at a flush run of taut stretched bungee.


While those OT drilled dowels work wellenough, and satisfy my Thoreau-vian instincts, I have come to prefer a drilled wood ball for easier paddle blade stufffage.


Those wood balls are cheap at Arts and Crafts stores in half inch or one inch diameter. You might as well buy a half dozen each of those while you’re at it, drill them and dip them in repeatedly spar urethane and hang ‘em to dry.

Make me a couple extra while you’re at it; I’m running low.
 
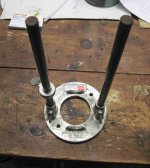
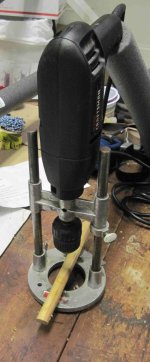
I have muddled through with one of these Portalign drill guides, and I have to say, it works pretty dern well. I have a corded drill dedicated to it. It is surprising to me that these are no longer made. 1000% better than eyeballing it. Someday I will grow up and get a drill press and table sander.
 
I have muddled through with one of these Portalign drill guides, and I have to say, it works pretty dern well. I have a corded drill dedicated to it.

I'm with you. Poor man's drill press. I've had it for about 40 years, and like you, dedicated a corded drill to it. It really is quite a clever design, surprised it isn't made anymore. I never really had a shop large enough to set aside the floor space for a drill press, and in my 20's wouldn't have had the $ to buy a drill press.
The Port-Align drills round stock, self centering on ~~ 6 inch or less wood, stops for setting drill depth,etc.. Well worth the $20 or so I paid for it.

port2.jpg


port1.jpg
 
If I need to drill a hole that has good alignment that can't fit in the drill press I just use a longer drill bit. A 12" long 1/4" bit is not very expensive and the length really helps line up the hole. Two speed squares can also give sight lines.
Jim
 
Back
Top