The Mayfly was made in Austin, Texas around 1975. It is an 18.5 foot, fiberglass canoe with unique "shedding" decks.

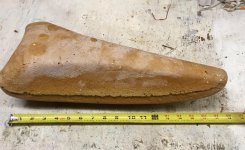
A foam “bun” had fallen out from beneath the upswept deck. This was likely placed in the canoe as floatation. Fiberglass is heavier than water, so I assume the foam was intended to provide enough floatation to keep the canoe from going to the bottom if it was swamped.
Here's a photo of the "bun"

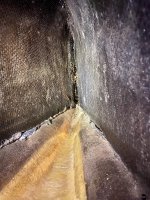
Inspection under both decks revealed a “footprints” where the foam had been installed. I matched the bun I had to the footprints and determined the one I had went in the bow, and there was not but a footprint in the stern. I think the stern floatation was missing when I got the boat.
Footprint of the bun under the bow deck:
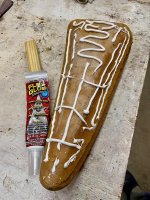
I cleaned up the bun and the underside of the bow deck. I ran beads of FlexGlue on the bun, stuck it back in the bow, and weighted it with a couple bricks.
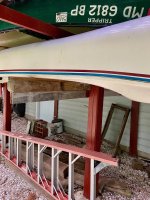
I had to prop up the stern a bit to get the (upside-down) top of the deck approximately level, I poured two-part urethane foam into the stern deck. It’s exciting to work with urethane foam. You have 45 seconds to get the two parts mixed and poured. I started out by measuring urethane part A and B into two separate cups. At the canoe, I emptied the two cups into a third cup. The urethane liquid parts are thick and pour slowly, so it took ten seconds just to get the two liquids into a mixing cup. Then I stirred the mix with a home-made stirring paddle in an electric drill. It looked well mixed after 20-25 seconds. I was well past the 40 second mark before I began pouring the mixture into the stern.
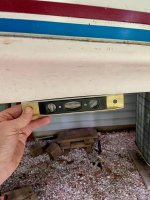
Propping up the stern to make it level:
Measure twice, mix once, and make it quick!
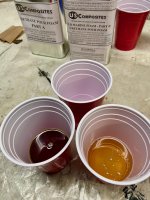
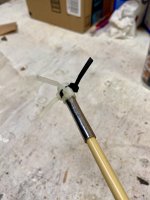
Thank you, Mike McCrea, for coaching me to make a mixing paddle for the drill. This made it easy to quickly and thoroughly mix the urethane.
Sorry, no time for photos of mixing and pouring. Below photo shows the pour about 1 minute after I poured the mix into the stern.
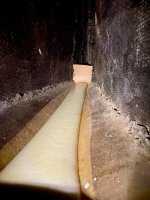
Here's my home-baked "bun," fully expanded. I'll take a drill and add channels to make sure water can pass on either side of the bun when the boat is racked for draining.
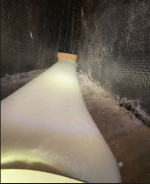
I’m pleased with the results. After a day, the bun in the bow is firmly attached under the deck, and the foam in the stern covered the old bun’s footprint, plus some, is well adhered, and completely cured stiff. With floatation in place, I am now comfortable letting the Brownline go to it’s new home on Rockhold Creek.

A foam “bun” had fallen out from beneath the upswept deck. This was likely placed in the canoe as floatation. Fiberglass is heavier than water, so I assume the foam was intended to provide enough floatation to keep the canoe from going to the bottom if it was swamped.
Here's a photo of the "bun"


Inspection under both decks revealed a “footprints” where the foam had been installed. I matched the bun I had to the footprints and determined the one I had went in the bow, and there was not but a footprint in the stern. I think the stern floatation was missing when I got the boat.
Footprint of the bun under the bow deck:

I cleaned up the bun and the underside of the bow deck. I ran beads of FlexGlue on the bun, stuck it back in the bow, and weighted it with a couple bricks.

I had to prop up the stern a bit to get the (upside-down) top of the deck approximately level, I poured two-part urethane foam into the stern deck. It’s exciting to work with urethane foam. You have 45 seconds to get the two parts mixed and poured. I started out by measuring urethane part A and B into two separate cups. At the canoe, I emptied the two cups into a third cup. The urethane liquid parts are thick and pour slowly, so it took ten seconds just to get the two liquids into a mixing cup. Then I stirred the mix with a home-made stirring paddle in an electric drill. It looked well mixed after 20-25 seconds. I was well past the 40 second mark before I began pouring the mixture into the stern.
Propping up the stern to make it level:


Measure twice, mix once, and make it quick!

Thank you, Mike McCrea, for coaching me to make a mixing paddle for the drill. This made it easy to quickly and thoroughly mix the urethane.

Sorry, no time for photos of mixing and pouring. Below photo shows the pour about 1 minute after I poured the mix into the stern.

Here's my home-baked "bun," fully expanded. I'll take a drill and add channels to make sure water can pass on either side of the bun when the boat is racked for draining.

I’m pleased with the results. After a day, the bun in the bow is firmly attached under the deck, and the foam in the stern covered the old bun’s footprint, plus some, is well adhered, and completely cured stiff. With floatation in place, I am now comfortable letting the Brownline go to it’s new home on Rockhold Creek.
