Just buy this kit:
http://www.amazon.com/West-System-6...8&qid=1410107628&sr=8-3&keywords=g+flex+epoxy
Ignore the fact that the package says "Aluminum Boat Repair Kit".
It contains 4 oz of G Flex resin and 4 oz of hardener, more than enough than you need. It also has some mixing tools and silica powder, which is useful for thickening the epoxy. I suspect that after you remove the loose wood and splinters and do the initial bonding of the pieces, that you will need to fill in some voids. Thickened epoxy can be used for that purpose so that you can fill and fair the joint flush with the adjacent inwales. The kit also includes a couple of dental syringes which have long, drawn out tips that can be used to inject epoxy into cracks and crevices. You take the plunger out of the syringe barrel, pour some mixed epoxy into the open end of the barrel, loosely approximate the end of the plunger to the barrel, invert the syringe and let the epoxy slowly run down. You can then eject the air from the syringe.
G Flex is ridiculously easy to use. You can mix up batches of any size, but you will mostly be using small batches. This can be done 1:1 by volume and can be done by eye. The G Flex will have a honey like consistency at most working temperatures, but you can render it a bit less viscous by warming it gently. If you want thicker, stir a bit of silica powder into the mixed epoxy.
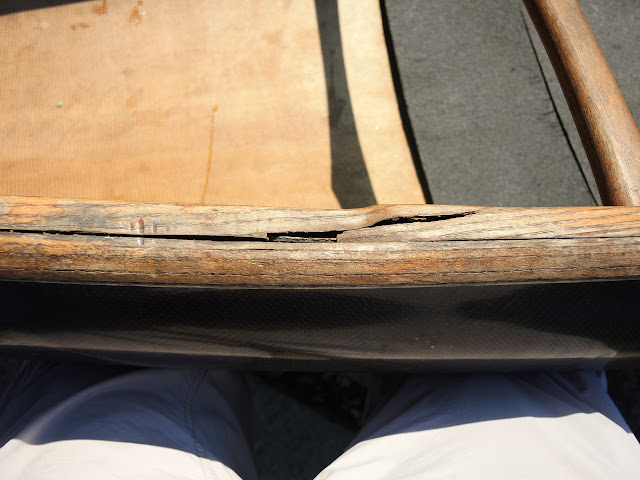
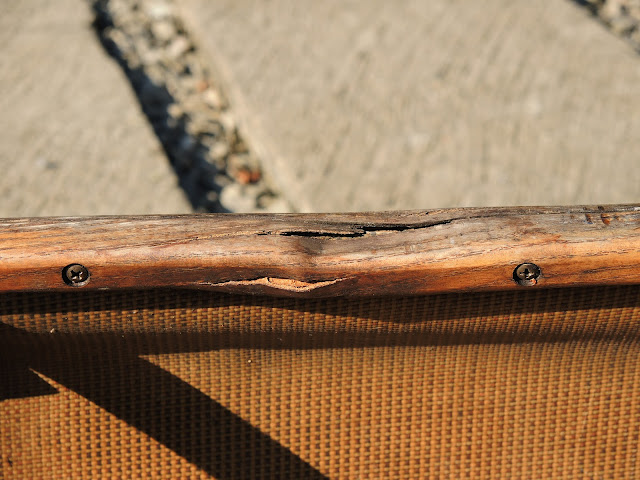
The position of your break relative to the thwart suggests that there should be plenty of room between it and the bow deck to allow the forward part of the inwale to be lifted away from the hull. You will need to remove the thwart to allow the midships part of the inwale to be lifted away. Just use a #2 Phillips screwdriver to remove all of the screws going into the inwale from the inside from the break to the deck. Remove enough screws in the other directions to allow enough freedom for the inwale to lift away. While working on the break you will probably need to shim a couple of thin wedges between the inwale and the hull to hold it off. This should allow you to get at and clean out the crack without need for dental instruments.
I have not used Elmer's wood conditioner. I know someone who did who was very unhappy with it. They used Minwax Wood Hardener instead which worked much better but I have not used that either.
I personally would not clamp the pieces together tightly. What I would probably do is put several rubber bands over the inwales before jointing the break and run them down away from the break. Once the break is clean, use some thickened epoxy as a glue and apply to both ends of the break. Then wrap either plastic wrap or wax paper around the inwale to cover the break and contain the epoxy. Slide your rubber bands down over the break to keep the ends in alignment. As the epoxy is curing, remove any wedges holding the inwale away from the hull so that the jointed inwale has the correct curvature.
After the initial jointing you will need to sand off the excess epoxy and fill and fair any voids. If you want a nice, smooth result, you will need to make multiple, small applications sanding in between.
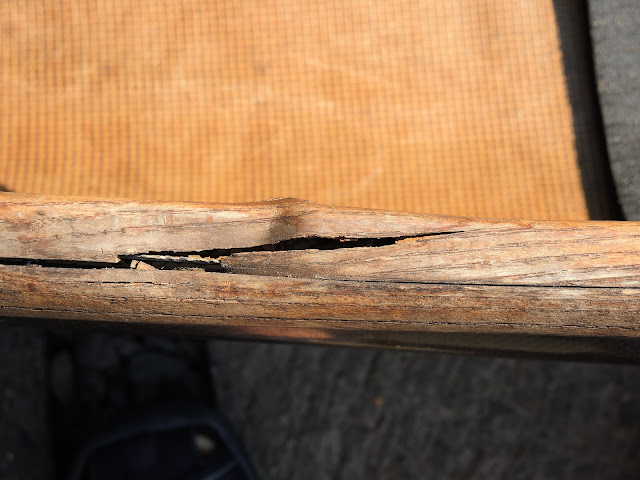
The fiberglass job I described is about the easiest imaginable. Fiberglass tape has what is referred to as a selvage edge running down both sides of the tape. The selvage edge prevents fraying, but results in a significant raised bump when the tape is wet out. Personally, I would not use if for this purpose. The first reason is that it usually comes in 8 oz/yd thickness which is thicker than you need. Secondly, the selvage edge is not likely to be of much assistance to you. You will probably wind up cutting it off. It looks as if your fracture is around 6-8 inches in total length. I would glass over a segment about 2 inches longer than the break in each direction, say 10-12 inches. I would wrap 4 oz glass completely around the gunwales overlapping the edges either on the side of the inwale facing the hull, or the bottom of the inwale. The cut ends will have some tendency to fray but it does not matter and you can later use sandpaper to feather the ends of the glass. Wedge the jointed inwale off the hull, coat the entire area to be glassed with some epoxy, carefully lay your strip of glass over the epoxy and wrap it around, then apply more epoxy to wet it out. The glass may try to lift away from the gunwale but as the epoxy starts to kick it will get tacky and the glass will stick to it. Also, 4 oz/sq yd fiberglass lays flat and goes over right angles much more easily than heavier glass cloth.
Once the wet out coat of epoxy has cured to a 'green' state, you can apply a bit more epoxy to completely fill the weave of the cloth so it is smooth. Wet sand the cut edges to smoothly feather them. You can cover this area with whatever you would use on the rest of the wood.