- Joined
- Jul 25, 2012
- Messages
- 838
- Reaction score
- 24
Every one was so kind about my fledgling efforts with the axe sheath that I thought I'd round out by showing you a typical knife sheath. And I hope to address some of the things I forgot the first time around. It is important to warn you that I expect that you've read about building the axe sheath; it isn't ego but I don't want to bore everyone reading the same things again that were discussed the first time.
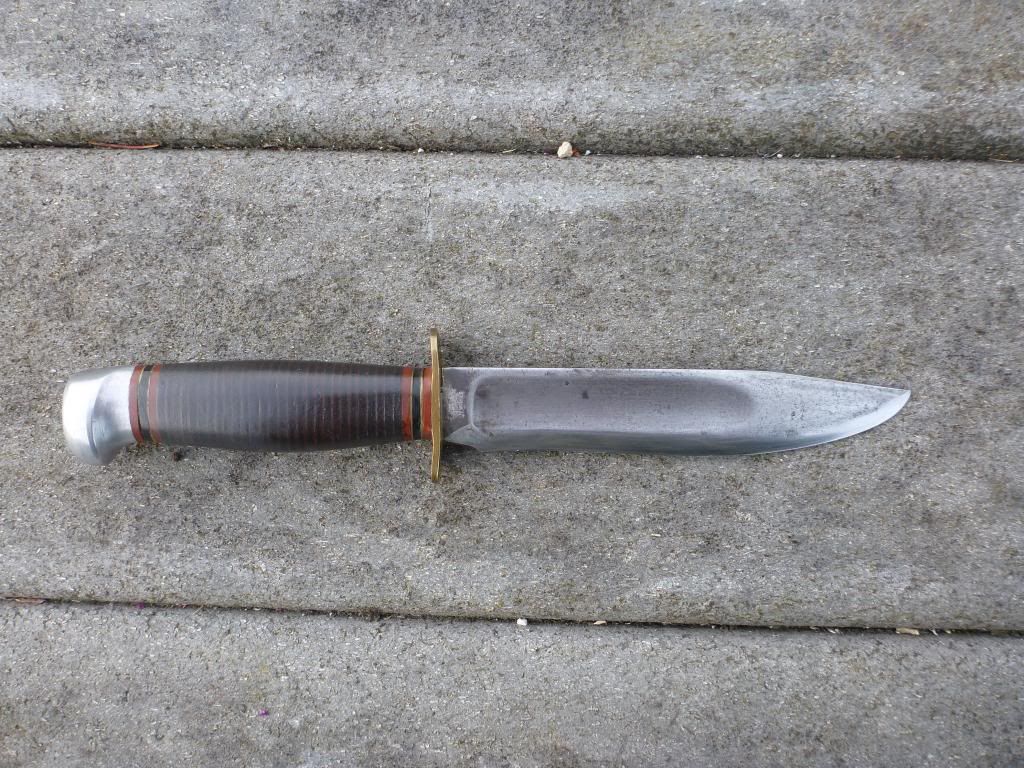
About the knife: I found it at a Junk shop dirty, rusted and abused. The leather washers were only partly there and those were rotted. I don't know why but these things just attract me like a load stone. Now cleaned and with a new handle and proper edge this Marble knife is once again ready to be used.
What you finally decide on for your sheath will depend on many factors: probably first is the shape of the knife, then where will you wear it and how will it be used and then finally, what skill set do you bring to the workbench? We will start as before by making a pattern from a sturdy paper bag. As you develop a feel for the leather and what can be done with it, you will become able to look at the paper pattern and "see" how the pattern will work out when we move to leather. Very soon you will be able to try various ideas out in the pattern stage without spending any money and giving you imagination a work out.
When I looked at this knife the first thing that struck me was the cross guard: It's a good strong one but worn on the side of my body those ends of the guard will catch things as I walk unless somehow I bury them somehow in the sheath. Several sheaths ago I've decided I really like to have the handle open and the knife secured by a strip of leather with double snaps. Just because that's what I do is no reason some other way you like won't work out better for you.
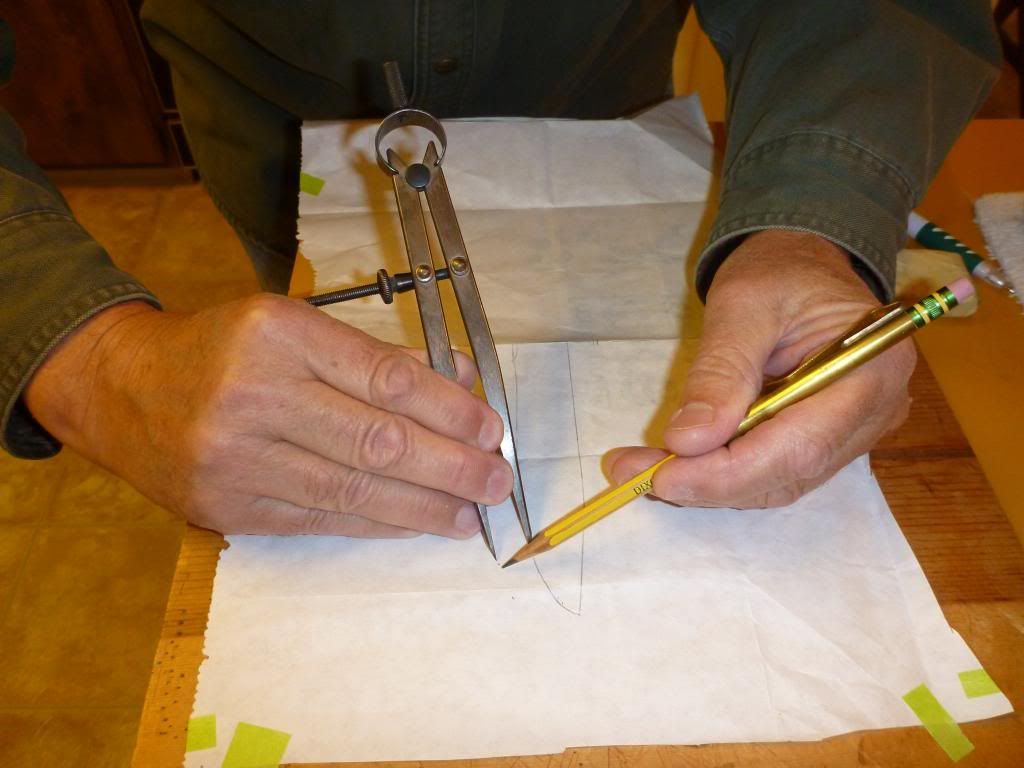
As you remember with that axe we had to fit and fiddle to determine the shape of the pattern; usually with a knife it's much more straight forward. Here we see the blade alone extending on the paper pattern to be marked out very closely to it's exact shape.
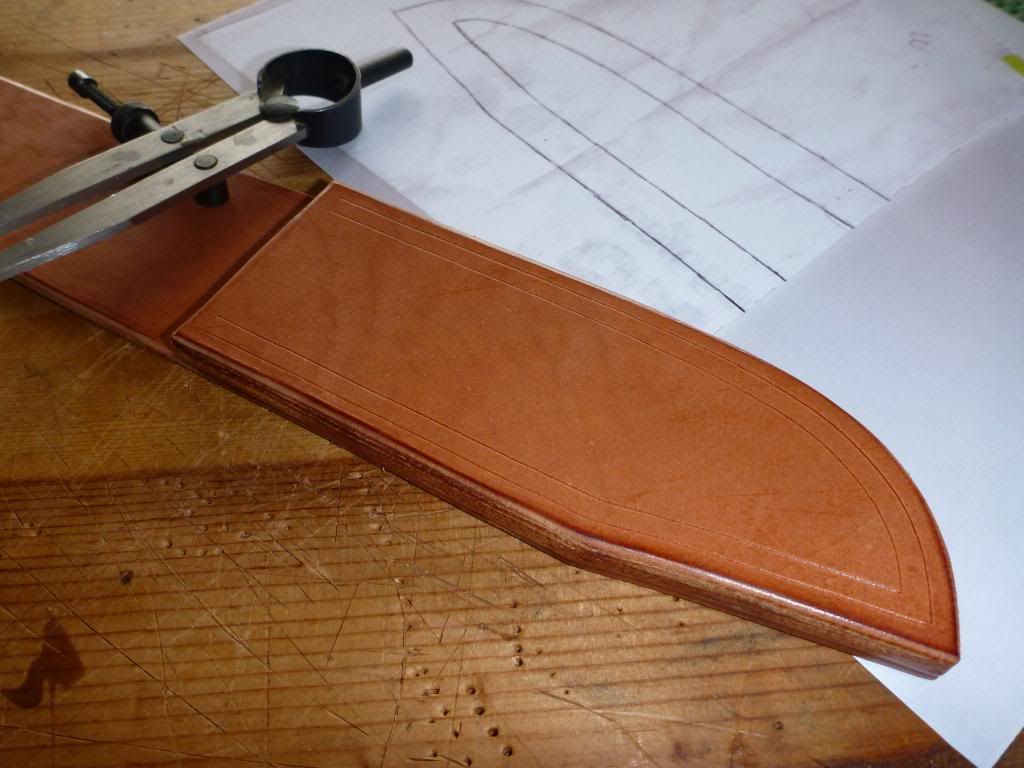
The shape of the blade has been marked out and I've made a momentous decision; the guards shall be "buried" in a wider sheath. The outside of the sheath is being marked here. My plan is to have two lines of stitching which if I do my part ought to look nice. We'll see.
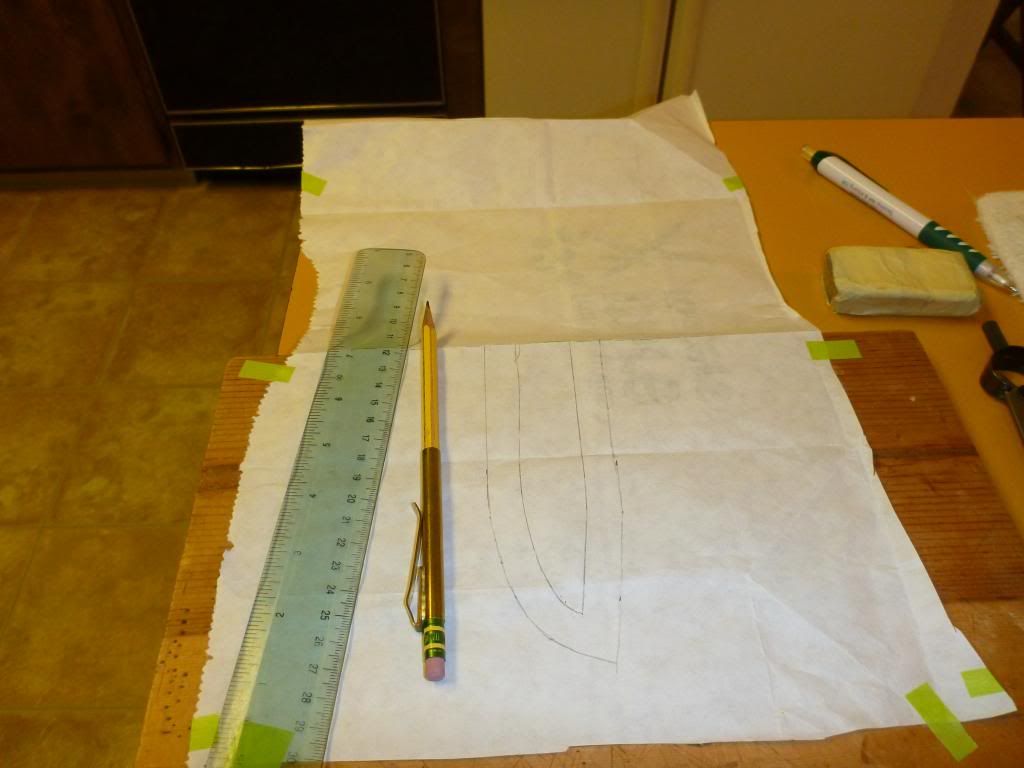
There is the shape it will be, please note that little notch at the end of the sharp just before the lower guard, we will not cut the leather so it goes up there, the effect would be to resist the movement of the blade. And clearly that's not something we want to do.
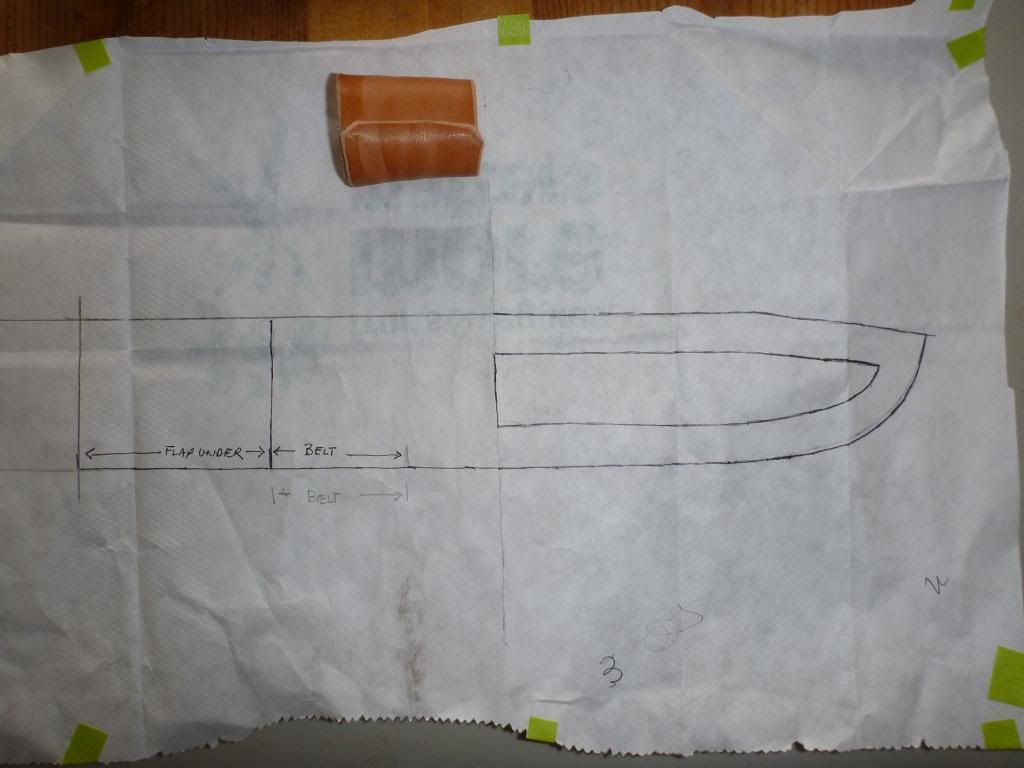
I extended the lines from the sheath by the blade on up and allowed for the space needed to attach the knife retaining snaps and the loop under that will give me a place to thread my belt through. That curled bit of leather above the pattern is what is going to be the retaining strap to hold the knife. It tapers because the knife handle tapers at that point. Well that's it for the pattern, we're done. Surprised?
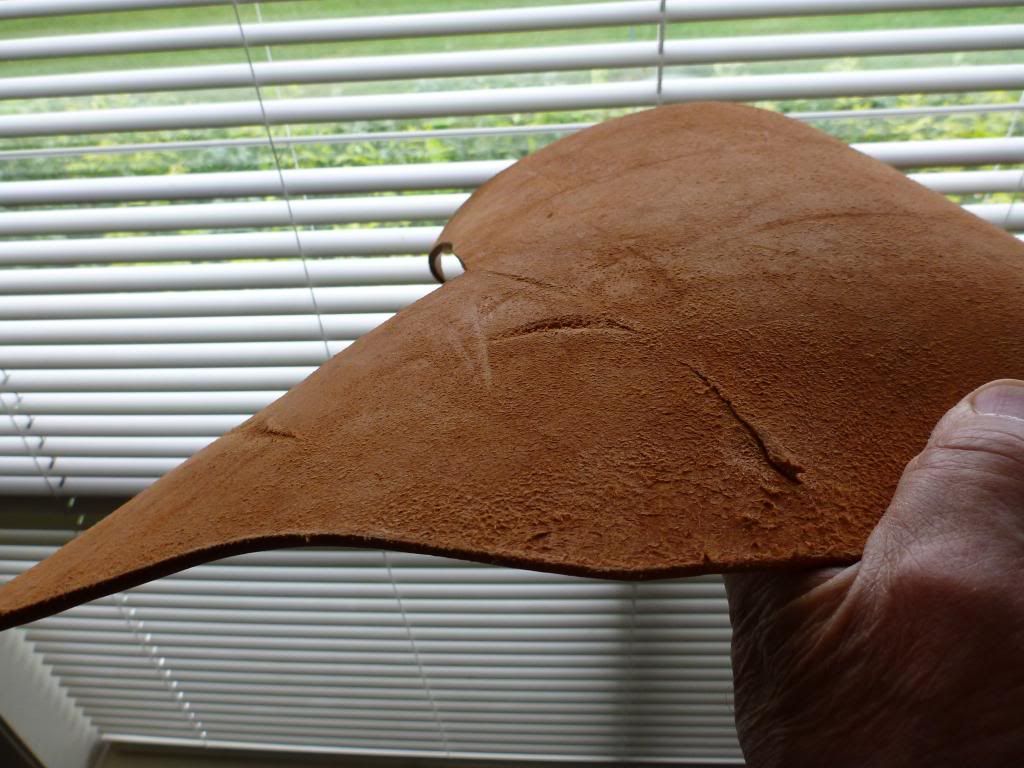
Now we're looking to pick out the leather to be used, this is the flesh side of this hide and those are nicks in it to be avoided. It's very easy to get carried away and not check both sides.
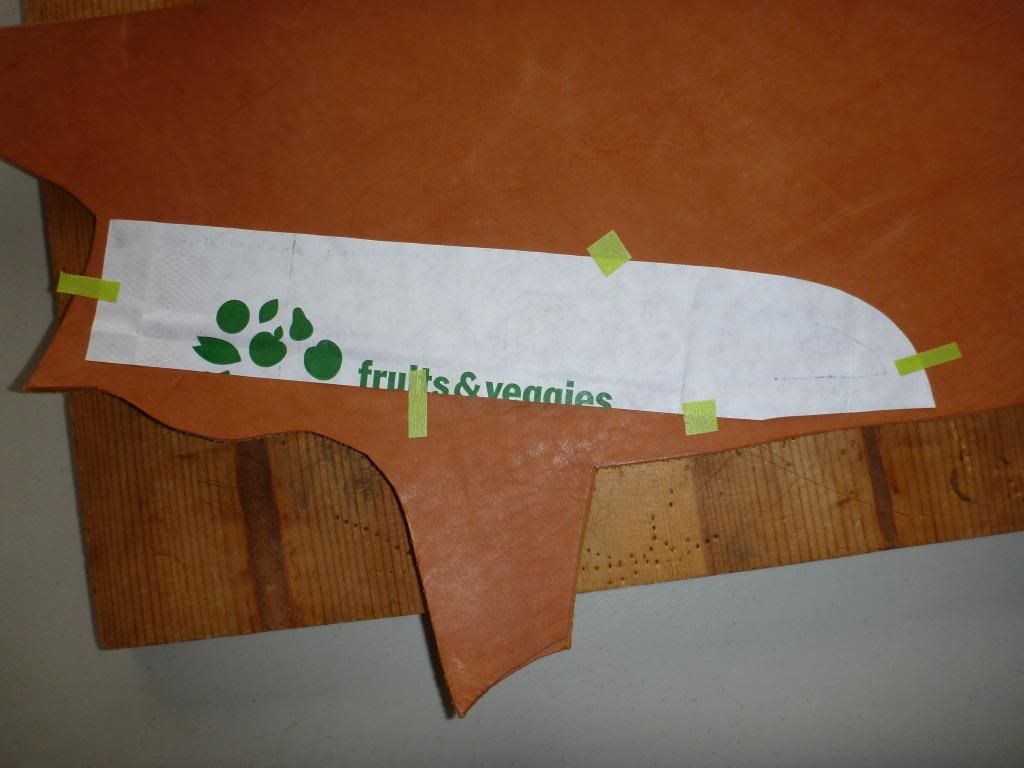
Whoops! He's got the pattern upside down! No, actually it's right, when I drew it I made it for a right handed person, that's not me. I'm a lefty and like the sharp to the rear so it needs to be this way.
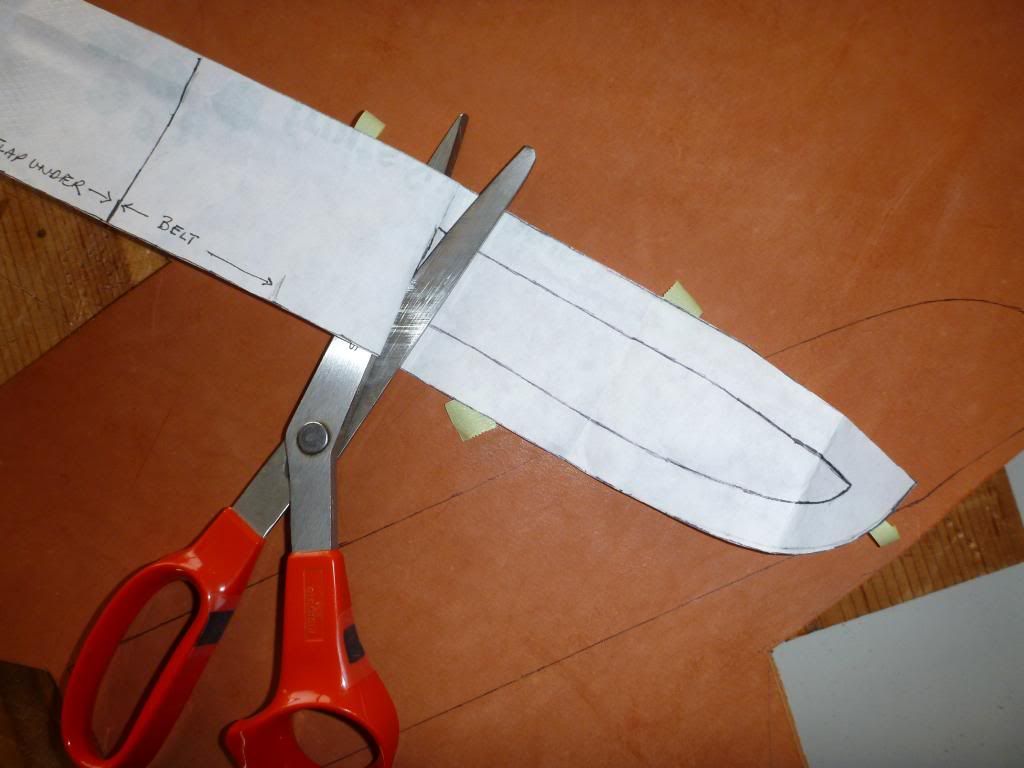
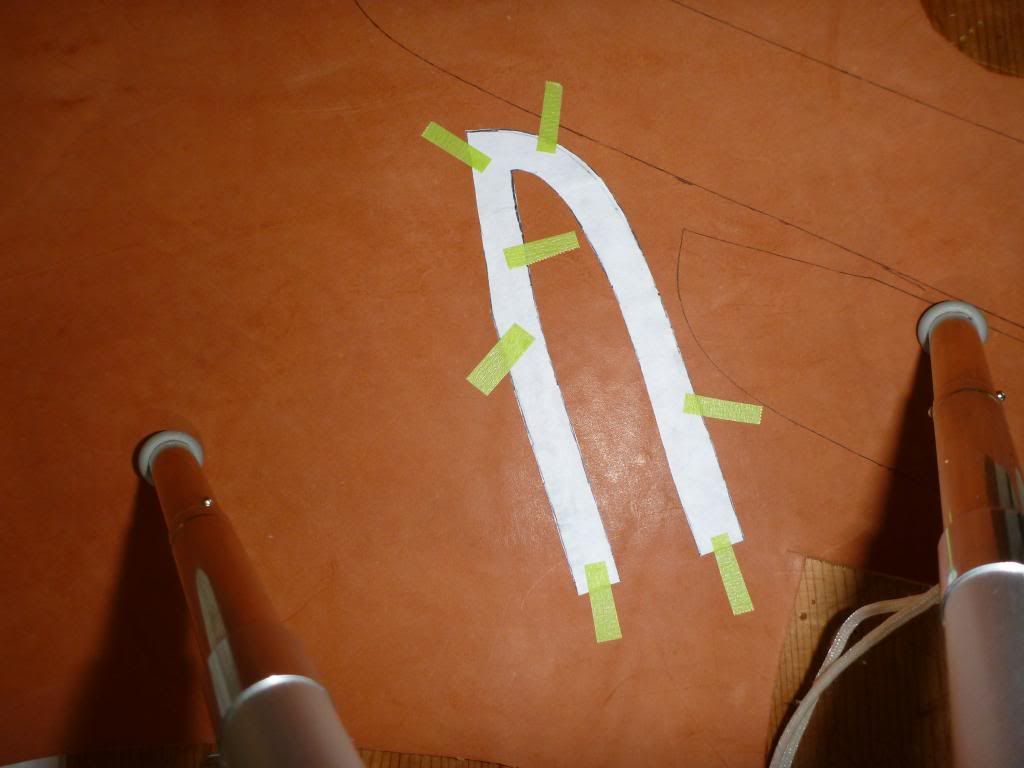
If you look closely you'll see the long piece has been marked out on the leather. Now we cut off the extra to make the front of the sheath. When you place the tape to hold the pattern down, place it where the it will be obvious how the lines need to go once the tape has been removed. Then simply free-hand the line in to complete the marking out. If you ever think you might want to use the pattern again it might be a good idea to make a copy of it.
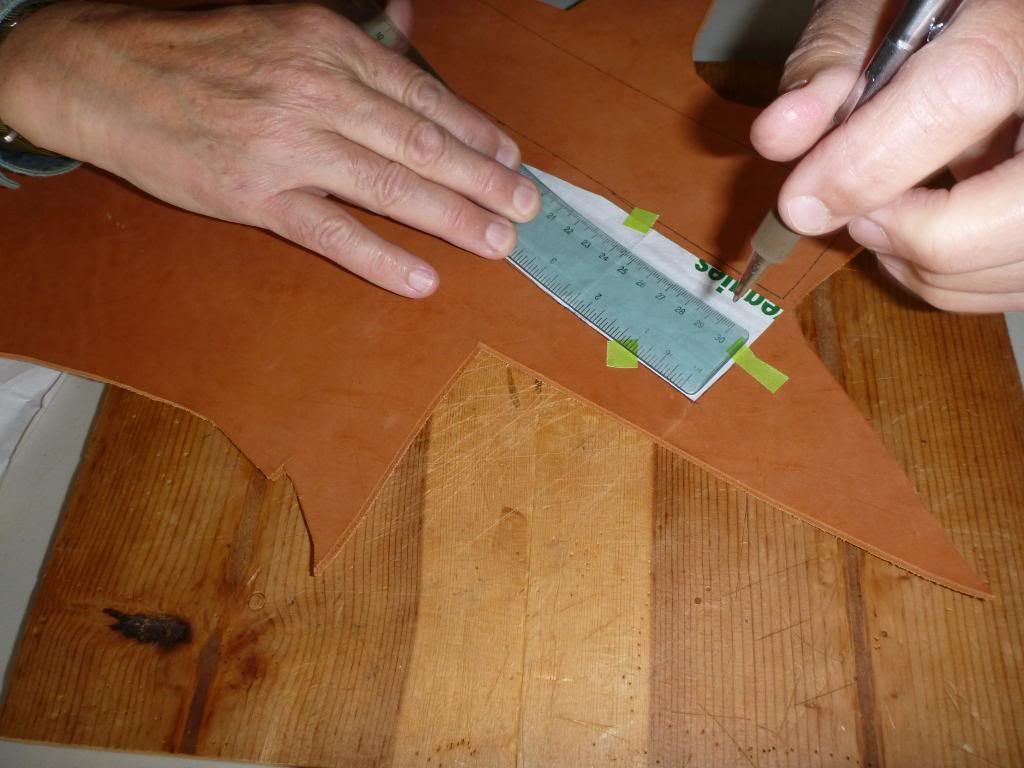
I use a flexible ruler to give some support to the paper pattern while I draw the line around it.
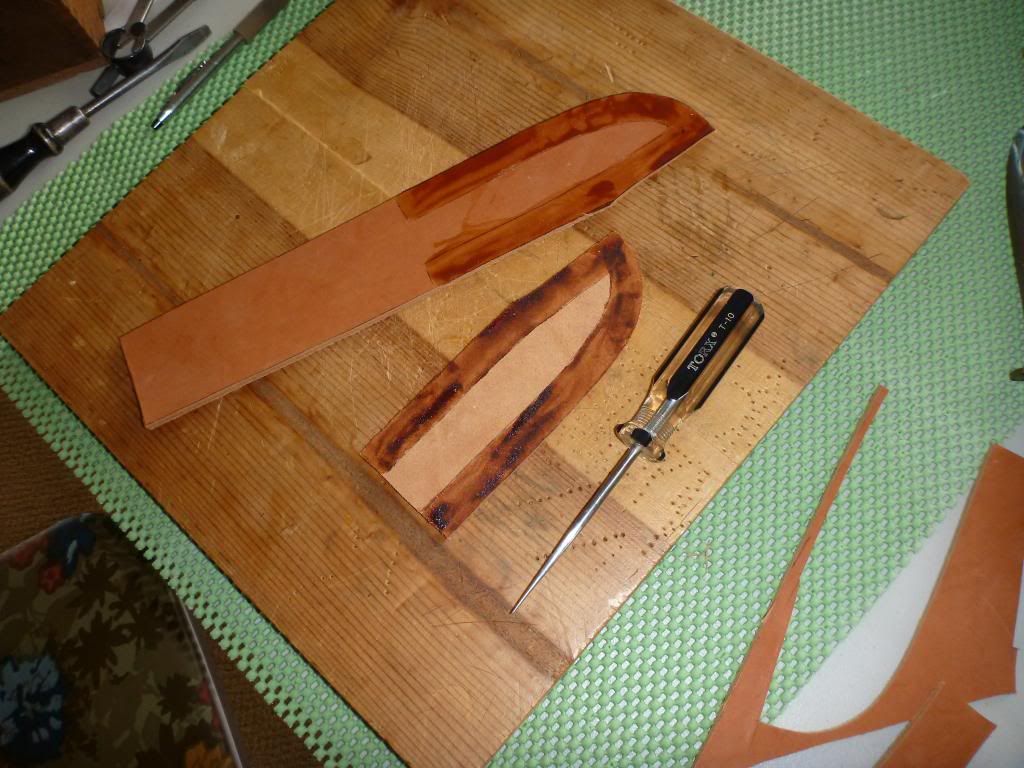
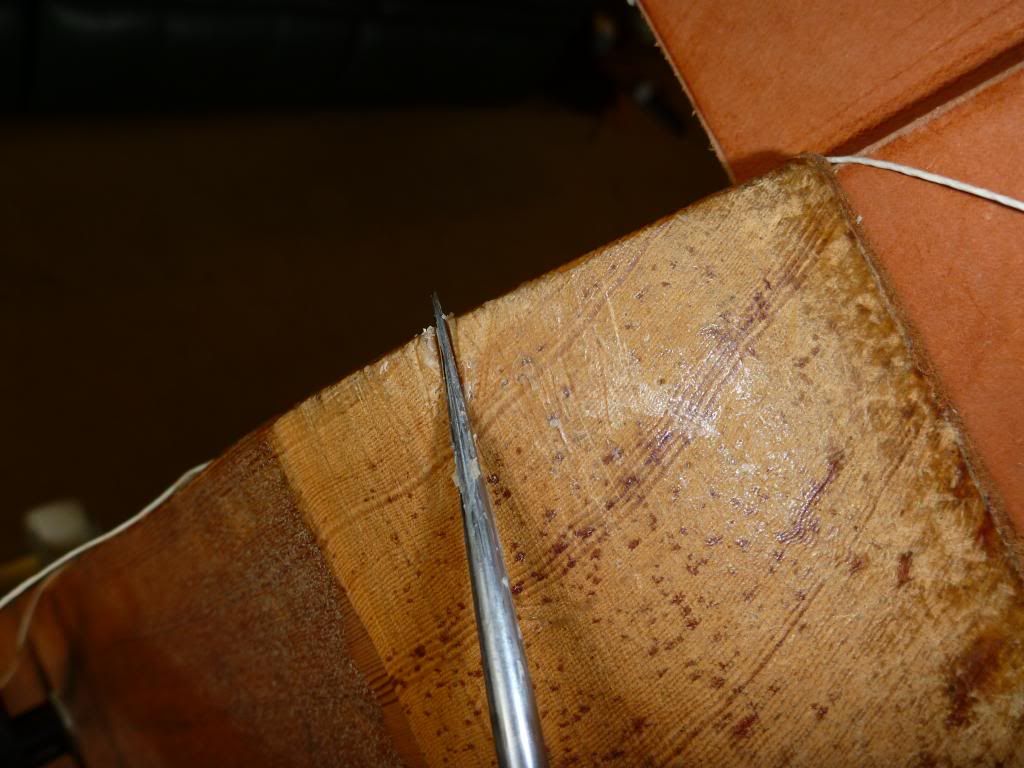
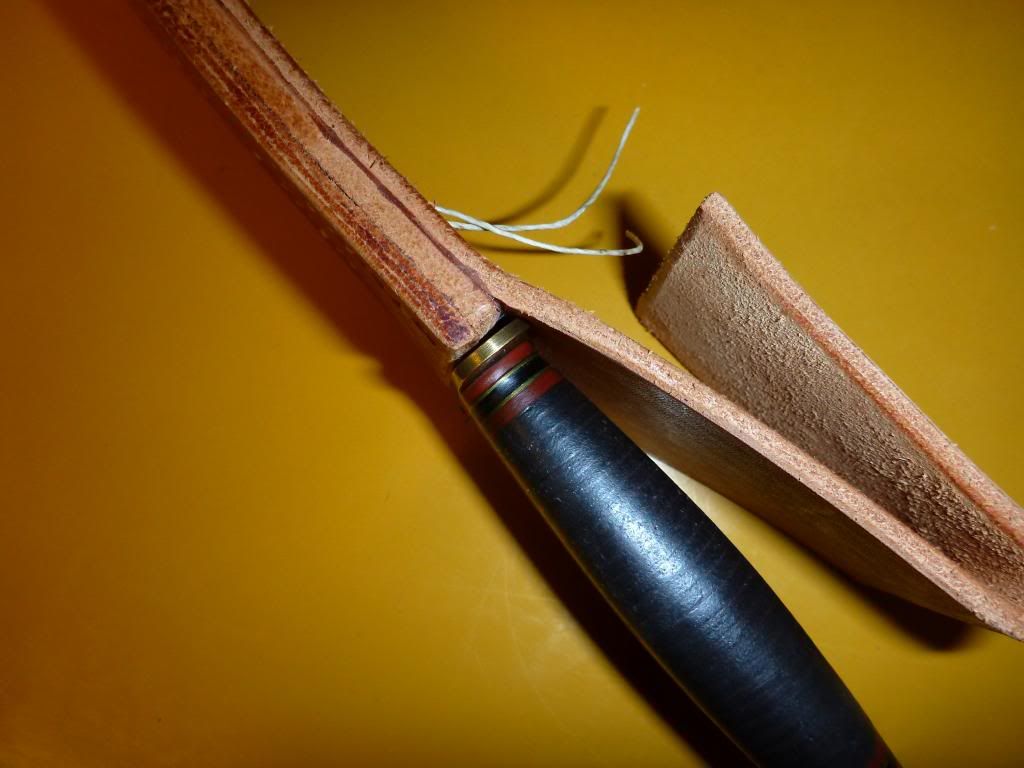
No doubt you recognise the third piece that is sandwiches between front and back. Generally any time you are trying to contain something sharp it's a good idea to employ this kind of "buffer" between the sharp and the thread. With the axe we backed it up with copper rivets too; it's not at all impossible that someone might drop the axe and cut through any unprotected stitching, the axe head has so much mass, but that's not true for the knife.
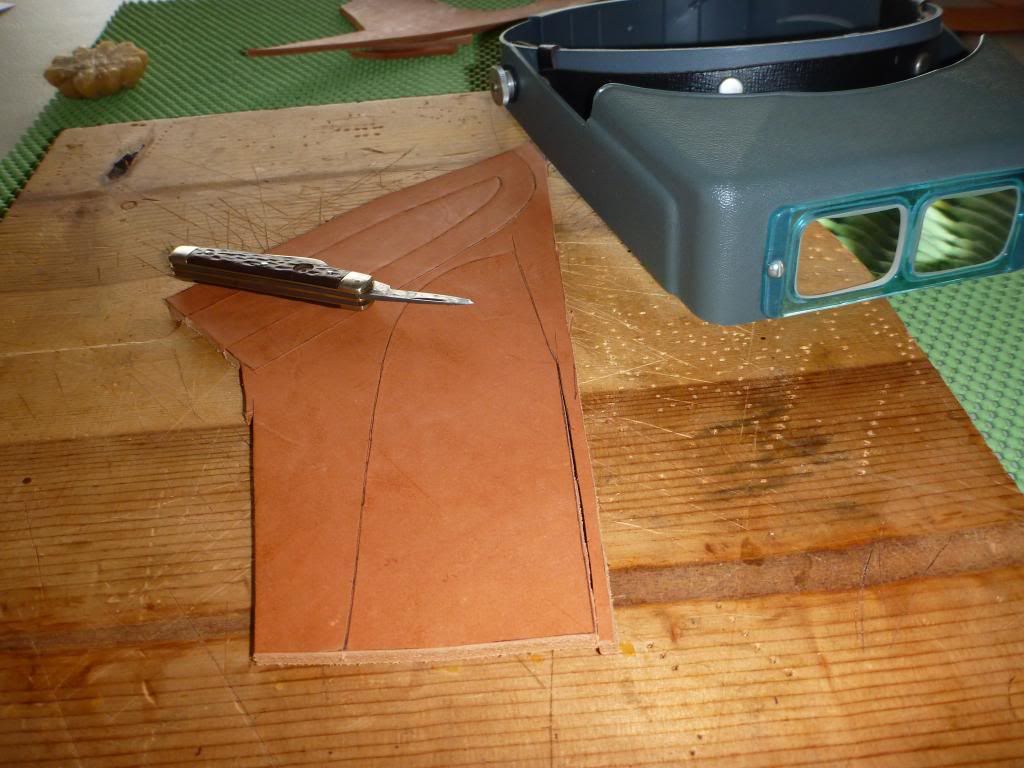
One of the unpleasant truths in all this is that you can cut yourself, possibly quite badly. To minimize the risk: keep your knife just as sharp as you can make it. Cut with multiple passes; less force is needed when you expect to go over the same cut many times. Often the blade will seem to jerk along, wax it with bees wax and that will help. Some times the piece of leather when you are starting to cut is awkwardly large, that problem will quickly be resolved. BUT try to keep the piece just as large as you can and still work with it easily. Cut all the marked pieces down to where they are just about but not quite free of the piece of leather. What that gives you is a way to easily cut out the smallest bit and still have room to keep your hands away from the cutting blade. Then at the last cut that last bit free, easy peasy!
Spreading the contact cement, note the nonskid pad under the cutting board, and my favorite awl; it started life as a screw driver but when the tip got wrecked I made it into an awl. In use it presses into my left palm and I wish I'd looked for something with a more comfortable grip.
I've leap frogged past all the prep of the edge, it's the same as with the axe. There are the two lines of stitching to be.....
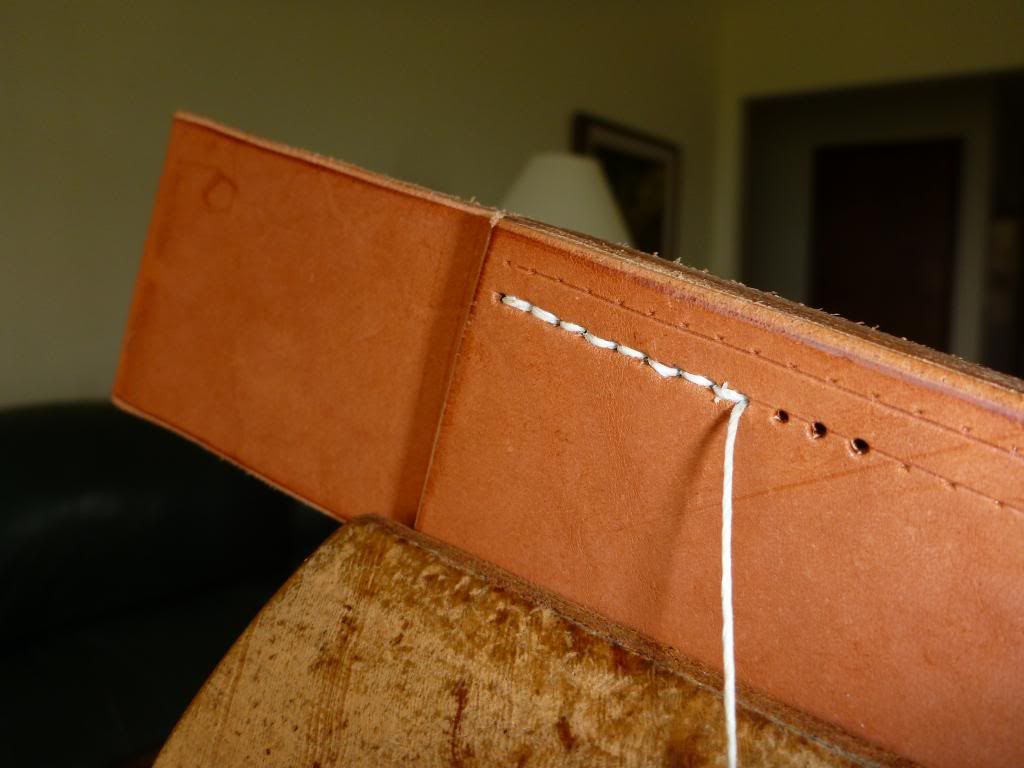
Stitching started.
Good Golly Miss Molly!! That is some serious stiff leather! I really had to work to get the awl through and there are many stitches to go. What I did was to cut a notch in the left side of the horse and stuck some bees wax there; slicked the awl just fine.
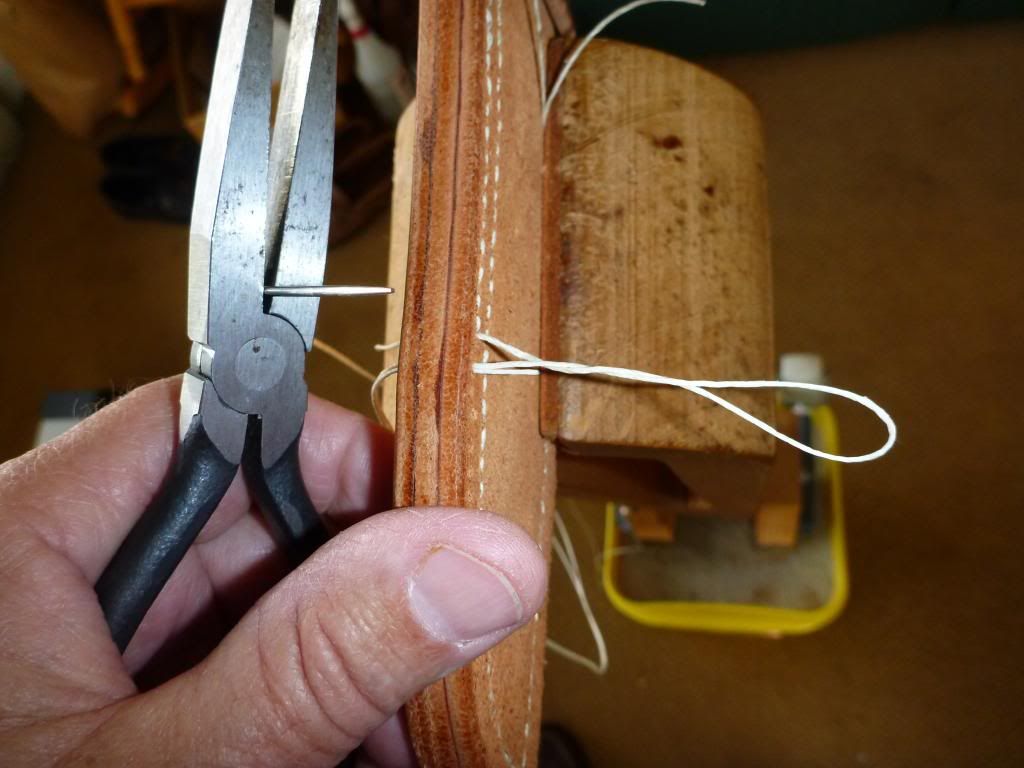
When this happens, the twisted thread, gently straighten it out don't just jerk it through. A great deal of my sewing technique is about not hurting the thread. The only thing I've used is the linen thread; was looking at the Tandy site and they had some synthetic threads and I couldn't help but wonder if they would work better.......
One line of sewing has been done and I'm checking to see the fit. Once I've wet molded the sheath it will fit to the knife like they are old friends. There is little need to show the rest of the sewing, I believe the expression is "as exciting as watching paint dry" that is, if the thread doesn't break.
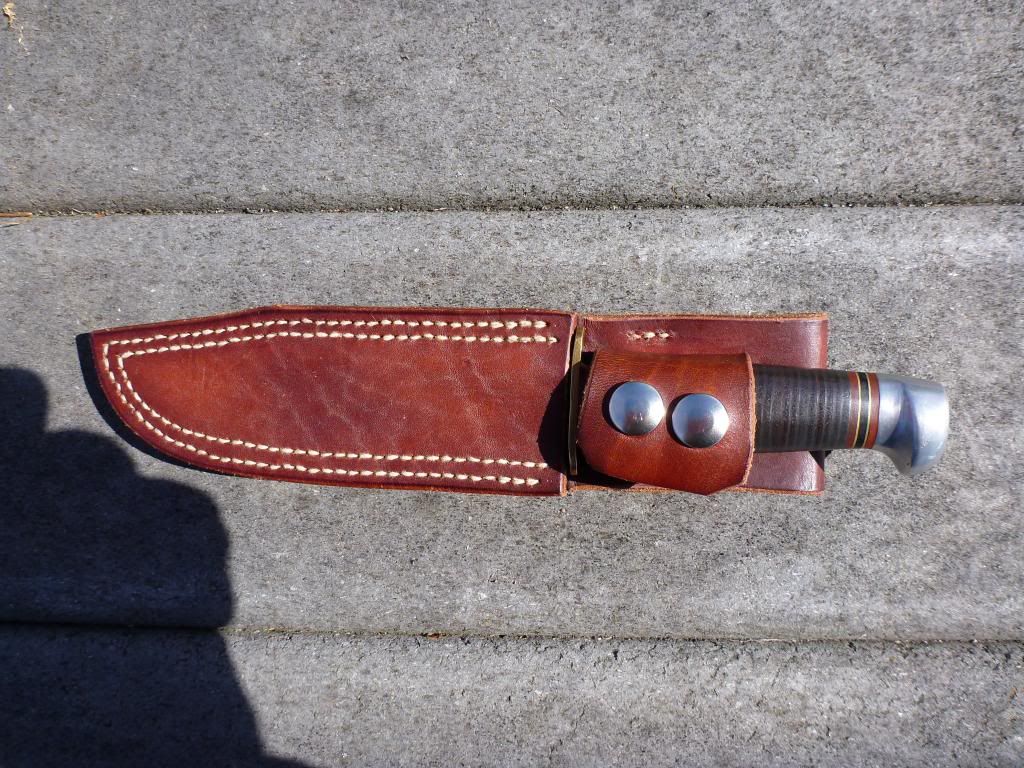
Well there it is. Done. Any questions that you might have I'll be glad to try to answer. Thanks for bearing up under all this and being so kind. I guess if I were to look for something to say as a closure, I'd suggest that being able to make something out of leather the way you think it ought to be, frees you to try out your own ideas and develop what works best for you.
Best Wishes, Rob
About the knife: I found it at a Junk shop dirty, rusted and abused. The leather washers were only partly there and those were rotted. I don't know why but these things just attract me like a load stone. Now cleaned and with a new handle and proper edge this Marble knife is once again ready to be used.

What you finally decide on for your sheath will depend on many factors: probably first is the shape of the knife, then where will you wear it and how will it be used and then finally, what skill set do you bring to the workbench? We will start as before by making a pattern from a sturdy paper bag. As you develop a feel for the leather and what can be done with it, you will become able to look at the paper pattern and "see" how the pattern will work out when we move to leather. Very soon you will be able to try various ideas out in the pattern stage without spending any money and giving you imagination a work out.
When I looked at this knife the first thing that struck me was the cross guard: It's a good strong one but worn on the side of my body those ends of the guard will catch things as I walk unless somehow I bury them somehow in the sheath. Several sheaths ago I've decided I really like to have the handle open and the knife secured by a strip of leather with double snaps. Just because that's what I do is no reason some other way you like won't work out better for you.

As you remember with that axe we had to fit and fiddle to determine the shape of the pattern; usually with a knife it's much more straight forward. Here we see the blade alone extending on the paper pattern to be marked out very closely to it's exact shape.

The shape of the blade has been marked out and I've made a momentous decision; the guards shall be "buried" in a wider sheath. The outside of the sheath is being marked here. My plan is to have two lines of stitching which if I do my part ought to look nice. We'll see.

There is the shape it will be, please note that little notch at the end of the sharp just before the lower guard, we will not cut the leather so it goes up there, the effect would be to resist the movement of the blade. And clearly that's not something we want to do.

I extended the lines from the sheath by the blade on up and allowed for the space needed to attach the knife retaining snaps and the loop under that will give me a place to thread my belt through. That curled bit of leather above the pattern is what is going to be the retaining strap to hold the knife. It tapers because the knife handle tapers at that point. Well that's it for the pattern, we're done. Surprised?

Now we're looking to pick out the leather to be used, this is the flesh side of this hide and those are nicks in it to be avoided. It's very easy to get carried away and not check both sides.

Whoops! He's got the pattern upside down! No, actually it's right, when I drew it I made it for a right handed person, that's not me. I'm a lefty and like the sharp to the rear so it needs to be this way.

If you look closely you'll see the long piece has been marked out on the leather. Now we cut off the extra to make the front of the sheath. When you place the tape to hold the pattern down, place it where the it will be obvious how the lines need to go once the tape has been removed. Then simply free-hand the line in to complete the marking out. If you ever think you might want to use the pattern again it might be a good idea to make a copy of it.

I use a flexible ruler to give some support to the paper pattern while I draw the line around it.

No doubt you recognise the third piece that is sandwiches between front and back. Generally any time you are trying to contain something sharp it's a good idea to employ this kind of "buffer" between the sharp and the thread. With the axe we backed it up with copper rivets too; it's not at all impossible that someone might drop the axe and cut through any unprotected stitching, the axe head has so much mass, but that's not true for the knife.

One of the unpleasant truths in all this is that you can cut yourself, possibly quite badly. To minimize the risk: keep your knife just as sharp as you can make it. Cut with multiple passes; less force is needed when you expect to go over the same cut many times. Often the blade will seem to jerk along, wax it with bees wax and that will help. Some times the piece of leather when you are starting to cut is awkwardly large, that problem will quickly be resolved. BUT try to keep the piece just as large as you can and still work with it easily. Cut all the marked pieces down to where they are just about but not quite free of the piece of leather. What that gives you is a way to easily cut out the smallest bit and still have room to keep your hands away from the cutting blade. Then at the last cut that last bit free, easy peasy!

Spreading the contact cement, note the nonskid pad under the cutting board, and my favorite awl; it started life as a screw driver but when the tip got wrecked I made it into an awl. In use it presses into my left palm and I wish I'd looked for something with a more comfortable grip.

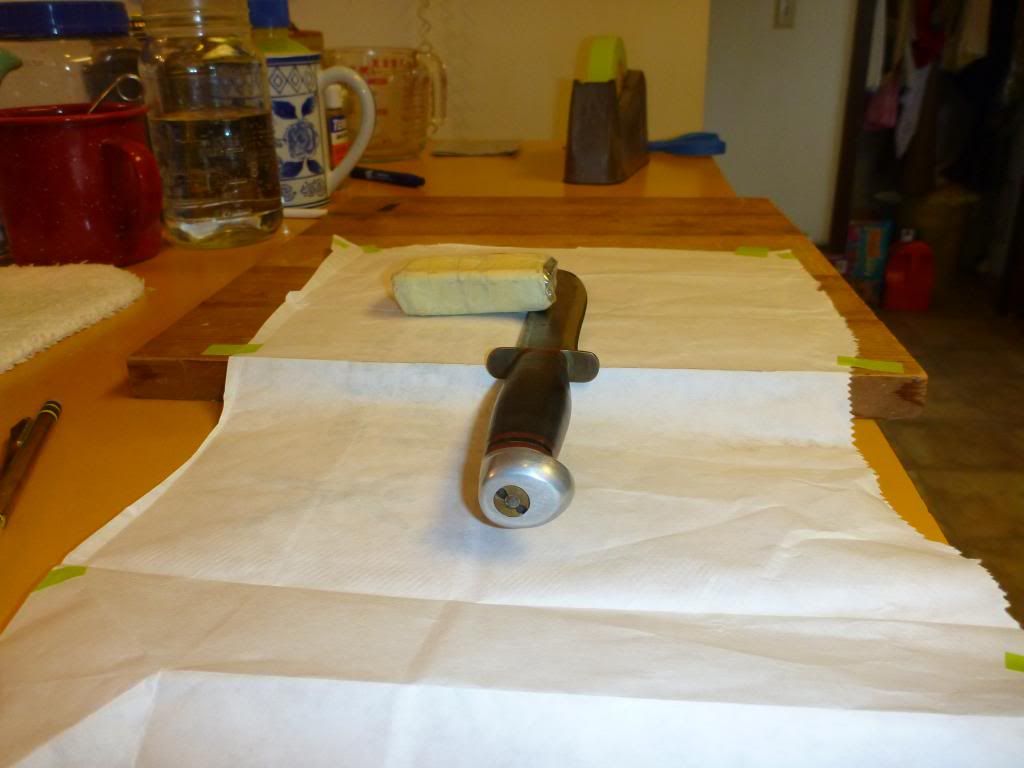
I've leap frogged past all the prep of the edge, it's the same as with the axe. There are the two lines of stitching to be.....

Stitching started.

Good Golly Miss Molly!! That is some serious stiff leather! I really had to work to get the awl through and there are many stitches to go. What I did was to cut a notch in the left side of the horse and stuck some bees wax there; slicked the awl just fine.

When this happens, the twisted thread, gently straighten it out don't just jerk it through. A great deal of my sewing technique is about not hurting the thread. The only thing I've used is the linen thread; was looking at the Tandy site and they had some synthetic threads and I couldn't help but wonder if they would work better.......

One line of sewing has been done and I'm checking to see the fit. Once I've wet molded the sheath it will fit to the knife like they are old friends. There is little need to show the rest of the sewing, I believe the expression is "as exciting as watching paint dry" that is, if the thread doesn't break.

Well there it is. Done. Any questions that you might have I'll be glad to try to answer. Thanks for bearing up under all this and being so kind. I guess if I were to look for something to say as a closure, I'd suggest that being able to make something out of leather the way you think it ought to be, frees you to try out your own ideas and develop what works best for you.
Best Wishes, Rob