• Happy National Zipper Day (pat. 1913)! 🤐

Carbon Fiber Nokomis

Almost two months. It's been a fun and busy Fall.
Now that Winter is here, I'm back in the shop.
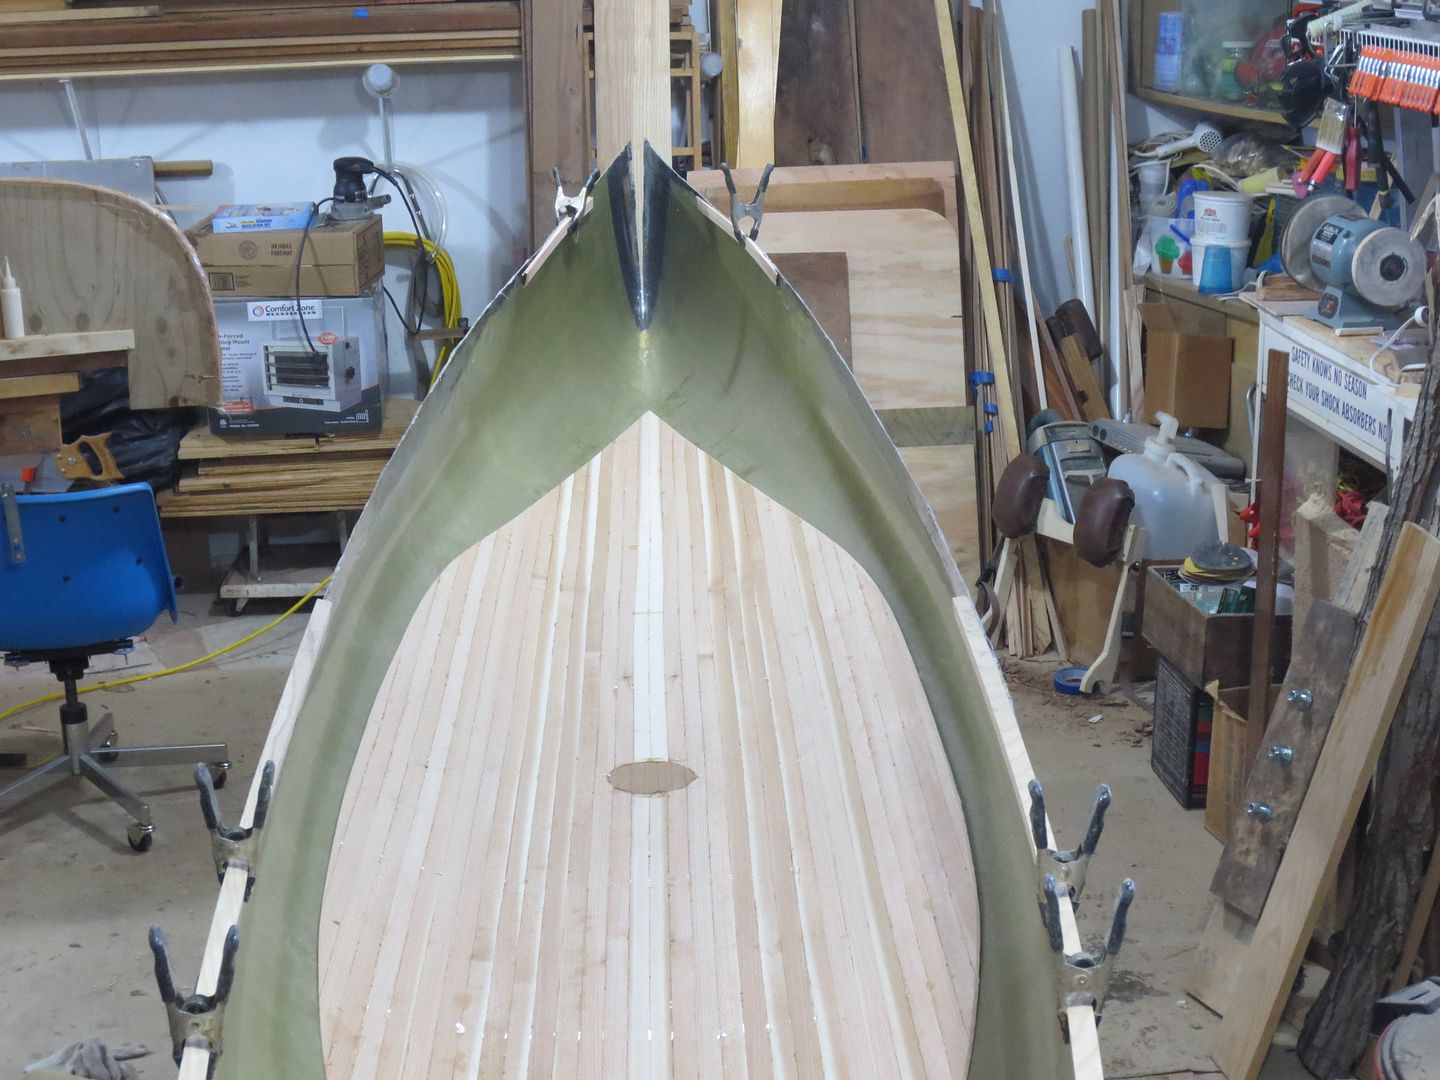
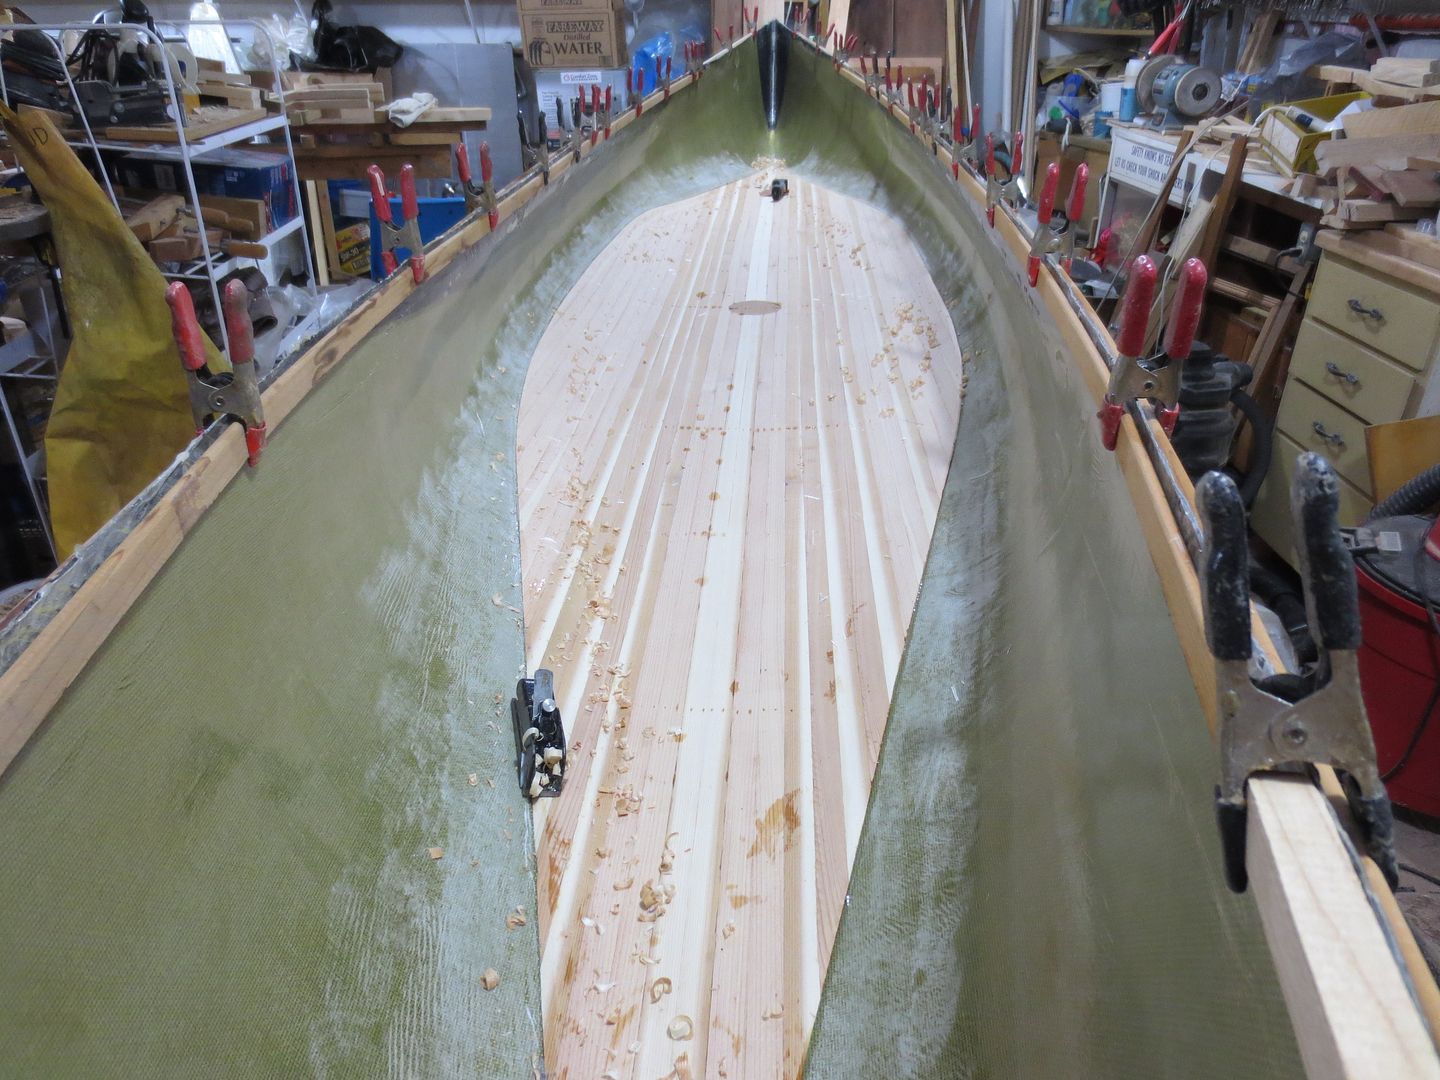
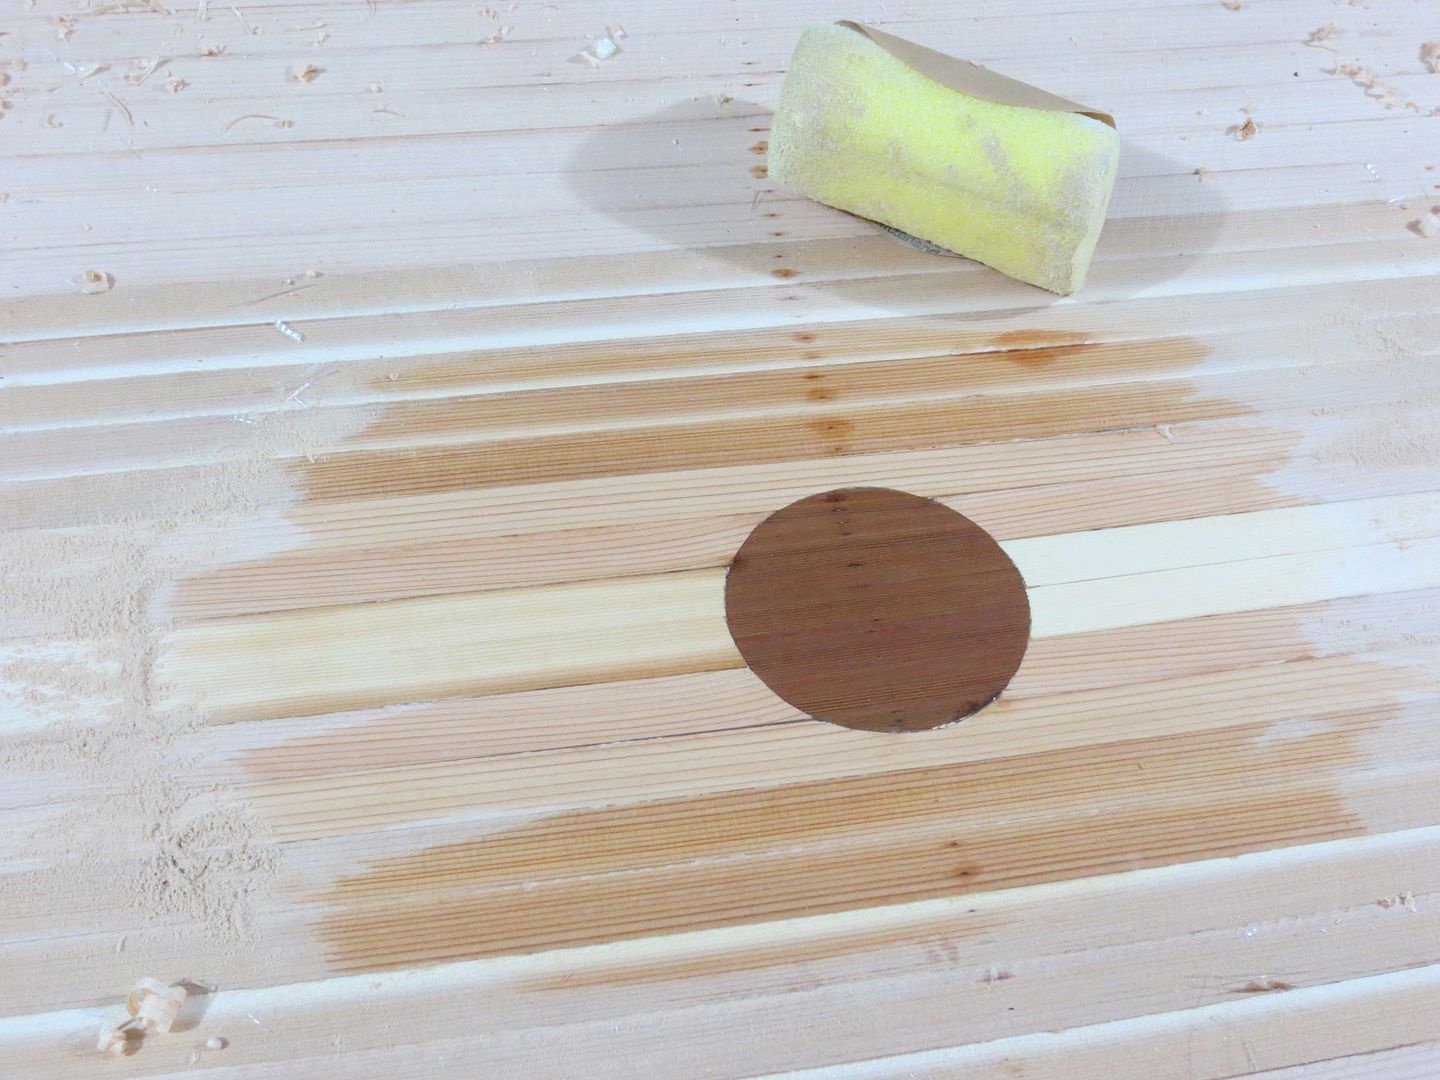
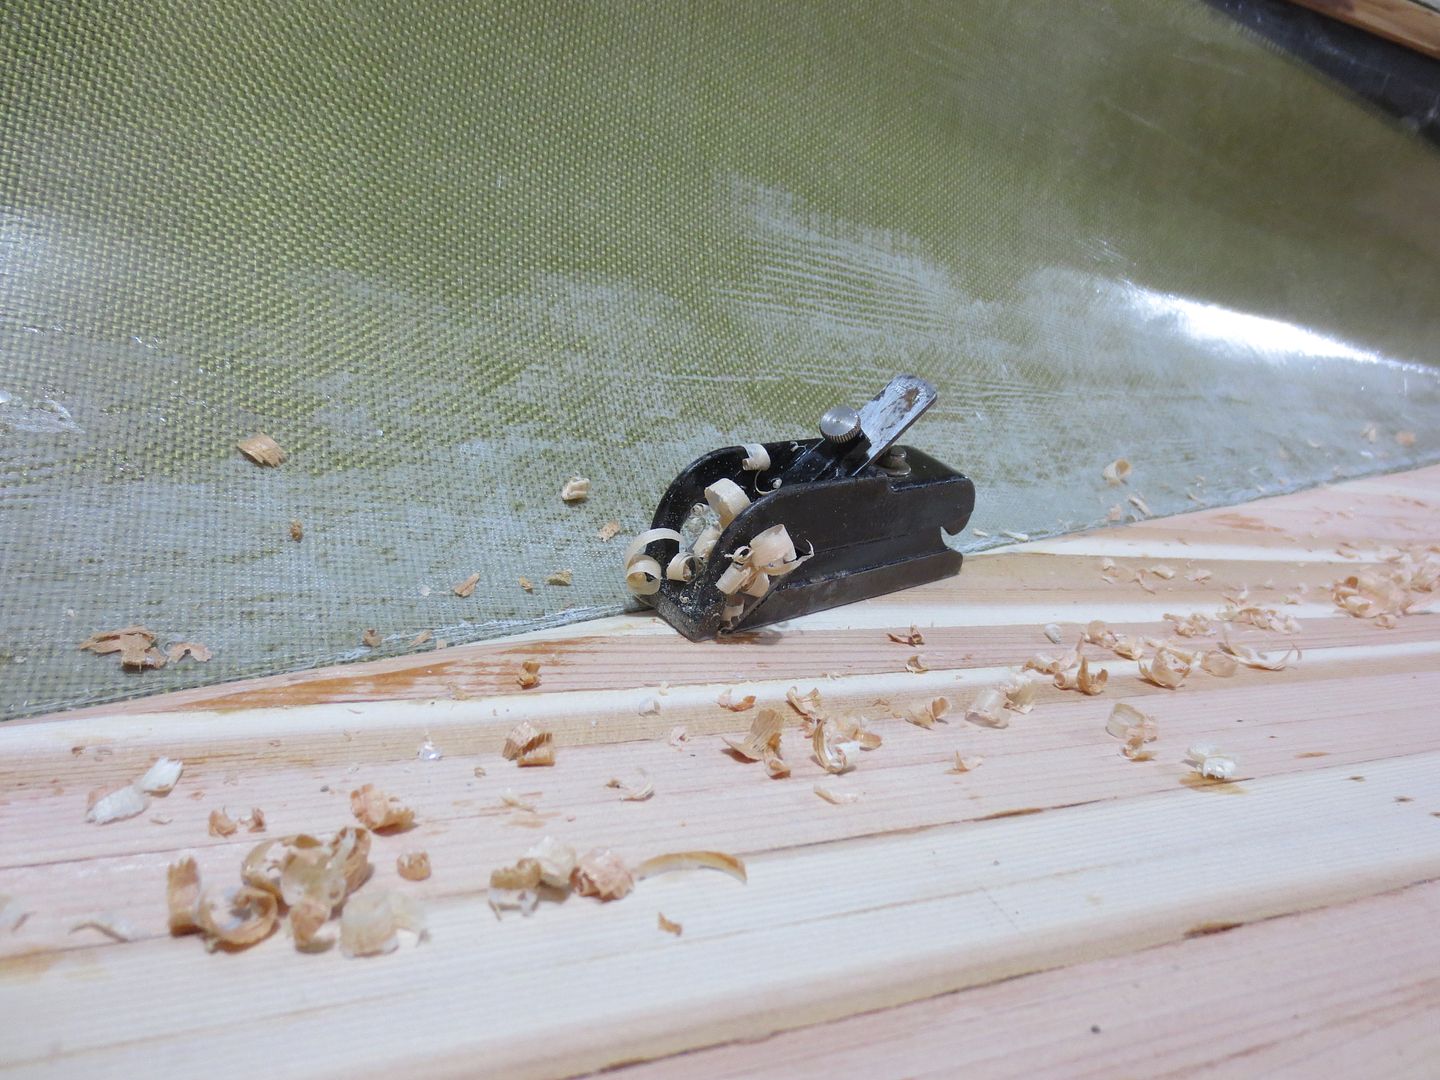
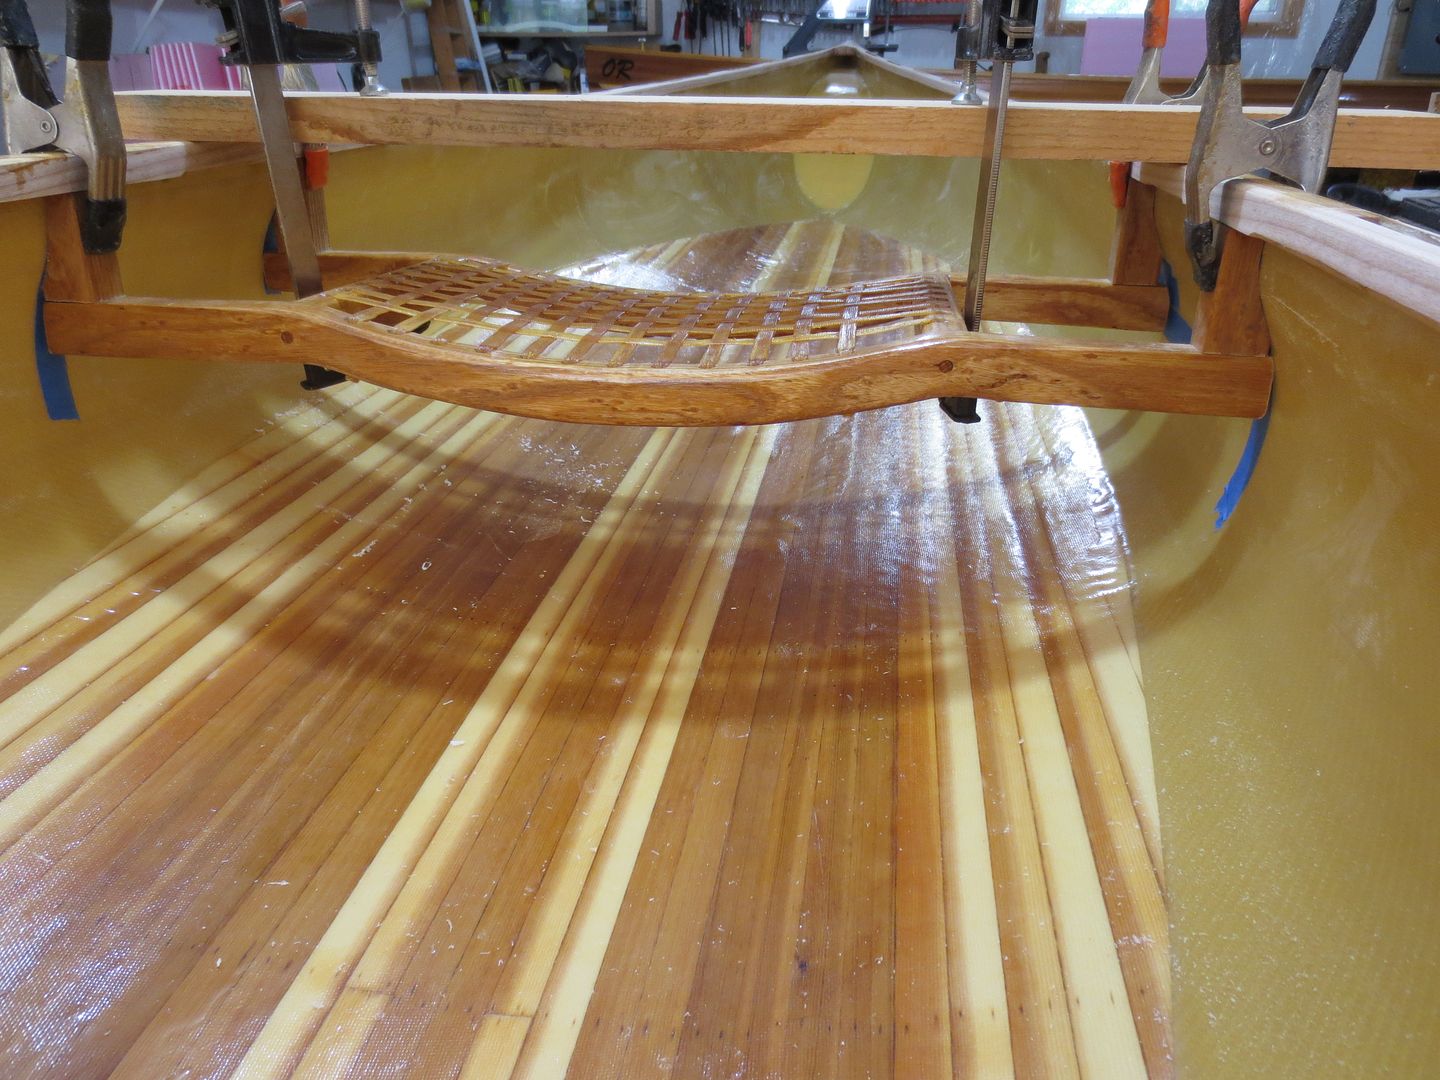
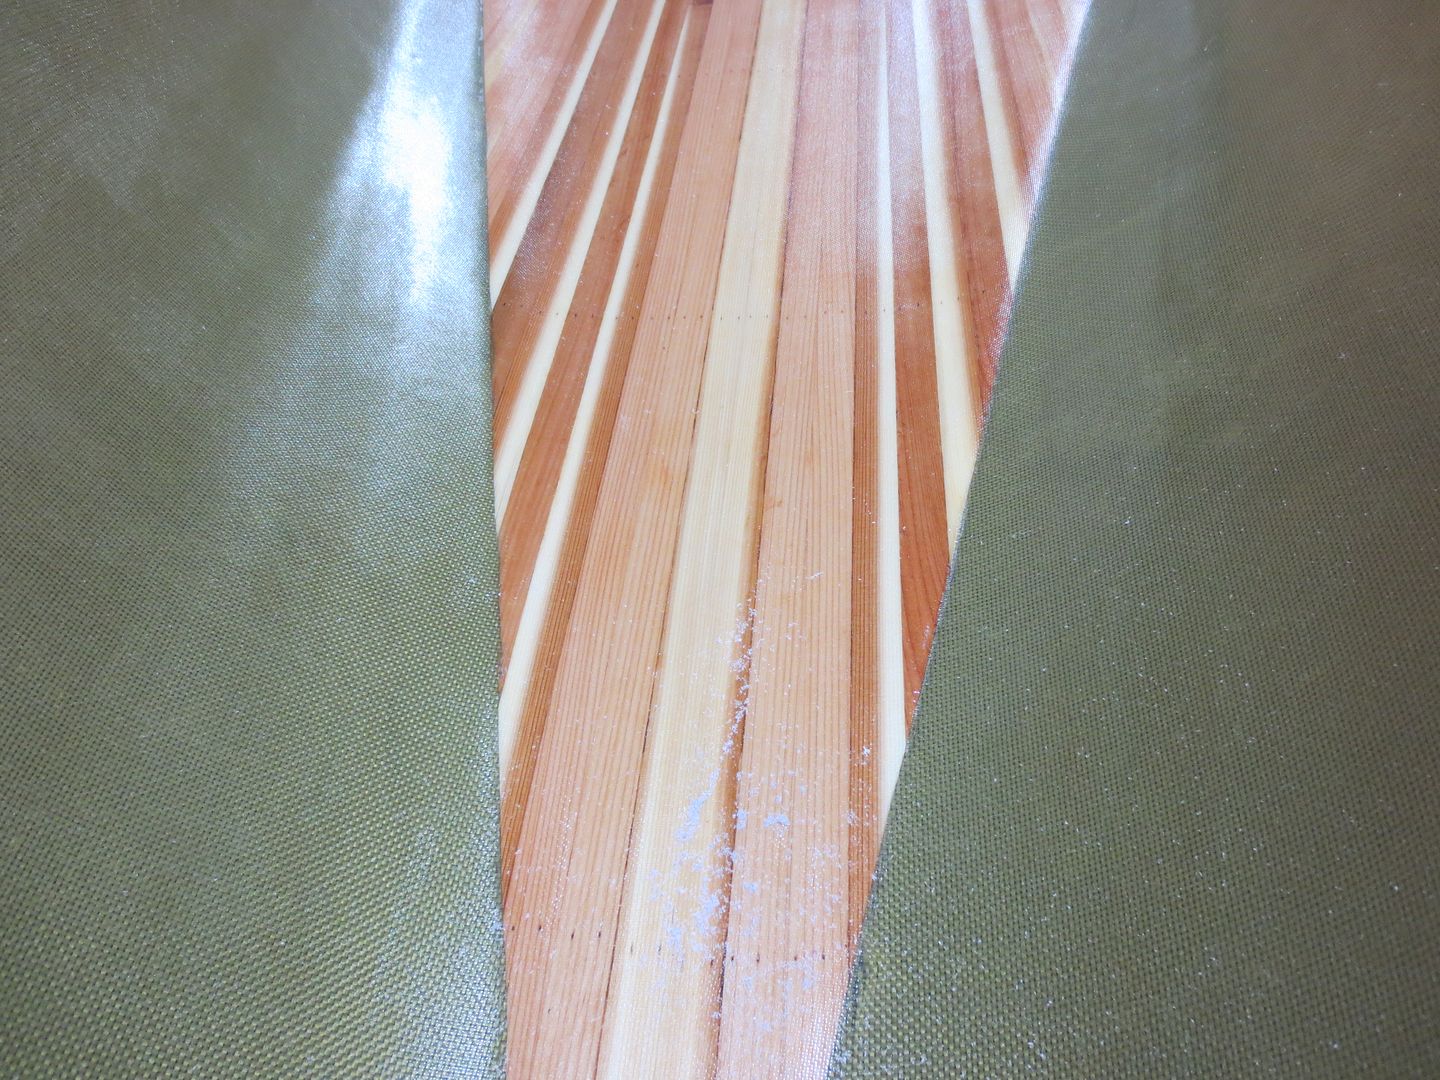
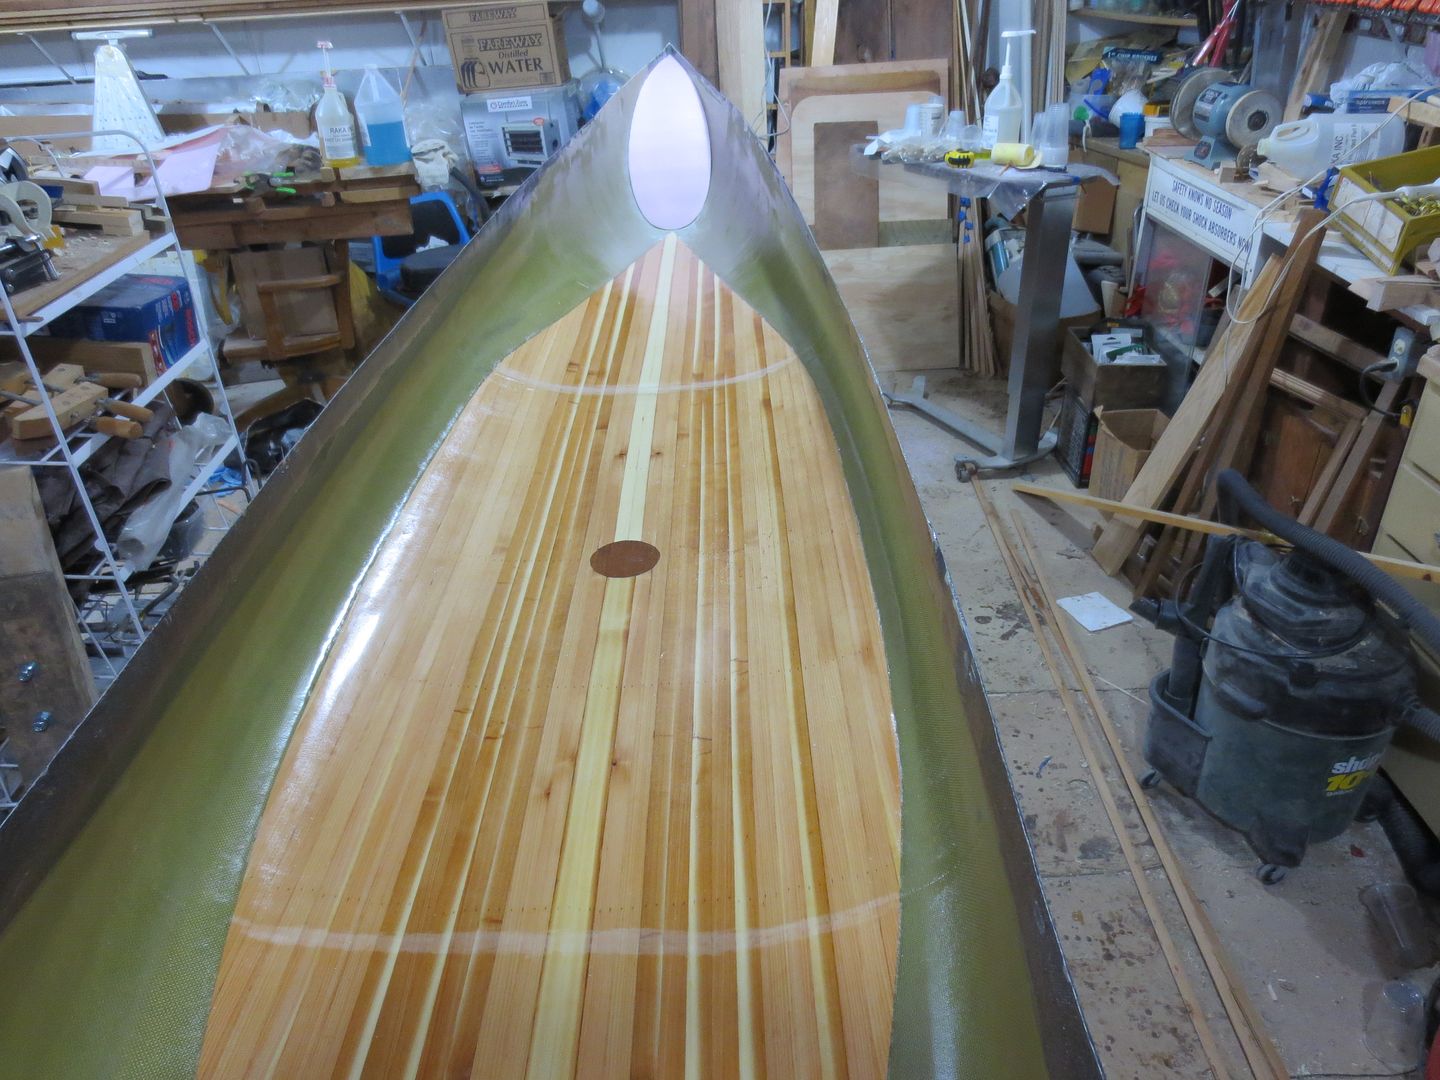
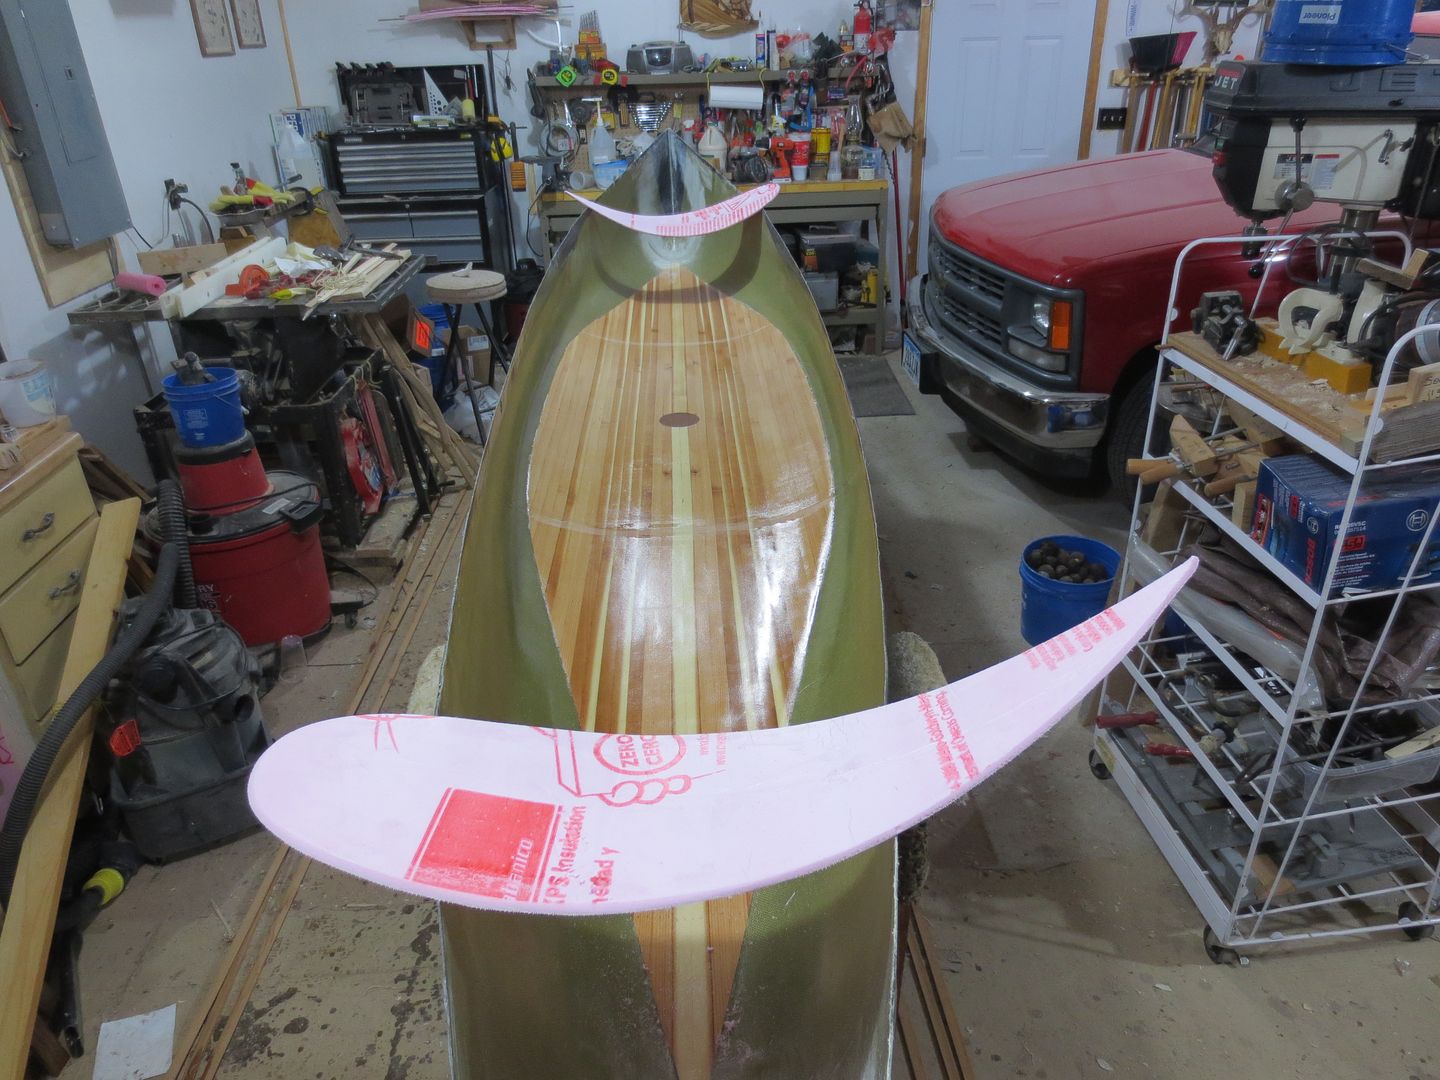
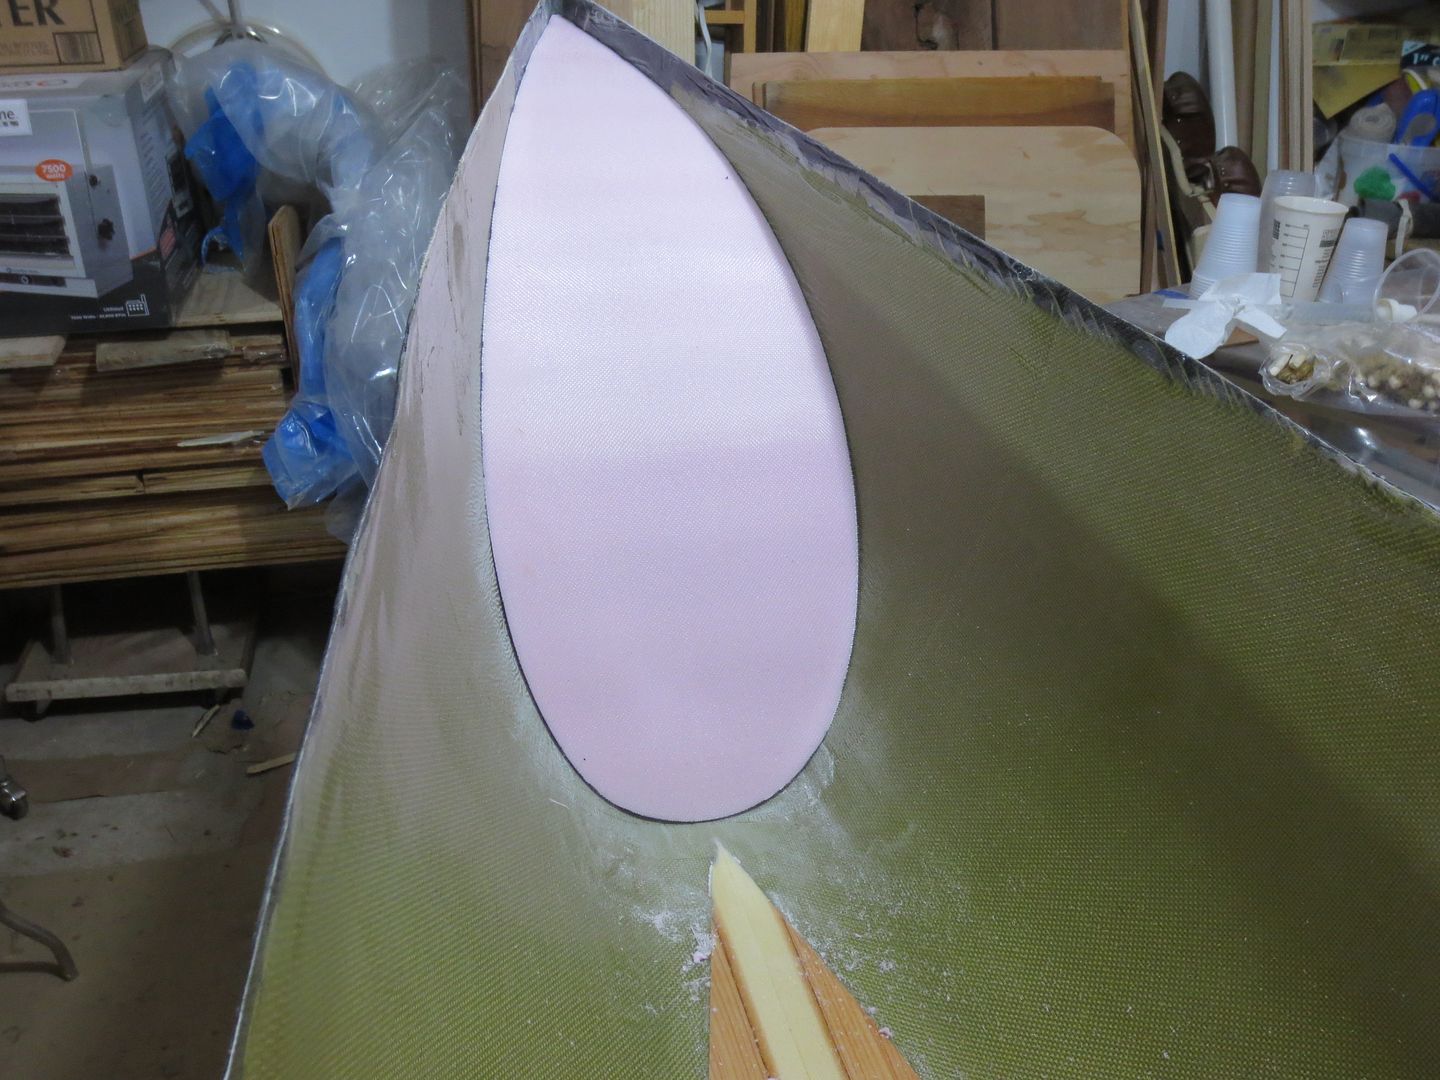
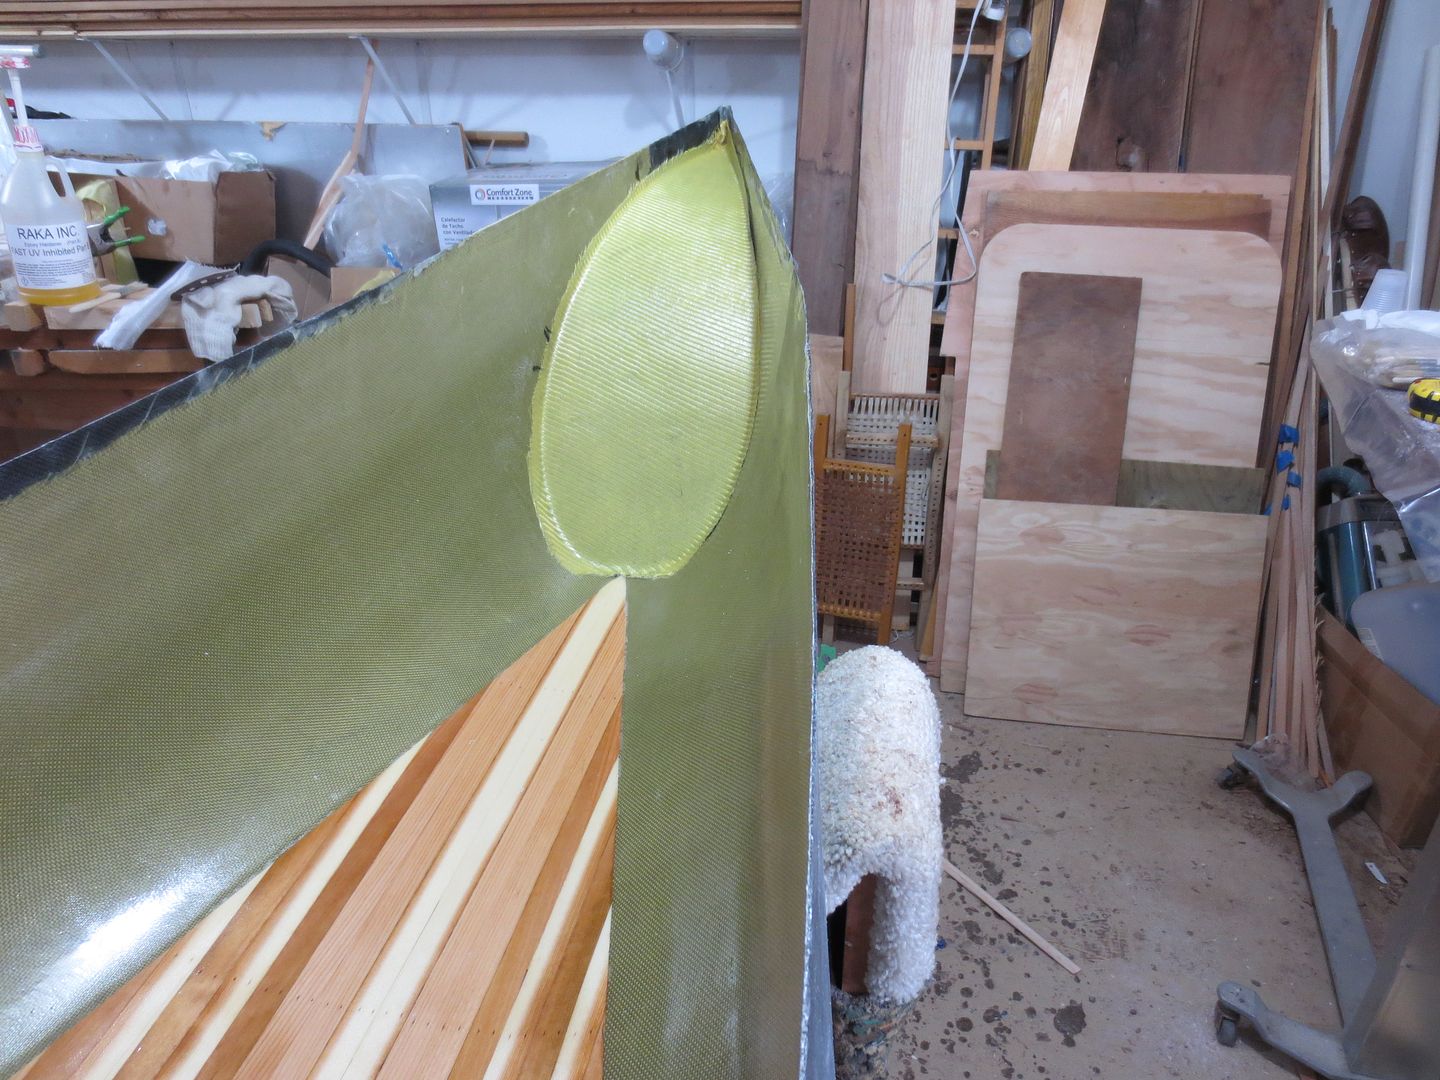
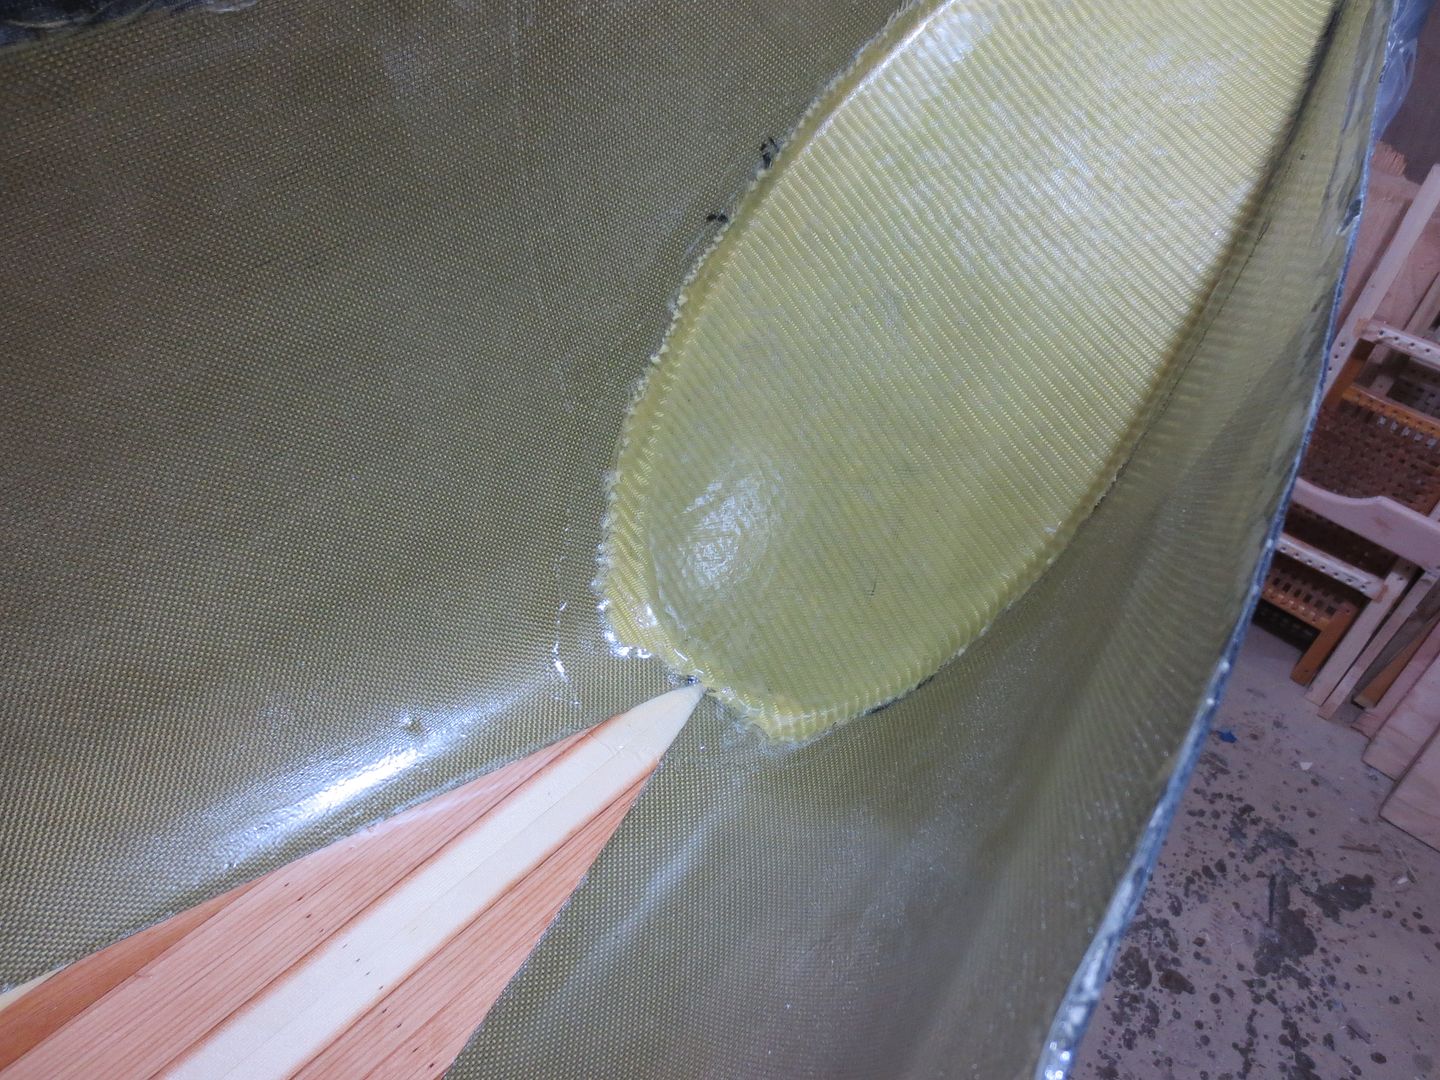
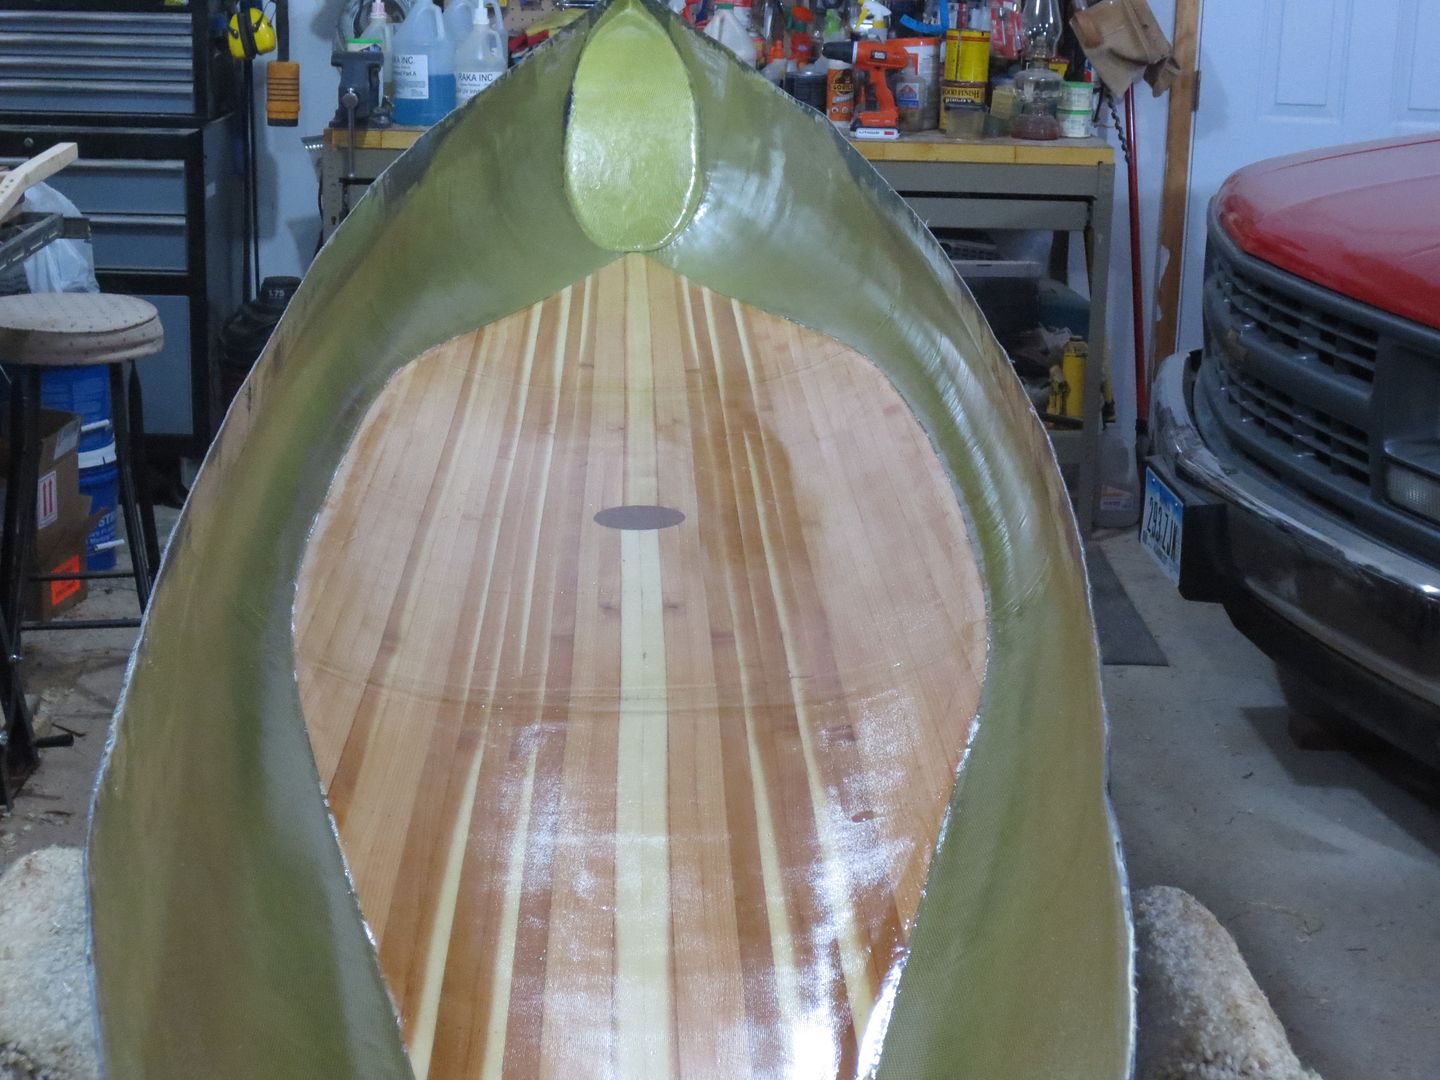
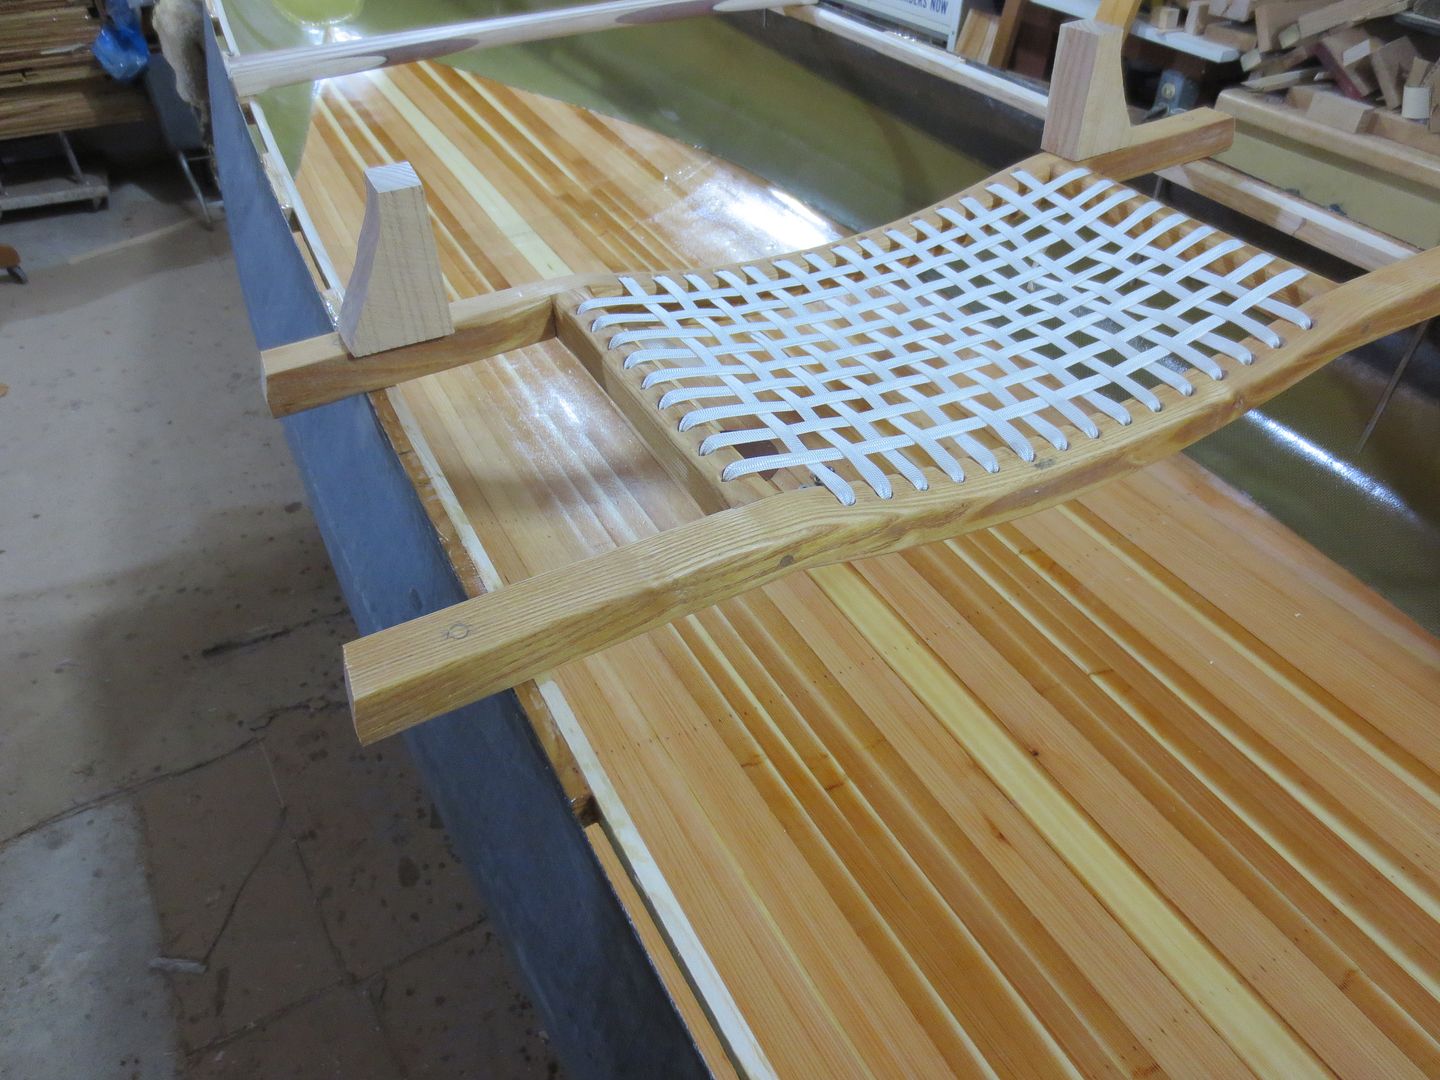
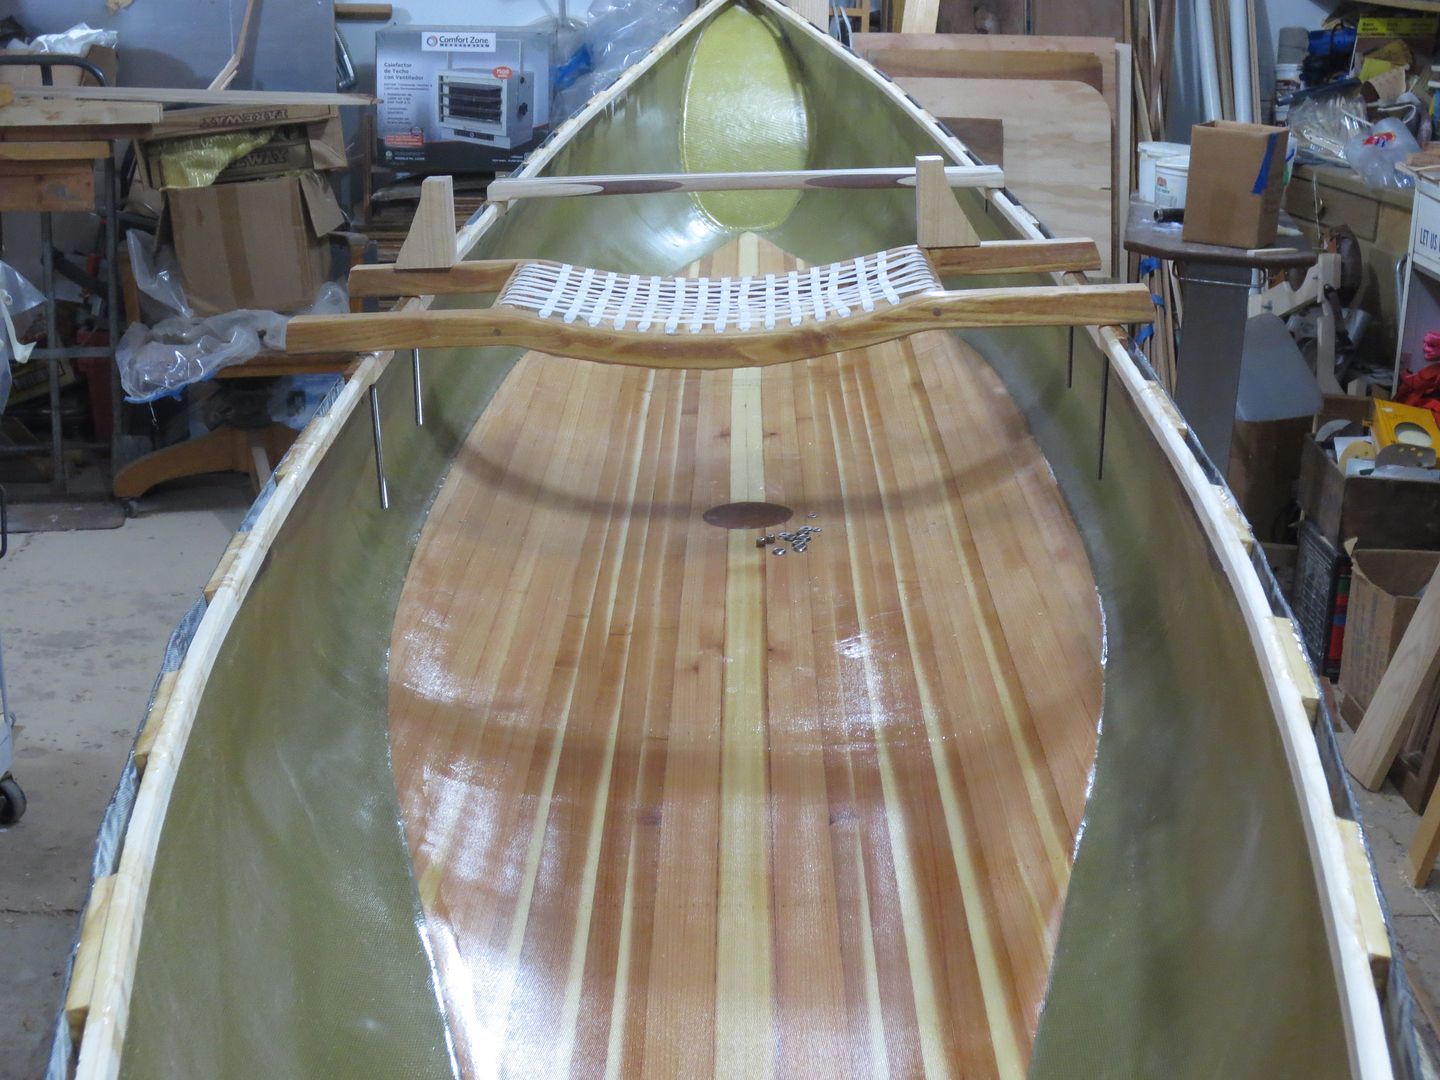
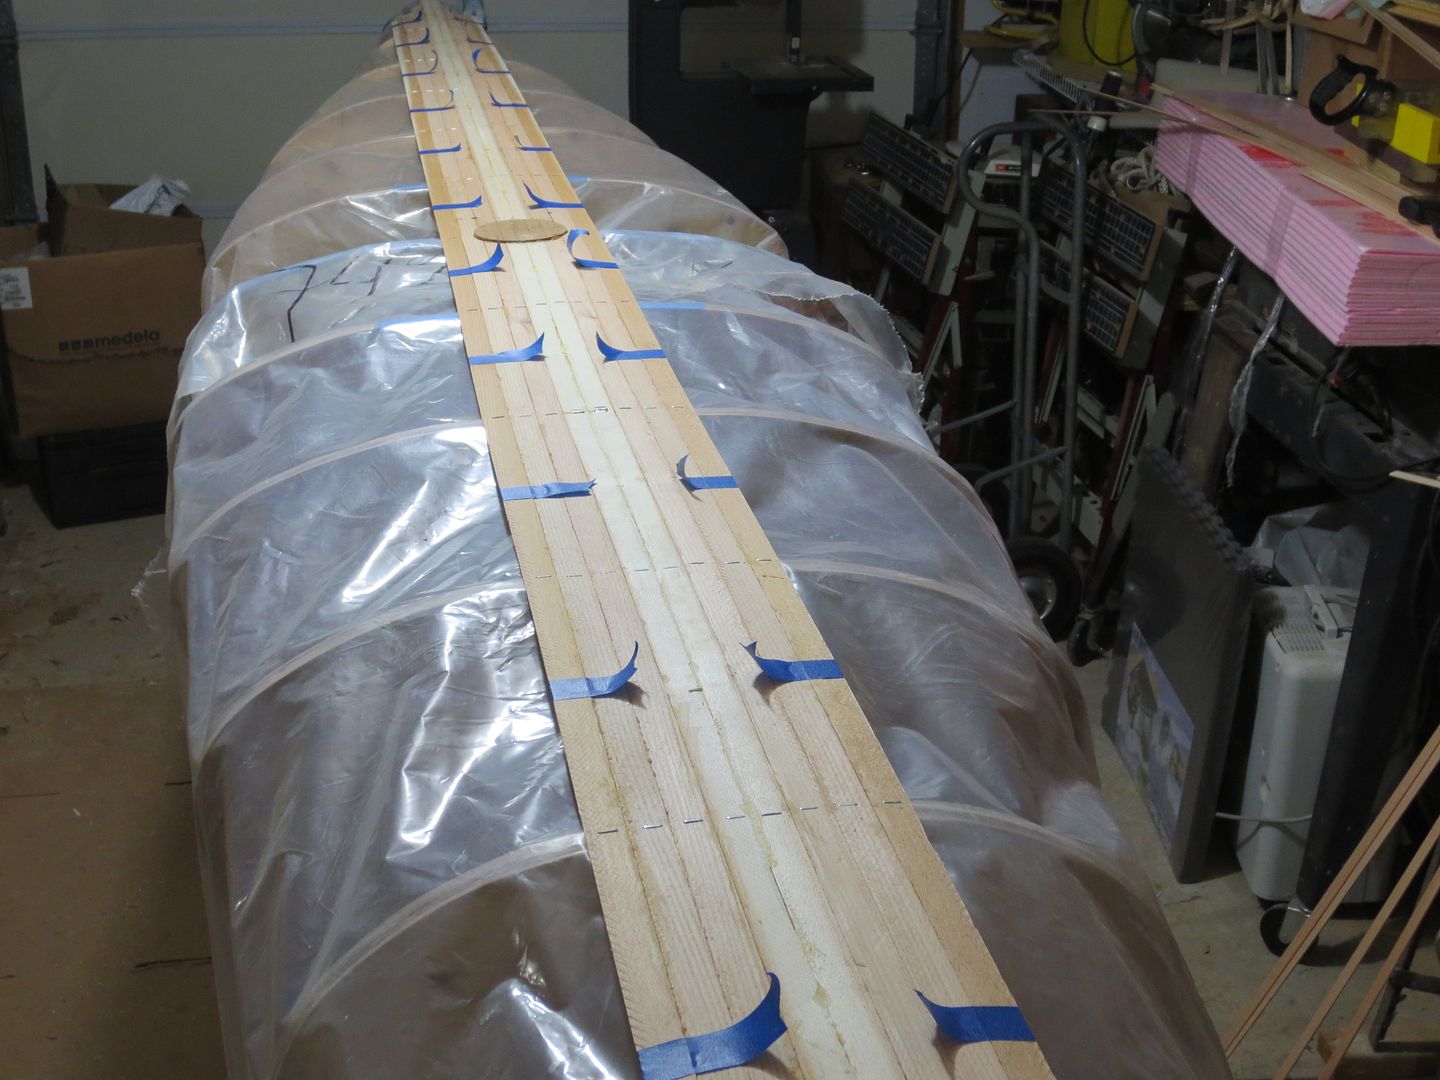
Stripping up the insert for CF Nokomis.
I went with real thin cut cedar, 1/8", as opposed to foam. One I like the look, but more importantly the price ! I put NO value on my labor :eek:

a couple of pics.

IMG_1339_zps01d30rdf.jpg

IMG_1340_zpsz7txkd2q.jpg


Jim
 
Last edited:
About ready to change my name to Molasses !

​ I did finish up the cedar strip insert for CF Nokomis.
I still have some prep work to do, and then I'm going to ATTEMPT to use a shopvac, and pull a vacuum. To epoxy the two together. Vacuum bagging on the cheap.
IMG_1357_zpsqeebzegc.jpg


​ Anyone try this before ! And what can I expect for results ?

Jim
 
Last edited:
Well, tis the end of the year and I'd better put up a report on CF Nokomis.

I had full intentions of vacuum bagging the insert. But since the insert was built on the same forms, and had the same shape, I opt for the Old Sand Bag trick.

I wet out the underside of the insert with mixed epoxy, took about 8 oz. Then I mixed a a 9 oz batch of epoxy and fillers to the consistency of runny peanut butter. Spread that on the inside, bottom of CFN.
Next I laid in the insert, covered everything with plastic.
Took three bags of sand, or three 4 gal. pails full of sand and spread out over the plastic to hold the insert against the inside hull. I can't believe I didn't take any pics, but I totally blew it off.

Backing up a little I supported the hull, which was really pretty stiff, So the hull wouldn't distort from the weight of the sand bags, probably at least 150# of sand..

It turned out great ! I'm really pleased with this build so far !
just one pic, as I'm having trouble posting pics.

IMG_1404_zpsujzlkfla.jpg
 
Last edited:
I just want to say how happy I am with the Skilsaw method of cutting strips ! I cut the strips for the insert at 1/8" thick. It left very little saw marks on the strips. I didn't do anything but edge glue the strips. Sanding will be minimal !

In the above pic, I used a little block plane to bevel the edge of the insert , so glassing should be a breeze.
 
Had to hand sand a little, here's a shot of the Black Moon, in the center of Nokomis.
and my play sand.

IMG_1414_zpsvncako7u.jpg


IMG_1407_zpshero4p67.jpg


My edge featherer. I love this little plane

IMG_1403_zpswtvk9kr0.jpg


Jim
 
Last edited:
Happy new year Jim! You're getting closer and closer to getting it on the water. You might have to take a break. It's going to be almost 60° here Monday. I'm hitting the local creek, hopefully you guys get the same warmth.
 
That is a neat idea Jim. I like the look of the cedar, and it stiffens it up just enough I would think. I am not a fan of bubble boats but this one looks right. I could see me using one now.
Are you going to use a pedestal seat?

Christy
 
Happy new year Jim! You're getting closer and closer to getting it on the water. You might have to take a break. It's going to be almost 60° here Monday. I'm hitting the local creek, hopefully you guys get the same warmth.

Happy New Year back at ya !

I'm really tempted to hit the water here , as it will be in the upper 30s.

Jim
 
That is a neat idea Jim. I like the look of the cedar, and it stiffens it up just enough I would think. I am not a fan of bubble boats but this one looks right. I could see me using one now.
Are you going to use a pedestal seat?

Christy


Thanks Christy !

I really wanted to use a pedestal seat, but I just put together a couple of my regular seats. I really like them, and they work with my portage yoke. They are heavier though.

IMG_0905_zpspjghat11.jpg


Need to DIG out Ash for the gunnels. May try something different with those ?

Jim
 
Last edited:
Stripperguy motivated me to make a little progress on CF Nokomis ! Thanks !

Have the insert glassed in place,and it weighs 30#.
Have the inserts for the flotation chambers shaped, and coated with one layer of 6 oz E-glass. I know I've cursed the pink foam, but I'll have three layers of cloth, the 6 oz E-glass already on, once it's in place, I'll add one 6 oz CF, and one 9 oz Kevlar.

Here's some pics.
IMG_1444_zps1jspsacd.jpg


IMG_1442_zps9aevdvwo.jpg

IMG_1438_zpsrraqy8kh.jpg


IMG_1439_zpswpppghc9.jpg
 
JIm, do you sand the face of that pink foam before glassing? The XPS foam I use doesn't have a shiny surface but there does appear to be some sort of thin coating applied to the face. I don't know if I really affects the way epoxy adheres to it or not but I always make a point of sanding it with 80 grit to take off that finish and rough up the surface.

Glad to see you getting back to work on it a bit. Can't wait to see it in the water this spring.

Alan
 
Jim,
Happy to hear that I still can motivate someone!
I really like the look and functionality of those flotation chambers.
Did you heat form that shape?
 
JIm, do you sand the face of that pink foam before glassing? The XPS foam I use doesn't have a shiny surface but there does appear to be some sort of thin coating applied to the face. I don't know if I really affects the way epoxy adheres to it or not but I always make a point of sanding it with 80 grit to take off that finish and rough up the surface.

Glad to see you getting back to work on it a bit. Can't wait to see it in the water this spring.

Alan
The plain side is perforated, the print side IS slick. I just glassed the perforated side. Original tests, when I used this foam as an insert. The epoxy bonded to both sides on my test piece. As I stressed it by bending it, the foam failed not the bond. The true test is when I pull the bottom apart, on my first Kevlar.

Stripperguy. I prebent the foam on a simple jig, and glassed it with one layer of 6 oz E-glass.. The glass is all that is maintaining the shape.

Just turned up the heat in the shop, and after lunch, I'll start installing the chambers
Thanks Guys !

Jim
 
A BEAUTIFUL Day !
Kind of hated to work inside. But the time was right. one pic of the bow flotation chamber.
Wished I'd cut the Kevlar a little bigger !
IMG_1449_zpshpkbnasr.jpg


I cut the carbon and wet it out on a flat surface, that was covered in 3 mil plastic. Wet out was great, laying it on the foam was tougher, but doable..
Tried some peel ply, and then pulled it back off. At least it pulled off some excess epoxy. Couldn't get the wrinkles out of the edges. Had I cut it closer to size, that would have helped.

I'll go back in a hour or so, to check on it.

Jim
 
Finished glassing the flotation chambers. Looking pretty Bomb Proof. They will serve as decks, as well as flotation chambers. Stiffening the bow and stern.
One layer of 6 oz E-glass, one 6 oz CF, one 8 oz Kevlar, and another 6 oz E-glass.
The last 6 oz of E-glass was definitely over kill !!!
I'm giving this hull the Expedition Grade stamp.
The two chambers brought the weight up 2#, for a total of 32#

Muskrat ! Thanks again for the Walmart Peel Ply idea ! I was nervous, but it came out fine. Took the time to trim it. Made it a lot better to work with. Bought it in white, and when it wet out, I could see through it easily, as I worked out air pockets.

Next, the inwhales. Ash again. I have to dig out some planks, and fire up the Old Makita Skilsaw.
 
Jim,
I went back and read your post #'s 62 and 63, where you described the stiffening strips and lamination. Is that what you used, 1/8 cedar and a single layer of 6 ox E-glass?
I need to decide on which Divinylcell to use...I'm trying to avoid modeling the different lamination schedules to determine their moments of inertia.

And man, those float chambers are cool! Do they have enough flat (or near horizontal) surface to step on? In your usual paddling, do you encounter a lot of beaver dams? I ask because I spend much time climbing in and out over beaver dams and the decks make for a very convenient ingress/egress.
 
Jim,
I went back and read your post #'s 62 and 63, where you described the stiffening strips and lamination. Is that what you used, 1/8 cedar and a single layer of 6 ox E-glass?
I need to decide on which Divinylcell to use...I'm trying to avoid modeling the different lamination schedules to determine their moments of inertia.

Yes. It seems plenty stiff adding the the cedar and another layer of cloth. I wished I had weighed everything as I went ! I'm sure if you compared the stiffness of a 1/8" strip of cedar to a piece of foam, you would get a good idea what foam to use.

And man, those float chambers are cool! Do they have enough flat (or near horizontal) surface to step on? In your usual paddling, do you encounter a lot of beaver dams? I ask because I spend much time climbing in and out over beaver dams and the decks make for a very convenient ingress/egress.

I don't think I would stand on it, but certainly put some weight on it. My balance these days would have me overboard, and flopping like a fish out of water.

I do plan on a cross the gunnel grab handle, on mine. Need something to tie a line.
I made up a test piece out of scraps. 2- 6 oz E-glass, a 6 oz CF, and a 8 oz Kevlar. Epoxied them together. I miked it tonight, at just under .060 thick. Seriously stiff.
A Pic.

IMG_1469_zpsxzsm9lmz.jpg

IMG_1467_zpsnvzd4xsh.jpg

IMG_1461_zps99kim9iz.jpg


Jim
 
Still plugging away.
Have the Inwhales on, and will finish mounting the seat, before, I flip and start prepping for Carbon Fiber #2.
Weight so far of #1? My trim will add a little over 10 #. So looking at a 41# hull. I don't know how much varnish will add to the weight. But I'll eventually scale the entire rig.

My plan for prepping for #2, is to varnish the outside of #1, paste wax with Mcquires, spray with, get this, Hair Spray. I'll then cut out some release plastic, that will cover up to the 2" water line. I still don't totally trust PVA as the total release, that is the reason for the plastic. PVA will be applied.
And then lay down cloth for #2.

I'm hoping #2 will benefit from all my mistakes on #1 !
Heres a few pics, of #1.

IMG_1548_zpsft2ct2kh.jpg

IMG_1547_zpsmzybzcmy.jpg

IMG_1553_zpswrmdfqnl.jpg


My inwhales are 3/8", with 3/8" spacers, making them 3/4". I make longer spacers where I hang the seat and thwart. I glue and screw the inwhales. Dry fitting everything, and the screws make it easy to align when installing

The bottom of the hull is stiff enough, but I may add another carbon layer, just in the bilge area, near the seat.
I plan to hang the front edge of the seat, at about 3 1/4" under the inwhale. I love how stable Nokomis is, so one more.

Jim
 
Last edited:
Back
Top