• Happy Marine Mammal Rescue Day! 🐳🐬🦭🦦

Another Kite Canoe Build

Hi Mark.

Don't worry about the heat, as the out-gassing is all done; just make it comfortable for yourself. It's logical that the craters are on the upper surface because gravity would help them fill in on the vertical surfaces.

Don't try to sand down to the bottom of the craters-- just sand the overall surface to a nice level fair-curve using a foam board that will contour with those gorgeous curves! You might have to go around with a piece of 220 folded around a pointed dowel and spin it in the remaining craters to rough them up.

None of this is unusual-- your boat looks great!

If you go the route of the longboard, there is only one direction of sanding motion: 45 degrees. Hold the longboard horizontal and move it at 45 degrees all around the boat in one direction, and 45 degrees all around in the opposite direction. Never horizontal, and never vertical. Keep the paper fresh and un-clogged.
 
Last edited:
Originally posted by Alan Gage: Re not asking for help.
"How old are you? I'm starting to think we might have been separated at birth."

Ditto!
 
OK, where was I?

I took a week away from the canoe project and made a trip over to Idaho for some skiing, soaking, and hiking. Backcountry skiing, followed by backcountry hot springs with some nice day hikes in Salmon River country. We could have brought boats over there too to float some of the Salmon, but we had enough gear jammed into my subaru as it was. ski.JPG


soak.JPG


And on to the canoe build..................

Next I did some sanding and filling of a few spaces between strips and along the keel. I think I got this part backwards. I should have done the filling, then the sanding. It would have saved some of the wood in the end. canoe20.JPG


I also filled that inside joint below the knuckle. I'm not really sure how important this is, but it was suggested with the plans from Green Valley. I think it makes for an easier transition once you're doing the fiberglass. In retrospect, rounding off that knuckle a bit would have helped the glass lay down. canoe21.JPG


Here I've wet the canoe with water to raise the grain after all the sanding is complete. I'm liking the look of the boat for sure. Those dark strips really are dark. canoe22.JPG


and the bottom. canoe23.JPG


I went ahead and did a seal coat in an attempt to minimize or eliminate trapped air bubbles. canoe24.JPG


I went with a full sheet of 6 oz. cloth and a partial sheet of 4 oz. only on the bottom along with 2 6 oz strips buried along the keel. This should make for a pretty rugged boat. canoe26.JPG


But that's not all. This photo shows the hull after wetting out all the layers above, then I've added another layer of 6 oz. glass and a layer of Dynel, no wait, Xynole is what Raka sent me (It sounds like the same stuff). Is this overkill or what? 5 layers of glass and 1 layer of xynole along the bow and stern keel. Like I said in an earlier post, I plan to really use this boat. canoe27.JPG


A closeup of the Xynole. I couldn't get it to cut straight worth a darn. I even used a really nice fabric cutting mat and a rotary razor blade and the stuff just wanted to fray all over the place. canoe28.JPG


And with this photo we're up to date with my canoe build. I almost pulled this xynole stuff off when I first wet it out, and in a way I wish I had. The fraying ends along the cut just got worse with trying to spread epoxy on it and as you can see, it's kind of ugly. I think I should have waited, then taped off the area and used some dark brown pigmented epoxy to fill it. Maybe next time. The only consolation is that I'll be glad it's there when I run the boat up on a coarse volcanic rock beach in big waves on Yellowstone Lake. canoe29.JPG


Enjoy, Mark
 

Attachments

  • canoe25.JPG
    canoe25.JPG
    199.7 KB · Views: 12
Last edited:
Yeah, that dynel is some ugly stuff. Best way to handle it visually might be to fill the weave and get a nice transition from cloth to hull (thickened epoxy speeds that up), then mask it off and paint it black. Peel ply is a big help when working with dynel. Keeps the coarse weave and transition area under control. Should be a very durable layup though.

Good move adding the fillet to the inside corner of the shear/knuckle transition. That's too sharp of an angle for the epoxy to lay over without pulling away. You'll probably want to do the same thing on the inside at the hull/knuckle transition.

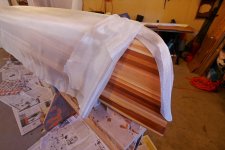
In retrospect, rounding off that knuckle a bit would have helped the glass lay down.[/qoute]

It won't hurt anything but that should have been rounded over. A sharp edge is more prone to damage and also harder on the knuckles. Rounding it over helps the fiberglass lay nicely too.
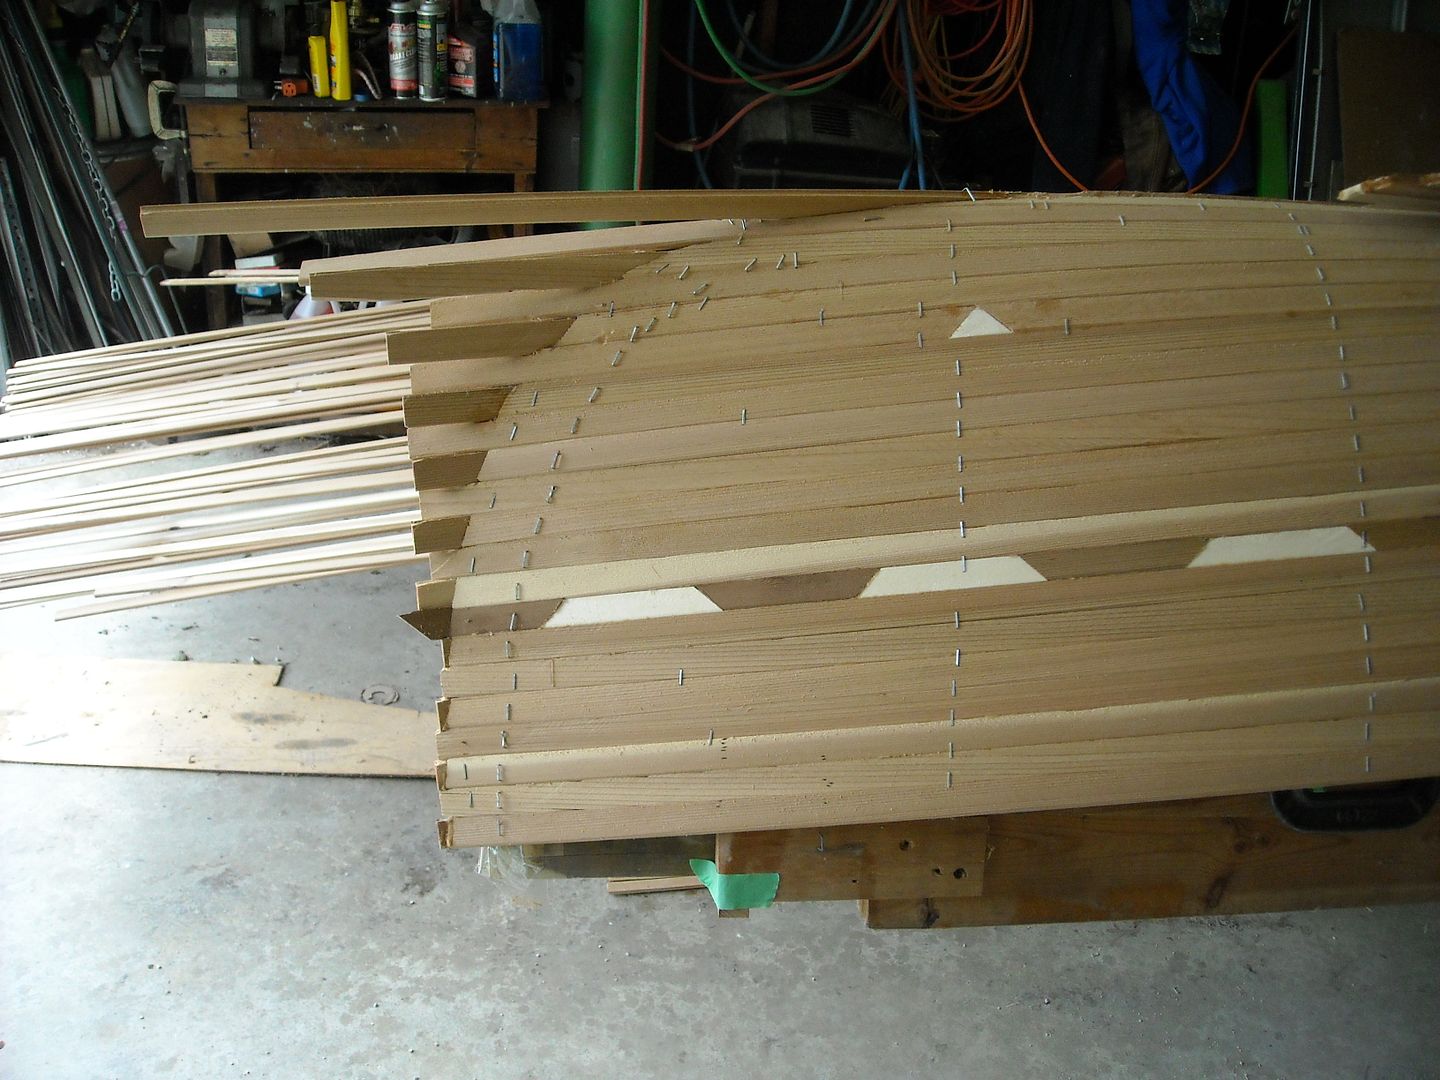
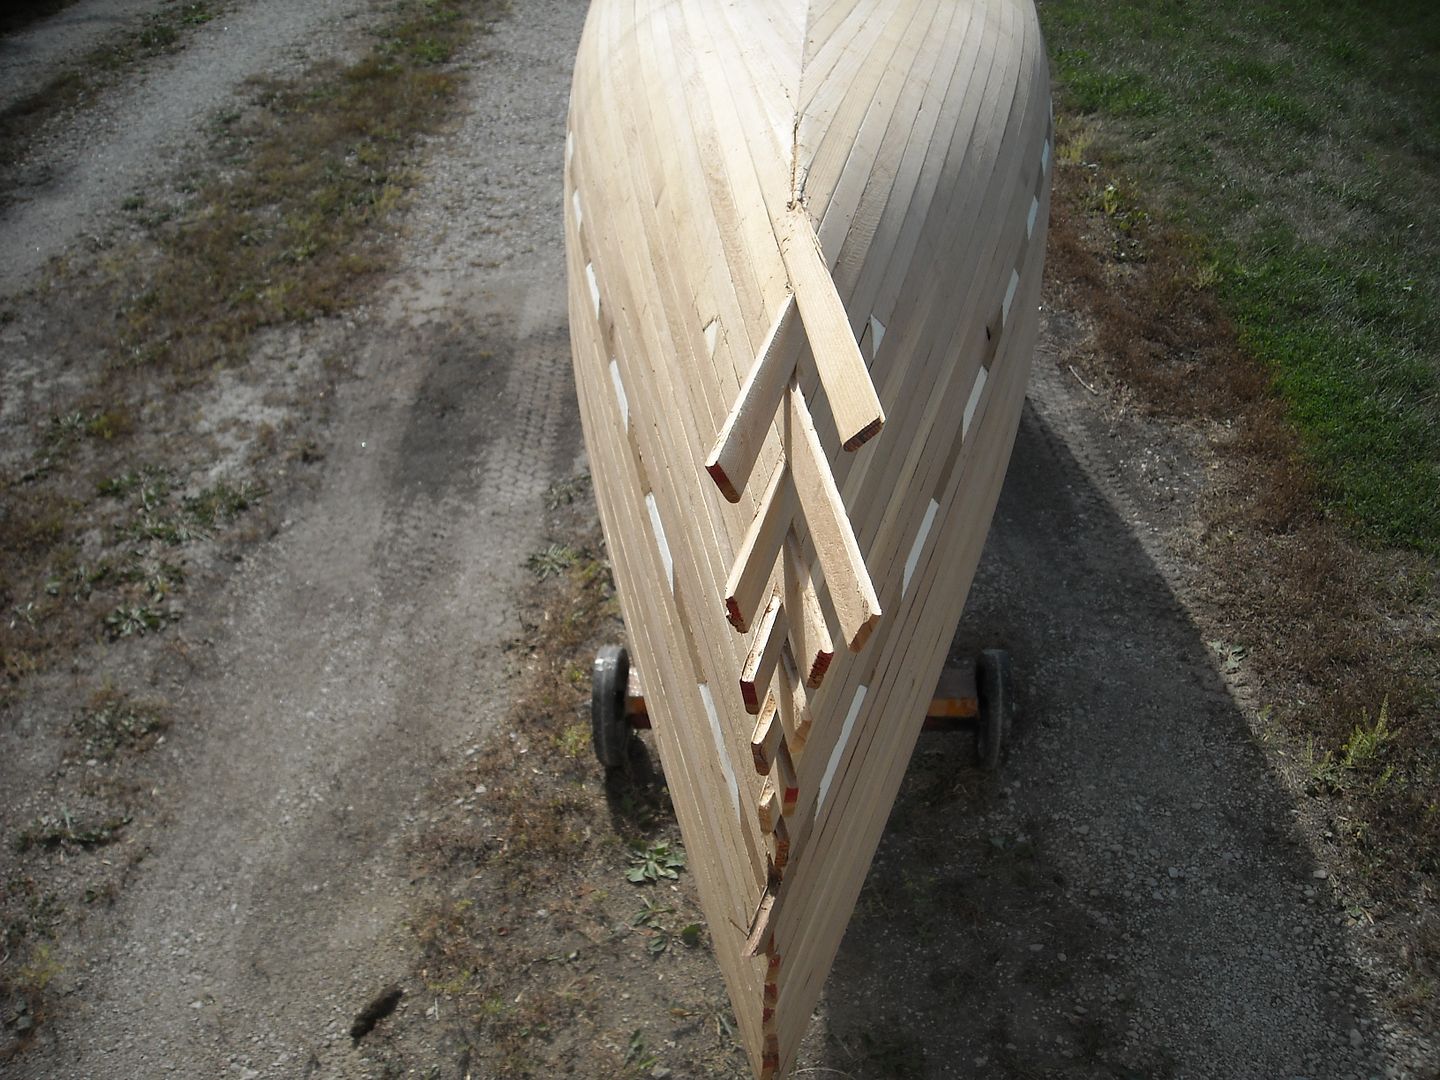
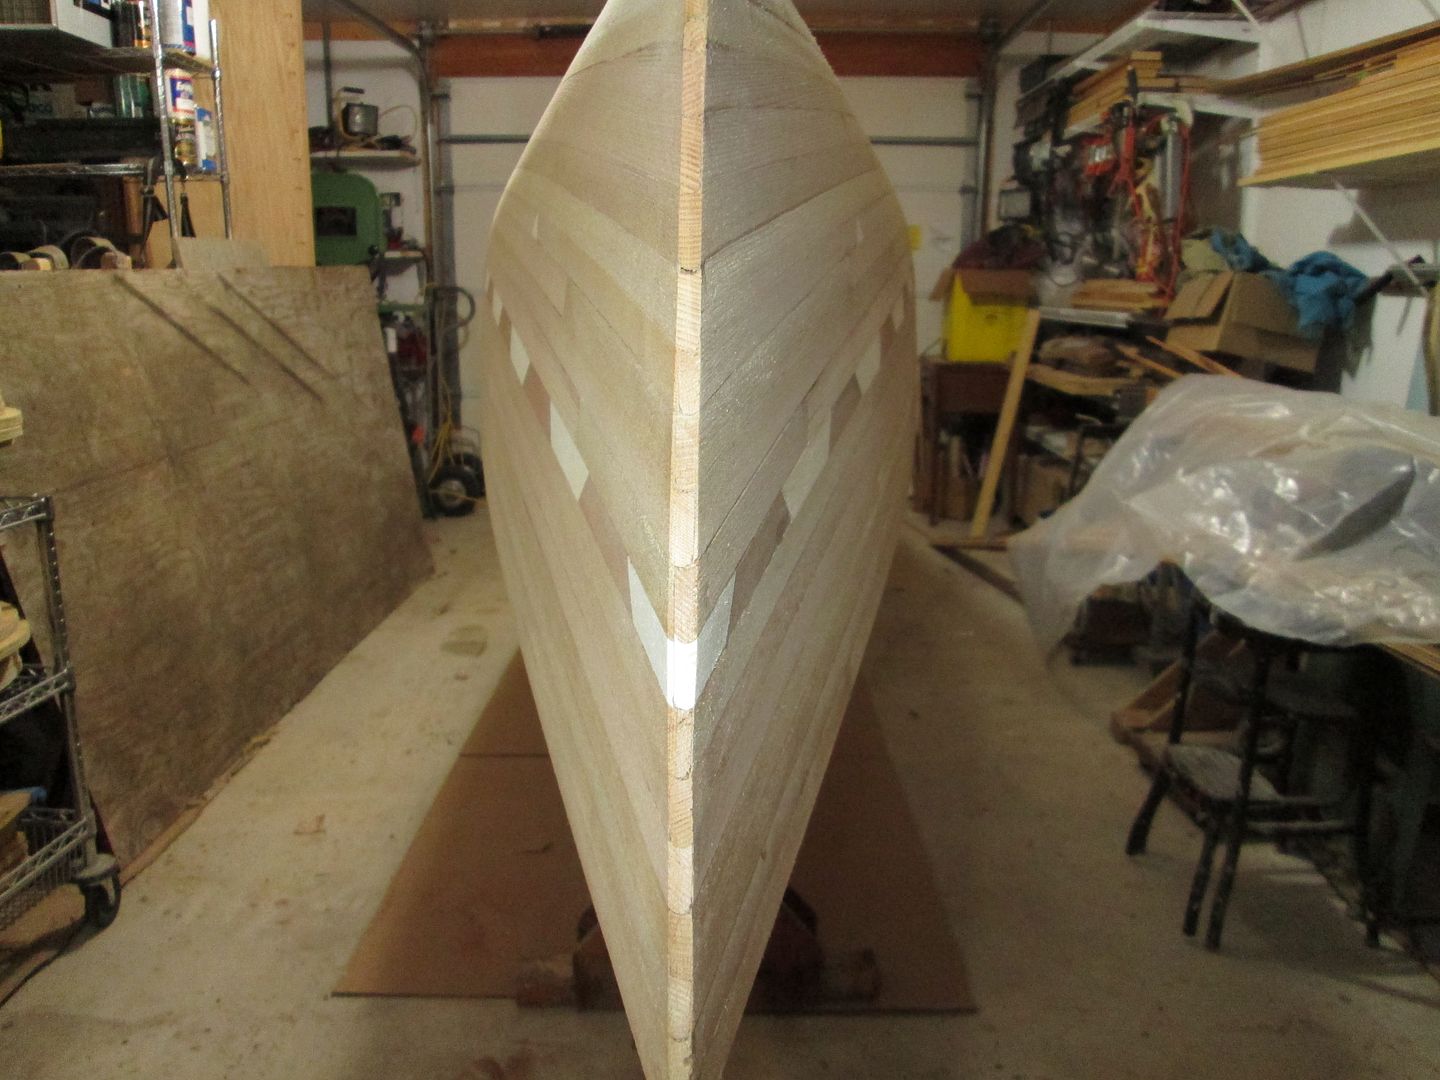
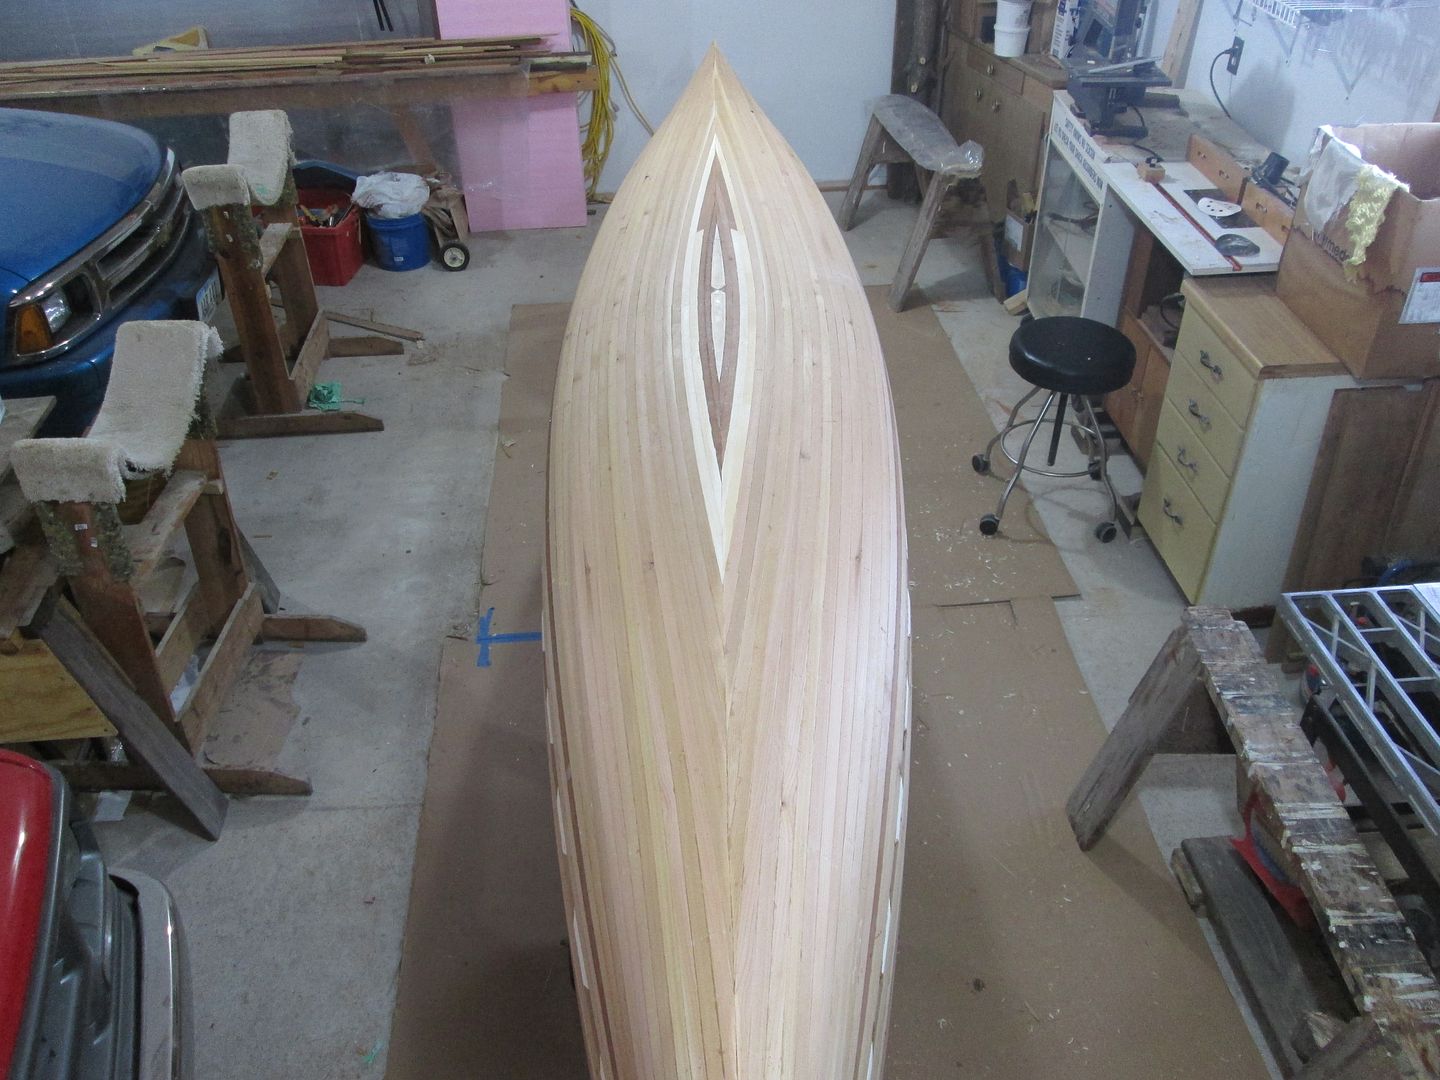
Foxy looking canoe!

Alan
 
Look awesome... An other thing you can do with "skid plate", is to hold them on the boat oversized a bit( you can use well stretched saran wrap between the boat and the skid plate) and when totally cured, take it off, grind/trime the edge like you want and epoxy back in place!

Mind you I never tried it, but it works for other area of a damage boat to make a good patch that will fit a gapping hole in the canoe.

That's a really good idea that I may try with the old wenonah someday. Thanks
 
That's an interesting technic of stripping.
Before I saw the light of bead and cove, I stripped hand beveled strips the same way. Then another light came on in my head. It must have been an LED, as I've been stripping stemless, and stripping past center on one side, then cut the centerline. Soo much quicker! ! And just as strong !
It only requires fitting one side of the football strips.

DSCN0219_zpsdd380bed.jpg


DSCN0222_zps643511f4.jpg


IMG_0674_zpsmepkyvb5.jpg

DSCN0212_zps0665c935.jpg


IMG_0632_zpszgcasxnp.jpg


IMG_0641_zpsacdeovgp.jpg


IMG_0155_zps2meljuwr.jpg


Jim
 
OK.
I'm trying to catch up on this tread, As I've been chained up at the Wife's house all day.

I'm no expert but those pin holes don't resemble out gassing to me. They aren't over staple holes, or along a seam.
Did you have air bubbles when you seal coated ?

The temperature of the epoxy is kinda critical. Did you warm it up any?
In the Winter I warm each batch with a hair dryer as I mix. If the resin is cold, air could have been trapped in the resin while you were mixing.

A contaminate is also a possibility. What cups did you use to mix resin in ?

I know a lot of questions, but by tracking it down, we can all learn from your misfortune.
Can you go through your method of mixing and application of the resin ? How long between fill coats did you wait ?

Thanks Mark !

Jim

Hi Jim, I'll go through everything as best as I can remember.

I didn't notice air bubbles when I seal coated, nor did I notice any after wetting out the cloth. I only really noticed them after the first fill coat where I mistakenly used a roller and should have probably been using a squeegee. Like I said above, the air bubbles only seem to be on the horizontal surface of the boat, the vertical surface has few if any. One other thing I realized this evening is that the bubbles are also only where I have the 2 layers of cloth, but that may not have anything to do with it.

I didn't warm the epoxy, this is one thing I completely neglected to do. As a result, the epoxy was probably always colder than the hull.

I used regular clear plastic drinking cups, the 12 ounce ones you buy at the grocery store. Not the hard brittle ones, but the more flexible ones.

My epoxy is Raka 127 with the 350 hardener. I had pre-measured 2 cups, one for 6 ounces total and another 3 ounces for smaller batches. I did the smaller batches because I was working alone. I nested a cup inside another cup and marked the outside cup so that every time I wanted to mix a batch all I had to do was drop a new cup inside the pre-measured cup. I'm almost 100% sure the ratios were correct. I simply poured the resin into the nested cups to the 4 ounce line and filled it to the 6 ounce line with the hardener. Then I mixed it thoroughly for a minimum of 2 minutes making sure everything was incorporated. I was careful about not beating it and introducing air bubbles, but I certainly did see them in the mixture.

I saw no problem after the seal coat, and absolutely no problem after wetting out all the fiberglass. I'm sure I got the fiber glass wetted out completely. I looked at it pretty closely, and I think I started to notice the problem after I started doing fill coats. I thought the next fill coat would take care of the bubbles, but they kept appearing.

I looked at times on the photos I took and I did the wet out in the morning, I had kept the temperature relatively warm in the shop overnight, close to 70, and was done by noon. I had turned the heat off, but the temperature stayed constant during the process and a few hours afterwards. After that it got warm here during the day and the temperature in the shop got up above 70. It looks like I was out there putting on the Dynel strips so I could wet them out when I did the first fill coat at about 4 pm, the boat had solidified pretty well by then, enough to move my fiberglass strips around without them getting stuck. I remember the shop temperature being in the mid 70s by then. I did another fill coat late in the evening around 9pm, again using a roller. I think I said above that I think I used way too little epoxy on these fill coats because the weave wasn't close to being filled.

The next morning I heated up the shop and waited a few hours then did another fill coat. I had run a radiant heater under the strongback all night to keep the hull warm, but turned it off after applying the epoxy. This time I really started noticing the little pinholes and started using a roller, but eventually switched to a squeegee when I realized the epoxy had some bubbles on the surface. I used a foam brush afterwards to knock down bubbles I could see. I then waited most of the day until late in the evening to apply yet another coat. Most of the weave had filled by this time, but there were patches of weave still showing, especially near the vertical ends, and of course I could still see the pinholes. This time I only used a squeegee and tried to spread it thin with a foam brush to try and force the epoxy into the holes.

That's the best I can recollect Jim. Thanks for your help, Mark
 
The woodworking teacher at our school is full of little pearls of wisdom. He used some of my epoxy to seal a table top he had built. After he had put it on, he took out a blow torch and lightly skimmed the surface. I asked him what he was doing. He claimed that applying heat to the fresh epoxy got rid of any bubbles. I have never tried it, but his seal coat was immaculate.
 
Great work and informative thread - I read it while eating breakfast. I'm blaming you guys when I show up late for work.
 
The woodworking teacher at our school is full of little pearls of wisdom. He used some of my epoxy to seal a table top he had built. After he had put it on, he took out a blow torch and lightly skimmed the surface. I asked him what he was doing. He claimed that applying heat to the fresh epoxy got rid of any bubbles. I have never tried it, but his seal coat was immaculate.

Absolutely true ! Even in warm weather, and especially when I see outgassing(air expanding either in a joint, staple hole, or the wood it self). I warm the surface with a blow drier(It used to be my wife's) It will expand the air even more, I'll brush the bubbles, and as it cools, the bubbles disappear.

I believe this to be Marks culprit as to his pinholes. Air in the cool resin. The double layer of cloth may have added to the problem.

Great advice so far as to a remedy.

Still a great build !!!

One thing different that I do, is I apply fill coats, one after the other, with an hour or two between. If the surface is still tacky, it will nearly eliminate runs. Also as resin cures, it creates heat.

Wet resin on semi wet resin also creates a better bond, than waiting to recoat, after the previous coat has cured.

Love the scenery ! I'd have a hard time staying focused on building a canoe !

Jim
 
Last edited:
I went out to the shop this morning with an old slide loupe, essentially a magnifier that lets you hold a photographic slide and see all the detail. I started looking at the hull. This got me to thinking that I could probably take my good camera and stick the lens right on the loupe and take a few photos to share what I saw.


First I looked an an area that had no divots, but I could see what looked like the weave of the cloth and here is what I saw. These little air bubbles seem to be suspended above the wood surface, so they're either between the 2 layers of cloth or laying right on top of the 2nd layer. This photo is roughly the width of a 3/4" strip from the bottom left to the top right of the frame.
bubbles1.JPG


Here's a zoomed in view of the last shot. In between all the large bubbles are even smaller micro bubbles.

bubbles2.JPG


I moved over to an area that looked clean, in other words no noticeable bubbles and here's what I saw, a few small bubbles here and there. The dark blotches are the width of a staple, so the largest bubbles in this frame are 1/4 or less than the size of a staple hole.

bubbles3.JPG


The previous shot zoomed in shows bubbles of all sizes, really really small ones. I wonder if this shot shows a typical epoxy application.

bubbles4.JPG


This shot shows the worst example of what I'm finding on the bottom of the hull. There are 3 patches that are less than 1 foot square that look like this.

bubbles5a.JPG


Here's a zoomed in shot of the area outlined above. It's easy to see the divots (the ones that show lens flare) but not so easy to see the bubbles that are buried under the expoxy.

bubbles6.JPG


So, what to do? I'll go out in the shop today and do a little test sand into the area I have marked above to see if I can get to the buried bubbles. I have nothing to lose at this point. I'm hoping that the bubbles are on top of the glass.
 
You might not have noticed them until later but I think all this started with the wet out coat. Either from outgassing, too little resin, or air bubbles trapped in the multi-layered cloth sections that couldn't get out before the epoxy got too thick.

I think you've got the right plan of attack. Sand it (which needs to be done anyway) and see what you get. After that I'd fill in any air pockets that opened up with sanding and go forward with the rest of the build.

I've got builds with more air bubbles than I'd like trapped in the resin (usually at the stems where there are multiple layers of cloth). It happens and gives you room for improvement on the next build.

Alan
 
Last edited:
Jim, thanks for the response. I'm taking this all in as a learning experience. I was a little stressed yesterday, but I also really enjoy solving problems and really feel lucky to have you, Alan, Peaches, Stripperguy and everybody else out there to help me though this.

I sanded a small area, less than the width of a strip. This is the worst area I could find on the hull. I think I'm seeing the cloth here so I stopped. Is this correct? I probably shouldn't sand beyond this point. I used 150 grit sandpaper. I would guess that I removed the last layer of epoxy and most of the previous layer.

bubbles7.JPG


As I was sanding I could see that I was cutting into more holes just below the surface, and the ones that were on the surface disappeared entirely. I'm taking this as a good sign. The closeup below shows a scattering of small bubbles remaining below the surface, but nothing like what was there before. Although I obviously had some problems before the last 2 coats, it seems like that's where most of the issues lie.

So, my next question is what to do next. Should I carefully go at it with my random orbital sander and 150 grit, or should I be more careful and find one of those sanding boards that peaches was describing in an earlier post with a finer grade paper. I apologize for all the detailed questions, but I would appreciate any and all advice from all of you experienced builders to get me through the next few steps.

We can address how to fill all these little holes in a later post, now that they're all filled with epoxy dust.

Mark

bubbles8.JPG
 
Back
Top