• Happy Invention of Scotch Tape (1930)! 🏴󠁧󠁢󠁳󠁣󠁴󠁿🧻3️⃣🇲

First Canoe

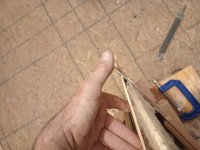
I was going to make each strip long on one end and short on the other but figured it makes every strip fussy. Seems easier to make one strip short at both ends then add the long strip on the other side. Alternating sides, of course. I stapled one strip but haven't cut the ends yet.
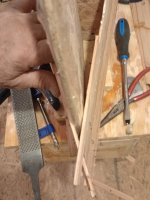
My thinking above was wrong. Now I have to get the short strip -- the first of the pair -- cut to exact length for the entire canoe. After I glue the short strip down, there's really no chance to saw the bevel to match the long strip. The bead of that short strip is glued down into the cove of the previous strip and sawing down into a cove isn't gonna work*. Stapling appears to tighten everything up so the length of an unstapled strip is inexact.

I just read a post by @Gamma1214 about building "Raven". His method there was each strip had a short end which was beveled, and a long end which bypassed the opposite side's beveled end. Courses were swirled left then swirled right, left, right. (My words, not his.)

Re-do.

The Weldwood Professional Wood glue on the beveled ends of the first strip broke apart easily after a couple of hours. This saves the long strip but I'll need to scarf another full-length strip.

* A) Saw then X-acto-knife? B) Saw then Dremel? C) Glue and staple as far as the last lateral form then saw? D) Doesn't matter this boat is turning around. Each strip will have a short end and a long end.
 
You do what you gotta do to in order to make it make sense in your own head but it seems to me you are going about this about the hardest way possible.

Lay the first strip and let it run long. Use a pull saw, with the beveled stem as a guide, and cut the angle on the end of the first strip. Lay the second strip and let it run past the first strip. For your next course the short strip will be on the opposite side of the hull so it will alternate back and forth.

I'm hardly one to stick hard and fast to convention but that's generally how it's done and I've never seen a good reason to deviate.

Alan
 
Your method is what I decided I have to do.

With all the build threads available, I didn't see much about two bevels on one strip vs. one bevel per strip. That's why I mentioned the Raven thread which clearly explained it.

So far its only the first strip on each side. That's where I saw that long and short strips would be trouble later.

The one book I have that covers stemless builds puts 5 or 6 strips on one side then 5 or 6 on the other. I want to avoid that.
 
Last edited:
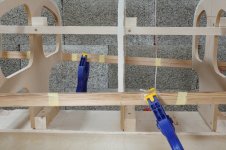
Staples!

View attachment 157152

I ended up moving only two forms. The battens and the straight-edge were valuable in different ways for finding and measuring the problems.

I was going to make each strip long on one end and short on the other but figured it makes every strip fussy. Seems easier to make one strip short at both ends then add the long strip on the other side. Alternating sides, of course. I stapled one strip but haven't cut the ends yet.

USPS delivered two glues yesterday: Titebond Extend Wood Glue and Titebond II Extend Wood Glue. TB E says do not use below 40F while TB II E says do not use below 60F. After mid-November, the basement won't have heat which usually means 50F (10C) into April. I can start heating some in March but not a lot and don't expect fast results.

I don't have any wood glues that make any claims for gap filling. Seems like the stemless ends of the first two strips are where I'd need that most. Or maybe I just need to spend more time cutting the angle right.

Dave

I found that using the stemless method created some gaps and such as well, I ended up just doing my best and cleaned it up at the end.

There were a few gaps, a few tears and I ended up waiting till the end when I usually go around fixing imperfections, for the stemless areas I just filled (before any cleanup) with colour matched, thickened eopxy .... followed by routine shaping directly (green) after it setup. The flaws just seem to disappear.

Brian
 
There were a few gaps, a few tears and I ended up waiting till the end when I usually go around fixing imperfections, for the stemless areas I just filled (before any cleanup) with colour matched, thickened eopxy .... followed by routine shaping directly (green) after it setup. The flaws just seem to disappear.

Somewhere I have before and after closeup pictures of one of my stems that had bigger gaps than Cletus's smile and you really can't tell at all after filling with thickened epoxy and shaping. I don't have the time to dig for them now, maybe later.
 
Back
Top Bottom