Looking good! I should be getting mine stripped starting tomorrow. I'm still undecided on the follow through of the knuckle in the Kite, we'll have to try to compare once I get to that point, although by then you'll probably be on the water.
-
Gone canoeing. You should, too! 👋🏻🛶
You are using an out of date browser. It may not display this or other websites correctly.
You should upgrade or use an alternative browser.
You should upgrade or use an alternative browser.
J Winters "Kite" build
- Thread starter stripperguy
- Start date
Well, I did order my resin and cloth today from RAKA. Bought enough 4 oz to do 1 1/2 layers in and out, but I'll probably only do 1 1/2 on the outside. And I checked in the boat shop tonight, I do have plenty of leftover Dynel.
Now I just need to order my pigment for the resin, pretty sure the outside of the hull will be red. Still need to decide on which material (carbon, carbon/kevlar, kevlar, kevlar/glass) for the seat frame, thwarts and gunnels. All of those will be foam cored, Started building a hot wire foam saw today at work, using some NiChrome wire and an old 5A step down transformer.
I'll have a few days before the resin and cloth show up, just enough time to touch up some spots on the hull that need a little more TLC.
EVERYBODY! Fiberglass! Fiberglass! Fiberglass!
I can only wish I had a warm work shop. Happy glassin' SG
I can only wish I had a warm work shop. Happy glassin' SG
Looking forward to seeing a few details of the hot wire saw. IMO making tools to fit one's personal needs is very rewarding. Making tools to make the tools is also fun.
Those dents can be fixed if you are on them right away. Put a damp rag over the dent in the wood and they will swell back up.
Those dents can be fixed if you are on them right away. Put a damp rag over the dent in the wood and they will swell back up.
Thanks red, I've done that on many of my hulls. The cedar is particularly responsive to raising the grain.
BTW, I did some more sanding this morning, and radiused that crease. I'm going to need to thicken a few ounces of resin with Cabosil and fill in a spot or two and create a fillet at the top of the crease, where it contacts the sheer strips. There's no way that the glass could fold into that sharp corner.
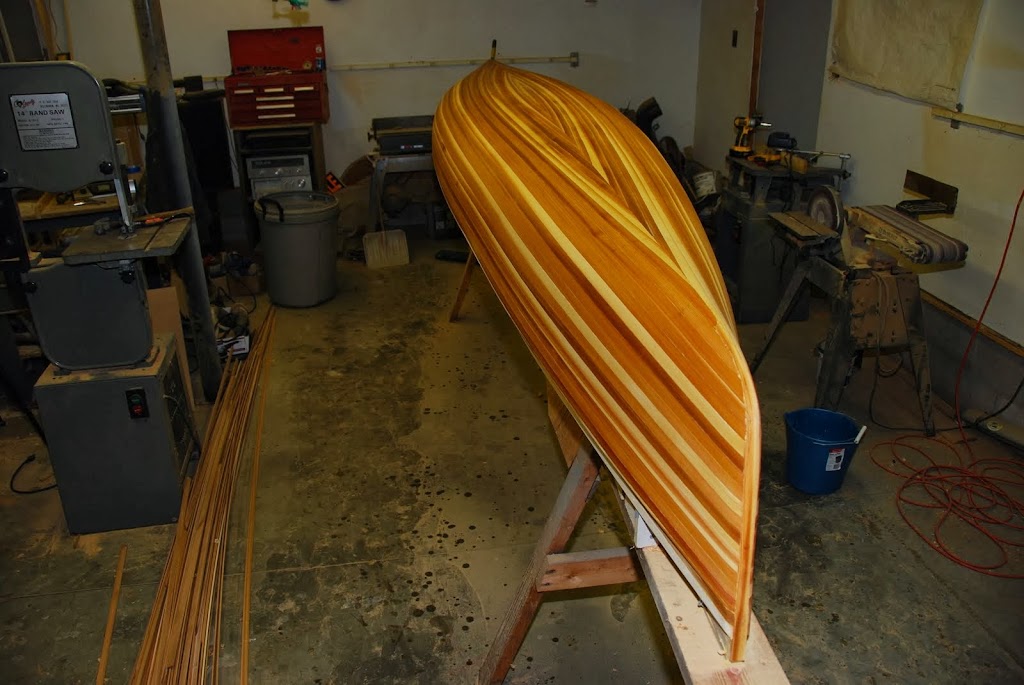
I had some time to soak the hull with hot water and a rag...what do you guys think?

And here's a staple dent responding after only 10 minutes, it remains to be seen if the largest surgical staple removal sites will respond the same.
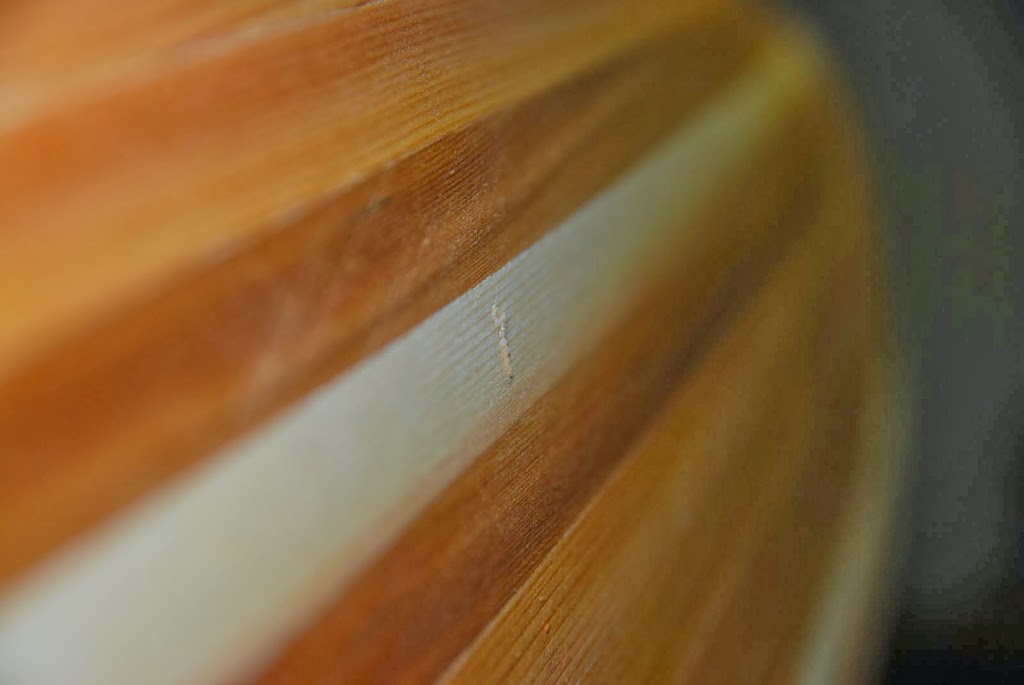
And here's a staple dent responding after only 10 minutes, it remains to be seen if the largest surgical staple removal sites will respond the same.
Very impressive! I really appreciate your extra time and effort taking the photos and posting them for us! Thank you sir.
Jason
Jason
Seems a shame to pigment your epoxy now when you get a look at it all wetted out. I don't think I'm gonna paint mine now.
Very impressive! I really appreciate your extra time and effort taking the photos and posting them for us! Thank you sir.
Jason
I only post the photos so that others may live vicariously through them. The same way I live vicariously through the photos from everyone else!!
Seems a shame to pigment your epoxy now when you get a look at it all wetted out. I don't think I'm gonna paint mine now.
I still plan to pigment the resin...I rarely see my boats from the outside except in photos. The inside will look the same as they all do. I'm curious to see how this hull will look all one color. I built a sailboat, a 19 ft performance hull, kind of like a 49er...the plan for that sailboat was to paint the hull. MDB and the kids refused to let me do it. This Kite build is going so fast they won't have time to object!!
Fantastic!!! That looks really great.
How do you get the hull off the form? Do you pivot the individual form pieces inside the hull and then lift straight up? Or just unscrew them from the "rail" they are affixed to and then remove them by twisting?
I think you should tint it. I'm all for it.
Your sanding is great. I used to work in an auto body shop and have probably hand sanded a couple of hundred acres of sheet metal over the years. Nothing quite like sanding for a weird work out.
Thanks, Hanz. Yeah, I unbolt the forms from the strongback, and twist them out from under the hull. The stem forms and #1 and #14 forms (they are attached to the stem forms) sometimes get stuck and need to be removed after the hull is flipped.
I am ordering the red pigment tomorrow, probably glass next week after a seal coat of epoxy resin. I also need to fill in a couple of spots with some Cabosil thickened epoxy, but I'm waiting for the new epoxy to do so.
My BIL was a bodyman for most of his career, for a while, he taught bodywork to inmates in the VA prison system. Now he teaches students in the VA public school system...he says the inmates were better behaved!!
Anyway, I won't arm wrestle him, he's got forearms of steel.
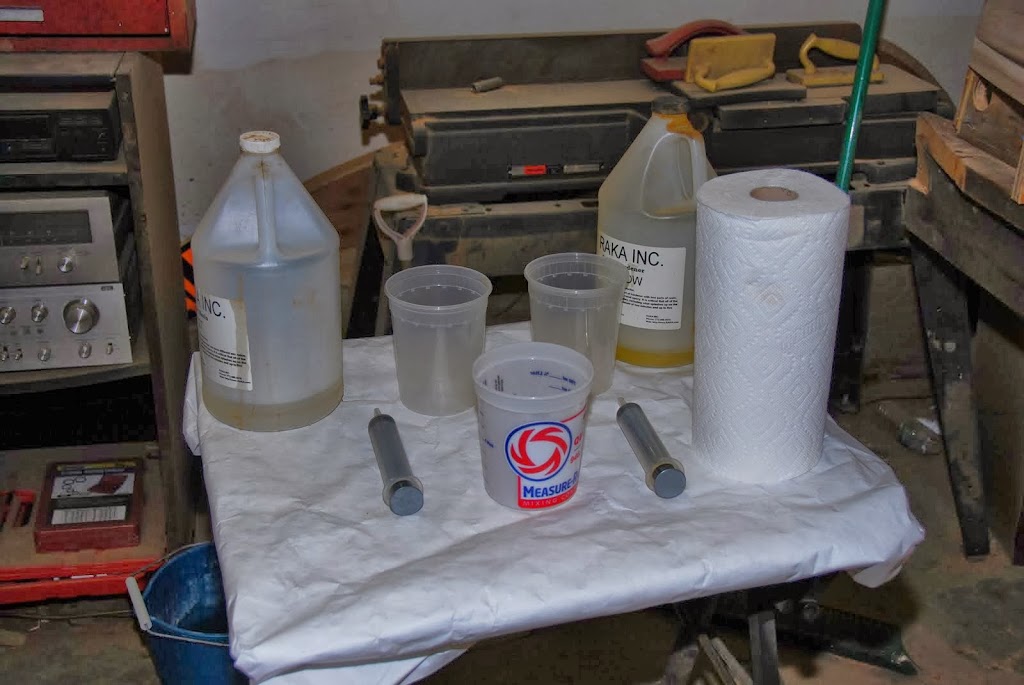
Well, the glass, resin and pigment all were waiting on my front porch when I got home from work tonight. After dinner, I zipped over to Lowe's to pick up some graduated mixing cups. Then I cleaned up my used squeegees, and flushed out the syringes.
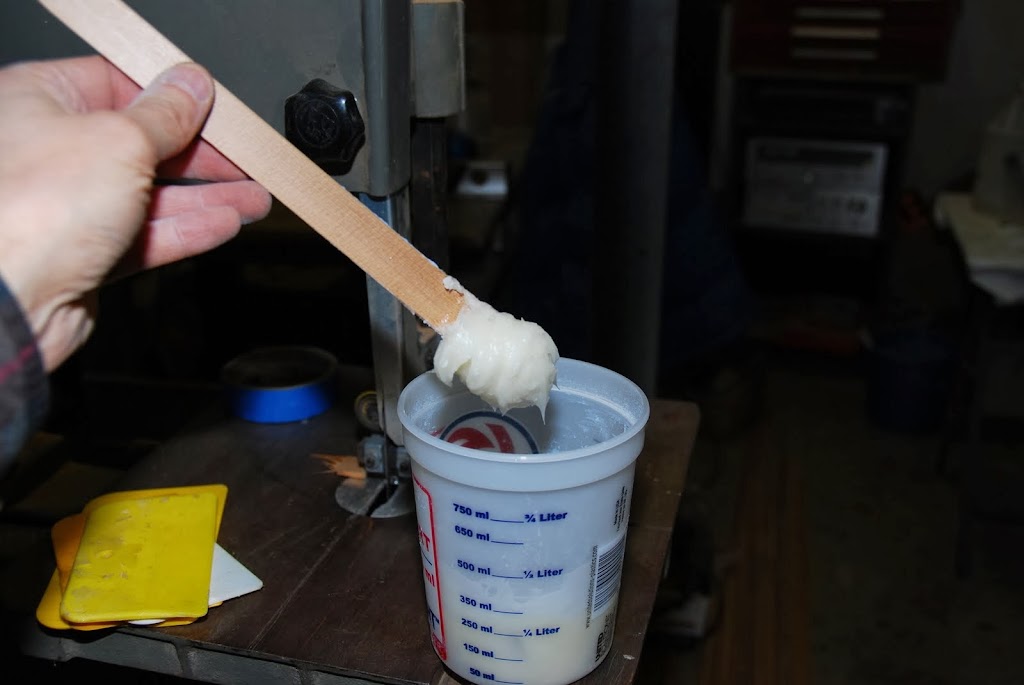
I mixed 3 oz of old leftover resin, and added enough Cabosil to make a peanut butter like putty. Then I filled in those divots and other low spots, knots, gaps, planer gouges. here, take a look.
Tools of the trade.
Cabosil thickened epoxy, on a custom stirring stick (I have thousands of these)
Filled spots
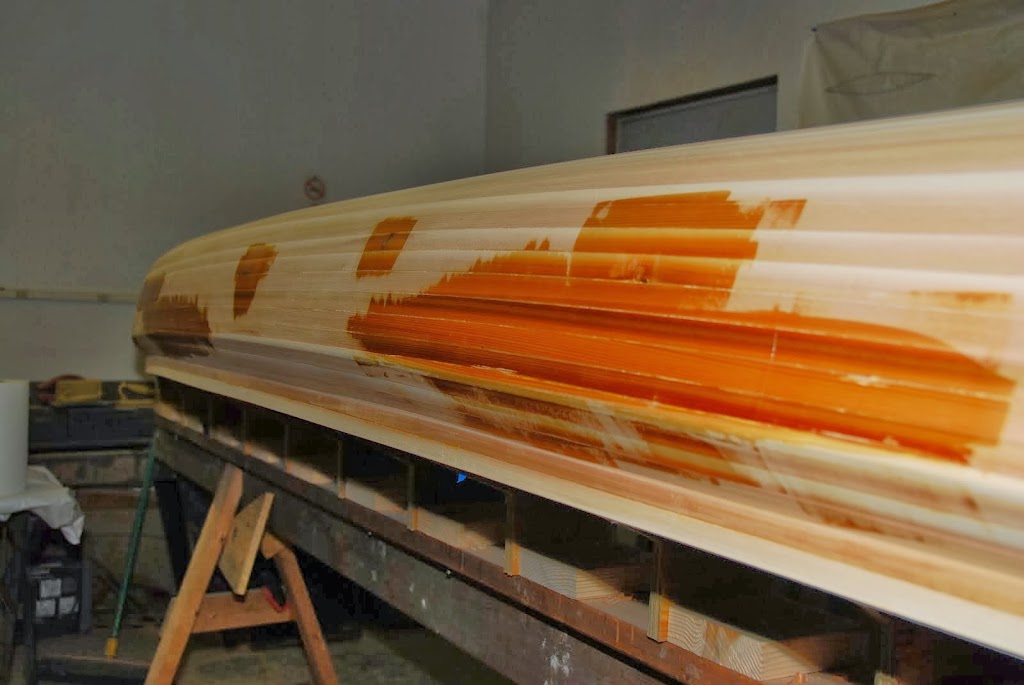
Eventually, the entire outside of the hull will be this color!
Soon, maybe tomorrow, I'll apply a seal coat of resin on the entire hull, wait a day or so, and then lay out the cloth and wet it out. I plan on 1 1/2 layers of the 4 oz cloth, with several bias cut strips over the stems, and a pair of large Dynel fiber rub patches near the stems. The seal coat, wet out, and covering coats will all be done with the red pigmented resin.
I mixed 3 oz of old leftover resin, and added enough Cabosil to make a peanut butter like putty. Then I filled in those divots and other low spots, knots, gaps, planer gouges. here, take a look.
Tools of the trade.
Cabosil thickened epoxy, on a custom stirring stick (I have thousands of these)
Filled spots
Eventually, the entire outside of the hull will be this color!
Soon, maybe tomorrow, I'll apply a seal coat of resin on the entire hull, wait a day or so, and then lay out the cloth and wet it out. I plan on 1 1/2 layers of the 4 oz cloth, with several bias cut strips over the stems, and a pair of large Dynel fiber rub patches near the stems. The seal coat, wet out, and covering coats will all be done with the red pigmented resin.
Update without photos:
Smoothed down the patched spots and applied a thin seal coat of epoxy on the entire hull last night. Tonight, (if I'm not plowing too much) I'll lay out the cloth, cut the stem strips on the bias, cut the Dynel for the stems. Next day, I'll wet out the glass with the pigmented resin...goodbye wood grain!!
Smoothed down the patched spots and applied a thin seal coat of epoxy on the entire hull last night. Tonight, (if I'm not plowing too much) I'll lay out the cloth, cut the stem strips on the bias, cut the Dynel for the stems. Next day, I'll wet out the glass with the pigmented resin...goodbye wood grain!!
SG - I've been thinking...
Since you're using pigment anyway (and I think I will too, when I do this), I wonder if it would be a good idea to use polyurethane expanding glue to fill the divots. We do it for royalex repair, and I'm planning to do the same for the old styro Snark that I'm going to skin. Might be a weight-savings there?
Since you're using pigment anyway (and I think I will too, when I do this), I wonder if it would be a good idea to use polyurethane expanding glue to fill the divots. We do it for royalex repair, and I'm planning to do the same for the old styro Snark that I'm going to skin. Might be a weight-savings there?
G
Guest
Guest
This build is driving me nuts. Those cedar strips look gorgeous, but oh baby I can't wait to see that shiny red hull! Strip, if I didn't live so far away, I'd plow your driveway for you, just so you could get a head start on that hull.
SG - I've been thinking...
Since you're using pigment anyway (and I think I will too, when I do this), I wonder if it would be a good idea to use polyurethane expanding glue to fill the divots. We do it for royalex repair, and I'm planning to do the same for the old styro Snark that I'm going to skin. Might be a weight-savings there?
Steve,
That polyurethane glue has a habit of expanding and developing bubbles, bit maybe it could work in the small volumes that I would need. I generally don't need to fill any gouges, I'm hoping that was an isolated event.
This build is driving me nuts. Those cedar strips look gorgeous, but oh baby I can't wait to see that shiny red hull! Strip, if I didn't live so far away, I'd plow your driveway for you, just so you could get a head start on that hull.
Actually, I left work early to plow...I own 25 rental units spread across 9 different buildings, as well as a share in a commercial building. Not all need to be plowed, but enough of them to keep me (or MDB) busy with every snowfall. Today I blew a hose and had to limp home to replace it, then back out for more plowing.
Not much time for boat building tonight.
My son was just looking at the hull, muttering about it being a shame to cover up that beautiful wood. But he did like the color of the pigment, and mentioned that it looks like the same color as mom's boat, a 12 ft Swift Adirondack.
I think he's right.
I'm ready for the pigment. All that wood business is hiding the lines of the canoe a little. I think the lines will pop more when the wood is not a distraction. Off to pop some pop corn while I wait.
Oh yeah - that looks about the same color I ordered my Coho in. Mid-life-crisis Red. ")
Finally some photos...
The other night I applied a seal coat of epoxy resin to the hull. I had originally planned to use pigmented resin for the seal coat, but a buddy mentioned that the resin sometimes seeps through the staple holes and gaps and goes all the way to the inside of the hull. Whoa, that would suck if I ended up with a polka dotted inside!! So, a clear seal coat it was. Then I rolled out the 4 oz per sq yd cloth, for the 1/2 layer.
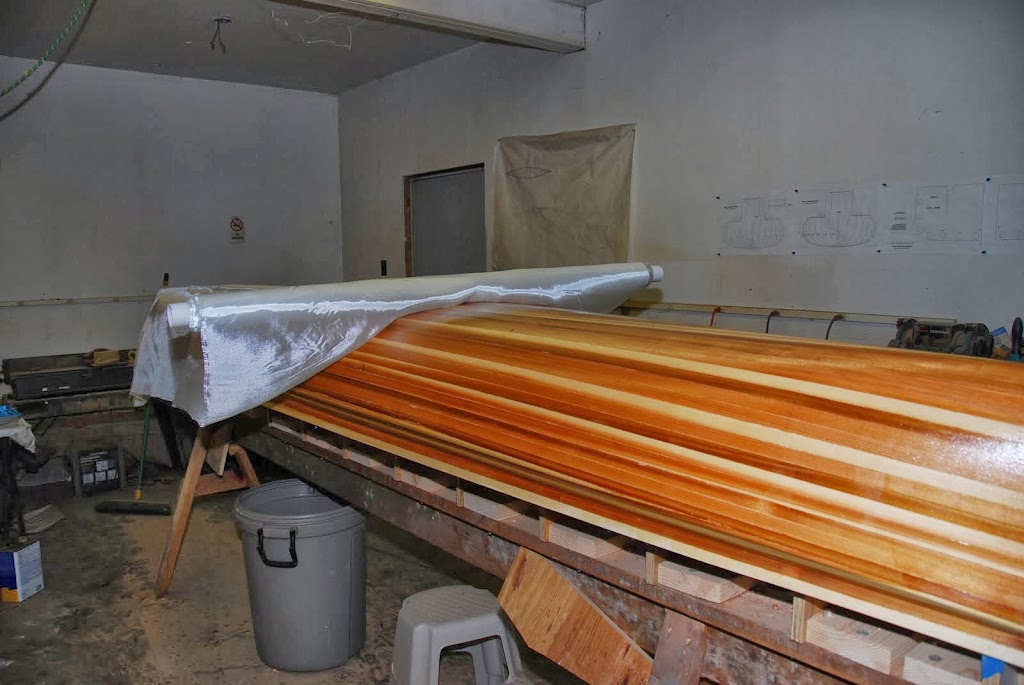
Invariably, the outer layer of the cloth is in rough shape from the supplier, so if I'm using a 1/2 layer, I start with the end of roll that's wrinkled and pulled. That way it's buried under the full layer and less conspicuous. Here's the cloth rolled most of the way from stem to stem, or is it stem to stern? (actually, it was stern to bow)
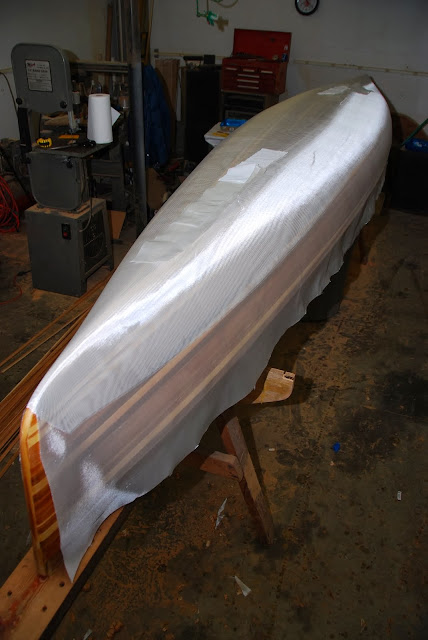
Here's the 1/2 layer trimmed a ways above the waterline.

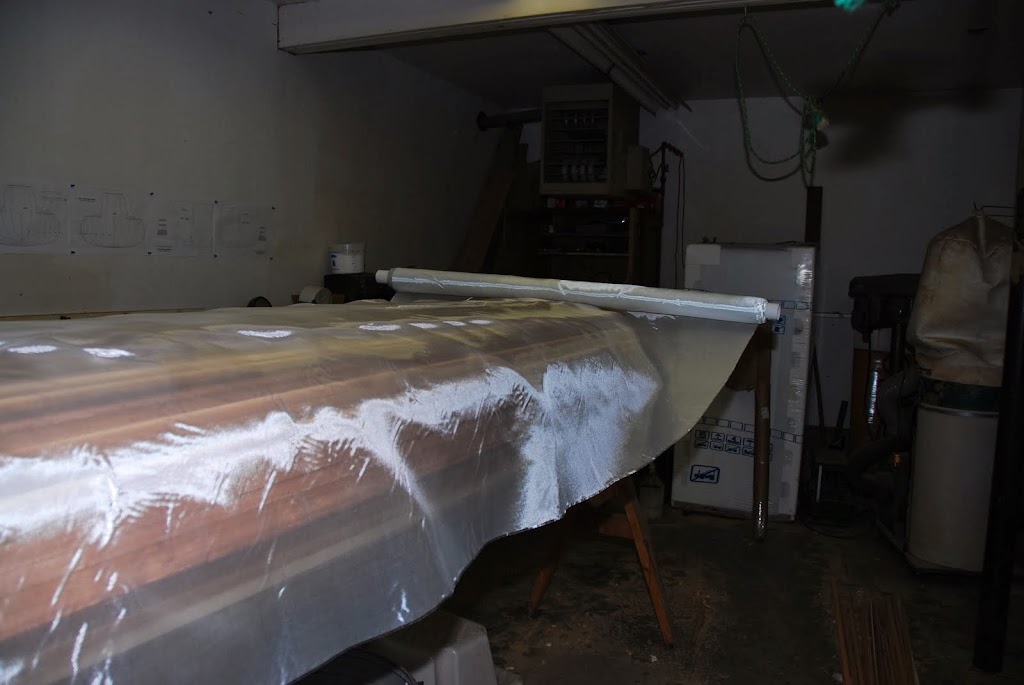
What's that?? You need to see a closer view of that 1/2 layer!? Here ya go!

As much as I had tried to clean the hull before I rolled out the cloth, I still found a few small lumps underneath. Maybe it's just easier to spot the lumps when the hull is covered in a uniform sheen. Any way, I had to carefully lift up the cloth a few times to pick out the debris. Then very carefully smooth out the cloth.
Once that 1/2 layer is smoothed down, I rolled out the full layer. Trimmed the exess and repeated the smoothing routine. It's much easier to smooth the cloth out now, while it's clean and dry. When it's being wet out and it's all sticky and uncooperative is not the time to remove major wrinkles.
Also, when smoothing, I try to not create a fold, which would become a wrinkle as I run my hands over it. Those wrinkles have a way of sticking around and showing through in the final finish.
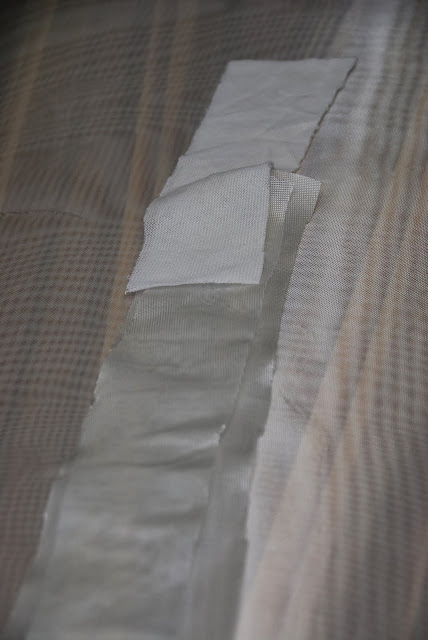
So here's the entire hull draped with 1 1/2 layers of 4 oz cloth. You'll also notice some precut strips laying on top. Those are the bias cut strips of 4 oz fiberglass cloth and the bias cut strips of Dynel cloth. The stips are cut on the bias (weave at 45 degrees to the strip) so that they conform nicely to the compound curves around the stems.
What's that? You need to see those strips from a closer view too!? Ok...
And now I wait, until a forum buddy (not this one) comes over to help after I go BC skiing tomorrow. (20 inches of untracked!! Hooo-weeee!)
Hang on, I seem to be forgetting something...
Oh yeah! I took the time tonight to add the pigment to the resin.
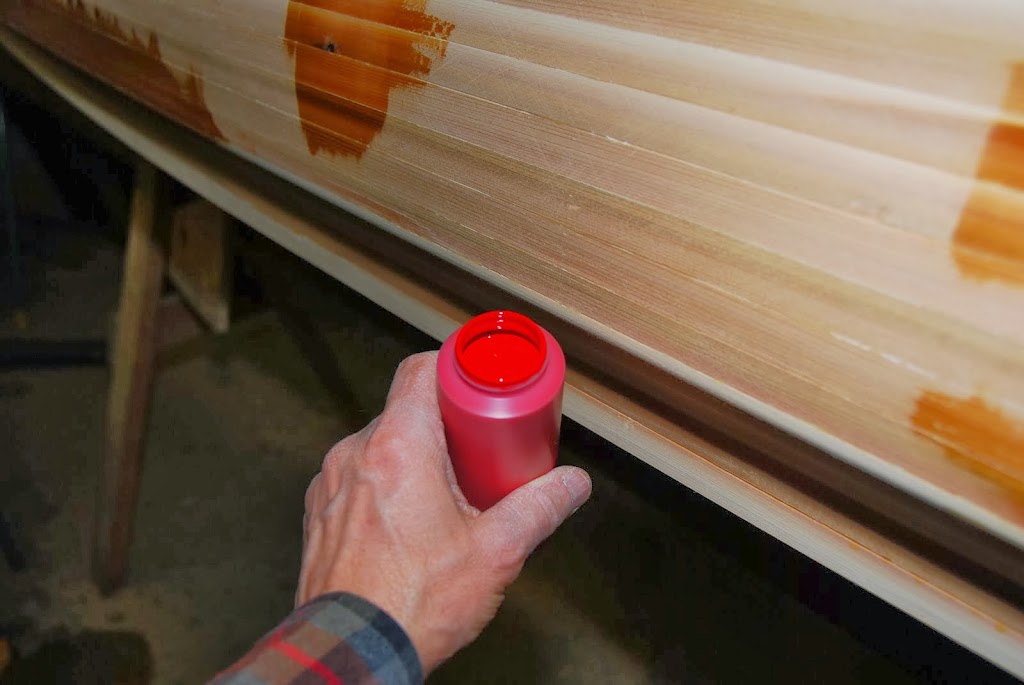
Here's the resin and an 8 oz bottle of the pigment. The vendor says to use 4 oz of pigment per gallon of resin for dark colors, 8 oz per gallon for light colors. I guessed that this is a dark color.
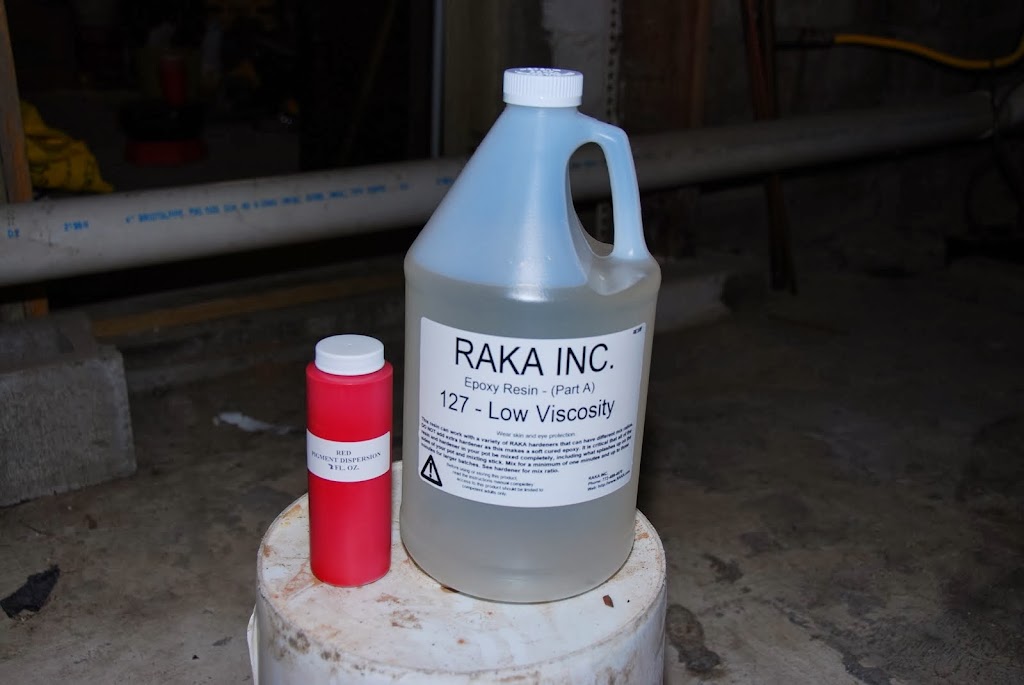
I added the pigment and Ta Da!! All the pigment sunk to the bottom of the jug! After much stirring, I ended up with this.
Yeowww...it's just what I imagined, maybe evem more vibrant than my imagination. Yeah, I think I'll be happy with the look.

So that's it for tonight, no more plowing, no more split hydraulic lines, no more work on the boat. Just the anticipation of tomorrow's skiing and the fun of wetting out the hull.
I do have a few more photos in my Picasa sie, it's linked in my signature, for those that want to see even more.
The other night I applied a seal coat of epoxy resin to the hull. I had originally planned to use pigmented resin for the seal coat, but a buddy mentioned that the resin sometimes seeps through the staple holes and gaps and goes all the way to the inside of the hull. Whoa, that would suck if I ended up with a polka dotted inside!! So, a clear seal coat it was. Then I rolled out the 4 oz per sq yd cloth, for the 1/2 layer.
Invariably, the outer layer of the cloth is in rough shape from the supplier, so if I'm using a 1/2 layer, I start with the end of roll that's wrinkled and pulled. That way it's buried under the full layer and less conspicuous. Here's the cloth rolled most of the way from stem to stem, or is it stem to stern? (actually, it was stern to bow)
Here's the 1/2 layer trimmed a ways above the waterline.
What's that?? You need to see a closer view of that 1/2 layer!? Here ya go!
As much as I had tried to clean the hull before I rolled out the cloth, I still found a few small lumps underneath. Maybe it's just easier to spot the lumps when the hull is covered in a uniform sheen. Any way, I had to carefully lift up the cloth a few times to pick out the debris. Then very carefully smooth out the cloth.
Once that 1/2 layer is smoothed down, I rolled out the full layer. Trimmed the exess and repeated the smoothing routine. It's much easier to smooth the cloth out now, while it's clean and dry. When it's being wet out and it's all sticky and uncooperative is not the time to remove major wrinkles.
Also, when smoothing, I try to not create a fold, which would become a wrinkle as I run my hands over it. Those wrinkles have a way of sticking around and showing through in the final finish.
So here's the entire hull draped with 1 1/2 layers of 4 oz cloth. You'll also notice some precut strips laying on top. Those are the bias cut strips of 4 oz fiberglass cloth and the bias cut strips of Dynel cloth. The stips are cut on the bias (weave at 45 degrees to the strip) so that they conform nicely to the compound curves around the stems.
What's that? You need to see those strips from a closer view too!? Ok...
And now I wait, until a forum buddy (not this one) comes over to help after I go BC skiing tomorrow. (20 inches of untracked!! Hooo-weeee!)
Hang on, I seem to be forgetting something...
Oh yeah! I took the time tonight to add the pigment to the resin.
Here's the resin and an 8 oz bottle of the pigment. The vendor says to use 4 oz of pigment per gallon of resin for dark colors, 8 oz per gallon for light colors. I guessed that this is a dark color.
I added the pigment and Ta Da!! All the pigment sunk to the bottom of the jug! After much stirring, I ended up with this.
Yeowww...it's just what I imagined, maybe evem more vibrant than my imagination. Yeah, I think I'll be happy with the look.
So that's it for tonight, no more plowing, no more split hydraulic lines, no more work on the boat. Just the anticipation of tomorrow's skiing and the fun of wetting out the hull.
I do have a few more photos in my Picasa sie, it's linked in my signature, for those that want to see even more.
Similar threads
- Replies
- 1
- Views
- 133
- Replies
- 42
- Views
- 4K
- Replies
- 2
- Views
- 726
- Replies
- 12
- Views
- 1K
- Replies
- 90
- Views
- 14K