Hi.
I have a very Specific question about my build but I thought I'd start off with a little introduction since I haven't posted anything about this build yet.
Last summer I started building my John Winters Kite up in northern Sweden. I've had a lot of help along the way especially from Martin Step at Greenvalley Boatworks where I bought the plans. Can't say enough good things about the service and support from him.
Stripperguy (no known blood relation) and Dogbrain has also provided much good advice and support along the way.
In short:
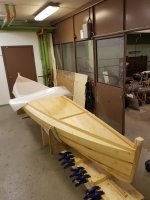
I finished the hull, glassed it inside and out, then the project was put on hold for 8 months until now.
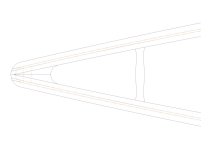
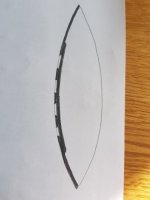
The hull is stripped with locally grown spruce (picea abies), stripped with rectangular strips or "rolling bevel". The strip dimension was 3/16" x 3/4". I cut out many knots and used a 1:12 scarf joint and glued the strips so that all of them were full length before stapling them on the forms. I found a very good technique and this felt like the easiest way to go about it.
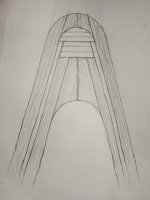
I'm using two piece tapered stems made from local Aspen.
Glass schedule is as follows: A full layer of 4oz E-glass on the outside and an additional layer of 4oz S-glass on the bottom stopping a few inches above the waterline.
The inside is 4oz S-glass laid perpendicular to the length of the canoe, overlapping about 1" every 30" and thus creating a sort of reinforcing rib at the overlaps. The hull feels stiff and sturdy enough.
I put three fill coats on the outside, none on the inside.
The outside will be painted with a high gloss "high performance two component polyurethane" from De Ijssel in a bordeaux red.
Inside will be the same quality polyurethane but clear with only a small amount of the red added to block UV even better and add a little red hue to the very bright spruce.
Weight at current stage is: 12kg or 26.5lbs
I'm aiming to keep the finished weight below 20 kg/44lbs which might be doable. I should at least get close. The Spruce I used as strips is of the northern variety which is denser than what can be found down south. I think this is the reason that the hull is a bit on the heavy side, or not heavy exactly.. Let's say it's a little heavy for a light weight craft.
I've started to sand the outside hull today.
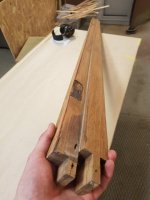
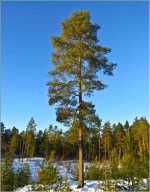
I also picked up a good 17 foot 2"x5" heartwood Scots Pine (pinus sylvestris) for the gunwales. It is has good rot resistance even though it doesn't absorb much of an oil finish. It cuts, sands and glues very well. This is my best alternative for gunwales. Even though this is old growth and much higher quality and harder than construction grade pine it is still a softwood. Should be lighter than Ash (which I can't get) but it's no where near as hard.
I would like to hear your opinions on gunwale dimensions using this type of wood.
I will not do scuppers and I will hang a sliding seat from the inner gunwale.
/Thestripper
I have a very Specific question about my build but I thought I'd start off with a little introduction since I haven't posted anything about this build yet.
Last summer I started building my John Winters Kite up in northern Sweden. I've had a lot of help along the way especially from Martin Step at Greenvalley Boatworks where I bought the plans. Can't say enough good things about the service and support from him.
Stripperguy (no known blood relation) and Dogbrain has also provided much good advice and support along the way.
In short:
I finished the hull, glassed it inside and out, then the project was put on hold for 8 months until now.
The hull is stripped with locally grown spruce (picea abies), stripped with rectangular strips or "rolling bevel". The strip dimension was 3/16" x 3/4". I cut out many knots and used a 1:12 scarf joint and glued the strips so that all of them were full length before stapling them on the forms. I found a very good technique and this felt like the easiest way to go about it.
I'm using two piece tapered stems made from local Aspen.
Glass schedule is as follows: A full layer of 4oz E-glass on the outside and an additional layer of 4oz S-glass on the bottom stopping a few inches above the waterline.
The inside is 4oz S-glass laid perpendicular to the length of the canoe, overlapping about 1" every 30" and thus creating a sort of reinforcing rib at the overlaps. The hull feels stiff and sturdy enough.
I put three fill coats on the outside, none on the inside.
The outside will be painted with a high gloss "high performance two component polyurethane" from De Ijssel in a bordeaux red.
Inside will be the same quality polyurethane but clear with only a small amount of the red added to block UV even better and add a little red hue to the very bright spruce.
Weight at current stage is: 12kg or 26.5lbs
I'm aiming to keep the finished weight below 20 kg/44lbs which might be doable. I should at least get close. The Spruce I used as strips is of the northern variety which is denser than what can be found down south. I think this is the reason that the hull is a bit on the heavy side, or not heavy exactly.. Let's say it's a little heavy for a light weight craft.
I've started to sand the outside hull today.
I also picked up a good 17 foot 2"x5" heartwood Scots Pine (pinus sylvestris) for the gunwales. It is has good rot resistance even though it doesn't absorb much of an oil finish. It cuts, sands and glues very well. This is my best alternative for gunwales. Even though this is old growth and much higher quality and harder than construction grade pine it is still a softwood. Should be lighter than Ash (which I can't get) but it's no where near as hard.
I would like to hear your opinions on gunwale dimensions using this type of wood.
I will not do scuppers and I will hang a sliding seat from the inner gunwale.
/Thestripper
Attachments

Last edited:

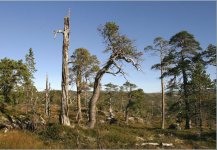
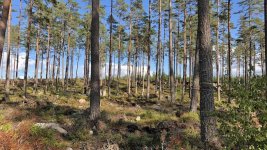
 . The "ugly" picture is the one with the skinny trees and destroyed undergrowth.
")