• Happy National Garlic Day! 🧄🚫🧛🏼‍♂️

J Winters "Kite" build

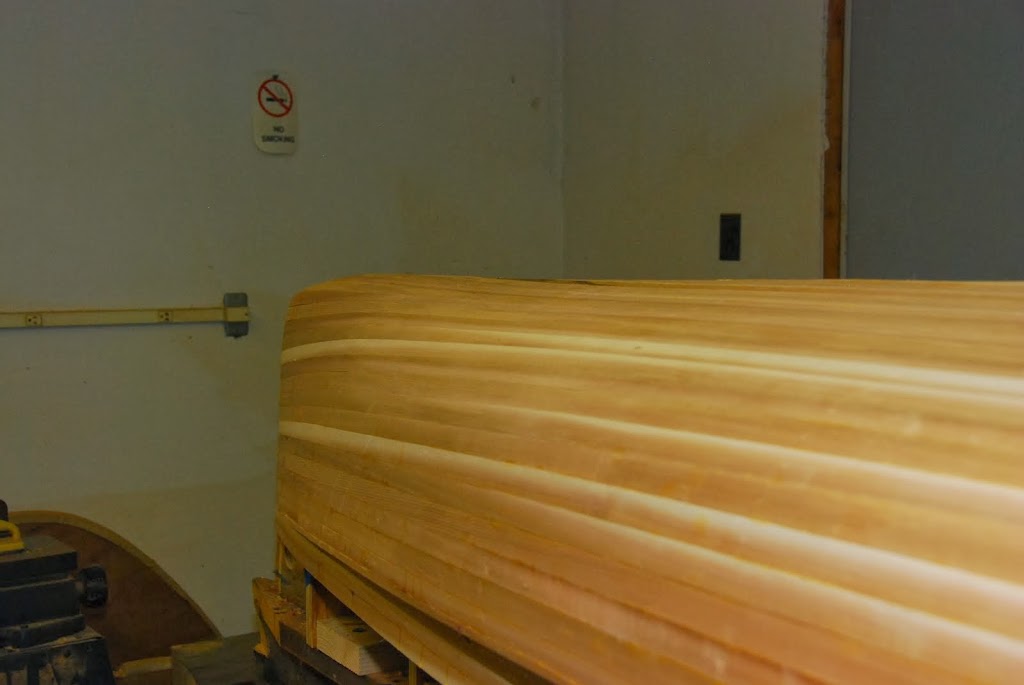
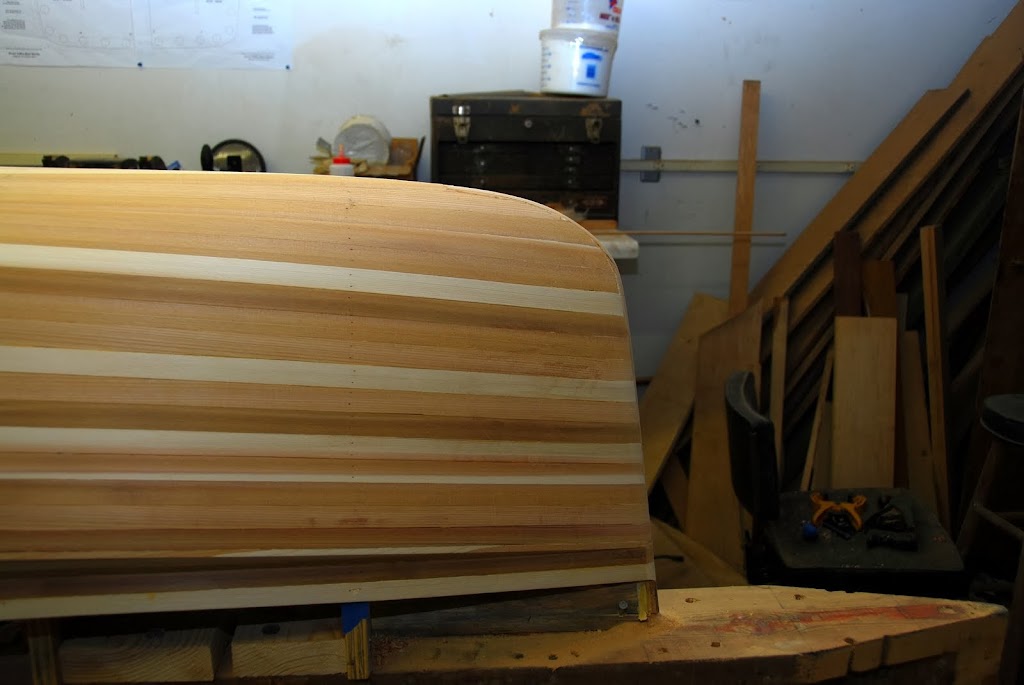
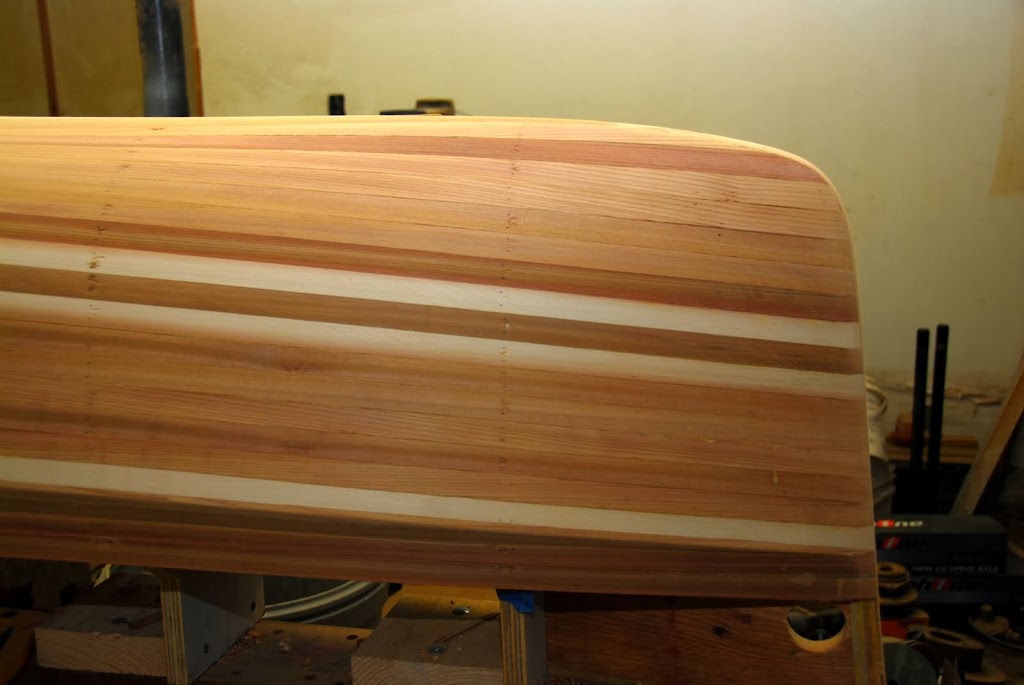
I was going to post this yesterday, but I didn't want to bump Rippy's knife thread...

DSC_1094.JPG


But hold on, you say, how did I get there??

OK, here's how it goes.

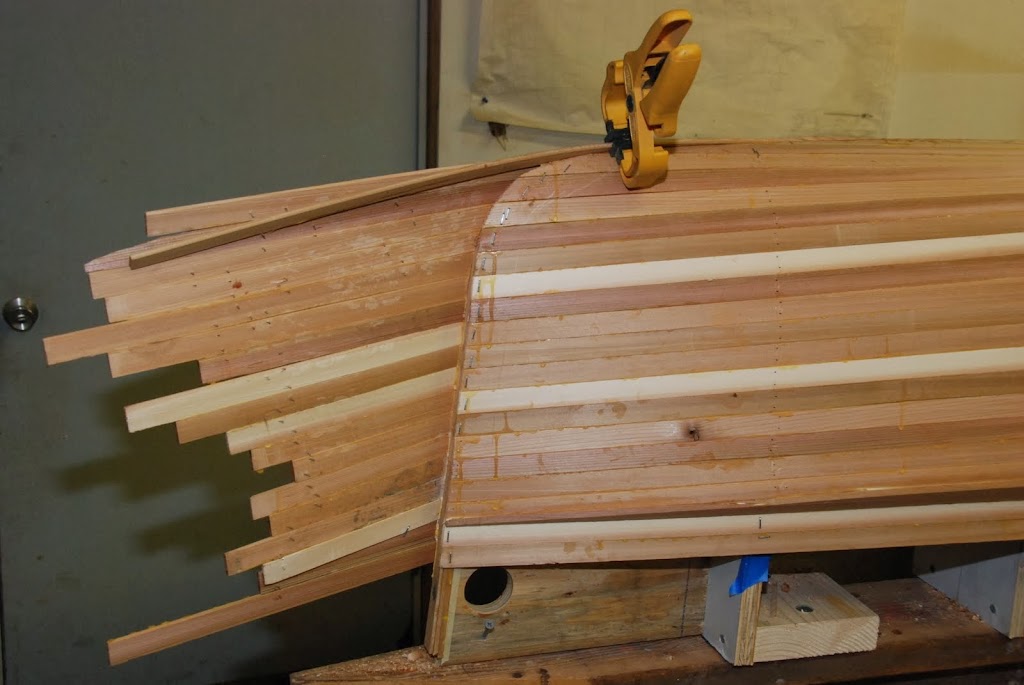
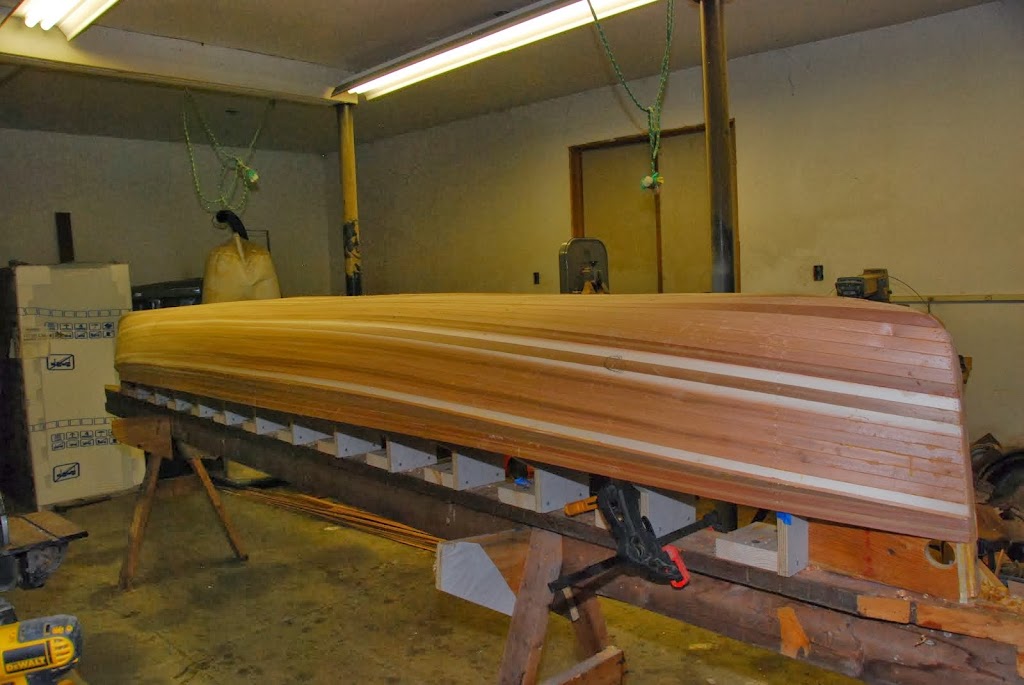
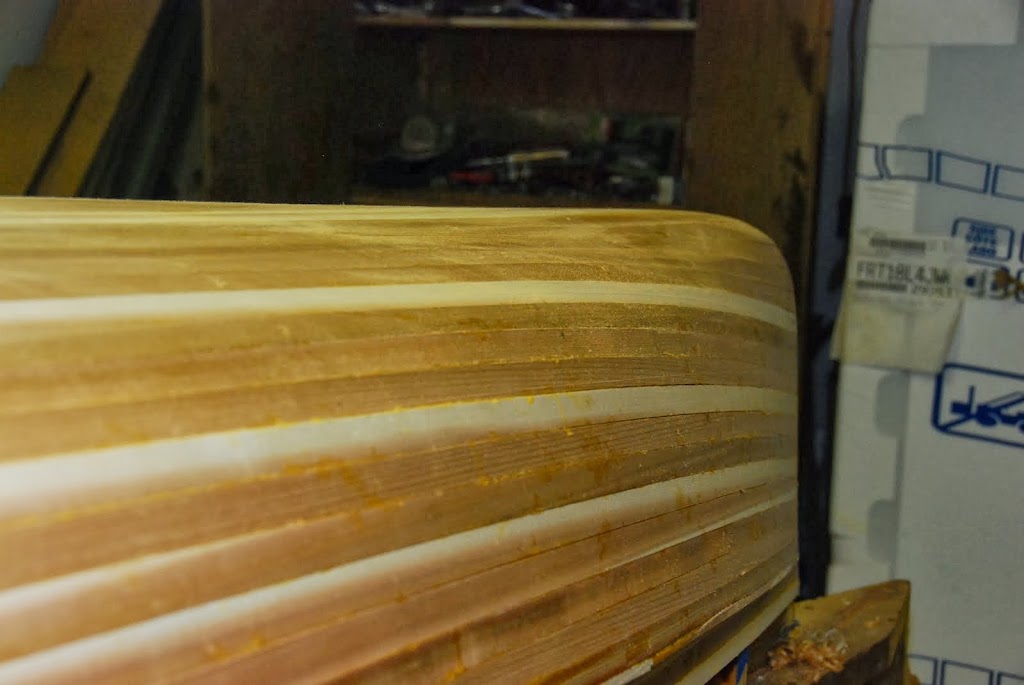
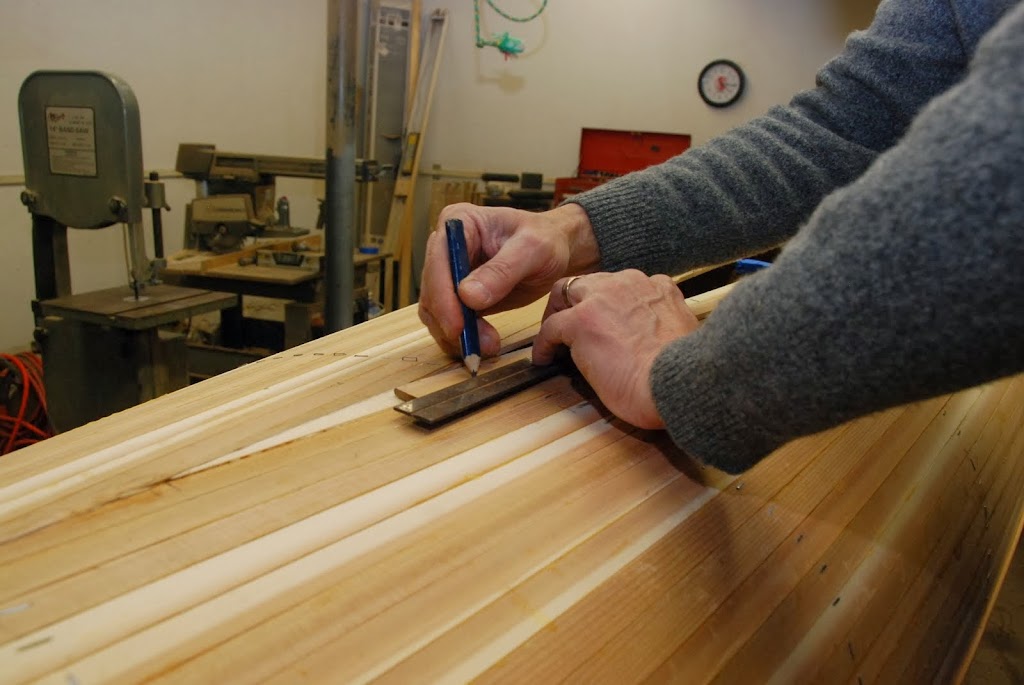
I start with a strip laid in place, parallel to the previously applied strips. I put the end of the strip right at the point where it will end. Then I mark a line to define the end of the angle cut.
Then I draw a pencil line from corner to tick mark, using a 12 inch rule.

DSC_1085.JPG


DSC_1086.JPG


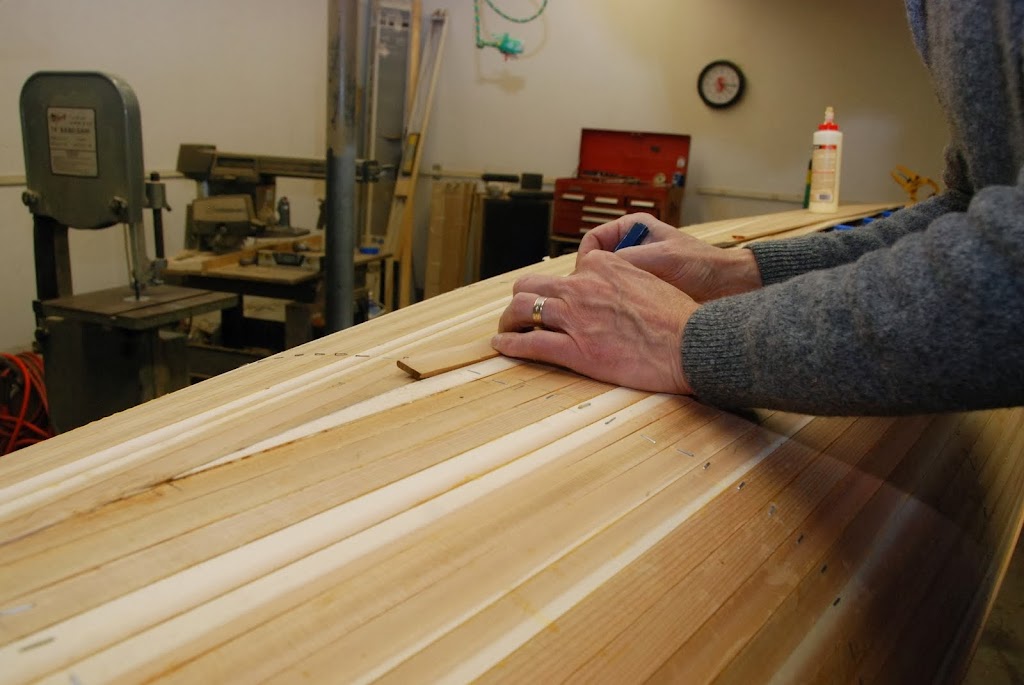
Then, I rough cut the strip on the band saw. I then use a itty bitty block plane to trim to fit the strip in place. The strip is trimmed to a point at the one end, so it needs support from an extra strip while I plane it.

DSC_1088.JPG


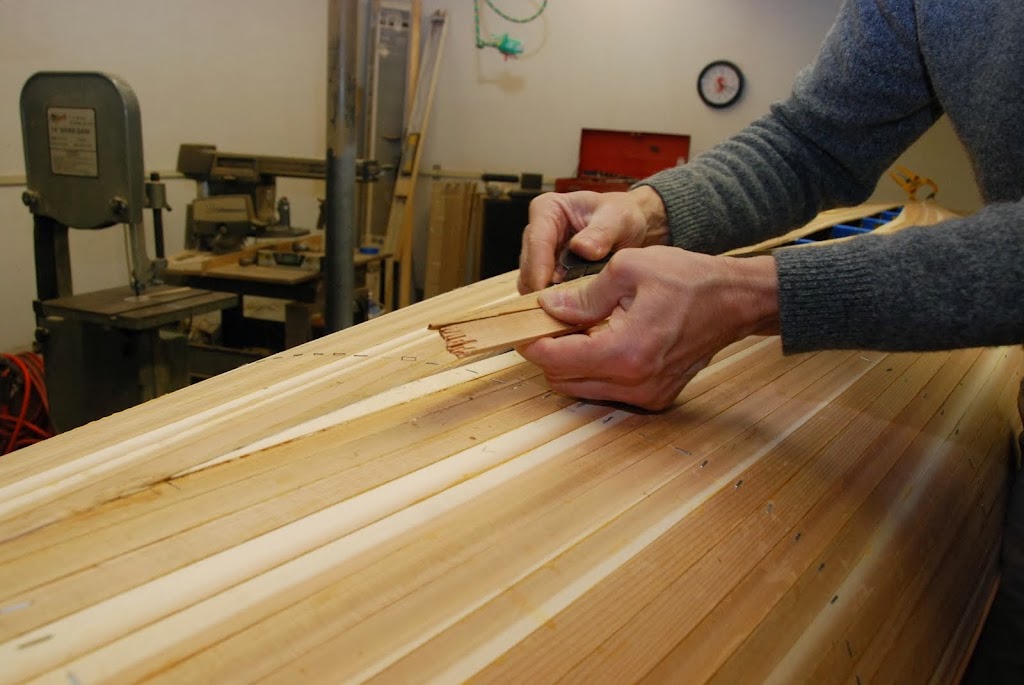
I sometimes have to trim and check fit several iterations, until the angle is just right.
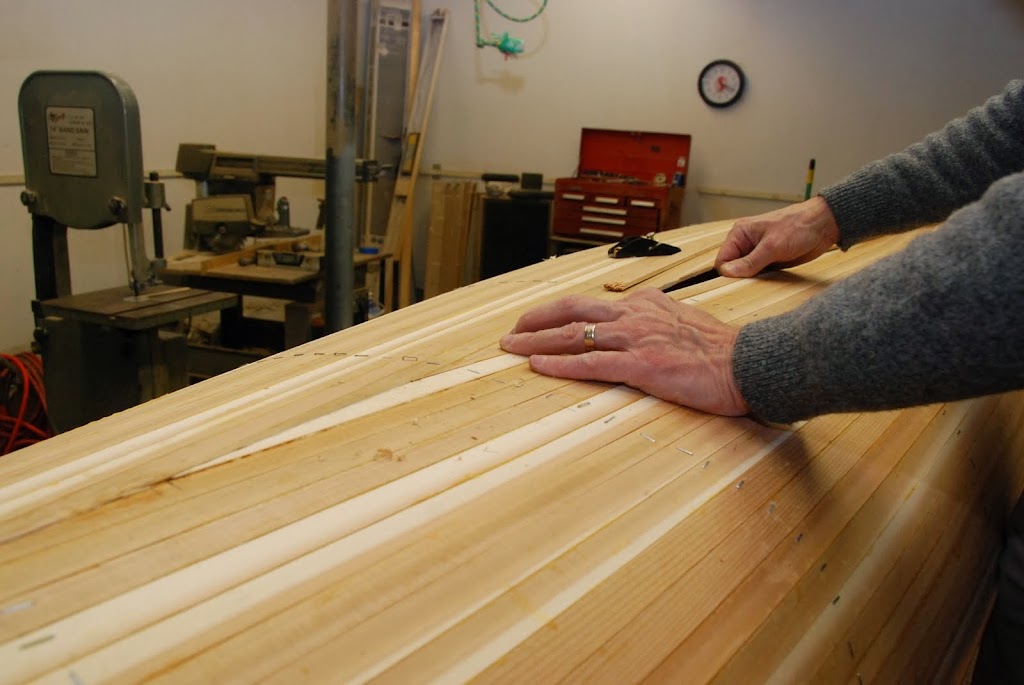
Once I get the fit that I want, I jam the strip temporarily into place, and put match marks all along the strip, as I'm forcing it into place.
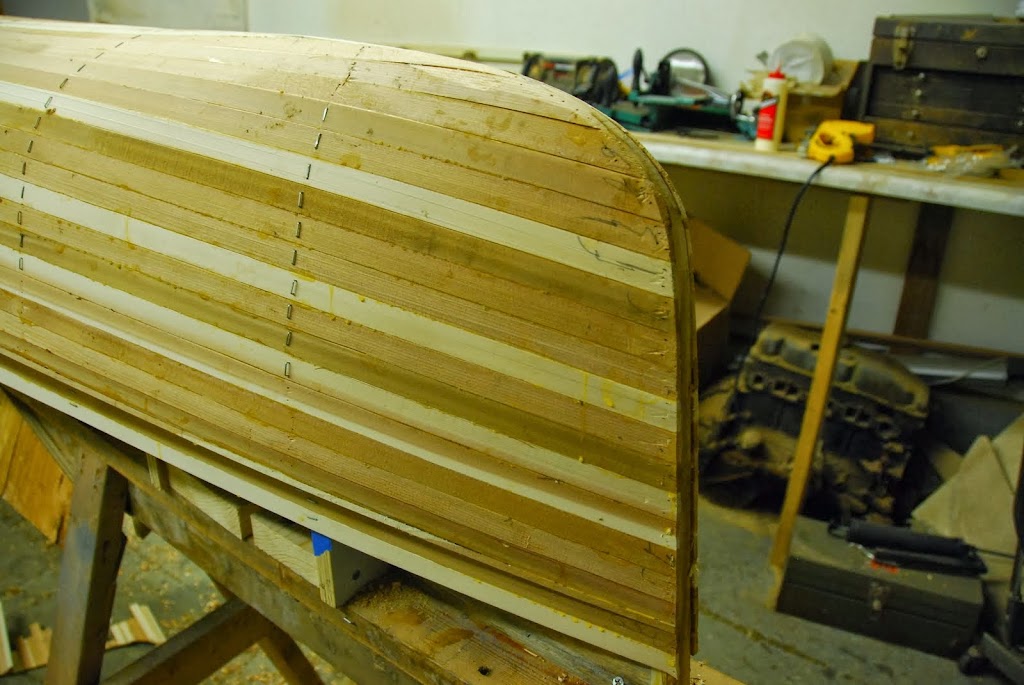
Eventually, I get to the other end of the strip, which also has to be trimmed. But the second end, has to be trimmed to the right angle (most of these are compound angles too!) AND trimmed to the correct length. That's what the match marks are for, to be sure that the strip hasn't slipped as I worked it into place.
After I get it to fit well, I slather the strip with glue and stuff and staple it in place, starting at the second end, working back to the first trimmed end. Why?? I'm right handed, and it's easier to work from right to left for me. I have to intentionally buckle the strip, to get it to engage the cove on the second (1st trimmed) end.

DSC_1089.JPG


DSC_1091.JPG


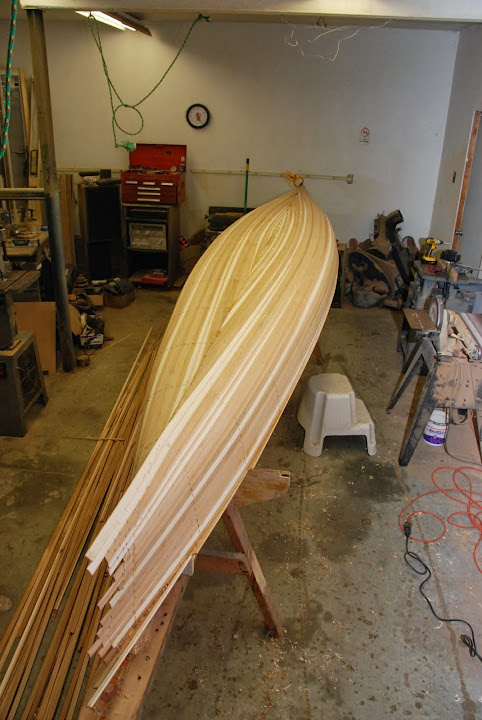
And that's all there is to it!! Uhmmm, except for the final strip, which took me three tries to get it right.
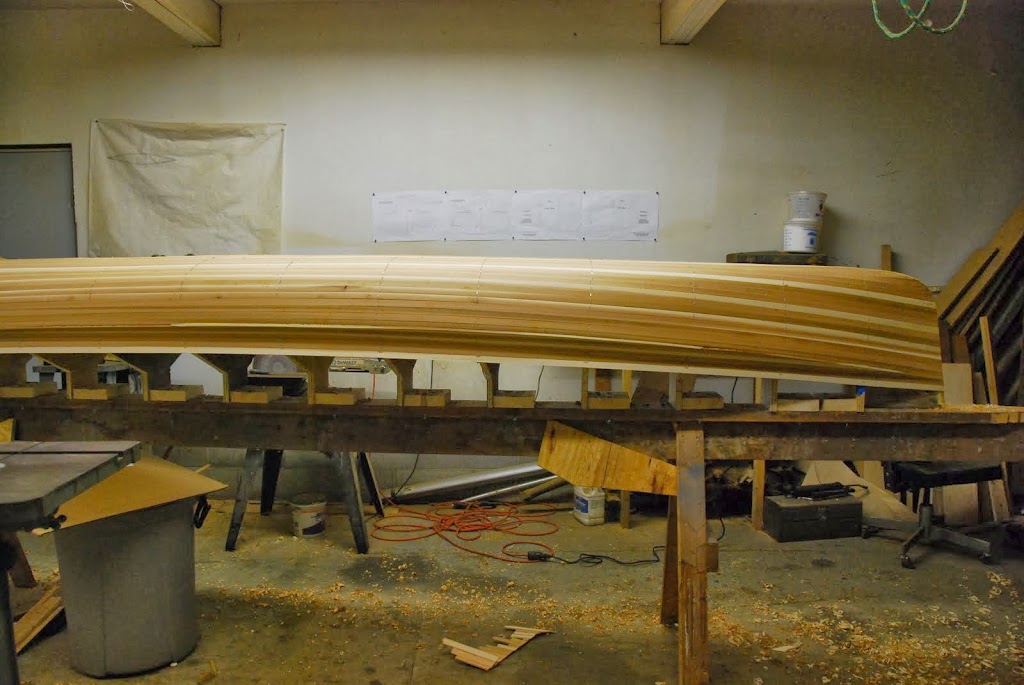
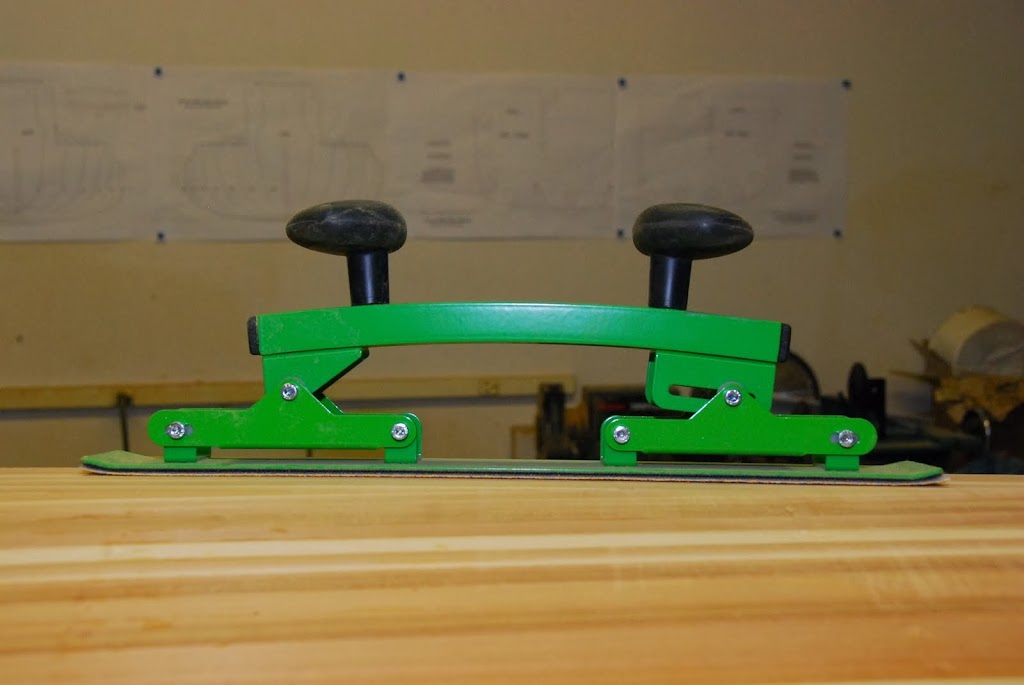
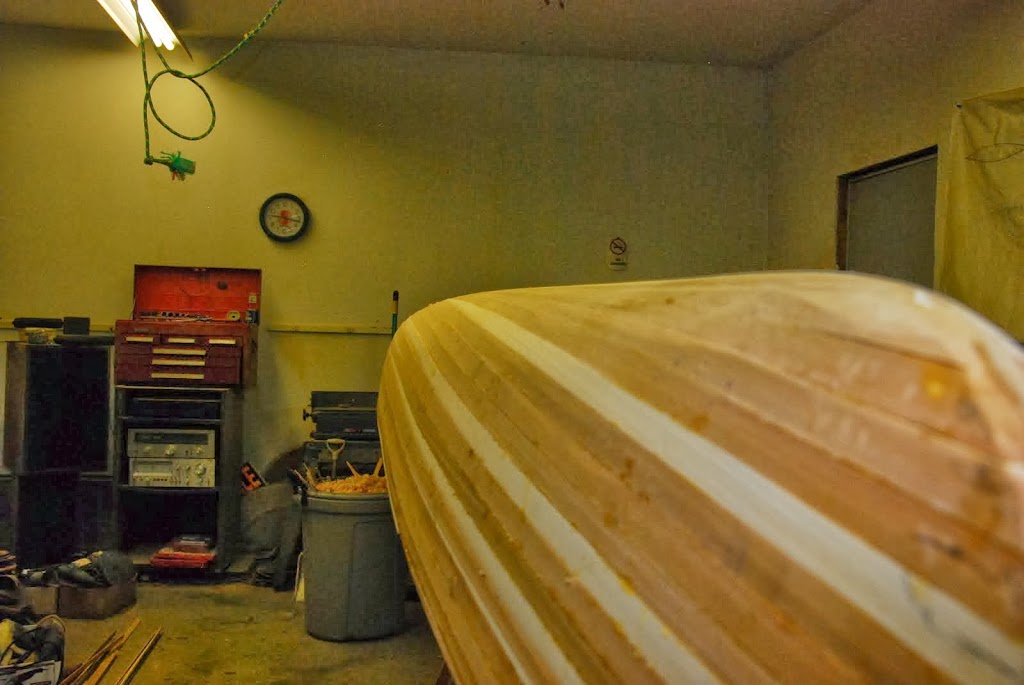
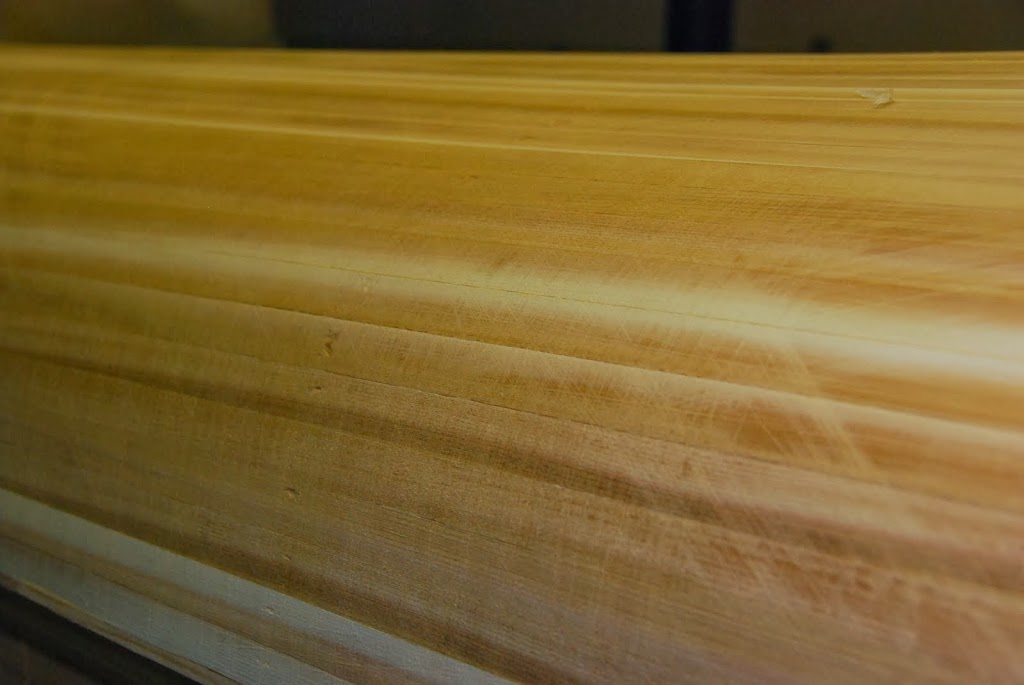
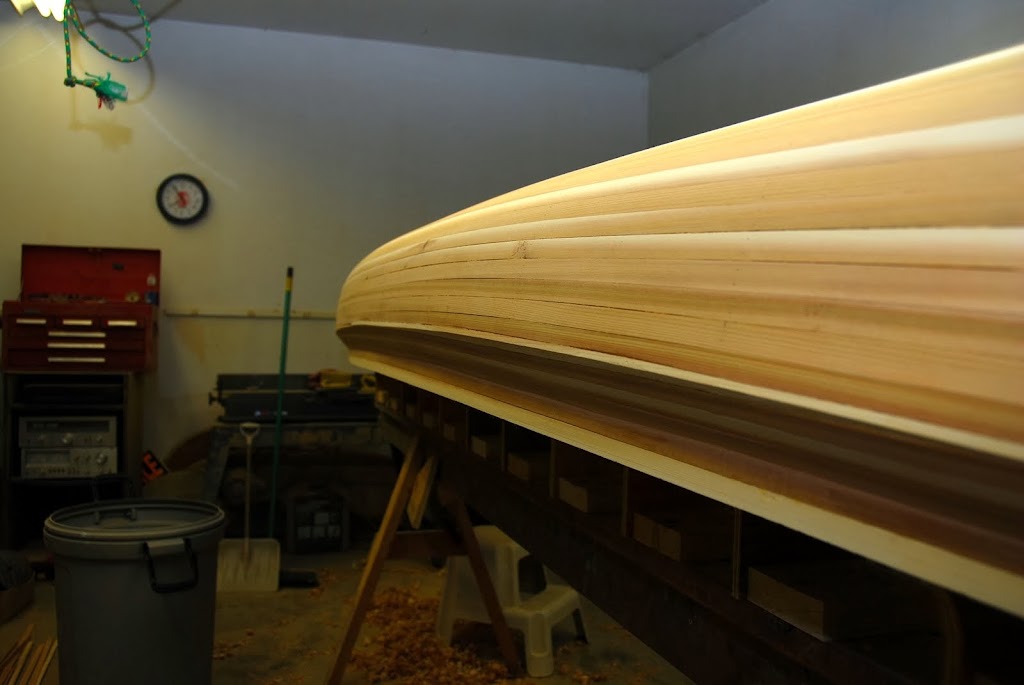
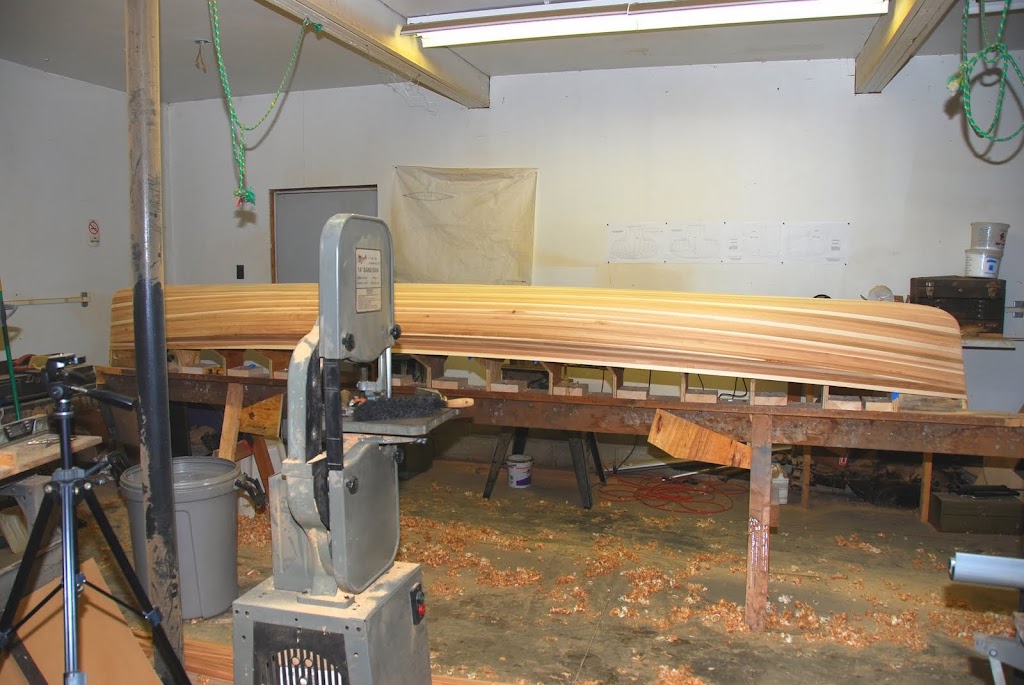
In a day or so, I''ll rough plane the entire hull, and start sanding...Oh yeah, I have to pull almost all the staples too.
 
Not letting any grass grow under your feet SG.

I like the way you backed the angled strip with another strip while planing it.
 
Last edited:
Looking very nice! Sheesh, That's fast! What are you planning for the stems?

It was fast, wasn't it?! Like I said, I have to squeeze these projects in as strategically as possible, no telling when my free time will vaporize.

The stems?? You're looking at them!! I deviated from my usual build methods with laminated stems. I stripped to them (past, actually, but they'll be trimmed) mostly. I stripped over the stem pieces near the keel line.
I'll do a fair amount of sanding and blending, hopefully, I can maintain the design stem shape. The plans called for inner and outer stems, I have never used even an inside stem before, I'm a very weight conscious builder.
I estimated how much hull would be added by stripping over the stem pieces near the keel line, and cut my stems forms accordingly. I kept the above water profile for the finished outer stem.
When all is said and done, I should have stem profiles and rocker that match the design.

Other than that, I'll have a few layers of bias cut glass wrapped at each end, and a good sized chunk of Dynel fiber, for a wear patch. Dynel is still the most abrasion resistant fiber for these applications. But the stuff wicks resin like an old sweatshirt!! And it is difficult to cut and wet out cleanly, and it always has a yellowish cloudy appearance. That's part of the reason I plan to have an opaque finish on this boat, to hide the ugly Dynel!!

I've loaned out one of my Dynel stemmed boats regularly for 10 or 12 years. That boat gets beached often, and yet it survives constant rubbing on those 40 grit beaches.

So, back then to the stem question. I think I have enough wood to work with to get a good blend and still maintain the correct profiles...If I have miscalculated, I can always add or remove some stock. I do plan to put bulkheads and decks on this hull, so any sins can be buried under the decks and/or the opaque finish.

Was it you that didn't like or use bulkheads and decks? I have used them since my 3rd build, not just for the floatation, but also for the immense increase in strength, and to bury all the ugly spots that I can't quite reach with my sanding!!
As far as the floatation, yes, the boats will not sink anyway, but those chambers at each end make the boats much easier to self rescue when far from shore.
 
Not letting any grass grow under your feet SG.

I like the way you backed the angled strip with another strip while planing it.

Hey Rippy, I didn't see you there while I was typing!!

Actually, I finished stripping yesterday, but I didn't want my post to trump your knife making post...

Yeah, I found out a long time ago that the tapered end of the strips get distorted as you plane. I don't think I could even plane to a point without that support. The strip would deflect so much that it would splinter if not backed up.
 
I have built with and without stems, and in the end prefer he look of the outer stem. When I use cedar, it really doesn't add much weight. I'm also kind of traditional in some things, I like that brass stem band. I have always used decks in the past, but never bulkheads. If I use decks this time, they will be quite small. Starting a new semester tomorrow, gonna be a bit before I get back to work.
 
That looks great!!! I love the shape and the symmetry the strips lend to it.

You are moving fast. I can almost smell the wood while sitting here the photos are so good.

You're doing a great job of arousing my curiosity. Good thing I don't have a spot to build one.
 
"Along the way, I have built 20 or 30 boats for myself and family members, and helped build another 10 or 15. And virtually helped another 6 or 7 guys, via the internet, one of the guys is here." That's me!!! SG helped me build by very own Cedar Stripped Canoe. With no wood working experience and no tools, and 4 months and 300 work hours - I was able to do it. That was about 6 months ago, and I still don't think it has set in!!! Still super amazed I did it. Then, after realizing my new found skills, I built my little guy a loft bunk bed - haha.

https://picasaweb.google.com/113318878240838203274/2013CedarStripCanoeBuild?authkey=Gv1sRgCITS3dzX8vKAWw&feat=email#5909517965651590290

No - back to Mike. More pics please!!!! ; )
 
Patch,

Well, let's see that bed!! Glad to see that your boat building exposed your innate skills, who knows what other dormant talents you have??!
 
That looks great!!! I love the shape and the symmetry the strips lend to it.

You are moving fast. I can almost smell the wood while sitting here the photos are so good.

You're doing a great job of arousing my curiosity. Good thing I don't have a spot to build one.

Hanz,
Thanks for the kind words, but I mean to inspire.
I never meant to arouse you!! Stimulate maybe, uhmmm, no, that's not right either!;)
 
Patch,
Nice...What's next??

And where's Rippy? That knife is looking great! Amazing to see the transformation from raw stock to a nearly finished piece of art.

Now, back to the business at hand...

I spent a few minutes pulling staples near the second side crease, and near the stems. I have an old can opener that I sharpened to a fine point back in '81. It's stamped "Utica Club"!! It works quite well for popping staples loose.
After I removed a bunch of staples, I used a block plane to trim the excess from the second side crease.
When I finished doing that, I used a jig saw to trim most of the excess from the stems.
Finally, I used that trusty block plane again to trim in the stems.

Here's the stern before trimming.

DSC_1095.JPG


And here's the bow after trimming with the jig saw, but before trimming with the block plane.

DSC_1099.JPG


And here's the bow again, after trimming with the block plane.

DSC_1100.JPG


The bow came out about the way I expected, but the stern needed a filler piece close to the keel line. The last thing I did tonight was to whittle a small chunk of cedar to fill in a gap at the stern.
Here's a wider view or the stern section so you can see the rocker and general hull shape.

DSC_1103.JPG


And so the bow doesn't get jealous...

DSC_1104.JPG


Here's a closer view of the bow, second side. You can see fresh glue dripping, I had to repair a joint on the last sheer strip.

DSC_1102.JPG


I noticed that I have a slight hump (what hump!?) between the forms 1 and 2, and another hump between forms 13 and 14. There should be enough cedar to remove that hump, it's very slight, but it's definitely there.
The next few days will be spent planing and sanding to fair the hull and blend the stems smoothly into the rest of the hull.

Lastly, here's an overview looking from bow to stern. Please excuse the lighting, my flash batteries are dead, dead, dead.

DSC_1105.JPG
 
Thanks for all the pictures SG. Looking forward to more . Curious to see how the stem areas are shaped when done. I guess what I mean is will the strips be blended into the stem pieces?
 
Looking good! Do you have the fiberglass already? What will you be using?

I didn't order the glass yet. I'm thinking to use 1 1/2 layers of 4 oz on the outside, and a single layer of 4 oz on the inside. I have to look through my boxes of excess cloth to see if I still have enough Dynel for the stems. And I need to but more resin too! At the moment, I'm trying to choose a color to pigment the resin for the outside. I plan to use pigmented resin, rather than paint the outside. I know the hull will get gouged and scratched, and I want the resin to retain its color. But I'm not sure if I should wet out with pigmented resin, I think I'll be able to see what I'm doing...As I type, I am convincing myself to not wet out with clear resin. If I put a deep enough gouge in someday, the clear cloth will poke through.
And then I wonder, how much resin should I add pigment to? I don't want to have different shades from inconsistent batches, but then again, I don't want to have too much pigmented resin laying around for years...

Anyway, I'll probably order my cloth and resin this week from RAKA.
 
Last edited:
I spent about an hour pulling staples. I can't tell you how many failed right at the bend, no matter how I tried to keep them in one piece. It seemed that one or two of the forms just wouldn't let go of the staples! As a result, I have some ugly compressions around the broken staple legs that I had to surgically remove. Took way longer than it should have.
Once all the staples were out, I planed a good section of hull and then sanded a bit too.
That humped up section that looked like a bottle nose dolphin easily planed and sanded away.

DSC_1106.JPG


not yet sanded side


DSC_1107.JPG


sanded side


DSC_1108.JPG


DSC_1109.JPG


see the circled spot? That was one of the worst spots that wouldn't let go of the staple legs


DSC_1110.JPG


close up of sanding in progress


DSC_1111.JPG


stern, with hump


DSC_1112.JPG


bow, no hump


DSC_1113.JPG
 
me too

me too

I haven't logged on, in a while, and now I see all these boat builds. My heart is beeting faster and faster.... haha. Very awesome pics. Those cedar strips are so tight. Amazing work. I walk past my canoe every single morning and afternoon. I seriously can't wait to get it back on the water!!!

I love stripperguy's stuff. I can't wait to see it complete!
 
Thanks for all the pictures SG. Looking forward to more . Curious to see how the stem areas are shaped when done. I guess what I mean is will the strips be blended into the stem pieces?

Rippy,

I just noticed that I didn't answer your query...Last night I spent another hour or so with a block plane and a spokeshave, the stems have already blended in fairly well. Near the keel line, there's barely any thickness left at the stems, higher up on the hull (lower, in the current orientation) the strips are thicker, as are the laminated stem pieces, tapered by design. I have yet to shape the stem and do the radius blend from hull to stem. I usually wait until most of the hull is sanded to finish shape the stems, maybe just a habit. But so far, it looks like the hull, in general, is nice and straight. I did find a dip near form 12, so I knocked that form around from below with a hammer. The hammering broke the hull free from the form and allowed the hull to spring to a more natural position. I'll wait a day or so, to see if the stressed strips will relax any more, and then I'll either continue planning and sanding, or shim the hull at form 12 and then plane and sand. At this point, the hull will do whatever I want it to, once the glass and resin are on, it's pretty well locked into shape for the foreseeable future.

I love stripperguy's stuff. I can't wait to see it complete!

Me too!! Seriously, I still get a kick out of seeing the hull take shape. Watching, almost like a bystander, as the wood and glass and resin transforms from a pile of raw material into a useful tool. I do get numb to the beauty, for me, it's not been about aesthetics for a long time now. I try to build the most purposeful boat that I can, as efficiently as possible. The purposeful definition includes the finished weight, as I continue to age I'm no longer the strapping young man that I once was. Lighter and faster helps keep me actively involved and travelling places that would be nearly impossible with a 50 lb boat!! My goal for this build is 25 lb, we'll see if I make the goal or not fairly soon. Once I get the hull glassed and off the forms, I can weigh it and get a good estimate of the final weight.


So then, update without photos:

Planed and sanded entire hull last night, 90 minutes of Jane Fonda aerobics (am I dating myself??)
The hull had a dip or two, and a hump near the stern. Hump has been planed away, I'm waiting for the dip to relax after loosening the form under it.
 
Here's a look at the stems, mostly all trimmed in now...

Bow, viewed from paddlers left side

DSC_1117.JPG


Bow again, don't be fooled by the color of the wood, the shape is a very smooth transition from keel to sheer

DSC_1118.JPG


Here's that creased tumblehome, it's hard to get a good photo of it, evem harder to plane and sand!!

DSC_1119.JPG


Stern stem, viewed from paddlers right

DSC_1120.JPG


And I had to drag the whole strongback and boat towards the stern to get this overview into view.

DSC_1127.JPG
 
Back
Top