• Happy National Bean Counter Day! 🫘🔢🧮

NorthWind blowing in Fl...

its a bit hideous, but ok for a first try at a rain/dew cover and should work as intended.
The way I approached this was to invert the fabric and lash it under the combing riser via bungy cord and stretch, fold and iron my way around. I found it best to do a few inches on one side then switch over to the opposing side to do a few inches and repeat. Still need to clean up the inner trim line a bit, it looks like I cut it with a piece of broken beer bottle :), before final ironing.

Now that I've done this I know how to do the next one better, It took several days to figure out how I was going to do it and then get the courage to pick up the scissors and plug in the iron. Probably have about 3 honest hours of labor cutting, fitting and ironing. I'm sold on the DIY aspect to this. I won't be putting Seal-Line out of business anytime soon, but starting to learn how to work with this fabric is beyond enlightening and very practical.

I do not see the hideous. It looks great and fits more snug flat than the manufactured storage covers I have. The in situ inverted ironing approach is genius, or at least the necessary mother of invention.

Making custom tapered dry bags for the Northwind stems should be a piece of cake after that.

Right now I'm contemplating whether to leave this as is or cut a big hole in the middle and iron in a riser to cinch around my lower chest for a spray skirt....

I am not a skirt guy, due in part to my dislike of occluding access to day use gear in the canoe, but mostly because I do not like getting in or out of a spray skirted hole.

But I can absolutely see the value at times in having a full deck and spray skirt. I also see the value in having a truly waterproof storage cover and have not found a spray skirt tunnel opening, even if cinched tight, to be 100 percent waterproof, especially if it flops down in the hull to create a funnel.

I have a tandem canoe in the shop with an odd two piece spray skirted cover. The bow position has a fixed spray skirt tunnel, but the stern tunnel is sewn into a separate oval piece with Velcro perimeter that attaches over a 4 foot x 2 foot opening over the stern seat location.

The stern paddler can enter or exit while wearing the tunnel and skirt part as on a WW or sea kayak. Hard to explain, I will take some photos.

Edit. I put the covers on. It is the bow station that has the removable tunnel skirt.
 
Last edited:
thanks Mike. As you know the skirt is more of safety thing for these watertribe events and of course my own coastal jaunts. This last EC event was delayed a couple hours due to small craft conditions. We could see the 4'-5' waves on the horizon from the beach, which was the approximate center of Tampa Bay shipping channel. Just getting across the channel is the first filter as they call it. All the paddlers were skirted in to make the crossing. In fact a few paddlers got out there and turned around and came back to wait a few hours for the conditions to calm down some more. There's about a mile of heck there in the middle where the water is deepest and the current rips, which was standing the waves up that morning. If you've followed past events you know several contestants end up getting rescued before they get across almost every year there is dicey weather conditions.

Anyway, I spent a good bit of time Friday afternoon before the event on the beach with BeaV, who is famous for his 5000 mile Alaska paddle in his kruger seawind. I think he was out 6 months for that. Heck of a nice guy too. We talked gear, setup, safety and strategy, etc. He even asked me if I had any tips on how to catch an everglades python. :) His spray skirt didn't have much of a riser or tunnel as you call it, but it had two big marine zippers, about 24" long that were about 2" apart at the center of his waist and they ran out diagonally almost to the combing on each side. Like a V. So when flipped it was easy to grasp the two pulls above the belt buckle area and push them forward and out to clear the skirt to exit the canoe. He leaves them open for ventilation and gear access when conditions warrant.

I'd definitely be interested in seeing what you have for sure. But I do like BeaV's setup with the zippers and he's real happy with how they works. Still, I have plenty of time to work it out and now that I know what to do, I can always get more material and experiment with different ideas. Need to research this some more for sure, but any thoughts and ideas welcome.
 
We could see the 4'-5' waves on the horizon from the beach, which was the approximate center of Tampa Bay shipping channel. Just getting across the channel is the first filter as they call it.
There's about a mile of heck there in the middle where the water is deepest and the current rips, which was standing the waves up that morning. If you've followed past events you know several contestants end up getting rescued before they get across almost every year there is dicey weather conditions.

Anyway, I spent a good bit of time Friday afternoon before the event on the beach with BeaV
His spray skirt didn't have much of a riser or tunnel as you call it, but it had two big marine zippers, about 24" long that were about 2" apart at the center of his waist and they ran out diagonally almost to the combing on each side. Like a V. So when flipped it was easy to grasp the two pulls above the belt buckle area and push them forward and out to clear the skirt to exit the canoe. He leaves them open for ventilation and gear access when conditions warrant.

I'd definitely be interested in seeing what you have for sure. But I do like BeaV's setup with the zippers and he's real happy with how they works. Need to research this some more for sure, but any thoughts and ideas welcome.

I had overlooked your desire to participate in the Everglades Challenge in the Northwind. In that kind of, operative word, Challenge, I would not trust Velcro in any application on a spray cover.

Did BeaV have stays or hoops affixed across the large cockpit area on his boat? Those were a common if kludgy feature on spray skirted Sea Winds.

Whatever spray skirt solution you come up with should be bombproof. Having a wave implode the spray cover in the worst of conditions on a long crossing could spell disaster. Enough so that I would want to try some acid test to see how implosion resistant the cover and stays performed, like sitting skirted in the boat and having someone dump a 5 gallon bucket of water on the cover from a few feet above.

I will post some photos of the peculiar spray cover on the Cronje, but that Velcroed skirt portion in the boat is the leaky weak point and not suitable for your purposes.

I have taken haystacks on the CCS canoe covers, and the implosion resistance is impressive. I recall a spray deck discussion on this board where someone mentioned that their sizable dog leapt onto a snap riveted cover without failure.
 
Yes to the wrist rocket, but with a raccoon on the boat I worry about missing and putting a ball through my Monarch.

I have a solution in mind for next trip that would not endanger my ride or require constant surveillance and good aim.

A simple mouse snap trap, tied off to the deck via a hole drilled through the traps base. A painful lesson that might lead to avoidance.
 
I'm sold on the DIY aspect to this.

If you want to give custom heat sealable dry bags a shot, especially custom tapered dry bags for the Northwind stems, some photos of the complex top fold over cuts and slices may be helpful.

Template for the end of a tapered dry bag, showing the taller flap side, corner notches and critical 1 inch slice cut. Note that the taper stops below the roll over top, so that upper part folds over evenly.

P5030777 by Mike McCrea, on Flickr

Template for a full sized camp chair bag with the same top fold over design.

P5030778 by Mike McCrea, on Flickr

Dry bag for ThermaRest with fastex buckles and grommets in the webbing for tie downs. T2a denotes which sleeping pad fits.

P5030780 by Mike McCrea, on Flickr

Dog ear corners heat sealed on the bottom with tie down grommets. The messy smear is some Aquaseal painted around the edges of the grommet to keep it from cutting into the fabric. Probably unnecessary.

P5030783 by Mike McCrea, on Flickr

I have been impressed with the durability of those DIY heat sealable dry bags, and they are as waterproof as any roll top bag. Hard to beat the custom sizing. And the cost, especially compared to manufactured taper dry bags.

We have a couple sizes of Seallines Kodiak tapered dry bags, which were made of much flimsier material, and even the widest was hatch sized and more appropriate for the stems of a sea kayak.

https://www.rei.com/product/722820/sealline-kodiak-taper-35-dry-bag-with-purge-valve

Those have been discontinued, replaced by this, which I have not seen. Also hatch sized.

https://www.rei.com/product/114730/sealline-bulkhead-tapered-dry-bag-20-liters

Fifty bucks for something DIYable from ten bucks worth of heat sealable material, webbing and buckles?

BTW, one helpful bit with using tapered end bags in a decked canoe. If a tapered bag is really pushed all the way to the stem it will be 3 feet out of arms reach. First tapered bag use I really wished I had brought a single blade with a tee grip to play snag the bag.

I now have a length of cord tied through the webbing grommet and Drings on the floor just below the ends of the bow and stern decks. The Drings are a handy tie down point for that line and other gear. And for securing float bags when I use them.

Finding appropriately sized float bags for a decked canoe is a whole nother story.
 
I tend to agree making the float bags to size is probably the best route and the heat seal nylon is impressive for sure and not that hard to work with once you get a little experience.

I'm still on the fence with float bags, but given the expedition use I may be falling toward bulkheads. As you say from a practical standpoint that's pretty much no mans land out there and I want the cargo weight in the center anyway. I can make some very light bulkheads by skinning some foam with glass on each side. Won't ever forget to bring them and they won't leak if I poke them with something sharp. :)
 
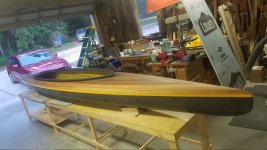
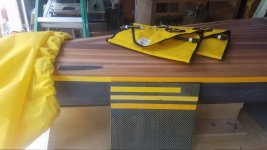
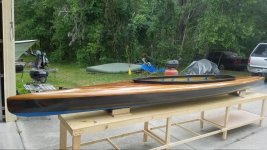
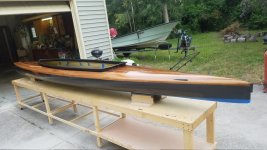
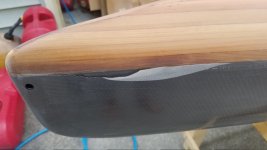
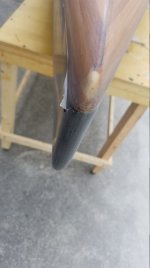
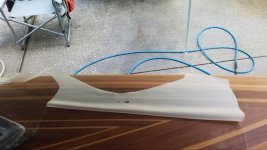
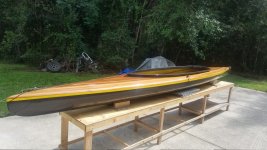
silly bling stuff... mulling over paint vs vinyl for deck/hull seam, color. With the kevlar interior with yellow tinted UV epoxy fill coat I think some sort of yellow for the deck seam and a smaller pin stripe to hide the somewhat crappy carbon edge line where the combing meets the bright deck. I didn't quite catch the gel stage of the cure when I tried cutting with a razor blade and clammed up that edge a lot more than I would have liked, but it was one of the many late nights in garage. So its a good candidate for a paint stripe now and it sets off the combing too. I do like yellow anyway and it works with the spray skirt in yellow as well. A little bling and good visibility in foul weather for safety reasons too. Now I probably need to get a different color PFD, SOLAS orange is going to clash horribly :)

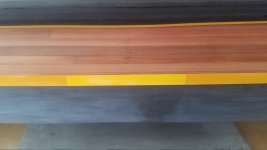
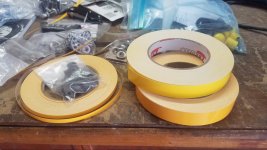
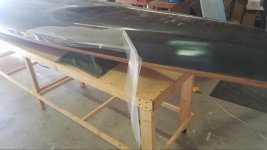
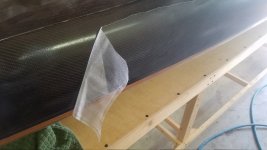
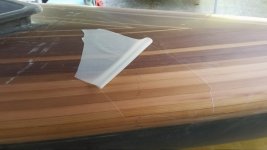
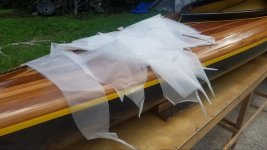
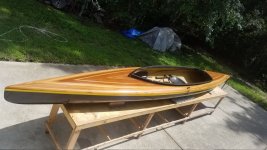
Ensemble challenges aside, I was initially planning to paint the stripes and bought a qt of safety yellow a month or so ago, but after reckoning the time and effort required to paint stripes and pondering whether the yellow was really the one I wanted to live with or not I decided to get some vinyl tape in yellow and yellow/gold to try first. Both tape colors appear to pretty close matches in the acrylic urethane I'm using for UV clear. After applying the yellow/gold tape on the sanded surface I think I like it better than the brighter safety yellow.

Over the course of day or two though I talked myself out of painting stripes entirely for now and just clear coat instead. I'll try each color tape for a while and decide which one I like best before committing to paint. Or maybe I'll just stay with the tape since I can change it completely in less than 30 minutes. Redoing painted stripes would be several hours work over several days. I figure if vinyl tape is good enough for Savage River its probably good enough for me too...

On to clear coating. For those keeping score at home. I'm using a marine grade acrylic urethane by Blue Water. Its an Awlcraft 2000 knock-off that is also rated below the waterline which Awlcraft is not.

https://www.bottompaintstore.com/to...ermarine-ironside-urethane-quart-p-28192.html

Why this stuff for a canoe? Well, in past projects I've painted both aluminum jon boats and fiberglass boats as well as aluminum airboats with Dupont Imron, Awlgrip and at the time Ditzler (now PPG) base coat/clear coat systems. These are all substantially more durable coatings compared to anything in consumer grade offerings, of course priced accordingly and far more complex and problematic to apply. I've received excellent long term results with all of them through relatively harsh use too. Like much of what I've done on this project this grade of finish is certainly over kill, but my next project is to build a 16' flats skiff where it won't be:

http://cernyyachtdesign.com/power/swift-skiff-series/guide-skiff/

With this skiff build on the radar I wanted try a different and less expensive advanced coating and decided this canoe would be a perfect sized experiment with clear coating over epoxy as opposed to manufacturer compatible primer and topcoat. (I plan to have some bright work under epoxy on the skiff too)

For those that are not familiar with these coating systems, clear coating (pick your favorite brand) over non-mfr-compatible paints and/or substrates is not for the faint of heart. Once you've conquered a particular combination its generally repeatable, but rarely does it "just" work In this case applying the clear over epoxy was an adventure.

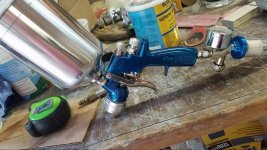
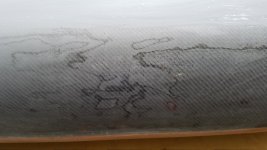
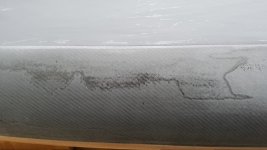
Anticipating "challenges", I started with my test panels and the small parts, rudder pedal cleats and the seat cross member, etc. For prep I went by the manufacturer recommendations sanding at 180-240grit, used the etching solution (think mild battery acid) on raw surface, then cleaning with the appropriate solvent before thinning and spraying, but still had incompatibility issues. Micro craters pin point size to about 1/8" or so and some kind of unexplained blush in places. Some of the problems were due to contaminates in my air system and some had to be tiny amounts of mold release wax I didn't completely remove. I replaced the oil/filter/drier and added additional inline filter at the gun. I sold my Binks conventional spray guns to a buddy many years ago and went HVLP and never looked back (I don't miss spraying 50lbs at the gun...). My first and only HVLP gun is a Porter Cable that has been a dedicated conversion varnish gun for over a decade and provided excellent finishes, but wasn't atomizing this high solid coating well enough with the 1.5mm fluid tip and air head at 15-20% thinning ratio and 22-30lbs at the gun. I took it apart and meticulously cleaned it and ran acetone, lacquer thinner and finally the 275 solvent for the SM-266 clear through it and tried some more, full fan, 4-6" away, farther, closer, dialed back fan, more paint, less paint etc. I ended up having to thin to about 40% by volume before I could get a decent flow out, but at that ratio the clear coat left on the surface was too thin and very difficult to avoid runs when going for a wetter application (spec calls for 4mil wet film thickness).

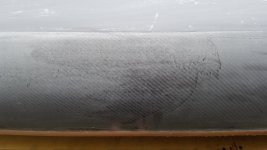
Long story short I bought a DeVilbis Finishline 4 FLG-670 hoping to get better results and it was fine. The winning formula is the 1.3mm tip, 20% thinner, 28lbs at the gun, 6" hold off with fan at about 90% wide open and 75% overage on each pass. Regardless, of all that I got the best results laying down a light coat of clear, let it cure overnight or at least 18hrs (mfr recommends 24) light sand then apply light tack coat, 2 min flash off and wet coat. Seems first layer to touch the epoxy no matter how well prepped will micro crater in places, but following a light sanding subsequent coats flow nicely without issue anywhere. Maybe re-etching and re-washing with thinner enough would do it, but didn't work to the extent I tried. Seems like there needed to be a light film down first.

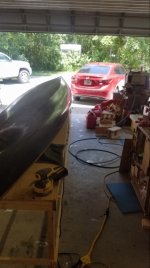
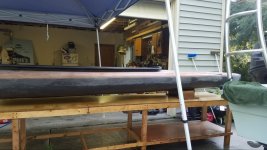
I burned through 2 qts of clear stumbling through the issues and small parts and ended up with only about 1.5 coats on the canoe, love bug tracks and all. Did I mention my compressor of 14 years died a slow miserable death this Friday afternoon with the 2nd to last pint of finish in the gun too. :)

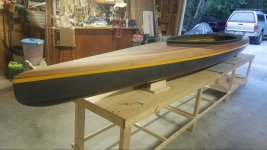
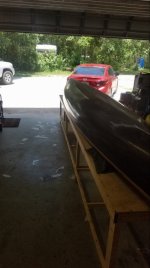
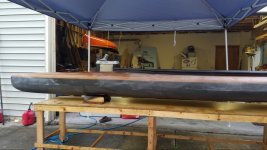
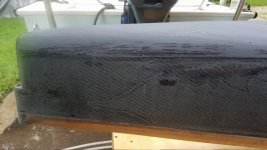
Spraying outside and finagling around the combing riser it's taking about a pint to cover the top and sides down to the tape line at the graphite scuff coat on the football. I'm figuring it will take about 3-4 coats to get the build I want before compound, glaze and wax. So I'll need at least 2 more quarts of clear and its f'ing done. Nothing but rain in the forecast into next weekend though too, so probably going to be another two weeks, arrggghhh...
 

Attachments

  • photo9556.jpg
    photo9556.jpg
    116.5 KB · Views: 3
  • photo9557.jpg
    photo9557.jpg
    204.7 KB · Views: 3
  • photo9558.jpg
    photo9558.jpg
    191.2 KB · Views: 3
  • photo9559.jpg
    photo9559.jpg
    164.3 KB · Views: 3
  • photo9562.jpg
    photo9562.jpg
    250.3 KB · Views: 4
  • photo9561.jpg
    photo9561.jpg
    182.4 KB · Views: 4
  • photo9560.jpg
    photo9560.jpg
    266.1 KB · Views: 4
  • photo9563.jpg
    photo9563.jpg
    232.1 KB · Views: 3
  • photo9564.jpg
    photo9564.jpg
    252.9 KB · Views: 3
Spoke too soon on getting through clear coat issues...

About a month ago I thought I was at the sand and buff stage, headed for the water soon...

Murphy sez not so fast...

Started wet sanding love bug legs, wings and tracks, gnats and other flying insect artifacts and of course orange peel off the hull with 800 grit. Buzzing along trying to get into a sanding vibe and after a short pass along the hull/deck seam and in the slurry off flies a small thin sliver of finish, wtf? stop and look at it, yup, that's clear coat alight, dang this sucks. <insert many expletives here> Squirt some clean water over the spot for another look. Not totally disheartened yet, maybe just a spot I didn't sand good enough or something... continue along and another sliver goes flying. f--k! <more expletives here>

So I stop, wash the hull down with water, towel dry then started hitting the peeled sections with compressed air and my assumed nightmare was confirmed. Once lifted enough to grab I could peel away the finish.

In prior post I knew I was flirting with danger not getting clear coat to recommended film thickness in one session. Nothing I could do though, between weather windows, not having enough finish and a compressor failure I had to apply it over the course of a few weeks. Mft rec's were scuff (220-320) between dried coats, no other admonitions or anything, which made sense to me because that's what you would do to repair or recoat a prior clear coat application. I tried 240 but could see some minor scratches if I looked hard enough so I went with 320 and washed with matching thinner. Was looking good until the wet sanding.

Anyway, I don't have a conclusive answer other than a combination of things. Different finish lott's. Prior coats dried too long and/or 320 grit not coarse enough given week+ dry times between coats in some cases.

Time to buy more sandpaper, beer and roll up the sleeves...
 

Attachments

  • photo9952.jpg
    photo9952.jpg
    114 KB · Views: 3
  • photo9951.jpg
    photo9951.jpg
    119.9 KB · Views: 3
  • photo9950.jpg
    photo9950.jpg
    69.4 KB · Views: 3
  • photo9953.jpg
    photo9953.jpg
    112.3 KB · Views: 3
  • photo9954.jpg
    photo9954.jpg
    148.3 KB · Views: 3
  • photo9955.jpg
    photo9955.jpg
    143.6 KB · Views: 3
  • photo9956.jpg
    photo9956.jpg
    145 KB · Views: 3
  • photo9957.jpg
    photo9957.jpg
    152.5 KB · Views: 3
Since I taped off and sprayed hull and deck separately I had high hopes the deck would be ok, not...
 

Attachments

  • photo9961.jpg
    photo9961.jpg
    199.6 KB · Views: 1
  • photo9960.jpg
    photo9960.jpg
    214.9 KB · Views: 1
  • photo9959.jpg
    photo9959.jpg
    174.6 KB · Views: 1
  • photo9958.jpg
    photo9958.jpg
    127.3 KB · Views: 1
ok, imagine about 3 weeks of sanding every spare minute...
 

Attachments

  • photo9962.jpg
    photo9962.jpg
    155.8 KB · Views: 1
  • photo9963.jpg
    photo9963.jpg
    141.5 KB · Views: 1
  • photo9964.jpg
    photo9964.jpg
    160.4 KB · Views: 1
  • photo9965.jpg
    photo9965.jpg
    149.9 KB · Views: 1
  • photo9966.jpg
    photo9966.jpg
    160 KB · Views: 1
Have to wait 3 weeks before I can wax the finish, but other than some minor rigging odds and ends, its done...
 

Attachments

  • photo9967.jpg
    photo9967.jpg
    148.6 KB · Views: 3
  • photo9968.jpg
    photo9968.jpg
    236.3 KB · Views: 3
  • photo9969.jpg
    photo9969.jpg
    257 KB · Views: 3
  • photo9970.jpg
    photo9970.jpg
    156.8 KB · Views: 3
  • photo9971.jpg
    photo9971.jpg
    217.5 KB · Views: 3
  • photo9972.jpg
    photo9972.jpg
    245.6 KB · Views: 3
  • photo9974.jpg
    photo9974.jpg
    252.6 KB · Views: 3
  • photo9973.jpg
    photo9973.jpg
    236.4 KB · Views: 3
thanks doug, finally got the spit shine on the dang thing, now its time to put some tripping miles on it.
 
Hi Deerfly, I was looking through your build post again (for the 10th time), and was wondering if you have any more thoughts about your build experience or how your boat performs now that you've likely put some time in on the water. I am starting my build and have a few questions on how you did a few things, or whether there is anything you would do differently?

Thanks, Mark
 
Hi Mark, glad I decided to check in today. :)

Overall I'm very very very happy with the northwind. I've done quite a few small excursions 10-12 mile local river stuff and one 26 mile 8 hr paddle with it heavily loaded. Didn't get to do the EC this year, primarily from not being able to train often enough and an unplanned surgery two weeks before the start made it a non starter. I will do that challenge before they plant me tho...

Anyway, I don't think I would do anything different with the forms and stripping aspects, except maybe buying a 2x4x14' aluminum beam instead of making one and be careful at the stems and do some test strips before commencing the build. I had to do some tweaking at the rear and should have tested more before stripping for real. I am also very glad I integrated the rudder gudgeon too. The rudder could bend or break off but there is no chance for the gudgeon to fail. I think you could glue and glass a carbon tube on there after the halves are glued together and over wrap some glass around it while glassing the exterior seams and it should still be very strong.

In terms of the build, you have to ponder is how hard to you want or expect to use it. Are you going for light as possible with some compromising on strength and durability vs something stronger and heavier. I decided to err on the side of indestructible but still managed to stay right around 60lbs. If I was shooting for light weight I think I could have come in somewhere closer to 50lbs. However, the build would not have been nearly as strong, especially from a deep scratch and puncture protection standpoint, which was an important consideration for me and the jagged coral cap rock and expanses of oyster beds where I paddle most often. Plus, I can sit or stand on my decks, I can get in and out of the canoe with my full weight (200lbs +/-) on the combing with the canoe on dry land or touching bottom. I can stand inside on on dry land or a bottomed out on a rocky shoreline too.

Simply using thicker strips and less glass doesn't cover all the dimensions of strength and durability. Again, a lot depends on how you plan or expect to use the canoe, but I would not realistically expect to come away with anything much less than 50lbs unless you can pamper it and/or repair it often. You're going to have about 30+ lbs of raw wood and glue in the canoe, so there isn't much room for barrier glass and epoxy to get the weight down and still be relatively durable.

If there was one major caution it would be joining the deck to the hull. I was not careful enough checking my beam measurements before glassing the insides of both halves. My over the top lamination schedule made this even more challenging because the parts were very rigid and were not particularly accommodating on the marriage. I did several dry fits with tape and even ended up using some temporary braces in a couple places to make it a little less stressful at glue up. I enlisted a friend to help too. Joining two halves of a 17' canoe was not a trivial task with the epoxy paste timer running.

So I don't think you can be too careful checking and supporting each half when glassing the interior. If I build another one I think I would make some female forms for both top and bottom. Three support points would probably be sufficient, one on center and another one about midway between the center on each end.

Now that I know you are building one of these I am more than willing to answer questions or brain storm with you along the way. If you haven't already start a build thread here as there are many more experienced builders on here than me that can help with the general nuances of strip building too. I can pm you my contact info if you want, no problem. Don't hesitate to reach out.

- eric
 
Thanks for all your thoughts Deerfly. Sorry to hear that you missed the EC. Your build posts on this forum are what finally convinced me to move forward with a build myself. I have a friend who owns both a Kruger sea wind and a MR Monarch, so I've been looking at this style boat for a while. The North wind is noticeably rounder on the bottom than the sea wind, closer to the monarch. The monarch is a little twitchy at first, but fine after that even with no extra weight on board. What's your experience on initial stability? Could you stand up in it?

This will be my 4th stripper build, so I have a good foundation for moving forward. I documented a couple of them on this site. I plan on using my existing strongback, so I'll be cutting a bunch of little plywood rectangles to mount the forms. As far as a rudder, I already talked to the Kruger guy who said he would sell me one. I really like that design since it runs a little shallower which is nice in rivers. I like how yours just drops in the tube though, think I'm still undecided.

As far as the build, I am going more for expedition strength since Igenerally won't be using this boat where it needs to be portaged very far. This is a replacement for a my sea kayak, and will be used for a few big trips on big rivers, big lakes and hopefully some coastal trips. I am using 1/4" spruce strips for the hull which will be sheathed with 5oz Kevlar inside and out, and an aditional layer of 5.5oz s glass on the outside. The deck will be cedar with Kevlar on the inside and 6oz glass on the outside. I am going with internal ash stems too just for the heck of it. I was going to scrap that idea if I couldn't get the 1/8" laminates to bend the tight radius on the stern, but it worked and I've already made them.

Thanks for the heads up on retaining the body shapes when laminating the insides. A wider hull with no deck is certainly much more forgiving in that regard. I'll bet the deck, with it being relatively flat, has very little flexibility, and maybe out towards the ends too? I imagine the coaming makes it rock solid once the lip is on and inside glassed. I'll take your advice with the female forms, and add spacers towards the ends when the time comes.

I plan to start a build thread once I get my wood milled and forms cut. I think I understand most of the entire build process, and that this boat is fundamentally like building a strip kayak, even though it is definitely not a kayak, it is a canoe. All I ask at the moment is whether you would entertain describing the construction of the coaming in more detail here in your build thread, especially how you made the lip and how you glassed it. If you have pictures too, that would be great. This is something unique to constructing this canoe that wouldnt be covered in other build threads. Obviously take your time on that, I won't be there for some time.

oh, one more thing. Did you add any floatation? Still undecided on whether to do tanks or foam. The Kruger and the monarch look like they just poured a can of expanding foam in the ends and painted over it.

Thanks again, Mark
 
Last edited:
ok so you're more in tune with a lot of this than I realized.

Initial stability... That is a bit subjective by person I think, but this design has a very rounded bottom that is meant more for friction reduction than stability. I happen to have very good balance too, esp for my age. I think I have some pics and or video on here somewhere standing up and fly casting in my Hemlock Peregrine solo. So I may not be a good indicator. I have stood up in the Northwind in calm, shallow water close to shore and not for long. I had to be committed to staying balanced and not falling in. It more like surfing than standing on a SUP board. There was no relaxing in that experiment. Sitting and paddling in it totally empty it can feel a bit loose, but I didn't try to roll it and never felt like it would go over without me initiating it. I had planned to do that along with open water self recovery, but after missing the EC window I haven't got around to that level of practice yet, but need to...

As you add more and more gear I would say stability is a non issue. I posted a trip on here where we got caught in squall last summer on the gulf between Yankeetown area and Cedar Key, 35-45 mph winds quartering into my starboard beam and I never felt challenged stability wise. I had about 75lbs of gear, fresh water and firewood on board, so that would have been close to 300lbs, maybe more if I factored in the beer. It was very choppy and wet with stinging rain and I didn't have a spray skirt either, so I took on some water too. Regardless I was able paddle my intended course to beach on a leeward point and wait to be fried by the lightening. :)

Ash stems will give you some extra bump protection with nominal weight penalty. I filled the stem areas with a mixture of epoxy paste and chopped carbon fiber and dammed in with a waxed wood panel that I removed after it set up.

In terms of the 5oz kevlar sandwich, I think I may have mentioned that recipe on the build thread or somewhere else, but I think that is a good approach for a tough but lighter build than mine. Kevlar inside and out should stay together better on a really hard impact after the epoxy is busted over the other fibers. Don't fill coat the insides either except the high wear area on the sole. I found this build with the continuous curves easy to squeegee excess resin, but you could probably save a pound or two by bagging and infusing. More cost and time, but something to think about if you want to minimize excess weight anywhere you can. I'd probably do it if I built another one.

You are correct about the combing adding some stiffness as well, but you may want to feather some glass out around the combing joint to help disperse the stress out more. I would go all the way to the seam on the sides, inside and out and maybe 5"- 8" forward and aft. You don't want much flex around there every time you put your weight on the combing or you'll be stressing the glass/wood bond. If you hear any crackling noises the first time you load it its already too late. ;)

I have to go back and look whether I mentioned it or not, but I added more camber to my deck up toward the combing to give it a little extra strength and water shedding. Its not a lot, but its more than whats on the plan. You should be able to see it in the pictures, if not I'll post some new pics.

No problem on the combing details either. It was actually pretty easy, just painfully time consuming. I would recommend making the lip wider than I did too. I should have more pic's of all that beyond what I posted, if not I can describe and/or sketch out the dimensions and steps.

I also agonized over using a bulkhead at each end, but ultimately decided to use float bags instead. Mostly so I could have easier access if I needed to get in there for an inspection or repair. And I could always add bulkheads afterwards if I decided they were better. But as it turns out the bags also make for a convenient friction hold for my 2 piece kayak paddle stuffed under the bow. Could stuff extra paddle or two in stern too Easy stowage and reach when needed without cluttering deck. I haven't had to patch these bags yet so I have no idea how patch worthy they are, but carrying an extra float bag or two rolled up as backup is a non issue to me, esp on any kind of major adventure.
 
Back
Top