• Happy International Left-Handers Day! 🫲🏻

First Canoe

Trick to seal Staple holes !
After applying seal coat, wait an hour, and with a small brush, paint over the staple holes, with epoxy. The second coating really seals them.

Jim
Earlier you posted a link to your build "Pearl". In that thread, you have a pic of your stemless method showing where you file what I'll call "cross-coves". The longer strip alternates sides and each one fits into the cross-cove of the previous longer strip from the other side.

You can probably follow that but clear as mud for other readers. Here: https://www.canoetripping.net/threads/pearl.73909/#post-74275

Thanks
Dave
 
I have caused a curve in my strongback. This is 100% my doing.

It looked like twist was going to be the problem. It doesn't have twist but it has a vertical curve, i.e. low in the center and high on the ends.

Tomorrow morning I'll be able to see exactly how it ended up.

Actually happy it's not twist.

Dave
 
Earlier you posted a link to your build "Pearl". In that thread, you have a pic of your stemless method showing where you file what I'll call "cross-coves". The longer strip alternates sides and each one fits into the cross-cove of the previous longer strip from the other side.

You can probably follow that but clear as mud for other readers. Here: https://www.canoetripping.net/threads/pearl.73909/#post-74275

Thanks
Dave
You'll find lots of things like that. As a first time builder many things won't make sense and you will often be bewildered by the multiple ways different builders do things. At least I was. I just wanted someone to say, "do x, y, and z." Instead I got all sorts of seemingly conflicting and confusing information on how to do essentially the same thing and I was left to try and decide which way was correct.

The freedom comes in realizing there is not a correct way. All those different ways work and will all get you to the same goal. It comes down to what is best for you as a builder and how you prefer to build. And you often don't realize what that is until you've built a couple hulls. I believe that's where Brian was coming from earlier when he mentioned people trying to make their first hull unique.

If someone only plans to build one hull and and it's kind of a bucket list type of thing then by all means, they should knock themselves out. But if they plan on building more than one boat and building their skills then many of us feel the first boat should just kind of stick to the basics. Once you've gone through the entire process so many things that are confusing now will make sense and the 2nd hull will be much easier and you can start branching out to explore different methods.

As for the strong back: I don't try to get mine perfectly flat or level and I wouldn't care if it had a twist. I use a laser to setup my forms (vertical and horizontal laser lines) so they will be straight and true regardless of the strong back. If you have one available it's a great tool and makes setting up forms a snap.

Alan
 
As stated, once you just build one per a book or plans, at least for me, the next one simply is an open book. Not needing to follow the original because you thought during construction, i should do/try this next.
It’s been years since I built 3 different strippers, changing things, but remember it all. They all had stems simply because I learned that. But seeing the picture you mentioned, I automatically understood what he was showing, because of physically having stripped canoes before.
Try it with some scraps, hot melt glue, I think you would understand as well then.
 
@Alan Gage
Thanks for your comments on straight (or not) strongbacks. I do have a laser level and put a pic in post 26 of this thread. When I clamped the strongback dry, it was straight. I just underperformed when glue was making it permanent. ;)

@Fourbtgait
I understand it and like it a lot. I just thought my words weren't as clear as what the picture shows. The book by Gil Gilpatrick says put 5 or 6 strips on one side then 5 or 6 on the other. So he's obviously not interleaving the strips in his stemless build.

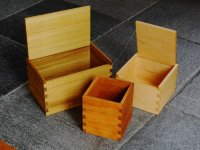
I don't have any measurements but believe interleaved with cross-coves would be stronger than several on one side then several on the other. I happen to like "box joints" Very strong and I use them many, many places:

PracticeBoxes.JPGTableCorner.JPG

I am using many sources for strip methods.

Dave
 
Yes, alternating sides, interweaving the strips (I use a chainsaw file to cut the cove into the lower strip that runs past the stem) creates a box joint similar to what you've shown.

DSCN1343.JPGI have no idea if it's as strong as inner & outer stems (I suspect not but I've never built anything but stemless). I can certainly say that it's strong enough for any abuse I've been able to dish out.
 
How easy is it though, to glass that tight inner V?
In a clean manner? Or do people worry?

It generally gets filled with thickened epoxy before glassing, which likely erases most of the weight savings. It can be a pretty messy process but I've taken to covering the thickened epoxy with peel ply which allows you to move, massage, and smooth the thick mass of epoxy with your fingers.

An inner stem poses its own fiberglassing challenges.

Alan
 
It generally gets filled with thickened epoxy before glassing, which likely erases most of the weight savings. It can be a pretty messy process but I've taken to covering the thickened epoxy with peel ply which allows you to move, massage, and smooth the thick mass of epoxy with your fingers.

An inner stem poses its own fiberglassing challenges.

Alan
So the weight of thickened epoxy would be more than a slim cedar inner stem.
No clean way to do it trying to get a wet piece of glass in there.
 
So the weight of thickened epoxy would be more than a slim cedar inner stem.
No clean way to do it trying to get a wet piece of glass in there.
I simply use a beveled scrap strip, to tuck in one side, then the other.
Wear good gloves ( Nitrile ).

Important to wet the cloth in the stems, but let them go until you are finished with the inner hull glassing.
Then go back and tuck everything in place.
If you botch it up ? It's easy to fill with a fillet of epoxy and fillers.

Do seal as best possible, as you don't want water penetration in your stems !!!

Jim
 
How easy is it though, to glass that tight inner V?
In a clean manner? Or do people worry?
I thought of a slim WRC inner stem only for gluing surface, barely any weight.
Once again, everyone is different & you'll find your own way.

Personally, I don't seal coat anything (though I may try one someday) but, other than that, I do them as Jim does: wet out the "stems" last and tuck in as best you can.

I do not use thickened epoxy and I use a cheap paint brush to dab epoxy into the tight ends. I don't worry about doing a clean job, just get it all wet out & overlap the sides a little.

While it's tacky, I cover that area with small float tanks to add strength & hide the evidence of my sins.
 
I have seen pics of thick fillets in stemless ends. I hope to avoid that. I may glass inside a model curved, narrow box of luan to see what I'm capable of. Applying thickened epoxy with a brush a la @Gamma1214 sounds OK. Would glass fibers add strength to a thinnish coat here?

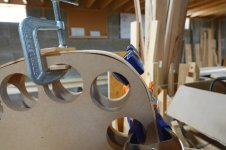
The strongback does have a curved sheer, 1/4" low in the center. The left end in the pic twists a degree or two in the last 2 feet.

Bent.jpg

The laser level in that small basement is fine for the strongback but the forms may be more challenge. I suppose moving the level to 4 different places to check plumb and level should work OK. I may have to adjust it all while measuring from one side then move the strongback over to check the other side. The laser will shine through, but checking from both sides seems prudent.

Thankyou, everyone, for your guidance.

Dave
 
How easy is it though, to glass that tight inner V?
In a clean manner? Or do people worry?
I thought of a slim WRC inner stem only for gluing surface, barely any weight.

Personally, I run the inside glass close to the V and call it a day. The whole area is sealed with epoxy anyway so it is waterproof, the outside is usually wrapped in glass. When you consider the forces the area will experience, there really isn't any reason IMO, to worry about the inner glass covering the V area.
You can (as mentioned) put a fillet there, but again, is this an area that really requires the work or weight, to provide increased strength in a small area that already has the exterior glass capping?


Brian
 
Applying thickened epoxy with a brush a la @Gamma1214...
Do as you like but I do not thicken the epoxy when I do it, I use it unthickened, brush to wet it and then dab it to kind of drag it into place. I try to get the first side to run past center & onto the far side of the hull and then overlap with the other side. It's usually not pretty (another reason for the float tanks) but I wind up with w double layer inside, often 3 layers on the outside plus the rigidity of the tank partition. I'm certainly not an engineer (a good reason to err on the side of "overbuilt" whenever possible) but suspect the "stem" is the strongest part of the hull

The strongback does have a curved sheer, 1/4" low in the center. The left end in the pic twists a degree or two in the last 2 feet.
Especially if you're able to use a laser level to align forms, that certainly seems straight enough to me.

Then again, the fact that you measured the twist to within "a degree or two" tells me that you're a bit more precise than I care to be (not a bad thing; we run the gamut from craftsman artist to outright wood butcher here and they all float)

I suppose moving the level to 4 different places to check plumb and level should work OK.
Again, build your own build but I don't move my level. I mark vertical & horizontal lines on each form, start at one end & work my way to the other. The vertical lines are helpful when I cut the keel line and you'll want to avoid mounting the laser level on the strongback to avoid moving it while attaching the forms. It probably doesn't need to be very far beyond the end.

A line down the center of the strongback is also helpful to verify that the laser level is positioned correctly as well as aligning the forms.

IMG_20240314_121408109_HDR.jpg
 
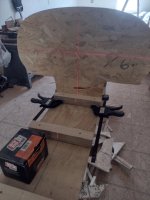
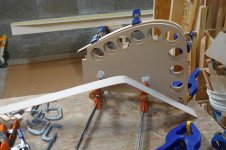
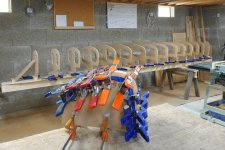
Before setting up forms, the CLC instructions say to laminate the stems. I won't be using stems but I do need to laminate an extension to the forms.

CLC provides 2" by 3/32" wood (spruce?) for this. I tried to bend one and failed. (OK, it IS bent so maybe I didn't fail). On the form you can see a random 1/16" strip left over from some project. Bends much nicer. But it's only an inch wide and I have only 8.

TooQuick.JPG

The radius of the curve is 2.5" for 70 or 80 degrees. A 5" sanding disk fits on that curve perfectly for nearly a quarter-circle.

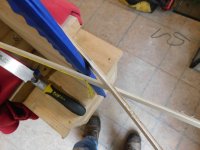
So I tried bending a 3/32" strip more slowy. And more heat. Better but still a fail.

SlowerBut.JPG

I don't have to fight with it. I've had a nice-enough piece of SPF here since 2001. Now I have a 13/16"-tall stack of 2.1" wide by .06" thick strips.

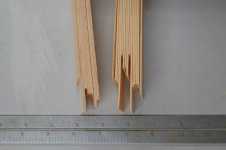
The CLC 3/32" strips on the left and the new, thinner strips on the right. Hard to see the difference in the pic but they really do bend much more easily and uniformly.

Thinner.JPG

But I'm not bending today. It's a beautiful day outside and I need to go set fence posts.
 
Last edited:
Back
Top Bottom