• Happy Weed Appreciation Day! 🌱🌿🌻

DIY No-Sewing Spray Covers

G

Guest

Guest
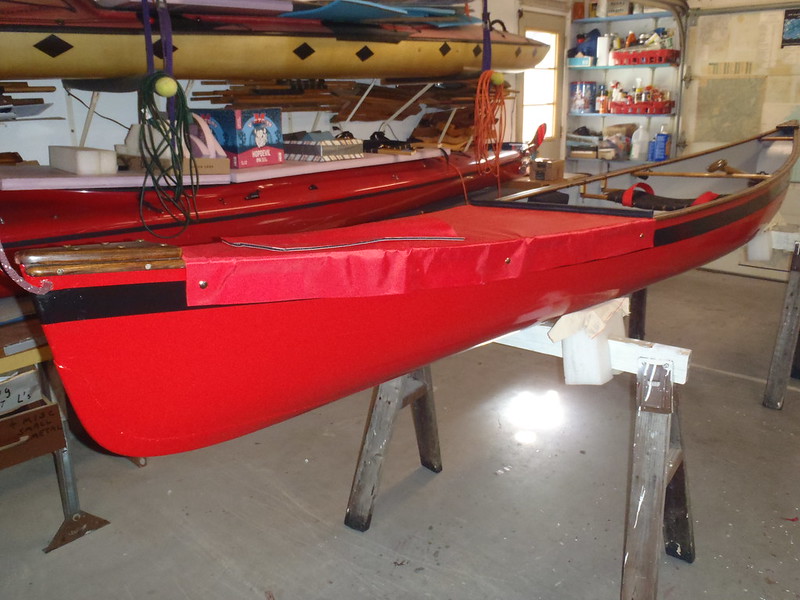
As the last outfitting touch on the FreeFIRE I wanted to install partial spray covers. This will be wordy, and photo heavy as usual; there are twentysome finicky little steps to the process. It’s not hard, just fussy to get right.

TLDR – I made a partial spray cover for the FreeFIRE using no-sew heat sealable material.

While only a day’s work (well two, I had to wait for some adhesive to set up) I will break up the process into manageable chunks for easier reading.

The bow cover will be more partial than usual; I typically bring the bow cover back to just before the utility/sail thwart, but this canoe has a combination foot brace/sail thwart, so the bow cover will be a shortie, call it 53” long. The stern portion can come all the way to the rear thwart, closer to 63”, leaving some easily accessible gear storage room behind the seat.

I do not saw. I can not sew. And our sewing machine has been broken for years. But, I have some leftover bright red heat sealable Packcloth from Seattle Fabrics, which needs only the use of an iron (and some tricky templates before cutting the fabric).

https://www.seattlefabrics.com/58-400-D-Heat-Sealable-Coated-Packcloth-2150-linear-yard_p_50.html

Some important caveats to consider before making a spray cover from heat sealable fabric:

First, without having purchased and installed the (far more elegant, custom) partial, open cockpit covers Cooke Custom Sewing made for our Wenonah Wilderness and soloized OT Penobscot I would be clueless about the basic design. And, without having installed those CCS covers using Dan’s step-by-step installation guide, even more lost about marking the locations on the hull for attaching the snaps on covers, which are installed first.

Second (& third) caveats, the Seattle Fabrics Packcloth is not the same material Cooke Custom Sewing uses for their spray cover. Not by a long shot; “It is weaker, the heavy urethane coating used to make fabric heat sealable reduces the tongue tear strength and if starts to tear it is far more likely to continue with less force”. I believe the coated nylon CCS uses has superior tear resistance when compared even to similar weight coated polyester.

The heat sealable Packcloth is heavier than coated nylon. I previously made short partial covers using heat sealable Packcloth for our Mad River Freedom Solo.

P1130039 by Mike McCrea, on Flickr

Those short partial covers weigh 1oz shy of 3lbs. The CCS covers for our longer, wider Penobscot 16 weigh a couple ounces less, and that weight includes a large center storage cover, paddle pockets at both ends and five lash straps. Gotta have lash straps for the paddles; five because I often have a double blade, single blade, furled sail and push pole to secure.

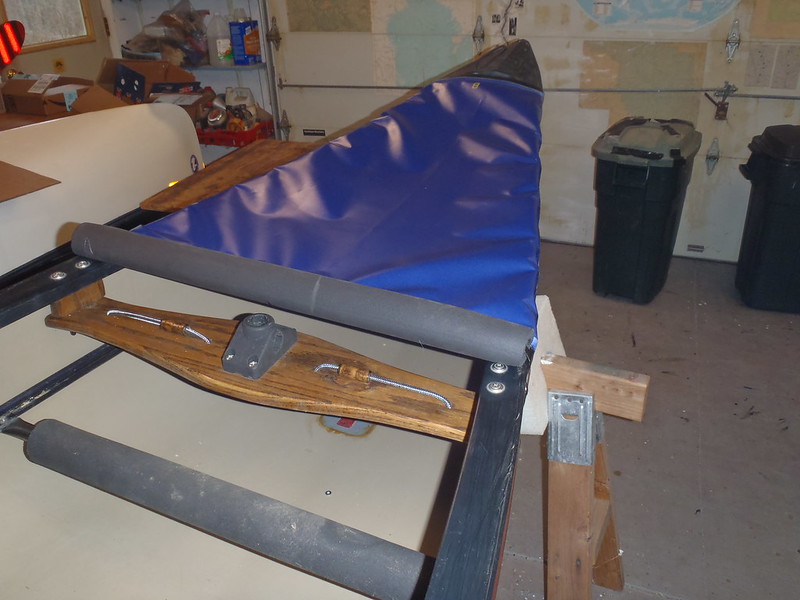
P2160542 by Mike McCrea, on Flickr

The same open cockpit design CCS covers for our Wenonah Wilderness, same two paddle pockets, large center storage cover, etc, weigh 2lbs, 10oz. If weight and tear resistant matter, coated nylon is a better choice.

Heat sealable Packcloth (or even the lighter 200D Oxford cloth – that will come up later) does not stuff. The DIY heat sealable Packcloth covers for our Freedom Solo are rolled into a cylinder and stored in an old camp chair bag. Our 3-part Cooke covers are in a CCS stuff bag the size of a youth football.

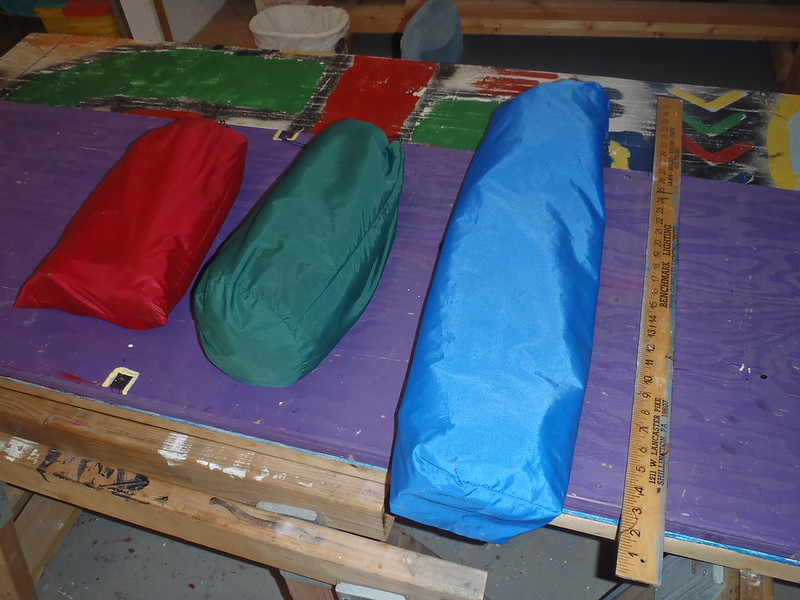
PB220102 by Mike McCrea, on Flickr

Red bag Wilderness, green bag Penobscot, blue bag DIY Packcloth

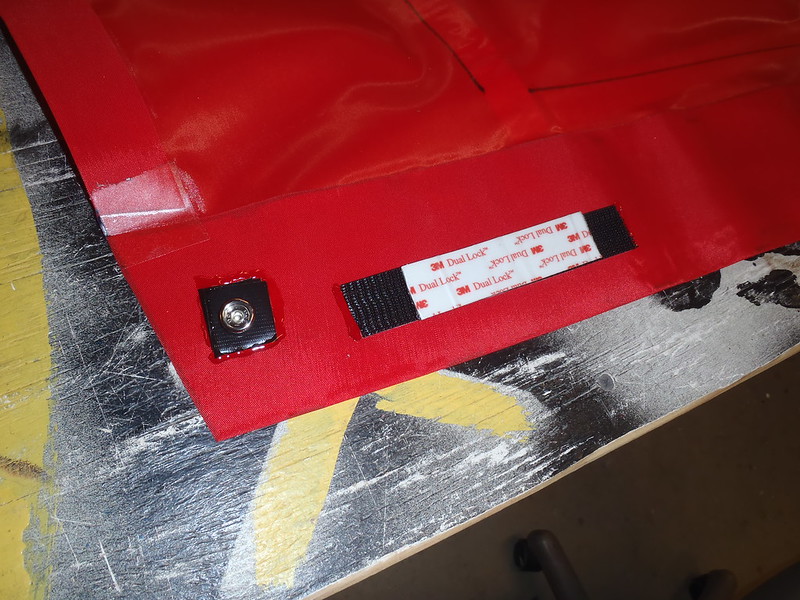
So there is all that on the demerit side to using heat sealable material. But I have bright red Seattle Fabrics material left and, as an experimental attachment, plan on using (a few) snaps combined with Dual Lock to make short partial spray covers for the FreeFIRE.

I needed to mark templates for cutting the fabric. To facilitate that I have a roll of Visqueen plastic, already cut to the same 58” width as the Packcloth. (CCS sends clear Mylar with instructions for that purpose)

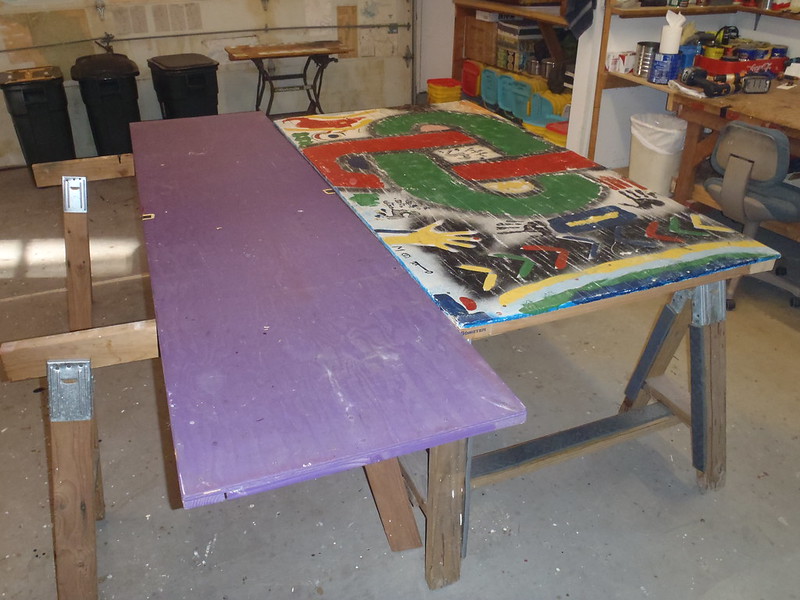
First though, I need a large table to use as a cutting and ironing surface.

Our large potable platform “tables” are mostly painted 4’x8’ sheet of S1S plywood, stiffened with battens on the backside. But the 48” dimension can be problematic with 58” wide material, so I grabbed a second work platform, one of the handy 2’x8’ platforms.

Those half-width tabletops are really handy, and much easier to move around from basement to shop through three doorways; the yellow square marks the center balance, so I can carry them via a backside batten dangling from one hand.

PB180001 by Mike McCrea, on Flickr

The Visqueen came folded, as did the Packcloth for less expensive shipping. Both have been stored tightly rolled on lengths of pipe to remove the creases, a good idea with any material that comes folded (hint for DougD and Chip).

PB180004 by Mike McCrea, on Flickr

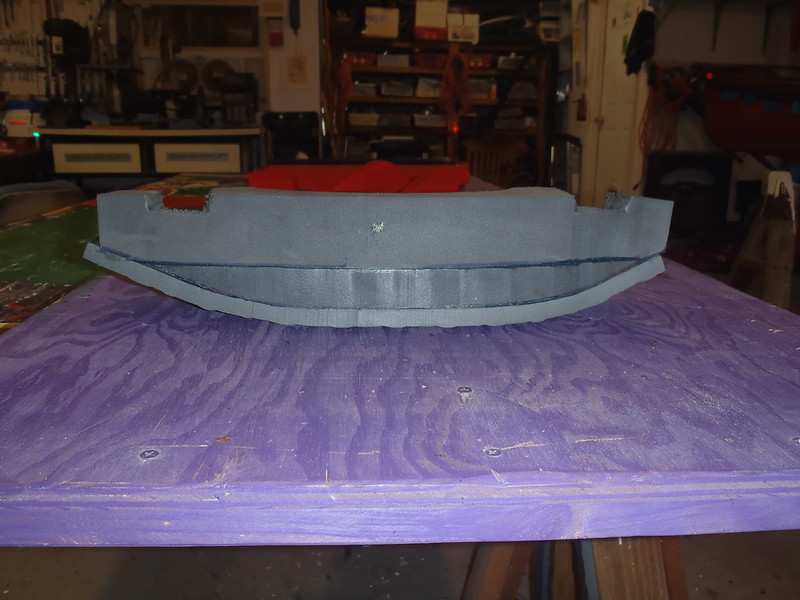
First, a length of 58” wide visqueen cut to the bow cover spray cover length. I folded over and temp taped 1” heat sealable “hems” at both ends, and Sharpied a centerline for orientation before placing it atop the canoe.

PB180005 by Mike McCrea, on Flickr

The visqueen was taped on the bow and some preliminary Sharpie marks drawn; the bottom of the black side stripes, as far down as I would want the spray covers to reach.

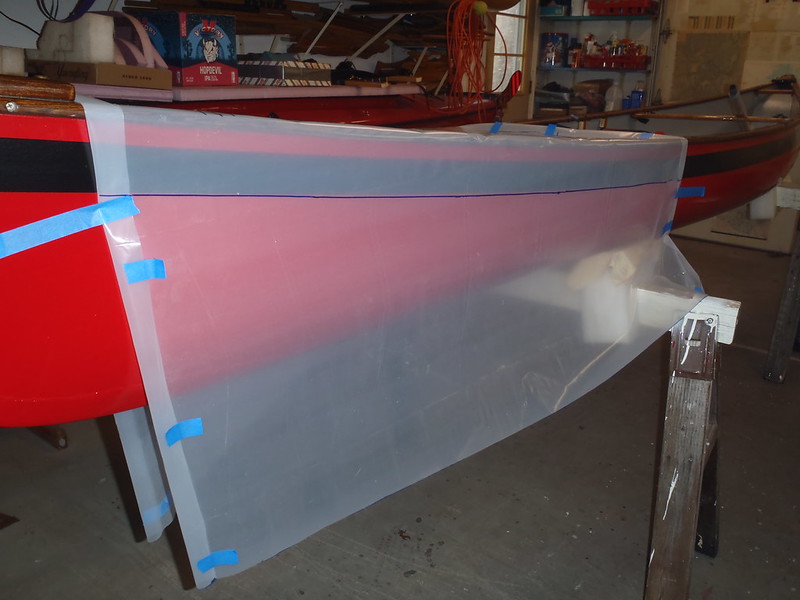
PB190007 by Mike McCrea, on Flickr

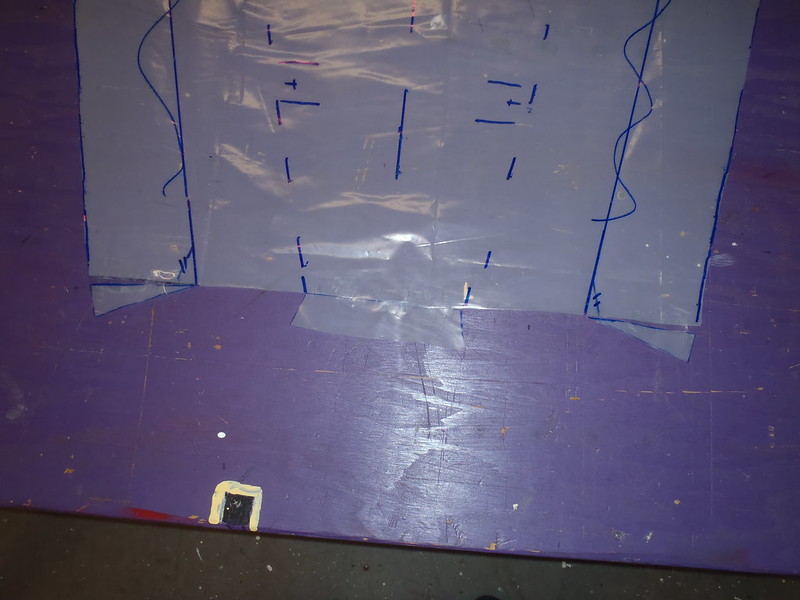
And marked the location of the carry handles and thwarts. I will be using at least a few snaps on each cover and those should not be seated directly behind the end of a thwart. I have done that in the past with DIY covers and had to remove the thwart to install the snaps. See also the reasons to use transparent visqueen plastic as a template material.

PB190010 by Mike McCrea, on Flickr

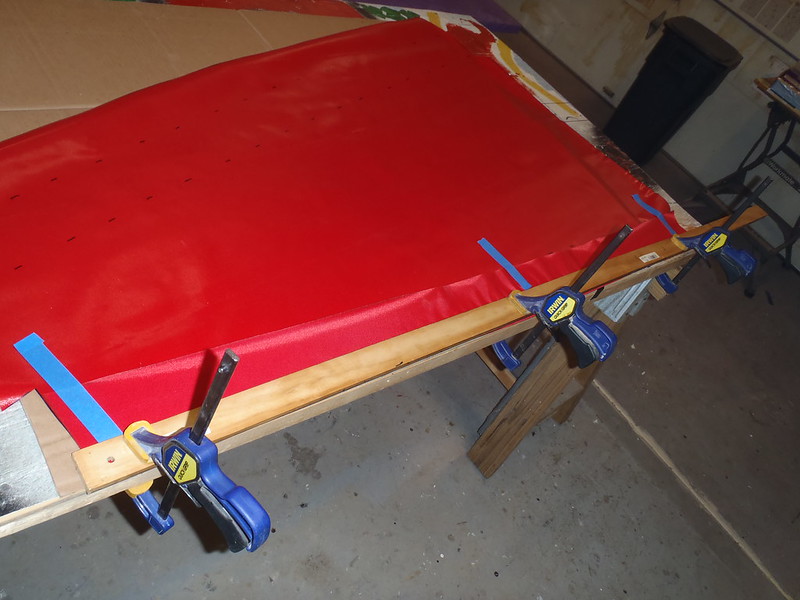
Template un-taped from the hull and back on the table I needed two more lines for the heat sealable “hems” on the long sides. I wanted a sizeable hem on those sides for doubled-over durability. My little shop iron is only 4” wide, so I went with a 3 ½” fold over hem, Sharpie-ing that fold over line below/inside the stripe line.

PB190012 by Mike McCrea, on Flickr

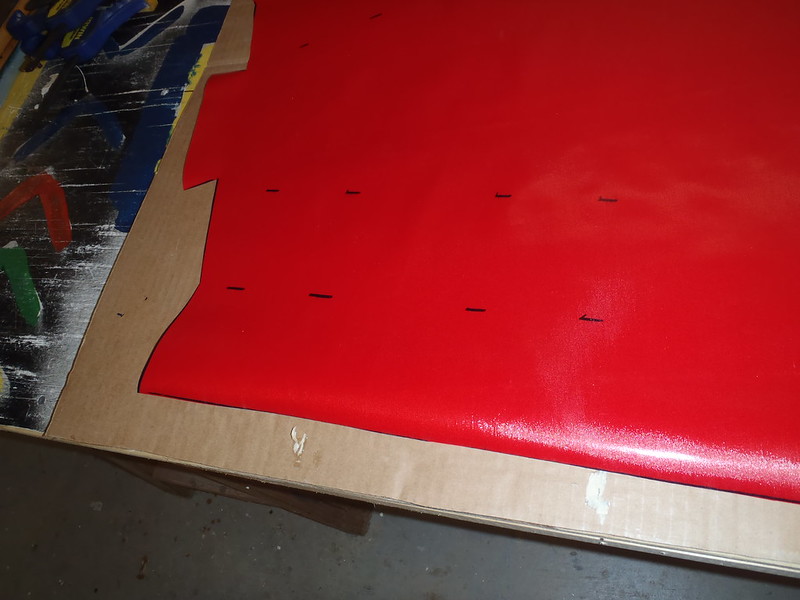
To make certain I didn’t cut the wrong line (not that I’ve ever done something like that) I crossed out the side stripe line, added a dotted line for the four inch fold-over-to-this-point (which will later be Sharpied on the heat sealable side of the material) and cut out the rough template.

PB190013 by Mike McCrea, on Flickr

That is a fair amount of material for a small bow spray shield, 55” long x 40” at the wide end.

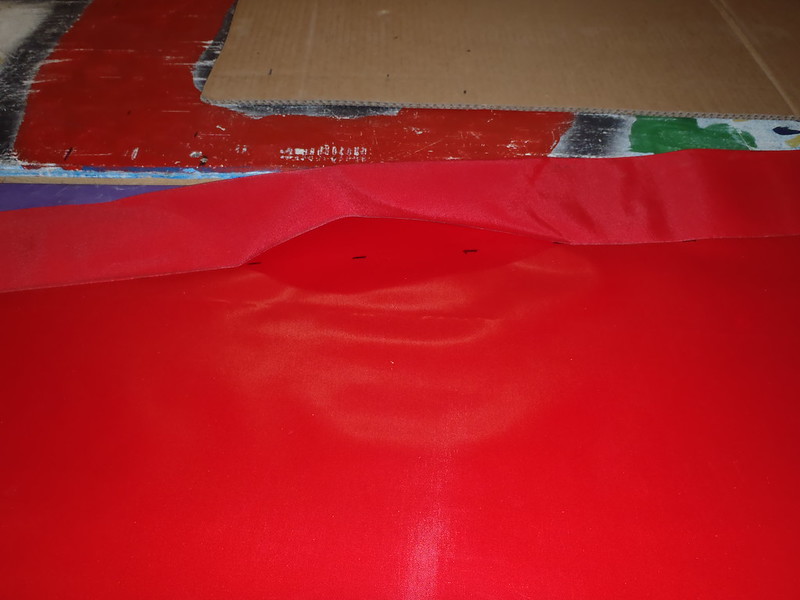
A very “rough” template. For starters the fold over heat sealed hems become peculiarly shaped with angled material; when properly cut to fold over two corners sticks out in pointy dog ears, and two corners come up a bit short.

PB190015 by Mike McCrea, on Flickr

PB190018 by Mike McCrea, on Flickr

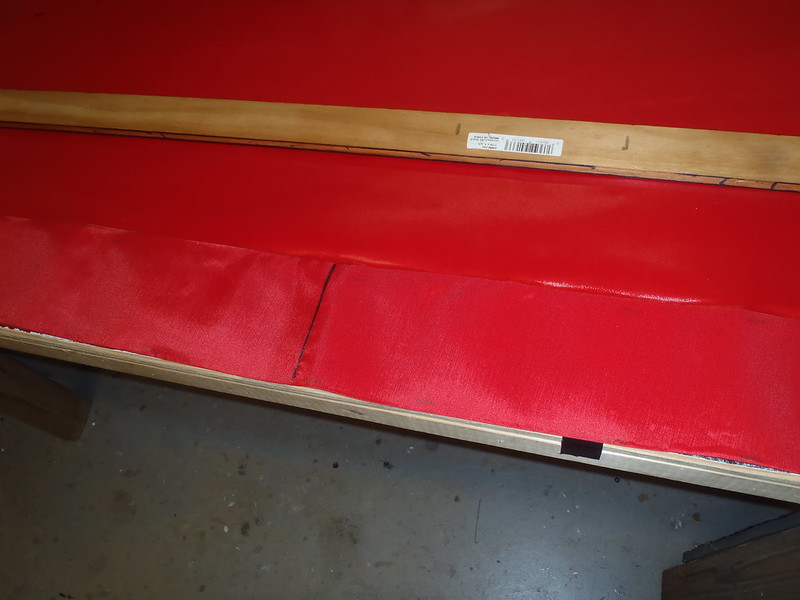
Helpfully the excess /| on the one corner is essentially the additional |/ needed on the other, just cut it off and tape it on the other side.

PB190021 by Mike McCrea, on Flickr

With the little slices and dog ears shaped there remain just a few more weirdo cuts to make on the template. The fabric only adheres heat sealable side to heat sealable side, and I will need to fold over and iron the 1” hems on the ends.

PB190024 by Mike McCrea, on Flickr

PB190025 by Mike McCrea, on Flickr

Last step with the bow cover template, toss it over the bow for a look see, and mark the snap locations on the plastic. The experimental plan is to use both Dual Lock and snaps. I found the snaps on a simple splash and drip cover, with no-stress from a spray skirt tunnel, can be spaced at least 10” or 12” apart, but with the Dual Lock augmentation I am planning only three snaps on each side of the bow cover, spaced 25” apart.

My theory is that having a snap at each end and, eh, one in the middle, will help align the Dual Lock for more accurate press fastening. I have a hopefully strategic plan for the Dual Lock installation as well.

Time to cut some red heat sealable fabric. Well crapola. I thought I had a lot more red heat sealable fabric, but have only enough for the bow cover. I will cut and install this one and ponder buying more.

PB200028 by Mike McCrea, on Flickr

I did not ponder for long. I really want a partial cover for the stern. The piece of red Packcloth I had left was 2 yards long, just enough to make the bow cover. Two more yards of Packcloth runs, yikes, $62 with shipping. In for a penny, in for 6200 pennies, so I called Seattle Fabrics to place an order.

With folks socially distancing a lot of people have undertaken sewing projects; Seattle Fabrics was going gangbusters. And, oops again, according to their records, the heat sealable material I am using is not 400 denier Packcloth; my last order for red heat sealable was for 200 denier Oxford cloth. Half the weight, and probably half the durability, but it will have to do. 4855 pennies including shipping.

I could have purchased 2 ½ or 3 yards and made the longer stern cover as originally planned, but the hull is symmetrical and, checking the template, the same size cover will fit on the stern

The waste pieces from cutting out the cover material are not actually waste.

PB200031 by Mike McCrea, on Flickr

A portion of the big red tapered “scrap” will be used to make a paddle pocket for the bow cover. The little 2” squares will get cut up for an experimental purpose to be revealed later. And red heat sealable scraps are really handy to make overhang flags for long canoes on roof racks.

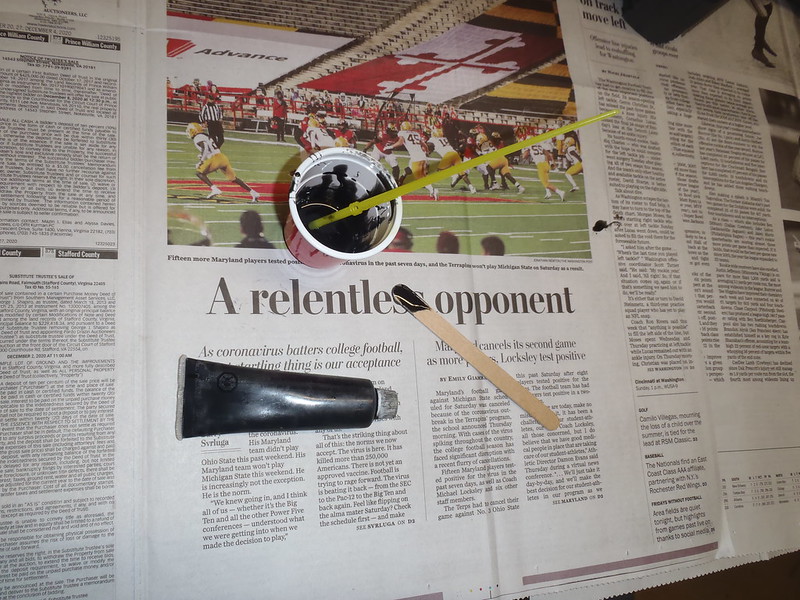
Time to slave over a hot iron.
 
My order of red heat sealable Oxford cloth from Seattle Fabrics has arrived at the USPS facility in Kent Washington. I sprung for the $10 expedited head-of-the-line shipping when I ordered, but was not charged for that. Those are nice folks at Seattle Fabrics.

Come on USPS, don’t ship it 2800 miles cross country via twenty-mule team wagon; I still have a broad expanse of tabletop ready to go in the shop, and am jonsing to make the stern cover.
 
A couple of steps before I get to the iron. More dotted lines on the heat sealable side of the material, a “fold” line and a “fold up to” line.

PB200035 by Mike McCrea, on Flickr

Then a snap rivet test. I had previously discovered that the 400D heat sealable Packcloth was not thick enough, even doubled over and heat sealed, to seat a cap button and socket without them remaining jingly loose. I really don’t want to sound like Santa’s sleigh coming downriver.

As a material thickening work around I tried using two pieces of 2” squares of material, lightly glued together with the heat sealable sides facing out, and ironed them between a 4” wide scrap of the spray cover material.

Back on the clock, 30-ish seconds on every inch of heat sealable material. Just to be sure I found a stud seating solution I made four test areas, two with internal layers of Oxford cloth, two with thicker Packcloth squares inside. A little ironing and stud seating practice never hurts.

PB200037 by Mike McCrea, on Flickr

Seating the stud buttons and sockets is relatively straight forward. First melt a hole in the fabric for the neck of the button. The torch and bulls eye block, even the same 20-penny nail, which melts and seals a perfectly sized hole for the neck of the button.

PB200038 by Mike McCrea, on Flickr

Seating the studs in the material requires an anvil and flaring tool (any hardware store, often included in a pack of studs). The anvil is two sided, one side flat for seating eyelets and the actual stud, the other concave for seating the button cap and socket.

PB200042 by Mike McCrea, on Flickr

I discovered a good reason to have made four pieces for the button and socket test. Four layers of Oxford cloth were not thick enough to firmly seat the buttons. Using thicker Packcloth squares inside for four layers of material was still not thick enough to firmly seat the button.

What worked as before, without using any the internal heat sealable thickness squares, was little squares of 1” Gorilla tape, laid 3-ply thick on the backside of the covers where they won’t show. Two layers of Gorilla tape was not enough, four was too many.

I had to do much the same making the heat sealable covers for the Freedom Solo. I’m not especially concerned about the Gorilla tape squares peeling up in that location, they are anchored in the center at least by the socket, but I’ll run a bead of E-6000 adhesive sealant around the edges of the tape squares when finished.

PB200043 by Mike McCrea, on Flickr

Another oopsie materials shortage note: I have brass snap buttons, sockets, studs and eyelets. Plenty of eyelets, you don’t use the eyelets behind the studs inside the canoe. But I do not have a sufficient number of brass buttons, sockets and studs to make both bow and stern covers. I have plenty in nickel plated brass of everything, so it looks like there will be some shiny twinkling on the hull and covers after all.

Time to finally turn to the iron. Really time, keeping an eye on the sweep second hand again. First the big piece of cardboard as an “ironing board”, the heat sealable material needs to be resting on something a wee bit soft, not a hard wood surface.

PB200045 by Mike McCrea, on Flickr

Even that cardboard choice is finicky; it needs to be smooth and not so heavily corrugated that it leaves a washboard road on the ironed fabric, and it helps if it is as long as the piece being ironed, so you won’t have to move the fabric or fence along to complete ironing down the hem. I use an 8’ long fence, clamped at both end of the table and in the middle,and wish I had a longer piece of smooth cardboard.

Next, it helps to temporarily tape the material folded over heat sealables sides together to the dotted hem line. After it has been temp taped I clamp a board atop the edge and let it sit for a few minutes to create a sharp crease.

PB200047 by Mike McCrea, on Flickr

Most important step before ironing, clamp a board at the edge of the folded material as an ironing fence, so you can’t run the iron past the edge and onto the exposed heat sealable stickem surface.

PB200049 by Mike McCrea, on Flickr

Ironing is, well, ironing, any idiot can do it, even me, just keep an eye on the clock’s sweep second hand. I ironed from each end towards the middle, leaving the center 6” un-ironed for a reason. You can iron close to the tape before removing it (don’t iron over the tape).

PB210052 by Mike McCrea, on Flickr

Because I incorporated a bit of sheerline curve when marking the template I needed to cut a slender /\ slice from the middle of the of the hem flap, so that the material would iron flat, not puckered or overlapped.

PB200050 by Mike McCrea, on Flickr

Another hint with using heat sealable material for any project (wonderful for custom dry bags or paddler guitar/mandolin cases, etc). It pays to let the material cool and check to make sure that the edges are all well stuck together. If you find a lifted edge just re-iron it.

https://www.canoetripping.net/forums/forum/general-paddling-discussions/diy/83031-making-diy-dry-bags

Nice work, but I should have used a red Sharpie to mark the fold and edge lines. On the heavier 400D Packcloth nothing shows through. A note on heat sealable colors; the lighter colors turn darker when sufficiently ironed and that darkening disappears once cooled. The darker colors are not as visibly indicative.

One long side ironed, turn the cover around and do the long hem on the other side, then the easier fore and aft ends of the cover.

As is often the case with those notched non-overlap flap ends I was a little long on the wide end, and a wee bit shy on the short end. I’ll fix that on the template before cutting the matching stern cover.

Any of the heat sealable fabrics, even pack cloth, are most likely to begin a tear at some single ply unfolded edge. There are a few small places like that on the flap ends that could use some additional bolstering.

To strengthen those “split ends” I opted to use transparent Gear Aid Tenacious Tape. That stuff is aptly named, it really is tenacious as heck and I wonder what type of adhesive is used. I had but a few scant inches of Tenacious Tape left and will want more for the stern cover.

https://www.amazon.com/GEAR-Tenacious-Fabric-Vinyl-Repair/dp/B0864K3KX2

PB210053 by Mike McCrea, on Flickr

The usual shop practice before applying any permanent tape, label or logo sticker; I scrubbed my fingertips clean of any contaminates. God bless Lava soap.

Next step, seat the buttons and sockets in the cover material. First some Sharpie dots from the template onto the for the (not behind a thwart) snap locations on the fabric.. Then the little 1” squares of triple ply Gorilla tape on the backside.

Melt the nail holes, seat the snaps. Those parts go really fast. Probably faster if you don’t accidentally flip the anvil upside down and try to pound a socket on with the button cap seated on the flat side of the anvil. Just sayin’.

PB210055 by Mike McCrea, on Flickr

PB210057 by Mike McCrea, on Flickr

Not too shabby, I can live with that, even with the bright SS snaps instead brass.

Next up, how to properly seat and install the studs on the canoe, with a big shout out to Cooke Custom Sewing’s installation instructions.
 
Hi, Mike. I hope you and the family are all well.

The pattern making demo and associated discussion should come in handy. I recently got a new-to-me sewing machine in an industrial table and sporting an industrial clutch motor drive and will soon be getting more sewing practice with an eye to working up to sewing a spray cover or two (three?). The machine itself isn't a true heavy duty industrial but is heavy enough to do anything I expect to do and will prevent me from killing off Nancy's machine.

Do you know what weight the nylon is that Dan Cooke uses?

Best regards to all,


Lance
 
Nice, real nice!! I need to find some of the heat sealable fabric up here and do some experiments!!
 
Do you know what weight the nylon is that Dan Cooke uses?

Per the Cooke Custom Sewing website 400 Denier urethane coated nylon Packcloth

http://www.cookecustomsewing.com/canoecovers.htm

Kinda like the amount of time, effort and materials involved in making my own canoe seats, vs just buying a seat from Ed’s or Essex, I am not sure DIY spray covers are worth it. Maybe if I knew how to sew, but even then Cooke Custom Sewing covers are the product of years of perfection, which I would doubtfully achieve.

Nice, real nice!! I need to find some of the heat sealable fabric up here and do some experiments!!

The DIY cover looks mighty fine on the FreeFIRE, and the combination of fewer snaps augmented with Dual Lock provided the anticipated ease of attachment advantage. The cover accoutrements – paddle pocket, (rigid, for a reason) drip baffle, lash straps for the paddle shafts – have turned out well. More photos coming soon, and of course more wordswordswords. If that wordiness bothers you just look at the pretty pictures ;-)

I have always ordered the heat sealable fabric from Seattle Fabrics in Washington State, and mostly* used the 400D Packcloth. Next Packcloth order may be for the heaviest of the heat sealable fabrics, 420D, which is only $3.50 more a 58” wide yard.

https://www.seattlefabrics.com/Heat-...lons_c_80.html

*Mostly. The original (easy peezey cylindrical) sleeping pad dry bags and (more complex) custom instrument dry bags we made 10 years ago used heat sealable 200D Oxford cloth, are still going strong. Even the Oxford cloth instrument bags, often strapped to the stern of a sea kayak or decked canoe, exposed to Florida sun, wash wave and saltwater, have held up well.

That is a lot of abuse, exposure and stress. Still, for a spray cover, since I do not do long portages/gear carries, I’d rather have the heaviest denier fabric I can find. I suppose, in partial cover gentle use, without the stress of a spray skirt pulling at the seams and snaps, heat sealable 200D Oxford cloth, or maybe even 70D Taffeta could work with some caution, and weigh X-amount less to tote from one lake to the next.

Another confession. Canoe Trippers Chip, DougD and I each have a supply of dark blue heat sealable 400D Packcloth, bought remaindered from the leftover supply of a most kindly gentlemen for 8.50 a yard, but I was not deviating from the red & black color scheme by using that dark blue. I believe that he bought nearly a full roll of Packcloth for making multiple custom dry bags for a group Arctic trip, and wonder what all custom dry bags he made. Any guitar bags?

Ehhhh, I revealed the source for that discount/remaindered Packcloth a while back. Deliberately buried deep in one of my over wordy posts, so that the gentleman would not be deluged with requests by the cheap and needy.

Too late now, Chip bought out the last of that supply; more than enough to have made a custom ALPS Leisure chair bag or two, and eventually, hoping to spur him into action, a custom belly cover for his OT Tripper.

Rolled shipping for stuff 58” wide is a killer, and unnecessary; laying the folded material out and roll wrapping it tightly around a piece of pipe for a week or two takes all of the creases out. Same thing for the transparent plastic; it came on a short roll with very sharp creases from 8 or 10 folds-on-the-roll, but those also vanished once rolled on a piece of pipe and rested.

FWIW I would recommend buying at least twice as much heat sealable fabric as you think or calculate you will need. If you find you have bought way too much I’ll gladly offer you $8.50 a yard.

Once you have made something, anything, by simply ironing over that heat sealable fabric the waterproof world becomes your oyster, and you will make other things.

I don’t know of another order on-line source. I think I have ordered from Seattle Fabrics at least a half dozen times, and paid shipping & handling charges each time. Still not sure why I ordered Oxford cloth last time, maybe because I was tired of the heavy duty dark blue Packcloth.

BTW, I did not stress this enough, pre-cutting the transparent plastic to the 58” fabric width before rolling it to remove the creases is a huge boon, especially if you are cutting multiple pieces of fabric for different things. You can find the best orientation on that same-width plastic, vertically or horizontally, and make the templates with as little fabric wastage as possible. With some tapered pieces /_\ and \_/ that can save a lot of waste fabric if laid angled side by side.

Canotrouge, and others, I’m looking forward to seeing what all you may create for that heat sealable material.
 
Ahh, I see now that it is buried a couple of pages deep in a pop up thingy. Thanks, I suspected something like 400D. And am I missing something here? Is Visqueen nothing but standard poly sheeting? If so, as a retired (reformed?) builder I've got oodles of it.

Best regards,


Lance
 
Before fitting the cover to the hull and installing the studs I put the Dual Lock on the back of the cover. The Dual Lock use is experimental, again for reasons to be explained later. The heat sealable fabric, unlike coated nylon, has zero stretch even when damp or humid, so I put both sides of the Dual Lock on, 6” pieces with the acrylic adhesive glued to the covers, and 4” pieces mushroom connected to those pieces with the adhesive yet unexposed.

PB210059 by Mike McCrea, on Flickr

Some rational behind the placement and length differences with the Dual Lock. 1) These are experimental covers and I would like to ascertain if the Dual Lock alone is sufficient to hold the covers in place, which would eliminate the need for snaps, and 2) the previous experiments with Dual Lock on heat sealable fabric showed that, while it took some effort, the ends of the Dual Lock on the covers were easier to begin peeling off than the Dual Lock on the hull surface. It definitely helped to allow the acrylic adhesive a day or two to fully set up.

https://www.canoetripping.net/forums/forum/general-paddling-discussions/diy/118158-stripperguy-questions-about-3m-dual-lock/page2

Using 4” pieces of Dual Lock for the hull side attachment should result in any removal stress being located away from the ends of the 6” long Dual Lock on the covers and more towards the centers.

I allowed the acrylic adhesive on the cover side time to set up and moved on to the snap installation. Again, I would be clueless about how to properly set the matching sockets and studs without having previously install Cooke covers.

A couple easy steps. Tape the cover in place on the hull

PB210062 by Mike McCrea, on Flickr

Make up a piece of duct tape for marking the stud locations on the hull. CCS suggests “Put a row of duct tape on the hull with the top edge ¼” approximately below the gunnel all the way around the canoe”. I install my first Cooke cover that way but hated wasting all that duct tape. Plus as I peeled the long tape row back after drilling the holes the loose dangling end began to mummify my feet and legs.

Instead I make a single piece of duct tape, or, actually, a square of cheap grey duct tape 4 or 5 layers thick for easier socket impression. A single layer of cheap duct tape is not thick enough.

Multi-layer duct tape made I removed the temp tape on one corner, put the duct tape on the hull approximately where the socket will sit, and pressed the button firmly against the duct tape. That leaves a circular socket impression, best center marked with a Sharpie dot, then drilled a 1/8” hole in the Sharpie dot.

PB210065 by Mike McCrea, on Flickr

Hint – Take the duct tape off before seating the stud. You would have to be pretty stupid to seat the stud atop the duct tape and I, personally, have only done that a couple times. Son of a . . . . .

The studs on the hull are pop riveted using rivets with a 1/8[SUP]th[/SUP] inch pin, and whatever mandrel length necessary to pass through the hull and accommodate a back up washer. Thick, old school Royalex may need a half inch or more of mandrel length.

However – to seat the studs you will need to use a pop rivet tool with a nozzle that fits inside the stud, the one on the right below. Some pop rivet tools conveniently come with that nozzle. When purchasing a Cooke cover CCS will modify a pop rivet tool nozzle if needed.

PB210067 by Mike McCrea, on Flickr

Put the rivet pin through the stud, hold a washer on the pin tightly against the hull on the inside and seat the stud in the hole with the pop rivet tool. Don’t pinch your fingertips under the washer. If you think you might pinch your fingertip get Tom to hold the washer in place.

PB210069 by Mike McCrea, on Flickr

PB210070 by Mike McCrea, on Flickr

One done. Snap the cover on that stud and do the same with the stud on the opposite side

An alternative to using washers on the inside, for boats that lack floatation or gear tie down points, is to use small stainless steel mini D-rings.

PB210073 by Mike McCrea, on Flickr

PB210075 by Mike McCrea, on Flickr

These are cheap, and probably crappy stainless. I bought some anyway, currently being exposure tested in my yard and at a friend’s place near the shore for faster saltwater corrosion. Results in a year or two.

https://www.amazon.com/EXCELFU-Stainless-D-Ring-Lashing-Trailers/dp/B0824SYMMN/ref=sr_1_6?dchild=1&keywords=stainless+steel+mini+ D-rings&qid=1606324109&sr=8-6

These are pricey as heck, but better quality construction and 316 stainless.

https://www.amazon.com/Marine-Boat-Stainless-Steel-D-Ring/dp/B072PQNGRW/ref=asc_df_B072PQNGRW/?tag=hyprod-20&linkCode=df0&hvadid=312128389336&hvpos=&hvnetw= g&hvrand=10657600986097432299&hvpone=&hvptwo=&hvqm t=&hvdev=c&hvdvcmdl=&hvlocint=&hvlocphy=9019571&hv targid=pla-592840041594&psc=1

I bought a pack of the better ones for comparison. Far superior, I used a couple of those. Neither of those mini D-rings has 1/8” holes; the cheaper ones have an 11/64” hole, the better 316 stainless have a ¼” hole, which necessitated backing up the D-ring itself with a washer, which necessitated using a longer pop rivet.

The cover looks a little floppy with just three studs per side, but once the Dual Lock has been mushroomed together it should sit more tightly flush.

PB210077 by Mike McCrea, on Flickr

A couple things are needed to make that front cover more functional; a paddle pocket and a drip baffle at the open end.

PB210079 by Mike McCrea, on Flickr

I made a paddle pocket for the Freedom Solo cover in an awkward fashion; the heat sealable material will only iron together heat sealable side to heat sealable side. I made that front cover upside down, so I could iron the paddle pocket on top.

(Ok, I confess, that was not intentional; I unthinkingly installed all of the cap buttons and sockets wrong side out on that bow cover, went over to drape it on the canoe and said many bad words. Whatever, it works)

P1130038 by Mike McCrea, on Flickr

But I can do better this time using scrap red heat sealable fabric and Dual Lock to adhere it. Should the pocket get snagged on something, or if I should stuff in one-too-many paddle blades, the Dual Lock may release before the fabric tears.

The usual visqueen template, cut with 1” iron over hems all the way around. Not a lot of scrap red heat sealable cloth leftover from two yards, but after making the paddle pocket still plenty to iron up for red flagging on roof racked canoe overhangs.

PB210080 by Mike McCrea, on Flickr

Hems ironed I laid strips of Dual Lock along the sides and top, leaving an open pocket at the wide end.

PB220083 by Mike McCrea, on Flickr

The arch at the open end is by design; I’d like to be able to stuff two or three paddle blades in that pocket, double blade and spare single.

That pocket will take care of the blades, but the end of the cover is only 44” from the paddle pocket. I need a drip baffle at that end of the cover, and I’d like something there to support the weight of the paddle shafts without sagging the cover and creating a downspout for collected rain to pour into the canoe.

PB220085 by Mike McCrea, on Flickr

The drip baffle and support on the Freedom Solo is the epitome of crude use-what-you-got; a length of self-adhesive split foam pipe insulation with a same length piece of ½” PVC pipe glued inside. Crude and unattractive, but very functional.

P1050032 by Mike McCrea, on Flickr

I should have thought harder about what leftovers I had in the shop, and did so when performing the Dual Lock experiments. I have some automotive weather strip left from bug and dust-proofing the cap on the tripping truck. This tubular stuff, which has a waterproof adhesive backing.

https://shop.advanceautoparts.com/p/ameriseal-multi-purpose-bulb-weatherstrip-3-4-w-x-7-8-h-x-8-l-13480/10017524-P

And I have several long pieces of ½” OD stainless steel tubing from an old watering system, which that experiment showed happened to sleeve tightly inside the weather strip tube.

PB060037 by Mike McCrea, on Flickr

Very tightly. I had to lubricate the short experimental piece with petroleum jelly to slide the tubing through. That weather strip proved to be extremely well adhered to the heat sealable material; I tried to peel that tubular weatherstripping off the fabric a few days later to no avail. I don’t know what adhesive is used on that auto weather stripping, but it is dang good stuff.

Petroleum jelly proved a no go with sliding in a piece of tubing, cut at 25” long so it will rest atop both gunwales, and got me three inches of insertion (Irish Curse joke there) before the length of SS tubing was would slide in no further. Silicon spray liberally doused inside the weather strip tube worked like a charm.

I peeled the backing from the weather strip and stuck that rigid drip baffle in place on the cover. I have enough of that auto weather strip left to add a drainage baffle to the stern cover. Come on Seattle Fabrics order, please don’t take 40 days like the Conk seats.

PB220088 by Mike McCrea, on Flickr

That rigid baffle looks much more attractive than the clunky spilt foam pipe insulation. That rigidity should also help prevent tears on that wide, otherwise unsupported end of the cover.

Last of the E-6000 work before removing the backing from the hull side Dual Lock and pressing the covers into place, I ran a bead of E-6000 around the ends of the Dual lock on the cover, and around the Gorilla tape squares. I don’t know if that was necessary, but it can’t hurt.

PB220089 by Mike McCrea, on Flickr

To attach the Dual Lock to the hull, I snapped the cover into place, backing still on the hull side adhesive, undid the snaps one at a time, peeled the backing off the Dual Lock adhesive, re-snapped the cover and pressed the Dual Lock into place. Dual Lock, unlike Velcro, needs to be firmly pressed/snapped into place before it sticks, and that seems a huge advantage with spray covers.

The few snaps did their expected duty, lining up the Dual Lock pieces, and the cover, with the Dual Lock holding the sides tight, looks mighty nice. I may add one more strip of Dual Lock on each side near the bow to eliminate a visible pucker, but that is easy enough.

PB230104 by Mike McCrea, on Flickr

Removing the cover I was relieved to find that the black Dual Lock was all within the black strips; some of the studs were right on the line. One Dual Lock piece is a little low, but that was done to compensate for a miscue with the Dual Lock on the cover. I will know better how with the stern cover.

PB230116 by Mike McCrea, on Flickr

I was pleased to discover that the Dual Lock released easily enough when “peeling” the cover back after unsnapping, but was sturdy as heck in tension. I pressed down on the covers with some force; nothing budged with the snaps snapped and, providentially for Dual Lock only covers, nothing budged with the snaps free and just the Dual Lock connected.

I am liking Dual Lock, for a variety of purposes. Thanks Glenn, Thanks Stripperguy.
 
Thanks, Mike

I was hoping the Dual Lock worked and will be really interested to see how it works over time. I have been kind of ruminating over sewing plain back Dual Lock on the inside of a spray cover in strips like you used and putting vertical clear Dual Lock strips on the hull to allow for some adjustment if a load ever extends above the gunwales.

I've got time to think about it as I need a whole lot of sewing practice before taking on a cover. That also gives me time to think about and experiment with some smaller pieces to mock up a dam at the open end of each cover panel.

McMaster-Carr has 7/8" 316 stainless d-rings for a bit over $1 but they have 1/4" holes in them. And with the shipping they'd likely be at least what Amazon charges unless you either had other stuff to order or needed a couple dozen of them. I will say that I trust McMmaster to actually have 316 stainless rings more than I trust some of what Amazon sells.

https://www.mcmaster.com/33815T31/

Best regards to all,


Lance
 
I have been kind of ruminating over sewing plain back Dual Lock on the inside of a spray cover in strips like you used and putting vertical clear Dual Lock strips on the hull to allow for some adjustment if a load ever extends above the gunwales.

Or maybe the other way around, strips of dual lock horizontally on the hull, and vertical strips on the cover, so the outside of the hull had fewer Dual Lock strip strips to perhaps scrape against something when the cover is not in use. If you had four or five inches of cover below the outwale you would have plenty of height adjustability.

One of today’s wee finishing touches is to paint a bead of black tinted G/flex on the ends of the Dual Lock on the hull. Even though the Dual Lock tested on a piece of Royalex proved to be quite firmly adhered I am a belt & suspenders guy, and a little bead of G/flex at the ends can’t hurt with long term adhesion.


McMaster-Carr has 7/8" 316 stainless d-rings for a bit over $1 but they have 1/4" holes in them.

Something to consider about the McMaster Carr and pricier Amazon D-rings, they are knurled for the D-ring only on one side, where the cheaper 30 each for $13 version are knurled on both sides. The ones with a flat “backside” would seat flush against the hull, the cheaper ones knurled on both sides would necessitate a fender washer or two behind the D-ring for them to seat flat.
 
Are you using the high or low profile dual lock, and why?

Standard Profile. The height difference is negligible; low profile = 1/16”, standard profile = 1/8”

Why?

Per 3M the low profile loses 50% of strength after 100-150 removals. The standard profile SJ3550 or Scotch-branded Dual Lock (same thing) loses 50% of strength after 1000 removals.

Per the Dual Lock experiments the standard profile SJ3550 has stronger adhesive, is easier to press connect, is easier to clean when crud encrusted, and has significantly stronger grip when snapped together.

Finishing the cover. With the paddle pocket on the cover I needed a way to secure the shaft(s) resting on the baffle. The reason for using a rigid baffle was to support that shaft weight; not an issue with longer partial covers or full covers, where there is usually a thwart to support some paddle weight at the grip end, but this shortie leaves a lot of shaft hanging over the end of the cover with no lateral support nearby.

Not Dual Lock as shaft straps, it is too tenacious for quick on-handed peel apart; this was a use for Velcro, specifically this stuff, which is not so clingy that it can’t be quickly pulled apart.

https://www.walmart.com/ip/ONE-WRAP-Roll-Double-Sided-Self-Gripping-Multi-Purpose-Hook-Loop-Tape-Reusable-12-x-3-4-Roll-Black-Take-control-computer-electronics-cord-clutter-By-/702755013

The usual double-circle loops, one short loop for around the thwart, longer ones for around the paddle shaft. I am generally not a fan of Velcro, and detest having to dig my fingernail under the end of a Velcro loop connection to peel one end free. Especially if I want the spare paddle in a hurry. Just let me put my glasses on, and wait a bit for my fingernails to grow. . . . .

The easy solution to that picky dilemma is to fold over a short tab (on the less fuzzy loop side) at each end, stick a dab of G/flex in the tabs and clamp them shut with binder clips. Might as well make a pair for the stern thwart while I’m at it; the back cover is getting a paddle pocket at that end as well.

PB230107 by Mike McCrea, on Flickr

The little squares of wax paper prevent epoxying the binder clips to the Velcro.

PB230110 by Mike McCrea, on Flickr

Eureka, everything on the cover works as planned, or even better than planned. With the Velcro strap hooked around the foot brace/sail thwart bungee instead of the thwart itself the Velcro shaft lash is under just the right amount of stretched bungee tension; pull the Velcro tab and the paddle pops free in an instant.

The stern pocket on our CCS covered canoes typically holds a long single blade for rudder use when sailing, and/or the push pole/hiking staff, used most often when canoeing in shallows, with a ducksbill or tee grip, handy to hook on to things just out of reach, retrieve yard sale gear or hook onto friend’s canoes when stopping for a floating muckleup part way down the river.

P2160519 by Mike McCrea, on Flickr

Once I have built a stern cover, I can take a few seconds to reach behind me and pull those easy release Velcro tabs for the push pole or long rudder paddle.

PB230113 by Mike McCrea, on Flickr

Last (I think) few touches for the partial spray covers. While the Dual Lock proved to be well adhered to the Royalex test piece in the experiments I wanted additional assurance of long-term durability for the pieces on the hull, which could be scraped against things when the covers are off.

Plus, at some angles, I can see the white foam/adhesive surface on the Dual Lock, and that isn’t black or red. First, a disposable shot glass with some unadulterated G/flex, and I painted the perimeter of the Dual Lock on the floatation tank where the custom seat yoke attaches.

PB270020 by Mike McCrea, on Flickr

Then a teeny tiny dab of black pigment in the G/flex shot glass and I tried my hand at black epoxy painting on the seat yoke Dual Lock.

PB270023 by Mike McCrea, on Flickr

PB270025 by Mike McCrea, on Flickr

That seat yoke has some seriously custom contour seat curvature.

PB270028 by Mike McCrea, on Flickr

Happy with that result I painted black G/flex along the tops and sides of the Dual Lock on the hull with a tiny brush.

PB270026 by Mike McCrea, on Flickr

I like it, belt & suspenders, acrylic adhesive and tinted G/flex, and no more unsightly white adhesive foam showing.

Once the stern cover goes on I will do the same Black G/flex on top and sides of those pieces of Dual Lock, and then flip the FreeFIRE upside down and do the bottom edge of every piece on the bow and stern.
 
PPine, I do believe that the FreeFIRE (nee Independence) is some of my finest work to date in terms of rebuild and outfitting.

Today, as I wait for the red heat sealable fabric to arrive for the stern cover, I started repairs on a plebian 25 year old Old Town in desperate need of help, once again trying to use what parts and materials I had on hand in or around the shop.

That one involved much simpler fixes, even some materials solutions suggested by my sons, with far less picayune attention to every niggling detail. It is coming along nicely, and I will do a less-lengthy write up with photos.

After that one is finished I reallyrealllyreally want to find some busted hull/rotted gunwales sub 45lb composite on which to do a full on rebuild; a big boy solo, or a small solo-izable tandem.

The FreeFIRE is the first nice canoe I have worked on in years, and the attention to detail was a shop pleasure. I think I’m done with rebuilding heavy RX canoes and woven roving/thick gel coat decked hulls.

There’s a jinx if I ever typed one.
 
Originally posted by Glenn MacGrady

Are you using the high or low profile dual lock, and why?


Standard Profile. The height difference is negligible; low profile = 1/16”, standard profile = 1/8"

Why?


Per 3M the low profile loses 50% of strength after 100-150 removals. The standard profile SJ3550 or Scotch-branded Dual Lock (same thing) loses 50% of strength after 1000 removals.


Per the Dual Lock experiments the standard profile SJ3550 has stronger adhesive, is easier to press connect, is easier to clean when crud encrusted, and has significantly stronger grip when snapped together.

That's a helpful summary of regular vs. low profile Dual Lock. From the short pieces of each you sent me, I find the low profile easier to pull apart, however, which may be good or bad depending on the application.

******************************
Tangent: Did we get multi-quote turned on? I guess not. Professor McDIY is the most difficult person to manually multi-quote because two layers of HTML font codes have to be deleted, whereas almost no one else has any.
 
Tangent: Did we get multi-quote turned on? I guess not. Professor McDIY is the most difficult person to manually multi-quote because two layers of HTML font codes have to be deleted, whereas almost no one else has any.

That may be the ancient, no-longer-supported version of Word I am using on my computer. I get the same layers of HTML font codes when I cut and paste a post to write a response.

For a tandem tripping canoe a belly cover, for rain, splash and even desert sun protection for gear, leaving bow and stern positions open, maybe with some arched stays, would be dead simple to make with heat sealable fabric, or by sewing if the skills were available. Even an easy to cut and iron over or sewn rectangle would work.

P6100010 by Mike McCrea, on Flickr

Yeah. I’m looking at you Chip, Old Town Tripper owner and possessor of yards of heat sealable Packcloth.

I would still want some paddle pockets on a belly cover. This solution was inelegant, but the open-at-both-ends pockets allowed both stern and bow paddlers to quickly snatch a paddle from the center cover.

P7140018 by Mike McCrea, on Flickr

Some connections at the stern end for a map case too Chip. I know you are a thinking man, I’m eager to see what you come up with for a Tripper belly cover. Maybe a very short cover up front to protect bowman Stephen’s pale, bony knees.

Not just the Chipster.

I used dual lock when attaching Bell Rob Roy covers back in the day... about three per side .

Or, if someone (Doug) owned a Bell Roy Roy (Doug) and had a supply of Packcloth (Doug) and needed an easy winter project (Doug) that could be done in their heated shop without keeping it toasty warm all freaking New Hampshire night (Doug), why I guess they could make short partial covers for that boat (Doug).

And if a person (Doug) had an ample supply of buttons, sockets and snaps (Doug), and a rivet tool nozzle for setting the snaps (Doug) and some leftover Packcloth (Doug) they could make more whitewater-ish spray covers, or at least a bow cover, for their Courier (Doug).

Of course Doug would need shop space for both the boat and a 6’ x 8’ work surface. And, uh, some supervision. dang shame Covid prevents a 2020 get together; it is really hard to smoke and drink together with a mask on.

Although, even with a mask on, Doug would still be able to hear my muffled supervisory commentary.
 
Thanks for writing, and writing, up these instructions which you were never going post. At least in my sea kayaks, I love spray skirts. Skirts keep the constant paddle drip off my lap, provide sun and bug screen, and make paddling in the rain not only tolerable, but a pleasure.

Having a sufficient quantity of heat sealable fabric in the shop, I envision I’ll be following in your non-sewable, hot-iron tracks. I have some thinking/planning to do, since I’d like a center cover with tunnel for the rainy days. Even without a center cover, bow and stern covers will offer many advantages, so I should at least get that far.

i confess to only skimming the thread, so first must fully read and read what you wrote and wrote. But it looks promising. Please get that boat out paddling so we can learn about real world performance!
 
Last edited:
Having a sufficient quantity of heat sealable fabric in the shop, I envision I’ll be following in your non-sewable, hot-iron tracks. I have some thinking/planning to do, since I’d like a center cover with tunnel for the rainy days. Even without a center cover, bow and stern covers will offer many advantages, so I should at least get that far.

Chip, I guess there are a number of ways to tackle that center seat cover desire. Simplest (although not especially simple) might be to make a full hull-length two piece cover with the split in the middle (-). Roll the bow and stern portions back to open the seats when tandem; the rolled fabric would create the drip baffle. Make a separate center cover with tunnel and roll the bow and stern portions away from center (making drip baffles again) and install the center cover with tunnel.

A couple caveats to that – I don’t think heat sealable fabric is a good solution for a tunneled cover, and believe that using a skirt tunnel would necessitate using snaps, probably no more than every 6 or 8 inches apart.

If a smaller cockpit sized center opening would work (with raingear) maybe just make a removable center cockpit opening, like this:

P7140022 by Mike McCrea, on Flickr

That “cockpit” opening wouldn’t need to be an oval, it could be a simple rectangle. Or, just make the belly cover and add a removable center open-cockpit portion.


Please get that boat out paddling so we can learn about real world performance!

As soon as the red heat sealable fabric arrives and I have the stern cover made, will do.
 
Back
Top