• Happy Birthday, Richard Feynman (1918-1988) 👨🏼‍🔬⚛️🏅🚀

Cedar Strip Build "The Experiment"

Thanks for the details, looks like Jim Dodd's method is what I'll go for on this one. Rough size turns in at 7 3/4 x 33.

The hull looks great. Can't wait to see it all fiberglassed!

Well, wait no longer.

Finished Sanding the fill Monday, and then realized that I needed more fill. Came up with a new (for me) Recipe that would not require multi-hour curing times.
1 part water, 3 parts wood glue (carpenters glue) (just a bit of water really thins it out)
wood flour and cabosil to taste. long pot life, but spread it in a thin crack and it's ready to sand in 25-30 min. Much lighter than an equivalent resin recipe, as well.

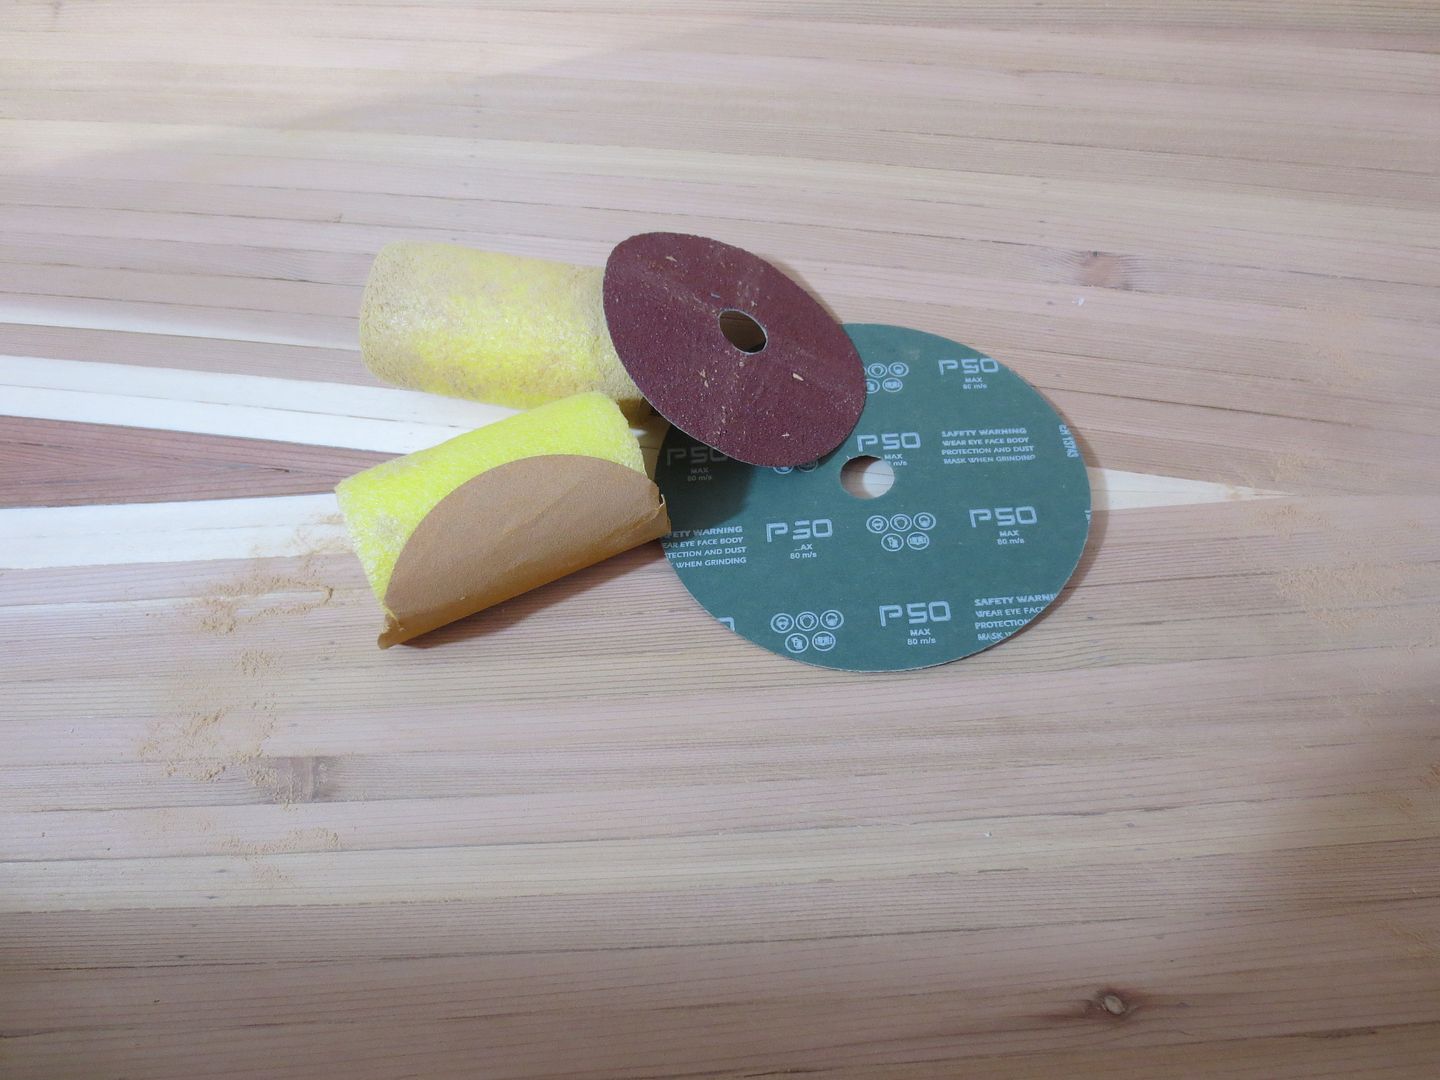
This is about as clean as I chose to get the ends, as they will be covered by the bulkhead, and getting in there is a real pain. Plus the main pad on the RO got used as a sanding pad without any sanding paper on it, so now it does not want to hang on to the interface pad.

100_4061.JPG 100_4063.JPG

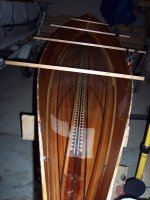
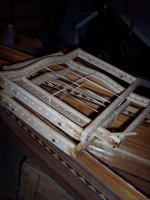
Wet-out (Solo, this time. My family all had schedules they needed to keep, so no help) took 4 hours. Finished at midnight. No Sealcoat this time, there seems no point with a resin this thin. There is definitely a use case for slow resins in temperatures just high enough for curing... The glass was being finicky. the inside of that knuckle could have maybe used a cabosil filet, but in the end it worked out. The sticks ended up being the best way to hold the hull in shape - the center had sprung about 2" with just the outer layer of glass. Four in those locations were just perfect.

100_4064.JPG 100_4068.JPG


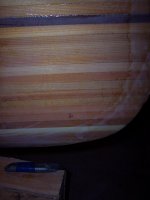
The night was not without some oddities. If you think that that looks like a patch in the middle of a fresh layup, you are right. I could not get the glass to lay in at this point - there were bridges 4"x4" on both sides of the hull, on both ends. I had to cut a slit about 6" long right down the center of the glass and allow it to spread. Since this will be under the bulkhead, I'm not terribly worried. Overall, though, I think it turned out well
 
I'm too late to offer a trick for sanding the stem area. But there is always next time !
IMG_0544_zpsgqydy0ur.jpg

The big stiff sanding discs really help sanding the inside stem area. The 50grit or 36 grit, they are made for angle grinders.

Jim
 
On thing with our shop is that if we are not around to heat it, it gets rather cool. This slows epoxy cures substantially. The wetout got a good start Monday overnight, but Wednesday afternoon it was still in green cure. Not really tacky, but still rather flexible and could be dented. Perfect chance to get a fill coat on.

100_4069.JPG 100_4070.JPG

Turns out that the glass had pulled in a few spots. All in the opposite end from where I had done the slit & patch. Think there might be a connection? These were not floated points, nor were they resin starvation. The cloth was fully saturated, and there was empty space between it and the wood below. The wood looked as if it had received a nice seal coat, no puddles.

There were a few smaller spots across the hull, but those I just pierced and worked resin from the fill coat into. These larger ones i needed to cut out and repair. I don't like sanding after a glass repair, but what can you do? I pulled out the secret weapon.

100_4071.JPG 100_4072.JPG

That's cheap Walmart polyester interfacing. Very slippery, used as a liner in suits and especially skirts so that they flow, rather than sticking to stockings, shirts, skin... on sale, $1/yard. The Silicone spray we have around for other purposes. Spray a bit of that on galvanized sheet steel, and it's slicker than an ice rink after the zamboni went by on 10. Spray it on the cloth, allow the propellant to evaporate, and Voila! Homemade peel-ply. At least, I hope. The resin was still not fully gelled last night when I left, so asked my dad to peel this morning... (Again, slow cure in unheated shed...) But the way the surface under the ply smoothed down was encouraging. If it doesn't come up, ill just have to sand. i suspect that it will still be better than a bare patch.
100_4077.JPG

Again, the messy end will be under the bulkhead, which is why I'm tolerating it. It also seems my flash made some odd patterns, there was no dust on the inside at this point.
 

Attachments

  • 100_4077.JPG
    100_4077.JPG
    282.1 KB · Views: 0
Jim Dodd Ended up using my soft interface pad as a backer for a standard sanding disk. Worked well, but I honestly did not prioritize it this time.

Also got a bit done on my seats. I'm putting together an adjustment rig, and needed to run bolts through the (Cedar) laminate. The bolts need to rotate. This means that I should use some sort of bushing. The cheapest bronze ones I could find were $2.36 each. I need 24, since I will have three seats. Ouch. Went shopping at my local fleet and farm supplier, poked around a bit to see what I could adapt. This turned out just too perfect:

100_4057.JPG 100_4058.JPG 100_4059.JPG

This is 3/8" brake line. $3.85 for a 30" piece. Once I cut the flares off, a 5/16" bolt shoulder fits perfectly. No other standard brakeline has a matching bolt size like that. Protip: any dremel accessory fits in a 1/8 collet in a die grinder.

100_4073.JPG 100_4074.JPG 100_4075.JPG

Enough for the seat frames. a drill press makes a handy press, as well. Just used hardware store 5 min epoxy for this, not a major load point, and it has a nice thick consistency without adding cabosil or similar.

100_4076.JPG

And this is how it fits together. The part the bolt threads into has not been built yet.

One other bit:

A while back, I read a thread that was discussing a lower, through hull fitting for bow and stern lines. Can't find it now, but there was some sort of nylon plastic fitting, and setting the attachment lower was intended to stabilize a canoe being pulled/guided by line. This makes sense with some of the things I have noticed, and so I decided to do similar.

100_4067.JPG 100_4049.JPG

Intended placement, and intended fittings. These are just soft copper tubing, spread with a standard plumber's flare tool. Still need to clean up the edges, but should look well. I'll epoxy a cedar block inside the hull for support before I drill for these.

Placement is about 2" above LWL. I have not set the blocks or drilled yet, so if this placement is a mistake, please say something!
 

Attachments

  • 100_4067.JPG
    100_4067.JPG
    210.3 KB · Views: 1
I think it is a mistake to put your bow and stern line that low. But others might have a different opinion.
 
I believe the plastic fitting you are referring to is called a Tug Eye, discontinued if I remember correctly. Although I agree putting the hole that low might be a tad low, I do remember seeing somewhere that if lining in the old days, they would make a rope bridle and attach to a seat frame so the line was attached below the boat. Pulling up, not down or sideways when lining. On my present build I did ponder through holes in the bow and stern and was going to go with just above the 4" waterline but then opted to not do them at this time.
 
On my original Bloodvein I believe I put them 3.5" above the designed water line. I did the same on Bloodvein 2.0 that I'm building now. I really liked that low position when lining. Lining isn't something I'm terribly experienced or skilled at and the low position was appreciated more than once when I ended up fighting the current. I posted the steps on this page of the build: http://www.canoetripping.net/forums...ssions/diy/25183-solo-expedition-build/page26

Alan
 
I believe the plastic fitting you are referring to is called a Tug Eye, discontinued if I remember correctly. Although I agree putting the hole that low might be a tad low, I do remember seeing somewhere that if lining in the old days, they would make a rope bridle and attach to a seat frame so the line was attached below the boat. Pulling up, not down or sideways when lining. On my present build I did ponder through holes in the bow and stern and was going to go with just above the 4" waterline but then opted to not do them at this time.

If you spend a lot more time lining than paddling, I hope you don't, I would put them just above the water line... But if you will do the occasional lining and do most of your outing in your boat paddling or poling, I would go like Mihun mention about the rope bridle! It is a way better system than having your grab loop low on the boat. Low grab loops are prone to snagging and are really inconvenient to use as grab loops. NOLS uses low rope loops on there boats, and never liked them. Just my 2 cents...
 
If you spend a lot more time lining than paddling, I hope you don't, I would put them just above the water line... But if you will do the occasional lining and do most of your outing in your boat paddling or poling, I would go like Mihun mention about the rope bridle! It is a way better system than having your grab loop low on the boat. Low grab loops are prone to snagging and are really inconvenient to use as grab loops. NOLS uses low rope loops on there boats, and never liked them. Just my 2 cents...

I thought about going the bridle route but in my solos I don't have any hardware, like a front seat, to tie off to. I use grab handles for carrying/pulling rather than grab loops. I do have to make a point to keep the painter lines pulled tight so they don't drag in the water.

I wonder if boat design plays a part. My solos aren't all that highly rockered and when lining in fast moving water the current tended to be really grabby. I see other people lining with the stems up out of the water and it looks more forgiving. I'm sure skill as a lot to do with it as well. But for me I like having them low.

Alan
 
You're onto something there Alan. I have done a lot of lining, with just the rope attached to my grab handles or the decks. With the asymmetrical models like the Raven, I had to be very careful with strong currents, as both the bow and the stern tended to dig in and want to go cross current....this could happen going both upstream and down. A waterline rope would help a lot with these designs.

The Chum is a different story, with it's highly rockered stems, it lines like a dream, rope placement doesn't seem to be so crucial, a mere twinge of the rope will cause it to respond, and I haven't had an occasion for it to dig in yet.
 
In the pic it looks low enough to gurgle in the water, and to far back.

I'd want it above the loaded waterline, and water tight. If it leaked into a sealed bulkhead, it might cause a lot of headaches down the road.

I don't believe Bill Mason had in his wood canvas canoe.

Jim
 
I thought about going the bridle route but in my solos I don't have any hardware, like a front seat, to tie off to. I use grab handles for carrying/pulling rather than grab loops. I do have to make a point to keep the painter lines pulled tight so they don't drag in the water.

I wonder if boat design plays a part. My solos aren't all that highly rockered and when lining in fast moving water the current tended to be really grabby. I see other people lining with the stems up out of the water and it looks more forgiving. I'm sure skill as a lot to do with it as well. But for me I like having them low.

Alan

In my limited experience, when lining, it is always good to have the down stream stem heavy( Bow light) so the up stream stem will be out of the water, just like when poling! That way you have less chances of the curent grabbing the bow and had to fight it back in the right direction!!
 
Thank you all for the feedback. Consensus seems to be that this spot is almost certainly too low. I'm going to re-check the positioning on this, though It should be a couple of inches above designed, loaded, 4" waterline already. I'm definitely starting to agree that it's too far back, though.

Like Alan Gage, I'm not going to have hardware for bridles or even just a line that far up front, carry handles will be the decks.

Jim Dodd Definitely don't want a gurgle under normal paddling! I agree that watertight is important. What I intended is more like what wysedav did on his freedom 17, but with the copper for wear protection.... Let's see if I can borrow his photos...

fetch?id=31358&d=1434294635&type=full.jpeg fetch?id=31357&d=1434294622&type=full.jpeg

Seal really well on all surfaces of that block.

Should be able to finalize that Monday, and also hopefully put together the bulkheads and seat frames. I'm at the point where I really need to start putting the trim together, so that it can just be installed when the hull is ready. (close!)
 
Like everyone here I just read a lot, I definitely didn't invent it. I probably saw it on a kayak forum at some point. I was into them for a few years until I went on a few camping trips and how hard they se to pack.

Nice to see someone reading the old posts and getting use from them. I always wonder if it's any value to do it.
 
Oh, I find tremendous value from this forum, and a few others too. It's like having a super handyman in your pocket, who used to work for every kind of boss, in every kind of project. Lots of different methods come to light as well as the whys to do one method versus a different one on any given circumstance! Thanks to all who contribute!

Jason
 
Well, this week had success, D'oh moments, and some concerns.

First: Homemade Peel Ply: can you find the patch? I'll call this a success!
100_4080.JPG 100_4078.JPG

This one, less so. I missed an entire bubble right where I patched. And the one near the gunwale apparently was not feathered well enough. Get the sander out and try again. :/

Did some re-measuring on where the painter line will go. Please ignore the smudged one, it was never going there. The middle one is what I had posted last week.Up near the tip, almost lost in the glare is much closer to right.
100_4082.JPG 100_4083.JPG

End on to hopefully help with perspective. Do you see the marks up on the end? I'm going with the center of the next strip down. This will be 5" above the 4" waterline, which would be the fully loaded point for me. Those strips are following the curve of the knuckle, so they gain quite a lot of height near the stems. Sorry about the poor lighting. My camera does not cope well with high contrast/spotlit situations.

I did not get the blocks set due to time constraints, but they are fitted.

Also roughed up the bulkheads for the float chambers. For some reason, the forum software claims certain image files are corrupted, and apparently the bulkhead blanks is one of them.
 
When I have several things that have similar priority, I kind of get like the dogs from "Up:" Working on something.<Squirrel>Working one something else...

I couldn't find Walnut dowels in my area, so I made a jig: Just spin the blank up with a drill, and you're good to go. After cutting to length, I think they turned out well. I can upload a plan of the jig if anyone is interested.
100_4056.JPG 100_4085.JPG

These are for the seats. Just a physical Key point, as I am not to happy about any kind of glue in end grain.
100_4086.JPG 100_4087.JPG 100_4089.JPG 100_4088.JPG 100_4094.JPG

Yes, The third one is from a different joint. I took pics out of order. Sand the pins back when set.

This is where something that concerned me happened. The seat frame Pieces are a laminate, with epoxy and Cabosil as the glue. When drilling the pilots for the dowels, I had two of these joints fail partway back. I do think I hit them with the edge of the drill bit. (brad point) Both were at the interface of the cedar portion and the maple surface, both were face-on-face joints. Both were in the curved portion of the laminate that had been hot-bent. I hope that it was just a couple of joints that had ended up resin starved, but that could be a warning of other issues. I am planning on making sure that the entire construction gets a generous soak-in of resin, so any micro-voids in the joints should wick resin and self-fill. If that is what happened.

Has anyone else had a face-grain, wood on wood epoxy joint fail? How would you go about troubleshooting?
 

Attachments

  • 100_4094.JPG
    100_4094.JPG
    298.8 KB · Views: 0
Back
Top