• Happy National Limerick Day! 🅰️🅰️🅱️🅱️🅰️

Cedar Strip Build "The Experiment"

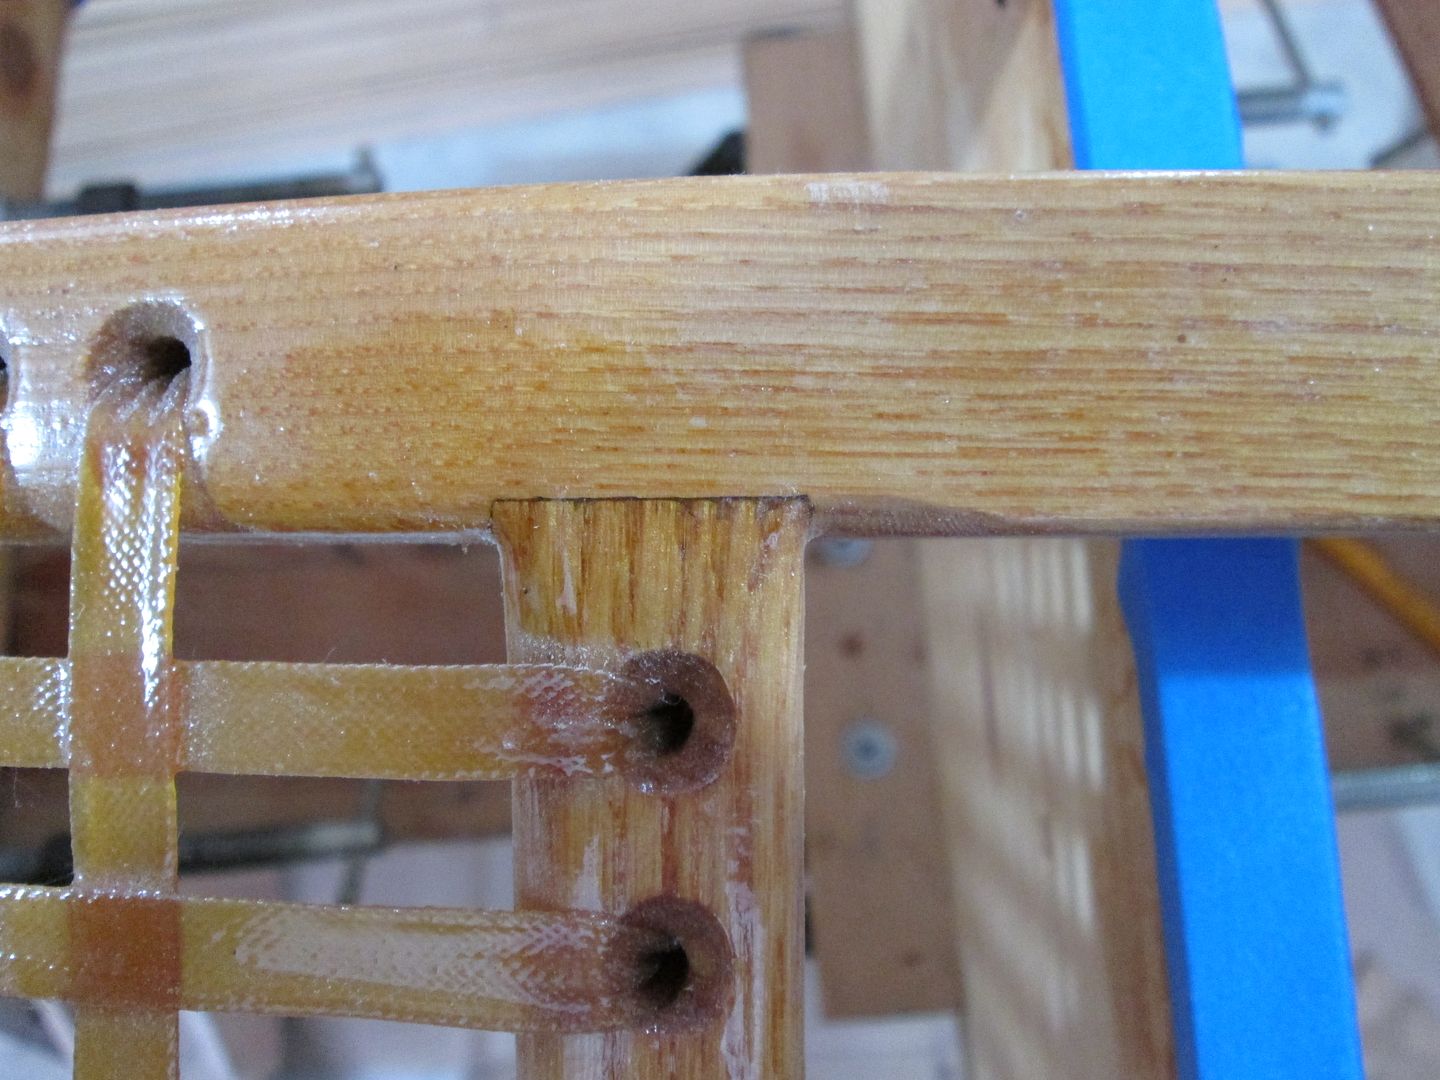
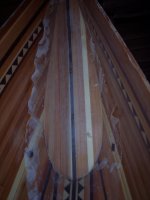
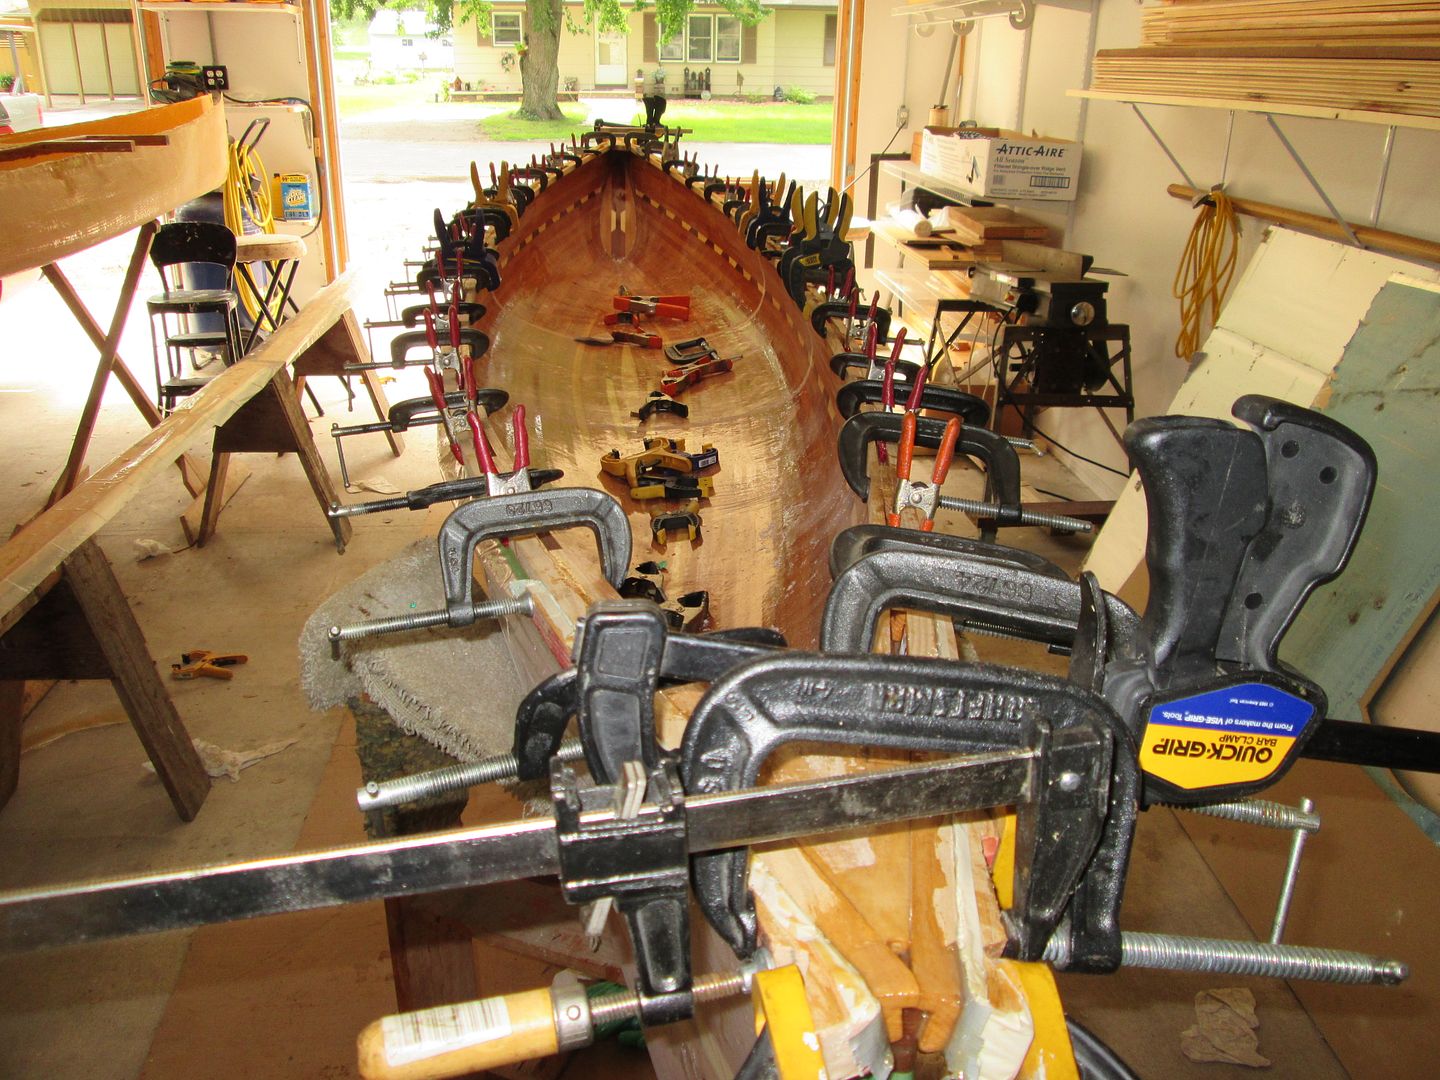
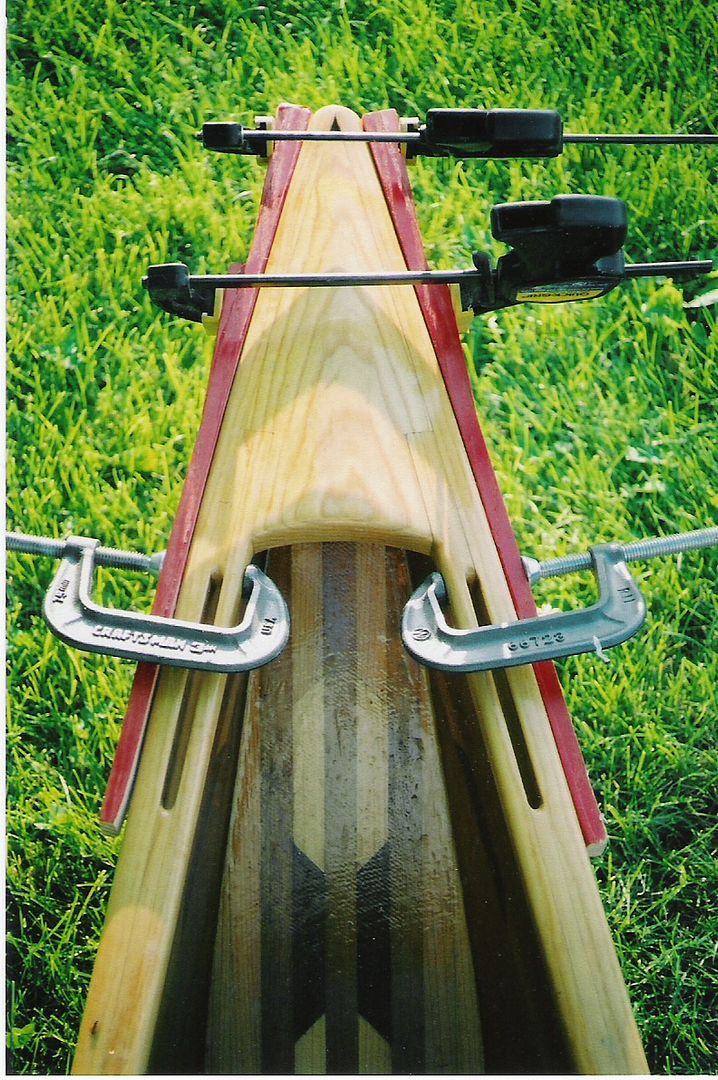
Also: Another mystery project for you all.
100_4093.JPG 100_4090.JPG

Anyone care to guess where this is going?

This technique is best done using a Radial Arm Saw. Looks something like this:
100_4092.JPG

The blade is pulled out, lowered until it will just take a bite out of the wood, and pushed back. Raised just enough to clear the surface, and the process is repeated until you reach the depth you are after. The angle of the blade could be calculated, but it's simpler and faster to experiment on scrap.

I normally figure that safety is the user's business, but just in case anyone is tempted to try this out for their projects, I feel like I need to say the following:

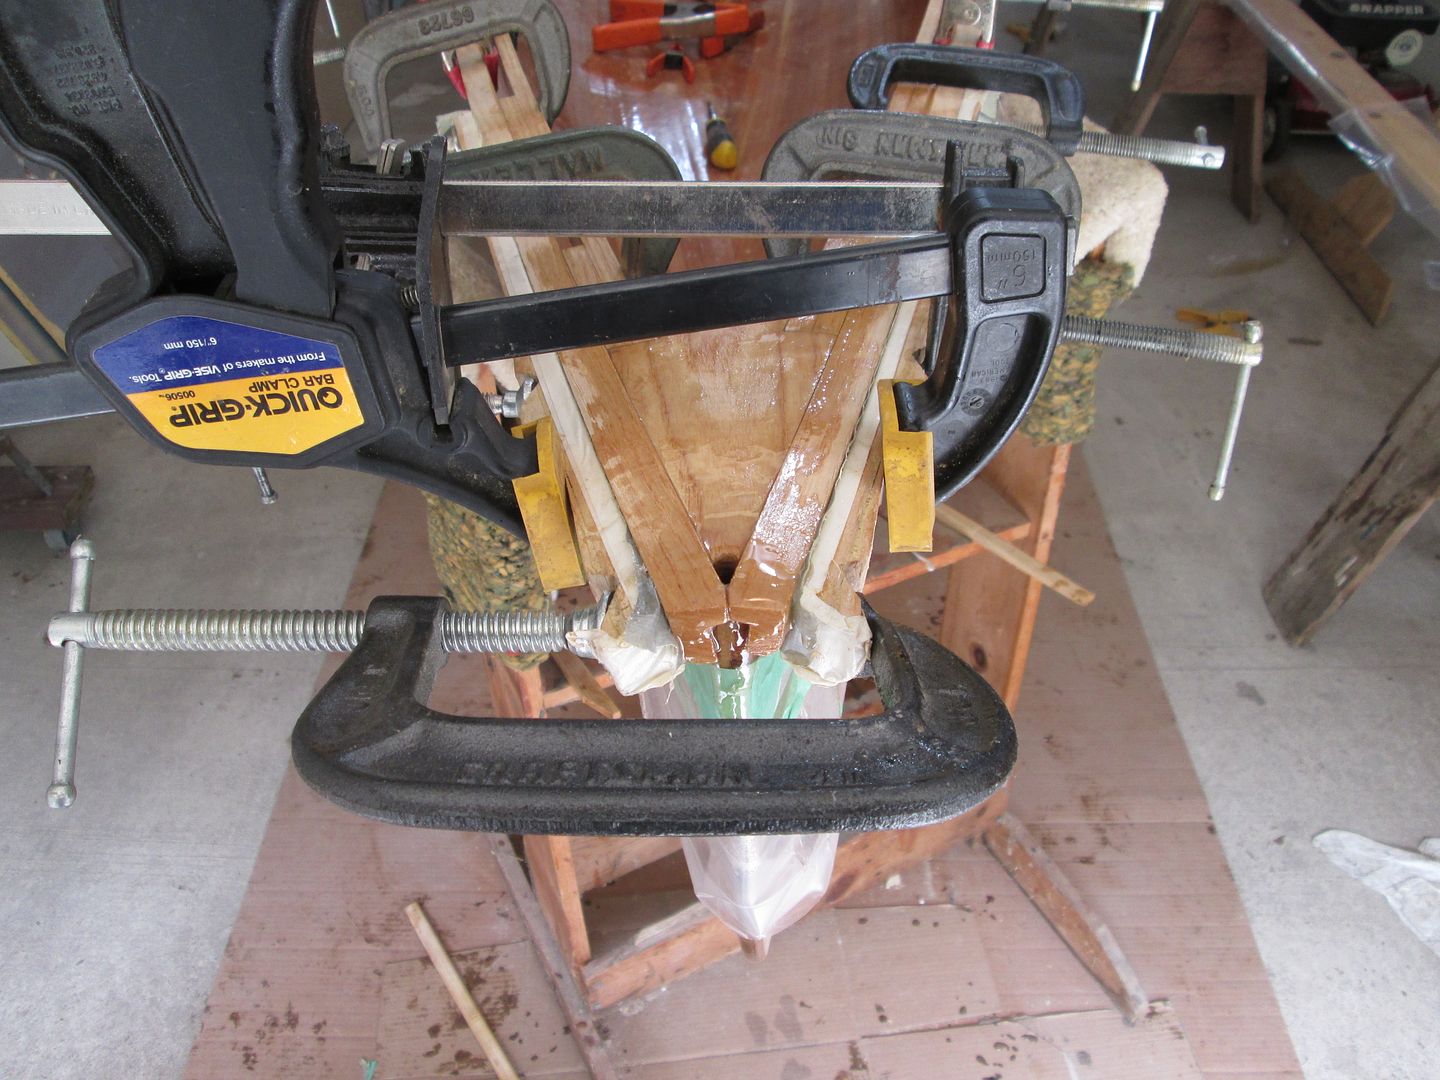
- Clamps for the workpiece are not optional - this saw could throw the entire board across the room without half trying, and the loads on the blade are at unusual angles. Your normal tool sense does not operate in this zone.
- The rotation of the blade is always into the cut. No climb cuts here! They could blow up the blade.

If you do these two things, this operation is safer than many things people do regularly with a table saw or miter saw.

If you do not have access to a Radial Arm Saw, a tablesaw can be used. It takes some sturdy, precise jigs to make it reasonably safe, especially for crosscuts. Please do some research. The little direct drive 'mini' tablesaws have, I've heard, had issues with this sort of thing. People have seized up their drive bearings. The tables are not really large enough to support this, either.

If you do not have a tablesaw, either, Please seek the assistance of someone who does, or look into another method. The thought of someone attempting this with a skilsaw makes me cringe. If I seem to be panicking about this, please check Steve In Idaho's recent thread here in the construction forum: http://www.canoetripping.net/forums...3192-i-think-i-ll-just-put-this-here-gruesome
 
Has anyone else had a face-grain, wood on wood epoxy joint fail? How would you go about troubleshooting?

I notch my seat frames, and have not had any problems. I'm at 225#
A pic.
IMG_0109_zpsmoqbjk92.jpg


It doesn't take a lot of inletting, to make a strong joint.

Jim
 
Try painting on a seal coat first. After that cures the epoxy will stay in the joint rather than being sucked up into the end grain.

Jason
 
Canotrouge Mihun09 Got it. Canot has the way I'd pronounce the word, Mihun has the way I'd spell it. Have you two seen this done before?

latremorej thanks for the thought. That's not the kind of failure I was discussing. A couple of the existing lamination glue lines failed. I later got to examine them a little closer, and it seems that they were definitely resin starved. They were some of the first epoxy glue joints that I had done, and I either clamped too hard, didn't apply enough, or, just perhaps, not enough cabosil, and the mix flowed out of the glue line. That's all fixed now, and the actual seat joints aren't going anywhere.

100_4095.JPG 100_4099.JPG 100_4106.JPG

Painter block epoxied in and starting to drill. Cabosil seems to stay milky when mixed with Silvertip resin (thicker, laminating resin) But that does not seem to be a problem when the result is to be hidden.

100_4111.JPG

The copper lining in place.This side is a little mis-aligned, but I'll be able to fix that. Sorry about the lighting, this was mostly flash. I'm going to allow the copper to age naturally, rather than seal in that fresh, bright face. I like natural copper patina.

More photos later.
 
Well, I was not terribly nervous, but I did make sure that the holes were drilled before I put the bulkheads in place.

100_4101.JPG 100_4102.JPG 100_4108.JPG

100_4109.JPG

Fairly self explanatory, I think. Made sure that the epoxy filet had set to green stage and cleaned up the face before laying glass. My "Peel Ply" does not like these curves, and the shears that I use for glass and am willing to get epoxy can't cut it, so darts were out. The actual glass laid flat. I'll have to wait till Monday to see how this turned out.

100_4100.JPG 100_4105.JPG

The cove plank cut up for gunwales. Since the last series of pictures, I broadened the cove. It was 4" with 4" lands. It's now 4 3/4" with 3 1/4" lands. I put a 1/4" round over on the edges of the inside of the coves, for smoother lacing and handling. If the bridging seems thin, it is - about 1/4" - there is more to it yet. Sanded the top and bottom for saw marks. Built a jig for cutting scarfs. Now, I'm calibrating so that the arches line up. Still a work in progress.
 

Attachments

  • 100_4109.JPG
    100_4109.JPG
    212 KB · Views: 0
Last edited:
I have not seen it done but they looked like scuppers to me. If I tried it that way I would cut a hand off. I do mine by marking where I want them and making multiple passes through the router to the depth I want. That always finishes the inside ends round. After sanding the entire rails I round over the top and bottom with a dowel wrapped with sandpaper which is attached with double sided tape. A bit time consuming but it works for me. I could run the scuppers through the router again to do the round over but fear making an error and having to start again. I just take the edge off for lashing loads really.

The method of cutting separate blocks and gluing them up looks too tedious for me and would still require the inside to be rounded over to eliminate the square ends.

There is no best way, only the best ways that work for each of us.

Karin
 
latremorej Thanks! I'm just an amateur, but I try. Sorry for skipping a week, things got busy.

The bulkhead/float chambers turned out well.
100_4132.JPG

Now, the inside of the hull needs a through sanding, and maybe another skimcoat. RO is down, the backer got accidentally used for a couple of minutes without sandpaper. It holds well enough on a flat, but forget using the interface pad. Replacements are at the Post office, but with weird hours, I have not been able to retrieve them yet.

Scarfs on the inwales went well, I used the tablesaw jig that someone posted recently. The cove cutting process apparently left some mismatched coves, or my rather rough and ready way of smoothing off the blade marks had more effect than I anticipated, as all of these joints needed a little massaging to match each other.
100_4140.JPG 100_4141.JPG

Outwales are maple. This is the one place where I'm not regretting using it in the canoe. As always, I don't have full length pieces.

It seemed best to avoid running narrow pieces through various machines, including a router table. I therefore did things this way:

Cut a series of dados at appropriate separation. Route a round over on the accessible edge, and then slice the piece of the full width stock and repeat. Result: matching thin pieces, machined with the safety of handling wider, stable stock.
100_4150.JPG 100_4154.JPG 100_4156.JPG 100_4158.JPG


I'm also adding a 1/4" strip of cherry to the inside of the gunwale. Example below, but I'll be rounding the cherry over.

100_4171.JPG

Next post will discuss the thing you see in the background....
 
I was in the mood to finish something, so I turned some attention to the seats:

The frames that I had glued up got themselves an all-over resin sealcoat. This was sanded to a nice, even surface, though later I noted that I had missed some overflow from the various cabosil-thickened squeeze outs. I'm using SystemThree's WR-LPU. I know that some on the forum had a poor experience with it last year, but I had already purchased, and I'm going over the top of the matching resin, as intended. I got to apply three coats of crosslinked LPU in less than two hours, including a scuff sand between coats 2 and 3. (I'd gotten a little too eager with amounts) and under the prevailing conditions, could probably have done it even faster. I was able to take them back in my vehicle shortly after with no tackyness or smear, They will soon be laced. (At my apartment, so as not to cut into my limited shop time)

100_4164.JPG 100_4168.JPG 100_4169.JPG 100_4170.JPG

Part of my mounting hardware needs to be strong in several directions. I decided to make some hardwood ply. The raw stock mostly came off the scrap pile, so I was not at all sorry to see it cut up into tidbits.
100_4128.JPG 100_4130.JPG 100_4131.JPG 100_4142.JPG

I also made use of the really thin Maple I prepped a while back. I honestly wish I had used Cherry for this, as I think it would take a bend better. These are being laminated up, thin maple and feathered pieces of cedar for thickness in the straight: sequence 2 Maple, Cedar, 2 Maple, Cedar, 2 Maple.

100_4136.JPG 100_4146.JPG 100_4149.JPG

Their Purpose is to be a sliding rail for the seat mount, and the curve over is to allow them to be mounted parallel, with no extraneous bits on the gunwale mount. I've ordered threaded inserts for the mounting points. The first one came out rather ugly, but I've been experimenting with layup order, and the rest are getting better.

100_4160.JPG 100_4161.JPG

This brings me to the two opinion points in this stage:

The layup of these slide rails is 3/8" of maple, with another 1/2" of cedar as spacers. (think webing of an I-Beam) Any reason to think this will not be sufficient? The loaded span is ~32" end to end. I'm tempted to add another cedar spacer and two strips of Cherry just for good measure, but not sure it's worth the effort.

I put the inner gunwale together as I did so that I could laminate another, feathered 1/4" strip between the walnut and the cherry at each attachment point, just to add a little more meat at the loaded places w/o thickening up the entire assembly. walnut is 5/8" wide, 1/4" for the cherry. The threaded inserts are 1/2" at the outside of the knife threads, nominal pilot hole is 12MM (~3/8") x 1/2" deep. Has anyone used threaded inserts at minimal clearances? That extra 1/4" might be rather handy.

Any thoughts appreciated.
 
Got some more done on various parts of the gunwales, etc. I scarfed the outwales, but forgot to take pictures. More layup on the bent laminated rails, which is taking the most time at this point.

I decided, after some careful measuring, that the thickness of the inwales will be sufficient with just one strip of Cherry at the hard points, So I started on that with leftover epoxy from other projects.

I did get to lay out the parts that will be made with those chunks of Cherry ply.

100_4176.JPG 100_4177.JPG 100_4179.JPG

A lot of the visible lines, including the arcs, are for layout only. The middle is a test fit, the nut is placed in a hole and will be epoxied in place. These are the bolts that run through the swivel fittings in the seats. I'll loctite the threads, blue stuff, so I can remove later, but they won't work out on their own. The ply stock is a total of 1/2" thick, and the blind holes are about 3/8" deep. Some of the holes are on the back, so I transferred their centers using a 1/16" bit drilled through. I have not had a chance to cut these out yet...

I also laid up the blanks for my end decks.
100_4172.JPG 100_4180crop.jpg

Cherry and Walnut, when done these will have a notch to overlap the ends of the Walnut inwales, by about 2" These fit so well, that I just set them on edge until the epoxy gelled. No clamping required.
 
I'm thinking that I'll have most, if not all, of the build done tomorrow. Then, once the last of the resin is set, finish on Wednesday? LPU dries fast enough That I can get all the coats on in one session, then it just needs to harden up. (a week for full hard, according to the can)

100_4199.JPG 100_4208.JPG 100_4206.JPG 100_4209.JPG

I finally found a sensible way to lock down the laminated twists. Cherry trim on the inwales, now ready to be cleaned up and attached to the hull. The decks are fitting very nicely. There are some jobs that you just can't beat a hand plane for.

100_4201.JPG 100_4202.JPG

This is what came from that plywood. These two brackets (?) will pivot around the central holes. The seats will mount on the far side, in the holes that center on the pinpricks. Two positions, up and down. The brackets will brace on each other to be stable in either location.
The one part that I need to fabricate from scratch is the slide block arrangement, which will run on the rails, and which these contraptions will mount on.
 
And speaking of the seats, I've got one frame webbed to an extent.

100_4185.JPG 100_4189.JPG 100_4192.JPG

This stuff is just some cheap, 550 paracord. Not even the mil-spec stuff. The end was secured with a tiny bowline, and the line from the next run looped through it. Snugged up good, this was already a fairly comfortable support. Weave the next batch through, of course.

100_4194.JPG 100_4193.JPG

looks fairly respectable, when all is tightened. I was intending to run a few diagonal lines, total of five, just the full lengths filling corner to corner. What's in the picture was just some experimental slack line, but I could not figure out a weaving pattern that would stay consistent down the entire diagonal. This looks like a mess to me, so I have abandoned the diagonals for now. If anyone has an idea of how they should be woven, please let me know.

I'm leaving the long tail on the cord for now, so if the line 'settles in' at all and goes slack, I can have the leverage to snug it up.
 
From my experience, I wouldn't varnish tightly woven cord. I use nylon snow shoe cord, and the varnish shrinks the cord and makes it very ridged. Like sitting on stretched wire cable.

I leave mine slightly loose, to allow for the shrinkage, and it works.

I realize you are using para cord, so it might be different. Just a thought.

You have made a nice looking project out of this canoe ! Great !
 
Jim Dodd Thanks for the thought. I have no intention of varnishing the seat strands at all - I want them flexible. The seat frames were varnished before the webbing was strung.

100_4226.JPG 100_4227.JPG

The fully laminated inwale being fitted. Yes, I put in wood screws. I view them as a permanently installed clamp, rather than much strength in their own right. Before I could do a permanent install with epoxy, I needed to do some final fitting:

100_4230.JPG 100_4231.JPG 100_4233.JPG 100_4234.JPG

I needed to know exactly where the seat rails should be mounted, so I clamped everything, and marked positions. I didn't want to run bolt through the gunwale, so I went with threaded inserts. Much cheaper than I anticipated, and the drill press jig was great to keep things aligned. No power of wrench needed, they turned in easily with hand pressure. They came out nice, with a little epoxy in the threads to increase holding power.

With the inwales installed for good, I turned to the last step before fitting the outwales:

100_4235.JPG 100_4236.JPG 100_4237.JPG

The deck was to be fit to the ends of the inwale. It will double as a carry thwart, so the dado was cut to give a grip point. Once everything was cut, the edges of the crescent and the grip dado were rounded. The deck is fitted, and epoxied. Not yet sanded to match the slight negative dihedral on the inwale surfaces, and the holes will definitely contain wood screws.

100_4239.JPG 100_4240.JPG 100_4241.JPG 100_4243.JPG

The outwales needed to be trimmed. The gap is the result of the ends not being held into the curve. I do love my walnut pins... In the last, the very tip is not clamped yet. The point of the outwale will be rounded off, but provide a handy gripping point while installing.

100_4242.JPG

Miniature disaster, minor catastrophy.... Guess who miscalculated and ran out of resin? At least, I got everything done evenly on both sides...

Need to obtain more resin. I'm only able to get 12oz kits of my preferred clearcoat from a local supplier, and they will only have one in stock. That being the case, I think I'm going to get some t-88 for the rest of the glue projects, and save the small batch of clearcoat for coating, and glassing the paddle(s) I'm working on. If anyone has thoughts on other alternatives, I'm all ears. Need to finish the outwales, and then have some other epoxy jobs that will be fairly structural.
 
I have never run out of resin, and always have enough left over to give me reason to build another canoe !
RAKA has been my supplier for the past 8 canoes. Good service, quality. and price.
Express composites is unbeatable for quick shipping, as well as service, heck price too. I can order one day, and have it the next, where I live.


Are you capping the shear strip ?
 
Have you ever used Dragons Teeth, for clamping the outwhale at the deck?
It's sticks with wedges that provide a nonslip point for clamping.

Not the best pic.


IMG_0434_zpsvub9v3jd.jpg


IMG_0438_zps28668ca3.jpg


Here's a better pic. The red is the Dragons tooth clamping fixture. Of course, it's taped to prevent permanent gluing to the outwhale !
scan0004_zps9c0a3c1f.jpg


Jim
 
You're doing very nice work. The decks look great. I look forward to seeing this one done and on the water.
Running out of resin in the middle of gluing outwales must have been a bit of a panic attack. Like Jim I always keep quite a bit of resin on hand because I know there's always another boat to build shortly. Once I ran out of resin because it took me two days to figure out where I stashed the extra gallon I'd ordered. I convinced myself I must not have ordered it after all and then I stumbled across it the next day.

I like Jim's dragon teeth. Nice solution the problem of clamping on angles.

Alan
 
Back
Top