• Happy National Audubon Day! 🐣🐦🦅🕊️

Carbon / Kevlar BLACK Pearl

We do 3 layers, one right after the other. Seems t be working out well.

Thanks ! I'm a one man operation. I should enlist my Wife's help !

The type of resin I use, RAKA, may have a shorter pot life, than what you are using ! Can I ask what resin you are using ?

. The first time I tried putting an extra layer of 6 oz E-glass over the football, I distorted the weave a bit. Maybe if I do it right after I coat the hull, I can get by !

Now I guess I'll have to build another ! :rolleyes:

Thanks Gene !

Jim
 
looks dang good.

On the 6580 that weave is a bit too dense for contact layup, Better suited for infusion. 6533 would have been a better choice there.

I work alone as well, really stressful doing a full layup against the cure clock.

I've tried successive layups too, but you really need to time it just right otherwise if the under coat is too tacky its hard to move the new cloth around without pulling yarns and creating wrinkles etc. Working a full hull without extra hands is pia for sure.
 
Thanks Eric ! I'll check into the 6533 !

I'm really a beginner at this, and can use all the Help I can get !

I would love to pull this hull off, and set it aside and start another ! But My Pocket book says No ! So I'll have to keep going ! As of now, I have these Two canoes to finish !

Jim
 
np Jim, that 6580 is tough small bubbles be danged, you have a lot of stored energy in that lamination. :)

I should have pointed out too that warming some low viscosity epoxy and applying a generous coat on the hull before laying the 6580 over it will work better. But when warming the epoxy its obviously going off faster so you have to use slow cure hardener and work faster and in smaller sections at a time with a strategy to squeegee out the excess in time too. Working solo this can be a little intense until you've done it a few times and have a better sense for the area size you can work effectively given the amount of epoxy you blended up.

The fact that you;re doing a partial wet out with the kevlar you obviously understand its ok if you don't coat the entire fabric in one pass. Just mix another small batch of epoxy and do the next adjacent section, repeat until finished. Mostly mentioning this for those keeping score at home... :)

I also totally agree with your assessment of just using kevlar without the carbon. I mentioned that briefly in my northwind intro diatribe too. With strip builds you don't need the stiffness that carbon contributes. The cored structure of the glass skins on each side of the wood is more than stiff enough for this application. Kevlar is light, plenty stiff and more stable when impacted and very hard to puncture in typical canoe use.

I ended up using the carbon on my NorthWind as a compromise between cosmetics and durability over the alternative high build epoxy primer and a catalyzed urethane top coat over the Kevlar at the expense of an extra 7-8lbs of hull weight. For my purposes the extra skin durability was far more important than weight. In my area I have almost no need to portage in the tradition sense. Portaging to me is taking the canoe on and off the roof rack and carrying it to the water and back, which is generally less than 10 yards each way. :) I doubt I'll bother using carbon in this manner on any future strip builds, except maybe a powered skiff, which is next on my list after the NorthWind is done. Otherwise, kevlar and some s-glass in the right places is probably the toughest and lightest formula, assuming you want to hide your beautiful cedar....
 
np Jim, that 6580 is tough small bubbles be danged, you have a lot of stored energy in that lamination. :)

I should have pointed out too that warming some low viscosity epoxy and applying a generous coat on the hull before laying the 6580 over it will work better. But when warming the epoxy its obviously going off faster so you have to use slow cure hardener and work faster and in smaller sections at a time with a strategy to squeegee out the excess in time too. Working solo this can be a little intense until you've done it a few times and have a better sense for the area size you can work effectively given the amount of epoxy you blended up.

The fact that you;re doing a partial wet out with the kevlar you obviously understand its ok if you don't coat the entire fabric in one pass. Just mix another small batch of epoxy and do the next adjacent section, repeat until finished. Mostly mentioning this for those keeping score at home... :)
...
Indeed. I am and this has been a very instructive thread.

That satin weave sure looks great, even if it's hard to pull off without bagging. A weekend warrior like me should probably stick to plain 6522/6533.
 
Indeed. I am and this has been a very instructive thread.

That satin weave sure looks great, even if it's hard to pull off without bagging. A weekend warrior like me should probably stick to plain 6522/6533.

Yes I think 6533, would have been a much better choice !!!
I didn't have a problem Wetting the Carbon. I might have got by with a fill coat, or do as Gene suggested, lay the S-glass while the Carbon was still wet !

Oh to go back a few days ! !

Jim
 
Last edited:
Thanks ! I'm a one man operation. I should enlist my Wife's help !

The type of resin I use, RAKA, may have a shorter pot life, than what you are using ! Can I ask what resin you are using ?

. The first time I tried putting an extra layer of 6 oz E-glass over the football, I distorted the weave a bit. Maybe if I do it right after I coat the hull, I can get by !

Now I guess I'll have to build another ! :rolleyes:

Thanks Gene !

Jim

Jim,

We use a vinyl ester and mix it at about 25 minutes of pot time. We do half the hull at a time and use 2 batches for each side. Always mixing the 2nd batch with a slightly longer pot time to make sure it doesn't kick faster otherwise the batch under it might never fully cure.
 
Jim,

We use a vinyl ester and mix it at about 25 minutes of pot time. We do half the hull at a time and use 2 batches for each side. Always mixing the 2nd batch with a slightly longer pot time to make sure it doesn't kick faster otherwise the batch under it might never fully cure.

I think if I had another experienced hand ! Like Alan Gage around, I could have done things different ! I can see how you would save resin, doing it your way !

I'm pretty pleased with everything ! Tilting the strongback,and clamping the tumblehome with the paint edging ! I will do that again.

Today, I trimmed the excess material at the shear, and couldn't resist lifting the hull, a little. Black Pearl is Loose ! I will leave her on the mold a couple of weeks, and then sand Her . One Plus of the S-glass, I have a very smooth surface to sand, probably start with 120 grit.

I want to Thank James Moran for inspiring me to build these composites ! And All the others here on this site for their Help !.

If I had more cloth, and resin. I'd do another, after I pull Black Pearl !

Lastly, I really like the looks of the Twill weave of the Carbon Fiber !

Jim
 
Last edited:
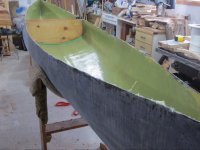
Black Pearl is off the back of Pearl.
Gave the resin plenty of time to cure, and no gumming of the paper !

Yesterday, I spent a little over an hour sanding Black Pearl. Two, 180 grit H&L discs, was all I needed. The tight weave of the S-glass, made it possible to get by with with such a fine grit, and short sanding time. I didn't weigh it, but it is light .

I'm always nervous when I pull, a hull off the male mold ! It came off easy,

It looked Good, but I have a few things to tend to.
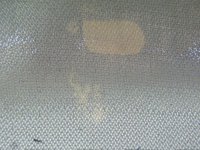
A few spots, where I didn't get the Carbon wet out enough. Planning to try and inject mixed resin in these spots.
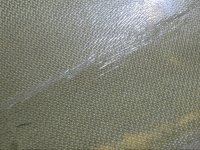
Also a few resin ridges, caused by wrinkles in the Heat shrink film. I expected these, and they are really not a problem. They scrape easily with an old paring knife !

All in all , I'm happy with the weight and stiffness .

A few pics

IMG_2220_zps6nbvnfot.jpg - Click image for larger version  Name:	IMG_2220_zps6nbvnfot.jpg Views:	1 Size:	199.3 KB ID:	78051


IMG_2220_zps6nbvnfot.jpg - Click image for larger version  Name:	IMG_2220_zps6nbvnfot.jpg Views:	1 Size:	199.3 KB ID:	78051
 
Last edited:
Working on seats at the shop today, and decided to put BP on the scale. Digital fish scale said 15# Oh would it be nice to keep it there !

Need to find out how much Stripperguys Kite weighed.

Jim
 
Jim,
I can't recall the weights at specific points in the build, but I'm pretty sure I posted that data in the thread as I went along.
I do remember that the bare, untrimmed, open stemmed hull was 16.5 lbs.
Final weight was a disappointing 25 lbs...I would not recommend using bias woven 13 oz carbon cloth for the gunnels. Two layers of 4 oz glass would be just as effective, without the massive (relatively) weight of the resin. The foam substrate is a no brainer.

Edit:
I just went back and reread my carbon copy thread...funny how memory bends to accommodate desires. Actual final weight was 28 lbs.
 
Last edited:
Thanks !
I searched your thread. Our weights may differ, depending on what is added to the hull, at the time. Wouldn't a 15# 16' canoe be cool ?

B Pearl so far is lighter than Vader, at this point, and similar in stiffness. I believe the S-glass is responsible for that.
Well and Vader was 6" longer, and wider.

Thanks again !

Jim
 
WOW ! I can't believe it's been this long since I posted anything on this build, but here goes !

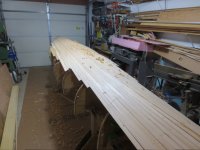
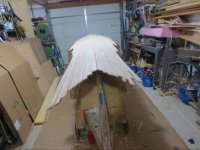
Blacky has been patient ! Finished stripping the WRC insert from 1/8" strips. I'm really impressed with how uniform those thin strips come out of a Skilsaw set up !

Planed the the hull side of the insert, now I'm waiting for the 30 degree weather that's been Promised. That will give me a chance to wheel it outside for a rough sanding.

Stripping this insert on the Pearl forms should match the hull shape, pretty close.

Next it will be trimmed up to where the bilge just starts to rise.

A few picks so far.

IMG_2622_zpsgmskxg1q.jpg

IMG_2631_zpsx1d94ygh.jpg

IMG_2634_zpsijxskta4.jpg

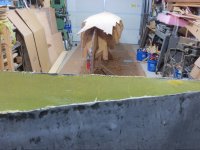
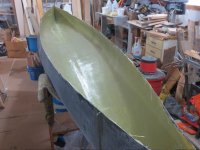
and a shot of Blacky as it's sat for a long time !

IMG_2632_zpslvmue2gl.jpg

Jim
 
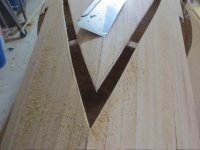
Was able to spend a little time down at the shop, and started working the 1/8" Cedar insert.

Removed the excess glue, and took down any ridges with a small Block plane. Then rolled the strongback and insert outside, for a quick sanding with 50 grit.
Back inside, I laid out a batten, on the insert, where I would trim at.
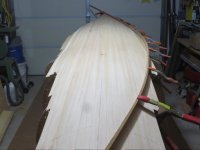

IMG_2641_zpsamuv72yq.jpg - Click image for larger version  Name:	IMG_2641_zpsamuv72yq.jpg Views:	1 Size:	113.8 KB ID:	86389

dusted off my old Japanese pull saw, and went to work.
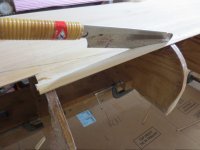
IMG_2648_zpsbdobuttj.jpg - Click image for larger version  Name:	IMG_2648_zpsbdobuttj.jpg Views:	1 Size:	116.1 KB ID:	86390

IMG_2649_zpsyrtmekcb.jpg - Click image for larger version  Name:	IMG_2649_zpsyrtmekcb.jpg Views:	1 Size:	141.2 KB ID:	86391

Trimmed with an old Razor plane. The new ones aren't as good, but I love this old one ! I trim nearly all my football strips with this little plane. !
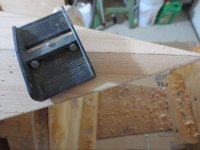
IMG_2652_zpsiioj4nh1.jpg - Click image for larger version  Name:	IMG_2652_zpsiioj4nh1.jpg Views:	1 Size:	128.1 KB ID:	86392

After trimming was complete, I dug out three scales The Digital conferred with one other, and the insert weighed in at 4 lbs 3 oz.

I hope Stripperguy is still around, and maybe comment of the weight difference between the foam he used on his Kite !

I figure I will shave a 1/4 lb off the insert after it is glued in place, scraping and sanding.

Then it was time to lay the insert in the hull. It fit like a glove ! Using my forms to make the insert was the secret !
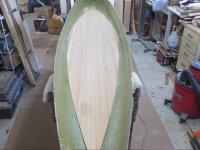
IMG_2656_zpssd7gnpi0.jpg - Click image for larger version  Name:	IMG_2656_zpssd7gnpi0.jpg Views:	1 Size:	154.5 KB ID:	86393
Next step I'll close the ends, and epoxy the insert to the hull.

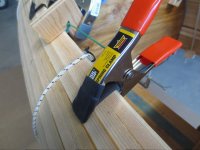
I just want say that working with 1/8" strips was easy ! No beveling, or bead and cove, just edge glue ! Yes I used staples on the forms, but just the modified Spring clamps to hold the strips tight together !
IMG_2641_zpsamuv72yq.jpg - Click image for larger version  Name:	IMG_2641_zpsamuv72yq.jpg Views:	1 Size:	113.8 KB ID:	86389

I may even attempt a 1/8" strip build someday ! An easy hull design to strip up might be in line !

More later !

Jim
 
Last edited:
I'm still here Jim, but I'm in BC skiing mode...Just now trying to remember about the Divinycell.
Let's see...it was H80, 1/8 thick and 5 lbs/cu ft. So a piece that's 30" wide (I'm not deducting for any tapering near the stems) and what? Uhmm, 13 ft long? That would be 0.388 cu ft and/or 1.69 lbs.
But remember, I assumed a full rectangular piece for simplicity. Actual weight of a shaped stiffener could be about 1/4 less...maybe around 1.2 lbs?
It's tough to overcome that density differential 5 lbs/ft^3 vs 22 lbs/ft^3 (foam vs western red cedar)
Just think how light a fully foam cored canoe can be!
My only issue is that I'm still homeless, with no dedicated work space, and I know some of you guys will build it first!
 
Thanks ! That is close enough for me !

Well I'm going to HAVE to Build with some Divinycell !

Thanks for your insight again !!

Jim
 
Jim, I follow these build threads with great interest. Even as a non-builder I continue to pick up tips and tricks and tools that I have incorporated into repairs.

I am certain that I will never build a canoe (or kayak) of any sort, from scratch or from kit, but I enjoy the vicarious ride. But:


My inner Felix Unger has the urge to drive to Iowa and tidy up your shop, but then I realize that is pretty much what most stripper’s places look like.

That shop condition alone is cause enough to keep me from ever building a boat. I still have the willies; think I’ll go clean mine.

(Actually I have some shavings and dust to make, best do that first)
​​​​​​​
 
In person Jim's shop is quite well organized, at least compared to mine. He's basically working out of a 2 stall garage but one of the bays has a truck parked in it. Often there are two boats being worked on at the same time. I'm always amazed how many tools and supplies he can fit into that space. You've got to move things out of the way to get at some of the tools but nothing is ever "buried."

I know you weren't really ragging on Jim and that Jim wouldn't be offended. Just wanted to give him props for making great use of a small space.

Alan
 
No offense taken Mike ! Even if you meant to !

Yes ! My shop is a mess and I know it ! I would Welcome you to come and help Tidy things up ! I have COLLECTED more things than I need for sure !
I guess I would rather spend the time building something than cleaning up my shop ! I really Hate to throw something away, that I could , and have found a use for !

When I drive by a a place with a neat and tidy garage with the door open, and nothing in it, There you can be sure, the Owner doesn't know how to do anything ! My Personal opinion !

While a Janitor at the local High School, years ago,I was cleaning rooms. A teacher apologized for her messy room, that I was about to sweep the floor and empty garbage. I told her "It's not a problem, that's what I got paid for !"

She then told me that she had seen on the internet, that " Messy People were more Creative ! " I analyzed her statement, and Yes ! She was an excellent Teacher, and on occasion would bring in and share the Best Home made Carmeled rolls. To date Hers were the Best Carmeled rolls I've had ! She often went beyond the call of duty for her students !

Some of the Best People I know, are Messy !

I'm trying to finish my third canoe this year.

Again no offense taken Mike ! You're always Welcome !

Jim
 
Last edited:
Back
Top