Is mounting a small fan high on the side of the cap possible? It would solve much of your rain issue and leaves the top free for canoes.
-
Happy National Sunglasses Day! ☀️🕶️😎
You are using an out of date browser. It may not display this or other websites correctly.
You should upgrade or use an alternative browser.
You should upgrade or use an alternative browser.
G
Guest
Guest
Is mounting a small fan high on the side of the cap possible? It would solve much of your rain issue and leaves the top free for canoes.
I suppose a fan vent hole could be positioned centered under where the canoe is usually racked to eliminate some rain issues, but I am not brave enough to start cutting holes in my cap.
I have enough glass and epoxy experience that I think I could make a neat and well sealed job of it, but I am leery of doing anything that might weaken the structural integrity of the fiberglass cap.
I often have two heavy RX canoes on the racks and the crossbar foot rails are molded into the cap roof, so the roof itself is bearing the weight of the boats. I am sometimes travelling rough washboard or potholed dirt roads. The idea of having 150 lbs of canoes weighed on the roof in such conditions with a roof hole cut gives me the willies.
I’d be even more leery of cutting a fan vent hole into one of the side pillars or above the windows, there is not a lot of fiberglass support structure along the sides of the cap, but there is a lot of crackable glass. With a construction-style rack, cantilevered off the bed rails around the cap those stress fracture concerns would be eliminated.
My heat discomfort in the truck bed is sometimes only for the first couple of hours, when I turn in early and the bed space is overwarm from the day’s sun and temps. I have a simple DIY screen that covers and seals the area between the cap & cab windows. Worst case scenario I could open the cab and cap windows, seal & screen that gap and blast the truck AC for a spell to blow cool air back into the cap.
If I hung the battery op fan at the window I expect I could quickly cool off the under cap space. I have not resorted to that yet, but expect I will at least try someday. Enjoying some cool dry air at least for a while until opening the side sliders for whatever breeze is available later in the cooler night.
Simple easy and effective DIY front slider window screen and seal:
Cut two pieces of split foam pipe insulation as wide as the slider window opening. Put those two pieces in place, so the split captures both cap and cab windows. Measure the distance remaining between the top and bottom split foam and cut two more pieces to that length or a tiny bit longer for a tight foam compression seal.
Cut a piece of old tent screen a couple or three inches wider than the window opening. Cut the screen height wise 5 or 6 inches taller than the window opening. Excess there doesn’t matter and can be trimmed later.
Tape the last inch or so of screen inside the split foam side pieces and tape in place. Don’t tape the top or bottom.
Stick the screen in place side to side and the slide the two loose pieces of foam into place capturing the excess screen underneath.

I have a stash of old tent screen, split foam pipe insulation and plenty of tape. Pretty much a freebie front window screen and it fits rolled up in a small ditty bag.
The screen/seal works equally well with just the cap window slid open. “Equally well”
If that was hard to follow, step by step photos:
http://s1285.photobucket.com/user/Co...?sort=2&page=1
Last edited:
G
Guest
Guest
The skeeter beaters also seemed like a winning idea until I began wondering to what I'd stick those magnets. The cap is fiberglass and I think all the lift-gate frame is aluminum.
Chip, the DIY tailgate screen I made from an old cabin wall tent is far better gap sealed than that manufactured tailgate tent. It is inconveniently but securely attached using binder clips to the fiberglass & aluminum cap and magnets to the truck body.

It is also an unzippered PITA to get into and out of and not exactly a “tent” in the rain. But I can pull it taut and it works with no bug gaps.

There is a lot more open screen on that DIY version than the tailgate tent, and it doesn’t occlude the sliding side windows. It isn’t perfect (the zippered wall tent screen door might have been better), but is airy.
More photos:
http://s1285.photobucket.com/user/CooperMcCrea/library/Truck Cap Screen Door?sort=2&page=1
So, summer is rolling around and I am still considering my options. Dithering is my downfall. Could be sweaty in the cap soon.
Same here. Everglades minivan camper Joel has a DIY’ed combination of folding solar charger panels, rechargeable battery and fan that he swears by. I want to see it and test it for a night, and then maybe order like components.
Worst case summer traveling scenario I will pay the price for a campsite with, gasp, electric service and bring a bigger, more powerful 110V fan to augment the wee 5 inch thing installed on the bedside table. Set on a side shelf or the cooler that larger fan moves a lot of air, blown along the length of my sweaty self.
OK, real worst case scenario I’ll set up the Hubba Hubba with an open fly. It is hard to convince myself to do that when there is a comfy and well appointed bed at the ready, especially if it is just an overnight stay and pre-dawn getaway. Not having to dick with taking down a sometimes dewy tent at 0 dark thirty is a boon for getting back on the road.
Fully screened at the lift/tail gate provides a huge volume of window, about as good ventilation as you are going to get with passive systems. I like the looks of it. I have some tents ready to scrap so I think I have a big enough piece of screen.
My practice in buggy areas has been to keep the cap closed until I enter for bed, and once I'm in I don't come out until I am ready to roll in the morning. So, I wouldn't be too concerned about entry and exit. However, I would not want to be binder clipping and magnet latching before I go to bed, since that would give the bugs a chance to move in while I am messing around with the screen. I'd likely want to set it up earlier, which means I'd need a way in when I was ready to sleep.
The thought of glueing zippered "leader" around the inside periphery of the gates has appeal. I could just cut the zipper off the tent, along with an inch or two of fabric to glue, and glue the fabric/zipper to the inside of the cap.
All well and good until it rains, and the rainy nights are the ones that have me wanting the fan-forced ventilation in the first place. Miuke and I are both sleeping in Leer caps, I'm guessing water enters at the corner of his raised lift gate, just as mine does. And he probably does as I do, and partly lower the lift gate when it rains so water will at least run down off the lift gate, and he has probably found, as I have, that you have to almost completely close the lift gate to avoid the intrusion of water.
I still want a forced air vent, covered so as to keep rain out. I hear Mike's concern about the roof strength, but don't think there is a lot of stress in the middle of the cap roof. I can see his point about leaving the corner "pillars" intact.
I imagine its about time for Joel to make his seasonal migration. I'd love to get a look at his electrical solutions.
At the RV store, they sell little tents that cover RV vents. I don't think it is for me and am amazed anybody would climb up on top of their RV to attach the things and then remove them before hitting the highway.
G
Guest
Guest
Picked up a used topper yesterday, now to read back through this thread for some ideas.
Nice find. Welcome to the world of portable instant bedroom. I now wish I had kept the tripping truck outfitting as a single thread under just the DIY forum.
I am not sure what all I have mentioned in sundry cap outfitting threads, curtains and shelves and storage ties down and etc for sure.
I would highly recommend climbing into the capped truck bed and looking for light leaks around the tailgate and cap door. Any gap big enough to let in light will also let in bugs.
And dust. A dust covered bed is no fun to climb into.

I have a combination of foam weather stripping and custom cut/shaped and contact cemented in place exercise flooring sealing any gap at that end. I spent an hour climbing in and out, installing foam, cutting puzzle pieces of exercise flooring, checking and rechecking. Most of those gaps were somewhere along the edges of the closed tailgate; the cap door seals well except the bottom inch on each side, and that gap was filled as well. Light freaking tight, bug and dust free.
BTW, there were bunches of manufactured “drain” holes in the Taco bed; two at the front of the bed and four at each side at the back inside compartment storage areas.
I had not noticed the storage compartment holes until Willie mentioned them; there was an inch of dust in each of them and my section of tow chain was rustier than usual. Those drain holes are useless and detrimental with a cap.10 pieces of tape solved that.
Have you cogitated a roof rack yet? One issue with a cab-height cap, especially with an extra cab truck, is that canoes with much stem recurve will not clear the cab roof unless positioned far forward.
One solution is to use construction style racks that are cantilevered off the bedrails around the outside of the cap. I had a set of WeatherGuard racks on my 90’s extracab Toyota and they were plenty tall enough for the stems to clear the extended cab roof.
Kinda like these, but all steel:
http://www.weatherguard.com/en/view/...er%20Rack/1200
The downside of that style construction rack used with a cap is that they are not coming on and off between trips easily. The upside is that even those aluminum ones are rated to 800 lbs, which would support a helluva canoe pyramid, with no weight on the fiberglass cap roof.
Lots of manufacturer’s make construction racks, and I’ve seen versions for a couple hundred bucks; I’d look for one that is height adjustable to clear the stems off the cab roof.
Edit: It is easy to DIY a removable crossbar extension for a construction rack for racking a couple of canoes gunwales down. My extensions went out to the outside edge of the side view mirrors; I figured I was unlikely to clip them on a narrow dirt road sapling, and I was probably street legal in terms of side overhang*
*I kinda wish my Taco didn’t have fancy electric adjust mirrors; I would prefer to replace them with big work truck or RV mirrors, for the extra view and another couple inches of crossbar extension.
Last edited:
G
Guest
Guest
I regret not dropping in on this thread when Mike was considering the tailgate tent since I could have saved him the trouble. I considered it, ordered it, tried it, and rejected it. It didn't fit my Taco at all well. Additionally, if it rains and you're parked with the tailgate downhill, water will roll back on the roof and get underneath.
Chip, no worries, I would have ordered it anyway, just to see firsthand if I could somehow make it work. That is two “nopes” for the tailgate tents, so caveat emptor.
I had considered the water running along the cap roof under the fly; I try to park level or slightly uphill when sleeping in the tripping truck. If the tailgate tent had worked satisfactorily I planned to contact cement a half-round baffle at the end of the cap, glued down in a ( elipse so rooftop water would run off the sides before it got to the cap door end.
Miuke and I are both sleeping in Leer caps, I'm guessing water enters at the corner of his raised lift gate, just as mine does. And he probably does as I do, and partly lower the lift gate when it rains so water will at least run down off the lift gate, and he has probably found, as I have, that you have to almost completely close the lift gate to avoid the intrusion of water.
Chiup, mostly correct. The cap lift gate drips water into the edge of the bed. Having it help in place at a downward angle helps some, but doesn’t completely resolve the issue. What has helped that cap door entry opening drippage is carrying a small squeegee. It’s a Wallyworld squeegee, 8 inch long with a folding retractable handle. If I squeegee the water off the cap door first the foot of my bed isn’t wet before I climb in. This thing:
https://www.walmart.com/ip/RainX-Co...34491&wl11=online&wl12=34653245&wl13=&veh=sem
It is really freaking handy to have your own personal squeegee. Backing up out of a site, or even in our tree-tight driveway turnaround, with a rain spattered cap window is far down my list of favorite things.
Then there is the matter of leaving the tailgate down for additional screened ventilation. If it was a dewy night my arse gets wet when I slide out in the morning. Where’s my thermos of coffee and dry pants before I hit the road? As often as not the tailgate stays closed. Plus I feel more bedded down secure and out of sight with the tailgate closed.
The most useful (compromise) cap end screen might be a fair-weather DIY that covers only the cap lift gate area, with the tailgate closed. That cap door size would accommodate a 20 x 50 inch screened window, which is a considerable size increase from the side window sliders. With the cap lift gate angled down and some custom rain baffles glued in place that might work for dewy nights and even light rain.
Put your thinking cap on for an easy install/deployed cap gate screen door design. I have some ideas.
Then we can start thinking about how to easiest prevent wind driven rain from coming in the side windows. I have some ideas there too, starting with a 40 inch wide (space between the roof rack feet) by 10 or 12 foot long tarp, run across the roof between the crossbar feet and guyed/staked out angled off the roof to the ground. No poles; I tried that method and it is too much stuff to put up/take down. Four corner grommets, four guylines and four stakes simple would be preferable, even with some breeze occlusion,
I see an 8x10 or 8x12 cheap poly tarp, cut down to 40+ inches x 10 feet with a couple grommets added to the cut edge as an initial experiment.
I do wish the ubiquitous poly tarps were not bug-blue, or heavy duty green. Are there paler shades of grey poly tarps, white or tan or some light color for heat reflection?
No Title
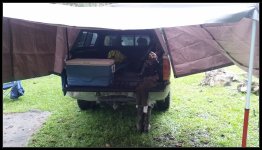
I sleep in my topper most weekends during hunting season, the first month or two being prime time for mosquito's in my region. Instead of trying to net off the entire topper space in the back and front though as some kind of bug free living quarters, which I found to be largely futile anyway, I just suspend a rectangular net, Coughlan's single wide I believe, over the bed platform and crawl under it like a princess canopy.")
I started with six velcro points contact cemented to the carpet lining the ceiling of the topper above the bed and mating ends glued and stitched to the netting corners and centers. I just tacked up the net when its time to crash. Tucking loose netting under foam mattress is plenty good seal too. But the velcro proved to be too easy to pull down while rolling around and getting adjusted on the bed. So I place 4 solid fiberglass rods at each corner of my mattress platform, pressed a foam golf ball on each end of the fiberglass rod and draped the net over that. Foam golf balls keep the net in place and from tearing through. This even works with the bed out of the topper on the ground.
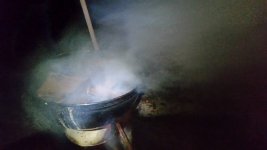
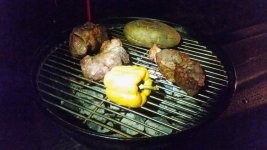
All I care about is not getting bit when I'm trying to sleep or riding out a thunderstorm. I treat the net with permethrin each season too, which helps. During the buggy season its generally pretty hot and humid, even at nights, so I have the topper ends open for better cross ventilation. I also have a 10" 12v fan for those warm nights too. Fan can reduce a horrible nights sleep to only a bad nights sleep.
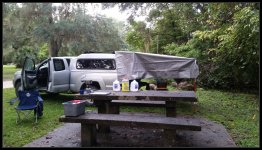
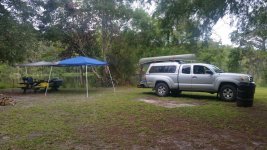
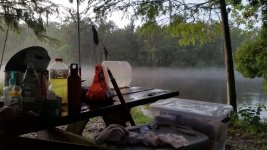
Not many elegant options for wind driven rain so I usually go full hobo on that. A few pics of my typical setups...
I sleep in my topper most weekends during hunting season, the first month or two being prime time for mosquito's in my region. Instead of trying to net off the entire topper space in the back and front though as some kind of bug free living quarters, which I found to be largely futile anyway, I just suspend a rectangular net, Coughlan's single wide I believe, over the bed platform and crawl under it like a princess canopy.
I started with six velcro points contact cemented to the carpet lining the ceiling of the topper above the bed and mating ends glued and stitched to the netting corners and centers. I just tacked up the net when its time to crash. Tucking loose netting under foam mattress is plenty good seal too. But the velcro proved to be too easy to pull down while rolling around and getting adjusted on the bed. So I place 4 solid fiberglass rods at each corner of my mattress platform, pressed a foam golf ball on each end of the fiberglass rod and draped the net over that. Foam golf balls keep the net in place and from tearing through. This even works with the bed out of the topper on the ground.
All I care about is not getting bit when I'm trying to sleep or riding out a thunderstorm. I treat the net with permethrin each season too, which helps. During the buggy season its generally pretty hot and humid, even at nights, so I have the topper ends open for better cross ventilation. I also have a 10" 12v fan for those warm nights too. Fan can reduce a horrible nights sleep to only a bad nights sleep.
Not many elegant options for wind driven rain so I usually go full hobo on that. A few pics of my typical setups...
Attachments

Put your thinking cap on for an easy install/deployed cap gate screen door design. I have some ideas.
I do wish the ubiquitous poly tarps were not bug-blue, or heavy duty green. Are there paler shades of grey poly tarps, white or tan or some light color for heat reflection?
The tailgate is an inconvenient thing to attach to because it moves and because there is a gap between the truck and the gate. So, ignore the tailgate and just attach the screening to the cap and the truck bed sides and floor. I guess velcro could be an option, especially if it sticks to your carpet lined cap. I'm thinking zippers, just like in tents. I'm thinking the zippers are sewn to some type of fabric and the fabric is somehow attached to the truck all the way around the entrance. Maybe the zipper would dangle from an inch or two of fabric. The trucker would get inside and then zip in tent screening around the perimeter of the gate openings.
Yes, the gate openings. With screen zipped in place, the trucker would not be able to access the lift gate and tail gate. So, the trucker will need to arrange the lift and tail gate before he zips in.
I have some brown tarp with silver on the back. Got it from some big box or other.
I contemplated deployable roller awnings for the side window: a tube that attaches above the screened side window, from which we could pull, window-shade style, an awning. There'd be a tent-pole sort of thing to hold the awning away from the window. It seems way too hard. But cool.
And those plan-built camper tops really are the solution. Especially for somebody like me that occasionally needs a truck. I just took off my cap to do some brush hauling. That would raise havoc with a pimped out cap. The camper comes off without disrupting the interior pimping so truckers can have their cake and use it for a truck, too.
G
Guest
Guest
The tailgate is an inconvenient thing to attach to because it moves and because there is a gap between the truck and the gate. So, ignore the tailgate and just attach the screening to the cap and the truck bed sides and floor. I guess velcro could be an option, especially if it sticks to your carpet lined cap. I'm thinking zippers, just like in tents. I'm thinking the zippers are sewn to some type of fabric and the fabric is somehow attached to the truck all the way around the entrance. Maybe the zipper would dangle from an inch or two of fabric. The trucker would get inside and then zip in tent screening around the perimeter of the gate openings.
Ah, spring, when an old man’s thoughts turn to bugs and sweaty nights.
I’m think there must be a KISS way to (permanently ?) hang no-see-um netting across just the lift door area of the cap, and sleep with the cap door open to 90 degrees, where it rests on the stern canoe overhang, and the dewy damp arse-wetting tailgate closed.
I’m thinking a screen secured furled up inside the cap roof at the lift gate, something that could be quickly released/unfurled to cover the cap door area. Open the cap, release the screen, open the tailgate, climb in, close the tailgate, tuck/fasten the screen tight along the sides. BTW, the hook side of Velcro sticks nicely to the Leer carpeted interior.
I contemplated deployable roller awnings for the side window: a tube that attaches above the screened side window, from which we could pull, window-shade style, an awning. There'd be a tent-pole sort of thing to hold the awning away from the window. It seems way too hard. But cool.
I contemplated the manufactured small RV version of as well. Pricey, and I was loath to drill even those holes in my cap. Plus with the tarp awning efforts I have tried I really didn’t like dealing with the pole issue. I’d rather any awning be pole free and quicker to set-up deploy.
Since I always have at least one boat on the roof racks my current awning thought is this; a tarp over the canoe(s), long enough to stake out /------\ angled off the sides, with a couple feet of guy line at each corner so the tarp sides are a few feet off the ground, to allow breeze in along the sides.
With the stern overhang of the canoe that would give me some welcome rainfly at the tailgate end as well.
It would not even be an odd sized tarp. Some rainy day measurements; 8 feet long to span the side windows and stern canoe overhang, by 10 or 12 feet wide to extend out away from the windows on each side should work fine.
So, a simple urethane coated nylon tarp seems a minimalist KISS truck tarp solution; one tarp with corner guylines and four stakes, done and done. If it was a light color for heat reflection the truck bed shade might help on high summer sun days as well.
Back to the drawing board. I need to pull out some flat tarps to check size and etc, and it that solution seems viable find one in white or silver or light tan.
G
Guest
Guest
Tripping Truck Curtain Work
(TRIGGER WARNING FOR SWEEPER)
No stop, Go go Gadget go
https://www.youtube.com/watch?v=FPHMiQ0PZmY
The curtains in the Tripping Truck work very well in some aspects. Black microfiber pillowcases (8 total, spanning four cap windows). Those curtains have a small grommet though (only) one side of the pillow case at the closed end and simply hang suspended from a cord above the windows, sliding open or closed. They can be tied off when fully open with a couple short pieces of thin webbing affixed at the windows edges.
Easy, peazy quick no sewing curtains that make the back of the tripping truck blackout dark. Near light tight, which helps keep the bugs away when I’m reading at night before bedtime.
That solution has worked satisfactorily for years, but even tied fully back they occlude a little bit of the cap windows, and they don’t get aired out enough when bunched tightly together when left tied back in daily driver use.
Or actually cleaned at all; when I took them down each curtain had dead stinkbugs in the gathered folds. And many more dead stinkbugs inside the pillowcase itself. Desiccated stink bugs still stink. Even after they have gone through the washer and drier (I really thought I had shaken them all out).
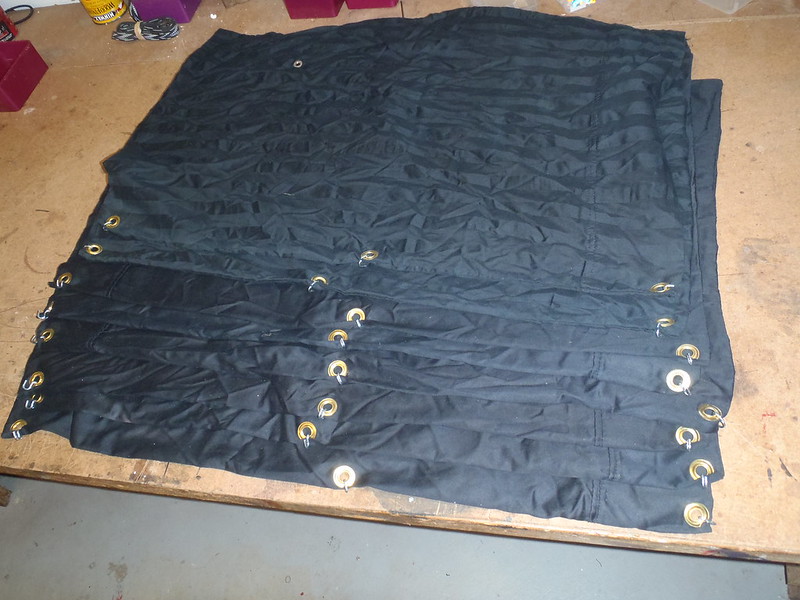
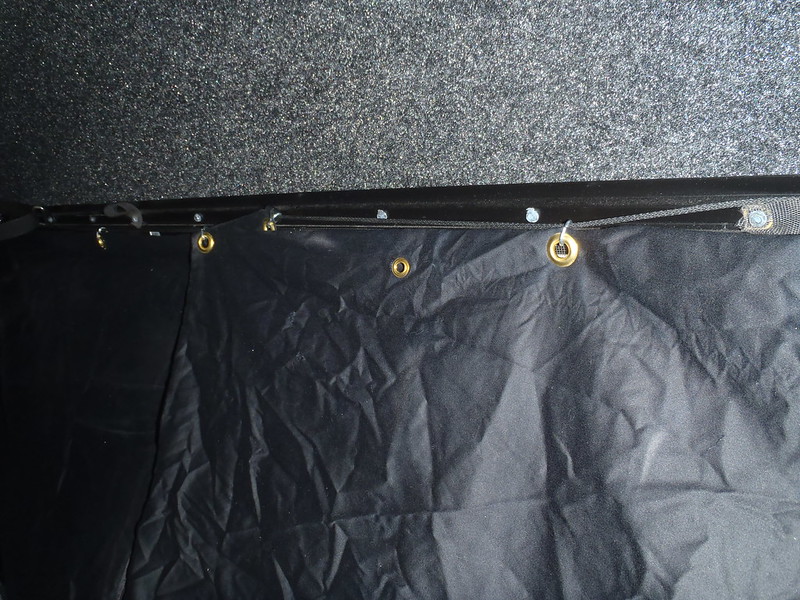
I needed a removable when-not-in-use curtain solution. Instead of a single grommet through just one side of the pillowcase to hang along a traverse cord inside, three grommets on each pillowcase curtain, through both sides, hung on the same cord with small S-hooks.
 PC071405 by Mike McCrea, on Flickr
Melting 24 grommet holes in Mico-fiber fabric will get you stoned, even with an exhaust fan running a few feet away. You will probably misplace your propane torch.
A small S-hook, bent closed through each curtain grommet as a hanger hook, and I can put up and take down the curtains from the window lines at will. After 4 years as a permanent install they really needed to be washed, and de-stinkbug-afied.
No curtains daily driver mode:
 PC071407 by Mike McCrea, on Flickr
Curtains hung (couple seconds per curtain to S-hook hang them on the line)
 PC071409 by Mike McCrea, on Flickr
I can quickly and easily hang them before a trip and tie them drawn back with the webbing straps, slide them closed along the (permanent) hanger cord, and take them down to store away out of the truck in daily driver mode.
It’s a little thing, but much better.
(TRIGGER WARNING FOR SWEEPER)
curtains in the windows, stop, STOP!!!!
No stop, Go go Gadget go
https://www.youtube.com/watch?v=FPHMiQ0PZmY
The curtains in the Tripping Truck work very well in some aspects. Black microfiber pillowcases (8 total, spanning four cap windows). Those curtains have a small grommet though (only) one side of the pillow case at the closed end and simply hang suspended from a cord above the windows, sliding open or closed. They can be tied off when fully open with a couple short pieces of thin webbing affixed at the windows edges.
Easy, peazy quick no sewing curtains that make the back of the tripping truck blackout dark. Near light tight, which helps keep the bugs away when I’m reading at night before bedtime.
That solution has worked satisfactorily for years, but even tied fully back they occlude a little bit of the cap windows, and they don’t get aired out enough when bunched tightly together when left tied back in daily driver use.
Or actually cleaned at all; when I took them down each curtain had dead stinkbugs in the gathered folds. And many more dead stinkbugs inside the pillowcase itself. Desiccated stink bugs still stink. Even after they have gone through the washer and drier (I really thought I had shaken them all out).
I needed a removable when-not-in-use curtain solution. Instead of a single grommet through just one side of the pillowcase to hang along a traverse cord inside, three grommets on each pillowcase curtain, through both sides, hung on the same cord with small S-hooks.
PC071405 by Mike McCrea, on FlickrMelting 24 grommet holes in Mico-fiber fabric will get you stoned, even with an exhaust fan running a few feet away. You will probably misplace your propane torch.
A small S-hook, bent closed through each curtain grommet as a hanger hook, and I can put up and take down the curtains from the window lines at will. After 4 years as a permanent install they really needed to be washed, and de-stinkbug-afied.
No curtains daily driver mode:
PC071407 by Mike McCrea, on FlickrCurtains hung (couple seconds per curtain to S-hook hang them on the line)
PC071409 by Mike McCrea, on FlickrI can quickly and easily hang them before a trip and tie them drawn back with the webbing straps, slide them closed along the (permanent) hanger cord, and take them down to store away out of the truck in daily driver mode.
It’s a little thing, but much better.
- Joined
- Aug 10, 2018
- Messages
- 2,394
- Reaction score
- 8,445
Outstanding!You will probably misplace your propane torch
PS: As to your earlier reference to sleeping places, when on the road & I need to sleep a few hours, I'll often look for a Walmart parking lot. They're safer than an Interstate rest area as most are open 24/7 and there's always someone around, they have restrooms (but no showers) and cheap resupply options for food, etc.
G
Guest
Guest
when on the road & I need to sleep a few hours, I'll often look for a Walmart parking lot. They're safer than an Interstate rest area as most are open 24/7 and there's always someone around, they have restrooms (but no showers) and cheap resupply options for food, etc.
I have yet to sleep in a Wal-Mart parking lot, though I appreciate the availability as a last ditch choice. If there were RVs already parked there I might avail myself in need.
Not all Walmarts permit overnight parking. Parts of snowbird south Florida for example (although the Seminole Casinos do permit overnight parking, and a casino at 2am is a peculiar place to people watch. And drop some coin in the slots on the way to the restrooms.
Back in the olden day I slept in the back of the truck dang near anywhere, including the trucker’s side of rest stops and wide scenic pullovers.
I’m pickier now, no more skeezy rest areas or side of the road business. I will happily pay for a (reasonable) State Park, or better a Nat’l Forest or BLM site. Even if I am laying over for a day I need no services. Water, showers, electric and RV parking pads attract the wrong crowd.
A worthy travelling companion:
https://www.amazon.com/Camping-Americas-Guide-Low-Cost-Campgrounds/dp/0937877557
12,000 sites, many free or minimal cost.
Which reminds me, I have passed the requirements for a Golden Age Pass/Senior Pass/America the Beautiful Pass (make up your dang minds) and need to bring my US Passport to the next Nat’l Park I visit.
- Joined
- Aug 10, 2018
- Messages
- 2,394
- Reaction score
- 8,445
By the looks of your curtains, no one would know you're in there unless you snore loudly.Not all Walmarts permit overnight parking.
Useful link for the campgrounds. Looks like a good Christmas present (and it's probably ok if Santa gets something for himself).
I have yet to sleep in a Wal-Mart parking lot, though I appreciate the availability as a last ditch choice. If there were RVs already parked there I might avail myself in need.
...
Back in the olden day I slept in the back of the truck dang near anywhere, including the trucker’s side of rest stops and wide scenic pullovers.
...
Which reminds me, I have passed the requirements for a Golden Age Pass/Senior Pass/America the Beautiful Pass (make up your dang minds) and need to bring my US Passport to the next Nat’l Park I visit.
Mike and I have similar Tacomas, but different use scenarios. Mike has made his Taco into a tripping truck, while mine is just a truck that I sometimes take tripping. Mine still gets used for truck stuff, so there has been very limited pimping-out. The sole pimp-out, thanks to Mike, is a mini-hammock suspended in the back corner, a place to put your shoes after crawling in for the night. I've spent a hundred nights camped in the truck and have very little desire for pimp-outs, including curtains. The Leer cap has windows that are dark enough to provide privacy, and I can sleep with a little light, so in most cases, curtains are extraneous.
Two, maybe three nights, I slept in Walmart Parking lots. As a last resort, they work out okay. But, Walmart parking lots tend to be noisy, people drive through at all hours, and they are very well-lit. I can take a little light, but it's hard to find a spot at the Walmart where there is not a high intensity light shining right in your face. Were I to make a habit of Walmart parking lots, I'd definitely want black-out curtains. And, some sound cancelation technology, for among other things, motors running in RVs and diesel truck rigs.
Trucker's side of rest stops... Rant alert. I have a peeve over truckers converting highway shoulders and rest-stops to truckers rest stops. Most trucks now have cabs that are bigger than small hotel rooms and in my area they can be found crowding the shoulders of major highways and cramming rest-stops including the shoulders of the in-ramp and out-ramps. These are areas that the designers of the roads intended as a margin of safety for all motorists, areas that are denied the motoring public so the trucker can save a few dollars by avoiding a hotel or truck stop fees. I don't know why the State Troopers allow it, and have contemplated stopping my Taco among them and pulling in for what would surely be an unrestful evening, just to see if the cops would bug me. Perhaps a letter to the governor would be more effective. End Rant.
Mike, you don't have to go to a NP for your geezer pass. You can get them at many other places that NPS operates, e.g. Ft. McHenry, or online at https://store.usgs.gov/senior-pass. Holy flip! The $10 Golden Age Pass is no longer sold (though it will continue to be honored). Renamed the senior pass, the cost is $80 for life or $20 for an annual pass. Better to be golden than senior!
G
Guest
Guest
By the looks of your curtains, no one would know you're in there unless you snore loudly.
Useful link for the campgrounds. Looks like a good Christmas present (and it's probably ok if Santa gets something for himself).
I am told that I snore, and am reminded of one particularly memorable snore-fest.
During a Raystown Paddle & Compare event the group had filled every lakefront site for two hundred yards. I had achieved last-man-standing status and was staggering, somewhat worse for wear, back to my site at the far end of the loop in the wee hours.
Raystown tended towards an older crowd. Every single tent I passed contained some old guy, sonorously sawing away, each with a different pitch and pattern.
By the third tent I was laughing my arse off, and it just got funnier the further I walked.
I looked up a couple of my favorite cheap and freebie primitive drive-to sites in that book and they were all there.
The best source of that information is still like minded travelers met along the way, and the occasional affable local at the diner counter.
G
Guest
Guest
Mike and I have similar Tacomas, but different use scenarios. Mike has made his Taco into a tripping truck, while mine is just a truck that I sometimes take tripping. Mine still gets used for truck stuff, so there has been very limited pimping-out. The sole pimp-out, thanks to Mike, is a mini-hammock suspended in the back corner, a place to put your shoes after crawling in for the night. I've spent a hundred nights camped in the truck and have very little desire for pimp-outs, including curtains. The Leer cap has windows that are dark enough to provide privacy, and I can sleep with a little light, so in most cases, curtains are extraneous.
Glad you are enjoying the mini-shoe hammock. That was a Dollar Store item meant to hold stuffed animals in kid’s bedrooms, but it works great when lined with a piece of foam for muddy/sandy shoes.
My Tacoma still gets used for truck stuff every week. I don’t load the bed with loose mulch or manure, but trash & recycling cans go to the top of the hill, runs to the dump, transporting large items, bringing home lumber.
For sheets of plywood I just pullout the bedside table and minicel cradles for the barrel and leave the two side benches in place. Those two benches are at the same height, so sheets of plywood can rest atop them (and stick 2 feet out the back) with room underneath for other items.
I don’t always close the curtains, in fact usually don’t, especially when I want max airflow through the windows. But I still do some State Park type camping and on close packed sites I like the privacy. And the darkness; I am an early to bed guy when solo and don’t want the glare from a neighboring Coleman lantern shining through.
I even took out the side benches recently, they are attached via screws into blocks of wood epoxied to the sides of the bed. Not because I needed to room to haul something, which was my original design consideration, but for another recent tripping truck upgrade.
Or downgrade. The minicel exercise flooring insulation padding was originally cut to size and spray glued in place. Now it is removable. I was starting to notice a mold smell in the bed of the truck and after considerable investigation discovered that the minicel on the floor and walls was trapping temperature change condensation between the foam and the bed floor and walls.
Easy enough, the big floor piece is taped together on the backside and just slides in and out as needed. Same for the headboard piece. I left the minicel glued to the inside of the tailgate; my knees would never forgive me if I took that entry/exit cushion piece out.
About the impromptu trucker’s rest stops on wide highway shoulders, big rigs had begun to line the shoulder of I-83 a few miles north of the beltway. Sometimes dozens of them lined up nose to tail on the “Emergency Stopping Only” shoulder.
They were a menace, having to pull out heading up a hill onto a busy 2-lane highway, from a dead stop without a lot of running room between them and the next truck parked up front. I nearly wore one as a hood ornament one morning.
I think (I will look) that additional signs went up, or maybe the State Troopers got busy or the local Lot Lizard moved on, but no more trucks
G
Guest
Guest
Caps and Truck Beds
AKA, “The never ending saga of the tripping truck”, or “Gawd I’m a dumb crap
Six months ago the outfitted bed of the tripping truck started to smell slightly moldy. At first only I could smell it, but I am sensitized to mold from too many years spent cleaning out cold rooms with blackened walls.
If I opened the widows the smell quickly dissipated, but left buttoned up (as usual when parked at home) it got worse. That’s my beloved travelling bedroom back there, this will not do.
Hmmm, maybe it’s the microfiber curtains, which have been up for 5 years, most often bundle-tied tightly back for window visibility while driving. OK, they definitely needed to come down, get washed and go back up with an easier to hang when needed method (grommets and S-hooks on curtain “rod” cord).
Curtains down, washed, retrofitted and stored away until trip needed.
A week later and dammit the bed still smells moldy. The interior of the bed floor is covered with minicel exercise foam for noise reduction and insulation (and knee comfort when crawling around back there), maybe there is condensation between the minicel floor and the composite bed. I cut the floor piece out (in one large slide-out removable section) and sure enough, it was damp under there. AH HA! I am smarter than I look, provided you give me 6 months to puzzle something out. The culprit must have been condensation trapped between the bed floor and foam.
I bleached the floor to kill the mold, and now I can lay in the puzzle edge exercise foam floor piece (Gorilla taped together on the backside) in the bed only when needed. Which is most of the time, ‘cause cases of beer and gas cans and groceries slide around wayyyy too violently back there without that unslippery foam surface. Oh look, my eggs from the store are making an omelet in the truck bed and one beer is already open. Who’s ready for breakfast?
And, a week after that Ah Ha! Moment, the bed still smelled moldy. I took out the sidewall cabinets (simple removal, 6 screws and one restraint strap for the frou frou nightstand), and yanked off all of the remaining minicel insulation on the bed walls, some of which was very well adhered and required a putty knife stabbed underneath to pull free.
Some of that side wall minicel was damp underneath. A-FREAKING-HA, and eureka, I’ve got it! It is not just the exercise foam floor, temperature change condensation between the bed walls and the minicel cause condensation as well. Makes sense to me.
I stripped the bed of everything, all the cabinets and all of the minicel flooring, and bleach solution sponged the entire now naked bed. I even sprayed a 10% bleach solution on the factory carpeted headliner and side rails , just to be sure. Screw you mold, I win!
A couple days later it rained hard. When I opened the back of the now naked truck bed there were puddles of water on along either side, where they would have been hidden by the sidewall shelving.
Son of a. . . . .
It must be coming in through some window. I tightened up every hex head screw holding the window frames in place, thinking maybe they had jiggled loose via hundreds of mile of washboard road. Some did need a minor quarter turn of tightening, so that is probably a good thing to check and tighten occasionally.
And then, finally, did the test I should have done 6 months ago, back during the balmy summer months. Sat inside the capped, still stripped naked truck bed and had a helper flood and sideways spray the cap top, door, windows, walls and edges with a garden hose.
Cap top, fine. Cap door, fine. Cap windows, fine. But water was dripping in at the front corners, between the cap and bed rails. Dripping in and, parked on a slant, seeping down along the bed rails and creeping down both the side walls where the minicel had been. Damp, damp everywhere.
I tighten up the clamps holding the cap to the bed. It leaked even worse.
Why didn’t I do that hose drench test in July, when it was warm and sunny? Before I gutted the entire back of the tripping truck? Dumbshit.
Dumbshit II Side Note: I randomly grabbed hose for that test, too short to reach the driveway. So I drove the truck onto the front lawn near the hose bib. And proceeded to flood the slightly frozen but thawing lawn with hose water. Even with snow tires on got the 2wd Tacoma I got hideously stuck in the mud there. Thank gawd it snowed the next day and my wife hasn’t yet seen the gouges I left on the front lawn.
I guess I could have fixed this cap leakage myself, but the (small family business) that installed that Leer cap, Wildasin in Hanover PA, have been wonderful to work with, and I’d rather have a professional diagnose and repair the leakage. Besides, them are nice folks, occasional paddlers and I always enjoy talking with them.
Up to the good folks at Wildasin. For starters it was a mofo to get the cap unstruck from the bedrails; it took three guys, lifting inside the bed and out, and I think they were ready to go get the forklift. So much for taking a cap on and off as needed; never tried it with any of my truck caps, now I never will; caps be a permanent install for me.
With the cap off the leakage areas were apparent; the bedrail foam “weather stripping” material between cap and rails (thick, 2” wide dense black foam) had been compressed over time to a paper thin, dried out husk. There was some cap installation silicone sealant in there as well, which fared little better.
I mentioned that this may have been my fault, hauling the weight of two large canoes along washboard dirt roads and occasional parking desiccation in hot desert locals, and was assured “Nope, don’t matter, every four of five years. . . . .”
I still think the boat weight on the cap must have contributed to the foam flattening, but it was a freebie fix from Wildasin, so I wasn’t arguing. They gave me a partial roll of the wide thick sealant tape to DIY fix it in the future. Thanks, I’ll just bring the Taco back to be resealed again in 2024.
Back from Wildasin with the cap resealed I sprayed the entire truck bed, even the carpeted headliner, with vinegar (and aired it out, fheew-wee). Thanks WillDerness for the tip that vinegar kills mold spores better than bleach.
https://restorationmasterfinder.com/restoration/what-kills-mold-bleach-vs-vinegar/
I reinstalled the side cabinetry and bedside table. Which, again, would have been so much easier back in July.
The shelves are attached via screws sunk into custom shaped wood blocks epoxied into molded reveals in the truck walls. The wood block under the leakiest corner was damp never epoxy sealed or painted, and poorly shaped to begin with. Time to cut and shape a new, better fitted block, a block to last the ages, epoxy coated and painted black. All easily done in the comfort of a nice warm shop.
Epoxying (G/flex and 406 Silica) the block in place, not so easy. The shop is stuffed to the gills with boat and house projects, so I need to epoxy the wood block with the truck parked outside. Mid-twenties this morning. Fark me twice, once now, once back in July.
An extension cord and electric heater warmed that little cap space up to equatorial levels in short order.
Wood block epoxied in place I Iet the heater run for the rest of the day. I could have raised orchids back there.
Tomorrow I can reinstall the last shelf, slide the minicel floor back in and add some cinderblocks and sandbags over the rear axles so I can get back up the snow covered driveway. More snow coming later this week. See again “July” dumbshit.
I don’t know if the seal between cap and bed rails compressing over time is a common problem. Based on Wildasin’s diagnoses even before the cap was off, and the reveal of the paper-thin compressed seal, I suspect it is. I still think carrying 100+ lbs of boats on the cap racks must contribute to that seal compression, especially with the longer canoes cantivered forward over the cab on the front crossbar, weighting down that front cap edge.
FWIW my first cap, an already old aluminum cap, bought used and stuck on an ’84 longbed, leaked in various places. But it sometimes carried a 3-canoe pyramid and had a 5 gallon jerrycan of gas bolted through the frame on the side. And, OK, I kinda sorta crushed one back corner when a tree jumped out behind me. I just sopped up the drips for 250,000 miles.
The Leer cap on my mid-90’s Toyota was fiberglass, and I don’t recall it ever leaking over 10 years of cap use, but we concurrently had the big Ford E-150, quadruple racked to carry four canoes, so that cap saw little weight toting abuse and less use as a tripping truck.
It may also have contributed to the recent leakage that there is no level parking spot at my home, and that it rained constantly from July to January. YMMV if you have a garage or carport.
Which is a very, very long way of suggesting that, if you have a truck topper used for hauling boats, one that has been on for 4 or 5 years, maybe do a 2-person hose or powerwasher leak test.
Sometime this coming July.
I've found that the channeled heavy duty rubber seals (e.g. link below--mine I got from a Leer dealer) work pretty well. I also lay a squiggly bead of silicone on the rails of my truck to facilitate a better seal. As I have a topper and a camper, I remove the topper several times a year (I have a pulley setup in my garage so I can do it by myself), so I get to check the seals relatively often. I have some diamond tread foam (from Costco) for the floor, underneath carpet. So, I take that out when I'm using my camper, so it's easy for me to keep things aired out. Also, having a garage to park the truck in helps tremendously--I leave the topper windows open after the snowy skis have been inside to allow things to dry out.
Last edited:
Similar threads
- Replies
- 3
- Views
- 424
- Replies
- 17
- Views
- 4K