• Happy National Paranormal Day! 🔮👻👽

Yet another JW Kite

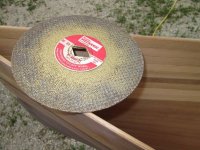
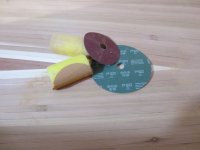
For hand sanding the inside of the Tumblehome, I use really stiff resin backed sanding discs, The kind that is fastened to a 9" grinder. They usually come in only two grits. 50 and 80 grit.

They are stiff enough to cut the glue, not just ride over it, like soft interface pads do. I have better luck sanding the inside Tumblehome by hand, than with a ROS
!IMG_0544_zpsgqydy0ur.jpg
I also use a Metal cut off blade, to knock out glue inside the stems

IMG_0544_zpsgqydy0ur.jpg
 
I have completed 2 Freedom Solo's which have almost identical tumble home sections to the Kite, I will stick with the scraper set (they are almost like a set of french curves, but in a scraper set) to level that area ... the usual tricks of sandpaper on a bottle and such just don't seem to match the curves well enough. The scrapers get the area level enough to proceed with foam blocks and hand sanding to get that area smooth/level enough for glassing.

I have used 60 grit on a ROS (with vac as well) lightly to knock down the high spots before moving to 80 grit. I usually finish up with 100 grit for glassing. Using 50 grit on a ROS on softwood is not something to be done without the skillset, you need to have worked with softwood and that sort of coarse grit to develop a feel how fast the sander will cut wood. A little too much pressure, staying in one spot too long and you can get a very thin area or go right through the hull. If you haven't used coarse grits before, might be best to practice some beforehand or just take a bit more time with lighter grits.

Sanding overview: http://www.laughingloon.com/sanding.html

Another idea for working the flat(ish) sections of the hull is to get a contour soft pad for the sander, it allows the paper to better follow the curve of the hull and generally make the ROS perform better on the hull : https://www.amazon.ca/3M-Sanding-In...d=1532527308&sr=8-3&keywords=3m+hook+and+loop

When working with cedar especially, protection is your best friend. The dust can cause asthma and asthma like symptoms, as well as allergic reactions ... other wood dust can cause a whole host of reactions and permanent disabilities ... so protection in the wood shop is a very smart idea.


Brian
 
Thanks everyone for the guidance on sanding the inside!

This evening I sanded the outside and pulled it off the forms. For the time being, it is resting on the outer forms on the garage floor. Tomorrow evening I will tidy up the shop side of the garage, put together a cradle, and get a start on sanding the inside.

During finish sanding, a couple of the ripples in the second layer reared their collective ugly head. I imagine I will need to hit those spots with epoxy again to seal them off, and perhaps do a light hand sanding to avoid re-exposing them. This may be a foolish question, but is it unwise to skip re-epoxying those spots, and just varnish? Some pictures are included below.

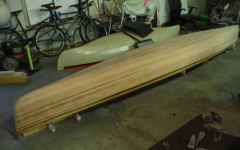
Off the forms and in the company of the SOF:


Screen Shot 2018-07-25 at 9.05.47 PM.png


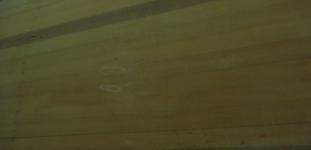
Ripples:

Screen Shot 2018-07-25 at 9.05.17 PM.png

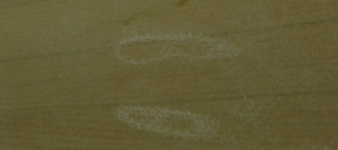
Closer:

Screen Shot 2018-07-25 at 9.05.35 PM.png
 
Last edited:
I like to strap in my center form, to hold the shape of the canoe.

As far as the ripples, pics would help.. Generally adding epoxy, just creates more work. the varnish should hide the weave of the cloth.

Jim
 
Moving on. Slow but steady progress over the past week or so. After flipping the canoe and putting together a cradle, I did the fill coats on the section above the knuckle. I followed Dogbrain's lead on this, since it was just too difficult to get at it upside down. The outside is now essentially finished, with the exception of varnish.

I spent last Saturday scraping, poking, sanding (80, 100, wet out, 150), , etc., and added a fillet on the inside of the knuckle. I also added a fillet on part of the front stem, but had to wrap things up before it was completed. Once the stem fillets are complete, as well as some spot sanding, I will be ready for glass. I didn't perfectly sand inside the stems (the last 10 inches on either end) at because I plan to add a bulkhead at around 12" from either end. I am still not settled on a breasthook/bulkhead style, though.

6 oz. glass is in the mail. I will be adding a full layer of 6 oz., and a partial layer of 4 oz. Perhaps one fill coat.

I plan to do a seal coat on the inside before glassing and then wet out the glass one layer at a time. I am wondering if anyone has advice on the timing between the sealcoat and the first layer of glass, as well as between the two layers of glass. Stripperguy, I could have sworn I noticed in a build thread, that you waited a couple days between seal coat and glass. Was that my imagination? If not, was it intentional?
 
I'm in the no seal coat camp but if you want to do a seal coat just wait until it's not tacky before putting down the glass. That way the glass won't stick to it but it won't have fully cured yet so no need to sand.

Do both layers of glass at the same time. Put the partial under the full. One step and done.

Alan
 
Adding the extra layer should be applied, as soon as the first layer has cured just past tacky. This is usually 4 to 6 hours. Your gloved hand will tell you when it is time. Waiting longer, just decreases chemical bond.
If you are set on a seal coat, be sure there are no protrusions, that might lift your cloth up away from the hull, stuck in the seal coat, or previous layer.

Me ? Beings it's the inside, I'd skip the seal coat, and wet out both layers at the same time. ( Assuming both layers of cloth are NOT the tightly woven variety).

Reason. Time saved, no worries about bonding between layers.

Advise ? Work out to the ends from the center, that will give you more time to wet out the inside of the stems, and not be so rushed.

I also prefer the little Cigar foam rollers ( Get good ones), over a squeegee. I don't seem to move the cloth around so much.
Good Luck !

Jim
 
Last edited:
Will a gloved hand leave a finger print at the just past tacky stage? I am still working on grasping the timing between the sticky stage where the glass gets bunched beyond return, and the point where it is too late and must be sanded. I've dabbled in both, and don't want to again. :)

Also, I am using the plain weave glass from RAKA (http://store.raka.com/6ozplainweavex60in.aspx). Would that be considered tightly woven?
 
I think if you did your seal coat in the evening it should be ready to go for glass next morning.
Fingerprints shouldn't be an issue. When ready the resin will feel fine to your touch but will scratch/gouge/cut/shave easily. You might be able to leave an indentation with your fingernail. When pressing on it with your fingers it shouldn't stick when you pull them away. As Jim says this seems easier to feel with gloves.

Alan
 
I do wait a day or two between seal coat and wet out. I have read data sheets frm a few resin manufacturers that the epoxy will cross link successive layers for up to 72 hours. you deficately don't want tacky resin!
I know Jim likes those little cigar rollers, and so does a boat building buddy of mine. I'm not a fan, I prefer a 3" or 4" full diameter foam roller, it holds more resin.
Oh, and I usually wet out both layers at once. Be sure to squeegee any excess resin and entrained air as you go.
I'm also in the wet out only camp, no more resin need be applied, it only makes your inside more slippery and the boat heavier.

On my stripped Kite, I added bulkheads and decks...I kept the decks slightly recessed from the sheer line. I like the decks to use as a convenient step when climbing in/out and for crossing beaver dams.

Lastly, let's see some photos!! You gotta be getting antsy to get it on the water.

View attachment T9PvBsSrj4bwi5a28NiBbSLcffyIhKmQ-4IBdmstouLfMUIC8GYCyMVVT2sJXrh-FR9dNO9cEqpvcmDQjR5e2ha_UsZKlQA90meO
 
Last edited:
The reason for the glove, it keeps your hands clean.
I used to use Latex, they don't work very well ! My hands still smelled like epoxy ! I like the Black Nitrite the best ! Wearing gloves makes clean up easier, and it should provide a barrier to possible health risk.

If the cloth sticks to the seal coat, you are too soon, wait until it no long sticks. take a small scrap piece of cloth, lay on the seal coated hull, if you can't easily move it around, it's too soon.

As far as the 72 hr thing ? That's under perfect conditions. If you want to wait until 71 hrs. Go for it.
I've seen some lay cloth on a wet surface, and make it look easy ! I tried that once. It didn't work for me ! A once bitten twice shy thing !
This time of year 6 hrs is plenty.

Last thing. Have a squeegee and a foam roller, either regular, or cigar, ready to go, Which ever one works best, stick with it ! Oh and foam brushes for bubbles !

Again ! Good luck !

Jim
 
....I've seen some lay cloth on a wet surface, and make it look easy ! I tried that once. It didn't work for me ! A once bitten twice shy thing !....

Jim

Yeah, I tried that once, too.... once ;) And it was a small kayak thus figured it wouldn't be all that difficult to drape the cloth. I always seem to learn the hard way!

I usually revisit between 12 and 24 hours.
 
Just a caution with the general assumptions of different epoxies, they are not all the same and the manufacturers have estimates for setup time for each flavour ...... some require application when the initial coat is tacky, some want the tack gone, some will allow up to 72 hours ... read your specific manufacturers recommendations before you start applying and assuming all epoxies are the same.

Just something to keep in mind.

Brian
 
I agree with Brian on the whole idea that not all epoxy is created equally...I have used 3 different epoxy systems to date, and some of them with different speed catalysts. There will certainly be variations in cure times. My rule of thumb is always read directions...especially when dealing with a new to you product.
 
Thank you all for the responses. I will take a look at RAKA's specs on the epoxy I am using. If there are no conflicting specs, I plan to do a fill coat next Friday night, and then wet out both layers at once the next day,

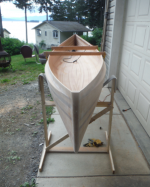
As requested, here are some current-ish photos.

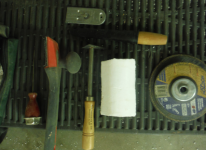
I used a collection of scraping implements, including the following. The styro-foam block took the place of a bottle, and worked semi-effectively in the chine area. The cut off disks and icepick were helpful when working around the stems. Razor and scrapers for the vertical areas and bilge. A couple useful tools not included in the photo were a rounded and sharpened flathead screwdriver, and chisel, all for glue globs in the stem area.

Click image for larger version  Name:	 Views:	1 Size:	214.5 KB ID:	83308

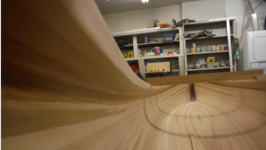
After many hours on the ROS:

Click image for larger version  Name:	 Views:	1 Size:	214.5 KB ID:	83308

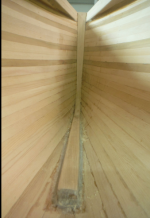
Current status of the front stem (in progress):

Click image for larger version  Name:	 Views:	1 Size:	231.1 KB ID:	83309

Fillet inside the knuckle:

Click image for larger version  Name:	 Views:	1 Size:	214.5 KB ID:	83308

P.S. I apologize for the poor quality photos. All of my pictures have file sizes too large to post. I have been posting screen shots of the photos. Does anyone have a better solution?
 
Last edited:
I use GooglePhotos ..... free, easy to upload, easy to post .... eliminates the issue of file size

To upload
- drag and drop

To Post
- select pic and right click, and select "Copy Image Location"
- got to post and right click "Paste" or Ctr V, to drop the link
- I have found that you also need to add "[ img ]" to the start and "[ /img ]" (without the spaces and quotes)

That's it, once you preview you will see pic


Brian
 
Back
Top