• Happy National Telephone Day! 🔔☎️📱📶

X canoe build

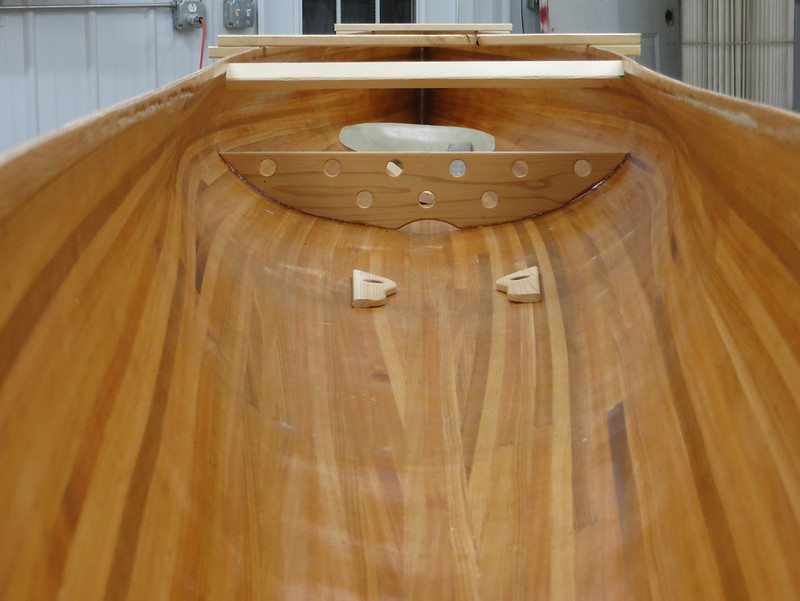
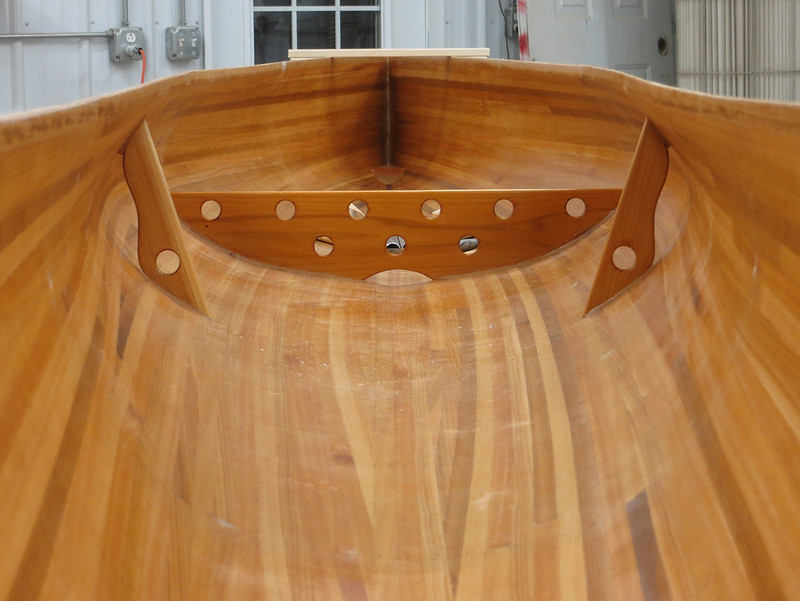
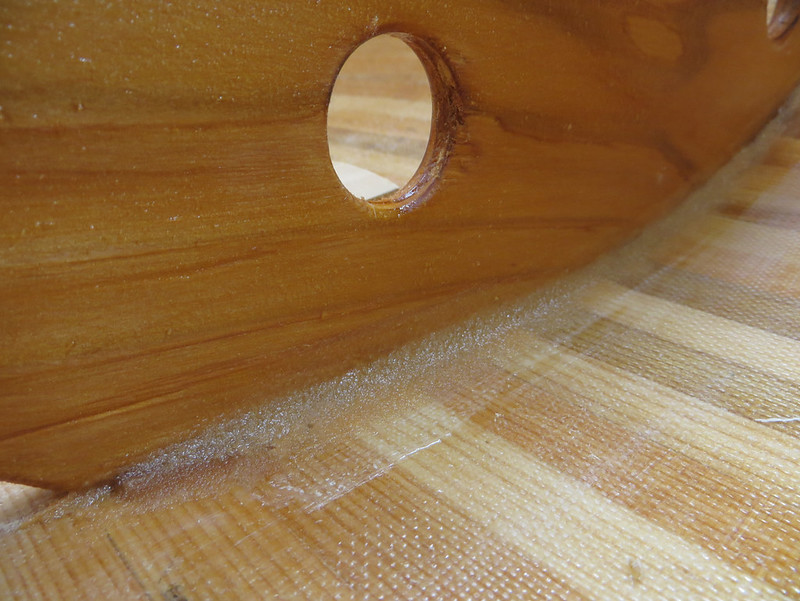
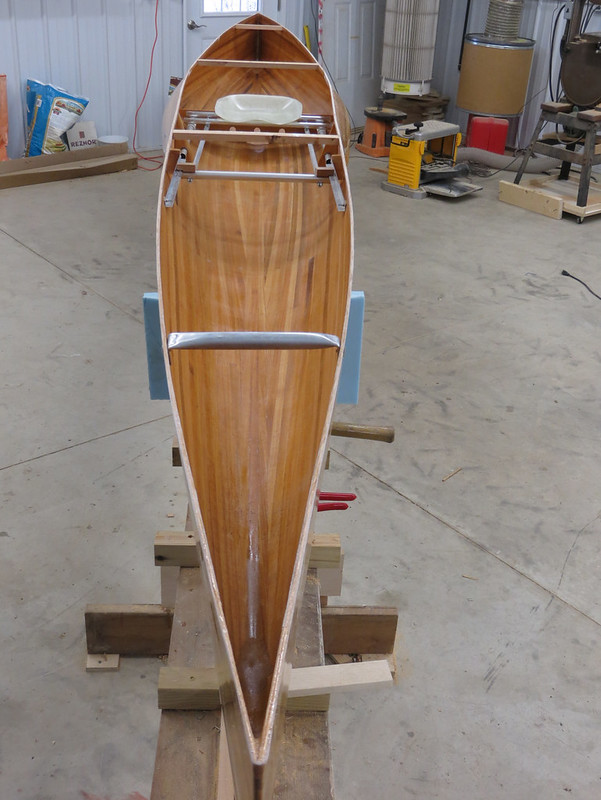
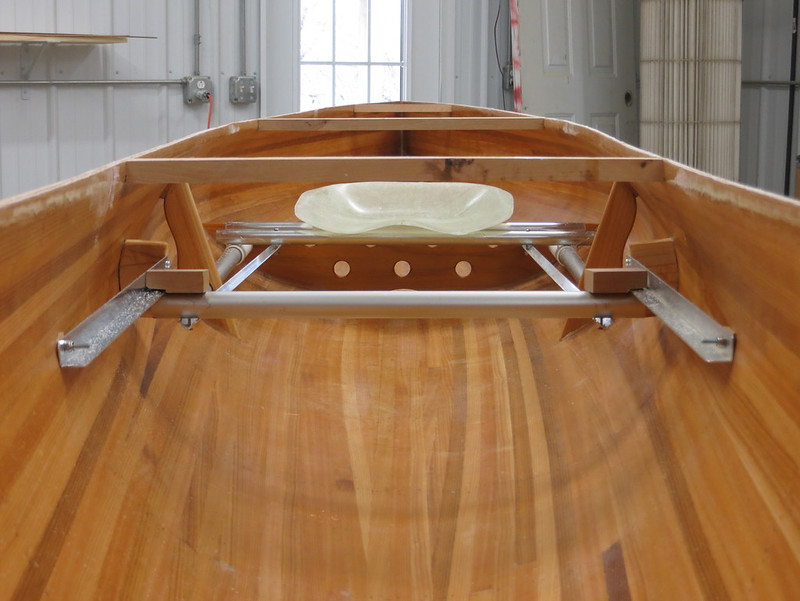
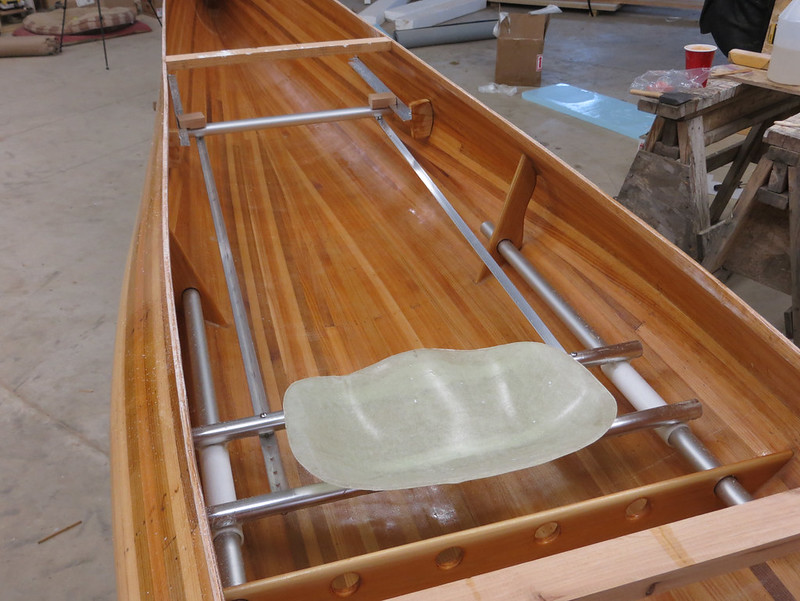
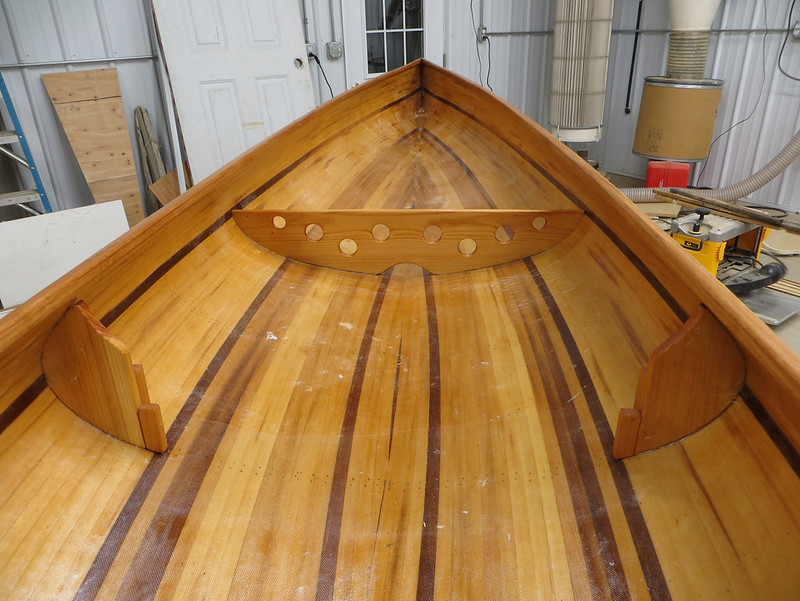
Not too worried about the thin integrated gunwales based on a woodstrip racing boat I used to have that only had a thin, about 1/4" high, hardwood strip added to the top of the cedar, presumably for wear resistance. Once glassed inside and out the cedar frame is surprisingly stiff and I think it will hold up fine. The oak strips will be encased in that fiberglass sandwich as well. There will be a few thwarts. Aluminum for now to get it done and maybe CF later if the boat works out and I want to spend more time prettyfying it. I'll also have other hull supports similar to what I integrated into the seat/foot brace on the Barracuda, pictured below.


20140731_016 by Alan Gage, on Flickr

Certainly isn't something I'd want to do on a tripping boat but this is just for workouts and racing, a pretty easy life. If it doesn't work out adding something more substantial after the fact won't be a huge deal.

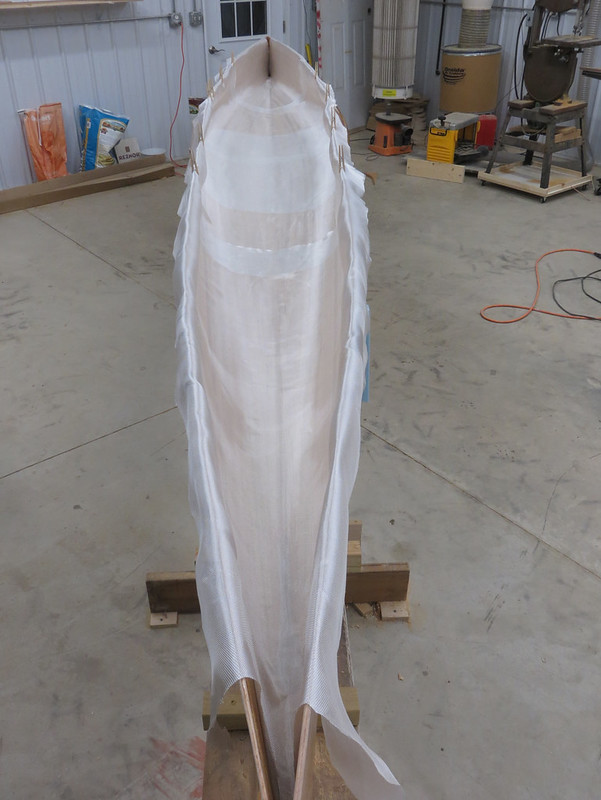
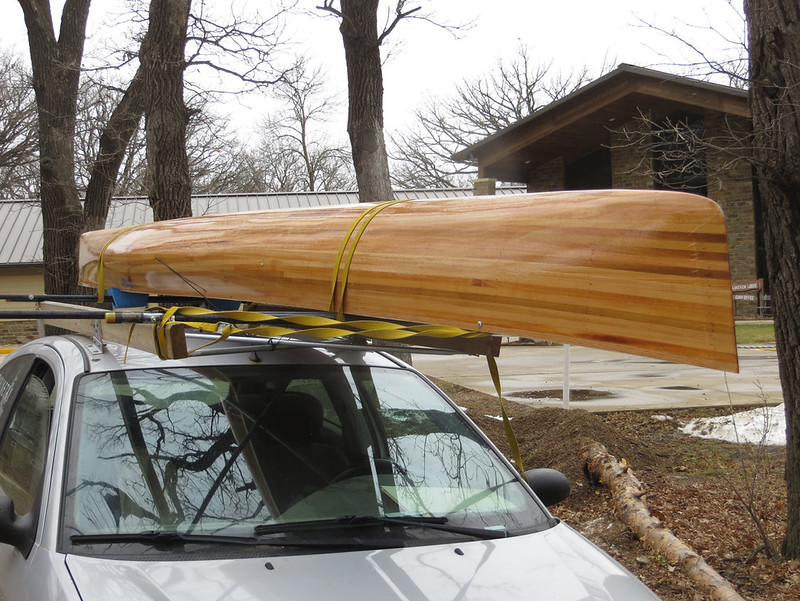
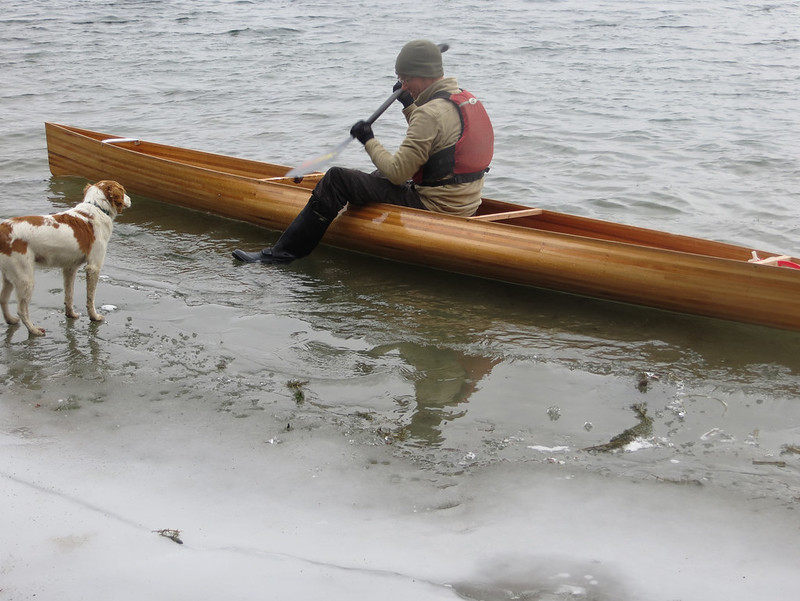
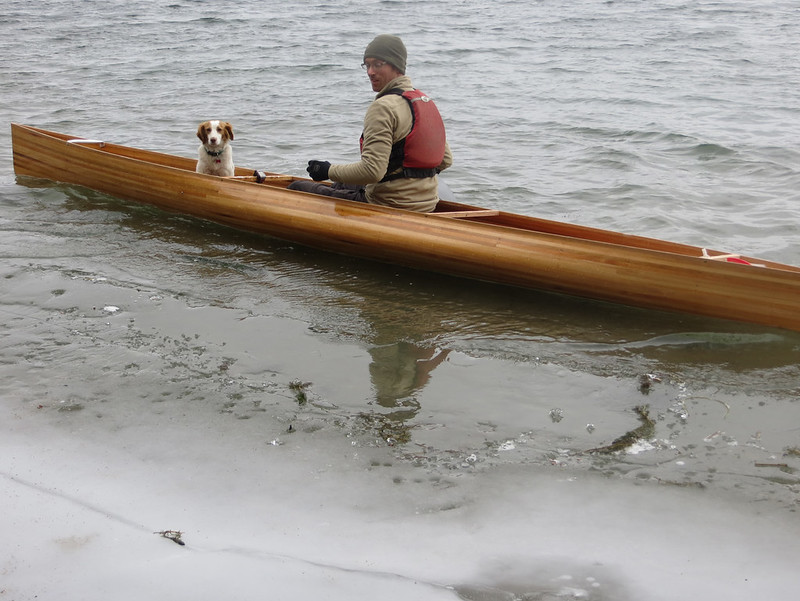
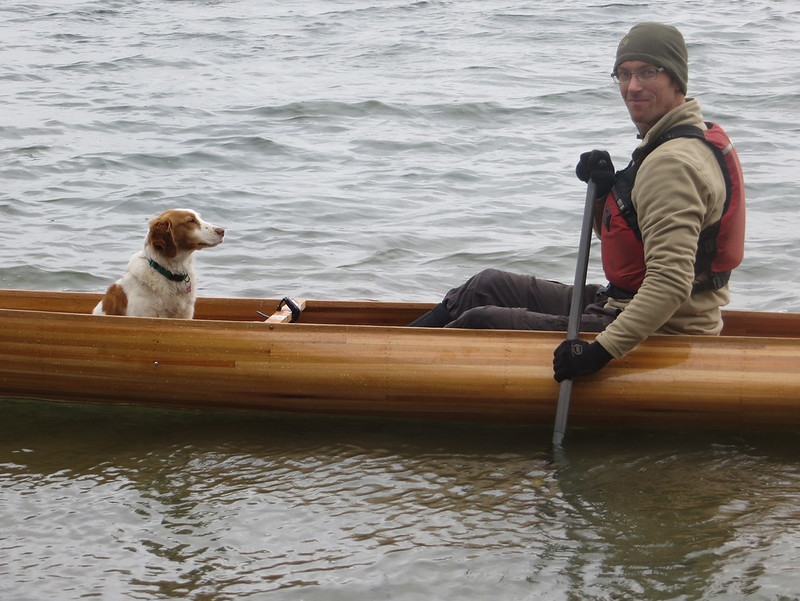
I got some exciting news this morning! There's still open water within 20 miles of me! I thought all the lakes froze over last week but we have one semi-large but very deep (165ft) lake and it's yet to ice over despite the fact that we haven't been over freezing (or even close to it) in over a week, a few nights below zero, and lots of wind. I checked the water report this morning and it's at 38 degrees. If I can get the inside fiberglassed by Wednesday or maybe Thursday and if the ice up can hold off until this weekend, when we're expecting highs in the low/mid-30's, I might be able to get it on the water for a test without having to drive 4+ hours.

Gonna be close on both ends. We aren't even supposed to see the 20's until Friday with single digit lows and I've got plenty of work to do before it's ready to paddle. Including waiting for epoxy to set!

Alan
 
Finished sanding the interior tonight with a mix of chisels, paint scraper, orbital sander, and sandpaper wrapped around a Nalgene and glue bottle. The boat is so narrow I can't get very far into the bow and stern. Maybe I'll have to build some float tanks to cover that up. I guess I'll see what it looks like after glassing.

And the sanding is done none to soon as my orbital sander conked out on me! I literally just finished touching up the seam between the oak and cedar and shut it off, calling it good. Then I felt one more small area that could be knocked down and when I tried turn it back on I had nothing. Good timing I guess but it was pretty new, I bought it just before starting on the Barracuda. I was really happy with it before this, mainly because the onboard dust collection seemed better than most. It's a Rigid brand from Home Depot. It's probably gone through 75 discs. Of course I didn't keep my receipt so I'll probably be out of luck on warranty. I'll have to look into it. If I have to replace it I'll need to decide if I want another cheap one or step up to something like a Festool with vacuum. Figured I'd upgrade someday but didn't plan on doing it now. Maybe there will be some good holiday sales coming up.

Alan
 
Good news:
Home depot can look up old receipts for purchases made in the store.

Bad news:
Can only return goods to the store, for any reason, for 90 days

Good news:
All Rigid tools carry a 3 year warranty

Bad news:
They must be mailed, freight pre-paid, to a Rigid service center, with original receipt.

More bad news:
That means I'd have to drive 1 1/2 hours to the Home Depot in Mankato just to get my receipt.

Even more bad news:
The chances of me taking the time to drive to Mankato for said receipt and then package and ship a $70 sander for warranty work aren't very good

And just when you thought it couldn't get worse news:
I have little faith that, should I rise to the Herculean challenge of mailing the sander for repairs, I'd have it back in less than a month; at which point I'll be well into my next stripper and in need of a sander

Good news:
It was only $70

Bad news:
I don't want to buy a new sander

Good news:
I'll let you know when I find it.

Alan
 
Try blowing out the area around the on button with some pressurized air. My dewalt kept not coming on, so i would take the blower to it and then really press that switch...got a few more canoes out of it before it finally died.
 
Try blowing out the area around the on button with some pressurized air. My dewalt kept not coming on, so i would take the blower to it and then really press that switch...got a few more canoes out of it before it finally died.

I'll try that when I get home. A little research reveals the switches on these have been a common failure. Also, before it quit altogether it was starting to forget that it was a ROS and was acting more like a grinder, another common complaint. Before touching it to the canoe I had to first put in on the strongback for a couple seconds until it quit whirling like a demon and went into normal operation. Otherwise big divots!

A sander question for anyone following along: What size do you all prefer? A 6" isn't much more money and the larger size would be nice sometimes. But does the larger size become a hindrance on things like canoes with less area and tighter inside bends? All I've ever used is a 5".

Alan
 
Blew the sander clean as a whistle but no love. The top half pulled of easy which let me access the switch and blowing that clean didn't help either. I jumped the switch with a jumper wire and it took off and ran so now I know the switch is bad. Gave a switch a few sharp raps with the butt of a screwdriver and I've got a sander back, at least temporarily. We'll see how long it lasts.

Unfortunately its "random" days are pretty much over. It takes a lot of pressure to get it to stop spinning. But it's better for nothing and works fine for stock removal.

Got spreader bars made tonight. Thickened epoxy glopped into the stems and an epoxy radius added to the inside seam of the shear. Used the "piping bag" trick again with the corner nipped of a zip-loc baggie. That really works good! Figured out where the seat will sit and cut out the rear bulkhead. I don't foresee me getting the seat and foot brace done in time to paddle this weekend but I'm sure I can rig up something temporary. Ready for inside fiberglass tomorrow.

Alan
 
You sir, are a mad man. Inside fiberglass already??? You are moving, aren't you?
I was thinking about your 6" vs 5" sander question. I have a 6" ROS that has the pressure sensitive adhesive (PSA) and have found that there is a limited selection of discs available for it at the local stores. If I want to buy bulk loads and have it shipped to me, the world changes, but in small quantities, it's not ideal. If I were to convert it to the hook and loop style, again the world is a better place to be. I haven't found that to be true of the 5" sanders though. Seems like there is stock everywhere for these.
So, I guess the bottom line is, stay away from the PSA type of base if you are going with a 6" unit, unless you know for sure that you can get disks. Other than that, I think it's use greatly depends on what you are sanding.
Hope this helps
 
You sir, are a mad man. Inside fiberglass already??? You are moving, aren't you?

Yes, things are progressing along quite nicely. Haven't been any real hangups or delays and it should be smooth sailing from here on out, though figuring out the seat and foot brace is a brain twister trying to get everything centered, square, and the same height without having a flat surface to reference.


20141120_001 by Alan Gage, on Flickr

Last night I got the inside fiberglassed but I was too tired when I got done to post pics. It went smoothly. Took 2 hours from the time I mixed my first batch until everything was wetted out and the excess squeegeed out. Then it was wait around and babysit it to pop tiny bubbles and make sure no runs/sags formed. While I was waiting for the epoxy to setup I went ahead and used the fiberglass scraps to make my seat. At that point things seemed to be setup fine but when I came out this morning I still found plenty of those tiny bubbles had formed on the surface. Not a big deal as they're cosmetic only and the mini-craters they left will disappear with the varnish. But I was disappointed to see 3 small air pockets that had formed under the 'glass. Not too big, about the size of a finger tip, but disappointing none the less. I'll probably cut them out or sand them flat and after applying a little epoxy you'll never know they were there.

Tonight it was time to start working on the seating arrangement. It's to the point now where I do more thinking than actual work. I'd cut out the bulkhead the other night so the first thing to do was figure out how high the rails needed to be and how far apart. I leveled the canoe front to back and side to side (only worried about the center 3 feet being level front to back) and then shot the laser straight down the center so I had a straight line to work from. Marked the center of the bulkhead via the laser and then measured over an equal distance from that line to mark the holes for the two rails the seat will slide on. I cut those holes out as well as a few more to save some weight, give me extra attachment points for drink jugs, and to look cool.

Then I had to figure out how to support the front of the rails and how to measure and mark the holes in those pieces so that the rails run parallel to each other and stay level from front to back. This is where another set of hands would have come in really handy as I was trying to mark the front supports while holding them in place as well as holding the tape measure exactly on line. Eventually I got it, I think. With the laser still running straight down the middle I measured over from that line the same distance as I did on the rear bulkhead to get the right width. For the height I set the laser up so that it was horizontal and measured down from the laser line to the height of the holes in the rear bulkhead. Then came to the front supports and measured down the same distance from the laser. Sounds easy, and it would have been if everything was held steady, but nothing was fastened so it was a bit of a juggling act.

Ended the night by epoxying the rear bulkhead in place. Once it's set I can fine tune the placement of the front supports and will attach them in the morning so they can set up during the day. Promised the dog I'd wear her out tomorrow so I'll do some epoxy work early, play outside as much as possible, and come back to the boat in the evening. Here's where she sits now:


20141121_001 by Alan Gage, on Flickr


20141121_002 by Alan Gage, on Flickr

Those whitish looking marks on the inside of the gunwales in the last pic are just a reflection. They had me really worried when I opened the pictures tonight, had to go back out in the shop to check it out.

Alan
 
I almost forgot to report on the weight! It was 19.9 pounds when it came off the forms and 23.9 pounds after fiberglassing the inside. 4 ounce cloth inside and out with a small extra layer on the inside under the seating area and about 8" overlaps where the 4 interior pieces join. The hull really stiffened up afterwards.

The seat weighs 8 ounces, as does the rear bulkhead and front supports. Maybe another 2 pounds of hardware to finish off the seat and foot brace and 3/4 pounds in the thwarts? I'm hoping for around 28 pounds when done.

Alan
 
I bet juggling the fittings while making measurements got pretty frustrating.

I'm glad to see all the progress you've made. It looks great!
 
A little more progress to show and more behind the scenes.

The front rail supports are in as well as a sealing coat of epoxy and fillet added to both them and the rear bulkead:


20141122_001 by Alan Gage, on Flickr

I love using a zip-lock baggy as a piping bag to add thickened epoxy fillets. Too easy. Wish I would have figured that out a couple years ago.


20141122_002 by Alan Gage, on Flickr

The rest of the seat components are built/cut and the epoxy and fiberglass are setting up as we speak to hold them all together. I think the sliding foot brace is about ready to go but we'll see in the morning. I epoxied a couple small mounting blocks in place just before leaving the shop and I hope they'll work ok but now that they're installed I can see they aren't plumb. We'll see what I get. If it doesn't work I can cobble something together short term. No time to fix it proper because tomorrow afternoon we paddle!!!!

Alan
 
Well, she's ready to go! Thwarts and foot brace are all temporary but she's paddleable. 29.1 pounds as she sits now. Grabbing a quick bite to eat and then time to head over to the lake. If it was successful I'll report back tonight. If you hear a news story about some moron and his dog who died of hypothermia because they went paddling in 35 degree water well, you know.....


20141123_001 by Alan Gage, on Flickr


20141123_002 by Alan Gage, on Flickr


20141123_003 by Alan Gage, on Flickr

Alan
 
We're alive!!!

Getting on the water was quite an adventure. It was about a 20 mile drive to the lake with a very strong head/side wind. I was seriously afraid the front of the canoe was going to break. That long bow has hanging out right in front my face and I watched it take on all sorts of new shapes. The front cross bar of the rack landed between the front two thwarts and those thin gunwales wanted to roll under the from the side pressure like an unbraced wall racking in the wind. I couldn't go over 30 mph. I tried sliding in farther back on the rack but that still didn't help much. Finally I tied off the front thwart to the corner of the rack on the side the wind was coming from. This too most of the strain and let me drive a comfortable 35 mph. I didn't have a choice on vehicle speed at that point since I got behind an oversized load that was taking up 1 1/2 lanes.


20141123_002_1 by Alan Gage, on Flickr

There are only a couple bays on the lake that will allow protection from the strong NW wind so that's where I headed and was a bit dismayed to find this:


20141123_009 by Alan Gage, on Flickr

The whole bay was frozen. It looked like someone busted a path about half way out in a boat before turning around. Tried another spot that was open but very windy and rough. We could see that Miller's bay was open so we headed to the only public access but it would be a carry in down a steep hill. Found a way to the water only to find a 30' band of ice ringing the shoreline. But farther down, by a beach, I could see the ice was much narrower. We went in search of access to that beach and found it part of the large church camp that was deserted for the winter. Figuring they were gracious people I unloaded and headed down to the water.

Ice only extended about 5' from shore and it was shallow enough not to reach my boot tops. Would have been nice to have some more protection. Waves weren't bad but it was still a bit breezy. It was the best I could do though.


20141123_003_1 by Alan Gage, on Flickr


20141123_006 by Alan Gage, on Flickr


20141123_008 by Alan Gage, on Flickr

Those pictures with Sadie in the boat are actually from the second run. My mom came along and shot some video of the original launch. Apparently Flickr videos can't be embedded so here's the link. The blue thing that flies up part way through is Sadie's foam cushion.

https://www.flickr.com/photos/793545...n/photostream/

So what do I think? I think it has potential. At least it's not a throw it in the waste pile and start from scratch thing. Now I know I can take the time to sand the exterior smooth and finish the trim work. Conditions weren't ideal to really get a feel for how it handles and I was only able to paddle it about 10 minutes total, if that.

But stability felt good. More tender than the Barracuda and Magic but there felt to be plenty of secondary, though I wasn't about to push it and see just how much. So far it feels like about exactly what I was looking for in that regard.

Narrow paddling station feels nice and the range of seat adjustment feels right. Went an inch higher on the foot brace (close to 7") and that feels good. Seat is at 6" and I think it will be fine with a pad on top.

Sadie fits well.

The jury is still out on speed. I was able to find one area about 75 yards long with deep water and no wind or waves and got it up to 6.3mph, pretty much the same as I was able to push my Magic, Barracuda, and the SR Blackwater I paddled. But on the other hand I haven't taken a hard paddle stroke in about 2 months so I won't really know until spring comes and I can get back in paddling form and take it for some longer paddles. Also, when designing the boat, I gave 5.5-6mph speeds preference. There were changes that could have been made that would make the boat easier to paddle around 6.5mph but those same changes would make it harder to paddle at 5.5-6mph, which is more of a realistic speed over distance for me.

It probably doesn't sound like I'm excited but I am. I'm just realistic and know that I won't really know what I've got until I can put in a lot more seat time. I didn't know if I'd have boat that would turn turtle as soon as I sat down, only want to paddle in circles, or wouldn't go over 5 mph and put out a wake the size of the Queen Mary. But now I know that I've got something in the ball park and just from that short paddle I finally have some correlation between what I see on the computer screen compared to how it feels in real life. From here I can go forward.

To celebrate I took the evening off from the shop with ice cream, pumpkin pie, and a couple glasses of wine. Now the real trick will be to not fall into that habit and keep busy!

Thanks for following along. Probably no more reports on this boat until spring. I won't be doing the final sanding or thwarts until later in the winter. On to the next project now.....

Alan
 
Last edited:
And about those gunwales, or lack thereof. I'm not ready to give up on them yet. The boat feels stiff enough between the center thwarts (the paddling station) and on the water it feels fine. But on the roof rack it was apparent there was a too much flex in the bow between the two thwarts and probably in the stern as well, though it likely doesn't see as much stress.

One thought, though not attractive, would be to run an 8" or so wide piece of carbon fiber from gunwale to gunwale in this area. Or maybe a 1/2-3/4" strip of wood on the inside running from keel to gunwale. I think of there was something to tie the whole hull together at that point it would solve the problem.

No doubt installing actual gunwales would solve the problem too but I already know that. I want to know what else will, or won't, work.

Alan
 
A success! I'm glad to hear it.

It looks great on the water and even better when moving along.

Sadie looks right at home.

I'm sure spring can't come fast enough so you can finish your evaluation.
 
First off, congratulations on getting it in the water so quickly. It looks quite sexy in and out of the water...maybe we have a new designer here???

I watched your video and noticed that the part where your back was to us, the boat looked quite stable. Did it feel that stable? I was quite concerned that you would end up with more than a soaker if you dumped it in that frigid water.

An idea popped into my head when you were talking about your gunwale issue. Hear me out for a minute...

What if you were to use a temporary gunwale stablizer to use for transport only? You could machine a piece of material how ever long you wanted with a channel in it so that it could cap the existing gunwales on the boat but only to be used for when you transport it. I'm thinking something like a 1x2 on the flat, with a groove in it for the gunwale. You would of course have to have it follow the shape of the hull.

Did I explain it clearly? You get the picture? It would certainly give you some stability while in transport, and then you could just leave it in the car while you are paddling. Thoughts?

Once again Alan, well done. Can't wait to see what's next.
 
Alan,
Looks pretty good! I bet you're happy you didn't roll, that water is a little chilly, huh?
I noticed that your bow swung a bit away from your paddle side...it looks like it's a nice balance between tracking and maneuverability.
I know you only had it out for a few minutes, but are you happy with that tracking/maneuverability? Did you shift your seat much, to see how a different trim affects the handling?
And some carbon to stiffen up the sheer could look pretty cool, a blend of traditional looks and modern materials.
 
Back
Top