• Happy National Zipper Day (pat. 1913)! 🤐

Whelen lean-to

Joined
Jan 3, 2015
Messages
1,413
Reaction score
875
Location
Mid coast, Maine
I finally got started on sewing up a Whelen lean-to. Glen if you want this in tents and tarps section feel free to move it.
For some reason it took me quite a bit of searching to find the fabric I wanted but this winter I did, 8.5 oz Sunforger fabric plus it is 5’ wide so less sewing for me and less money too.
Finding a pattern wasn’t hard, this is one on line.
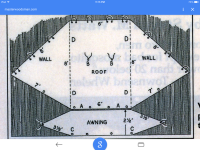
IMG_0500.png
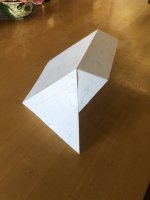
Then I made a paper mock up.
73377972275__9C154760-3A2D-4E76-BE3C-1E793461D725.jpeg
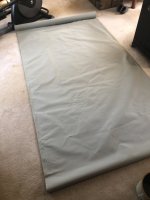
I really wished I had access to a sail loft at this point but I made do and laid out the fabric on the bedroom floor. The fabric is doubled over so it would be easy to cut the one edge absolutely square where it is folded. The roof is 8’ long so I cut two 9’ lengths.
RenderedImage.jpeg
The back edge on the pattern shows 6’ but I wanted 8’ just to have a bit more room. The two 5’ panels give me a little less than 10’ when joined so I cut two strips off the edge. Those will get used as sod cloths along the back edges.
IMG_7643.jpeg
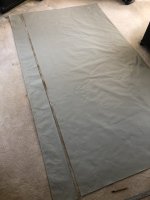
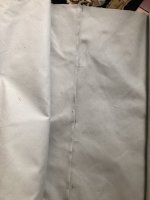
Excited to get started I marked of the overlap for the seam and started sewing. What I forgot was to add witness marks along the length, as a result and in my enthusiasm when I got to the end of the 9’ seam one panel was 1 1/4” shorter than the other. So I ripped out the stitching, adjusted the machine for this fabric (as opposed to the heavier fabric it last sewed) and sewed it again. Success this time . Even though it doesn’t look like it the edge of the fabric does lie on the overlap marks.
IMG_7657.jpeg
Jim
 
Big fan of Col Townsend Whelen. I have used a nylon version for 35 years, They are surprisingly comfortable in cold weather with a fire in front. It has a couple of small burn holes. "Ways of the Widlerness" is one of the great outdoor books of all time.
 
Yes, The Ways of the Wilderness is probably how I first learned about them. I even started to make one with coated ripstop nylon it was all sewn up but I never got the tie out points on it. So this is round two for me.
Jim
 
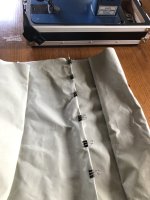
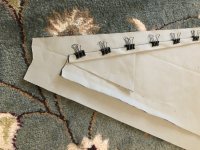
Now that the two panels are joined I fold one along the edge of the other panel and hold it with a small binder clamp.
IMG_7662.jpeg
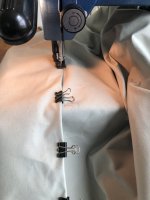
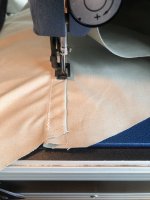
Then making sure the edges of the two panels are right at fold I sew down one side removing the clips as I go.
IMG_7659.jpeg
Then the panels are flipped over and the other edge is sewn finishing the flat felled seam.
IMG_7663.jpeg
Jim
 
Last edited:
I contemplated a Whelen shelter many times and even bought fabric once. It never happened. I will live vicariously following your post.
 
Looking forward to seeing the finished product. Your sewing skills are impressive, I could have used some help back when I sewed my canvas tent, but then again it’s held up so far.
Nice job.
 
This is the kind of post that interests me. I am a huge fan of the Baker Lean-to, but like Whelens as well. I used to have a large Baker with a wood stove that was base camp for deer season, November through January in Wisconsin. I am excited to see your finished product … and read details of trips in it. 😉👍

Bob.
 
Thanks Robin, you have done well for yourself in your tent modifications. I just seem to muddle along, learn mostly from trial and error as I demonstrated in the first post.
Bob, there may be a baker tent in the future. The Whelen and the baker fought in my head before I started so you never know. I do have a wood stove for hot tenting that I bought from Coldfeet so I’m covered there. Years ago I lived in a wall tent and have fond memories so I’m not sure what the next one will be. First thing first finish this one and put it to use.
Jim
 
Jim…..
Make sure you have appropriate placed tie tapes on the inside for hanging mosquito netting for bug season use.
Great tent for spring and fall trips where there is a little frost on the pumpkin during the wee hours. It is kinda like sleeping in a reflector oven with the appropriate fire out front. Don’t use tamarack for firewood too many sparks. Nothing like looking up in the morning to see what appears to be the Milky Way in the roof of a Whelen Tent. I have been contemplating trying the Finnish Gap/Rakovalkea Fire for all night warmth without having to crawl out of the sougans every few hours to add firewood. Make sure you are getting instructions from a Finnlander, not some guy that’s only experience is his own YouTube channel he films in his parents back yard.
…….BB
 
Yes boreal, I do plan to have tie loops strategically located on the inside seems. I don’t seem to tolerate the bugs as well as I used to, so a bug net will be made.
Jim
 
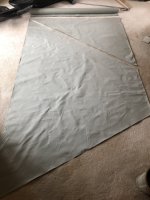
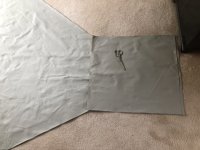
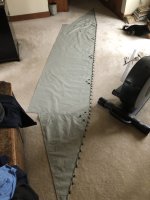
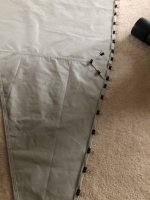
With the back panel sewn I cut and finished the two big side wings. I learned long ago to cut the largest pieces first. The dimensions of the panel are 8x8x7’ so keeping the seam allowances in mind I marked one edge 8’ plus the seams then I made a triangle with a 7’ and an 8’ stick (I with I took a pic of that but I forgot). I then marked and cut out one panel. Then I unrolled more canvas, overlayed the first cut piece matching the already cut line and cut out the second panel. This pic is that step with the two panels together.
IMG_7654.jpeg
The two separate triangles at the top are reserved for side triangles of the awning as those are bigger than I need to finish the wings.
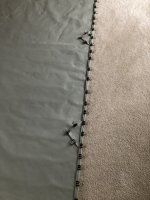
I then cut another strip off the roll finish out the corner. They are cut oversized to start with because hemming the two pieces pulls the little piece in and would make it too small.
IMG_7655.jpeg
IMG_7656.jpeg
The same flat felled seam and maybe you can see how if it was cut as a straight extension it would be too small.
IMG_7660.jpeg
The edges were then extended and the little corner cut down to size.
IMG_7661.jpeg
The folds on the seam are so the water drains over the top of the seem as opposed running into the fold and catching.
Hope that makes sense.
Jim
 
Not to be a pedant, but also don't want interested people looking for something that doesn't exist... Whelen talks about his lean-to in his book "On Your Own in the Wilderness". "(New) Way of the Wilderness" is by Calvin Rutstrum, and he prefers a different kind of shelter (tent with multiple configurations). Both are excellent books, and are on my top 5 "wish I'd read these first" list.

I love my home-made Whelen... have spent many nights in it over the years. My only wish is that it was lighter (3lbs, and made of a medium-weight green and brown Tractor Supply Co. tarp). Because of that, I tend to go with a 10x10 (polyurethane ripstop, at 28 oz) or 9x9 (silpoly, at 15oz) set up in a plowpoint... good, but not quite the Whelen for room and visibility. Both are easy to set up though.

Looking forward to seeing a picture of yours set up in use!
 
Thanks for the correction. It’s been a long time since I read those books.
Jim
No worries... and thank you for graciously taking it in the spirit in which it was intended... one of the things I like about this forum, people's courtesy.

btw, I had to move everything out of my wife's living room to do my first Whelen on the floor... second one, I had a big enough basement space.
 
Since the back panel or roof has been sewn already I now could measure its width to start on the awning. The canvas was rolled out and a new piece cut to match the already sewn roof. This is the last big piece needed. The material is 5’ wide and I don’t need all that width so it is cut lengthwise down to size. That leftover strip will be used as the third sod cloth so it isn’t wasted.
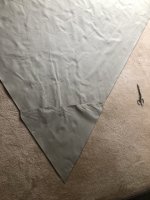
This is the end of that cut down piece butted up to one of those large triangle reserved earlier from cutting out the side wings. As you might be able to see I decided not to make an equilateral triangle as the plans showed but chose instead to make the side that buts up against the wing longer so when the tent is set up high the awning will not always be at a steep angle. Time will tell it if it works out.
IMG_7664.jpeg
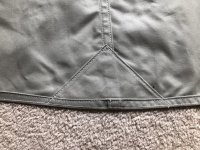
Reinforcement patches were made for the corner and half way down the side that meets the wing. Once those are located the hem is folded and ready to sew. This is sewn before joining to the main panel so its upper edge is sewn in under that seam. Sorry I just have a pic of the corner.
IMG_7681.jpeg
The two wings are joined to the main panel, more reinforcement patches are made and the long hem on the edge of the awning is folded and ready for sewing.
IMG_7682.jpeg
IMG_7683.jpeg
IMG_7684.jpeg
Jim
 
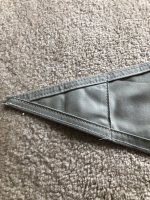
That long hem is now sewn and except for the ties to join it to the side wings and pull outs it is finished and ready to join to the roof.
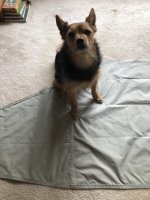
We adopted this dog when he was seven and was told he as raised in a family with cats, see what he learned from them.
IMG_7688.jpeg
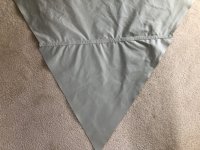
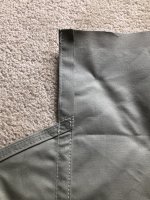
Just some details of the finished awning. When the side triangles are sewn on the seam rolls the edge in so when it is joined to the roof there will not be a major stress point.
IMG_7690.jpeg
IMG_7691.jpeg
IMG_7692.jpeg
Now I can transfer the locations of the reinforcement patches to the side wings and sew up the front edge of the wings.
That’s all for now, I need to get more sewing done before the next installment. Plus I need to make some decisions, where the awning wings meet the side wing, should it be a loop and toggle? just to strings that get tied together? I haven’t decided yet.
Thanks for following along.
Jim
 
Anytime Dave. The first set will be in the back yard just before a rain storm so I can test it out. I still have a ways to go but in ready to sew the side wings to the ‘roof’, I just need to scrounge something to use for tie loops to hold bug net or lanterns.
Jim
 
Back
Top