G
Guest
Guest
In some thread this spring I had posted about a process I have for embedding semi-precious stones in living saplings. The process is simply; drill/carve a stone sized hole in the tree, insert the stone and keep it held in place with a hose clamp. I add a little rubber cork spacer so the stone doesn’t crack and the hose clamp isn’t wrapped tight where I want the bezel to form.
I put stones in a few swamp trees in NC this March, Holies and Swamp Magnolias (Sweet Bay). The growing process usually takes 3 to 5 years (and the drying process another 3 – 5 years….long term project).
This is one of those, implanted in March:
I’ve implanted 70+ trees with that technique over the years, mostly for fancy walking sticks and canes, but also for sculptures and pipe bowls and candle sticks. And gear shift knobs. This shift knob was in my ’84 truck, my ’95 truck and my new truck:

That looks and feels a lot better than this fugly clunker:
That knob is Holly, inset with picture jasper. 5 years in the ground, 3 years to dry. Again, long term project.
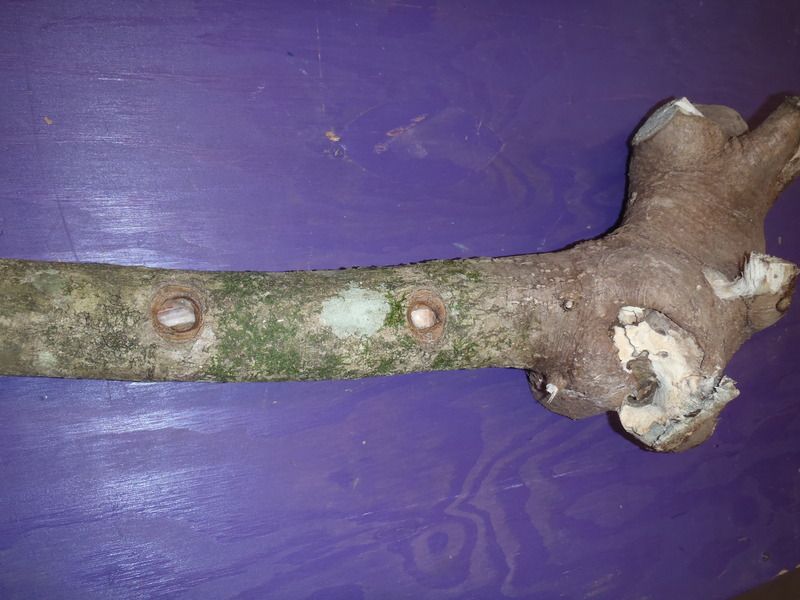
Except when the growing location receives nearly 30 inches more rain than the historic norm. I needed to dig a post hole in that NC location, up on the higher ground, and hit the water table before I dug deep enough.
9 months later:
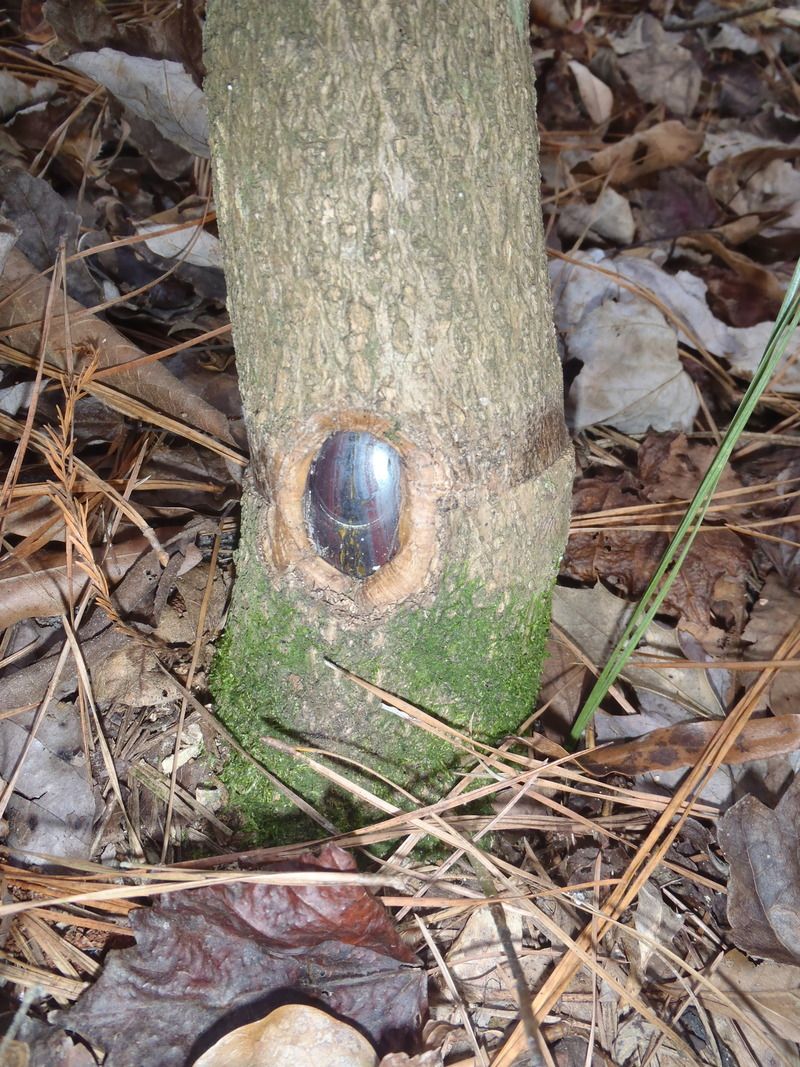
I dug up three saplings that were ready, with tap root structure intact, and that is left to do is wait a few years for the wood to dry and start carving. Once I start carving away at the root structure the tree will tell me what it wants to become.


Now the long wait for a slow dry time begins.
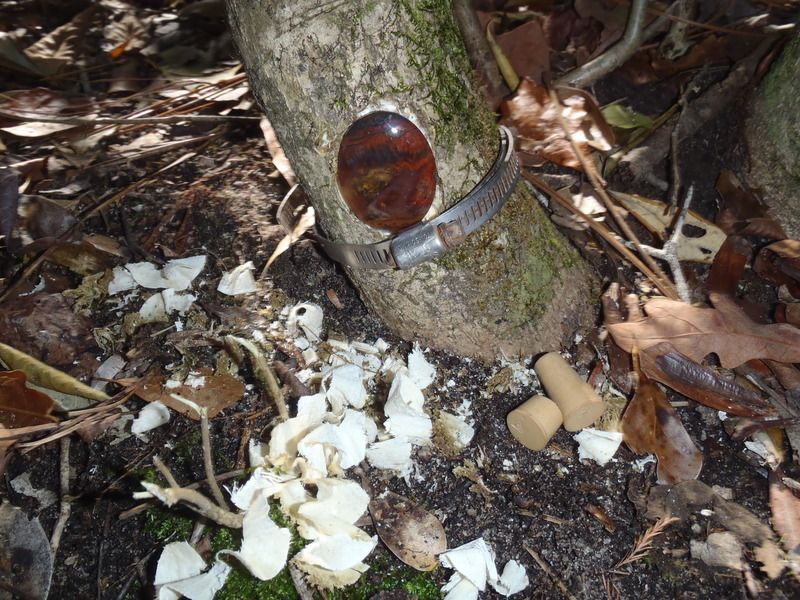
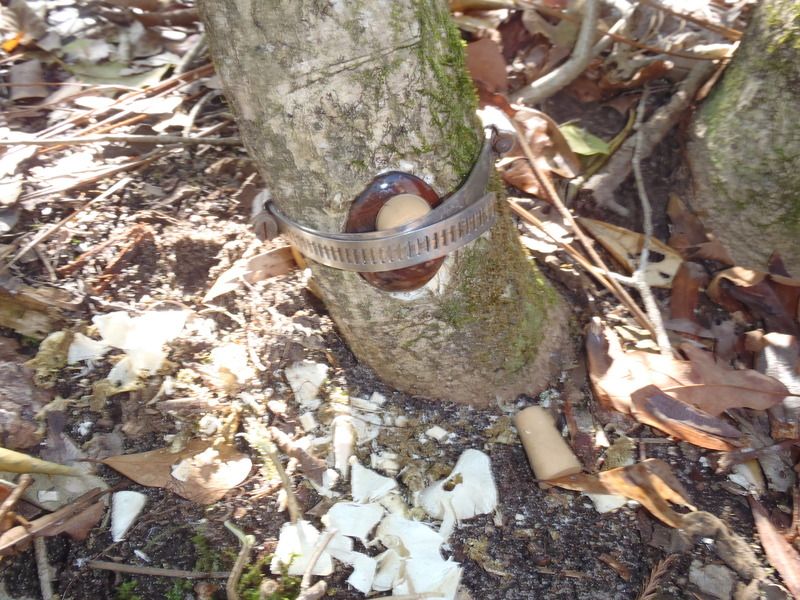
I put stones in a few swamp trees in NC this March, Holies and Swamp Magnolias (Sweet Bay). The growing process usually takes 3 to 5 years (and the drying process another 3 – 5 years….long term project).
This is one of those, implanted in March:


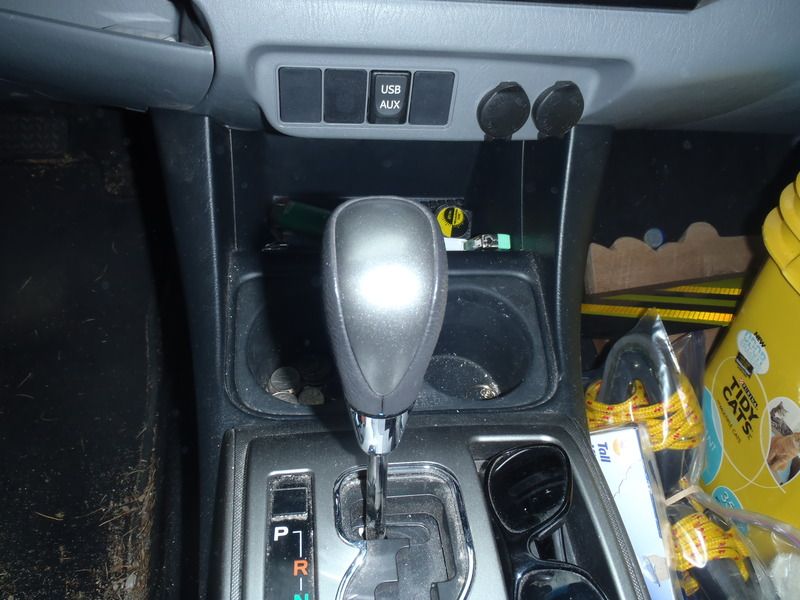
I’ve implanted 70+ trees with that technique over the years, mostly for fancy walking sticks and canes, but also for sculptures and pipe bowls and candle sticks. And gear shift knobs. This shift knob was in my ’84 truck, my ’95 truck and my new truck:

That looks and feels a lot better than this fugly clunker:

That knob is Holly, inset with picture jasper. 5 years in the ground, 3 years to dry. Again, long term project.
Except when the growing location receives nearly 30 inches more rain than the historic norm. I needed to dig a post hole in that NC location, up on the higher ground, and hit the water table before I dug deep enough.
9 months later:

I dug up three saplings that were ready, with tap root structure intact, and that is left to do is wait a few years for the wood to dry and start carving. Once I start carving away at the root structure the tree will tell me what it wants to become.


Now the long wait for a slow dry time begins.

") . Wait.
. Wait.


