G
Guest
Guest
Memaquay promised me a private show in a back room of the Blue Lagoon, so I feel rewarded enough to publish the impact resistance results
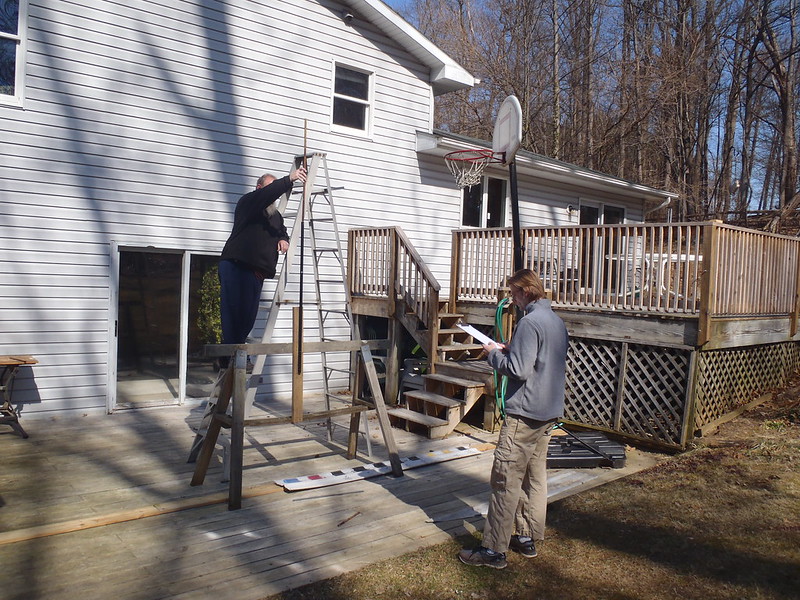
I brought this down to the DIY board, where shade tree boat tinkerers and manufactured canoe skid plate installers might easier find it. The pre-test pondering and experimental set up starts here:
http://www.canoetripping.net/forums...5-the-half-arsed-skid-plate-experiment-begins
I pseudo-scientifically impact tested eight different skid plate layups. Ten if you include two done simply for color saturation that don’t really count. Some of the impact drops were too gentle, a 9oz piece of rebar dropped from 7 feet didn’t dent any of the test pieces and barely left a scuff mark.
Some were a bit extreme, a 3lb, 9oz steel Horseshoe stake, guidance dropped from 7 feet high with the pointy end down, punched deep dents in some materials and shattered others.
 P3170001 by Mike McCrea, on Flickr
As expected there is a significant impact difference between kevlar felt, Dynel and Dynel with an under layer.
Test material results, subjectively observed and inspected.
TL;DR; kevlar felt is crap for impact resistance. At some foolish point I said “If I ever do another kevlar felt skid plate . . . . .” Seeing the test results I’ll never use kevlar felt again.
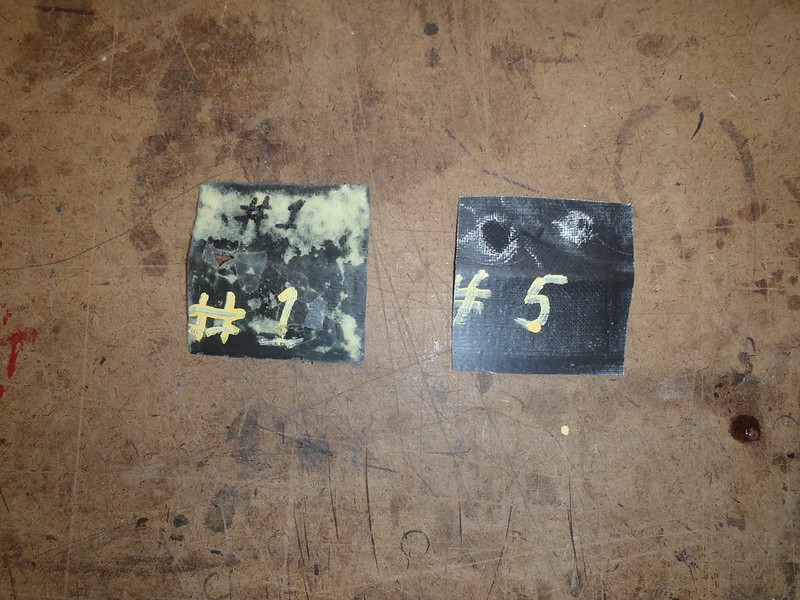
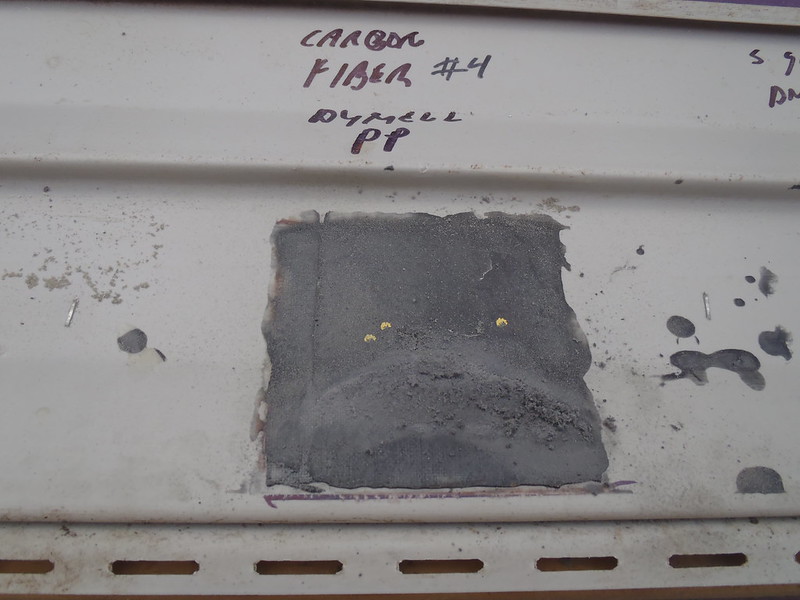
The assorted minor damage is hard to assess in the photos. The yellow dots on some graphite pieces were needed to denote different impact strikes.
 P3170005 by Mike McCrea, on Flickr
#1, kevlar felt, graphite powder, black pigment, peel ply compression:
9 oz rebar at 6 and 7 foot drop heights, scuff mark
1lb 4oz rebar at 6 feet, minor dent
1lb 4oz rebar at 7 feet, dent and slight crack
3lb 9oz horseshoe stake at 6 feet (blunt end), large circular dent with cracks emanating
3lb 9oz horseshoe stake at 7 feet pointy end, chunks busted out cracks emanating
 P3170006 by Mike McCrea, on Flickr
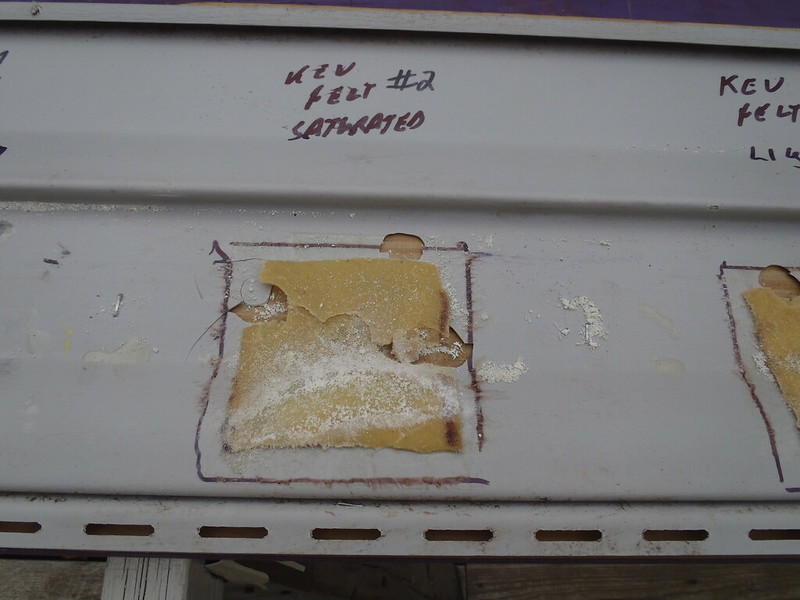
#2, kevlar felt, heavily epoxy saturated:
9 oz rebar at 6 and 7 foot drop height, scuff mark
1lb 4oz rebar at 6 feet, worse scuff mark
1lb 4oz rebar at 7 feet, dent with cracks
3lb 9oz horseshoe stake at 6 feet (blunt end), deep dent with cracks (we missed the center of the of the target with the first stake drop and hit the edge, busting edge pieces of kevlar felt out)
3lb 9oz horseshoe stake at 7 feet pointy end, not as close to the edge, still broke pieces out.
 P3170009 by Mike McCrea, on Flickr
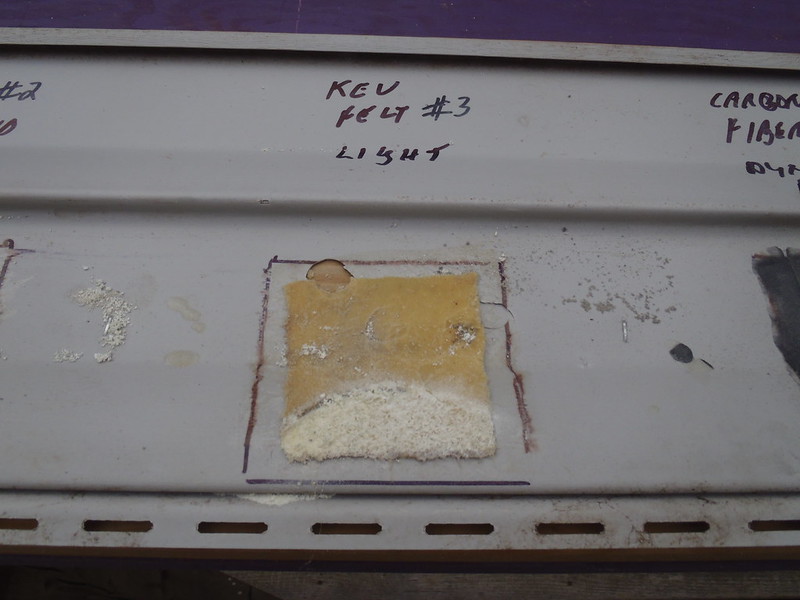
#3, kevlar felt, more lightly epoxy saturated:
9 oz rebar at 6 and 7 foot drop height, the usual scuff marks. We continued dropping the 9oz rebar first just to check our aim each time.
1lb 4oz rebar at 6 feet, cracks, no dent
1lb 4oz rebar at 7 feet, dent with cracks
3lb 9oz horseshoe stake at 6 feet (blunt end), dent with cracks. We again missed center target with the stake and hit an edge, busting off chunks of kevlar felt.
3lb 9oz horseshoe stake at 7 feet pointy end, no piece broken out, but a circular dent with cracks.
 P3170010 by Mike McCrea, on Flickr
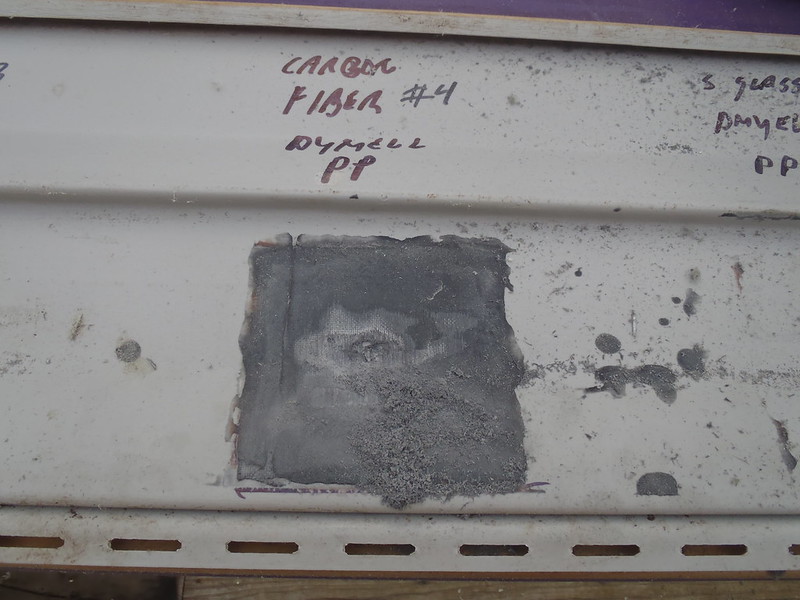
#4, Carbon fiber under layer, Dynel, graphite powder and black pigment, peel ply compression
9 oz rebar at 6 and 7 foot drop height. Scuff marks, barely
1lb 4oz rebar at 6 feet. Scuff mark
1lb 4oz rebar at 7 feet, one very small crack
3lb 9oz horseshoe stake at 6 feet (blunt end), shallow circular dent, no cracks emanating
3lb 9oz horseshoe stake at 7 feet pointy end, conical puncture, no cracks emanating
 P3170013 by Mike McCrea, on Flickr
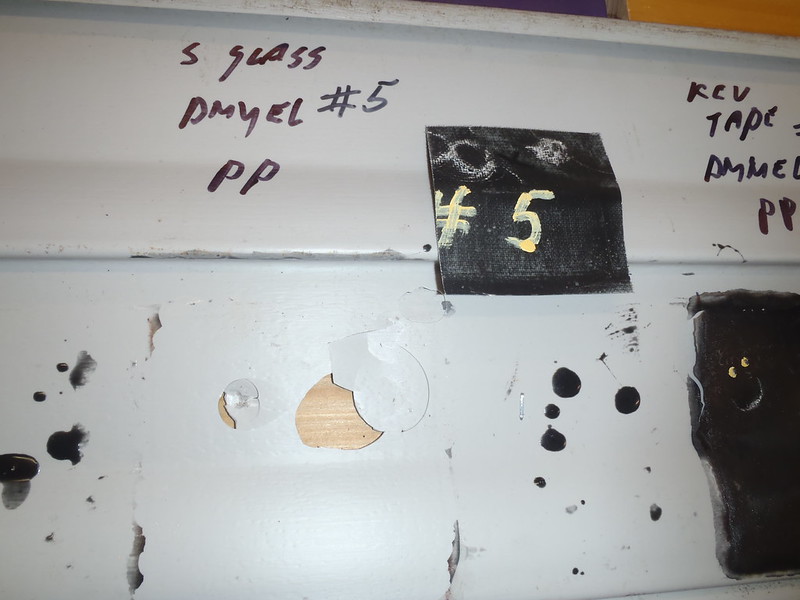
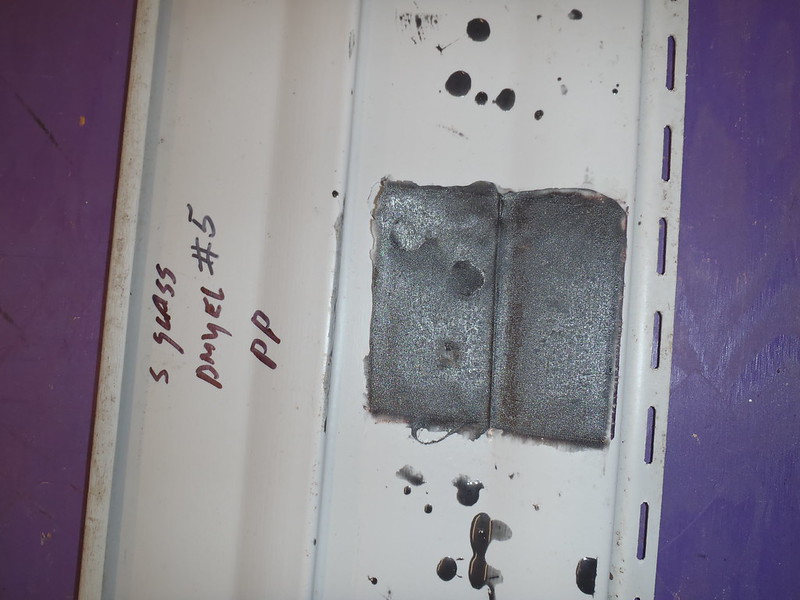
#5, S-glass under layer, Dynel, graphite powder and black pigment, peel ply compression
9 oz rebar at 6 and 7 foot drop height. Scuff
1lb 4oz rebar at 6 feet. Scuff
1lb 4oz rebar at 7 feet. Slight dent
3lb 9oz horseshoe stake at 6 feet (blunt end). Semi circle crack broken, no other cracks emanating
3lb 9oz horseshoe stake at 7 feet pointy end. Conical dent with X shaped cracks in the dent
(I do not know what weight S-glass I used, something lightweight)
 P3170015 by Mike McCrea, on Flickr
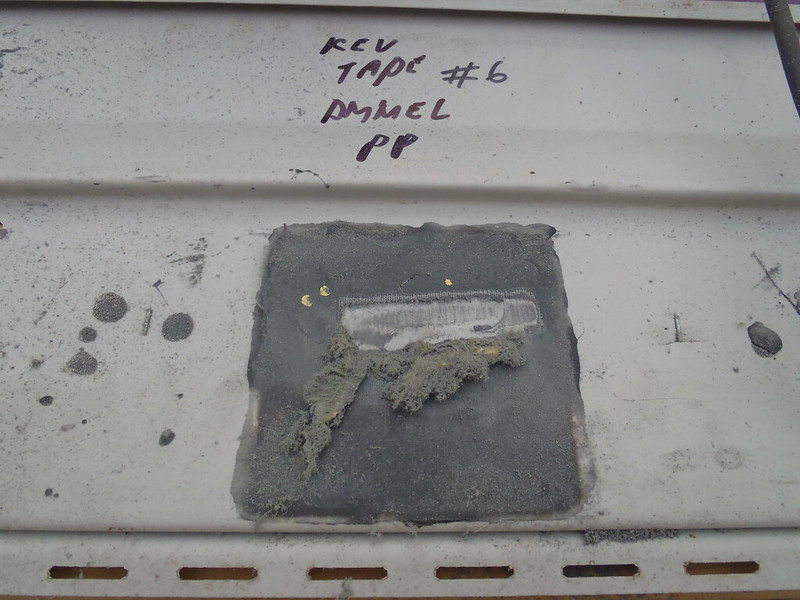
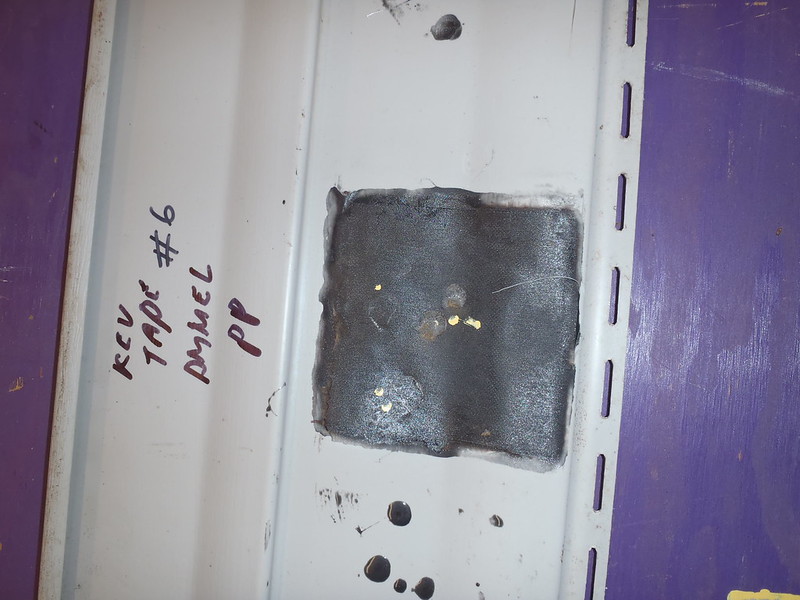
#6, Kevlar tape under layer, Dynel, graphite powder and black pigment, peel ply compression
9 oz rebar at 6 and 7 foot drop height. Scuff
1lb 4oz rebar at 6 feet. Scuff
1lb 4oz rebar at 7 feet. Slight dent, no cracks emanating
3lb 9oz horseshoe stake at 6 feet (blunt end). Semi circle crack broken, no other cracks emanating
3lb 9oz horseshoe stake at 7 feet pointy end. Shallow conical dent with small X shaped cracks in the dent
(We dropped the horseshoe stake several times to assure we had hit the 1.5” wide kevlar tape below)
 P3170017 by Mike McCrea, on Flickr
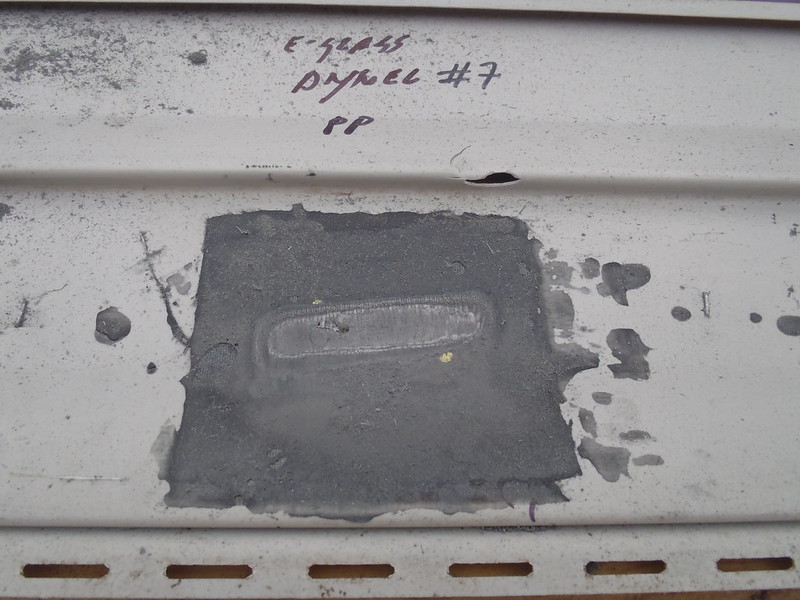
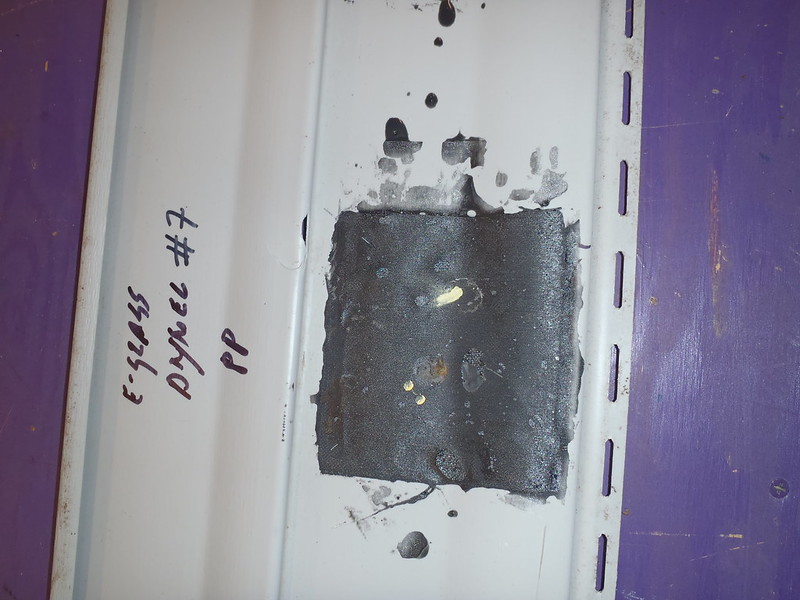
#7, E-glass under layer, Dynel, graphite powder and black pigment, peel ply compression
9 oz rebar at 6 and 7 foot drop height. Scuff
1lb 4oz rebar at 6 feet. Scuff
1lb 4oz rebar at 7 feet. Small dent
3lb 9oz horseshoe stake at 6 feet (blunt end). Semi circle crack broken, no other cracks emanating
3lb 9oz horseshoe stake at 7 feet pointy end. Conical depression, not broken through, no cracks
(It’s hard to tell apart from the epoxy pock marks, but that ancient E-glass did surprisingly well. Better than the S-glass. It was a heavier weight material than the S-glass)
 P3170018 by Mike McCrea, on Flickr
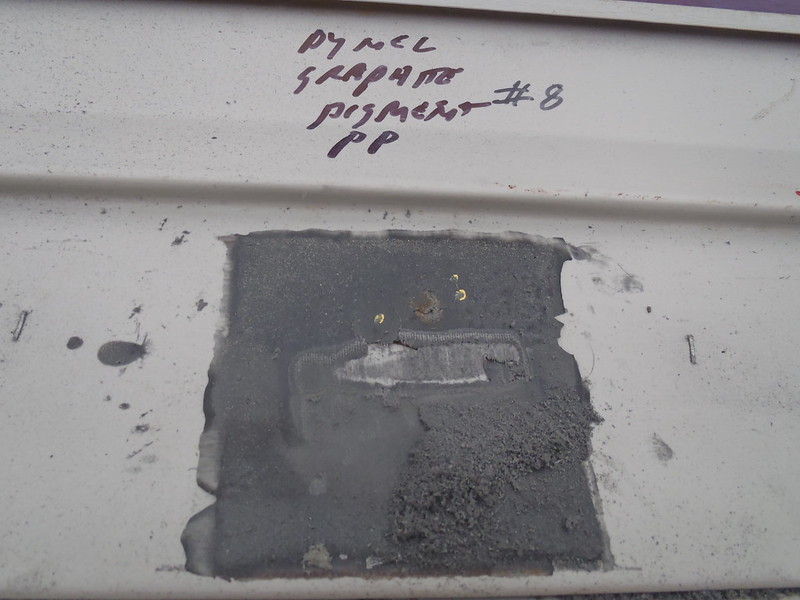
#8, Single layer Dynel, graphite powder and black pigment, peel ply compression
9 oz rebar at 6 and 7 foot drop height. Scuff.
1lb 4oz rebar at 6 feet. Scuff
1lb 4oz rebar at 7 feet. Small dent.
3lb 9oz horseshoe stake at 6 feet (blunt end). Near full circle (almost broken free) crack and dent
3lb 9oz horseshoe stake at 7 feet pointy end. Conical depression, small hole dead center.
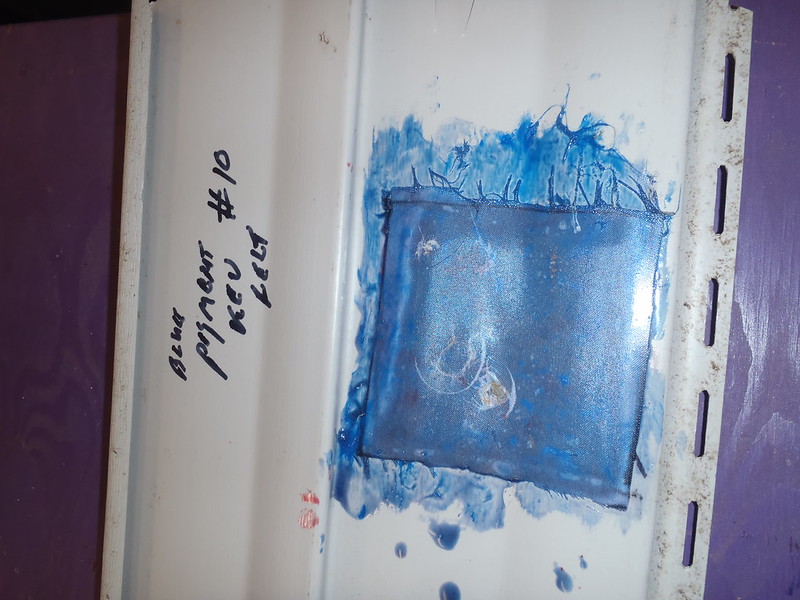
#9 and 10, Kevlar felt with red and blue color agent pigments, done simply to verify that even kevlar felt skid plates need not be as fugly. Not a valid test; I cut the peel ply covering squares too small and they remained unpeelably epoxied atop the felt, which provided an additional impact layer. On the downside I used no G/flex in the epoxy mix. None the less, both felt patches dented and cracked, staring with the 1lb 4oz bar.
 P3170021 by Mike McCrea, on Flickr
 P3170022 by Mike McCrea, on Flickr
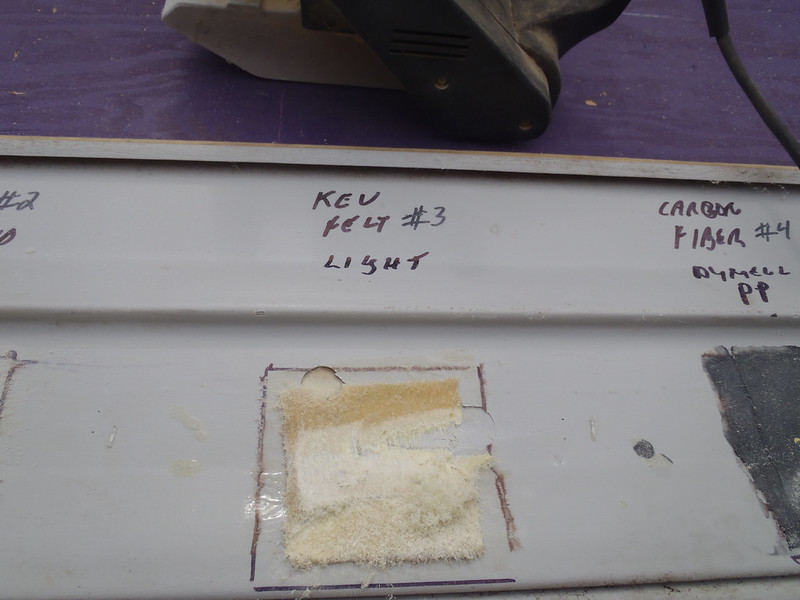
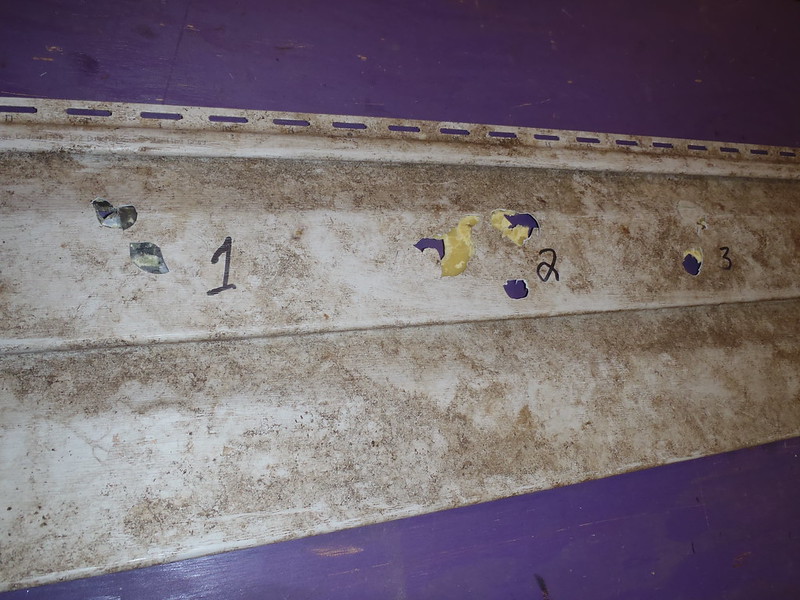
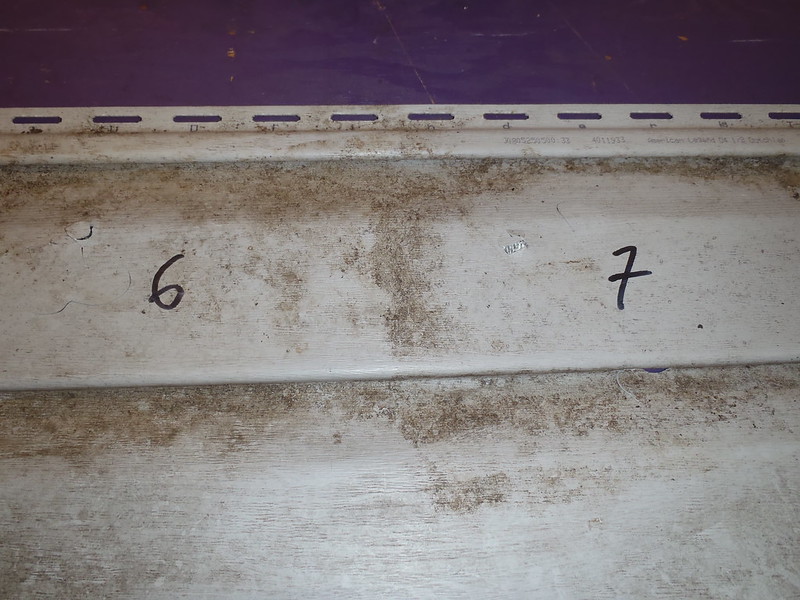
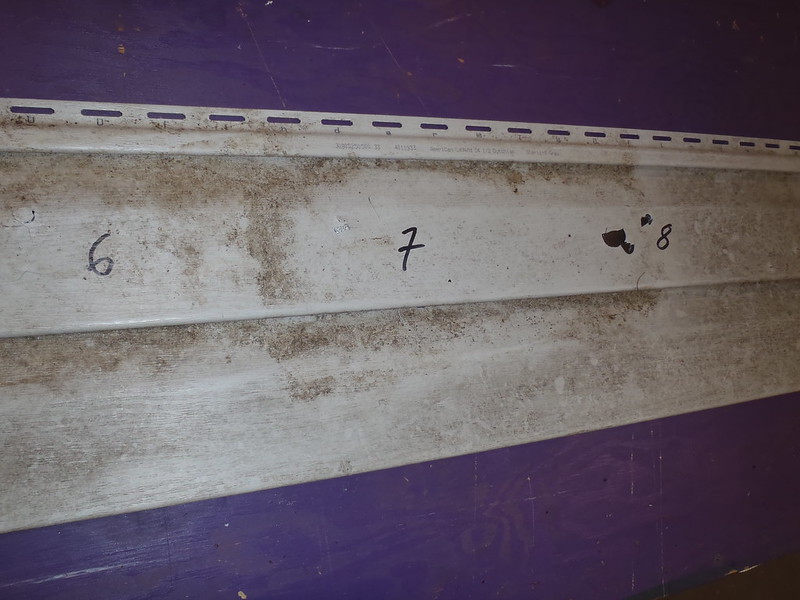
For what it’s worth, the back of the vinyl siding. Hull stem thickness (and shape) in any material would not have punched through or have broken off substrate pieces as easily as thin vinyl siding. FWIW, the kevlar felts (#’s 1, 2 and 3) all punched out chunks of material and siding.
 P3180024 by Mike McCrea, on Flickr
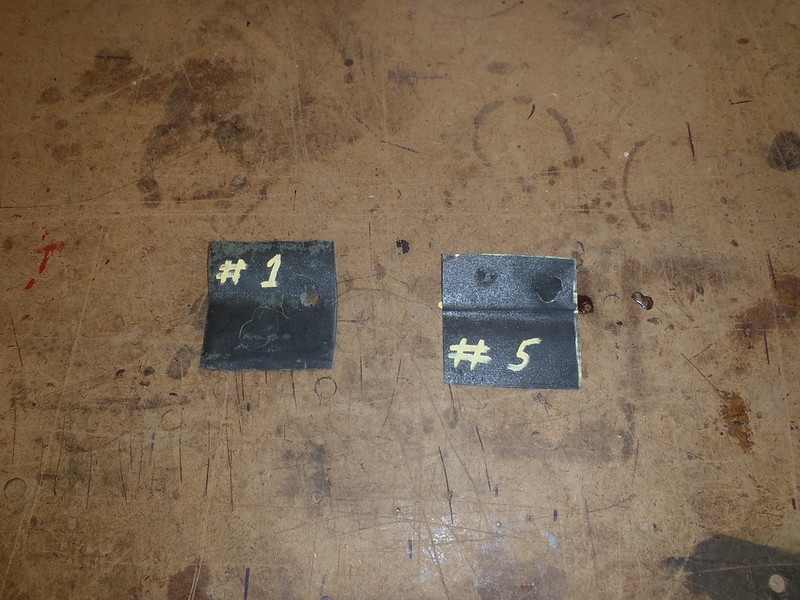
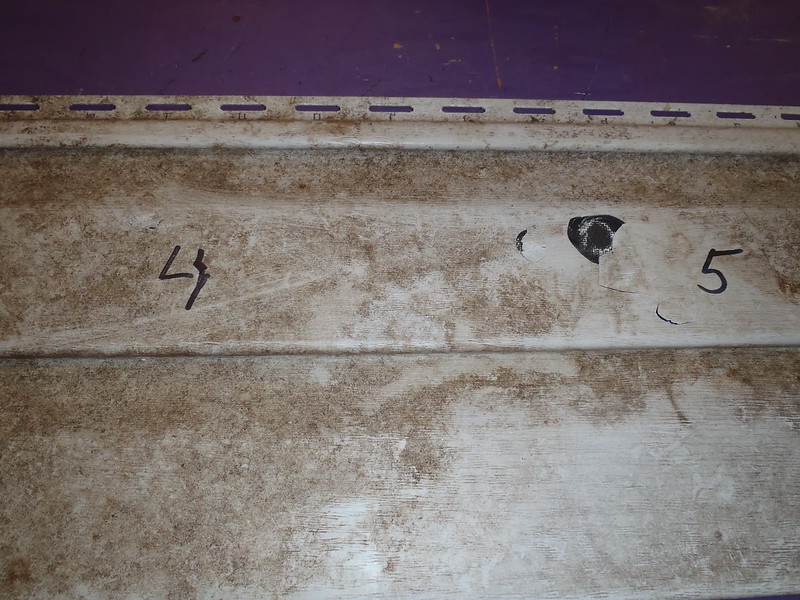
The least damaged on the backside are #4 (carbon fiber underlay), #6 (kevlar tape) and #7 (E-glass), and the E-glass fared the best of those.
The lightweight S-glass underlay (#5) fared poorly. FWIW I think that was 6oz S-glass, maybe 4oz. Single layer 5 oz Dynel (#8) also punched through on the backside.
 P3180025 by Mike McCrea, on Flickr
 P3180026 by Mike McCrea, on Flickr
 P3180029 by Mike McCrea, on Flickr
Having completed the impact testing portion of the experiment it occurs that there is a lot I could have done better. More on those (not my future) testing improvements later.
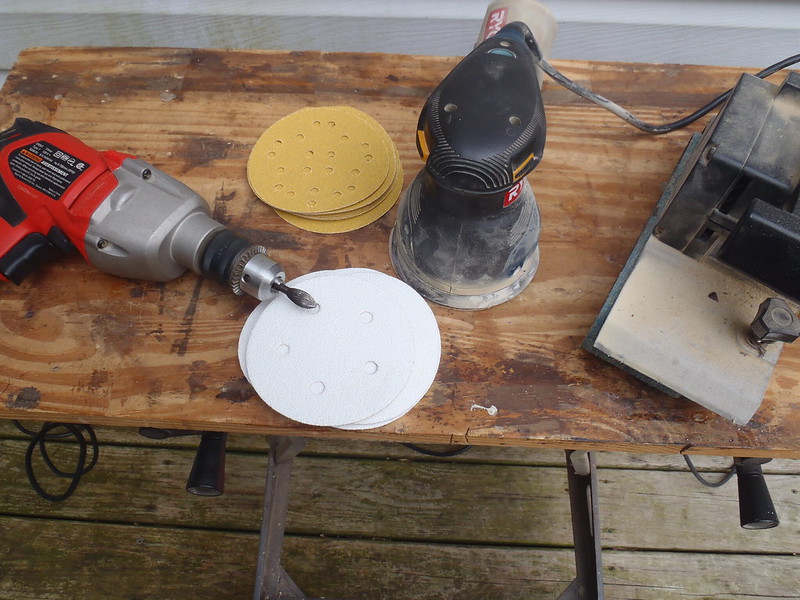
I have sufficient undamaged skid plate areas on each piece for the next test.
That will be a largely subjective abrasion test, running some power sanders and different grits. Gloved and gowned and goggled and respiratored, making ultra-fine graphite powder and Dynel dust. Outside.
Anybody want to swing by and do that for me while I take notes and photographs?
I brought this down to the DIY board, where shade tree boat tinkerers and manufactured canoe skid plate installers might easier find it. The pre-test pondering and experimental set up starts here:
http://www.canoetripping.net/forums...5-the-half-arsed-skid-plate-experiment-begins
I pseudo-scientifically impact tested eight different skid plate layups. Ten if you include two done simply for color saturation that don’t really count. Some of the impact drops were too gentle, a 9oz piece of rebar dropped from 7 feet didn’t dent any of the test pieces and barely left a scuff mark.
Some were a bit extreme, a 3lb, 9oz steel Horseshoe stake, guidance dropped from 7 feet high with the pointy end down, punched deep dents in some materials and shattered others.
P3170001 by Mike McCrea, on FlickrAs expected there is a significant impact difference between kevlar felt, Dynel and Dynel with an under layer.
Test material results, subjectively observed and inspected.
TL;DR; kevlar felt is crap for impact resistance. At some foolish point I said “If I ever do another kevlar felt skid plate . . . . .” Seeing the test results I’ll never use kevlar felt again.
The assorted minor damage is hard to assess in the photos. The yellow dots on some graphite pieces were needed to denote different impact strikes.
P3170005 by Mike McCrea, on Flickr#1, kevlar felt, graphite powder, black pigment, peel ply compression:
9 oz rebar at 6 and 7 foot drop heights, scuff mark
1lb 4oz rebar at 6 feet, minor dent
1lb 4oz rebar at 7 feet, dent and slight crack
3lb 9oz horseshoe stake at 6 feet (blunt end), large circular dent with cracks emanating
3lb 9oz horseshoe stake at 7 feet pointy end, chunks busted out cracks emanating
P3170006 by Mike McCrea, on Flickr#2, kevlar felt, heavily epoxy saturated:
9 oz rebar at 6 and 7 foot drop height, scuff mark
1lb 4oz rebar at 6 feet, worse scuff mark
1lb 4oz rebar at 7 feet, dent with cracks
3lb 9oz horseshoe stake at 6 feet (blunt end), deep dent with cracks (we missed the center of the of the target with the first stake drop and hit the edge, busting edge pieces of kevlar felt out)
3lb 9oz horseshoe stake at 7 feet pointy end, not as close to the edge, still broke pieces out.
P3170009 by Mike McCrea, on Flickr#3, kevlar felt, more lightly epoxy saturated:
9 oz rebar at 6 and 7 foot drop height, the usual scuff marks. We continued dropping the 9oz rebar first just to check our aim each time.
1lb 4oz rebar at 6 feet, cracks, no dent
1lb 4oz rebar at 7 feet, dent with cracks
3lb 9oz horseshoe stake at 6 feet (blunt end), dent with cracks. We again missed center target with the stake and hit an edge, busting off chunks of kevlar felt.
3lb 9oz horseshoe stake at 7 feet pointy end, no piece broken out, but a circular dent with cracks.
P3170010 by Mike McCrea, on Flickr#4, Carbon fiber under layer, Dynel, graphite powder and black pigment, peel ply compression
9 oz rebar at 6 and 7 foot drop height. Scuff marks, barely
1lb 4oz rebar at 6 feet. Scuff mark
1lb 4oz rebar at 7 feet, one very small crack
3lb 9oz horseshoe stake at 6 feet (blunt end), shallow circular dent, no cracks emanating
3lb 9oz horseshoe stake at 7 feet pointy end, conical puncture, no cracks emanating
P3170013 by Mike McCrea, on Flickr#5, S-glass under layer, Dynel, graphite powder and black pigment, peel ply compression
9 oz rebar at 6 and 7 foot drop height. Scuff
1lb 4oz rebar at 6 feet. Scuff
1lb 4oz rebar at 7 feet. Slight dent
3lb 9oz horseshoe stake at 6 feet (blunt end). Semi circle crack broken, no other cracks emanating
3lb 9oz horseshoe stake at 7 feet pointy end. Conical dent with X shaped cracks in the dent
(I do not know what weight S-glass I used, something lightweight)
P3170015 by Mike McCrea, on Flickr#6, Kevlar tape under layer, Dynel, graphite powder and black pigment, peel ply compression
9 oz rebar at 6 and 7 foot drop height. Scuff
1lb 4oz rebar at 6 feet. Scuff
1lb 4oz rebar at 7 feet. Slight dent, no cracks emanating
3lb 9oz horseshoe stake at 6 feet (blunt end). Semi circle crack broken, no other cracks emanating
3lb 9oz horseshoe stake at 7 feet pointy end. Shallow conical dent with small X shaped cracks in the dent
(We dropped the horseshoe stake several times to assure we had hit the 1.5” wide kevlar tape below)
P3170017 by Mike McCrea, on Flickr#7, E-glass under layer, Dynel, graphite powder and black pigment, peel ply compression
9 oz rebar at 6 and 7 foot drop height. Scuff
1lb 4oz rebar at 6 feet. Scuff
1lb 4oz rebar at 7 feet. Small dent
3lb 9oz horseshoe stake at 6 feet (blunt end). Semi circle crack broken, no other cracks emanating
3lb 9oz horseshoe stake at 7 feet pointy end. Conical depression, not broken through, no cracks
(It’s hard to tell apart from the epoxy pock marks, but that ancient E-glass did surprisingly well. Better than the S-glass. It was a heavier weight material than the S-glass)
P3170018 by Mike McCrea, on Flickr#8, Single layer Dynel, graphite powder and black pigment, peel ply compression
9 oz rebar at 6 and 7 foot drop height. Scuff.
1lb 4oz rebar at 6 feet. Scuff
1lb 4oz rebar at 7 feet. Small dent.
3lb 9oz horseshoe stake at 6 feet (blunt end). Near full circle (almost broken free) crack and dent
3lb 9oz horseshoe stake at 7 feet pointy end. Conical depression, small hole dead center.
#9 and 10, Kevlar felt with red and blue color agent pigments, done simply to verify that even kevlar felt skid plates need not be as fugly. Not a valid test; I cut the peel ply covering squares too small and they remained unpeelably epoxied atop the felt, which provided an additional impact layer. On the downside I used no G/flex in the epoxy mix. None the less, both felt patches dented and cracked, staring with the 1lb 4oz bar.
P3170021 by Mike McCrea, on FlickrP3170022 by Mike McCrea, on FlickrFor what it’s worth, the back of the vinyl siding. Hull stem thickness (and shape) in any material would not have punched through or have broken off substrate pieces as easily as thin vinyl siding. FWIW, the kevlar felts (#’s 1, 2 and 3) all punched out chunks of material and siding.
P3180024 by Mike McCrea, on FlickrThe least damaged on the backside are #4 (carbon fiber underlay), #6 (kevlar tape) and #7 (E-glass), and the E-glass fared the best of those.
The lightweight S-glass underlay (#5) fared poorly. FWIW I think that was 6oz S-glass, maybe 4oz. Single layer 5 oz Dynel (#8) also punched through on the backside.
P3180025 by Mike McCrea, on FlickrP3180026 by Mike McCrea, on FlickrP3180029 by Mike McCrea, on FlickrHaving completed the impact testing portion of the experiment it occurs that there is a lot I could have done better. More on those (not my future) testing improvements later.
I have sufficient undamaged skid plate areas on each piece for the next test.
That will be a largely subjective abrasion test, running some power sanders and different grits. Gloved and gowned and goggled and respiratored, making ultra-fine graphite powder and Dynel dust. Outside.
Anybody want to swing by and do that for me while I take notes and photographs?