G
Guest
Guest
(Already long, and the real shop fun is just getting started)
I didn’t feel like waiting to find Royalex or composite stems to chop saw off of junk canoes for a skid plate materials test, so I am again using leftover vinyl siding as the test bed. Should at least replicate RX vinyl skin.
I cut out (Scot’s frugal) three inch squares of test materials (and overlapping squares of peel ply). One benefit already, I squared up some oddly Tetris-cut odds and ends left on lengths of material. I even taped out the perimeters on the test bed, but did not paper between for sloppy loaded brush drips.
I used my usual mix of West System 105/206 and G/flex epoxy. Well, not my usual; I was hesitant to use up G/flex for an experiment, and didn’t go the usual 50/50 mix. More like 25/75.
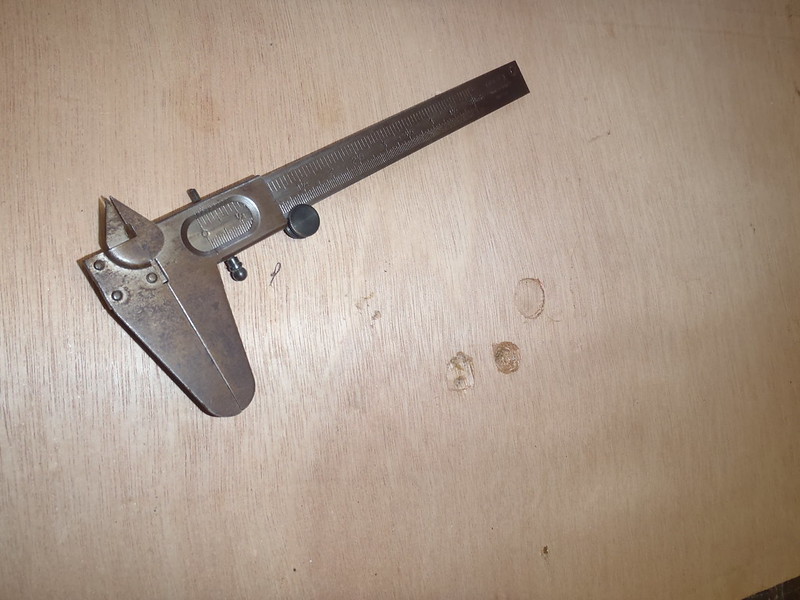
I meant to photograph the appearance of the raw test materials, but already had the epoxy going and gloves on before I remembered.
 P3130003 by Mike McCrea, on Flickr
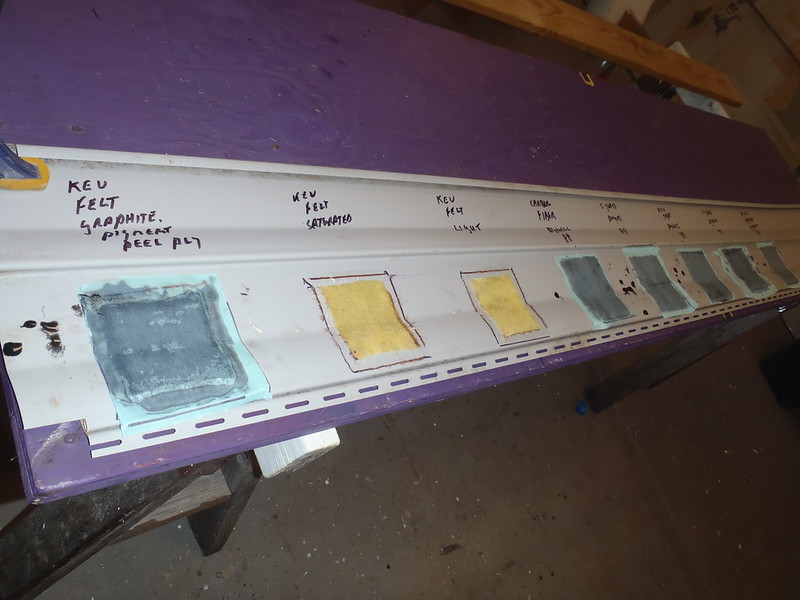
Materials left to right, now epoxy-coated on the vinyl siding panel.
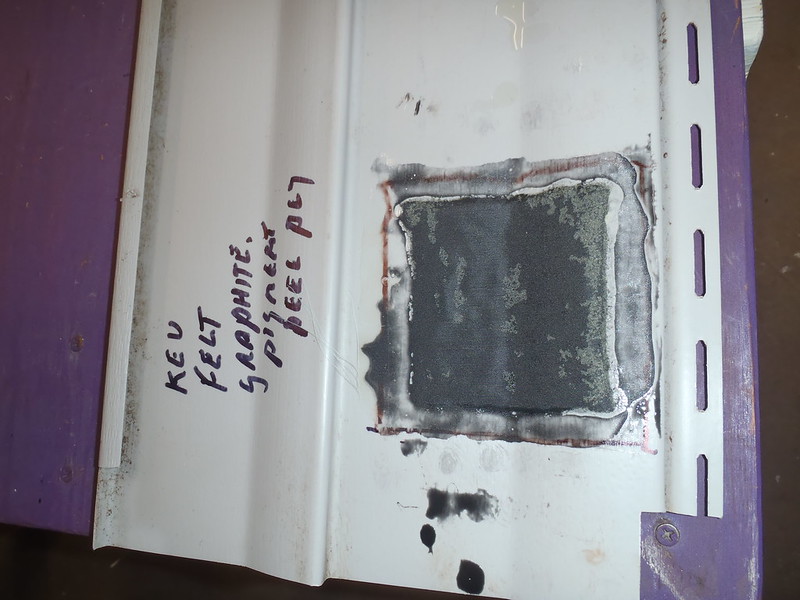
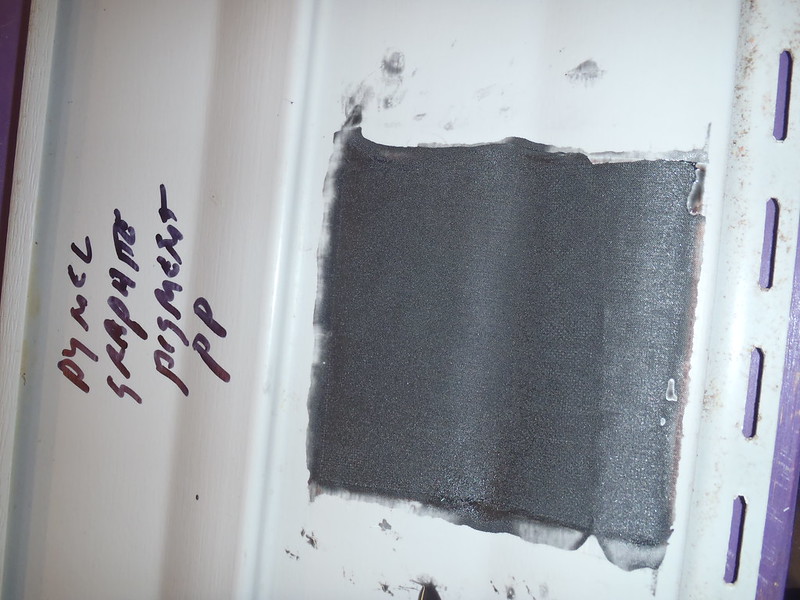
#1, Kevlar felt with graphite powder and black pigment, for future peel ply compression. I just want to see how kev felt compresses and takes color. I still believe it is crap material, but at least it would look better if colored, and should stand less tall and cure less rough with just hand compressed peel ply
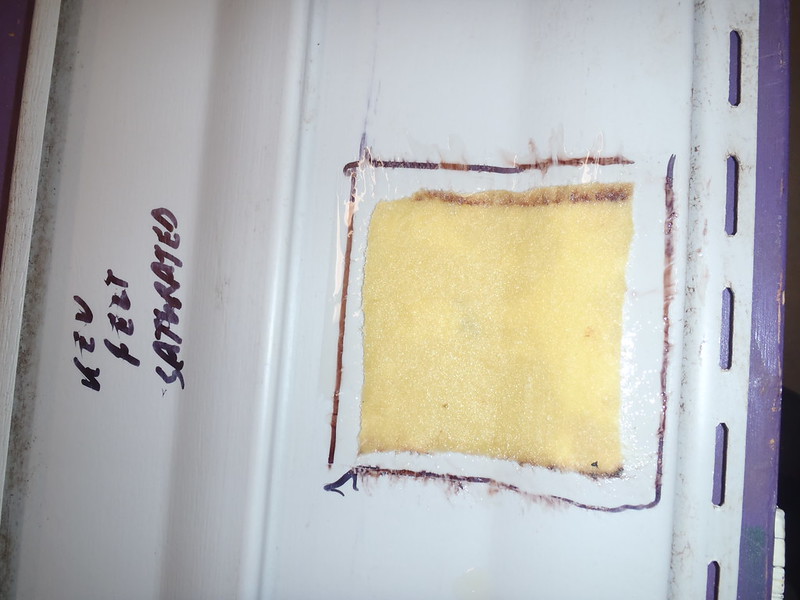
#2, Kevlar felt, resin rich, no peel ply. To replicate the way too many skid plate kits were installed, using every ounce of epoxy in a $100 skid plate kit. I predict raspy rough.
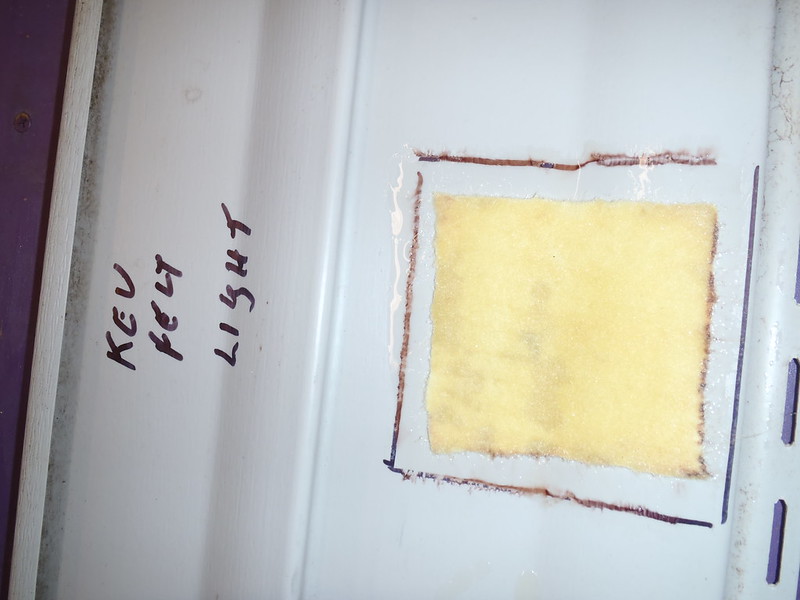
#3, Kevlar felt, slightly resin starved, no peel ply. Not really “starved”, but I believe a little light on the epoxy is better than over saturated.
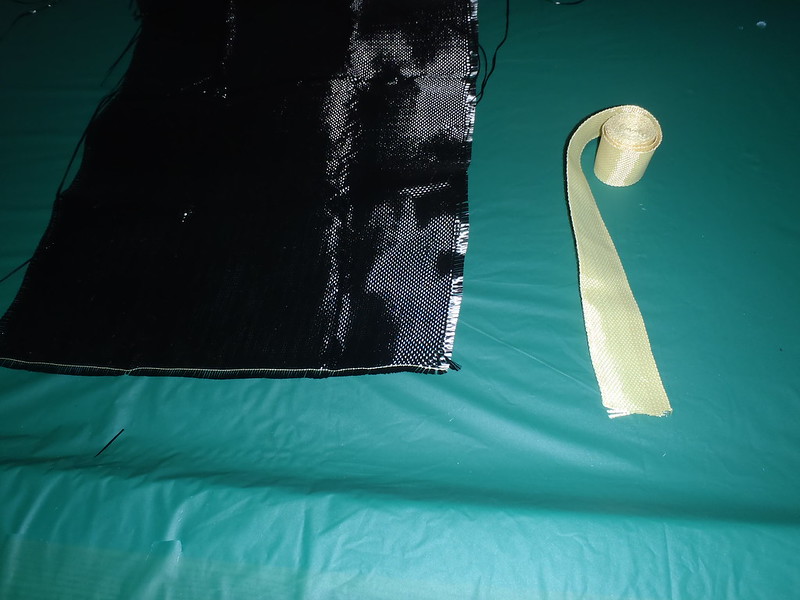
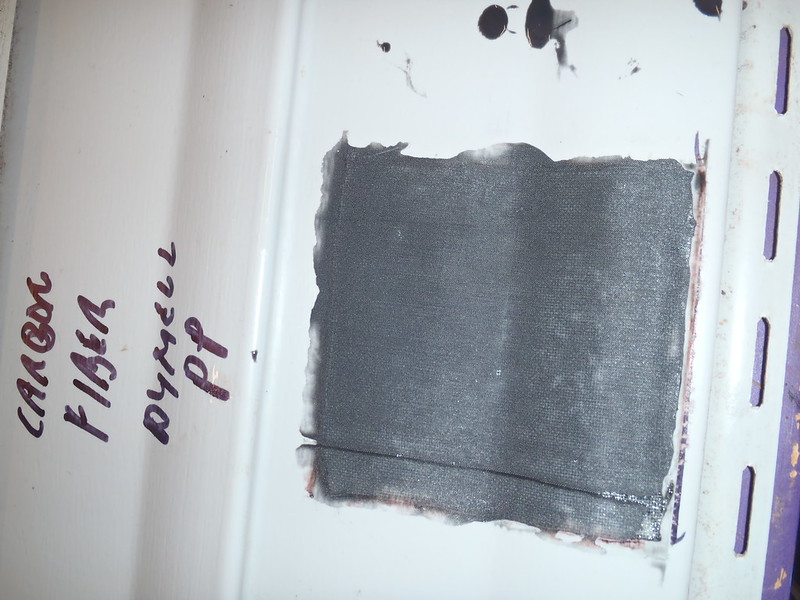
#4, Carbon fiber under layer, Dynel over, peel ply. What the hell, I had some (thick, wide-weave?) carbon fiber. The carbon fiber black under the Dynel looked hideously shadowed in dry layup, so graphite powder and black pigment in the epoxy mix to hide the fugly.
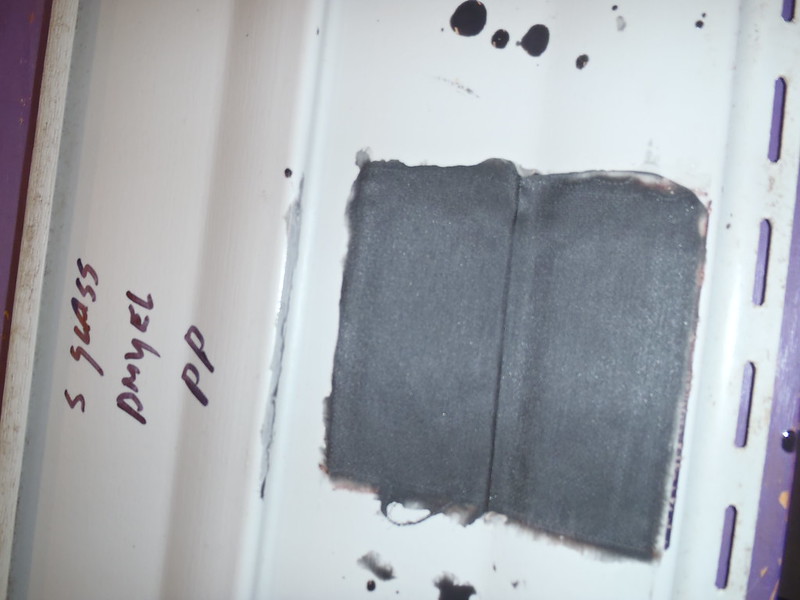
#5, S-glass under layer, Dynel over, peel ply. The S-glass under layer should be invisible, but epoxied Dynel turns out kinda cloudy with epoxy (and G/flex), so graphite powder and black pigment.
#6, Kevlar tape under layer, Dynel over, peel ply. The yellow kevlar tape (thick, woven fabric) was ugly visible dry, so graphite powder and black pigment.
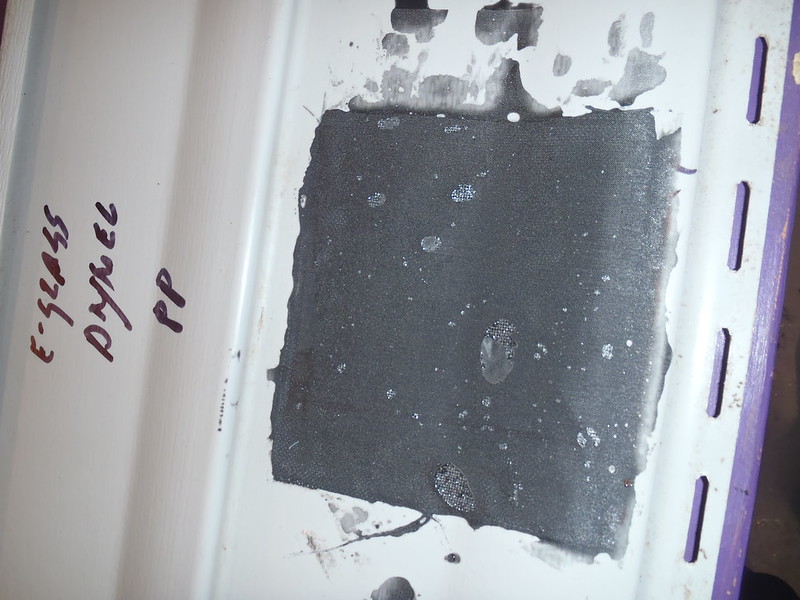
#7, E-glass under layer, Dynel over, peel ply. Only because I had leftover E-glass I never use. I still had enough graphite powder and pigment epoxy mix, so it got blacked out as well.
#8, single layer Dynel, graphite powder, black pigment, peel ply, because that’s my usual skid plate practice.
Installation note: In the sandwiched fabric layup, once everything was prep-work cut to size and taped, adding a single piece of under layer fabric took all of seconds, as long as to lay another piece of fabric in place, brush on some epoxy and lay some Dynel overtop.
I usually wait several+ hours for the slow hardener to begin to set up before pulling the perimeter tape and hand-compressing the peel ply. I know I can achieve cleaner epoxy edges doing that, but how much do I care on a test panel? Not enough.
I didn’t wait for clean edges and pulled the tape barely an hour later with the epoxy still oozey, laid on the peel ply and hand compressed each fabric piece. And used a tongue depressor to feather out the edges of the two pieces of un-peel-plied kevlar felt, so the felt transition wouldn’t stand as abruptly proud.
 P3130006 by Mike McCrea, on Flickr
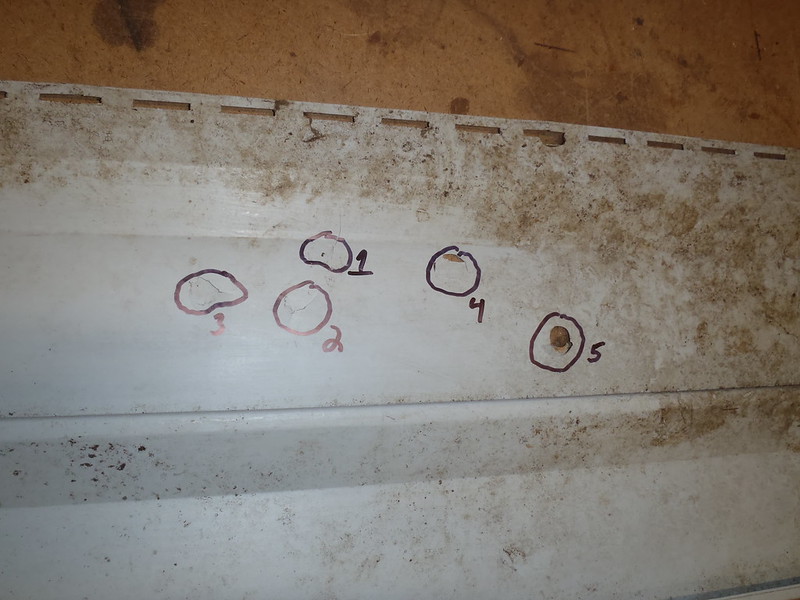
The peel ply is release treated, so I pulled it the next morning; well after the epoxy had fully up. Gotta love release treated peel ply.
The three kevlar felt pads are the most different in visual inspection and feel.
 P3130009 by Mike McCrea, on Flickr
 P3130010 by Mike McCrea, on Flickr
 P3130011 by Mike McCrea, on Flickr
The kevlar felt with graphite powder, black pigment and peel ply is, unsurprisingly, by far the best of the felt lot. As expected the smoothest, and the edges are feathered down beautifully for felt. It is less thick than the un-peel ply’ed pieces, although not by a tremendous amount, it’s still much thicker than any of the vanishingly thin composite sandwiches.
The two pieces of felt uncovered with peel ply are much alike. Both are rough to the touch and the heavier epoxied one is noticeably rougher. The edges, despite being feathered down with a tongue depressor as the epoxy began to set, are still abrupt. I should have continued feathering down the edges ‘til the epoxy was nearly firm, but that takes hours of tongue depressor attention with kev felt.
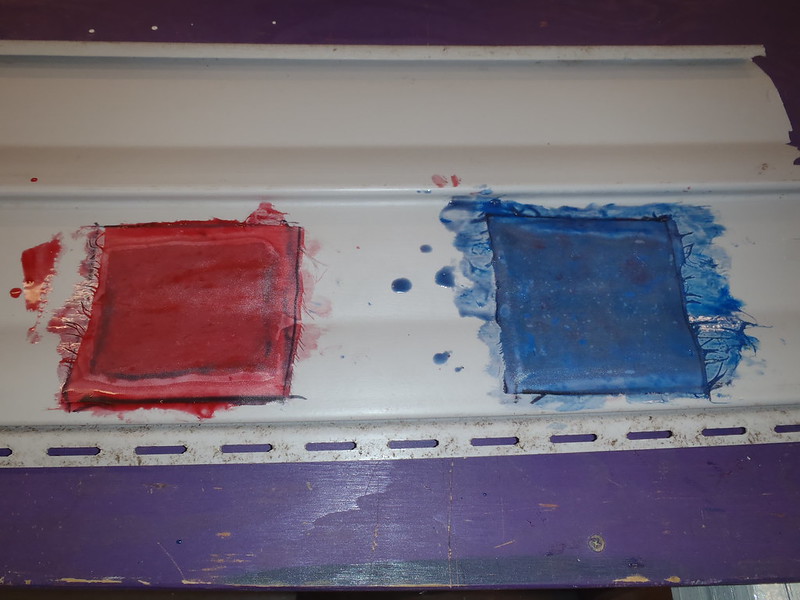
The felt patches do at least answer the question about whether graphite powder and black pigment will deeply saturate kevlar felt. I may never do another kevlar felt skid plate, but if I do, once you go black . . . .
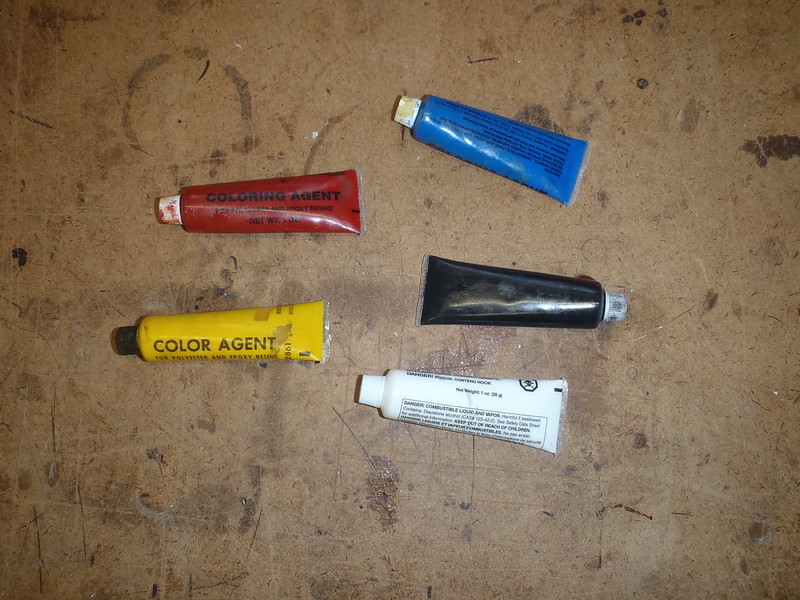
That also brings up another easy test. Next time I have some epoxy mixed up I’ll lay out some felt squares and try using just color agent pigmented epoxy to see what kind of green or red I can achieve over yellow felt. Anything is better than Baby crap yellow.
The other peel ply compressed test patches are all capped withDynel, and all are visually similar, with nicely feathered fabric edges, and are similarly smooth (with one exception).
The carbon fiber & Dynel may have been just a touch under saturated, I don’t often work with carbon fiber and epoxy. A UV top coat of black paint, which I do anyway, would hide/fill any faint fabric weave. (The sharp line is a fold crease in the peel ply scrap)
 P3130012 by Mike McCrea, on Flickr
The S-glass pad and kevlar tape patches are all but identical, which is surprising. The 1 ½” wide kevlar “tape” was thick, and the selvage edge was thicker. That raised sewn edge vanished under peel ply compression, lying as flush as the S-glass. Some (?) composite tape as an under layer might work well for impact resistance on a sharp vee stem. Handling and epoxying a skinny 3’ long piece of cloth seamed edge tape can be a no-frays boon.
 P3130013 by Mike McCrea, on Flickr
 P3130014 by Mike McCrea, on Flickr
The E-glass was under saturated with epoxy; I had forgotten how thirstily E-glass drinks resin. Old E-glass at that, I should probably trash what E-glass I have left, it is ancient and may have degraded.
 P3130015 by Mike McCrea, on Flickr
The single layer of Dynel looks the same as it always does, smooth and easy and durable. But it doesn’t appear noticeably thinner than the ones underlaid with carbon fiber, S-glass or even Kevlar tape.
 P3130016 by Mike McCrea, on Flickr
And that lay up day isn’t the funnest part. In a few days (A week? How long?) I can do some half-arsed impact and abrasion testing.
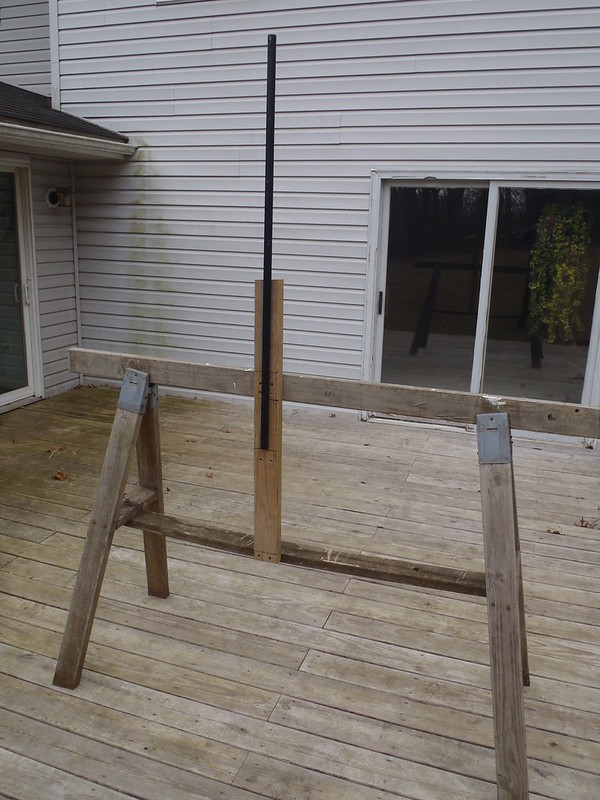
I’m going to replicate Epoxyworks impact test, using a piece of pipe affixed vertically as a center aiming device, and dropping a 2’ length of rebar (1lb, 4oz) through it from height, or higher heights, until I see some damage.
That may be a body and soul shattering experience, definitely needing some PPE, maybe a full face shield. And leather chaps. Maybe standing chap-crotchless on a ladder beneath the shop twinkle lights.
That’s Mr. July to you, on next year’s Limited-edition “Men & Women of CanoeTrippping” calendar. Rob may appear several times (hide the children). Karin and Christine as well. I know I have a photograph of Doug flipping me off moments after he intoned “I haven’t swum in 6 years”. He is quite wet in the photo.
Back to future testing, just needed to blackmail Doug for a minute. The impact results should at least be more revealing than some half-arsed abrasion test.
I’m thinking various RO and belt sanders with different grits, touched down briefly (or not so briefly). That sounds like a less fun day, all gowned with respirator and goggles, making microscopic graphite powder dust. Best done outside the shop. Ask me how I know.
For what; grinding away at five test patches, all with a Dynel outer? I know how abrasion resistant Dynel is. There might be some value if I ground down into the under layer. That sounds like an even less fun day.
I’m kinda at a loss on any shop-rudimentary abrasion test with even pseudo-measureable results
I didn’t feel like waiting to find Royalex or composite stems to chop saw off of junk canoes for a skid plate materials test, so I am again using leftover vinyl siding as the test bed. Should at least replicate RX vinyl skin.
I cut out (Scot’s frugal) three inch squares of test materials (and overlapping squares of peel ply). One benefit already, I squared up some oddly Tetris-cut odds and ends left on lengths of material. I even taped out the perimeters on the test bed, but did not paper between for sloppy loaded brush drips.
I used my usual mix of West System 105/206 and G/flex epoxy. Well, not my usual; I was hesitant to use up G/flex for an experiment, and didn’t go the usual 50/50 mix. More like 25/75.
I meant to photograph the appearance of the raw test materials, but already had the epoxy going and gloves on before I remembered.
Materials left to right, now epoxy-coated on the vinyl siding panel.
#1, Kevlar felt with graphite powder and black pigment, for future peel ply compression. I just want to see how kev felt compresses and takes color. I still believe it is crap material, but at least it would look better if colored, and should stand less tall and cure less rough with just hand compressed peel ply
#2, Kevlar felt, resin rich, no peel ply. To replicate the way too many skid plate kits were installed, using every ounce of epoxy in a $100 skid plate kit. I predict raspy rough.
#3, Kevlar felt, slightly resin starved, no peel ply. Not really “starved”, but I believe a little light on the epoxy is better than over saturated.
#4, Carbon fiber under layer, Dynel over, peel ply. What the hell, I had some (thick, wide-weave?) carbon fiber. The carbon fiber black under the Dynel looked hideously shadowed in dry layup, so graphite powder and black pigment in the epoxy mix to hide the fugly.
#5, S-glass under layer, Dynel over, peel ply. The S-glass under layer should be invisible, but epoxied Dynel turns out kinda cloudy with epoxy (and G/flex), so graphite powder and black pigment.
#6, Kevlar tape under layer, Dynel over, peel ply. The yellow kevlar tape (thick, woven fabric) was ugly visible dry, so graphite powder and black pigment.
#7, E-glass under layer, Dynel over, peel ply. Only because I had leftover E-glass I never use. I still had enough graphite powder and pigment epoxy mix, so it got blacked out as well.
#8, single layer Dynel, graphite powder, black pigment, peel ply, because that’s my usual skid plate practice.
Installation note: In the sandwiched fabric layup, once everything was prep-work cut to size and taped, adding a single piece of under layer fabric took all of seconds, as long as to lay another piece of fabric in place, brush on some epoxy and lay some Dynel overtop.
I usually wait several+ hours for the slow hardener to begin to set up before pulling the perimeter tape and hand-compressing the peel ply. I know I can achieve cleaner epoxy edges doing that, but how much do I care on a test panel? Not enough.
I didn’t wait for clean edges and pulled the tape barely an hour later with the epoxy still oozey, laid on the peel ply and hand compressed each fabric piece. And used a tongue depressor to feather out the edges of the two pieces of un-peel-plied kevlar felt, so the felt transition wouldn’t stand as abruptly proud.
The peel ply is release treated, so I pulled it the next morning; well after the epoxy had fully up. Gotta love release treated peel ply.
The three kevlar felt pads are the most different in visual inspection and feel.
The kevlar felt with graphite powder, black pigment and peel ply is, unsurprisingly, by far the best of the felt lot. As expected the smoothest, and the edges are feathered down beautifully for felt. It is less thick than the un-peel ply’ed pieces, although not by a tremendous amount, it’s still much thicker than any of the vanishingly thin composite sandwiches.
The two pieces of felt uncovered with peel ply are much alike. Both are rough to the touch and the heavier epoxied one is noticeably rougher. The edges, despite being feathered down with a tongue depressor as the epoxy began to set, are still abrupt. I should have continued feathering down the edges ‘til the epoxy was nearly firm, but that takes hours of tongue depressor attention with kev felt.
The felt patches do at least answer the question about whether graphite powder and black pigment will deeply saturate kevlar felt. I may never do another kevlar felt skid plate, but if I do, once you go black . . . .
That also brings up another easy test. Next time I have some epoxy mixed up I’ll lay out some felt squares and try using just color agent pigmented epoxy to see what kind of green or red I can achieve over yellow felt. Anything is better than Baby crap yellow.
The other peel ply compressed test patches are all capped withDynel, and all are visually similar, with nicely feathered fabric edges, and are similarly smooth (with one exception).
The carbon fiber & Dynel may have been just a touch under saturated, I don’t often work with carbon fiber and epoxy. A UV top coat of black paint, which I do anyway, would hide/fill any faint fabric weave. (The sharp line is a fold crease in the peel ply scrap)
The S-glass pad and kevlar tape patches are all but identical, which is surprising. The 1 ½” wide kevlar “tape” was thick, and the selvage edge was thicker. That raised sewn edge vanished under peel ply compression, lying as flush as the S-glass. Some (?) composite tape as an under layer might work well for impact resistance on a sharp vee stem. Handling and epoxying a skinny 3’ long piece of cloth seamed edge tape can be a no-frays boon.
The E-glass was under saturated with epoxy; I had forgotten how thirstily E-glass drinks resin. Old E-glass at that, I should probably trash what E-glass I have left, it is ancient and may have degraded.
The single layer of Dynel looks the same as it always does, smooth and easy and durable. But it doesn’t appear noticeably thinner than the ones underlaid with carbon fiber, S-glass or even Kevlar tape.
And that lay up day isn’t the funnest part. In a few days (A week? How long?) I can do some half-arsed impact and abrasion testing.
I’m going to replicate Epoxyworks impact test, using a piece of pipe affixed vertically as a center aiming device, and dropping a 2’ length of rebar (1lb, 4oz) through it from height, or higher heights, until I see some damage.
That may be a body and soul shattering experience, definitely needing some PPE, maybe a full face shield. And leather chaps. Maybe standing chap-crotchless on a ladder beneath the shop twinkle lights.
That’s Mr. July to you, on next year’s Limited-edition “Men & Women of CanoeTrippping” calendar. Rob may appear several times (hide the children). Karin and Christine as well. I know I have a photograph of Doug flipping me off moments after he intoned “I haven’t swum in 6 years”. He is quite wet in the photo.
Back to future testing, just needed to blackmail Doug for a minute. The impact results should at least be more revealing than some half-arsed abrasion test.
I’m thinking various RO and belt sanders with different grits, touched down briefly (or not so briefly). That sounds like a less fun day, all gowned with respirator and goggles, making microscopic graphite powder dust. Best done outside the shop. Ask me how I know.
For what; grinding away at five test patches, all with a Dynel outer? I know how abrasion resistant Dynel is. There might be some value if I ground down into the under layer. That sounds like an even less fun day.
I’m kinda at a loss on any shop-rudimentary abrasion test with even pseudo-measureable results
Last edited: