• Happy Weed Appreciation Day! 🌱🌿🌻

Rigging Tarps

Joined
Mar 31, 2018
Messages
165
Reaction score
102
Location
Delta Jct, Alaska
In a recent thread we discussed setting up a tarp quickly to escape sudden rain showers.

A few years ago, a friend gave me a bunch of CamJams that I rig on a long piece of paracord.

I keep several of these attached to the tarp grommets and I can quickly attach the tarp to surrounding trees by a timber hitch and tighten as needed at the CamJam.

When taking the tarp down, I leave the CamJam in the grommet and throw the sord tails in to mid-tarp and roll up the tarp for packing.

One of the more useful new gadgets out there IMO.
 
Same as Sweetfancymoses, but with the addition of a ridgeline stuff bag. Essentially just a stuff sack with a grommet at the bottom. One side of the ridgeline rope goes through that grommet, with a length of line, prussic and clip bundled outside the bag. The other end of the ridgeline and prussic/clip can get stuffed inside at the top during storage.

Setting the tarp up solo becomes a snap. Remove the inside ridgeline and tie the ropes at the desired height between trees, with the tarp still in stuff bag suspended in the middle. Open the bag, pull out the tarp and adjust the prussics/clips as desired and stake out guylines. When the tarp is up the stuff bag stays on the ridgeline at one end.

The stuff bag keeps the tarp off the ground and out from underfoot, and is way much easier if windy.

Packing up just reverse the process, undo the prussic clips, slid the bag and half of the tarp to the middle of the ridgeline, and stuff the tarp inside the bag before taking the lines down. The tarp need never touch the ground.

CCS sells a well designed ridgeline stuff bag, sil-nylon for easy stuffing, with two cinch cords, one cinch for compacted storage, one for looser stuffing while at home.

CCS Ridgeline stuff bags, compressed and uncompressed:

P6100871 by Mike McCrea, on Flickr

https://www.shop.cookecustomsewing.com/product.sc?productId=227&categoryId=56

We have those for two large tarps, and while I prefer them to our DIY ridgeline stuff bags (the sil-nylon facilitates easy stuffing), sticking a grommet on the bottom of an old stuff bag, or even an old camp chair bag is easy enough.


P7110972 by Mike McCrea, on Flickr
 
I’ve seen his and have a tarp with a pre-rigged ridge line, but never thought to put a grommet in the stuff sack. Clever.

Bob
 
I use the ridgeline stuff sack as well. I use zing it for the tie outs, and have recently swapped out the ridgeline prussiks for these: Nama Claws
 
This topic is exactly what I need. I am a total novice on tarps, setting them up every which way. Hoop's video is great. Clearly I will need to learn some knots.

Question: You get the tarp set up, as Hoop did. Then what do you do when the storm is driving the rain in under the tarp? I usually have to find an extra couple of trees or stakes so I can pull at least one side almost to the ground. And I don't put the tarp up so high either. I have to keep it low to keep the wind and rain out.

Or, there are no trees at all, and I'm setting it up with paddles as front poles and anchoring in the back with the canoe.
 
My preference, most often, is for a rectangular tarp, usually a 10’ x 14’ Tundra Tarp, with a center ridgeline set a foot or so above head level. A little overkill for solo, perfect to two people, decent with four in almost any wind and weather condition.

With the ridgeline set across the 10’ length I have seven feet of tarp on either side that I can drop near ground level for wind and blowing rain protection. If it is seriously snotty it is easy enough to drop the ridgeline lower.

PA060096 by Mike McCrea, on Flickr

That takes care of wind or sideways rain from the front or back. As a front moves over that can become wind from the open /\ apex, and I really don’t want to go out in the rain to take down and reorient the tarp. And sometimes the ideal ridgeline to tree orientation is not available. So I bring a cheap, coated nylon side block, that quickly clips in place on either side.

P1060482 by Mike McCrea, on Flickr

That is actually an old Eureka Timberline “Annex”, a semi crappy, pseudo vestibule tent solution, but it had clips in just the right places to attach to the Tundra Tarp’s webbing loops, so clip-clip-clip, a couple ground stakes and done, winds from either side easily blocked.

I have thought about designing something more / \ shaped with clips to fully block one side, but I don’t sew, and that Annex works well enough.

One benefit to the 10’ ridgeline is that my day hammock fits just right underneath. For hammock dozing in rain, or in chilly winds.

P1070518 by Mike McCrea, on Flickr

In conditions where high winds are anticipated I leave the Tundra Tarp at home and bring a parawing with true catenary cuts.

P5061985 by Mike McCrea, on Flickr

P2180690 by Mike McCrea, on Flickr

A parawing has disadvantages, low side corners, reduced coverage and it can only be set up one taut way, no dropping one side for wind. But when it is blowing like stink nothing performs as well as a wing. The wing in that canyon photo is up in extreme winds, blowing 40, gusting 50+. Solid as a rock.
 
Thank you, Mike, for the informative post and photos. Great detail and information I can really use. It turns out I have a parawing tarp that came with my emo hammock. It is pitifully small. I erected it over the hammock on the Swannee and there was light rain and light wind. I could see that in heavier weather, it would be largely useless.

I think I camp in areas that don't necessarily lend themselves to these beautiful tarp setups. I can remember one such beautiful place, an esker camp on Circuit 77 in Laverendrye. Tall pines. Flat. Open. That was 30 years ago or more and I still remember its beauty.

Here's a photo of the tarps I set up, in the rain, on the Peace River. This is the morning after, so you can see the effects of the wind and rain, especially on the guerilla tarp on the left. However, it did not leak. Not one bit. TarpSetJp.jpg

While I was googling tarp setups, I came across this website out of GB. He calls his website Path of the Paddle (!), but is not in any way connected to Bill Mason's family. This is from a trip report on the River Wye in Wales:

TarpRiverWye.jpg

That looks pretty neat. I'd like to figure out how to set up a tarp like that. Apparently in much of Wales and Scotland, there is still the right for people to camp (slightly and politely) along river banks, which I think is pretty cool. I remember paddling a day trip on a river in Virginia? South Carolina? where the rule was you could paddle the river, but you could not let your foot touch the ground, even under the river, ie. in the water.
 
About the weirdo “Don’t step on the river bottom” business; a few sections of river in Virginia (and maybe elsewhere?) are subject to landowner’s claims of still existent “Kings Grant” rights, including ownership of the river bottom. Lots of litigation about that in Virginia.

Ah, tarps. I love me some tarps, different tarps for different solo or group sizes and different environments and applications.

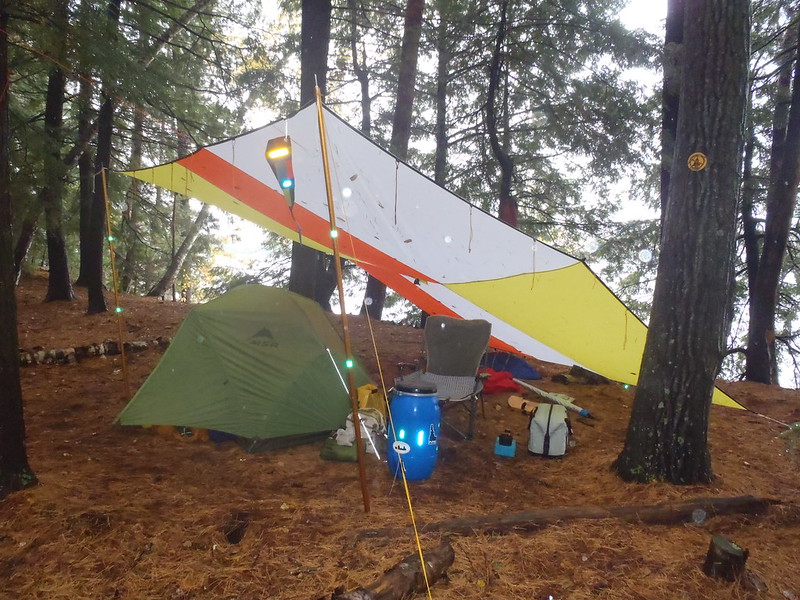
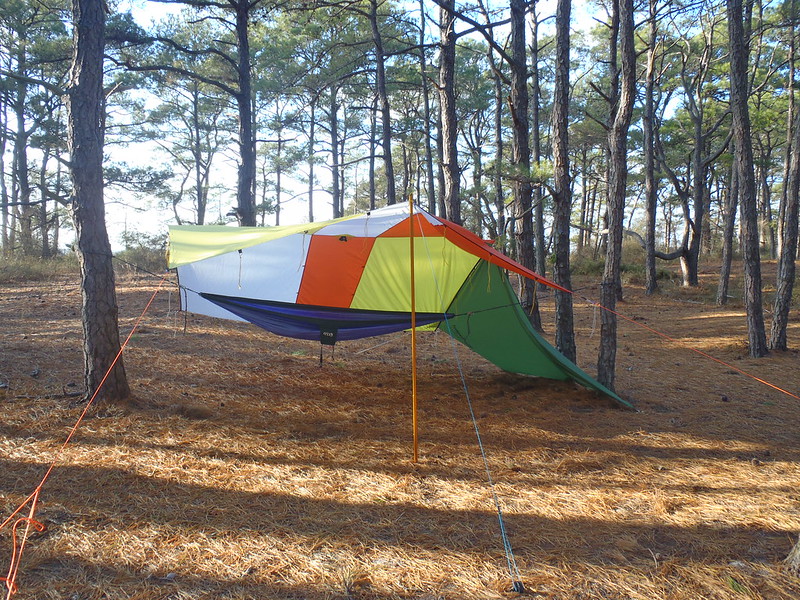
In areas with a dearth of trees most tarps can be set up using two poles. I’m partial to adjustable height Kelty tarp poles. Durable and dependable, if there is only one suitable tree on which to attach a ridgeline a single pole on the other side works fine.

https://www.campmor.com/products/ke...Zxd3CPJF8DvVb86PNBwtrtBqIdISmW9hoCSM4QAvD_BwE

Using a just two poles gets trickier in setting a ridge line, easiest done using two angled guy lines off the pole(s) and, because you can’t hold both poles upright at once, there are some tricks to doing that by yourself.

Easiest way, for me, is to measure off* the tarp orientation and spacing, and stake out two angled guylines from a tilted-back-a-bit pole, then, still holding the pole, add a third, temporary guy line, facing inwards and stake it down inside the tarp area to form a tripod of taut-ish lines holding that pole upright.

Attach the ridgeline to that now steadied pole, walk it back keeping a little (tricky part) tension on it, and anchor the other two guy lines as usual outside the tarp area. Then walk back and unstake the third leg of the tripod from under the tarp area; since it is already attached and has a stake I usually just add it to that side, with three guylines /|\. Then adjust the pole heights and guy line tension as needed. Height adjustable poles are really handy in that guise.

That sounds more difficult than it is. Probably took longer to describe than to do once you have some practice.

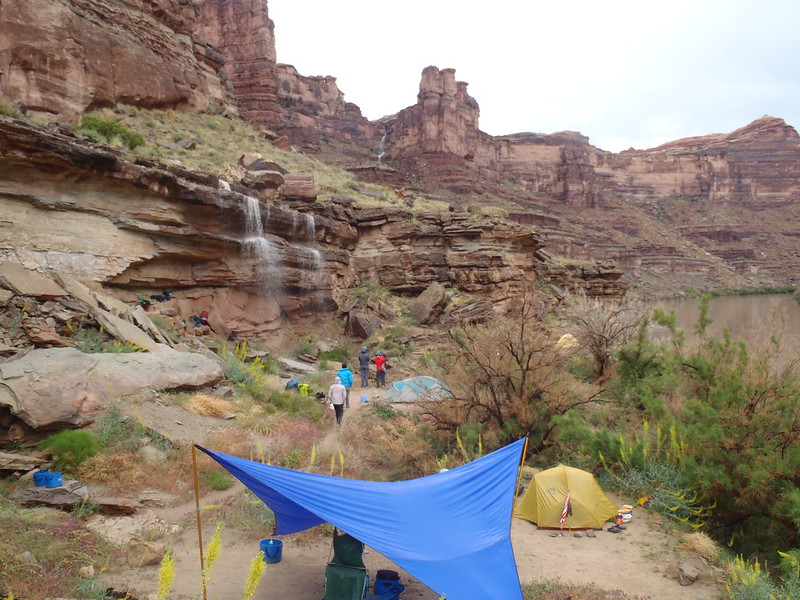
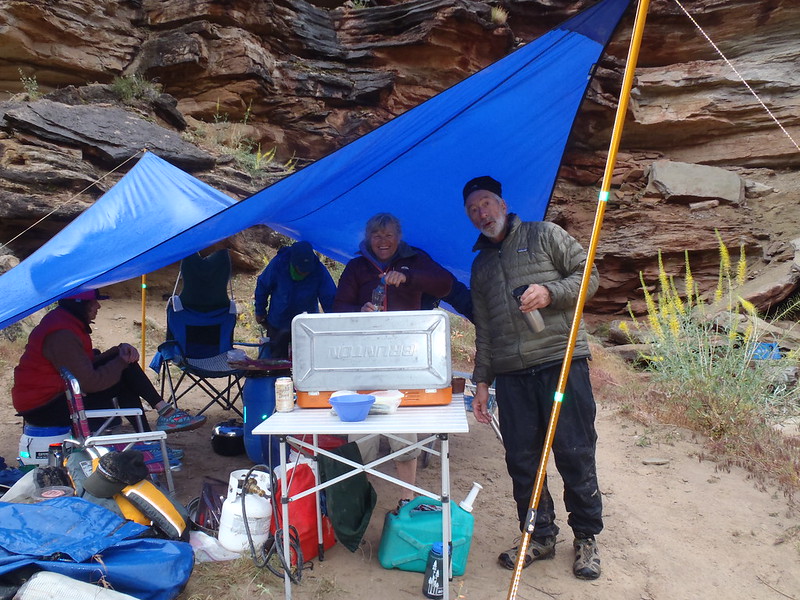
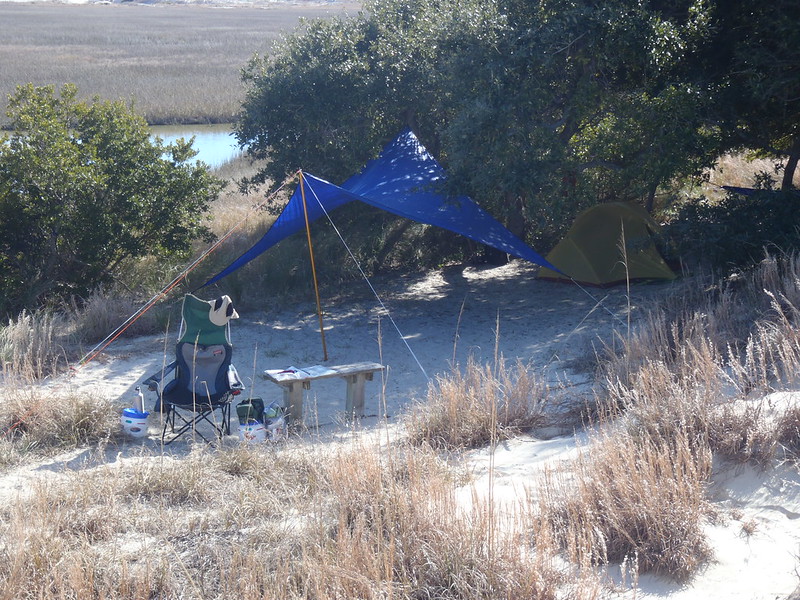
Two or even three guy lines off a pole tip have other advantages. The blue wing in the canyon has three guy lines off each corner, attached to deadmen buried in the sand. With piles of rock atop. It was seriously freaking windy, for days.

*OK, I “cheat” at measuring tarp spacing. I have a length of cord in the stake bag with long pushpin attached at one end, and a knot in the cord at the minimum distance between trees for a 10’ ridgeline and for a 14’ ridgeline. The tarp is almost always at the 10’ orientation, so I have more wind wall to drop for blowing rain, and my day hammock fits better with trees 12 to 14 feet apart. I just push pin one end to a tree and step off in different directions.

That string measuring device is handy when there are too many tree options. “These two are too close, and these two are too far apart, and these two are juuuuust right”. With ample choices of trees like an open piney forest the anticipated wind direction and being able to drop one side or the other becomes a factor.

At times, even when there are two well spaced trees I’ll use a pole somewhere on the tarp edge to create better directed drainage for shedding rain. I try to be cognizant of where rain will drain off a tarp, and where it will run or pool on the ground; I’d rather direct it away from flowing puddles-underfoot back under the tarp, and away from my tent if proximity need be.

That is both how the tarp is erected and some visual “Which way will it flow?” ground surveillance. I can’t say I always get it right, but I’m getting better with practice.

Quality tarp poles, or even a single pole, help. There are one (or two) Kelty poles in different tarp applications in all of the photos, some just for better drainage purposes.

I know some folks use their paddles as poles, including using two paddles connected with a sleeve. I’ve never been fond of that solution. I don’t want my paddles unavailable holding up the tarp if I opt to day paddle from camp, and don’t want one end of any of our paddles being ground into the dirt or duff.

And, with a parawing, arching concave downwards in the middle, the poles need to be adjusted taller than with a flat tarp. With fully extended 99” Kelty poles that 8 ¼ foot height puts the center of a wing a bit of 6 feet high. Get ready to crouch and shuffle around the edges.

Another caution about “wing” tarps, and I do love a real wing tarp for high winds. A lot (maybe most) of wing tarps I’ve seen are not actually parawings. They are shaped <> , and do have a concave arch profile along the top, but do not actually have the catenary shape that makes a true wing. In the photo of the wing in the windy canyon the lofted “bat wing” curves are obvious.

That true wing shape acts much like an airplane wing; the catenary cuts lift the wing in higher winds instead of depressing it, forming that shape. The harder it blows the “stiffer” the wing becomes. If erected properly a wing doesn’t flap or billow, and even in very high winds the fabric and stitching, held rock steady, seem to be under far less stress.

The other facet of a wing is most useful on desert or coastal trips. Rainwater flows predictably off just the low corners. I tie a little string there, to prevent the rain from shooting off the side past the bucket. A collapsible bucket set at the corner makes a handy freshwater collector. Note the collapsible bucket under the far corner of the wing, and a couple other filled buckets set off to the side.

P5112025 by Mike McCrea, on Flickr

The river is silt-brown as usual, and the water pouring over the rock face is filled with dirt, sand and god only knows what critter crap or carcass bits from the top of the plateau. The rainwater that comes off the wing is often dang near crystal clear. During a sleet storm on a desert trip I had a bucket of ice water. And some beers that needed chilling. Score one for the wing.

We own a different “wing”, an early NRS River Wing.

https://www.nrs.com/nrs-river-wing/...U9e60nXb7BWnWm6FmqtR-jQmLCL9DoYxoCfgAQAvD_BwE

It is a wonderful tarp, 17’ x 16’, but our early version does not have a true catenary cut, and is made of much heavier material than the current 4.3lb version specs. I know NRS did a redesign of the River Wing years ago, with lighter weight materials, but it still doesn’t look like it has true catenary cuts.

Our River Wing was made as a raft trip tarp, and with a couple poles and eight beefy sand stakes it is most suitable for that application, or for car campers and no-portage group trips. Overkill for one or two person trips.

Our (true) blue wing is close to 30 years old, and while it is still going strong someday I will need to replace it. That one, IIRC, is 19’ x 19’; with the true catenary cuts and loss of headroom at the low corners it is ideal for 1 to 3 people, 4 max, otherwise it is standing room only.

P5112034 by Mike McCrea, on Flickr

If anyone knows of a true wing, with properly designed catenary cuts, that 19x19 size or a little smaller please do tell; I have a friend who lusts after mine, and he’s getting impatient waiting for the reading of my will.

Although I expect, looking at recent prices, that I’ll say YIKES! and stick with what we have. The heavy duty rafter version NRS River Wing as half that $450 price at the time.

If I could only have one tripping tarp to choose from I’d have a rectangular Cooke Custom Sewing Tundra Tarp, in bright cheery multi-colors. Maybe ordered one size larger than I think I need; a little more tarp is almost always better than one a bit too small.
 
Fantastic thread! I enjoyed reading through all of the informative posts.

I use paracord for my ridgeline, but I use shock cord (bungee) for my tieouts. I cut the shock cord into ~20 ft lengths, and then fold it in half and tie the ends together. From there I then tie knots in the doubled shock cord in ~1 ft increments. That allows me to stake out the cord in different lengths depending on what works best.

I was using a warbonnet superfly for years as my main shelter, but I recently switched to a CCS tundra tarp. I still love the superfly, but I got the the tundra tarp in a bigger size. It also has more tieouts, and it comes in a nice and cheery yellow color. I will still be bringing the superfly for a general use tarp.
 
I have a rectangular CCS Tundra Tarp and I like it a lot. But I agree with Mike that a catenary cut tarp has distinct advantages in some situations.
I recently bought a tarp at a very reasonable price that I used for a camping trip this past May. It is the Mountainsmith Mountain Shade 12x12 tarp. It is a six sided, cat cut tarp but the catenary cut is not very extreme. With two lightweight aluminum poles this tarp can be set up very quickly without a ridge line. It is not as flexible as a rectangular tarp and you don't get quite as much coverage per square foot of material, but it sheds wind and water better. It won't pack down nearly as compact as a sil-nylon CCS tarp but if you are looking for an inexpensive tarp I recommend it. You can get it for $59.95 at Amazon. Moosejaw also has it for sale at the same price and currently has a 20% off code (BREAKFAST) that works for this item.

Here is a review video for this tarp:


I have two of those Mountainsmith tarps that I got from Moosejaw or Backcountry a while back.

Pros:
-Included reflective guy outs
-Good tie-out reinforcement
-Sheds wind well for a hybrid design
-Loan it to a friend without excessive financial risk

Cons:
-The Included stakes are the small diameter smooth rod type that don't stay in the ground well.
-The material is not ripstop and must be kept rather taut or it will rip rapidly in gusty winds.
-It doesn't pack down very well in the Included stuff sack

Photos:

20220514_154033.jpg20210905_120748.jpg20210905_120812.jpg


I thought I had one of the tear, but apparently not. The tarp ballooned due to the pitch in a 40+mph gust and the material split like a trouser seat. Some repair tape fixed the 6" tear right up, but it was disconcerting in the face of a storm.

Anyway, i find it to be a great value and a really solid option for forest camping. I don't think I trust it in the barrens or the mountains.
 
I have two of those Mountainsmith tarps that I got from Moosejaw or Backcountry a while back.

Pros:
-Included reflective guy outs
-Good tie-out reinforcement
-Sheds wind well for a hybrid design
-Loan it to a friend without excessive financial risk

Cons:
-The Included stakes are the small diameter smooth rod type that don't stay in the ground well.
-The material is not ripstop and must be kept rather taut or it will rip rapidly in gusty winds.
-It doesn't pack down very well in the Included stuff sack

Photos:

View attachment 131412View attachment 131413View attachment 131414


I thought I had one of the tear, but apparently not. The tarp ballooned due to the pitch in a 40+mph gust and the material split like a trouser seat. Some repair tape fixed the 6" tear right up, but it was disconcerting in the face of a storm.

Anyway, i find it to be a great value and a really solid option for forest camping. I don't think I trust it in the barrens or the mountains.
Sorry to hear yours ripped but thanks for the info. I had mine up for several days including two that rained and one with fairly stout wind and it did well. But I usually do adjust the tension on my guy outs to keep the tarp taut.

Yes, the pegs that come with the tarp are cheap hook type pegs but that seems to pretty much be the norm with most tents and tarps these days. And the tarp does not pack down very compactly. I certainly wouldn't recommend it for backpacking. Probably best for car camping but it is a tolerable size and weight for canoe camping.
 
So, using Hoop's video as a template of sorts, I have put together a ready-to-setup tarp similar to his. I checked the CCS website and the costs were prohibitive at least at this point. I'm sure they are excellent.

I have a 12 x 11 tarp, a Gorilla tarp; I think it is the sil nylon stuff. It kept me dry and had not a single leak in a severe rainstorm on the Peace River in February. It wasn't even set up optimally because I couldn't find a place to camp and finally got to shore with some small willows. I think the photo is near the beginning of this thread. There was one dip in the tarp that must have had three gallons of water in it and the tarp held. Wow.

So, I took that tarp and sewed some small stainless steel rings along the ridge line. I put in the prussic tied lines Hoop has for shedding wind. I attached guy lines tied onto the requisite places and also secured them with hair ties, like Hoop suggested.

The Gorilla tarp has tie downs only at the corners and then two fabric ones per side mounted half way up the tarp. It also has corner flaps which can be joined in case of rain coming down sideways.

I took a compression sack I already had and Brad put a grommet in the bottom. I assembled the entire thing per Hoop.

Incidentally, I also learned a bunch of knots to make my life easier. Previously I just tied things up and then, predictably, they were extremely difficult to untie. I got tired of that. So I have now learned the bowline, prussic and truckers hitch and a better way of tying a slip knot. I am looking forward to being able to untie everything by a simple pull at the loose end. :)
IMG-5734.jpg
 
I guess I'm lucky to have survived comfortably with my 10 x 10 sub $100 tarp from Campmor. Always solo or tandem. Nearly always set up with a ridge line diagonally and adjacent corners staked or guyed out. Has served me well. Wish I could kill it to justify a CCS 1.1 ounce maybe 12 x 12, but this one keeps working fine.
 
Back
Top