Pete, great to see a near-dead boat brought back to useful and attractive life. Kudos
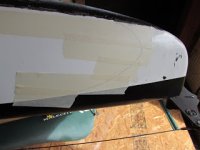
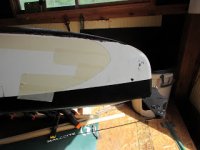
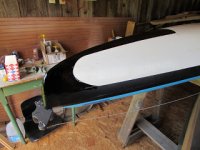
Peel ply will certainly allow one to achieve a smooth result quicker with less sanding. When I was working on this boat, temperatures were very hot and by the time I got the whole piece of Dynel wet out, the epoxy applied to the first part had already kicked, so it was too much bother to use peel ply. I imagine I could have applied it piecemeal but decided not to.
I have been very impressed with how using peel ply over Dynel compresses the Dynel so that it isn’t standing tall like (phrase I read and liked) “a resin saturated sweatshirt”. I’ve been taping around the Dynel, removing the tape once the resin has stopped dripping/running, and then laying the peel ply in place and smoothing it out. At that point the resin has begun to set up a little, to where it is not running or dripping but is still compressible tacky.
I learned a neat trick from DougD for taping around curves. Instead of trying to force the tape into a curve, or using many small pieces, he uses wide masking tape, sometimes two or more slightly lapped pieces, laid on so that the edges of the curved “box” are covered with tape overlapping inside the boxed area to be epoxied or painted.
The masking tape is transparent enough to see an outline of the area to be epoxied, or just lay the piece of Dynel on top and mark around that. Then just cut out the desired shape with a razor blade and remove the excess inner tape.
I used Doug’s razor blade trick to make the repair-hiding flames on the Klepper, which would otherwise have been impossible to tape out for painting.
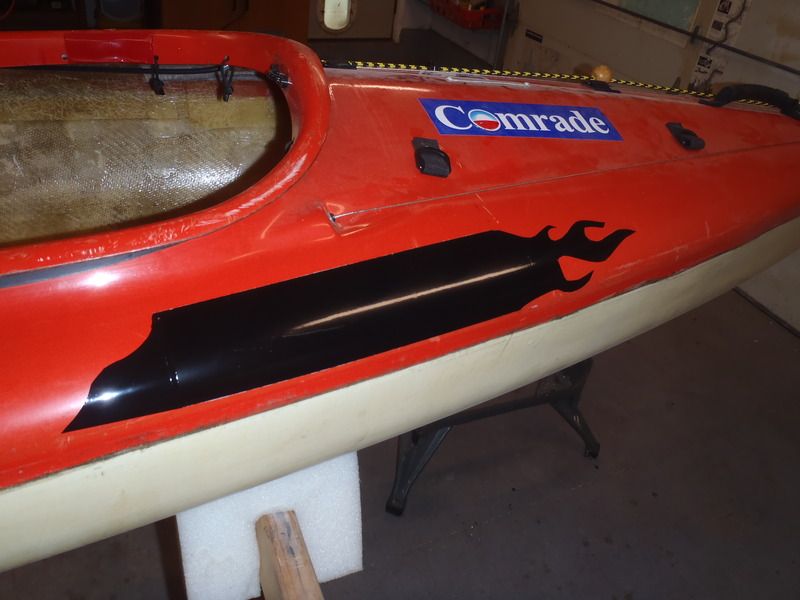
Doug used that method to add some accent to the black skid plates on his Optima, painting on a stylish black wave curve that ties the black seam trim and black skid plate together. Hard to describe how nice that looks on the stems of his boat, but the next black skid plate I install will get a similar treatment.
Hey doug, post a photo of that end design.