I know most of you done plenty of scarfing and have your own methods and jigs but much of this wood working stuff is still fairly new to me and I'm sure I'm not the only one. Before I did much wood working making jigs for certain tasks seemed very difficult. It's refreshing to find that, most of the time, it's quite quick and simple.
I had to scarf gunwale material for my current build so that meant I had to come up with a way to cut them. Last time I did this the jig was about as slap-stick as you could get and while it worked it was used up as scraps soon afterwards. I always admire the beautiful and well crafted jigs that some people make and decided that since I had some free time I'd make up one of those myself, even if it took a couple hours. That idea lasted about 2 minutes and 10 minutes later I had my jig. I'm happy enough with it that I set it aside for later use, unlike most of the things I cobble together.
I apologize for not taking pictures of the first couple steps.
I wanted something that slid in the table top guides rather than against the fence. Those are 3/4" wide and so was the mahogany I'd just ripped for my gunwales. I grabbed a piece of scrap and it was a perfect fit in the guide so I glued it to the bottom of a scrap piece of particle board that was handy. I shot some brad nails to hold it in place while the glue dried.
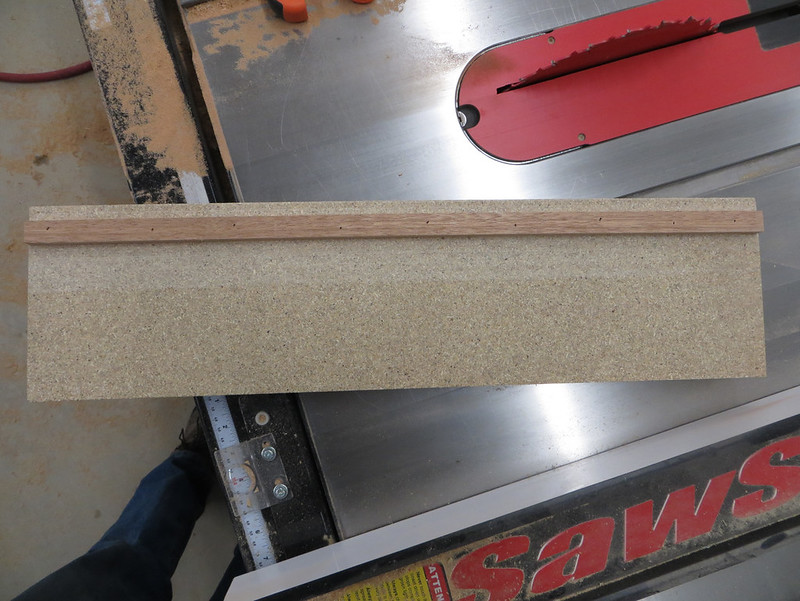
20150104_001 by Alan Gage, on Flickr
No need to worry about getting the hardwood guide perfectly square to the blade, just make sure that when the piece is slid across the table with the hardwood in the groove that the particle board (or whatever you use) extends past the saw blade. So the first time you run the jig across the table, with the blade running, it will cut off the excess particle board and give you an edge that's perfectly square to the blade. Did that make sense? I hope so.
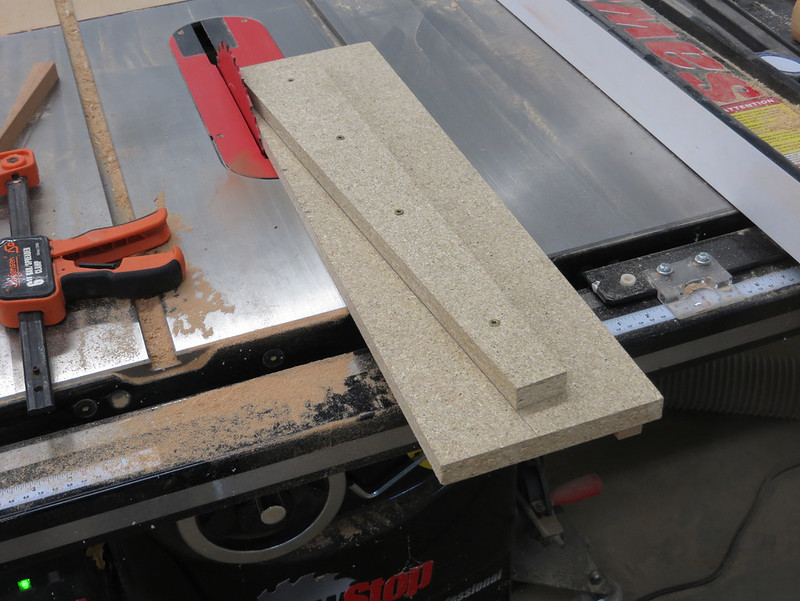
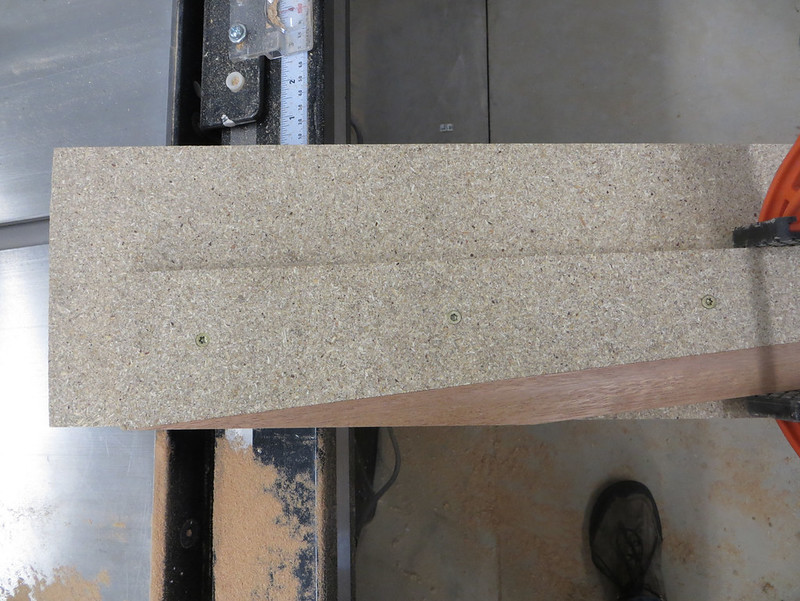
Now I drew a pencil line across the top of my jig at the angle I wanted to cut to be. This was easy to find and didn't require any fancy measuring or geometry. I wanted a scarf length of 8:1. So for everything inch of material width the joint would be 8" long. So I drew two pencil marks on the edge of the jig 8" apart, one where the cut would begin in the material and the other where it would end. Then I took a 1" wide piece of wood and laid it at an angle so the starting line aligned with the inside edge (where the blade would enter) and the finishing line aligned with the outside edge (where the blade would exit). That's the angle I wanted so while I held the wood in place I used it as a guide to draw my pencil line. Then I found another piece of scrap and screwed it to the top of the jig, following that pencil line.
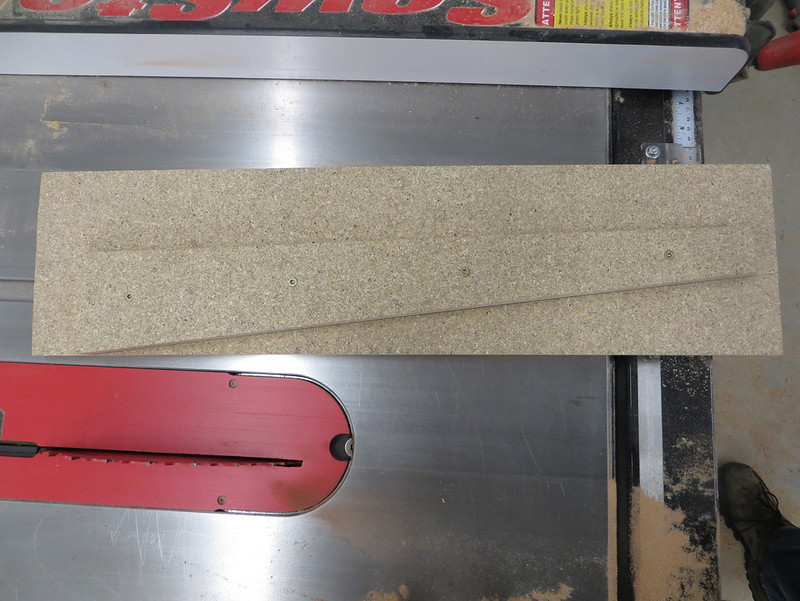
20150104_002 by Alan Gage, on Flickr
This is how it will slide through the saw. Now I just need a way to hold the gunwale to the jig so that I don't cut my fingers off.
20150104_003 by Alan Gage, on Flickr
It might not be elegant but it works:
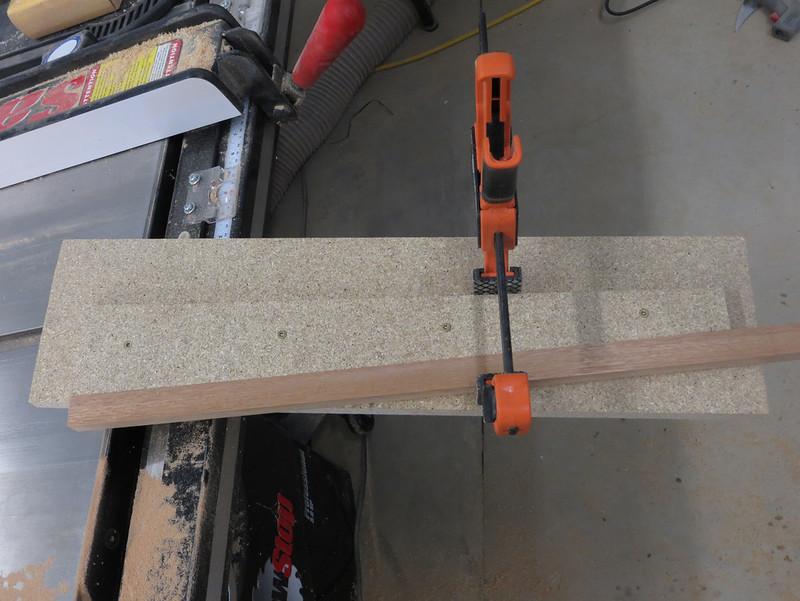
20150104_004 by Alan Gage, on Flickr
A couple pieces had a slight bow so that when clamped the leading edge wasn't tight. I just flipped them so the bow was the other way and that held them tight.
I couldn't have been happier with the final results. No touch up needed, epoxied together right off the saw.
20150104_005 by Alan Gage, on Flickr
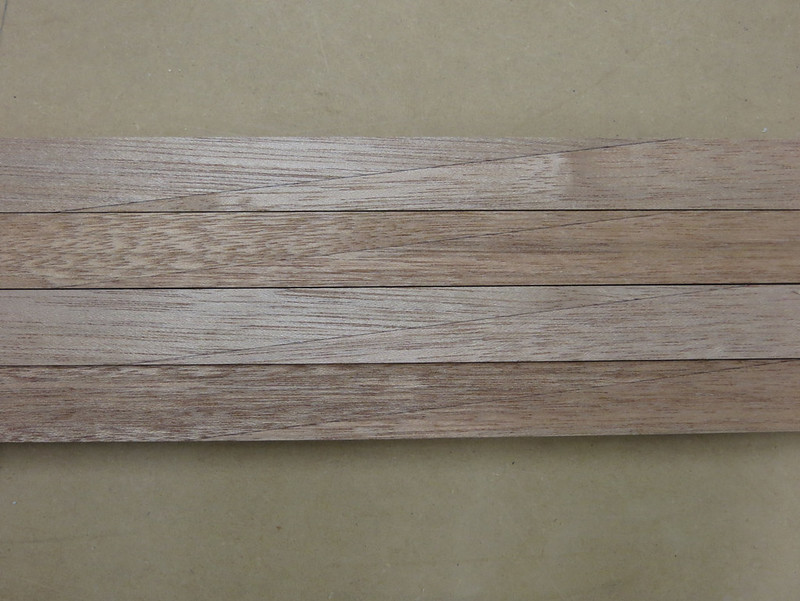
20150105_002 by Alan Gage, on Flickr
Alan
I had to scarf gunwale material for my current build so that meant I had to come up with a way to cut them. Last time I did this the jig was about as slap-stick as you could get and while it worked it was used up as scraps soon afterwards. I always admire the beautiful and well crafted jigs that some people make and decided that since I had some free time I'd make up one of those myself, even if it took a couple hours. That idea lasted about 2 minutes and 10 minutes later I had my jig. I'm happy enough with it that I set it aside for later use, unlike most of the things I cobble together.
I apologize for not taking pictures of the first couple steps.
I wanted something that slid in the table top guides rather than against the fence. Those are 3/4" wide and so was the mahogany I'd just ripped for my gunwales. I grabbed a piece of scrap and it was a perfect fit in the guide so I glued it to the bottom of a scrap piece of particle board that was handy. I shot some brad nails to hold it in place while the glue dried.
20150104_001 by Alan Gage, on Flickr
No need to worry about getting the hardwood guide perfectly square to the blade, just make sure that when the piece is slid across the table with the hardwood in the groove that the particle board (or whatever you use) extends past the saw blade. So the first time you run the jig across the table, with the blade running, it will cut off the excess particle board and give you an edge that's perfectly square to the blade. Did that make sense? I hope so.
Now I drew a pencil line across the top of my jig at the angle I wanted to cut to be. This was easy to find and didn't require any fancy measuring or geometry. I wanted a scarf length of 8:1. So for everything inch of material width the joint would be 8" long. So I drew two pencil marks on the edge of the jig 8" apart, one where the cut would begin in the material and the other where it would end. Then I took a 1" wide piece of wood and laid it at an angle so the starting line aligned with the inside edge (where the blade would enter) and the finishing line aligned with the outside edge (where the blade would exit). That's the angle I wanted so while I held the wood in place I used it as a guide to draw my pencil line. Then I found another piece of scrap and screwed it to the top of the jig, following that pencil line.
20150104_002 by Alan Gage, on Flickr
This is how it will slide through the saw. Now I just need a way to hold the gunwale to the jig so that I don't cut my fingers off.
20150104_003 by Alan Gage, on Flickr
It might not be elegant but it works:
20150104_004 by Alan Gage, on Flickr
A couple pieces had a slight bow so that when clamped the leading edge wasn't tight. I just flipped them so the bow was the other way and that held them tight.
I couldn't have been happier with the final results. No touch up needed, epoxied together right off the saw.
20150104_005 by Alan Gage, on Flickr
20150105_002 by Alan Gage, on Flickr
Alan
") When things warm up a bit I believe I'll make a similar jig.
When things warm up a bit I believe I'll make a similar jig.