• Happy Midnight Ride of Paul Revere (1775)! ⛪🕯️🕛🏇🏼

Hiawatha 15- Long term build

Sorry for the delay in posting folks. It has been a busy time for us right now.

OK, enough suspense on who came to visit me...I had Roger Foster from Carlisle Canoe Co come to have a look at my creation. Carlisle Canoe is about a 20 min drive from my house. They build all things wood canoes, and paddles. I called them originally to get a little advice on my not so wide fiberglass dilemma. We talked on the phone for a bit, and he offered to come have a look at my build so far. I have to say, I am very impressed with Roger. What a great guy, and a great resource to be able to glean info from. He is a totally laid back guy with a great approach to these builds. He apparently has done a few hundred canoe builds, so I think he knows what he is doing!

So, he really liked what I have done so far, and told me to go ahead and apply the fiberglass as is. The area that will not be covered by the fiberglass is only a small run right at the widest point, so he said to overlap and feather in a small section after the first coat has set. If that's what he would do then I'm OK with that.

Saturday is the day, so I will be posting before, during, and after shots of the whole procedure. I hope you enjoy.

Go visit Carlisle Canoe. www.carlislecanoe.ca

Momentum
 
No Title

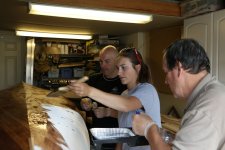
So, the day I have waited for, for so long was a very exciting one. I couldn’t really sleep so I was up early. I gathered the crew, (my father, daughter, and son), cleaned the garage, dusted off the hull, bought latex gloves, drop cloths on the floor, cardboard on the work bench, epoxy lined up, trays and brushes at the ready…Here we go.

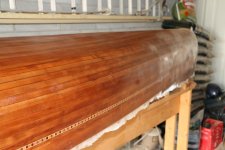
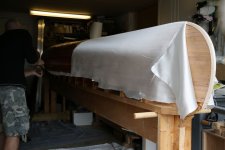
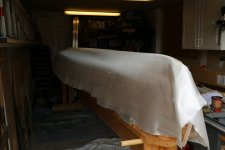
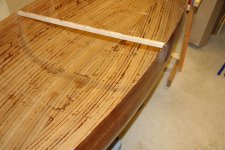
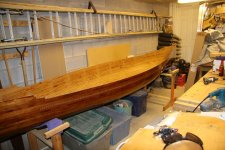
First step was of course, to lay out the fiberglass on the hull. As I said earlier, I bought 4 OZ weight, so it was a little more finiky than 6 OZ to get wrinkle free. I had not even unrolled it since I purchased it. I found it to be pretty well packaged with the exception of a couple small folds part way through what we unrolled. I hoped they didn’t pose a problem. The pics don’t really show anything really remarkable. Just the usual “Ghost costume” as I have heard one builder say. True. One thing though, we expected to be short on the fabric coverage due to my little faux pa. It turns out that we had 1/4" to spare. I must have measured wrong. I'm so very glad I messed up the measuring. I didn't need any extra. Woo hoo.

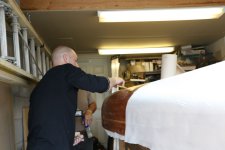
I set my son on the task of mixing batches as we called out for them. Not having used any epoxy in the past, I’m flying blind here, so I told him to make up a 6 squirt batch. He mixed it for about a minute and a half. We started a couple feet from the end of the hull, doing the usual brushing the epoxy on. My father and I both started with brushes. Cool, what a transformation from the dull looking sanded hull to a deep, rich tone. Very stoked. I was actually surprised how well it went on. I let my father continue with the brush while I took to the squeegee. I love that word…squeegee. It would be great for a scrabble word score. Anyways, I let it sit for a bit, then began the squeeging. I was careful not to starve the fabric. My father and I took turns looking over each other’s area as another set of eyes. I’m glad we did this.

I had machined a radius on the leading edge of the stems so I was told to just let the fabric sail past them. We would cut off excess on second coat. I don’t plan to use a brass stem band, so I wanted this edge to be as clean as possible. My new friend Roger, told me not to bother with wrapping the fabric around the stems, just to trim them and apply epoxy directly to the wood. All went well in applying the wet out coat. As I said, I didn’t find it to be that hard, but would not have done it without the help of my crew. A big thank you to them.

I waited for about 3 hours from the wet out coat until the epoxy was just a little tacky. Time for second coat. I applied this with a squeegee (there it is again) for the most part. I actually found this coat a bit more stressful. I lost all my helpers, so I was mixing and applying by myself. I figured that the first coat took about an hour and a half, and the second, the same. It really shouldn’t have taken this long. Ok, all done, now wait…

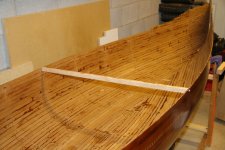
The secret from what I understand is to wait until the epoxy is just a little tacky. Kind of like applying contact cement to two surfaces. So, now time for third coat. I chose to roll this one on with one of those foam rollers. This worked so well, and so quickly that I actually forgot at one point, that I was applying epoxy and not varnish. Once done one side of the hull, I went back over it with a dry foam brush to get rid of any air bubbles. The second side was as easy as the first. I then went over the stems once again, to give them the most protection. Great, no runs, no sags, no drips. The Canoecraft book says to apply four coats if using a roller. I’m really not sure I need one more. We’ll see.

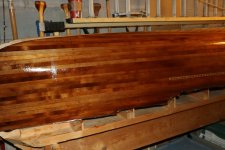
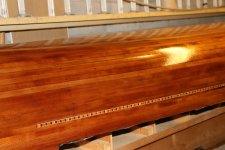
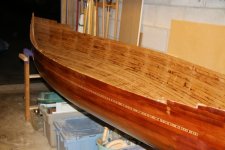
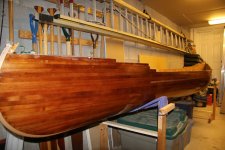
I really wanted to linger at this point, just to admire. I found myself making excuses to leave the house to go put something in the garage, just to see it again. I love the way the inlay pops now, and I am itching more than ever to get it off that monument of a form. I want to see it upright!

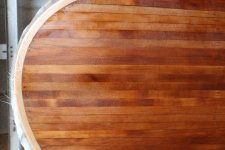
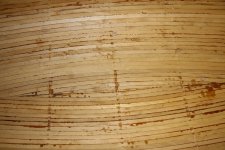
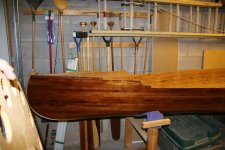
I went out this evening “to put the garbage out” and noticed that there was a little bit of fabric pattern showing in a few areas. Maybe I should have applied the fourth coat. Can anyone give me some tips here? If I have the pattern showing in a few small areas now that the epoxy has had two days to cure, what should I do?

Have a look at the pics. I apologize once again for the room to get a better angle of view. Also, the lighting in my garage is terrible, so there is a lot of glare from both flash and overhead lights. Feedback is always welcome.

Thanks for following along.

BTW- I'm in the black shirt with the bald head. It's all my kids fault :)
 

Attachments

  • photo689.JPG
    photo689.JPG
    116.3 KB · Views: 0
  • photo690.JPG
    photo690.JPG
    132.1 KB · Views: 0
  • photo692.JPG
    photo692.JPG
    127.4 KB · Views: 0
  • photo691.JPG
    photo691.JPG
    133.8 KB · Views: 0
  • photo693.JPG
    photo693.JPG
    177.8 KB · Views: 0
  • photo697.JPG
    photo697.JPG
    115 KB · Views: 0
  • photo696.JPG
    photo696.JPG
    93.5 KB · Views: 0
  • photo694.JPG
    photo694.JPG
    81 KB · Views: 0
  • photo695.JPG
    photo695.JPG
    79.5 KB · Views: 0
Last edited:
I've never worked with 4 ounce, other than to bury a layer under six ounce. I would imagine that it would fill easier that 6. If it is just a pattern showing through, you should be fine. When you sand it, just go light. The varnish should cover if there is some patterning. Applying another coat two days later is not a sin, I have done this frequently. Epoxies like silver coat have a 72 hour working span. If you are nervous, give it a light sanding and put another coat on. I usually have some rough spots, not filled in all the way, on the tight turns around the stems and stuff, but they buff up fine.
 
Looks great. Love how the inlay looks! It's such a wonderful feeling to have that step over with. Not that it's particularly difficult, but it's a thing that isn't easily reversed. Now you get to take it off the molds and hold it for the first time, very exciting.

I had a few spots on mine that still showed the weave after 3 coats. Later on, as I was epoxying other things, I just brushed another coat on those areas (after a light sanding) which was then sanded smooth in preparation for the varnish. I don't know that it was really necessary but it was easy enough.

Alan
 
Momentum,

Looks great and yeah, that inlay really does pop!!
One comment on your wet out technique...you should start near the center of the hull and work towards the stems and shear line as you go. When it comes time to wet out the inside, you might have a problem working from one end to the other. The cloth can bunch up and give you fits to get the wrinkles out. Best to work from middle to each end.
So congrats, you are now an accomplished laminator!!
 
Thanks for the kind words guys. I'm just following what I read and hear from good folks like yourselves. I'll certainly take your advice Stripperguy, on the wet out of the inside. I'm sure it will make my life easier, and give auch better result to boot. Next step for me is to lightly sand those areas I'm not too thrilled to see, and get a bit more epoxy on them. I'm hoping to get that done tomorrow, so that I can get this thing off that stinking form. Do you guys just use a regular household scale to weigh your canoes? I don't have one, so I'm gonna have to borrow one, or come up with a way to weigh it. I'm so curious to find out where we are at so far
 
The build is impressive, but finally finishing a 20 year old project is even more so and must be very satisfying. Once you had the time and some, uh, momentum, it all came together nicely.

I have had one experience with an unfinished canoe build. Some friends of mine picked up a half finished Boy Scout canoe project that had lingered for decades in a Scout building. They hung on to it for a few years without touching it and gave it to me. I hung on to it for a few years without touching it until it was taking up valuable indoor storage space and gave it to an outfitter friend.

That was 10 years ago and I believe it still hangs in the rafters of his shop, still untouched and unfinished.

Finishing that canoe after a 20 year wait should make it even more special, and you can probably knock the next one out in 10 or 15 years.
 
Do you guys just use a regular household scale to weigh your canoes? I don't have one, so I'm gonna have to borrow one, or come up with a way to weigh it. I'm so curious to find out where we are at so far

I am guilty of using the bathroom scale to weigh my boats, but I realize that I get differing weights when I step on the scale with a 16 foot long object on my shoulders. The difference is usually a few pounds plus or minus and is probably attributable to where my feet are on the scale and how the boat is balanced on my shoulders.

If I find weight variances when using a bathroom scale I just weight it several times and use the average.

Robin’s method would be more accurate

DSC01898.JPG


DSC01900.JPG
 
Momentum,

It's been several days now...how is the build going? Off the forms yet? Did you weigh it? Did you figure how you'll sand the inside?
Are you leaving the stems open? Or enclosing them with decks and bulkheads?
 
Yep, I have been kind of awol from the site for the last couple days. Instead of taking a few days and going somewhere for a mini vacation, my wife and I decided to just do some day trip activities with our kids. It gives each of them a chance to do something they really wanted to do without having to drag teenagers too far out of the "cool" zone. It seems to be working so far.
it did however manage to sand down the entire hull in a couple hours one evening. Based on the spots that I saw (maybe 5 in total) and that I was not that comfortable with what appeared to me to be very thin in some other areas, I decided to go ahead and apply another coat of epoxy on the entire thing. Call me chicken, or crazy, or paranoid, but I'd rather not kick myself later thinking that I should have and didn't. You know what I mean?
Anyways, it looks very good now, so I was just waiting so it to really set before removing from the form. I'm Really hoping to get it off them tomorrow. I've got one cradle made, and have to build the other. I can't wait. Hopefully, I'll have some good news and some pics for you guys tomorrow.
 
Forgot to answer the other questions... I'm thinking about buying a small rotary carving disk that can be used in a drill. It is the equivalent of about 60 grit sandpaper, so that would probably remove material in short order. I've also got a large hand plane that has a curved sole on it. I can send a pic if you wanna see it. You can adjust the radius for quite a range of shapes, so I'm thinking that may just finish the shaping for very little sanding. I don't know how it's gonna work though. As far as the stems go, i'd like to enclose them with the decks. I personally don't like to see the end grain interrupting the clean face of the deck. It doesn't look finished to me. So I guess that means I'll run the decks over top of the stems once they are cut a little short to accommodate for the thickness of the deck material. I've got some cool ideas for the decks, but I'm not gonna let the cat out of the bag until I settle on one of them. I'm gonna hit up a local thrift store to see if I can score a scale of some kind. You never know :) As I said though, stay with me for pics and news about form and canoe separation for good.
 
That plane sounds pretty cool and handy as well. Have you had a look under the boat to see how much 20 year old epoxy oozed out between the strips that needs to be removed before sanding? We had a hard time just with the carpenters glue, let alone epoxy removal.

Patience is key, you should have that after so long, but I know what it feels like to get it off the mold and wanting it to get wet before ice up.

Karin
 
That is looking good. Remember, the results are all due to good prep work. So take your time and BE fussy about all the little epoxy spots. You are going to see them every time you sit in the canoe. We scraped our glue residue off by hand and it was tedious to be sure. You could always either tint the resin or paint the floor after as well. I like the natural wood colour but painting is also a great plan for a hard use boat.

You have gotten me all revved up again. It may be time to build another stripper.

Christy
 
Sorry, but I take no responsibility for creating strife amongst friends. You can always live vicariously through my build :)
 
Today will forever be known as “I finally took the canoe off the form day.” At least in my mind anyways. WOOHOO! It is free from its wooden constrictions. I now get to see this thing the right way up, and can only imagine the journey’s we will see. Here’s how it went…

I started by removing each of the station molds one by one, starting with the center. I had fastened them to 2x2 blocks with 4 screws. Thankfully I had not glued them to the blocks too. Dodged that one. Even though I had waxed the top edge of each mold, some of them were a little stuck to the cedar from glue ooz out. A gentle tap with my favorite persuader freed them up. I left the bow and stern station molds because of the re-curve in the stembands.

All those who have done this before, will know how flexible these hulls are until you get the gunwales in place. Mine was no different. I fastened a temporary spreader at the center line to keep the true max width. It also gives me somewhere to grab when I need to move it around. Not too bad for weight, although I have no scale to measure it. Just a gut feel at this point.

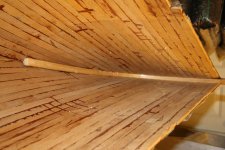
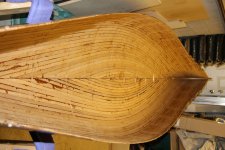
In the pics, I’m hoping you can see the glue drips, the rogue staples on the inside of the stems, as well as how much work I still have to do. Bear in mind, this is epoxy and not just regular glue. I did a couple little tool tests to see which seems to be the most effective at removing the epoxy. I tried an upside down ¼” and ½” chisel, a paint scraper, and a french curve cabinet scraper. So far the scraper wins hands down. It’s different radii works really well for the shape of the hull. I’d still like to have a look at the rotary carving type disks. We’ll see on that one. Enjoy.

I better get started.
 

Attachments

  • tn_IMG_1507.JPG
    tn_IMG_1507.JPG
    168.4 KB · Views: 0
  • tn_IMG_1511.JPG
    tn_IMG_1511.JPG
    152.9 KB · Views: 0
  • tn_IMG_1508.JPG
    tn_IMG_1508.JPG
    118.1 KB · Views: 0
  • tn_IMG_1510.JPG
    tn_IMG_1510.JPG
    157.3 KB · Views: 0
  • tn_IMG_1512.JPG
    tn_IMG_1512.JPG
    141.3 KB · Views: 0
  • tn_IMG_1509.JPG
    tn_IMG_1509.JPG
    156.6 KB · Views: 0
  • tn_IMG_1502.JPG
    tn_IMG_1502.JPG
    139 KB · Views: 0
  • tn_IMG_1503.JPG
    tn_IMG_1503.JPG
    156.5 KB · Views: 0
  • tn_IMG_1499.JPG
    tn_IMG_1499.JPG
    148.9 KB · Views: 0
  • tn_IMG_1504.JPG
    tn_IMG_1504.JPG
    193.7 KB · Views: 0
  • tn_IMG_1501.JPG
    tn_IMG_1501.JPG
    158.1 KB · Views: 0
Momentum,

Those recurve stems look great!! So elegant, so classic...I like that inlay too.
If nothing else, those epoxy drips change the appearance of your strips the same that the epoxy and glass will. If you had used wood glue, any remnants would be very obvious. With these epoxy drips, any leftovers may not be so obvious, so, at least you have that going for you! For sanding the inside, I use a 7" sander with the backing disk modified to make it much more flexible. And that epoxy won't soften and clog up a sanding disk the way that wood glue would, so, you have that in your favor too! See how lucky you are?!!
 
Thanks Stripperguy. I like the silver lining approach to what I'm facing. It really shouldn't be that much work to get the inside prepped for fiberglass. I'm just looking at time ticking away here, and it will be getting too cold here in Ontario soon to be out in the garage messing around with epoxy. I'm just gonna keep doing what I have always done... One step in front of another
 
I'm just looking at time ticking away here, and it will be getting too cold here in Ontario soon to be out in the garage messing around with epoxy.

My garage shop is unheated but well insulated. When I do epoxy work (or etc) and am concerned about temps dropping too low overnight or as the epoxy/etc sets up I use an electric radiant oil heater, which works especially well under an inverted hull with the rising heat captured within the boat.

I also use that radiant oil heater when I want temperature to fall slightly/slowly. I turn it on under the hull, warm the boat and then turn the heater off.

Definitely do not use a kerosene heater; the aerosolized kerosene/fumes can cause fisheyes in the epoxy and contaminate the hull for any topcoating.
 
Back
Top