• Happy Weed Appreciation Day! 🌱🌿🌻

Dreamboat Rebuild Rebuild

A reservoir permit requires a bunch of personal and boat information, including the HIN. A oopsie ten digit HIN might not pass muster, so YARR’s HIN is now DRM1684OL110. Adding a couple characters to the middle made YARR a 2010 canoe.
I've long suspected you are operating a chop shop and trafficking in hot canoes out of that so-called workshop of yours. How else to explain the endless parade of canoes passing through it, often leaving with their hulls repainted different colors and customized to the point where the true owners would walk right past them? Your altering HINs just confirms my suspicions.

I assume you'd roll the odometer back, too, if a canoe had an odometer. Come to think of it, there may be an odometer somewhere on the Utility Thwart -- its got everything else (gotta admit that drink holder is pretty slick)!

THAT’S why he rebuilds them backwards! To roll back the odometer!!!
 
Mike, it was Virginia Whitewater author Roger Corbett that paddled Intrepids until he “wore the bottoms off.” The Chapelle family regularly participated in Corbett-organized trips, so it is possible he passed a canoe to them.

Unrelated story: I met Sheila Chapelle on a Corbett-organized trip on Antietam Creek in midwinter when we paddled the Creek along with ice blocks. Everybody had on lots of clothes plus PFDs, so you couldn’t really tell people’s shapes, and I thought Sheila was just a large woman. The next week there was an email reporting Sheila delivered the baby she was carrying in the canoe that day. She went canoeing with the ice blocks when she was full-term pregnant! Those Chappelles are serious about their paddling!
 
Hence, the only way you can prove anti-canting is to float the canoe and put a bubble level on the seat. Foreshortened photos in a foreboding shop, where many liquids have been decanned and decanted, can't prove anti-canting

When I thought the stern seat cant angle looked wrong that is exactly what I did. YARR was a flat bottom, so I leveled it out on the ethafoam blocks

P6060046 by Mike McCrea, on Flickr

And put a level on the stern seat.

P6060048 by Mike McCrea, on Flickr

Way the heck off. I expect my original intention was to use longer peg drops at the back of the seat to compensate for the sheerline rise at the stern, but I over compensated, and never actually checked.

That will be an easy fix when the old seats come out for refinishing.

I've long suspected you are operating a chop shop and trafficking in hot canoes out of that so-called workshop of yours. How else to explain the endless parade of canoes passing through it, often leaving with their hulls repainted different colors and customized to the point where the true owners would walk right past them?

It helps that I did a really crappy and unskilled job of rebuilding some derelict canoes 20 years ago, and get to try again when they return for refurbishment.
 
YARR Reassembly

Before the center seat and new brightwork went back in YARR a minor attempt was made at removing the grunge left behind from under the kneeling thwart ankle blocks. Acetone and a sharp (but rounded corner) metal putty knife and elbow grease.

P6040001 by Mike McCrea, on Flickr

OK, even with some steel wool scrubbing that did very little except demonstrate that my contact cement work leaves behind some seriously tenacious grunge. Those two little squares are not worth any additional effort

Moving on, the new center seat went back in. Reinstallation is easy once everything has been dry test fitted and removed for urethane finish work. The center seat drops have a touch of forward cant, which will be oppositional force helpful after I install a DIY foot brace for that center seat position.

The aft thwart got strung with bungee cord and a cord lock tensioner. I like having a spacer ball on one topside run of the bungee. The bungee cord holes in the thwart are offset along the grain from the machine screw holes at the butt ends; probably unnecessary, can’t hurt for split end prevention.

P6040004 by Mike McCrea, on Flickr

I should have laid another coat of urethane on the old re-used balls, but they’ll do for now. Those are the last of my wooden balls, time to buy more. Michael’s, not mine, the craft hobby store.

Same deal for the front thwart.

P6040006 by Mike McCrea, on Flickr

With the two thwarts in place I could remove the wing nutted portage yoke. It will be superfluous with YARR chained up at the reservoir edge, perhaps most often used as a solo, but it is already cut to size, with hardware, so it might as well be refinished, if only for installing it when shouldering YARR on and off the roof racks twice a year.

With the yoke out YARR is starting to look like a functional solo/tandem canoe.

P6040007 by Mike McCrea, on Flickr

Last of the brightwork, the frou frou bow utility thwart. It still needed a few things, starting with a couple belt & suspenders webbing straps under the mesh bag for additional support.

P6050012 by Mike McCrea, on Flickr

Like the other thwarts an over/under/over run of bungee, with a drilled dowel this time instead of a ball; on the more platform-ish utility thwarts an easy lift spacer is still a good idea, but a flat bottomed spacer is sometimes better.

YARR already has beaucoup webbing loops pop riveted under the inwales, useful as tie points in a tripping canoe, less so for reservoir day paddling and fishing. Those were made so they could be turned unexposed under the inwales; no need to drill them all out, just turn them sight unseen.

P6050009 by Mike McCrea, on Flickr

I have a webbing loop idea for the utility thwart that will leave more flat surface available, without using any pad eyes, mini SS D-rings or deck hooks. Any of those doohickies, if desired for purposes yet unknown, can be added later.

My custom has always been to put webbing loops on machine screw ends underneath a thwart or carry handle. I never thought about putting webbing loops on top of the brightwork; four little webbing loops, more open workspace atop the utility thwart.

P6050015 by Mike McCrea, on Flickr

I like it, and think that the unoccluded space may have true utility.

Woman, make me a sandwich and get me a beer!

P6050017 by Mike McCrea, on Flickr

Uh, honey, no, wait, put down the knife
 
Lots of outfitting still to do. Knee bumpers, but I have readymade minicel pieces (thanks as always Conk) for the bow and stern seats.

With YARR on the shop floor pad and a sitter testing knee spread on the bow and stern seats there was, as expected, no decrease in width needed, so just a little cushion for the pushin’ on the side of the inwales. Four thin minicel Conk strips, exactly the size of the inwale edge.

A comfortably braced knee spread at the center seat height and location proved to be 25” apart. Inwale to inwale YARR is 28” at knee brace location, so I need to come in 1 ½” on each side. A yoga block brought that distance in perfectly, 1 ½” past the inwale edge.

P6060033 by Mike McCrea, on Flickr

Contact cement, as usual two coats on the hull, three on the foam, heat gun action, clamps and boards.

P6060035 by Mike McCrea, on Flickr

When the clamps came off I infilled the inwale edge above the yoga blocks with a slender chunk of minicel. I had just the thing for that purpose; friends had leftover 4’ long strips of minicel, cut with a taper from 1 ½” thin tapering out to 1 ½” thick.

Useless? There is no such thing as useless minicel. I had sliced those into 24” lengths for easier storage, and I cut the backfill pieces needed from the thicker ends of that scrap.

P6060036 by Mike McCrea, on Flickr

The yoga blocks come with beveled edges; a couple band saw slices off sections of that long, tapered minicel scrap and I had two perfect infill pieces, 8 ¾” long, 1 ½” thick and 1” deep. Those will add needed cushion at the right-angle inwale edge, and the minicel is a little squishier than the EVA yoga block foam.

P6070051 by Mike McCrea, on Flickr

I’ll Dragonskin some additional curvature on the edges of the infill pieces. Or perhaps something else; one avid fisherman relates that he keeps his trolling rod trapped between his leg and the inwale when paddling for better tactile feel of a fish on the line. The protruding center seat knee bumpers may have enough depth to rasp and Dragonskin out angled rod handle sized C-slots.

I need advice from my intended reservoir fisherman friend first.
 
As with the OOSOBO rebuild I needed to make another aluminum L-bracket and telescoping bar foot brace, adjustable old school style with wing nuts.

I have 40” of aluminum L left; rather than have wastage I’ll cut that into four 10” lengths and make an extra set of foot brace side rails. 10” rails is a little short, but if I install the bar at center hole I will have four inches of adjustment fore and aft, which should be accommodating enough for different legged paddlers.

Four 10” long pieces of aluminum L. The sharp right angle corners had to go, and you can guess where I went to see them get gone. The 1” tabletop belt sander.

P6070056 by Mike McCrea, on Flickr

Those will do. I drilled them out for 3/16” flange rivet holes on one side, and for wing nut foot bar holes on the other. Might as well drill both sets while I’m at it, and put the second set in a spare parts box, ready for the next canoe. Eh, the next “give-away” canoe; if it’s my canoe I want a Wenonah adjustable foot brace dammit, fumbling with wing nuts sucks.

https://haywardoutfitters.com/product/wenonah-wenonah-foot-brace/

Those Wenonah foot braces are out of stock almost everywhere, and nearly 50% pricier via secondary vendors than just a few years ago. Screw that, I can buy aluminum L and sleeve-able conduit, drill some holes and make multiple telescoping foot brace bars for less.

As long as I’m not the one needing to make occasional wing nut adjustments. I am not a wing nut fan; day one on a multi-week paddling trip with a friend. He had lent his L-bracket, wing nut foot brace rarely paddled solo canoe to someone. Someone who had adjusted the bar position.

100 yards down on the first day he announced “Hold up, I need get out and move this foot brace”. I waited up. Had a beer and waited up some more. Had a bite to eat and finally said “I’m gonna mosey slowly on, see ya downriver at the next big eddy” Freaking seized and corroded wing nuts.

Eh, for a canoe I may paddle very rarely these will do cheaply just fine.

P6080060 by Mike McCrea, on Flickr

Still, I detest metal work in the shop. Sharp little curly-cues of aluminum shavings everywhere,

P6080062 by Mike McCrea, on Flickr

Dammit, I walk out there barefoot sometimes, or worse with just socks on. That drilled shaving stuff is evil.

Prep work drilling done, the rest of the foot brace installation is a piece of cake. Cut the sleeved crossbars to fit, wing nutted centered on the side rails while resting atop a temporary platform, call it my usual 32-ish inches away from the front edge of the seat for my leg length (seat height and gunwale knee spread matters in foot brace location too), 6 ½” high for the ball of my angled size 12’s and pop rivet in some flange washers.

Having the foot brace bar resting on the temporary platform makes installation a lot easier. Drill one hole from the inside, through the hole in the rail, pop one flange rivet through that hole from the outside, measure/adjust the depth of the other hole, drill, pop rivet and walk around to the other side for more measuring, checking and pop riveting.

P6090065 by Mike McCrea, on Flickr

That’s a couple minute task once everything is ready. Perfecto. Slide the platform out, slip some black foam pipe insulation in place and all is comfy in YARR land.

P6090067 by Mike McCrea, on Flickr
 
I think I have a model ID on YARR. A first glance comment from an old school paddler – “That looks a lot like my ‘80’s Old Town Kennebec”. Not a lot of Kennebec photos or specs on the net, but yeah, kinda ‘80’s old school this:

https://canoes-for-sale.com/old-tow...ver-whitewater-canoe-local-pickup-only-147448

The Old Town deck plates and gunwales I installed may have helped his first glance “looks like”.

Or, says he on further inspection reflection, “One of the early Mohawk “Whitewater” models”. A possibility perhaps verified by CBoats:

The Mohawk Whitewater was a boat made in the early 80’s. It is the first version of the Intrepid series of boats”.

Ding, ding, ding; between some hints from Mohawk, and the memory of a guy who was selling Royalex canoes before I had even heard of such a material, I think we have a winner.

1984 pre-Intrepid “Whitewater” model molded by Mohawk and sold naked hull to Dreamboat.

By the time I’m done with plastic surgery and cosmetics she’ll look 40 year younger. I wouldn’t recommend it for any whitewater paddling, but as a reservoir canoe YARR has still some good years left.

I want to see a birthday cake with candles floating on the reservoir in 2024 for the 40th anniversary. I’m partial to chocolate and coconut.
 
Stern seat cant correction and back band attachments

Before proceeding any further the reverse cant angle of that stern seat needed to be corrected; 20 years of discomfort was enough.

The long drops I had originally made proved to be, uh, jeeze, a whopping ¾” too long. Cut down to proper size and test fitted the stern seat has a touch of forward cant.

The good news was that the butt ends of the drops and seat frame were already heavily urethaned and look solid. Eh, I needed to lay a couple coats of urethane on the cut ends of the newly shortened drops, may as well lay some more urethane on all of the butt ends and pipe cleaner some inside the machine screw holes. When the uninstalled opportunity arises, especially after 20 years. . . . .

While the urethane coats set up I turned to some other comfort issues. I gave OOSOBO paddler Eddie a couple junky old back bands, and I know my aching back necessitates the comfort of my preferred sacroiliac support, a Surf-to-Summit Performance back band.

https://www.surftosummit.com/collections/back-bands/products/performance-back-band

The back band’s swivel clips need inwale attachment points; on the stern seat I turned four of the existing webbing loops out from under the inwale and those were perfectly positioned, no additional attachment points needed in that seat location.

The bow seat had useable webbing loops under the inwale for the front straps, but needed pad eyes for the back straps. Pad eyes I got, I use them often enough to buy them in quantity.

P6090001 by Mike McCrea, on Flickr

Front back band clipped in.

P6090004 by Mike McCrea, on Flickr

The center seat had the reverse, with usable webbing loops at the back but needing pad eyes up front.

P6090006 by Mike McCrea, on Flickr

Using four new pad eyes and eight existing webbing loops any seat can have a back band.

Since I was dropping vinyl curlie cues inside YARR I rounded the edges on the minicel knee bumper infill pieces.

Done drilling, pop riveting and making minicel dust in the hull, not yet even vacuumed up, a travelling friend stopped by on his way north and we had a grand ole time; shot the crap, repaired a ukulele, found a clamp on sail thwart and downwind sail that should work on his Loon, and as usual managed to foist off some other shop surplus on him.

Remember the can of West System 420 aluminum powder I was given?

https://www.canoetripping.net/threads/west-system-423-graphite-vs-420-aluminum-powder.127469/

That stuff is now $65 a can, and I have zero use for it on composite or RX repairs. He, on the other hand, has a leaky, family-historic Grumman in Maryland, and several ancient & suspect aluminum fishing boats in Canada, which may or may not have survived the recent Derecho intact.

West System’s “Aluminum boat repair kit” comes with G/flex 650 and 406 colloidal silica as a thickener. But, seriously, $45 for this kit:

Each kit contains 4 oz. G/Flex 650 Epoxy Resin & 4 oz. G/Flex 650 Hardener (for a total of 8 oz. of mixed epoxy), 406 Colloidal Silica, 2 reusable mixing sticks, 2 pairs of protective neoprene gloves, 2 application syringes, 2 plastic mixing cups, and detailed repair instructions

Those better be some dang special mixing sticks, gloves and cups.

https://www.jamestowndistributors.c...XkfEDOkK5fOvonNmb5Cja9Tw1hqyLvBhoCx6oQAvD_BwE

With multiple aluminum boats to repair screw that, 32oz of G/flex 650, enough to do all of his leaky boats, is $86.

https://www.amazon.com/WEST-SYSTEM-...=1655049163&sprefix=g/flex+650,aps,487&sr=8-2

If Colloidal Silica is the thickening agent of choice that stuff is $20 a can.

Any reason the 420 aluminum powder wouldn’t be as useful, or better, than silica in repairs to aluminum hulls? Serious question; he left with the can and plans to use it. Sure hope it will work as a thickener in that aluminum-repair guise, but whatever, not my canned problem anymore.

Shop visitor on the road again I finished the Dragonskin work. I love Dragonskin on minicel. Still do, even though Dragonskin was discontinued a few years ago. I have a stash, including a full virgin piece and a couple pieces new in bag.

P6090010 by Mike McCrea, on Flickr

One trick to preserving minicel; it’s better to cut off a piece off just the size you need for the shaping at hand; too large pieces tend to crease and crack.

P6090009 by Mike McCrea, on Flickr

That little finger sized squib of Dragonskin, retrieved from the scrap box, was perfect, and is still good as new.
 
While I was making shop dust I wanted some plastic flanges to reduce the size of the hawser holes in the stems. I did not drill those oversized holes, and the massive bow rope loops, knotted inside the hull, were possibly Dreamboat or original owner installed. That was some beastly and long lasting line; I might have left it in place, but it was overkill, and intact would have been a PITA when painting the canoe.

P5240002 by Mike McCrea, on Flickr

YARR doesn’t need anything near that girth for painter loops, and I wanted to sleeve the naked, gaping ¾” holes. To help ascertain a decently tight fit I drilled a ¾” hole in a scrap of Royalex (thanks Doug, I keep finding uses for it) and went hardware shopping.

P6050019 by Mike McCrea, on Flickr

Bupkiss, nothing even close. So back to the tried and true, conduit box adapters.

The smaller size of those have a neck OD just over 13/16”. This is familiar territory; I needed to shave a touch off the flange neck of four conduit box adapters. Such familiar territory that I have a custom box adapter belt sanding implement.

P6050025 by Mike McCrea, on Flickr

Incrementally sanded, test fitted and sanded some more they all fit like a glove. I didn’t need the long flange neck protruding inside the stems, no lining hole tubing needed, so I shaved down the neck length to just over Royalex thickness. Caliper says 3/8” of neck will do.

P6050022 by Mike McCrea, on Flickr

While the sander and dust extractor was in play I sanded off the embossed “Carlon ½” E996D PVC” lettering. ‘Cause, you know, weight savings.

In for a penny, I might was well spray paint those box adapters black while I’m at it, they are not getting epoxied in place until after YARR is painted, but at least they will be done and ready to go.

P6050030 by Mike McCrea, on Flickr
 
Brightwork reinstallation. With multiple coats of urethane on the stern seat and drops that brightwork could be reinstalled. Before the reinstall I installed loose “pad keeper straps” around seat the frame, and paid attention to which drops went where this time; I didn’t want to pull a Glenn and installed the drops incorrectly.

The stern seat now has a touch of forward cant. That slight cant angle is imperceptible to the naked eye, but with the hull verified level the stern seat now has the proper touch of forward cant.

Not to say that installation mistakes were not made. I reused the same seat hardware; the machine screws in the original once-oversize peg drops were already longer than need be. With ¾” of peg drop cut off I had a whopping lot of machine screw shank end protruding.

Fortunately I have a goodly supply of various length ¼” machine screws; take two out, put two shorter ones in.

With a back band, a partially deflated Thermarest seat pad draped over the front rail edge for thigh comfort and minicel knee bumpers; those are some creature comfort seats, as they should be.

P6100012 by Mike McCrea, on Flickr

The old bow and stern seats, while still sturdy and tightly webbed, are the epitome of my work 20 years ago. The stern seat was simply webbed over cane, surprisingly still intact cane. There are no staples on the webbing ends, instead I used two small brass brads on the ends of each piece.

A few of the brass brads had started to lift. Re-hammered in place, with stainless steel staples added, that stern seat is now much improved. Having seen that lack of craftsmanship I needed to take the bow seat and drops out, sand and refinish.

But not right yet. I had a tester sit in each seat and marked the hull for some heel padding. Plus I’m not sure I want to see another seedy underbelly of my vintage crude seat work when this recently arrived.

P6100014 by Mike McCrea, on Flickr

That is a Bubba Butt Solo seat. Laminated frame, flat back rail, contoured and canted front rail, 27” wide webbing at the struts.

That Bubba Butt seat isn’t going in some giveaway canoe; now I really need to find a composite Big Boy tripper to rebuild and (lightly) outfit; that wide webbed Bubba Butt Solo seat weighs only 1lb 3oz, a pound less than some standard seats.
 
YARR needed a little more cushion for the pushin’, or at least for heel resting. With thin water shoes, or summer barefoot, Royalex is a hard surface when resting my heels for long hours, and even light pressure on a foot brace makes it worse still. Some exercise flooring will serve as durable heel cushion.

Plus the embossed exercise flooring is a less slippery when wet than vinyl, and better as a sacrificial boot-heel scuff layer than whatever the floor of the canoe; that heel wear may be most apparent on composite hulls. Decked canoes and sea kayaks, with feet-on-pedals concentrated wear aspect, often show interior heel scuffing.

I want a little bit of cushion, for any paddler in any seat, where their heels may rest. And I had just the thing, a 21” square of exercise flooring.

P6100001 by Mike McCrea, on Flickr

Cut up into six 7” x 10 ½” rectangles those will be perfect.

P6100003 by Mike McCrea, on Flickr

They just needed the corners rounded off.

P6100005 by Mike McCrea, on Flickr

And a last bit of frou-frou shaping. That exercise flooring is ½” thick, cut out on the band saw that leaves an abrupt right angle edge exposed to the sheer forces of misplaced feet or gear slid fore of aft. I wanted to bevel down that edge a bit for less exposure.

And, as usual, I turned to the 1” tabletop belt sander. That little tool has many fine-tuning and custom fit uses.

P6100007 by Mike McCrea, on Flickr

Those will do nicely.

P6100009 by Mike McCrea, on Flickr

YARR needed at the least one junky D-ring; I can’t let a canoe leave without a D-ring, even if I foresee no need for such, and while I had contact cemented heel pads curing I G/flexed in a D-ring.

A cheesy D-ring that came out of the second OOSOBO rebuild that once sported a not-stainless but sure as heck crustyrusty metal D-ring, since bolt cuttered off. I used the same paracord “D” loop with heat shrink tubing as on the OOSOBO reinstalls.

P6110010 by Mike McCrea, on Flickr

Before those heel pads and D-rings were installed I removed the bow seat for refurbishment. With the stern seat redone it more obviously needed some TLC

With three seats, the exercise flooring heel pads and a foot brace there wasn’t a lot of floor space left for that cheesy D-ring; best open location is behind the stern seat.

A little G/flex for the D-ring, and some for the wing nutted yoke. Rather than fumble with loose washers under the yoke I had originally installed a countersunk a 1” stainless fender washer. Like the missing flange washer on one side of the yoke those SS fender washers were absent as well. I must not have used epoxy. Or, ya know, maybe peculiar Tom mishap.

That to-be-used-twice-a-year thwart did not get refinished, other than slapping another coat of urethane on the under-inwale edges and butt ends. I cleaned out the fender washer countersinks with a 1” spade bit.

P6110014 by Mike McCrea, on Flickr

P6110016 by Mike McCrea, on Flickr

The fender washers got covered with a wax paper cover and clamped down tight. Same for the contact cemented heel pads, weighted down in place.

P6110018 by Mike McCrea, on Flickr

The pre-curled D-ring vinyl pad fit the stern vee nicely, and went under a curve conforming sand bag weight. Almost time to walk away, but I pulled that sand bag every half hour or so to roll/thumb compress the vinyl pad.

Other than G/flexing the conduit box adapters in the oversize hawser holes I think that is almost the last of the epoxy work.

Weights off the next morning each heel pad got a perimeter bead of E-6000 adhesive sealant. Excellent stuff for preventing any water or grit infiltration under the pads.

https://www.walmart.com/ip/Eclectic...pPjp0T37AU_GRQ0hUqgaAv8qEALw_wcB&gclsrc=aw.ds

It took half a tube to bead all six heel pads and the vinyl D-ring pad. Well worth $1.57

P6120030 by Mike McCrea, on Flickr

P6120028 by Mike McCrea, on Flickr
 
It was time to reinstall the last of the brightwork. The bow seat, like the stern, had long ago* received the same crude webbing attachments. Apparently high quality webbing, cluelessly installed using brass brads holding the webbing in place. I tapped those brads firmly back in place, and added stainless steel staples this time around.

P6120027 by Mike McCrea, on Flickr

I’m sure during the original rebuild I said “I’m not buying a box of stainless steel staples just for this, I got plenty of brads”. Jeeze Louise, there are 56 brass brads in each seat. That was a lot of brads to tap in with tautly held webbing vs 5 minutes of stapling; kinda like spacing vinyl gunwale pop rivets out every three freaking inches, mistakes were made. WWIT?

Today there three boxes of different SS staples hanging on a shop peg. Hidden behind three boxes of different sized steel staples. “Hidden” so the Missus isn’t using stainless staples to hang holiday decorations on the porch or deck. Nothing is as much fun as yanking $10 worth of SS stapes off the deck rails when the garland comes down.

I hide my good duct tape even more cleverly, and leave a bait roll of cheap duct tape easily accessible.

The refurbished bow seat got the usual pad keeper straps and the seat and drops went back in. Uh, not so fast, those seat drops, even for long ago work*, were custom fitted. Not only were they paired at slightly different lengths for a touch of (actual spirit level verified) forward cant, the under-inwale edges of those peg drops are slightly slanted to accommodate the inward tilt of the vinyl gunwales, so the pegs hang straight down under slanted inwale and not cockeyed.

P6120033 by Mike McCrea, on Flickr

Wondering how many times I might get this wrong, with some actual thinking before screwing - never my strong suit by any definition - the correct pegs went in under correct holes in the correct orientation the very first time, and the gunwale slant accommodation for vertical peg drops was perfect.

P6130038 by Mike McCrea, on Flickr

I finished up the brightwork installation by putting the wing nutted yoke in place, mostly so I don’t misplace it.

P6130040 by Mike McCrea, on Flickr

*How long ago? Sir Thomas, he of the incredible memory, answered a couple of ancient history questions. “When was the battle of Thermopylae?” No, wait, he’d probably know that (480 BC).

Tom, when did I give you the Dreamboat?

Several involved tales later, including that it was just after he and the missus did a group trip down Conococheague Creek, paddling tandem in her Mohawk Rogue solo WW canoe. Not lap dance straddled together on the Perception saddle, but sitting atop dry bags fore and aft. Tom declared the year to be 1999.

OK, I was responsible for Jane’s ill-suited Mohawk Rogue. It was advertised locally way under-priced and I told her “Just buy it, any canoe is better than no canoe!” Maybe, but the Rogue was not a great choice for the flatwater stuff we often group paddled.

I later sold it for Jane for what she paid to a paddling club friend. At a canoe club picnic Ed Evangelidi, who loves him some old-school heavy duty Royalex, handed me a couple hundred bucks and snatched it off my roof racks like it was it was the Holy Grail. Being Ed I expect he eventually wore the bottom off it.

Trusting but verifying Tom’s tales of recollection I found the Conococheague trip report, from September 1999. Not so much a trip report as an aftermath report. Reproduced here; no literary license taken, just the facts.

An Un-chivalrous Shuttle

After a group creek run some mysterious force arranged for the back shuttle drivers to be comprised of all the “gentleman” in the group, with the wives, girlfriends and children left waiting at the take out.

The gentlemen had driven a hundred yards when someone declared that he needed to take a leak, and “Oh look, there’s a roadside tavern”

A warm cozy tavern. “Let’s just stay for one beer”. Oh, cheap pitchers? Maybe two beers. Free shuffleboard table. Great juke box. “Maybe just one more”

When we finally departed we were shocked, shocked I tell you, to discover that it has gotten quite dark. We have since calculated that this is predicable when you go into a bar at dusk and come out two hours later.

We might have gotten away with it if we had coordinated our stories. Unfortunately when we finally arrived back at the take out, to a chilly reception, we all blurted out a variety of excuses. “We had a flat”, “We had to wait for a really long train to pass”, “It wasn’t my fault, they made me do it”

The “gentlemen” were never again allowed to run shuttle without a lady present.


YARR’s history is almost complete. Mohawk Whitewater model, outfitted by Dreamboat in 1984. Given to me by Shelia Chapelle in 1999. Unskillfully refurbished and given to Tom that winter, returned 23 years later for some much needed TLC.

To close that circle I need to get in touch with Shelia, and ask what she recollects about YARR’s history and origin.
 
After the initial scrubbing YARR weighed in at 84lbs, before the addition of a center seat, a couple thwarts and still to come paint job. The stern deck plate tip, an Old Town deck I installed in 1999, plainly shows that neither Tom, nor I, nor anyone he knows, was hip-flipping that beast onto their shoulders. Ground the stern, lift the bow, walk back under the yoke and don’t worry about scraping the deck plate.

P6130042 by Mike McCrea, on Flickr

That deck plate tip wasn’t yet worn through. I filed the burrs smooth and added something sacrificial. I realized I had overlooked one new-to-me but should be a rebuild tradition; I did not add any of friend Brian’s ashes to the fiberglass bottom patches, so a bit of B could be scraped off from time to time on errant rocks (not Mallow’s Bay sharps!).

YARR needed at least a touch of Brian. Some G/flex, some graphite powder, some black pigment.

P6130043 by Mike McCrea, on Flickr

And a touch of Brian to the mix, for a memorializing scrape off layer.

P6130045 by Mike McCrea, on Flickr

I left it a bit rough surfaced intentionally. Brian was the master of the one handed Strike-Anywhere thumbnail trick when lighting his pipe, twisting the lit match around pipe-wards with two-fingered snap flourish. I never mastered that trick, usually ending up with burning phosphorus under my thumbnail and an unlit pipe.

Brian had grit. If his cremains mix proves rough enough I’ll include a box of Strike-Anywhere’s with YARR, so the sternman can reach behind and flame on via some Brian roughness.

That strike-ability, and of course a bit of Brian scraped off in the driveway when racking YARR, and a bit of B left at the water’s edge twice a year. We had a lot of water’s edge moments. A lot of mountaintop moments too, but I don’t see anyone humping YARR up to an alpine lake.

EK_0018 by Mike McCrea, on Flickr

Yeah, yeah, we were stretching foodstuffs; if we caught it, we ate it. Except the hat-slap-stunned grasshopper bait. Which, fried up crispy, might have been a tasty addition to the last of the noodles.

EK_0027 by Mike McCrea, on Flickr

Those sacrificial deck tips will do. Walk back under the yoke by grounding the tip the deck plate, and say hello to my old friend.

P6130047 by Mike McCrea, on Flickr

I had a little extra “enhanced” epoxy mix leftover, so, symmetry; I coated the tip of the bow deck plate as well. A wee bit of B, coming or going, is a good thing.

P6130050 by Mike McCrea, on Flickr
 
I had done everything I could do topside for now, time to turn YARR over to expose her ugly bottom. The epoxied patches and recoated mega skid plates have had plenty of time to cure. Gawd bless peel ply for greatly eliminating the sanding required.

P6130002 by Mike McCrea, on Flickr

220 in an RO sander, interstitial pad, light touch and dust extractor on that glossy epoxy. Didn’t take long.

P6130004 by Mike McCrea, on Flickr

I had cleaned the epoxied patches before sanding, just in case there was any blush or other contaminate I might sanding smear around, which there shouldn’t be, but that epoxy is a week old, the canoe has been moved this way and that, and other work has been done in the shop. Couldn’t hurt to clean it just in case.

P6130006 by Mike McCrea, on Flickr

Those are still some ugly mega kevlar felt skid plates.

With everything dry I taped the gunwales . One nice thing about painting the entire hull, the taping – no paper mask for drips needed - is easy; a continuous run of 1” tape covering the outwale on each side, and squibs of tape over the hawser holes on the inside, so I don’t inadvertently dribble dark green paint inside the hull.

P6140008 by Mike McCrea, on Flickr

Time to start rolling and tipping Rustoleum Dark Green Topside paint. If it was a keeper canoe I’d spring for green EZ-Poxy, but OOSOBO got that same shade of green Rustoleum, and I should have plenty left over from a new can for OOSOBO touch up work this coming winter.

As usual, once all of the prep work was done, it took 30 minutes to roll and tip out both sides, including some post-painting cleanup. Also as usual it took almost half a quart of paint to lay the first, seriously thirsty coat. To be expected no matter the material.

P6140009 by Mike McCrea, on Flickr

The first coat looks good, and answers the question two coats or three? A second coat will cover the thin spots and holidays, but the glass tape patches, mega skid plates and 10,000 bottom scratches will remain obvious no matter how many coats of paint are applied.

Cured for a day and lightly sanded.

P6150012 by Mike McCrea, on Flickr

Tack cloth cleaned and a second coat.

P6160013 by Mike McCrea, on Flickr

The second coat, also as usual, required a lot less paint. A third coat would look better still. So would a 4th coat, and I have enough paint leftover to do that. Two coats was good enough on this patched, scratched and dimpled hull, and the old Royalex and new glass and epoxy has some needed UV protection.

Even with just two coats the once fugly skid plates look 100% better. Well, not just two coats of paint, some sanding, a coat of 105/206 and G/flex mix, and a fillet of thickened epoxy at the tall transition edges. Much, much better.
 
White Stripes.

I could have saved some green paint by taping off 5” below the gunwales and leaving that band unpainted until I added white accent stripes. But it is easier to roll paint than lay tape, so I didn’t.

Outwale tape still on, new tape 5” above (below actually) for white accent stripes under outwales. An easy RO sander pass between the tapes along both sides to scuff the green and it was ready to paint.

P6160016 by Mike McCrea, on Flickr

I think it may be time to buy a new tack cloth.

P6160017 by Mike McCrea, on Flickr

Sanding, rolling and tipping the stripes was a lot easier than rolling and tipping an entire hull. Executing face-your-work wisdom (and laziness) I never even stood up for the rolling and tipping; stripes at eye level in a wheeled chair, pulling the always handy wheeled cart alongside with pan, roller and foam brush. Roll out one stripe, tip out one stripe, wheel around the hull, repeat, scoot over to the bench for clean up.

Ahhhh, my back didn’t ache from crouching over. Love that little shop cart.

P6160020 by Mike McCrea, on Flickr

Not bad, but the white over dark green definitely needed a second coat. Back to the RO sander and another coat of white.
 
With a second coat of white rolled and tipped I wanted to recreate the diamond pattern on OOSOBO, the vintage Explorer currently residing permitted at Prettyboy Reservoir.

P3190001 by Mike McCrea, on Flickr

Not just because I like it and think it looks old timey classic, and is easy to do, but because it makes for a very distinctive canoe. And I can foresee that distinction having future WTF consequences.

The same reservoir police patrol the launches at both Prettyboy and Liberty reservoirs. I have this vision of a reservoir cop cruising through the Prettyboy launch and seeing this

P3090003 by Mike McCrea, on Flickr

Then, after driving cross-county to Liberty Reservoir, “What the heck!”, seeing the same canoe chained up at there. At least any borrowers of either canoe should be able to easily identify the correct hull to unlock.

An aside – OOSOBO was on the reservoir yesterday with another solo paddler at the helm. That is the 4th person to borrow OOSOBO so far this year, and they took a couple photos while paddling.

20220621_124423 by Mike McCrea, on Flickr

20220621_131555 by Mike McCrea, on Flickr

That 5-gallon water bucket for bow backwards trim weight is ugly, but necessary. Three seater YARR, paddled solo, will need no auxiliary weight.

YARR needed green diamonds in the same spacing on the white stripe. Easy taping, sanding and painting. The Diamond shapes are quick to trace and tape.

P6190029 by Mike McCrea, on Flickr

Other stencil shapes, not so much.

P6190031 by Mike McCrea, on Flickr

Although, if I ever work on another of Tom’s canoes, I’ll make a special effort; lay a stencil over a wide swath of painters tape, and cut out the interior trace with an Exacto blade. Hearts and flowers for Tom. Wait, I have a crescent moon stencil too; “Tom, it’s the Lucky Charms canoe you always wanted”.

P6190034 by Mike McCrea, on Flickr

The taped diamonds were also seriously easy to sand, a two second RO buzz on each diamond’s white under layer, didn’t even mar the tape edges. Five inch RO, five inch diamonds, maybe 60 seconds to wheel a chair alongside circumnavigating the hull. Gotta love eye level work in un-stooped comfort. My dad always said “You can’t get anything done sitting on your arse”, I beg to differ.

P6190037 by Mike McCrea, on Flickr

Painting the diamonds was equally easy; cart and chair again, brushed and, because my brush work streaky sucks, foam brush tipped.

P6190038 by Mike McCrea, on Flickr

First green diamond coat cured, another 60 seconds of RO buzz, another coat on the green accents and diamonds really are forever; there are two base coats of green, two stripe coats of white and two diamond coats of green. Between the six coats of various paints and cure time it took the better part of a week to paint YARR.
 
The tape reveal

The funnest part of a taping and painting extravaganza is finally pulling the tape. 
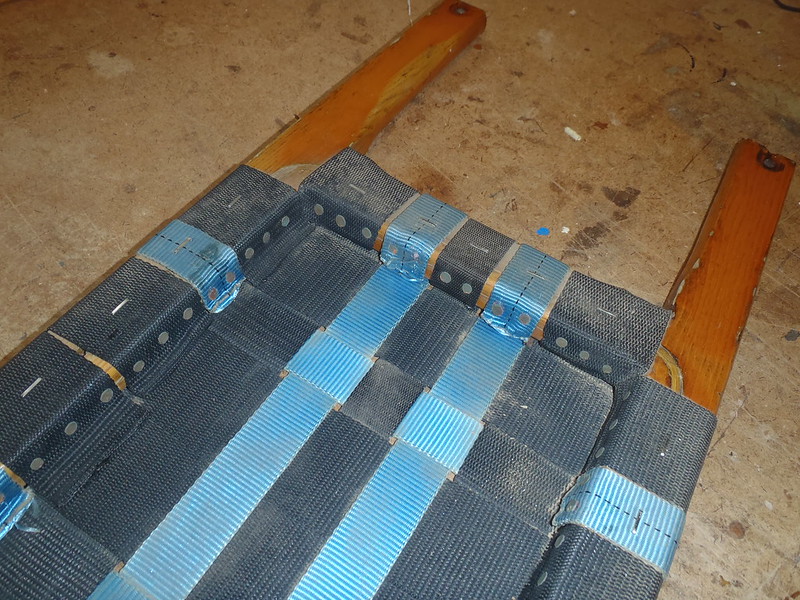
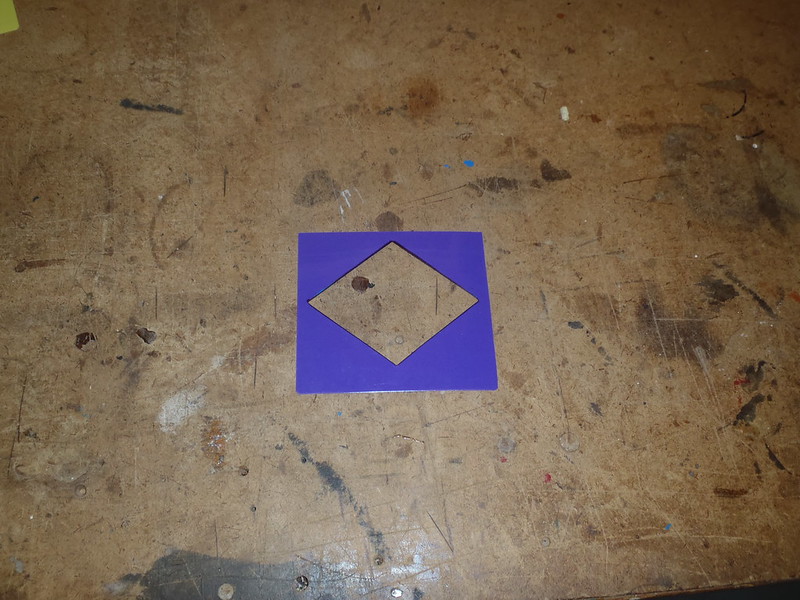
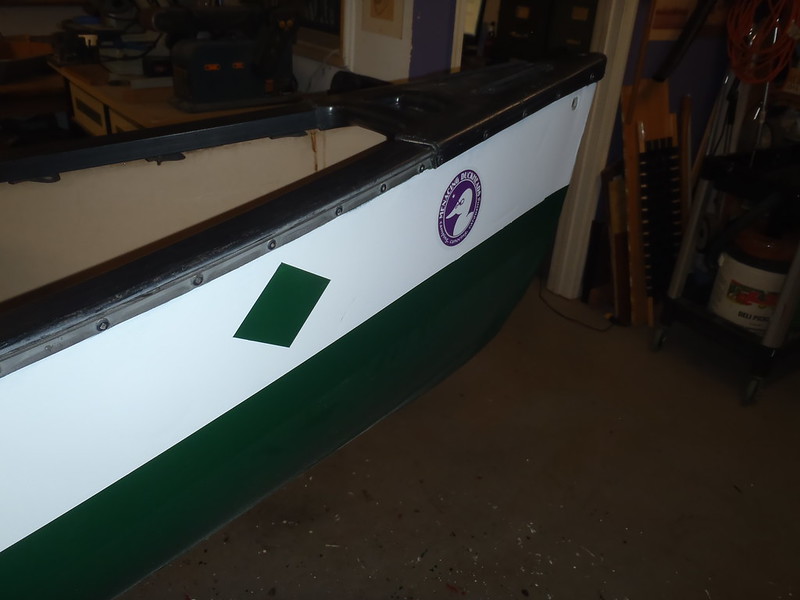
All of the tape, and there was a lot to pull; tape wrapped around the gunwales, tape 5” below the gunwales and tape surrounding accent diamonds.

Yay, I had thoughtfully laid all of the tapes in strategic order, all with folded over pull tabs on one end.

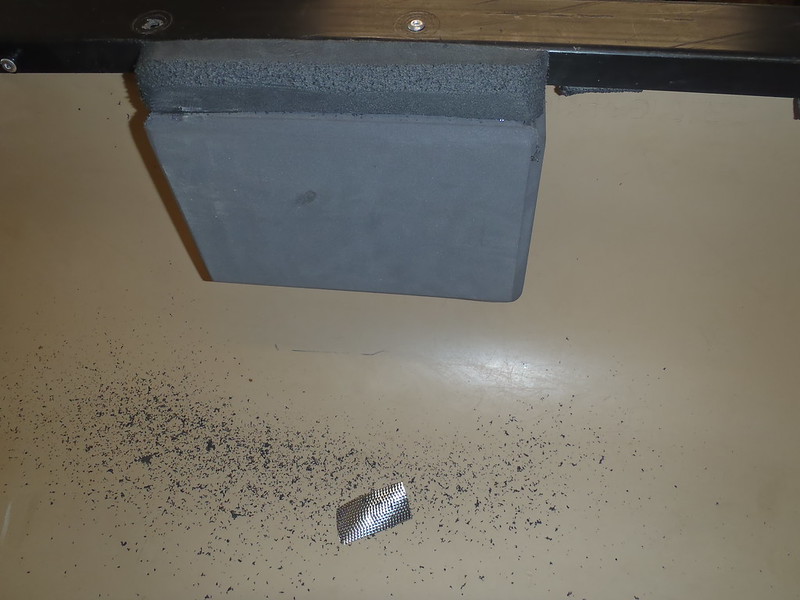
One other trick to it, the tape on the gunwales had four coats of paint, two coats green hull and two coats white stripe, all gravity fed sealing the edge of the tape to inwale edge. I ran an Exacto knife between the hull and gunwale edge to help free the tape.

Well, ok, I briefly tried to peel off the gunwale tape - egads, it was shredding within inches - before going to the Plan B Exacto blade. With the Exacto slice 99% of the gunwale tape came off cleanly, with just a few stubborn scraps.

P6190001 by Mike McCrea, on Flickr

Dang, what a difference a couple coats of paint can make.

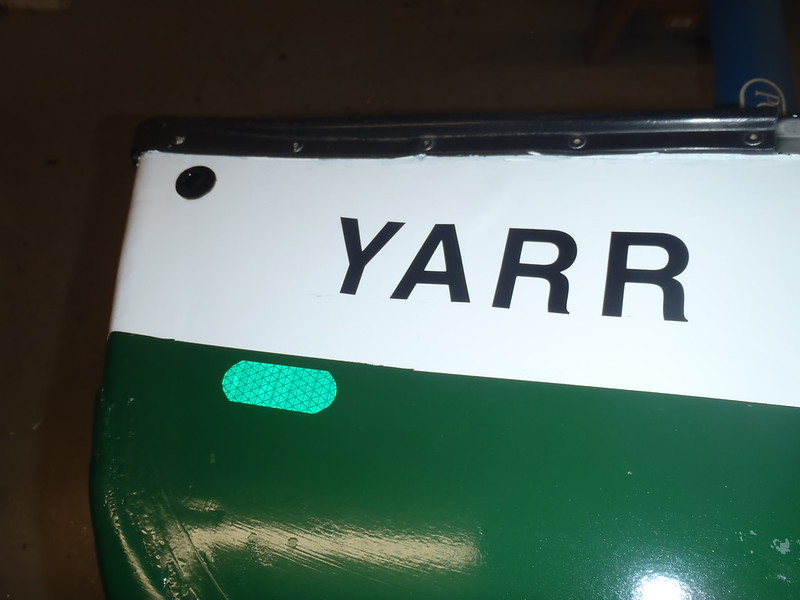
YARR still needed a few decorative white stripe touches. On the bow YARR needed YARR.

P6190004 by Mike McCrea, on Flickr

And, as balance on the other side, a Duckhead sticker. Nothing could be more Duckhead than a 1984 freebie canoe rebuilt twice. And of course there is a Duckhead sticker on OOSOBO. This matching canoe paint scheme and sticker décor has got to catch the eye of a curious reservoir cop at the launches.

P6190006 by Mike McCrea, on Flickr

On the right stern, where it should be, a stainless steel HIN tag, with homage to the original pre-rebuild.

P6190009 by Mike McCrea, on Flickr

BTW, once again I see in photos things I missed in person; I filled in the missing white under the deck plates with a small brush, actually OCD touched up any sliver of missing white along the outwale edges. Five minutes to touch up the under-gunwale holidays on both sides; I’m running out of YARR tasks.

And still making “mistakes”. I had three lines of text to available on that SS tag, I really should have included another historic line, “Das Uber Bot”. Tom told me the wording of the mostly vanished subtext line, but it was an esoteric Tom-ism; something like “Taking submarined canoeing to new low”, in honor of finishing some drops upside down.

While the alcohol spray bottle was out for stickers I found that I had a couple feet of green High Intensity reflective tape left, nearly the last of that discontinued tape. 3” pieces with rounded ends bow and stern; I didn’t want to crowd the white stripe, so adhered the tape just below where the green begins.

P6190012 by Mike McCrea, on Flickr

Without the camera flash that green-on-green tape is barely visible, but hit with a flashlight it winks back bright at night. It’s nice to be able to flash a light and see the canoe, or canoes, beam back. Our family trippers have different tape patterns, so I can flash a light and see four distinct tape arrangements wink back. Even with a single canoe, just checking.

P3070819 by Mike McCrea, on Flickr

The reflective stem tape also leads to less noggin bumping on the stern overhang in dark campgrounds and parking lots. Possibly a dusk capsize or lost boat help as well.

For symmetry YARR needed some flourish on the left stern to complement the HIN tag. As on OOSOBO another distinctive identifier, the traditional Shop Gogetch, indicating that this boat was refurbished under several moon phases, with a pipe phase or two, and a few IPA phases.

A small Shop Gogetch, traced on the hull with carbon paper, and as usual I called in the artist in residence to do the actual paint-by-numbers fill in.

P6200015 by Mike McCrea, on Flickr

That is the smallest Gogetch yet, 3” x 4”. He has the patience and steady hand to do fine brushwork.

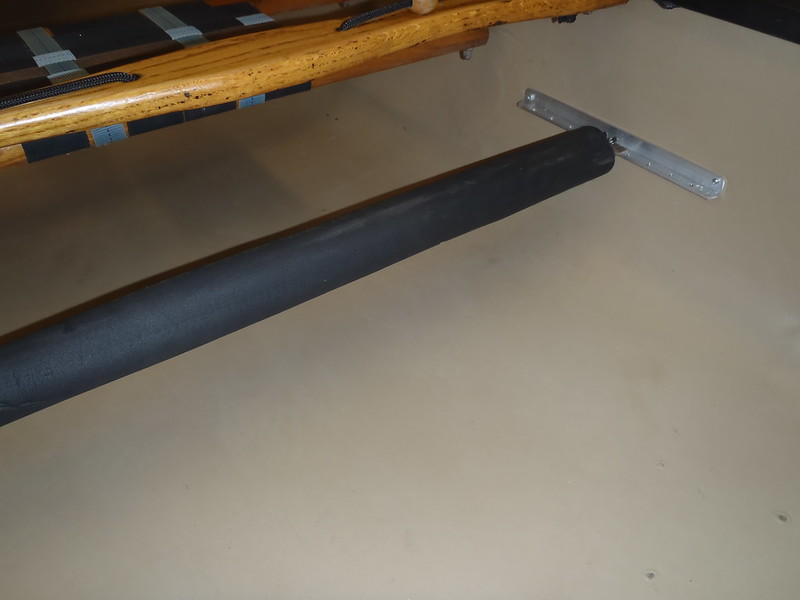
With YARR held sideways I had opportunity to install the customized flanges in the old ¾” hawser holes.

P6200018 by Mike McCrea, on Flickr

A little G/flex, a little wax paper cover, sandbag weight on the flanges, and it was again walk-away time. Those gaping holes looked much better with black flanges.

P6200022 by Mike McCrea, on Flickr

Flip YARR 180 degrees and do the flanges on other side. I made enough extra G/flex to belt and suspenders swipe some inside the hull on the slightly protruding flange necks. Those conduit adapters are not going anywhere.

It is always a good idea to prep things for any leftover G/flex, I removed the wing nutted yoke to lay an epoxy bead around the edge of the countersink, and prep-cleaned the Missus favorite sandals, which had become loose soled tripper flappers.

P6210024 by Mike McCrea, on Flickr

Done, barely a drop of G/flex left. Into the trash with the medicine cup and brush. And back out of the trash; I had forgotten about the fender washers on the yoke. I wasn’t making for G/flex for something destined to be used twice a year. Wringing the dregs out of the pot and tiny brush the fender washers got more of a smear than a bead. Don’t care, it’s the bottom of something that will get used twice a year.

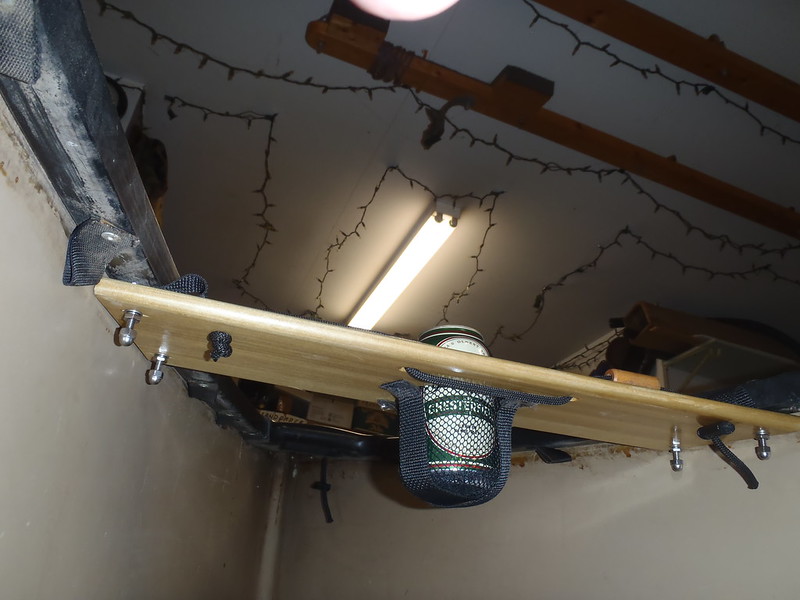
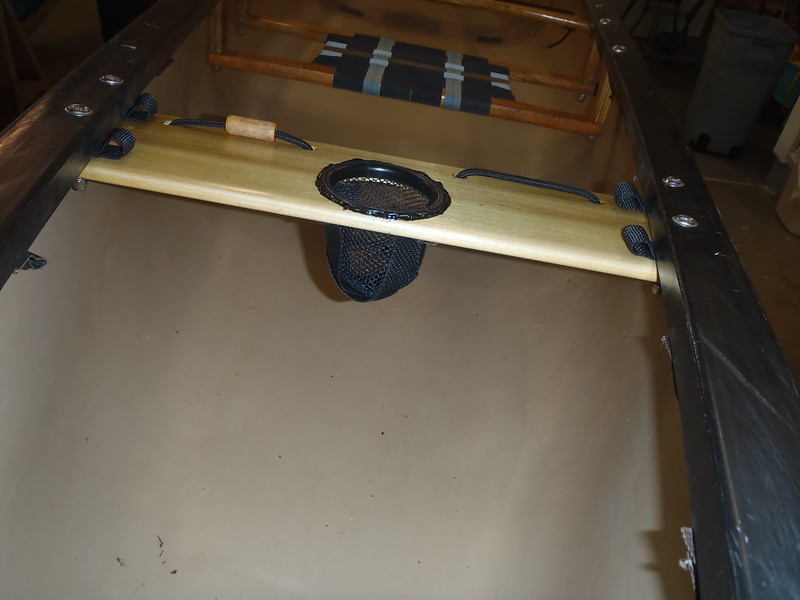
Once that flange epoxy set up YARR got painter line loops, with the usual bicycle handlebar toggle grips.

P6220029 by Mike McCrea, on Flickr

P6220030 by Mike McCrea, on Flickr

Uh, oh, I see a major mistake. There is nothing left to do on YARR, and summer has just begun. Guess I need to find another rebuild project soon.
 
Hey, you got the HIN plate on right-side-up! Although, given:

And still making “mistakes”. I had three lines of text to available on that SS tag, I really should have included another historic line, “Das Uber Bot”. Tom told me the wording of the mostly vanished subtext line, but it was an esoteric Tom-ism; something like “Taking submarined canoeing to new low”, in honor of finishing some drops upside down.

It appears this boat should have had the HIN plate intentionally installed upside-down!

Regarding your reflective tape, I had been thinking about doing that too. While searching the internets, I ran across a product consisting of adhesive reflective tape in red and green, that indicate canoe or kayak, to put the appropriate colors on each side. I also considered just buying a roll of tape and cutting out ovals to adorn the sides just below the gunwales. Still thinking and have not done anything yet 🤷‍♂️

 
Last edited:
The High Intensity stuff was a watersports tape available in 1” rolls. I bought a roll at an outfitter, bought another outfitter roll and eventually bought a 5-color pack (yellow, red, green, blue and, if forget, maybe orange) from the manufacturer.

That was a lucky buy; it was soon discontinued. This is what’s left of the green, getting ready to snip 3” long pieces off and round over the ends.

P6190010 by Mike McCrea, on Flickr

I have that green, and an 8” long piece of red left. Running low I bought a 1” x 30’ roll of waterproof reflective tape off Amazon

https://www.amazon.com/WOD-Engineer...+tape+outdoor+waterproof+yellow,aps,75&sr=8-3

It’s not bad, but does not the “High Intensity” reflectivity of the original stuff, which is comparable to SOLAS tape.

Reflective tape has uses beyond canoes. I have some on our barrels and drums.

P3070820 by Mike McCrea, on Flickr

Actually I have some on all of our hard sided tripping gear. The wag bag toilet bucket, so I can find it when stumbling around in the dark. Especially handy on black stuff like Pelican cases. And glasses cases; why are all of my glasses case black? A little squib of reflective tape on each side makes those a lot easier to find my flashlight amidst the tent clutter.

Small pieces of green on green or red on red on the canoe stems are discrete unfugly in daytime. I went a little crazy with it lengthwise at first, before I discovered that a 3” piece shows up just as well as a 12” piece.

P5010011 by Mike McCrea, on Flickr
 
Back
Top