• Happy National Telephone Day! 🔔☎️📱📶

Dagger Reflection 15 seat options? And paint thoughts?

Joined
Nov 22, 2019
Messages
438
Reaction score
197
Location
Pinnacle, North Carolina
I bought a Royalex Dagger Reflection 15 back in the winter and after cleaning it up, refinishing the woodwork, adding new seat webbing and stainless steel hardware and using a lot of heat and sweat to remove some hogging a young couple we know who were just beginning to paddle together bought it. Soo...

Two weeks ago another three seat Reflection 15 popped up on Craigslist less than two hours away. It is sun faded Midnight Blue, has only a few small dings and shallow scratches and I only paid $150 for it. As I noted in a thread about removing pine sap (denatured alcohol was the best thing I found for dried on sap....) it needed the woodwork refinished and seats re-done. Yesterday we had a magnitude 5.1 earthquake nearby enliven the morning and later on I pulled the handles, thwart and seats. I was planning to trim the rotted cane away, refinish the woodwork, flip the seat frames and add webbing to them but the undersides were badly chewed by what appears to be a squirrel or chipmunk.

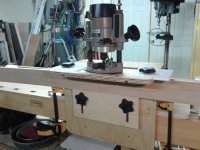
So, I'll make my own thwart and handles but I'm in the market for seats and am looking for seat source and type ideas. I'm 6'4" and 245 pounds and have wondered about the heavy duty or extreme duty seats at edscanoe.com or perhaps something from essexindustries.org If I decide to stay with all flat seats I might make my own frames and I have access to pretty much any wood you could think of.

The rear seat is 23" wide, the center seat is 31" wide (the canoe has a good bit of center seat area tumblehome) and the bow seat is 27" wide. I might be interested in contoured or bucket seats for the bow and stern but want to keep the center seat flat for foot clearance while kneeling solo. Like my previous Reflection, the center seat had the front edge set about 8-9" behind the balance point and it has an inch of forward slope for kneeling comfort. A contoured or bucket center seat would make getting my big feet out from under there much more difficult, especially in an emergency.

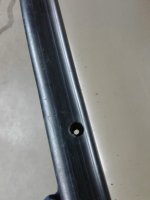
The canoe has seen little to no hard knocks and didn't see much use overall. It has all the original graphics, the original 5-year warranty sticker and the sticker extolling the virtues of Royalex although all are badly sun faded. The hull is quite dull from sun fading. If I can't get it to clean up I might be painting it. Am I correct that Pettit EZ-Poxy seems to be the Royalex paint of choice?

We're headed into the mountains in an hour until Friday with hopes of clear skies for the peak of the Perseid Meteor Shower. It may be this weekend before I can reply as cell coverage is very sparse there.

Thanks and best regards to all,


Lance
 
Ed's canoe heavy duty seat is quite stout. I'm a big guy as well, 6'1", 240 so I've opted for heavy duty when I replace my seats. Been very pleased with Ed's heavy duty seat.
 
I put an Ed's heavy duty seat in my Merlin II and although I'm lighter than you at 200-ish I could immediately feel the extra stiffness compared to a factory Bell seat. I think it also added about 2 pounds...I bought a walnut seat to replace the ash seat.
 
I'm 6'4" and 245 pounds and have wondered about the heavy duty or extreme duty seats at edscanoe.com or perhaps something from essexindustries.org If I decide to stay with all flat seats I might make my own frames and I have access to pretty much any wood you could think of.


I have Ed’s Extreme Duty center seats in a couple canoes, and believe the extra rigidity is worth the upcharge and weight in that application. For a seat frame spanning 30-some inch wide gunwales with a 200+ pounder seated on it I’d go with an Ed’s Extreme Duty.

I don’t recall what style seat drops were on the Reflection 15 center seat, but a set of Ed’s full truss Extreme Duty seat hangers paired with that seat are dang near a wide, stiff center thwart.

If you order from Ed’s be sure to provide the center-to-center hole spacing for the seats (and drops if ordered), so everything will match up with the existing gunwale holes.

If you do opt to DIY your own seats you could laminate the frames for some extra rigidity.

The hull is quite dull from sun fading. If I can't get it to clean up I might be painting it. Am I correct that Pettit EZ-Poxy seems to be the Royalex paint of choice?

While I am a fan of EZ-Poxy I have only painted canoes when the bottoms were getting well worn. Any paint will scratch and scrape in rock contact, and unless the paint is an exact color match the scrape contrast will not be pretty.

I’d try something (?) to bring some shine back to the vinyl skin first. A spray and wipe with 303 does ok, at least in the short term. If there is another product or method folks have used to bring back some color and shine to UV faded vinyl skin on RX boats please do tell.
 
I've gotten time to mull this over and am still up in the air a bit which is fine as I have more than enough projects to keep me busy. I have enough ash that planed down to 15/16" (24mm) on hand to make new seats and already have the webbing I thought I was going to put on the old frames so I'm giving some thought to digging out my mortising chisels and getting started chopping mortises. Or as I have at least 6 routers laying around I could make a quick mortising jig and just use the chisel to square the mortise off. If I make the seat frames I'll make the seating area wider than the originals.

My first Reflection came with the usual cheesy dowel seat hangers that weren't even varnished at the factory and were bare ash. This canoe came with pretty nice heavier duty hangers that remain in good condition so unless I make the seats deeper front to back I'll re-use them.

20200816_073516.jpg

The hull will never really be glossy again so I'll just give it another good washing with soapy water and a new Scotch-Brite pad and give it several rub downs with 303 Quick Wax which is a combination of 303 Protectant and carnauba wax.

Best regards to all,


Lance
 
The hull will never really be glossy again so I'll just give it another good washing with soapy water and a new Scotch-Brite pad and give it several rub downs with 303 Quick Wax which is a combination of 303 Protectant and carnauba wax.

It has been so long since I bought any 303 that I didn’t know they had diversified the product line. I used the original 303 spray sparingly, and not often on boats; the “Apply every 3 – 5 weeks” wasn’t something I was likely to do.

Where 303 did seem to work well was on PFDs and spray covers. One spray cover is red, and something about red makes it the quickest or most apparent to fade. That red spray cover had not seen an extensive amount of UV, but when I installed a same-material center storage cover the difference between old and new fabric was striking.

P3090604 by Mike McCrea, on Flickr

Yikes, that is some difference.

Maybe the green cover just doesn’t show the color fade as badly, but that cover has 3 times the UV exposure, and I 303’ed both of them.

P2160542 by Mike McCrea, on Flickr
 
Mike, I can't speak to 303 on fabric but we have used it for close to 20 years on vinyl window and corner trim on RVs where vinyl strips are often used to cover rows of screws, on poly kayaks etc and were always very satisfied with it. We only applied it one or at most two times a season to the sea kayaks and again at the end of the season but they did live indoors if they weren't in actual use. I also use it on the vinyl and poly parts of my Ferris zero turn mower like the seat and the poly side saddle fuel tanks. I was unaware of the Quick Shine until I did a series of online searches revolving around rejuvenating Royalex and other vinyls that were sun faded.

This Reflection has skin that is faded in color and has an appearance like flat paint so I'm not expecting miracles. When I run a hand over it I can hear the relative roughness of it. When I get around to using the Quick Wax I'll post some before and after shots out in the sunlight so any improvement is more visible than it would be under the fluorescent strip lights in the basement.

Best regards to all,


Lance
 
I have a regular duty center seat in my Reflection 15, which I recently raised up right to the gunwales on the rear and with the front canted down by 1". It is high but still remarkably stable thanks to the super flat profile of the hull bottom. I joke with my paddling friends that this makes it about like sitting in a lawn chair. The effect is notably stiffer when shouldering, a bit stiffer while paddling, and considerably more comfortable than before, when the center seat was dropped 1.5" in the rear and 2.5" in the front. Even right at the rails, the boat still flexes a bit with my 180#s, having only one thwart between the center seat and the front seat. I will be interested to hear if the heavy duty seat changes that much for your hull.

I love my reflection 15, particularly when out with little kids or for the extra freeboard when solo in moving water that is very shallow. Mine is branded 1989 and was the first and only reflection in the 1990 catalogue. I received it from a generous fellow who had a pair of r15s and took them all over North America even on far north trips. For most of the paddling I'm able to do, I prefer the reflection to the legend 15. The legend 15 is quite similar, only a touch more rocker, with the main difference being increased sheer line, bow flair, and dryness in continuous wave trains.

Per the other discussion, 303 markets a product product specifically guarding fabric. I have been curious but never tried it out.
 
I have a regular duty center seat in my Reflection 15, which I recently raised up right to the gunwales on the rear and with the front canted down by 1
The effect is notably stiffer when shouldering, a bit stiffer while paddling, and considerably more comfortable than before, when the center seat was dropped 1.5" in the rear and 2.5" in the front. Even right at the rails, the boat still flexes a bit with my 180#s, having only one thwart between the center seat and the front seat. I will be interested to hear if the heavy duty seat changes that much for your hull.

With the rear of the seat frame attached directly to the gunwales that is now the equivalent of a thwart, and will absolutely stiffen both the seat and the hull.

The further a seat is dropped the more sway and flex is possible; a wide center-boat standard frame seat on deep peg drops is perhaps the worst possible combination. Removing long machine screws from such seats often shows one effect, the machine screws are sometimes bent and come out wobblawobblawobbla with some difficulty. And go straight into the trash.

A heavy duty seat frame on truss drops should make a noticeable difference in that use.

OK, the worst possible combination would be a seat hung from aluminum plates like some Wenonah solos, with the too-close rear thwart removed, or even moved back too far. The rear thwart is located that (uncomfortably) close to the seat because there is nothing else nearby to stiffen the hull.

Per the other discussion, 303 markets a product product specifically guarding fabric. I have been curious but never tried it out.

It had been a while since I used any 303 and the bottle I had was in fact 303 for fabric. “Was”, when I last put it away there was a little left, but the bottle is now empty. I neglected to twist the nozzle to the “OFF” position and the remaining had 303 evaporated.

Years ago, when 303 first came out, I recall an advertisement test in which some orange horsecollar PFD’s were sprayed with 303 and some were not, all tossed up on a sun baked roof for a season. The results were enough to convince me to 303 our PFD’s and nylon spray covers.

A lot of our boats were freebies or $200 fixer uppers, but we paid full price for our PFD’s and spray covers. There some serious money in those fabric items, and I’d hate to have to replace any of our PFDs of covers because they UV aged out. The covers especially; trying to match the snap rivet locations on a new cover to the studs already on the boats would be a PITA to get just right.

Think I’ll order another bottle of fabric 303. Arriving in time for Christmas. We have some pricey Patagucci neck drape sun hats that I can’t replace, they were discontinued.
 
Mike, I just ordered a box of 100 of the screw hole plugs (AKA panel plugs) for the Reflection's gunwales. Let me know if you need some. They are for 1/2" holes.

https://www.mcmaster.com/9750K22/

And the thought occurred to my alleged brain cell that if I insert the outfitting screws from the bottom (using the usual depressed center washers) and if I have a deep thin wall socket that will fit into the 1/2" upper hole I can have flush screw heads under the outfitting and completely eliminate concerns of hanging my big feet or some other part of me up on too-long screws or on nuts during a bailout. I'll check the socket clearance the next time I'm in the basement.

For those who might be wondering, this Reflection and at least one of Mike's Dagger canoes have hollow section vinyl gunwales with an "ell" shaped aluminum insert riveted through the hull that has a leg on the bottom inside of the gunwale. They drilled a 1/2" hole on the upper surface of the gunwale to access the interior of the gunwale and a smaller screw sized hole though the lower aluminum and vinyl bottom of the gunwale to hang the outfitting. The upper holes are 1/2" and had nearly flush fitting plugs with a wide flange known to industry as a panel plug inserted in them.

The system offers a clean look with no exposed screw heads or washers to scuff things up but the plugs tend to sometimes disappear and they have enough of a memory when pried out that they seem unlikely to lay flat and stay put if replaced. It took me a little bit to find them but luckily they are less than $0.05 each....

Here are pictures of the upper gunwale hole and one of the fairly heavy duty seat hangers that came in the canoe. They are all in pretty good shape so I'll just sand them down and refinish them. If I make wider seats I'll pattern the new hangers on these....

20200816_114618.jpg


20200816_073516.jpg


Best regards to all.


Lance
 

Attachments

  • 20200816_114618.jpg
    20200816_114618.jpg
    210.8 KB · Views: 0
Mike, I just ordered a box of 100 of the screw hole plugs (AKA panel plugs) for the Reflection's gunwales. Let me know if you need some. They are for 1/2" holes.


For those who might be wondering, this Reflection and at least one of Mike's Dagger canoes have hollow section vinyl gunwales with an "ell" shaped aluminum insert riveted through the hull that has a leg on the bottom inside of the gunwale.
The system offers a clean look with no exposed screw heads or washers to scuff things up but the plugs tend to sometimes disappear and they have enough of a memory when pried out that they seem unlikely to lay flat and stay put if replaced. It took me a little bit to find them but luckily they are less than $0.05 each....


filedata/fetch?id=115579&d=1598290429

I did like that method of using hung hardware for seats and thwarts; the clean, smooth gunwale topsides were a nice alternative to scraping flange washers and machine screw head across roof and storage racks.

But I gave that Reflection to my niece as a wedding gift, along with some old paddles, PFDs and dry bags 10 years ago. She and her fiancé had been borrowing it a once a year, and developed a taste for canoe tripping. And have since gone to a couple places that are still on my bucket list.

Those plugs did have a tendency to loosen and lift, so I glued them down with some (I think) vinyl glue, thinking that adhesive would make it easier to pry them off if I needed to access the machine screws in the future.

Next time I speak with her I’ll ask if all the plugs are still intact, and if not may hit you up for a couple. They would make a cunning anniversary gift.
 
The hull will never really be glossy again so I'll just give it another good washing with soapy water and a new Scotch-Brite pad and give it several rub downs with 303 Quick Wax which is a combination of 303 Protectant and carnauba wax.
Yeah, I personally would consider that too if you must do something and beyond that I'd just live with any fading. I don't think I'd ever paint Royalex myself.

I have owned a badly faded Royalex boat and basically just lived with it doing nothing about it, not even washing, but that is me. If I thought it would restore the color I might try something like the Scotch-Brite and 303 Quick Wax rubs and would be curious how they'd work out. If the surface was smooth and not gouged running a buffer over it with 303 Quick Wax might be effective, but I'd go really easy with it. So it might be easy to get the sides looking decent that way, but not the gouged up bottom.
 
Last edited:
Lance I'd be quite interested to buy about 6 or so of those hole plugs from you, at least two are missing on my dagger legend with that style of gunwales. I'll try to figure a way to DM with a more specific request.
 
Kona, I'll get those out to you. Don't worry about the cost or postage. I'm pretty sure I have some small Tyvek envelopes in with my box of shipping stuff. As soon as I find one I'll send them.

Best regards,


Lance
 
Back to the seat saga.....

I decided to make new seats and I'm making them from the 15/16" ash I have on hand. The original seats were pretty standard at 10" deep with the front and rear seats being 13" wide and the center seat 18" wide. I'm going to bump that to around 12" deep, with a 16" or so wide seating area for the rear seat, 20" for the front seat and 24" wide for the middle seat so that a paddler sitting near the gunwale will actually have some support.

I'll make new hangers like the one in post #10 and the only decision I have to make about them is whether to go from the 3/16" diameter 10-24 screws to 1/4-20 hardware which might be more in keeping with the beefed up seats.

As I had this seat project and a few other projects calling for repeated mortises I made up an adjustable mortising jig so I can use a plunge router with an up-spiral bit to cut the mortises. I'll use a mortising chisel to square up the rounded corners the router bit will leave. As 3 seats makes for 12 mortises and 12 tenons I'll cut the tenons on either the bandsaw of tablesaw. Come to think of it, I lost all my backsaws, tenon and dovetail, in a fire 7 years ago and never replaced them. I couldn't hand cut the tenons if I wanted to......

Here's the jig with a stray piece of wood in it. Tomorrow I'll stop at a friend's cabinet shop and pick up a toggle clamp which will go between the two knobs on the front fence and it will be ready to work. The nice thing about this style of jig is that I only need to lay out one mortise so I can adjust the jig to the layout lines. Any other mortise cut the same distance from the face of the wood and to the same length only needs the center-line marked and clamped at the center-line of the jig so after initial setup it takes around a minute to cut a mortise....

The front fence will turn 90 degrees to the side for clamping a vertical work-piece. There are 8 Tee-nuts epoxied to the reverse side of the front skirt that allow the fence to support any width board.up to around 10" wide

20200916_160650.jpg

And a view of the sliding adjustable top table. It runs on tightly fitted runners fixed into the top of the base to keep it square to the front of the jig. The router rides in a trough the depth of the white poly stop blocks and is a hair wider than the router base for consistent mortise widths. The big oval slot is offset to the front of the jig to allow me to see the cut and for more room for chips.

20200916_160808.jpg

And what will square the round ends of the mortises....

20200916_154315.jpg

So hopefully before we go out of town Monday the seat frames will be made and maybe have the first coats of finish on them. This poor Reflection may actually get back on the water this season after all.......

Best regards to all,


Lance
 

Attachments

  • 20200916_160650.jpg
    20200916_160650.jpg
    299.4 KB · Views: 0
Love your router setup. I made my seats 15" deep with 12" inside of frame. Little deeper then necessary, I think. Seats can be very time consuming. How are going to do your seat material? Weave, webbing ? Oh I like the seat hanger you displayed on post #10.
 
Thanks for the interest,

I'll use 1-1/2" webbing and use an accent color to match the hull as I did in these seats for a green Reflection 15....

20200404_094650.jpg

I saved the factory seats on that canoe. I cut out the dried out cane panels, pared the remaining cane down with a sharp chisel, refinished the seats and put the webbing on what had been the bottom of the seats. This Reflection is "Midnight Blue" so it will get blue accent strips in the seats.

For the hangers, I plan to cut a pattern of the final profile from hard board so I can follow it with a top bearing router bit. Then if I cut the ash hanger blanks to around 1/16 of the profile line with the bandsaw a quick pass with the router will have them ready to round over the edges and cut to fit. My drill press has over 6" of quill travel so boring the screw holes should be easy enough once I decide what size hardware to use and order an appropriate sized 6" "aircraft" drill bit. I'll drill them before profiling them since working with a rectangular piece will be the easiest way to go.


Best regards to all,


Lance
 
Well, my friend didn't have the right kind of toggle clamps for the jig so I had to order them. Between slow delivery times and then us being out of town for 4 days I finally got my hands on the toggle clamp that holds the stock in the mortising jig today. After cutting the seat stock to rough length I laid out a test mortise and set the router for the mortise depth plus a wee bit for glue and adjusted the jig.

The bottom mortise in the test piece picture is the only one that needs to be fully laid out with a marked center line so the jig can be set up. The top mortise was a second one cut to test consistency with only marking the center of the mortise. Both mortises need the corners chopped square but the cuts are clean with clean flat bottoms. After cutting the first mortise I took a caliper to it and it was a tiny bit off center so I should have done better with that but I guess that's why you cut a test piece.....

After a minor jig adjustment the second mortise took less than a minute from the time I started to reset the piece in the jig to a fully roughed out mortise. The two mortises are only 55/10,000" different in length and less than that in width. That's a whole lot more accurate than I needs it to be but it is a good sign. This jig should speed up things like seat frames and mortised cabinet door frames a whole lot

I'm hopeful that with the other stuff I need to attend to tomorrow I can get the mortises and tenons cut and the seat frames glued up tomorrow or early Sunday..

20200925_171838.jpg

Best regards to all,


Lance
 

I’ve two-color rewebbed old seats on several canoes and had the same replicated-pattern issues as on those Reflection seats, because of the difference in seat frame sizes it is almost impossible to alternate webbing colors in the same manner on both seats.

Red canoe with black trim

P6100007 by Mike McCrea, on Flickr

The loose black straps are there to hold a seat pad in place. With the pad strapped on there isn’t much of the seat webbing visible in any case.

P6100008 by Mike McCrea, on Flickr

The best (or fugliest) of those “plaid” seats were on a MRC Explorer I rehabbed for a friend. I had some surplus webbing in hot pink and fuchsia and used that.

That webbing was from the American Science & Surplus catalog, always a wonderland of oddities.
 
I've been getting seat webbing and some hardware bits and pieces here:

https://customtiedowns.com/webbing/1.5-inch-polyester-webbing/

As they are oriented to custom strap making it generally takes them 4-5 days to cut and ship webbing. Otherwise the prices are good, what they show online for stock on hand is accurate and what hardware I've gotten from them was well made and stout-no flimsy cheaply made hardware in sight. In fact some of their hardware is heavier than I'd like for canoes as they are thinking in terms of vehicle cargo tie downs and DOT regulations so things can be stout and heavy.

I guess I don't have anything against plain black seats but as the cost of a little added color is the same as all black I like to add accent strips. On the green Relection's seats shown above with the wide center seat I wasn't worried that the pattern was different as the other seats are clearly not the same size. Given the odd number of strips in all the seats I likely would have had a more balanced look by using the first and last strips on the smaller seats and maybe the first last and middle strips on the longer center seat.

Since I'm making new seat frames for this Reflection and want to make them both deeper and wider the seating area dimensions are sized for evenly spaced 1-1/2" webbing with 1/4" spacing so total opening sizes are based on the number of strips times 1-3/4" plus an additional 1/4" for the starting space.

And, in this case it's easier than that as the frame members are 1-3/4" wide too so I just took the rough seat area I wanted and played with it a bit to come up with the outside width and depth of the seat frame using the same multiple of 1.75" + .25" for my overall seat frame. As we have a number of younger grandchildren with more on the way I'm making the center seat area darn near gunwale to gunwale so two of the little rascals can sit side by side.

For laying out the webbing spacing in a old seat where I have to use the existing opening I use a trick borrowed from working out the rough spacing of handrail balusters that is extremely sophisticated......a piece of elastic webbing with evenly spaced index marks about 1" apart (in this case) that is stretched to fit the opening to determine the webbing locations. Mark off the starting point for the first piece of webbing and be sure to keep the first index mark there as you stretch the elastic, stretch the elastic strip so that the marks are at least as far apart as the seat webbing is wide and the seat opening will be evenly filled, transfer the marks and start stapling the webbing down.

20200926_092240.jpg

The second picture shows the approximate 1-3/4" spacing I'm shooting for. The X on the elastic is a reminder of what side of the mark the webbing goes on to be sure I'm using the same alignment on both sides of the seat opening.


20200926_092254.jpg

This way there's no need to lay strips out to check spacing and it takes just a few seconds to get even webbing spacing in an existing opening.


Best regards,


Lance
 
Back
Top