• Happy National Blueberry Pie Day! 🫐🥧

Cedar Strip Build "The Experiment"

Like Jim said I've found that grain orientation is what causes the strips to get chewed up when running through the router. The cove is where I see the most trouble. Now I make a point to run the strips through so the bit will be cutting with the grain rather than against it. Made a big difference.

Alan
 
No Title

Jim Dodd I only wish I had some Aspen. (We call it poplar around here) Will have to make do with maple. Give the man a cookie, though, because you guessed right.

The only sorting I did of the strips was to separate the full length ones from those that I will need to break at knots.

Got all of the cedar coved today, and sliced up the hardwood sandwich for the accent strip. (one of them, anyway. I am not going for a particularly light build, and you will see that reflected in the amount of accenting material I am prepared to tolerate.)

Alan Gage I didn't have to much splintering happen - maybe a couple of strips that had early splits already.

I should get a picture of all the accent stuff in one place, once I have it processed.

I'm actually now to the point that next time I work on the canoe, I will be setting up the strongback & forms, and laying strip.
 

Attachments

  • photo2384.jpg
    photo2384.jpg
    278.2 KB · Views: 1
  • photo2385.jpg
    photo2385.jpg
    246.2 KB · Views: 1
For some reason the Aspen (poplar) seems to really stay bright and white.

And sands much easier than Maple. Looking forward to seeing how thing progress for you !

Looks great so far !

Jim
 
No Title

So, as usual, when I take time for my other project, didn't get as far as I intended on the canoe.

I did get my strong back and forms set. A bit of a fussier job than I remembered. Also placed the sheer strip. Decided I'm going stemless again, with perhaps float chambers on the end.

Photos:

Strongback is fairly light, constructed of 2X4 and exterior sheathing. Nothing fancy there, much like standard wall construction. You also get a first look at he hull shape in real 3d, chance to see to scale.

Sheer strip in place. Yes, I forgot to tape the forms, you wanna make something of it? I'll get that before I glue the next strip on.

I don't do scarf joints on my strips, this clamp arrangement is holding in a very fair curve, I'll remove once the next strip up is glued down & has had a chance to set. And yes, I'm doing bead up. The reason for that will be clear next time.
 

Attachments

  • photo2392.jpg
    photo2392.jpg
    182.9 KB · Views: 1
  • photo2393.jpg
    photo2393.jpg
    187.2 KB · Views: 0
  • photo2394.jpg
    photo2394.jpg
    197.7 KB · Views: 1
  • photo2395.jpg
    photo2395.jpg
    172.8 KB · Views: 1
Looking good. I don't scarf my strips either. I just butt joint them over a form. I found if I join them over a form I don't need to use anything as a backer behind the joint. But since the form is square and the strips don't hit it evenly (one strip hits the high edge and the other hits the low edge of the form) it makes for an odd angle. So once they've been stapled in place I pull the strip that's hitting the low edge of the form out just a little so they're even.

I think most of us on this site have started laying strips bead up. It's hard to place glue in the cove when it's already attached to the hull, especially when they stop being vertical. I have a couple blocks of wood and cut a kerf in them wide enough for a strip to fit. They're clamped to the top of the forms and the next strip is laid in them, cove up, while the glue is placed. Then the strip is put into place, cove down. Pretty fast process and makes adding the glue so much easier and cleaner. I think I stole the idea from Stripperguy and Dave.

Alan
 
Bead and cove really helps when butt joining strips.
I butt join between the forms, and still stuck on the OLD cove up technic.
I agree the bead up is a good twist though. Especially if you use the fishline method of holding strips together.
May have to try that one !

Jim
 
A pair of slotted holders is nearly as useful as a third hand!! (I have been unsuccessfully trying to grow one for years)

DSC_8440.JPG


And cove up is too easy to apply glue, then a quick flip and voila!

DSC_1043.JPG
 
WOW ! That's a lot of glue !

My goal is when I'm done stripping, there is no glue visible, outside or inside !

It makes sanding soo much easier !

Any small voids are filled with epoxy when I glass the hull, and epoxy makes a better bond, in my opinion than yellow glue !

I learned this lesson from a friend when building his first canoe ! I had cut, beaded and coved strips for him and his daughter's canoe. I got them started stripping the hull, and came back a few days later. They were closing in the football when I arrived. The first thing I noticed was the lack of glue slathered all over the hull ! I asked " Did you use Any glue?" They said that I had told them to be minimal with the glue !

A long story short, It was a breeze to sand, and it turned out Great !

Jim
 
So, I'm not the only one who thought that glue bead seemed large. Or is it just the angle? It does look, though, like stripperguy is wiping up the squeeze-out as he goes. That probably mitigates to a large extent... We'll see how strips go together tomorrow.

Question for more experienced builders:

I've done my gunwales in the past with a combo of the resin I used for layup (un-modified/filled) and hardware from the inside. The epoxy had some issues with not wanting to stay in place for this application.

Wondering about alternatives: What additives would be needed to improve resin performance here? Or would I be better off switching to a specialist epoxy for adhesive?
What about wood/wood bonds? (including multi-ply laminate, if you've tried it)

One of my objectives is to minimize the hardware I need for this build, as its a bit annoying to work around, and does not always hold in the places I want it to. But, for me, gunwales are not just trim. They are a handy place to support seats and carrying handles/thwarts from, and they also provide a tie point for gear.
 
Here's a look at the build that had those over filled beads...

DSC_1075.JPG

Maybe there was too much glue, but it only takes a few moments with a block plane and/or scraper to pop off those drips. Mostly, I didn't want any gaps or loose strips.

As far as special adhesives for gunnels, I have always used the same epoxy as for the rest of the build. I just add some Cabosil to thicken the epoxy and away I go.
I do not hang my seats though, I attach to cleats that have been epoxied directly to the hull. I've done single shear testing on typical sized cleats and the cleat failed (not the Cabosil thickened joint) at over 300 lbs!!
 
I stopped glueing gunwales on about 20 canoes ago. If you have an unfortunate incident and need to replace a gunwale, it's a lot easier to remove a few screws then try to deal with an epoxied gunwale. I just use regular wood screws, I'm sure the total weight is only a few ounces.

I wipe glue off as I go, just keep a damp rag hanging around, rinse it out once in a while.
 
So long as the gunnels are sealed really well, screws are fine.
Any place moisture can get between the hull and the gunnels, expect rot. And look forward to replacing them.
Unsealed screws, get ugly fast.

Tomorrow I'll be screwing and gluing my inwhales on my 21st stripper. After that I will glue on my outwhales. No screws will be showing, and gunnels totally sealed
I have yet to replace a gunnel on one done this way.

Jim
 
Thanks for the feedback.

memaquay Jim Dodd How do you handle thinner outwales? I've run screws from the inwale, through the hull, into the outwale, but with an outwale thickness of 5/8 or less, I've felt that I could not find a wood screw that would grab without poking through.

will be posting a few photos later.
 
No Title

And this is the progress today:

I tape with plastic packing tape. Nothing will stick to the outside. It takes some persuasion for the adhesive to grab wood, but once it does, you will not have to tape your forms again any time soon. - See pic of one of my older forms, kept in a drafty, snow-blows-through-the-cracks barn for years after my last build.

As Jim Dodd and Canotrouge
guessed, I'm using fishing line. I learned about this method from an article in Wooden Boat 202 (June 2008) by a gentleman named Steve Chapman, and it has some... interesting advantages.

Not only is it completely fastenerless, you don't need to remove any clamps to work on the next set of strips. The original instructions call for 10# mono line, but I've found that 20# is much more forgiving of larger forces, abrasion, etc. and is also nicer on fingers. (the worst part is holding tight while trying to tie a basic half-hitch.)

Got striped up to the knuckle edge, and decided to let the glue cure before messing with that. I had some glue squeeze-out, not near as much as stripperguy posted. I did make an effort to be more aware of picking up the drips with a little wood wedge before it cured.

This bit of stripping took a fair amount of spacers and wedges under the fishing line to hold things in place, but I think that is due to working on a concave curve in the shoulder area. Pics are actually of the clean side - the other side had a lot more in the way of spacers.

Last strip photo shows one of my favorite parts of this style of attachment. The inside fishing line stays in place until you cut it, so you get to do all your sanding, etc, and the outside glass/epoxy work with the hull held firmly to the forms.

Last photo is a mystery tool. Don't make one of these unless you are prepared to accept the responsibility for any consequences of what it does. The core is a pneumatic die grinder, and it has a router bit mounted. What do you think it's for?
 

Attachments

  • photo2410.jpg
    photo2410.jpg
    107.3 KB · Views: 1
  • photo2411.jpg
    photo2411.jpg
    271.6 KB · Views: 1
  • photo2412.jpg
    photo2412.jpg
    256.2 KB · Views: 1
  • photo2413.jpg
    photo2413.jpg
    234.8 KB · Views: 1
  • photo2414.jpg
    photo2414.jpg
    210.6 KB · Views: 1
  • photo2415.jpg
    photo2415.jpg
    225.3 KB · Views: 1
Thanks for the feedback.

memaquay Jim Dodd How do you handle thinner outwales? I've run screws from the inwale, through the hull, into the outwale, but with an outwale thickness of 5/8 or less, I've felt that I could not find a wood screw that would grab without poking through.

will be posting a few photos later.

My method is to glue and screw the inwhale to the hull, From the outside. My inwhales are 3/4" thick. The hull is 1/4" thick. I use 3/4" screws. This works great.

My outwhale caps the 1/4" thick hull. So I cut my outwales 5/8" thick. This leaves an outside thickness of 3/8". Outwhales are glued to the hull, hiding the screws that hold the inwhale.

I'm on my laptop, and don't have pics stored. I will post some when I get to my other computer.


Jim
 
7d44eafd-6418-4327-9fe8-219bc1ed2c78_zpsmrzrkpey.jpg
e7f6663c-3cb7-4240-8811-093c1b9ab271_zpsnjyxfu9c.jpg
IMG_0464_zpsbbe5a0ac.jpg
IMG_0410_zpsjpxyhgj8.jpg


Jim
 
No Title

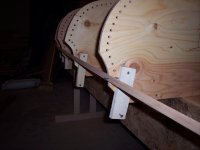
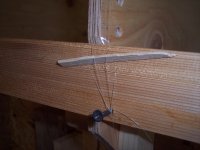
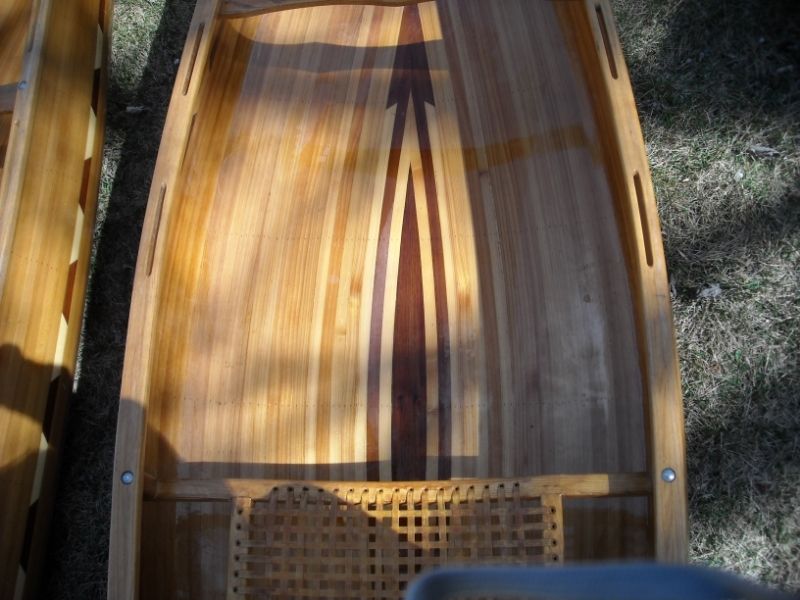
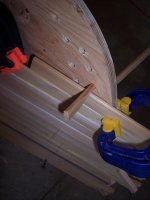
So, I've gotten past the knuckle. A bit of an adventure. If you guys haven't figured this out yet, I always go with something a little different from what others consider "Tried and Proven"

For the most recent example, I did the knuckle a little different from the way Alan Gage Did with his Solo Expedition (Page 2 on that thread)

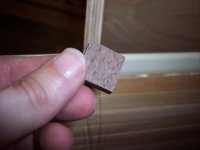
That "mystery tool" was 
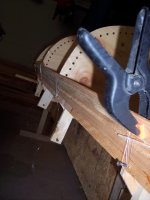
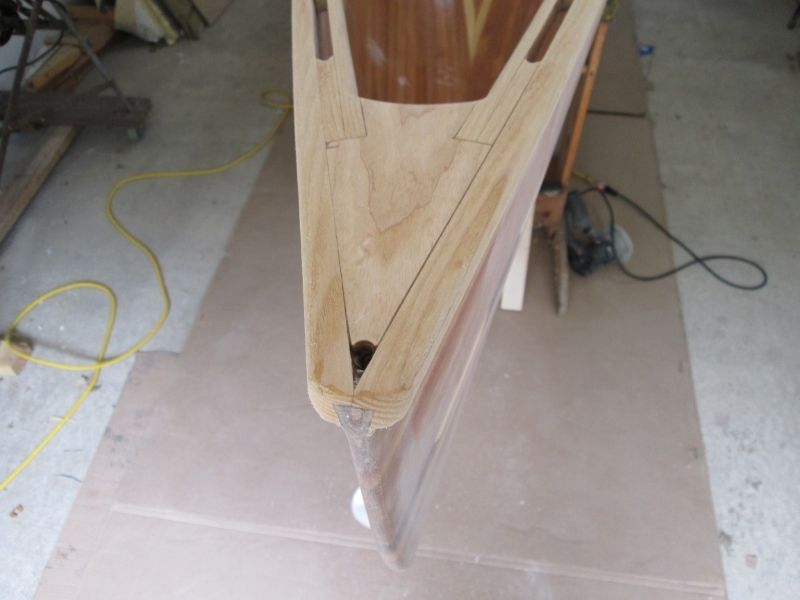
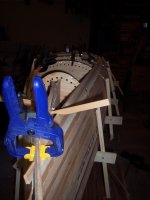
Supposed to be for trimming back the stepped strip edges parallel with the lower hull portion of the form, but that didn't work out. Something was in the way. Now what was it? Oh, yeah. All the fishing line. Oh, well. A handplane works just as well, and makes less dust.

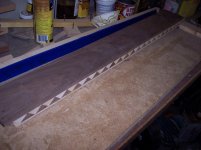
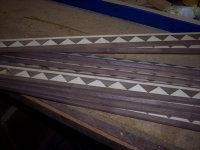
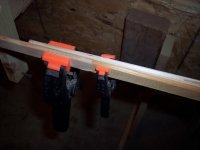
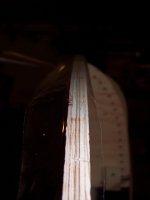
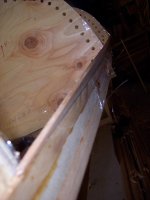
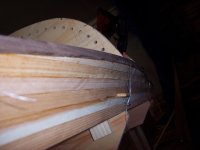
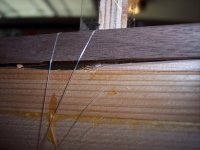
The reason for trimming first is in how I lay the next strip. It's walnut, and that means my hard edge is backed by something harder than cedar. Will end up fairing to match the two curves, and knock the corner off just enough to be able to get the cloth to lie around it.

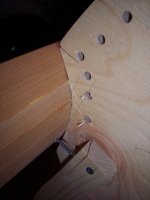
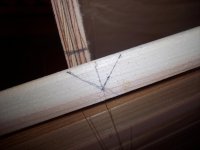
My Knuckle fades into the hull at the ends, so there is a winding bevel on the short bits of cedar, and a matching one on the walnut, in the space between the #2 and #3 stations. That one will take a bit of practice to get right, but the oops is small enough that I can fill it easily.

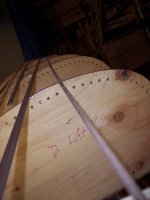
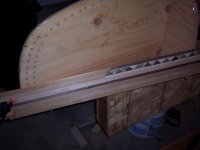
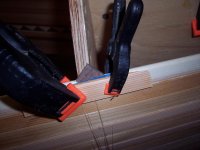
One cedar strip, than the accent strip.

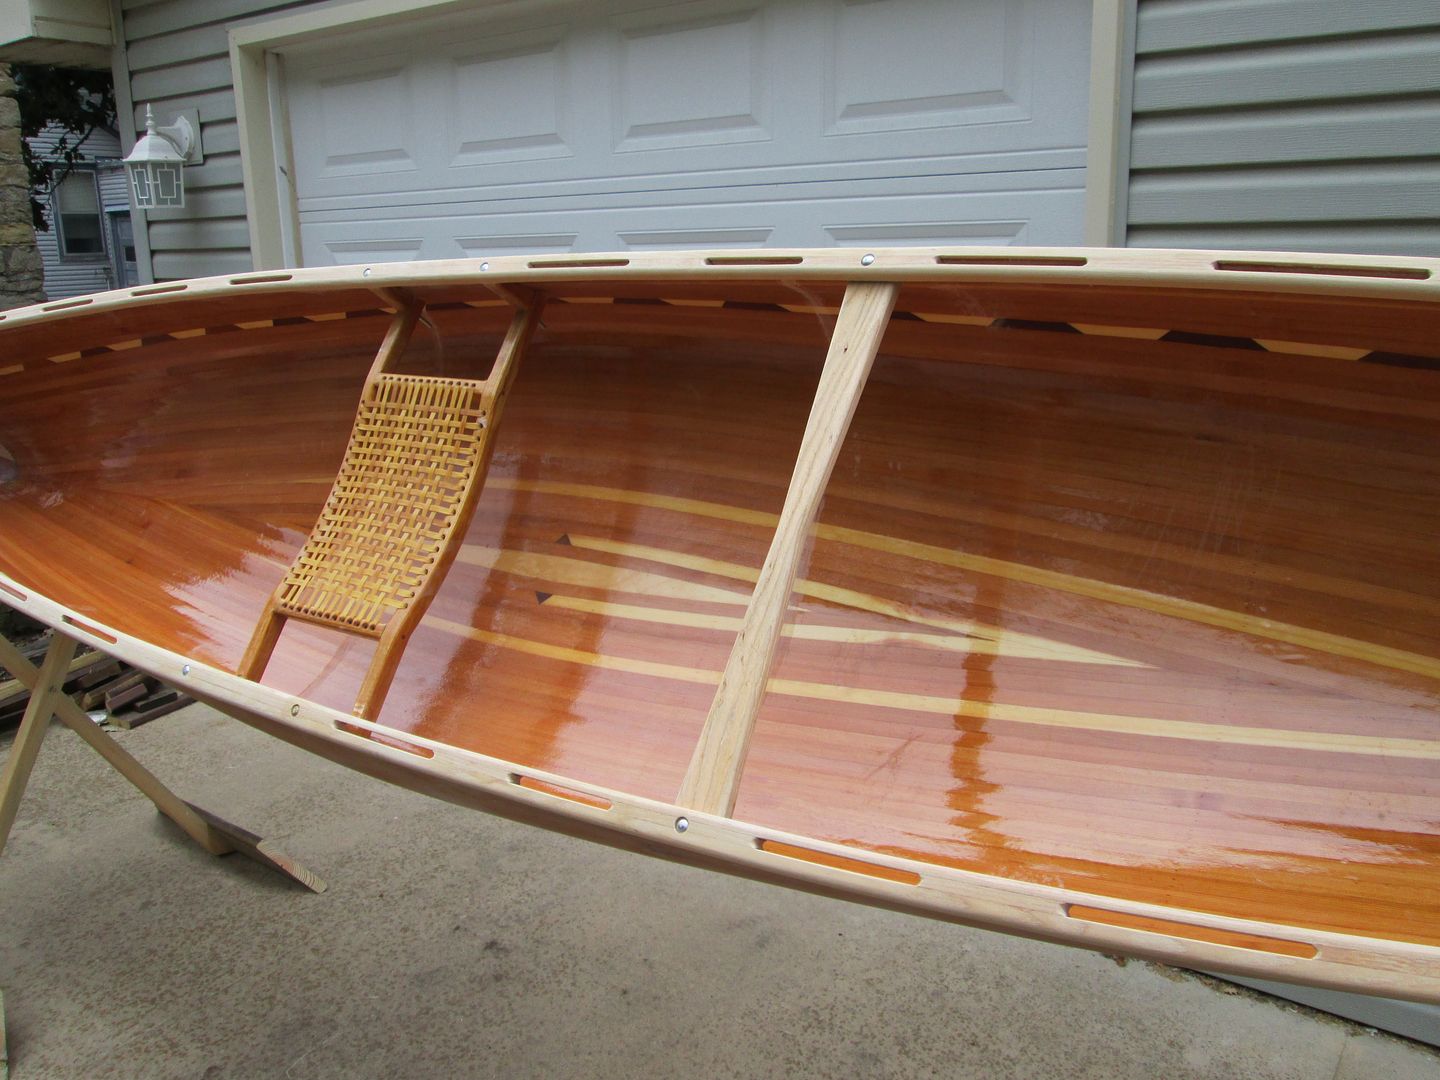
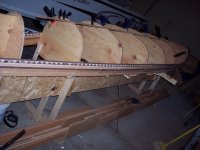
That's where the photos end. That was all yesterday

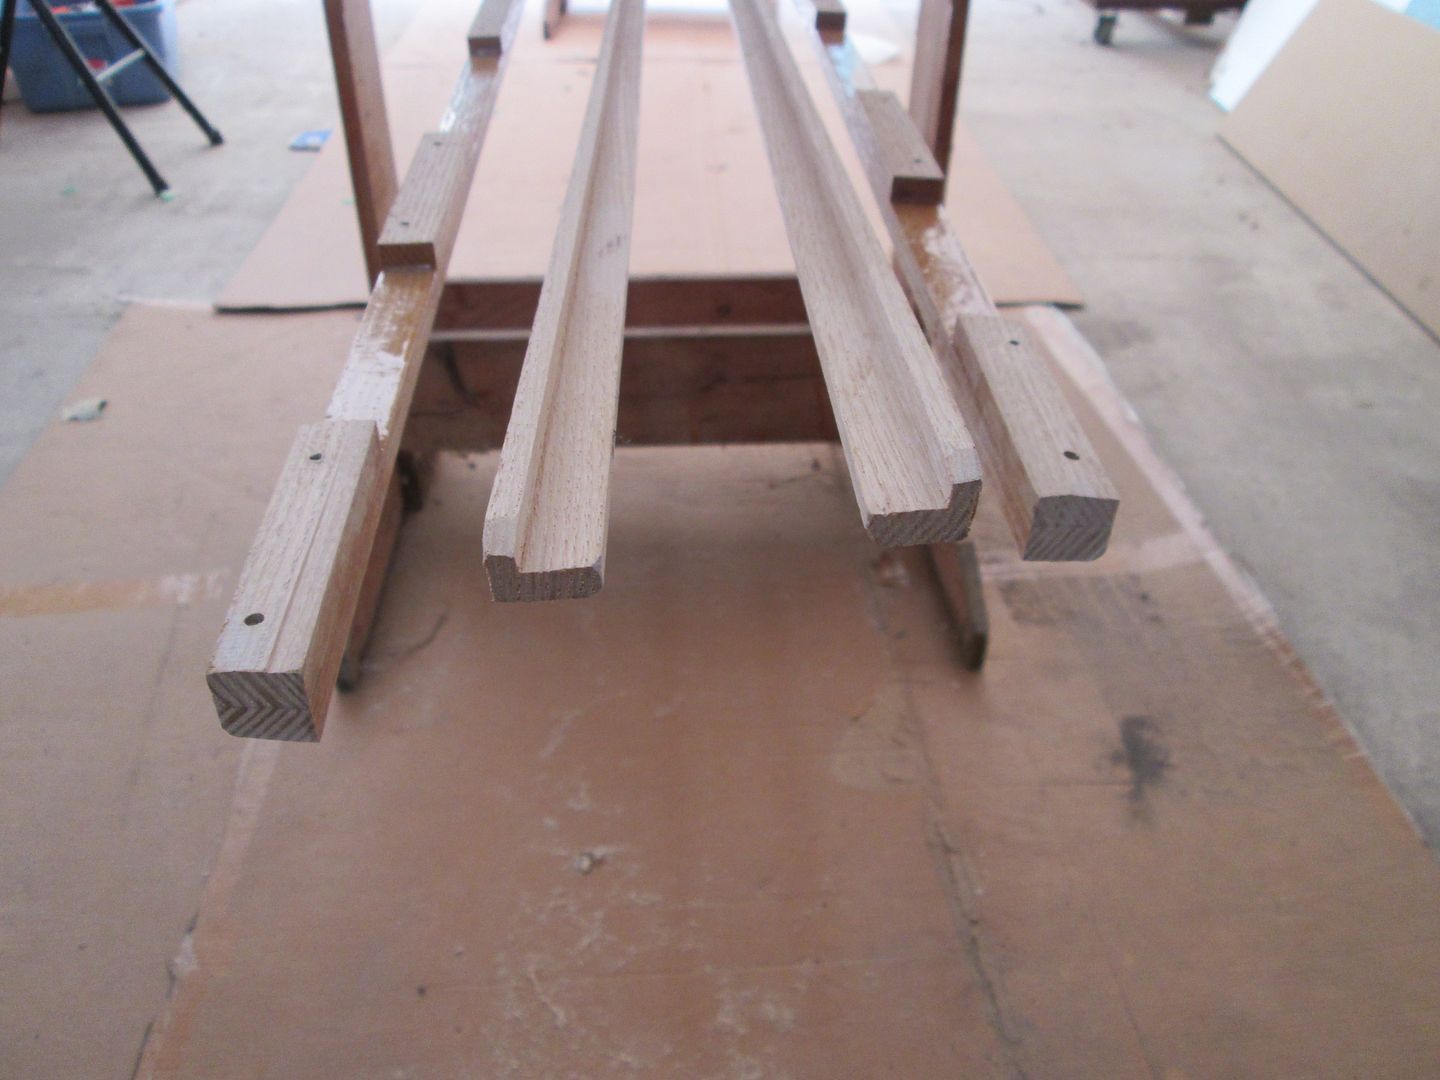
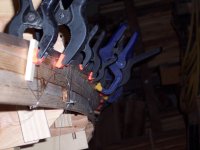
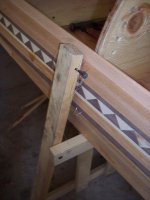
I did get a few more cedar on today, but no photos, and I left my camera at the shop. I know it's time to start moving my attachment points up when I spend more time adding fishing line than I do laying strip. 1/2 hr, per strip, 
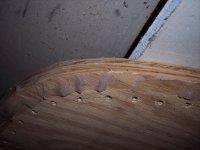
per side is getting a little crazy! This method is supposed to be fairly quick. I have decided, though, that if I ever do one where I don't mind fastener holes, I won't mess around with staples. 1" finish brads. (hand nail) They grab and grip like nobody's business, and you get precision control of placement, angle, and depth.
 

Attachments

  • photo2525.jpg
    photo2525.jpg
    184.6 KB · Views: 2
  • photo2526.jpg
    photo2526.jpg
    208.4 KB · Views: 1
  • photo2527.jpg
    photo2527.jpg
    212.9 KB · Views: 1
  • photo2528.jpg
    photo2528.jpg
    170 KB · Views: 1
  • photo2529.jpg
    photo2529.jpg
    275.6 KB · Views: 2
  • photo2530.jpg
    photo2530.jpg
    218.5 KB · Views: 2
  • photo2531.jpg
    photo2531.jpg
    281.3 KB · Views: 2
It should look nice done that way. I look forward to seeing it when it's been sanded down.

That fishing line bit sounds a little tedious. Hopefully it will go faster now that you've rounded the bend.

Alan
 
No Title

Time to wake up the construction board again.

Alan Gage Well, the fishing line seems to be the best compromise I've seen yet on staples/fasteners VS. fastenerless. It has certainly seemed less tedious now that I'm more on comfortable territory, but by the clock not a whole lot faster. (Course, I did throw in a couple more wrinkles!) Brads, as I said in my last post, would be my method of choice if I was not worried about looks/was going for opaque colored glass. The various clamp systems I've seen all seem like they would take even longer than the fishing line, and I've done enough with hot glue in other contexts to know I don't want to trust it with my strips! If I ever find/invent/cobble something better, I will be sure to share it.

First order of business after that accent strip was laid was to move the attachment points up a bit. This meant re-setting how the screws were attached. I should really have set things up this way to begin with. I've since moved some of them a couple of times, just pull the bottom screw and shift, and it's much more convenient.

I've got almost up to where I start transitioning into the bottom pattern. The twist while doing the bilge curve does wicked things to tension down the length of a strip. Much rather be working on the flat part of the bottom, even though the strips are being bent the "wrong" way.

In between, though, I came up with a slightly different way to handle holding the ends together. The fishing line is at its worst here, with no good way to run things and keep the directional forces that you need. These whittled pegs are actually pretty easy to use, and can be pulled for a short time to fit the next strip in. I get the feeling that part of that "better attachment" method is hiding in here, but not sure how to translate it into the normal forms....

I also borrowed a feature that I liked from one of Jim Dodd 's builds. I, of course, tweaked it a bit to match the rest of my scheme... The diamonds are right on the 4" WL at the #4 forms.

Luke
 

Attachments

  • photo2585.jpg
    photo2585.jpg
    227.7 KB · Views: 0
  • photo2586.jpg
    photo2586.jpg
    166.1 KB · Views: 0
  • photo2587.jpg
    photo2587.jpg
    241 KB · Views: 0
  • photo2588.jpg
    photo2588.jpg
    188.1 KB · Views: 0
  • photo2589.jpg
    photo2589.jpg
    153.3 KB · Views: 0
  • photo2590.jpg
    photo2590.jpg
    246.7 KB · Views: 0
  • photo2591.jpg
    photo2591.jpg
    245.5 KB · Views: 0
  • photo2592.jpg
    photo2592.jpg
    208.6 KB · Views: 0
Back
Top