• Happy Cinco De Mayo! 🇲🇽🎸💃🪅🌶️

Barrens build

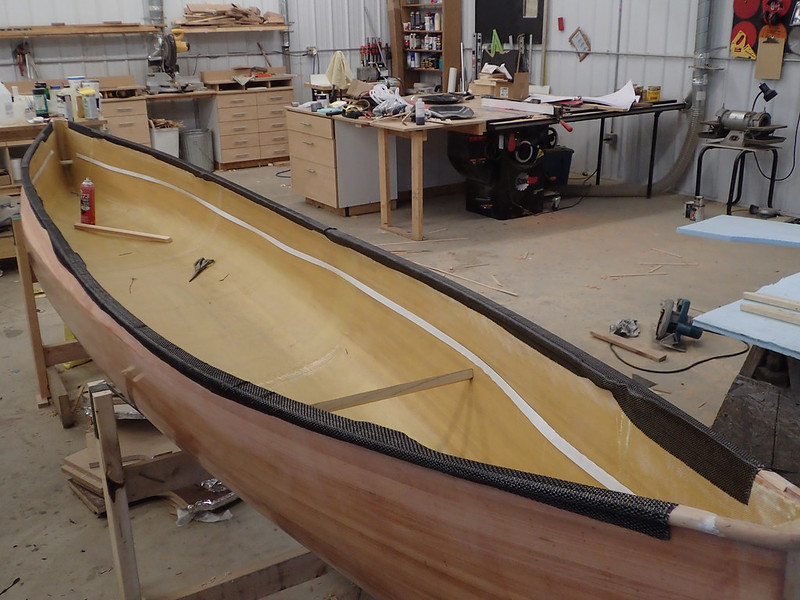
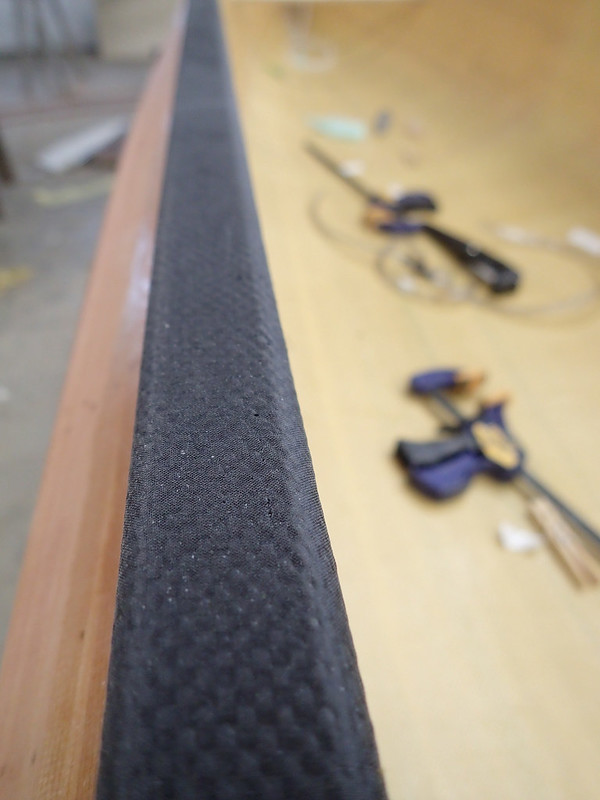
The gunwales are built and glued in place. I used the same profile I've used for my last few canoes that have had carbon over cedar gunwales: 1 3/16"x3/4" with a 1/2" round over on the bottom edge and a 1/4" round over on the top. The 1/2" round over on the bottom edge with this width of gunwale is perfect as it starts the arch right where it meets the hull so there's nothing to hold the water; drains immediately when inverted.

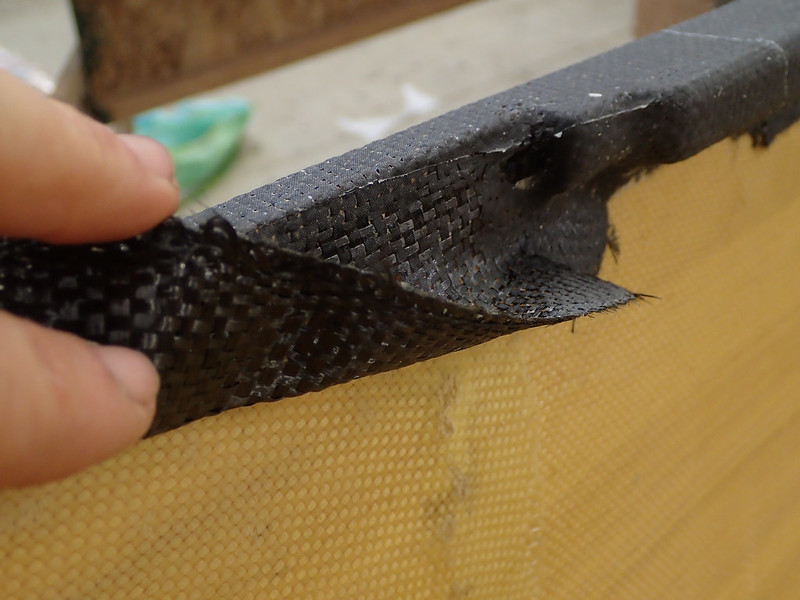
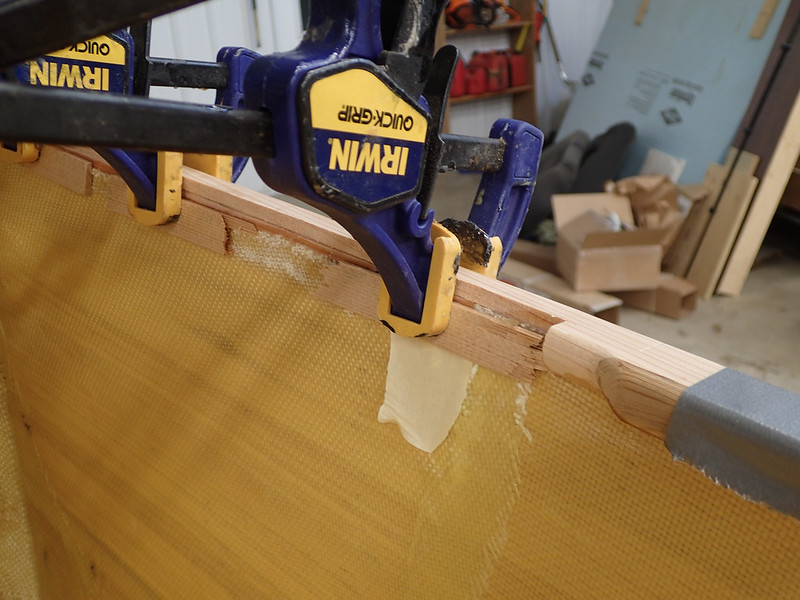
Only problem with that narrow gunwale and 1/2" round over is that it doesn't leave any flat space to attach thwarts or grab handles. Never been a problem before since I fiberglassed them in place but I don't want to do that with this time. So to give me a little extra meat I carefully measured where the thwarts and grab handles will go and glued on short pieces of 1/4" cedar strips to give me 3/4" width on the inwales in those areas. These small areas only got a 1/4" round over on the bottom instead of 1/2". Just have to hope I measured right.

20161112_005 by Alan, on Flickr

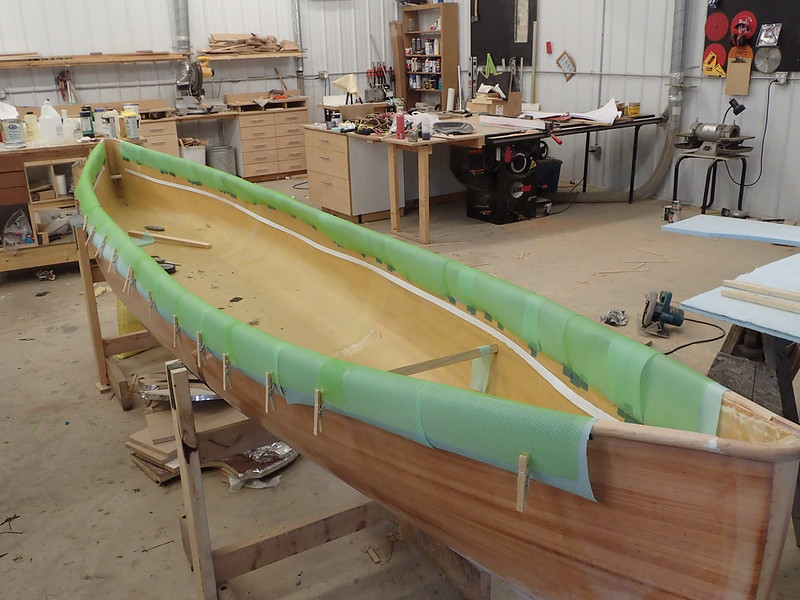
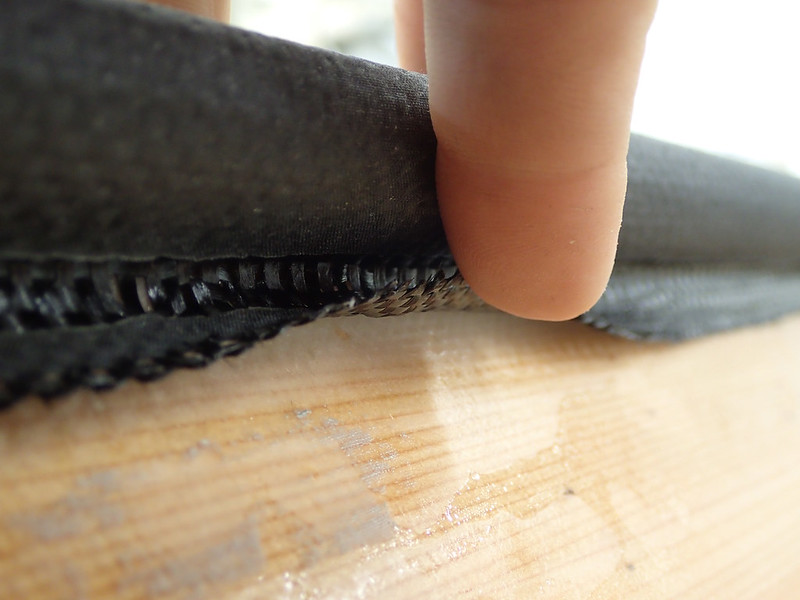
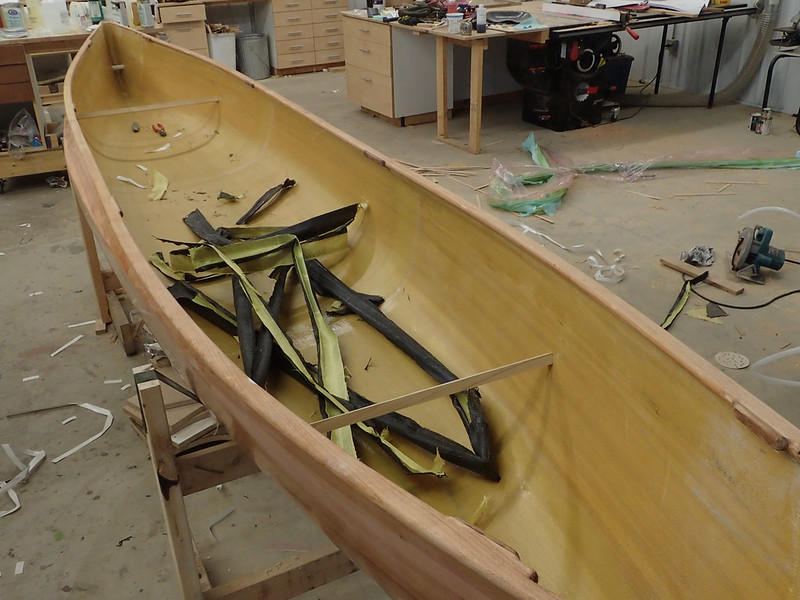
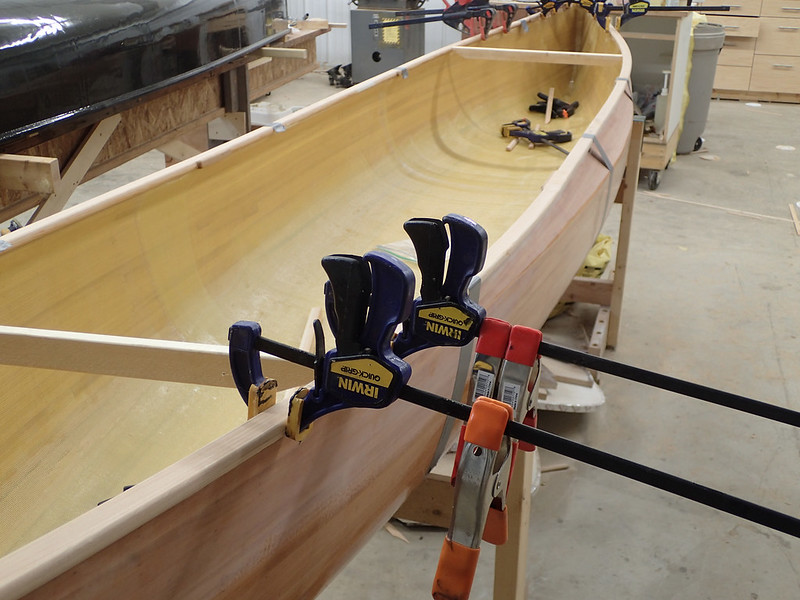
Instead of doing two piece like the last couple I went back to a single piece gunwale. They went on pretty good except for the last 15" or so. But that's no problem. I needed to cut off the last 15" of the inwale anyway at the point it will butt into the float tank so with only the outwale still attached at the last 15" it now made the bend no problem. I was going to take a picture of this but forgot to but you can see in this picture where the inwale stops and the outwale keeps going.

20161112_002 by Alan, on Flickr

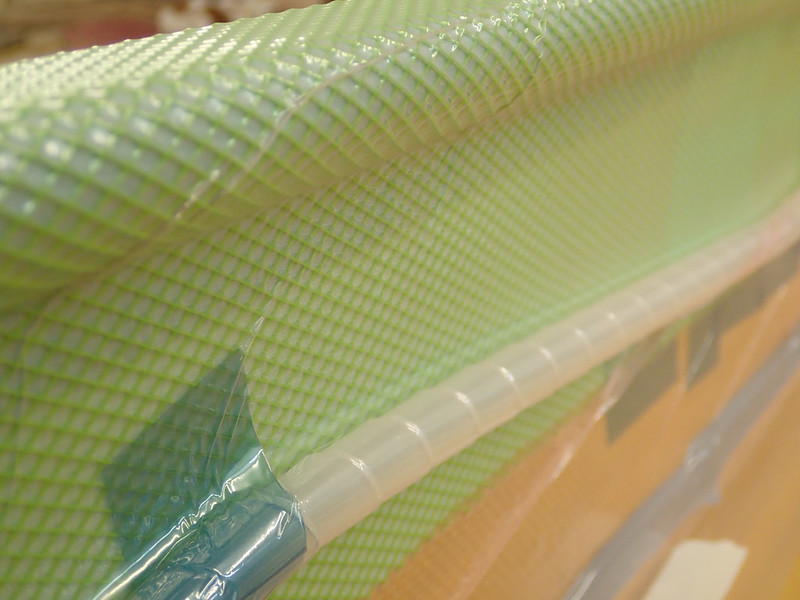
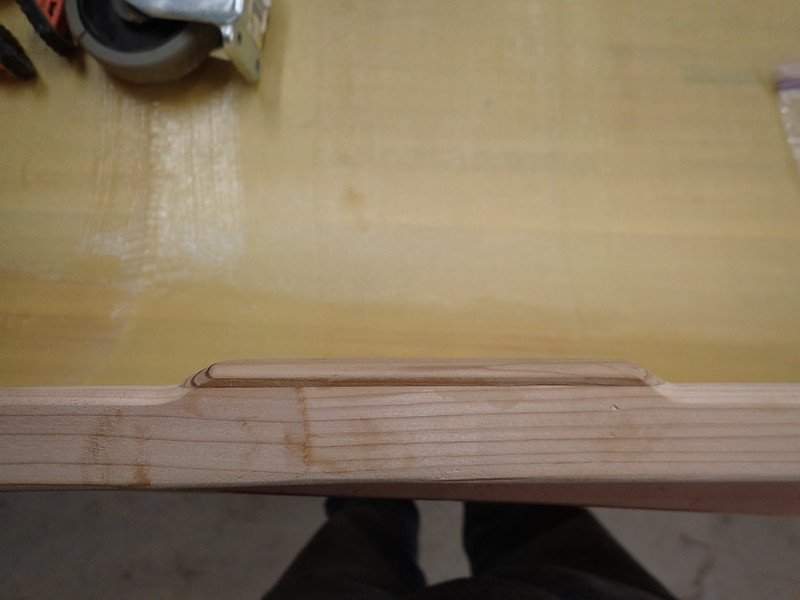
Here's one of those blocks after milling:

20161112_001 by Alan, on Flickr

Nice thing about single piece gunwales is that it doesn't take 500 clamps to glue them in place. The clamps are only for the last 15" where it's the outwale only. Otherwise they pretty much stay in place by friction with some duct tape for good measure.

20161112_003 by Alan, on Flickr

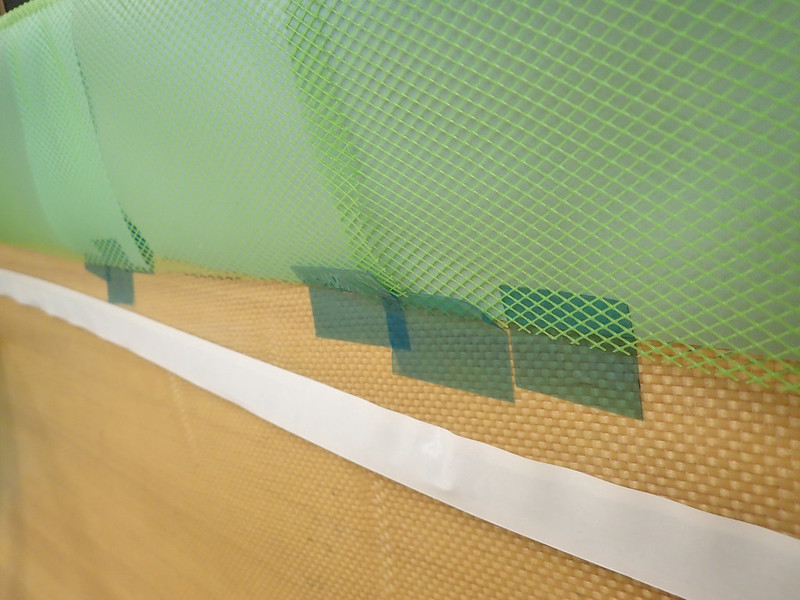
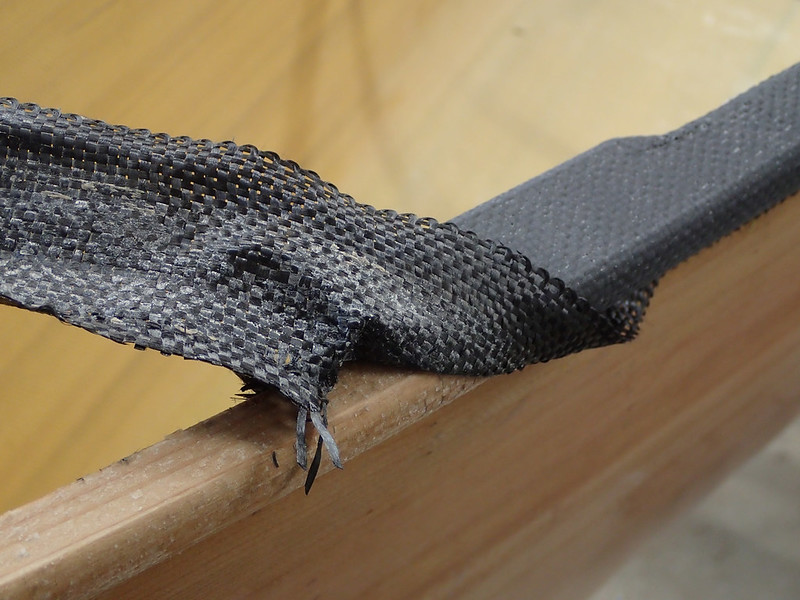
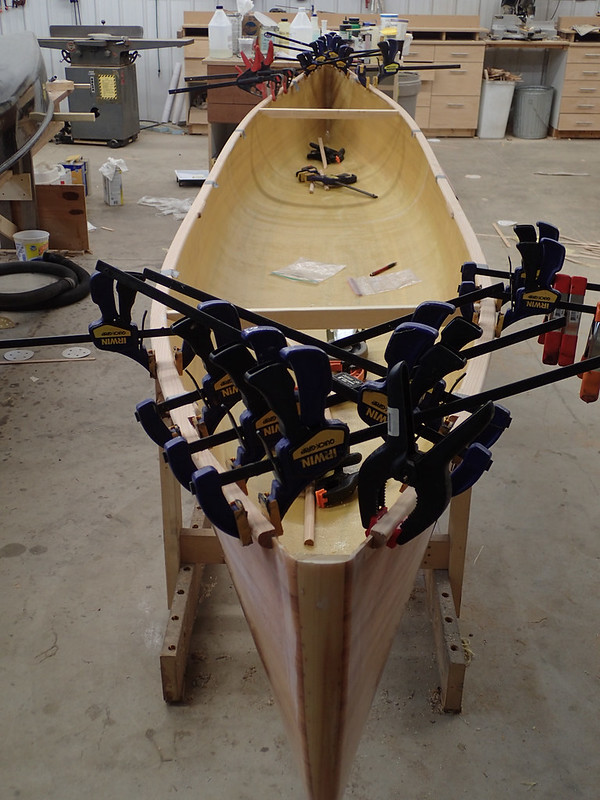
The slots in the gunwale are obviously oversized so I can slip it over the hull. At the bow and stern where it starts to curve towards the stems the gunwales want to tip in, kind of pigeon toed, and the oversized slots lets them do so. I added some clamps and counterweights to flatten them back out.

20161112_004 by Alan, on Flickr

Alan
 
Alan,
That's pretty much the way that I have evolved my gunnels as well.
The only challenge I have is filling the slot with thickened epoxy, I have yet to find an easy way to do it. I use the stem of a cotton swab (industrial, not Q Tip) to slather thickened epoxy into the slot for the hull. Hard to work quickly enough to get it all in before the end of the round when the epoxy starts to kick!!

Interesting that you install your gunnels before the bulkheads and decks...I always go the other way around.
 
Alan,

The only challenge I have is filling the slot with thickened epoxy, I have yet to find an easy way to do it.

That's easy. Put the thickened epoxy into a zip-lock baggy, nip off a corner with a pair of scissors, and squeeze it in just like a piping bag. That's how I usually apply my thickened epoxy. Applying fillets is a snap and requires hardly any touchup afterwards.

Interesting that you install your gunnels before the bulkheads and decks...I always go the other way around.

I thought about it on this one but didn't know how much the tanks would interfere with the infusion bagging.

Alan
 
Put the thickened epoxy into a zip-lock baggy, nip off a corner with a pair of scissors

I’m gonna guess that Alan reliably keeps a can of acetone handy for cleaning his shop scissors.

I try, not always successfully, to have a can of acetone and a rag or two handy whenever I use epoxy.

I went to use the shop scissors a couple of days ago to cut some paper. I tried several pair of shop scissors to frustrating/comical result.

Not epoxy, they had each and every pair been used to cut duct tape, and the stick tape residue made them useless.

On a more comical note, a year or so ago I cleaned and sharpened every pair of shop and house scissors. A stupid abundance of scissors, like 30+ pair.

Being the clever fellow that I am I hid a dozen pair of cleaned and sharpened shop scissors so that family or shop companions didn’t waste them on tape or epoxy.

I hid them a little too good.
 
Hey Alan, you are probably busy building a new canoe or something, but I’d love to hear your gear review; what you would modify, replace, augment or adapt from the last trip’s experience.
 
Hey Alan, you are probably busy building a new canoe or something, but I’d love to hear your gear review; what you would modify, replace, augment or adapt from the last trip’s experience.

X2 !
 

The Bloodvein II to Barrens changes are becoming apparent in the build thread, but I would enjoy a reprise of Alan’s solo tripper canoe design modification thoughts.

Likewise using the CCS Lean vs bringing a small tent (or bivy). As well as waterproof camp shoes, raingear and clothing in general.

Glad you decided to bring that fleece from the car Alan?. (Friend Jody had a similar heavy fleece dither at the car before setting out on a 28 day Escalante hike. He opted no. It was unseasonable cold for the next month)

Sail. Spraycovers. Paddles; I recall there was a wood blade split issue along the way. Repair stuff?

Stove/fuel/cookwear/food. Maps. Dare I say it – rudder?

That trip was a heck of a real world gear test, and even those of us who will never undertake such a long, far north trip would find food for thought.

Alcohol will clean uncured epoxy also. Not quite as fast, but not quite as toxic.

Toxic schmocik. A bigger concern is to not light a bowl with the can of acetone open. And following along behind Jody to put the cap back on.

I use a lot of alcohol in the shop. Even excluding the vast quantities of Yuengling Chesterfield Ale, Black & Tan and Porter the undrinkable isopropyl stuff goes even faster. Isopropyl alcohol , orange paint and painter’s tape constituted our complete list of hardware store run to repair 3 boats. I had thought ahead and laid in plenty of Yuengling.

Rubbing alcohol is another Wally-World item. I like the 91% Isopropyl, but I like most of my alcohol high proof.

Time to go use some. The latest epoxy repairs have had a few days to outgas, time to wash (twice, clean rags both times) and alcohol wipe any amine blush off those areas before UV topcoating.

Lots of contaminated rags in the trash.
 
I’m gonna guess that Alan reliably keeps a can of acetone handy for cleaning his shop scissors.

I do keep acetone on hand but try to use it as little as possible. Like Boatman53 mentioned I normally use alcohol. But the nice part about cutting the corner off the zip-lock baggy is that the scissors stay clean. The epoxy can't get all the way into the corner of the bag until you nip off the corner and expel the air.

That being said most of my scissors are a scabby mess of cured epoxy. I try to keep one pair that's dedicated for things other than cutting fiberglass and coming into contact with resin but it never fails that when the crap starts to hit the fan and I need a pair of scissors right now that clean set is the only pair I can find. I'm getting better at remembering to clean them up when done though. Haven't ruined a pair in over a year now.

I’d love to hear your gear review; what you would modify, replace, augment or adapt from the last trip’s experience.

Patience my friend, patience. Winter hasn't arrived yet and as such my daylight hours are spent outside having fun (or finishing up yard jobs) while my evening hours are occupied with the boat. But soon winter's icy grasp will be upon us and I'll finally sit down and type some of that out.

Alan
 
I'm betting Alan has that new boat in the water, before ice starts forming !

​ Looking forward to your infusion !

Jim

 
I'm betting Alan has that new boat in the water, before ice starts forming !


When I started this build I had no intention of racing the ice but the weather has been so mild, and continues to be so in the forecast, that it appears I will be on the water for a test paddle before it freezes. Which is great because I can't install my seat until a test paddle to determine how high I want it to be. Gunwales should be done this weekend so anytime after that.

Alan
 
This was the big weekend to infuse my gunwales with kevlar and carbon. Infusion means the need for really thin resin. And really thin resin means vinyl ester. They make epoxy in the same realm of watery thinness but it needs post cure (lots of heat) so that was out. I've always heard you can't use vinyl ester over epoxy; that it won't cure and you'll be left with a sticky mess. I always thought that seemed strange as I understood epoxy, once cured, was pretty much inert. How could it keep the vinyl ester from curing? A little Googling found an article from West Systems about applying polyester gel coat over epoxy. They said as long as the epoxy was fully cured and there was no blush that polyester would stick just fine as long as the surface was roughed up for a mechanical bond. http://www.westsystem.com/ss/polyester-over-epoxy/

Sounded good to me so time to push on with the plan. I washed the hull with water, wiped down with alcohol, sanded it with 80 grit, wiped with alcohol again, and hoped that my epoxy was fully cured. The exterior of the hull was done about 2 weeks ago and the interior 1 week ago. I'd been keeping the heat high in the shop to promote curing. Acetone seemed to have no effect on the epoxy.

For a quick overview of the infusion process you can check out this thread where I infused a carbon seat: http://www.canoetripping.net/forums...-discussions/diy/54083-infusing-a-carbon-seat

Friday evening I used spray tack to put the cloth in place:

20161119_001 by Alan, on Flickr

I spent most of Saturday placing the peel ply, flow media, sprial tubing, and the sealing bag. It was not very fun. Very tedious work and gravity wasn't my friend. The peel ply and flow media had to be put on in small sections to keep the cloth from wrinkling on the inside bend. These all had to be held in place with tape. I only taped the inside edge so that they would be free to move around and compress when the bag was sucked down. The the spiral tubing had to be attached to the flow media. I used tacky tape and that seemed to work well. I tried attaching it to the peel ply but nothing will stick to this silicone impregnated stuff. One length of spiral tubing running the length of the hull on each side would be the resin intake and another piece of spiral tubing running the length on each outside of the hull would be connected to vacuum.

20161119_004 by Alan, on Flickr

20161119_003 by Alan, on Flickr

Now a normal person would say that since there are two separate sides to be done it would make sense to do one side, learn from the experience, and then apply those changes to the second side. Well I'm not a normal person. I say go for the gusto and come what may. I connected the resin intake and vacuum lines with T's so that I could feed both and once as well as separate them (pinch of a line) if need be. Here I've sucked the bag down and am checking for leaks:

20161119_005 by Alan, on Flickr

20161119_006 by Alan, on Flickr

I chased down my leaks and got rid of all of them that I could hear but it still wouldn't hold a perfect vacuum. I suspected the problem was at the ends where I was try to seal against bare wood. I couldn't think of a way to get around that so I went for it anyway.

So I started the infusion and right away things weren't going so hot. It took a lot of resin. I mean a LOT of resin. Like over half a gallon of resin. Those spiral tubes must have more volume than I thought they did. The left side of the hull was doing ok but the right side hadn't even filled the spiral tube yet. I kept mixing up and adding more and more resin. I pinched off the resin supply tube to the left side to force it into the right side. It finally wet out all the cloth except for the very ends. I think most of the problem was from those leaky ends I was concerned with. Instead of drawing the epoxy out of the spiral tube it was drawing air in from outside, keeping the resin from getting all the way to the ends.

But that was ok. It was ahead of where the float tanks would be and not a very important spot. I could easily re-do those spots when I install the tanks. So I went to bed hopeful and woke up this morning excited to see what I had.

Whoa, check out that perfection!:
20161120_002 by Alan, on Flickr

It was smooth with only a couple wrinkles and the weave was completely fill except for the light texture from the peel ply.

At least where it was in contact with the bare wood. Where the cloth came into contact with the hull not so much:

20161120_004 by Alan, on Flickr

20161120_005 by Alan, on Flickr

Anywhere the resin came into contact with the hull (epoxy) it had not cured and was gooey. Crap!
At first I thought I'd just cut the bad part away and fix it later by putting a layer of fiberglass tape over the whole thing. Then I started pulling even harder on the cloth and it started to peel off the wood too. Double crap!

20161120_008 by Alan, on Flickr

So then I just tore the whole dang thing off. The fact that I was even able to do this, only having to resort to pliers in one or two spots, doesn't speak well for how it adhered:

20161120_009 by Alan, on Flickr

The only way I could think to console myself was to bolt on some temporary thwarts and take the canoe for a test paddle, which is exactly what I did and nearly killed myself in the process. But that's a topic for another thread: http://www.canoetripping.net/forums...ssion/54178-be-careful-out-there-crap-happens

So that's how I spent my weekend. Not so productive.

Alan
 
So how did the canoe perform you ask? It did fine. Hard to tell on a limited test paddle without gear but so far I'm happy. It was me, Sadie, and about 35-40 pounds of water in a dry bag. My seats are usually 6-7" off the floor. I went up to 9" on the test paddle and while it still felt ok on flat water I think I'll back it off to around 8" for the real seat.

The extra width (2" wider than any other solo I've paddled) was noticeable but not as bad I I feared it might be.

Now I'll start working on the seat and installing the float tanks. The hull and gunwales have been wiped down with acetone to hopefully remove any uncured vinyl ester resin. I'll give it a good long while before sanding it again and then will hand layup bias woven carbon tape.

20161120_010 by Alan, on Flickr

20161120_011 by Alan, on Flickr

20161120_012 by Alan, on Flickr

Alan
 
The thing is you will bounce back !
​ You are soo far ahead in this building game, than the rest of us, it's not even funny !

So keep looking ahead ! Besides how many people can say they swam in the lake this late in November?

​ OK , the build. Why didn't the vinylesther cure ? I can understand why it didn't stick, but it should have cured. Mix ratios, or amount of cure time, or ?


Jim
 
The thing is you will bounce back !
​ You are soo far ahead in this building game, than the rest of us, it's not even funny !

So keep looking ahead ! Besides how many people can say they swam in the lake this late in November?

No worries there; I'm find with it. The tone of my post probably sounds like I'm upset about the whole thing but not really. It sucks but I know that when I screw up something like that my dad's going to laugh at me so it's easier if I can laugh at myself too. I was actually relieved to be able to rip all the cloth off the gunwales because I wasn't quite sure what the heck I was going to do otherwise. And as for falling in the ice water, well, I do my best to avoid situations like that but whenever one comes along, and I come out the other side no worse for wear, it puts me in a pretty good mood. So while on the surface the weekend looked like a failure I was positively ebullient last night.

​ OK , the build. Why didn't the vinylesther cure ? I can understand why it didn't stick, but it should have cured. Mix ratios, or amount of cure time, or ?

I believe the reasons for not curing and not sticking are one in the same. The vinylester that was exposed to bare wood had cured hard, as did the extra left over in the mixing cups and the stuff that got sucked into the vacuum line. The only place it was still sticky and gooey was where it was in contact with epoxy that I'm assuming wasn't fully cured.

From the West Systems article I linked above:
the surface must be prepared properly; if it is not, then poor curing and adhesion may result. Polyester materials can be affected by amines in the epoxy hardener. If the hardener has not fully reacted with the epoxy resin or the amine blush is not removed from the cured surface, problems can occur.

As to why it didn't bond better to the bare wood I don't know. Maybe if I'd let it cure a couple more days I wouldn't have been able to peel it off but getting rid of all of it while I had the chance seemed to be the best option.

Alan
 
As much as I hate to recommend them as I had some quality control issues with their products in the past, PTM&W has some infusion epoxies that cure at room temp. Up to a 3 hr pot life and preheating the resin could make it even more flowable.
 
As much as I hate to recommend them as I had some quality control issues with their products in the past, PTM&W has some infusion epoxies that cure at room temp. Up to a 3 hr pot life and preheating the resin could make it even more flowable.

I'd never heard of them before. Went to their website and they show a viscosity of 300-400cps. The long open time sure would be nice. http://www.ptm-w.com/ptm-w-products/...-products.html

I have used Adtech 820 series epoxy resin for insfusing, which is in the same viscosity ballpark. It did work but was noticeably slower flowing through the laminate than the vinyl ester and it doesn't cure below 80 degrees.

System 3 clear coat is also rated at 400cps and I thought about giving it a try but, obviously, decided not to.

The vinyl ester, if I remember correctly, is around 200cps.

EDIT: just checked the vinyl ester and it's rated 250-300cps. Not as big of a difference as I thought between it and the thin epoxies.

Alan
 
Last edited:
What was the temp in your shop when you did the infusion? I've found vinyl ester cures pretty slow at lower temps. I did do a patch with ve over exopy that worked fine but then the epoxy had dried a couple of years ago.
 
Back
Top