Hi All -
I finally made some significant progress on restoring this old canoe lately. Until I read back through this thread, looking at all the incremental steps with me learning something new or building a jig for each one, I lost track of how far I've come with this project. After a bit of sanding and comparing the old ribs to new, I decided to stain all the new ribs except for the 2 red cedar ribs, which are pretty close in color to the aged white cedar ribs. Why did I use red cedar? I had some nice air dried stuff that I thought would work well and it did. Even with all the tape, there was a little bleed of stain onto the planking, but I think I'm the only one who will notice. All that taping was a pain in the lower back.
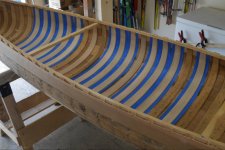
Here's the hull after oiling. Lots of new planking, at least half the boat, and it probably could have used some more in places.
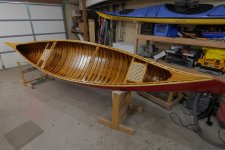
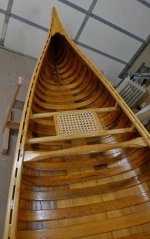
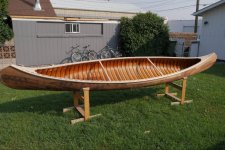
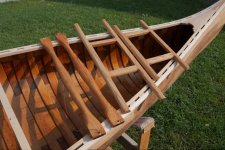
Here's a photo of the inside with 2 coats of varnish and new outwales installed. I was surprised and pleased at how close I got the new ribs to look like the old. The only difference is the dents and dark spots on the old ribs. The white cedar seemed to take the stain evenly. Of course I ended up finding a couple of more ribs that could have been replaced or at least repaired from the back. They weren't broken all the way through, just show a partial surface crack on the inside. These were invisible until I put that first coat of varnish on. Those repairs are for somebody else in 20 or 30 years when the canoe needs a new canvas.
A couple of the planks are way off in color, I should have chosen more carefully from what I made to get a better match. I steam bent the new outwales and shaped the profile on the boat with a plane, spokeshave and sandpaper.
Those Old Town outwales are a pain to get close to the originals. It would have been easier to use the router to match the profile and then bend the ends, but I was afraid the rails would twist if they were already rounded. Anyway, I learned a lot making them.
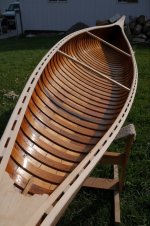
Another inside shot.
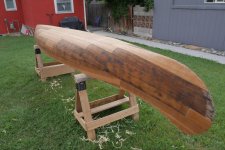
I repaired the rotted thwart ends with new wood. These will be hidden under the gunwales.

I decided to make some new seats instead of using the few parts I had of the originals. It wasn't difficult to match the originals. Now, ready for canvas
OK, bear with me for a few more pictures. I stretched the canvas 2 days ago.
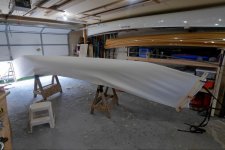
Canvas went on without a hitch. Getting the cut right on the stems was a little tricky, but I think it should all hold. This was probably the most enjoyable part of the restoration so far. Steam bending ribs is a close second.
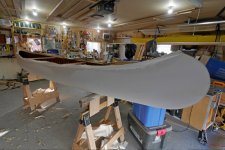
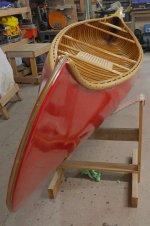
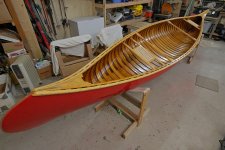
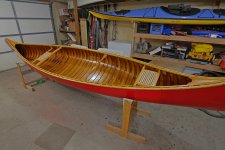
And yesterday the filler. It all went on well, but I was surprised how much elbow grease it took to get that stuff on the canvas. The color is not by design, just some left over rustoleum in red and gray. Of course I went out there a couple hours later and tried to smooth it out some more, a little too much in 2 spots, pulling some of the filler out of the canvas weave. I had to mix a mini batch of filler to re-do those spots which I hope will be OK in the long run. They looked OK this morning.
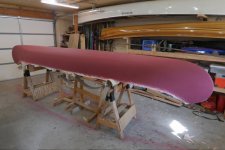
OK, Now the canoe gets to sit out of the way for a month or so.
Mark
I finally made some significant progress on restoring this old canoe lately. Until I read back through this thread, looking at all the incremental steps with me learning something new or building a jig for each one, I lost track of how far I've come with this project. After a bit of sanding and comparing the old ribs to new, I decided to stain all the new ribs except for the 2 red cedar ribs, which are pretty close in color to the aged white cedar ribs. Why did I use red cedar? I had some nice air dried stuff that I thought would work well and it did. Even with all the tape, there was a little bleed of stain onto the planking, but I think I'm the only one who will notice. All that taping was a pain in the lower back.

Here's the hull after oiling. Lots of new planking, at least half the boat, and it probably could have used some more in places.

Here's a photo of the inside with 2 coats of varnish and new outwales installed. I was surprised and pleased at how close I got the new ribs to look like the old. The only difference is the dents and dark spots on the old ribs. The white cedar seemed to take the stain evenly. Of course I ended up finding a couple of more ribs that could have been replaced or at least repaired from the back. They weren't broken all the way through, just show a partial surface crack on the inside. These were invisible until I put that first coat of varnish on. Those repairs are for somebody else in 20 or 30 years when the canoe needs a new canvas.
A couple of the planks are way off in color, I should have chosen more carefully from what I made to get a better match. I steam bent the new outwales and shaped the profile on the boat with a plane, spokeshave and sandpaper.
Those Old Town outwales are a pain to get close to the originals. It would have been easier to use the router to match the profile and then bend the ends, but I was afraid the rails would twist if they were already rounded. Anyway, I learned a lot making them.

Another inside shot.

I repaired the rotted thwart ends with new wood. These will be hidden under the gunwales.

I decided to make some new seats instead of using the few parts I had of the originals. It wasn't difficult to match the originals. Now, ready for canvas

OK, bear with me for a few more pictures. I stretched the canvas 2 days ago.

Canvas went on without a hitch. Getting the cut right on the stems was a little tricky, but I think it should all hold. This was probably the most enjoyable part of the restoration so far. Steam bending ribs is a close second.

And yesterday the filler. It all went on well, but I was surprised how much elbow grease it took to get that stuff on the canvas. The color is not by design, just some left over rustoleum in red and gray. Of course I went out there a couple hours later and tried to smooth it out some more, a little too much in 2 spots, pulling some of the filler out of the canvas weave. I had to mix a mini batch of filler to re-do those spots which I hope will be OK in the long run. They looked OK this morning.

OK, Now the canoe gets to sit out of the way for a month or so.
Mark
Last edited:

