
I'll start by saying hi, as I'm new to the forum. Buckle up, it's a long and wordy intro into my build.
TLDR: Had kids, need a bigger boat. Follow along for the build! Scroll down for the pictures if you wish to skip the detailed writing.
I have started my second cedar strip canoe build, and figured I'd share the progress for all to see and ask questions or give advice/feedback. This is my second cedar strip build, the first being a ranger 15. Things have been going so smooth and fast having one build under my belt. I had posted that build on the old bear mountain builders forum, but that site seems to have been taken down. I have found forums like this to be invaluable with providing information on these builds, so figured if a new builder (or experienced for that matter, as we are all constantly learning) comes across this and takes one or two things away my time posting will have been worthwhile.
The 15' did great over the past handful of years for my wife and I plus one or both of our medium/large breed dogs; we are used to ultralight backpacking so the 15' canoe always seemed like more than enough space. Enter the most recent phase of my life, parenthood. The kids are of age and size that they can't just be plopped on a drybag for a few days trip anymore, at least without significantly effecting the enjoyment of the experience, and at this point I want them to enjoy every bit of these trips to build a lifelong love for the outdoors and wilderness tripping. I wanted something big enough to haul a few days of gear while giving them dedicated positions in the canoe in the form of a side by side bench seat. I have always been interested in the freedom 17. Good capacity, faster, overall a better design for the type of water bodies I'm paddling. I decided 18' would be more ideal than 17', so I spaced each station by an extra 3/4" to make the overall length slightly longer than 18'. I like the design of the 17' better than the design of the Freedom 17'9", specifically the slightly narrower beam and slight tumblehome, which is why I decided just to elongate the 17. One thing I can already tell from the shape in comparison to the ranger, this thing should be fast.
A bit about my build process:
Now onto some pictures, always the best part of these build reports.
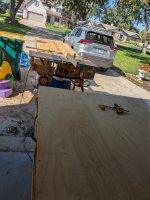
Tablesaw setup
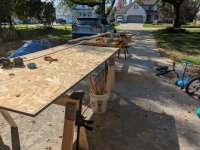
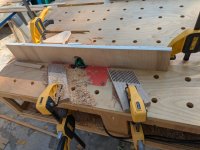
Router setup
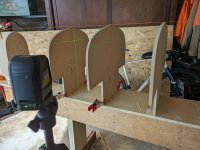
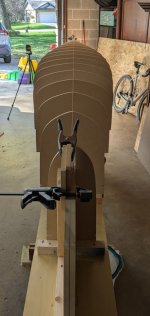
Setting up the forms. Laser level was a nice addition since the last build. My garage has a center floor drain, so leveling the strongback takes a bit more attention due to the variable slope. I level the strongback, but then also double check each form using the waterline & centerline. I then check plumb with a 3' level and tack in place with a batten along the top of each form.
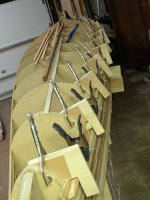
Stripping the hull. I use TBII. It worked well for me in the last build, so went with it again. Joints between each strip are scarfed; I use a disc sander to make clean bevels roughly 30°. I found with the last build, if I do a good job color matching the strips, the joints are nearly invisible unless looking very hard for them.
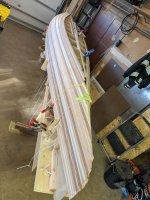
Thanks for tuning in! I will update as I progress and time allows.
TLDR: Had kids, need a bigger boat. Follow along for the build! Scroll down for the pictures if you wish to skip the detailed writing.
I have started my second cedar strip canoe build, and figured I'd share the progress for all to see and ask questions or give advice/feedback. This is my second cedar strip build, the first being a ranger 15. Things have been going so smooth and fast having one build under my belt. I had posted that build on the old bear mountain builders forum, but that site seems to have been taken down. I have found forums like this to be invaluable with providing information on these builds, so figured if a new builder (or experienced for that matter, as we are all constantly learning) comes across this and takes one or two things away my time posting will have been worthwhile.
The 15' did great over the past handful of years for my wife and I plus one or both of our medium/large breed dogs; we are used to ultralight backpacking so the 15' canoe always seemed like more than enough space. Enter the most recent phase of my life, parenthood. The kids are of age and size that they can't just be plopped on a drybag for a few days trip anymore, at least without significantly effecting the enjoyment of the experience, and at this point I want them to enjoy every bit of these trips to build a lifelong love for the outdoors and wilderness tripping. I wanted something big enough to haul a few days of gear while giving them dedicated positions in the canoe in the form of a side by side bench seat. I have always been interested in the freedom 17. Good capacity, faster, overall a better design for the type of water bodies I'm paddling. I decided 18' would be more ideal than 17', so I spaced each station by an extra 3/4" to make the overall length slightly longer than 18'. I like the design of the 17' better than the design of the Freedom 17'9", specifically the slightly narrower beam and slight tumblehome, which is why I decided just to elongate the 17. One thing I can already tell from the shape in comparison to the ranger, this thing should be fast.
A bit about my build process:
- I mill strips myself. Last time I was meticulous about milling everything to be exactly the same thickness; this time I omitted putting strips through the planer to ensure perfect uniformity among strip width since the rough hull will need to be faired and smoothed regardless; I can already tell this has saved me some time. The longest knot free boards I was able to source were 14', but got a variety of lengths down to 8', all from Menards. Table saw with a long fence and long in-feed and out-feed support is my preference; same applies for routing bead and cove. I was also able to source some extremely high quality long redwood off of Facebook marketplace for accent strips.
- Strip thickness is 1/4", but I decided to mill 2 different widths for different areas of the hull, 7/8" and 3/4". 7/8" wide as the lines of this model are quite straight in comparison to the ranger. 3/4" wide for the curves around the chine, but a majority of what I've used is 7/8". This has worked out great, saving me a bit of time and material.
- Stations are 1/2" MDF; stem molds get doubled up; I build stemless so this give me extra support at the bow and stern.
- This build is stapleless, as opposed to the ranger which was built with staples. For the ranger i still found myself using clamps and jigs frequently to help hold the twistier strips in place. I came to the conclusion that I was already halfway to building stapleless, and would save time in the long run by not having to pull thousands of staples, fill staple holes, and sand the filler smooth. I have mainly been using L shaped jigs held onto the forms with locking C clamps with wedges to apply the pressure. Hot glue has been quite helpful in holding everything in place after the jigs are removed, along with various other methods of applying pressure in the areas that require clamping creativity(rope, latex tubing, ratchet straps). Once I got into the swing of things, the stapleless method has not been much of a challenge to apply. Oh yeah, and the bike tube bandy clamps are amazing for between stations!!! The strips have been coming together super tight and I'm very pleased with how the changes I've implemented have been working.
- All trim and woodwork will be cherry; lumber already sourced. Cherry is my favorite looking wood.
- Seat frames have been assembled, and webbing holes drilled. I used the Jim Dodd method of 1/2" thick nylon snowshoe cord for seat webbing, and will use it again for this build.
- Outwales measure 3/4"x3/4" with a slight bevel on the underside and 1/8" roundover on the exposed hard edges. I epoxy them to the hull as opposed to screwing. On the ranger I coated with epoxy, and then varnished. This time around I'm considering just a penetrating oil since it is so much easier to do maintenance coats.
- Inwales will be 3/4"x1/2". For the ranger I didn't mill scuppers into the inwale, but this time around I plan on doing milled scuppers.
Now onto some pictures, always the best part of these build reports.
Tablesaw setup
Router setup
Setting up the forms. Laser level was a nice addition since the last build. My garage has a center floor drain, so leveling the strongback takes a bit more attention due to the variable slope. I level the strongback, but then also double check each form using the waterline & centerline. I then check plumb with a 3' level and tack in place with a batten along the top of each form.
Stripping the hull. I use TBII. It worked well for me in the last build, so went with it again. Joints between each strip are scarfed; I use a disc sander to make clean bevels roughly 30°. I found with the last build, if I do a good job color matching the strips, the joints are nearly invisible unless looking very hard for them.
Thanks for tuning in! I will update as I progress and time allows.


