• Happy Birthday, Gary Cooper (1901-61)! 📽️☝🏻🕛

Tips on float bag installation

I can picture this happening if the rectangular base just by itself is riveted through the hull or onto the inside face of the metal gunwale skirt. But if the rectangular base is wedged completely up and sandwiched between the hull and the metal gunwale skirt, it would seem impossible for it to rip out at the rivet. Excessive force should break the D-ring off the plastic base. No?

It is all in the installation and usage for sure!! But I've seen lots of them ripping, that said it was mainly on wood gunnels installation, where the black tab was installed in-between the inhales and the hull! I've seen a few rip from aluminum gunnels, but not as many as on wood gunnels! Up here half the canoes are clippers and the other half are Hellmans in the composite canoe market anyway!
 
Somewhere there are photos of installing pop riveted webbing loops and cage cord on a couple of canoes, including split center bags on a giant tandem. I’ll keep looking

I am not a fan of those Clipper (?) D-ring lash tabs either, although I have used them for some purposes. The flange that gets pop riveted or screwed through seems kinda thin. If you sandwich them between the hull and inwale the D part rests inconveniently flush against the hull if you do much lacing and unlacing.

Go plastic or webbing attachments in any case. Do not even be tempted by cunning metal doohickies.

This is a Wenonah “Stainless steel” attachment, which would have been useful for running webbing straps had it not rusted to heck in a year’s time. Actually more like 6 months, with no salt water boat use.


I need to cut the “SS” off each one and run a loop of 2.2mm Zingit through each plastic sleeve. Or maybe a single line of Zingit through the sleeves under each side of the bow and stern inwales.

There is one of those rusty POS webbing rings backing up dang near every spray cover snap rivet; in other words a lot of them. Most of Wenonah stuff is top notch, those are crap.

Cooke Custom Sewing sells tiny SS D-rings of much better quality stainless. Teeny, tiny; the D part is so small it is a PITA to lace through (think threading a needle). Those, after 6 or 7years are just starting to rust.

Webbing loops under (vinyl) gunwale.


Webbing loop on end of yoke. I think that is actually a bow-tie of webbing, with a loop on each end.

 
I vote for taking giant pieces of sheet metal and riveting a storage compartment over your bow and stern bags to seal them in your boat.

Starting to sound like my sea kayak, although your picture is perhaps a bit broader in the beam...

It might add a little weight to your setup but hey, when you finally get sick of lugging the boat around and abandon it beside the river, future paddlers will make honorary pilgrimages to visit what will then become known as the Folly Of FartherWest. It's even got a nice literary ring to it.


I do rather like that "Folly of FartherWest" and will tuck it away for future use. Perhaps when I start posting a few trip reports, this might be a very appropriate way to set the scene.... Thanks Uncle_Skwid!
 
...

Go plastic or webbing attachments in any case. Do not even be tempted by cunning metal doohickies.

LOL, that is actually what I was pondering about 4 o'clock this morning. So, thanks for the heads up. I am actually in favor of an idea that utilizes riveting the plastic piece similar to your first picture to the boat and allows for webbing or cord/line to be used for the actual lacing versus the ring. You got those from Wenonah?

.. “Stainless steel” ... had it not rusted to heck in a year’s time. Actually more like 6 months, with no salt water boat use....

There is one of those rusty POS webbing rings backing up dang near every spray cover snap rivet; in other words a lot of them. Most of Wenonah stuff is top notch, those are crap.

Cooke Custom Sewing sells tiny SS D-rings of much better quality stainless. Teeny, tiny; the D part is so small it is a PITA to lace through (think threading a needle).

As a person who works in a professional career where most folks take themselves way to seriously and never, ever say what's on their mind, you are so refreshing! Checking this thread was the best thing I did today at lunch.

Webbing loop on end of yoke. I think that is actually a bow-tie of webbing, with a loop on each end.
Perfect - thanks. Do you ever use grommets when you make the loops? I checked out your process and wondered if the holes might fail more slowly with a grommet involved. ?
 
LOL, that is actually what I was pondering about 4 o'clock this morning. So, thanks for the heads up. I am actually in favor of an idea that utilizes riveting the plastic piece similar to your first picture to the boat and allows for webbing or cord/line to be used for the actual lacing versus the ring. You got those from Wenonah?

I did get them from Wenonah, but I wouldn’t recommend them as a solution. Notice that I haven’t removed the horrible rusty rectangular SS “rings” yet. I am hoping I can pull or cut them off cleanly, but stainless steel is a b*tch to cut. Hench my rusty procrastination.

I would use beefy P-clips, especially if your gunwale tie down is lacing in float bags, and webbing loops if those attachment points may also see cross-boat straps to secure a gear load. I like straps for gear, and poking a webbing strap through a P-clip isn’t happening.

BTW, these are the tiny Cooke Custom Sewing D-rings. On inspection they are in fact more dirty than rusty, and I would use those again to back up spray cover snap rivets, even with the teensy thread-the-needle aperture. That Cooke D-ring is all of ¼ inch wide.


Again, lots of those tie points are through the hull below the gunwale, backing up snap rivets for spray covers, and so perhaps less applicable to your needs.


Do you ever use grommets when you make the loops? I checked out your process and wondered if the holes might fail more slowly with a grommet involved. ?

No need to use grommets with webbing loops. A well seated nut or nylock with a small flat washer works just fine. If you burn a hole with a 20-penny nail (for a 3/16 inch pop rivet) the hole edges of the webbing are well melt-sealed, and it doesn’t take a big washer to spread the load.

I have had a stupid shop experiment in mind of years, but keep hoping someone else will do it first and save me the trouble.

I have most every kind of D-ring or attachment accessory on-hand in the shop, as well as old sections of wood, aluminum and vinyl gunwale. The test I envision is this:

Attach pad eyes, P-clips, webbing loops, Wenonahs clips, Cooke d-rings and etc to those sundry gunwale pieces and secure them on high. Take a 5 gallon (41 lb) or 10 gallon (83 lb) container, don a flying-shrapnel face shield and fill them with a garden hose until something – attachment, pop rivet, screw, gunwale – fails.

Now I wish I had not Goodwilled that weight bench and 300 lbs of plates; I could just add weight plates ‘till something fails and avoid the wet from the waist down bucket crashes to the floor.

I don’t think that test has ever been done, and I’d really like to know what fails when, and how. Somebody get going on that experiment dammit.
 
Mike - You are right, that would be a great test.

Wish I was closer so I could stop by with popcorn, a lawn chair and watch. :D
 
Pending the outcome of Mike's Ultimate Attachment Clip Stress Test, I'd like to suggest that there need not ever be much stress on attachment clips for float bag cages.

Simply . . . don't pull the bag cage lines too tight, just gently taut. And use non-stretchable line such as polypropylene.

Here's what will happen if you use stretchable nylon line. When waves splash over your bags or when it's raining, the nylon line will begin to sag and the bags will slightly deflate from the decrease in temperature. So your bags will be flopping somewhat loosely in saggy cage lines.

If you use non-stretchable line, installed gently taut when the bags are at maximum expected inflation (such as a hot day), that will be the maximum normal stress on the attachment clips. The line won't change tautness because of temperature or wetness, though the bags may deflate slightly due to those conditions.

There will rarely be significantly more tension on the lines than this. If your boat is upside down in the water, the the pressure on the lines/clips will be less. You would get more pressure on the lines/clips if the boat is upright with a lot of water inside, buoying up the bags. But that situation shouldn't happen very often or be of long duration when it does.

In short, I would use non-metal clips, install the line gently taut in the maximum expected bag inflation state, and not worry about it.
 
Can't wait. Get your trip on and spread some folly and foolishness. Lord knows these old geezers need more of it!

As for the installation of your float bags: what they said. I've never had aluminum gunnels and I fail at almost everything I do, so there's a good chance whatever I say will be the opposite of what you should do, which might be useful for a kind of process of elimination. So instead I'll repeat what's been said above. Many of these folks are for real serious boat scientists who grow their own plastics and fibers and crap and then fasten them together before hanging them from the ceiling with weights and water to see how well they adhere. They would certainly know.

I like the thought that you ought to make certain you really need float bags, as lots of folks taking long trips in canoes don't. But you seem to want to crash, in which case they will come in useful, especially if you're alone and swimming with your boat full of expensive gear above Virginia Falls. I also assume this means you'll be my Oregon contact when I decide to brave the put-in hike and explore canoe camping Chetco Gorge, which looks like a wowzer canoe trip and will probably involve a few crashes.

View attachment ZLOpRkSkXG3lYCMJQjp98nvABHEj7jNhvNewsAuQfnoUSUzZiWNe5ZJYVFn2NlbQlP9QoMwL4uez2UbhZA_NkVPizWE9cEbm46Ej

(P clip under vinyl gunnel installation as a natural extension of gunnels and boat.)

I like the part about p-clip under-gunnel installation. Unobtrusive and looks good from a helmet cam and, provided you install them close, as was also stated above, like 4 inches apart or so, will do a decent job keeping the bag in your boat when you crash. Don't use the little plastic loop thing you show in the OP because it introduces an unecessary additional screw (also stated above, I think). I like stiff parachute cord double strung down both sides and pulled crosswise real snug between p clips, which is pretty standard. (Some people think I use too much cord, but don't listen to them: lash those bags in--see below photo.) I don't like the full Mike Yee cage down the front of the bag, as it is so easy to get stuff caught up in it (especially when swimming agressively out of your boat above Virginia Falls). Feet and sunglasses and small children and such all caught up in a big tangle of cord appropriately called a CAGE, drifting toward the ugly. Also I nearly always have several dry bags with me because I'm a multi-day canoe tripping maniac and they are often lashed directly in front of my float bags and holding them in. But I also tie the front end of my bags directly to the hull in both the stern and bow and then use cam straps if necessary to fasten the open end tighter to the boat. This seems to work fine for me and I've never lost a bag or plastic doohickey or torn any cords.

Also note any screws holding your thwarts that may come in contact with your float bags will need to be addressed or they will tear a quick hole. Consider the sharp metal! Because legit, as stated above, that water will want to lift your bag up and out of the boat.

View attachment -RGpNHaEY92uaLP7xDY9IgHv9ye4HejvpSedsIZA8QsAnnGYOiPQnpsY9U08wLxcVaOb8eJC3EKVayMBD2qQ27zzZu-JctOnFWhI
(P clip under gunnel installation with partial bag lift as boat fills with water. Note orange duffel holding open end of float bag in place. There is also a center cam strap pulling the "cage" down lower.)

So yea, what they said, with the additional thought that it needs to look good, which in this case means natural and like an extension of the boat itself. Don't show up for a long solo trip into the wild looking all ghetto sporting your fuzzy crocs. Geez.
 
webbing loops if those attachment points may also see cross-boat straps to secure a gear load. I like straps for gear

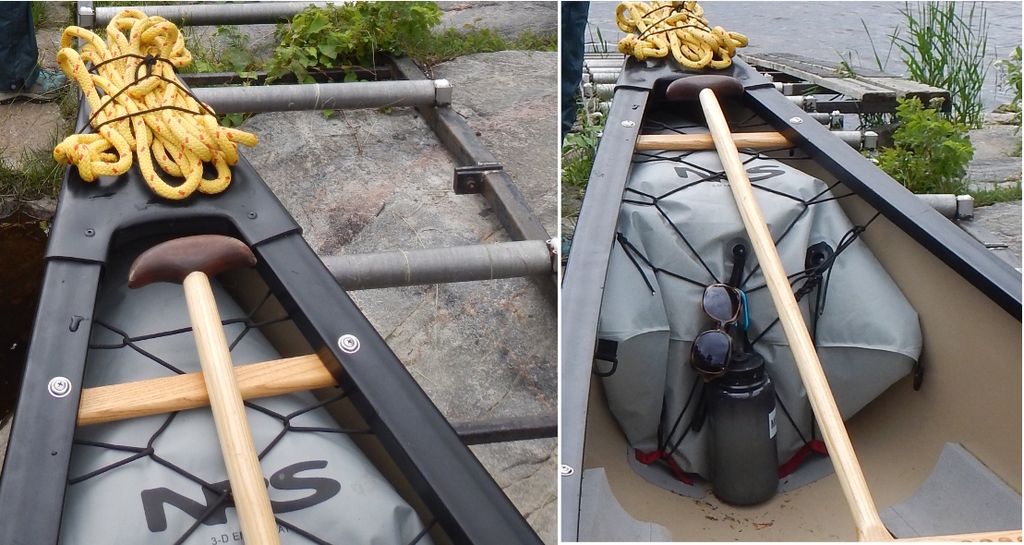
To be clear, I use straps through vinyl pad D-rings, Vynabonded or G/flexed to the bottom of the canoe, with a strap over the float bags and to keep gear held low and attached to the floor. Those are (mostly) the same D-ring pads that strap in float bags with less of a load.

Some multi-use canoes have ended up with lacing and vinyl pad D-rings to accommodate either small or large ends bags. The extra sets of D-ring pads (or two) are useful for securing sundry gear loads.

If you are thinking of taking float bags in and out depending on the trip and load, some system that laces, clips and straps into (and out of) place quickly and easily is beneficial. I do not like spending time bent over or on my knees futzing with boat outfitting at the launch. Let me git and go, away from syphilization quickly as possible if you please.

Still, I would prefer to take the float bags out when cartopping the canoe any distance, and not worry about cartopping deflated flapping wear, or over-expended in the sun bag bursts or ripped out D-rings. Bad, bad things can happen when a bag over expands in heat and sun.

Yeah. . . I have a high-volume low-pressure 12V float bag compressor in the truck and could easily inflate the bags at launch. One more dang thing to do.

In actually practice the only float bags I take out for travel are those most easily caged and uncaged. With other boats I do check and deflate/inflate the bags at every stop as temps and elevations change, but I know they really shouldn’t be up there for hundreds of freeway miles. Don’t be lazy like me.

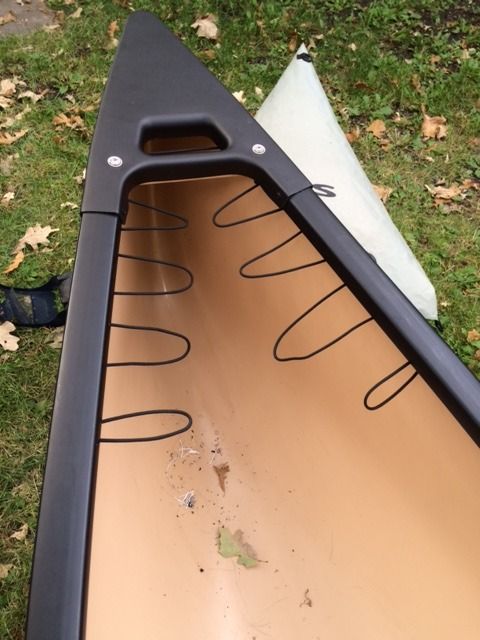
If you choose to be exceedingly lazy like me and leave some float bags in place, even for local trips, at least have a close look underneath at the stems, deck plates, carry handles and thwarts and eliminate any obvious puncture points. The best way to accomplish that inspection is set the canoe upside down and stick your head (and a flashlight) inside and have a looksee.

The naked end of a machine screw shank may be the worst abrasion/puncture culprit. Thread protectors are cheap insurance.

http://www.homedepot.com/p/Everbilt-10-Black-Rubber-Screw-Protectors-2-Piece-812788/204275995

Thread protectors are worth putting on every exposed machine screw end, even if there isn’t a float bag in the vicinity. Think puncturing or abrading dry bags and packs. Or gouging your hand or leg in a flop-into-the-hull self-rescue. Or, worse, an assisted rescue wth someone grabbing that raw shank end under the gunwale.

heck, think finger ring accidents. Some astronaut lost a finger that way jumping over a fence. Graphic photos warning:

http://ranchers.net/forum/viewtopic.php?t=38180

Machine screws in canoes should be properly sized, so there isn’t even an extra ¼ inch of shank protruding.

Washer, nylock, near flush; too many manufacturers skimp on that proper sizing.

Skwid, I’m wearing my fuzzy Crocs as I type, and had them on this morning when I went to the store for a newspaper.
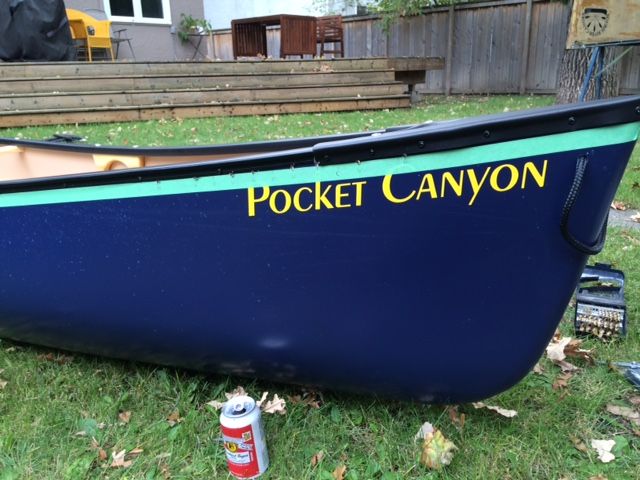
 
Mr. McCrea: As I recall you mentioning your highly refined sense of fashion in another thread, I'm sure you are sporting your fuzzy crocs. Comment meant for you...
 
Thank you all for the feedback - it sounds like the general consensus is the diminutive p-clip.

Next question - where to do I locate goods ones? I have ordered what I thought were good quality plastic bits online and what arrived in the mail was not what I was not something I was willing to rely on when the chips got down. A quick google search of "p-clip canoe" takes you on a journey across the pond to the UK. While I like international commerce, I'd like to spend the money closer to home. So please let me know the best place to order them and I'll get moving.

Once installed, the clips wont hide completely under the gunwale like the ones in Unlce_Skwids pictures, instead expecting something like Glenn's picture on the first page. The only danger there is to myself if I brush against them firmly in a rescue - but I've had bruises before and likely will again. As long as the drysuit remains intact, I'm fine. Keeping the float bags in place 99% of the time will reduce that likelihood.

And Mike, yes, I am lazy and the vast majority of what you describe is to some degree likely to happen. Add in the fact that I'm an asthmatic with no air compressor and that should leave you with an entertaining visual and a solid reason why I probably wont ever let all the air out of those bags... ever. I'll sort something out...

Uncle_Skwid:"But you seem to want to crash..." No, I don't want to crash, I'm a realist. :) I'm new at this and like to push boundaries just a bit here and there so the odds are not in my favor. I do tend to think the fun factor will be worth it though. Based on your pictures, I am several years (or a decade or two) behind you in experience and I'm not in that big a hurry to catch up. I'll drop you off at the put-in though and call the forest service if you don't show up on time. That's quite a canyon.

And fuzzy crocs huh? Like so?

78285-crocs-pink-crocs.jpg
 
Last edited:
I just drill through the boat under the gunwales. I've done it on my Royalex Nova Craft, Kevlar/Glass Souris River and now my T-Formex Esquif (all three vinyl gunwales). Rather than pay for the North Water or equivalent kit I just buy two lightweight D-Rings and some paracord. I install a run of loops that my lashing will attach to.

At the put-in I lace through the loops like a shoelace with a length of paracord and shove a mostly inflated bag in. I then bring the paracord through the first d-ring, around the crossing of the lacing up top, back down to the next d-ring then back to the loop where I started to form a 'W'. I start with a bowline and end with a trucker's hitch for tension. It laces up quite quickly.

I wish I had good pictures. When I finish outfitting my Pocket Canyon in spring I'll get some good shots of it with the bag installed. For now I just have photos from when I installed the loops. I'll also be adding lashing for a 35l Seal Line Pack or 40l duffel extending from the airbag lashing. Extra flotation!

Excuse the slightly deflated bag, we had been portaging and flatwater paddling up to this point:
Air%20Bag%20Lash_zpsccnjvhdx.jpg


Drilling holes in a brand new boat:
image0_zpsf1ejwyw6.jpg


Loops:
image1_zpsbdjms2ez.jpg
 
Do a search for "cable clamps". Most online hardware retailers sell them.

Again, make sure that hardware store type P-clips or cable clamps have a hole that will accommodate a 3/16 inch pop rivet. The holes in one’s I have found at Home Depot or Lowes are a bit too small, and they are kinda flimsy. I just compared a boat outfitting P-clip to a Home Depot P-clip; make that really flimsy.

I buy them from Blue Mountain Outfitters in Marysville PA, but that is a helluva drive from Orgeon. If you have a well stocked paddleshop nearby check there.

On-line Top Kayaker sells them in 100 count bags for $10. I have bought a lot of canoe outfitting parts and pieces from Top Kayaker and it is a quality company. I have not bought P-clip from them, and I am assuming that they are the beefier ones that use a 3/16 inch pop rivet. Maybe give them a call to verify; the owner Tom is always helpful on the phone.

http://topkayaker.com/index.php?main_page=product_info&cPath=2_133&products_id=577

It is best to drill the gunwale with the bit positioned at 90 degrees; the pop rivet will seat better that way, instead of going through an angled hole. The Prospector may be deep enough to do that, but most of my boats any drill I own is too long to position perpendicular to the flat bottom of an inwale, hence the use of a 90 degree drill attachment.

BTW, the easiest and most accurate way I have found the drill those holes is working with the canoe upside down from within (wear a headlamp). When installing a pop rivet the most important parts are to drill the hole perpendicular and to keep some downward pressure on the rivet gun while compressing the rivet. For me that is all much easier to do with the canoe upside down and me facing my work.

I mark each location with a piece of masking tape and Sharpie a drill dot in the exact center-inwale location for accuracy, rather than guesstimate where the center of the inwale is. Take the tape off before seating the rivet, a step I overlook occasionally.

If you look at the P-clip and aluminum gunwale photo you’ll see that there isn’t a lot of void depth in the inwale to seat the pop rivet shank. You will probably want 3/16 x ¼ (5mm x 6mm) aluminum rivets which fortunately are easy to find.

Love those Crocs, mine are boring black and fuzzy on the inside. I would wear those to the country store just for craps and giggles.
 
Thanks Mike, exactly what I needed. Topkayaker didn't have them in stock per their website but Blue Mountain Outfitters has an online store so I ordered through them. Their packages come with the rivets which reduces the guesswork on whether I picked up the right ones too.

I'll check the drill vs angle issue shortly and pick up the 90 degree adapter if needed (which is most likely needed).

Pictures in a few weeks when I have the chance to start drilling holes.

Thank you all for your input!
 
Blue Mountain Outfitters has an online store so I ordered through them. Their packages come with the rivets which reduces the guesswork on whether I picked up the right ones too.

There are a couple of lazy-susan bins of small outfitting parts and pieces at the end of BMO’s checkout counter that should not be missed by folks who can brick and mortar visit them in that old train station depot. There are dohickies in those bins I didn’t even know existed and yet have found perfect and intended use for.

I did not know BMO had an on-line store. They are only an hour away for me and the retail store is an absolute freaking wonderland of paddling gear. I know those are the beefier 3/16 hole “outfitting” P-clips, but I always toss the rivets back in the drawer since I have plenty sized for whatever application. Presumably those rivets will fit for your under aluminum inwale use.

If you can not press the pop rivet flange tight against the bottom of the inwale before squeezing the rivet gun they are too long. Pop rivets need to be sized just so, but they are cheap and easy to find.

(Apologies if you are tool and material handy and I am belaboring the obvious)


I'll check the drill vs angle issue shortly and pick up the 90 degree adapter if needed (which is most likely needed).

I’ll be curious about that. Once you chuck in a bit (which is actually a “drill”; words are important Glenn, but saying put a drill in a drill sounds confusing) I have my doubts that it will fit perpendicular to the flat underside edge of the inwale, even on a Prospector hull.

I think the only canoe on which I could drill all of the holes perpendicular was with a 20 foot freighter that was 16 inches deep at center and higher in the stems.


If you do not already have a pop rivet tool the same Sears source as the 90 degree adaptor is not a bad hand tool choice:

http://www.sears.com/a-e-s-industri...d=salefolks&prdNo=10&blockNo=10&blockType=G10

That qualifies as a Sears hand tool. I have worn out the teeth on two (and counting) over 20 years constant use and just keep taking it back for replacement.

Pictures in a few weeks when I have the chance to start drilling holes.

Yes please.
 
For future readers of this thread, you can avoid all this float bag string theory by simply buying (or making) all your tripping canoes with slotted inwales. It is mindlessly simple to string (and remove) line through the slots to create a bag cage, which is completed by V lines going down to the small D ring visible on the floor of the hull.

Inwale slots are unsurpassed for an infinitude of attachment possibilities for gear, straps, lines, doohickeys, thingamabobs, et alia, ad infinitum. The two small loops of yellow line are where I clip on my WindPaddle sail in 5 seconds.

ALWAYS get tripping canoes with wooden gunwales and slotted inwales. (You might even consider sanding and oiling or varnishing them once in a while so they look better in photos.)


Hop6wWrLZeo9c2SrSk7MHAhFipSM9gaBzhB9WsoKa8kL8poZCd2xrgVzzTfSCVFLR95TMm2xKphn4Ea9rGCbX6O9NLxsNuZQMIDEG8CQEi2rR-2S4FAnALQ2yNsF2zSqEps9ParvuTxzUExN5jLyqG-ohKYjp2C9hrsn1cXxKyN_iXelVzoCL-Z8k3WIxKiUgzmgpj9ejyuf5kqNx2_HfUAoxs66prn9a_KlJvNHUrHTJm66aWrTtThx5tDPgyvjhK-NNwonadxtGaexBBF0U5qBmtkiKlepQdQ83LpnpY3smMIESGLcFCuRoOafgJTOZywjf9FEmrA15Pm_fJffjv2f_xuHPip_QYjgENvRTyrqfSZIXqhnd5njHjSVbAHrZA3yjOfAJrI5JhJZWTUs9_DOccFbsEVOnzHSufnG45q4Kylh5LvT-mt6H7yKmALt2toaZkBk55wmnxrs-QQI6dvYtNa6-3StoNu75ZhOH5RklGWnGEAXlIZGGG9HRdty4YQ-WVcIRg5OmRmhpQKhF6lMXP0Qw4f1sITmhBXVYyYyj1NiWyxFMC4O4HMzcKQQ-a9IhYhSQPJa38bN3nfL8BgKaNepoWxeUmKqGkA1Z4KWqVt64D9u=w695-h926-no
 
For future readers of this thread, you can avoid all this float bag string theory by simply buying (or making) all your tripping canoes with slotted inwales.

ALWAYS get tripping canoes with wooden gunwales and slotted inwales. (You might even consider sanding and oiling or varnishing them once in a while so they look better in photos.)


Hop6wWrLZeo9c2SrSk7MHAhFipSM9gaBzhB9WsoKa8kL8poZCd2xrgVzzTfSCVFLR95TMm2xKphn4Ea9rGCbX6O9NLxsNuZQMIDEG8CQEi2rR-2S4FAnALQ2yNsF2zSqEps9ParvuTxzUExN5jLyqG-ohKYjp2C9hrsn1cXxKyN_iXelVzoCL-Z8k3WIxKiUgzmgpj9ejyuf5kqNx2_HfUAoxs66prn9a_KlJvNHUrHTJm66aWrTtThx5tDPgyvjhK-NNwonadxtGaexBBF0U5qBmtkiKlepQdQ83LpnpY3smMIESGLcFCuRoOafgJTOZywjf9FEmrA15Pm_fJffjv2f_xuHPip_QYjgENvRTyrqfSZIXqhnd5njHjSVbAHrZA3yjOfAJrI5JhJZWTUs9_DOccFbsEVOnzHSufnG45q4Kylh5LvT-mt6H7yKmALt2toaZkBk55wmnxrs-QQI6dvYtNa6-3StoNu75ZhOH5RklGWnGEAXlIZGGG9HRdty4YQ-WVcIRg5OmRmhpQKhF6lMXP0Qw4f1sITmhBXVYyYyj1NiWyxFMC4O4HMzcKQQ-a9IhYhSQPJa38bN3nfL8BgKaNepoWxeUmKqGkA1Z4KWqVt64D9u=w695-h926-no

Dang Glenn, at least wipe some oil on those wood gunwales. Be sure to take a cotton swab of oil to the insides of the slots. That is open grain, so it will drink in oil and you may need multiple coats inside each slot. Otherwise it’s eventually going to look like the other gunwale rotted hulls hiding under your porch.

Alternatively you can drop that canoe off at my place and I’ll oil the gunwales and slots for you. I should have it finished by 2019. 2020 at the latest, including some test paddling trips.

Slotted wood inwales are wonderful for tie downs and straps. If you can provide protected storage and routine maintenance.
 
After 40 years I've come to detest oil for canoe woodwork. I now much prefer a wipe-on varnish, which lasts much longer than oil and looks better to me, and is much easier to apply and re-apply than full brush-on varnish. I remain oiled to the SRT in that picture only because it has always been treated with nutmeg stain Watco, and I don't know of an easy way to refresh the nutmeg look with wipe-on varnish.

This maintenance crapola is actually an argument for NEVER having wood gunwales on a tripping canoe, or any bloody canoe. So call me inconsistent, or conflicted; just don't call me Sue.

Now that FartherWest seems to be in the bag, I ask the CTN braintrust how one might effectively and aesthetically attach bag cage lines to the carbon/kevlar fabric over foam infused rails of the boats I'm now looking at.

infused_flashfire_long_view-450x600-crop-u4572.jpg


f1b4eb_7b4e616cabfd49b7a35bc02862b78329.jpg

You could have a length of rope/cord running the length of the gunnels and say every 4 to 6 inches, have a little tab of Kevlar cloth epoxied to the hull overtop the rope/cord so to form somewhat a dasychain!!
 
Back
Top