• Happy Marine Mammal Rescue Day! 🐳🐬🦭🦦

Solo expedition build

And now for that seat which is finally coming together.

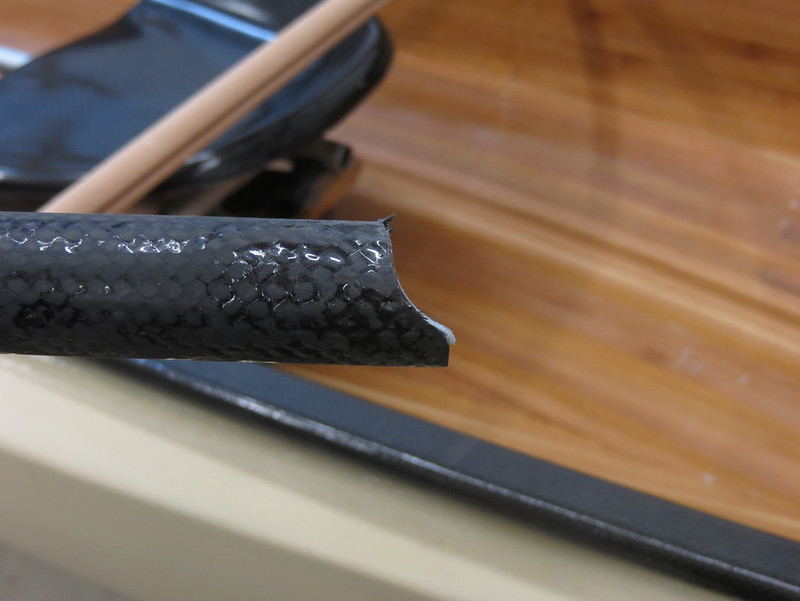
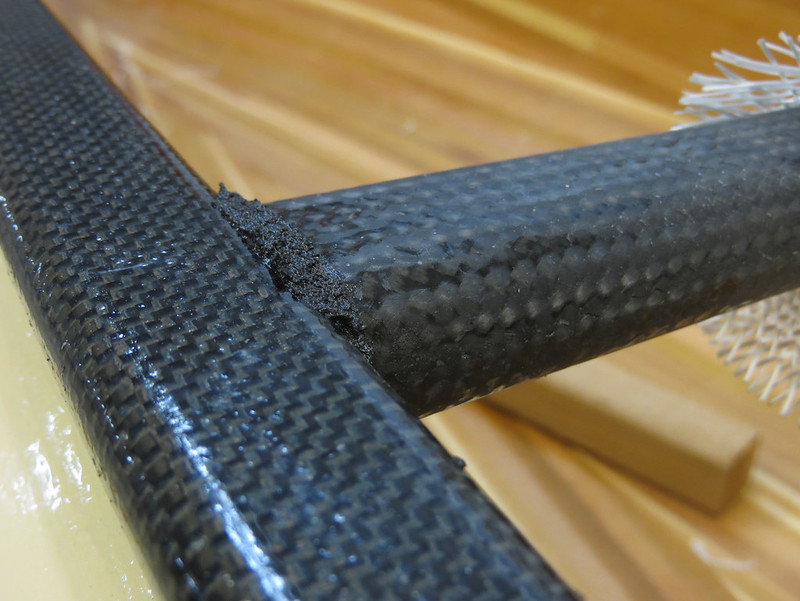
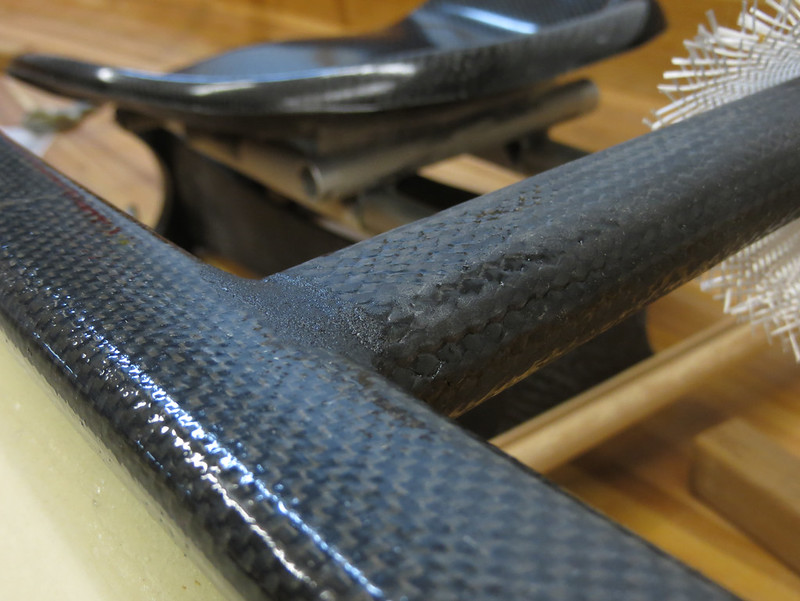
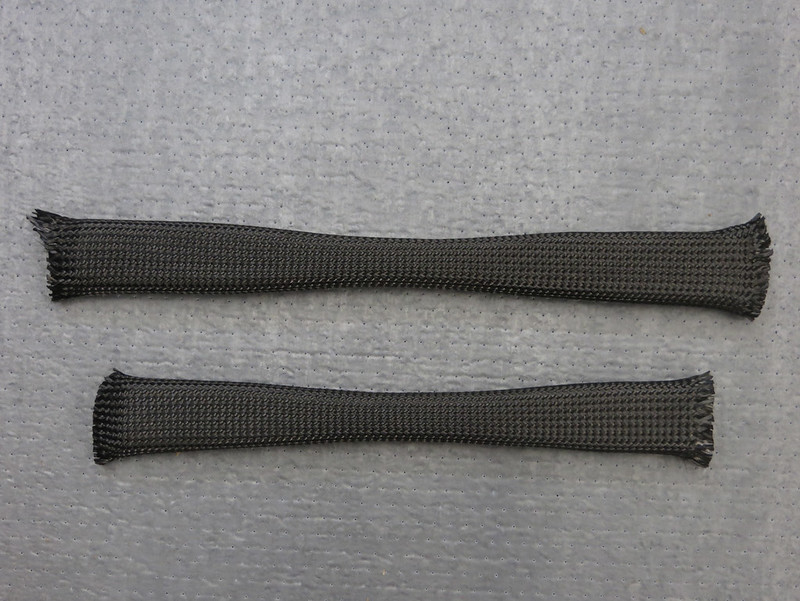
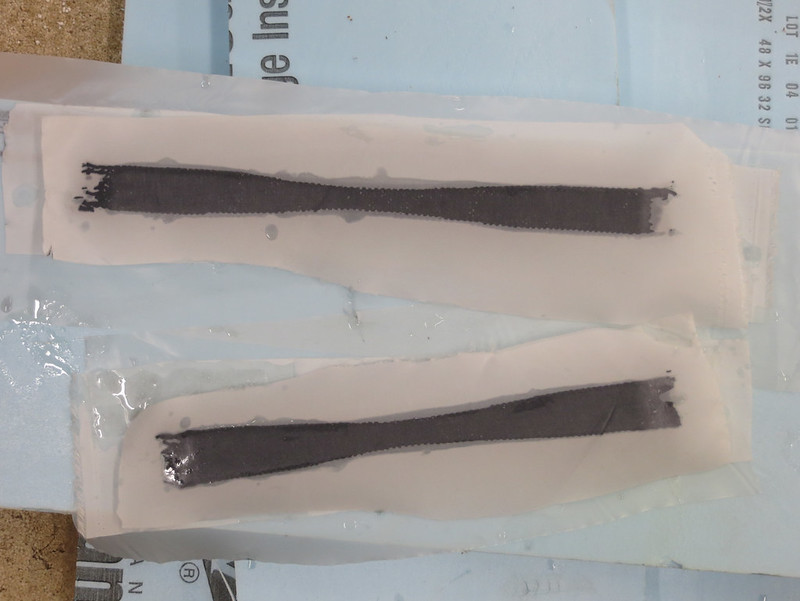
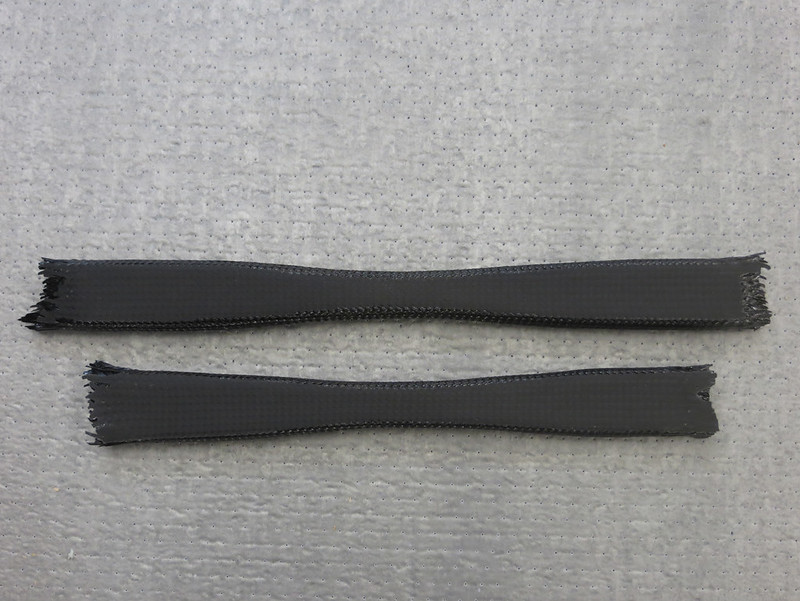
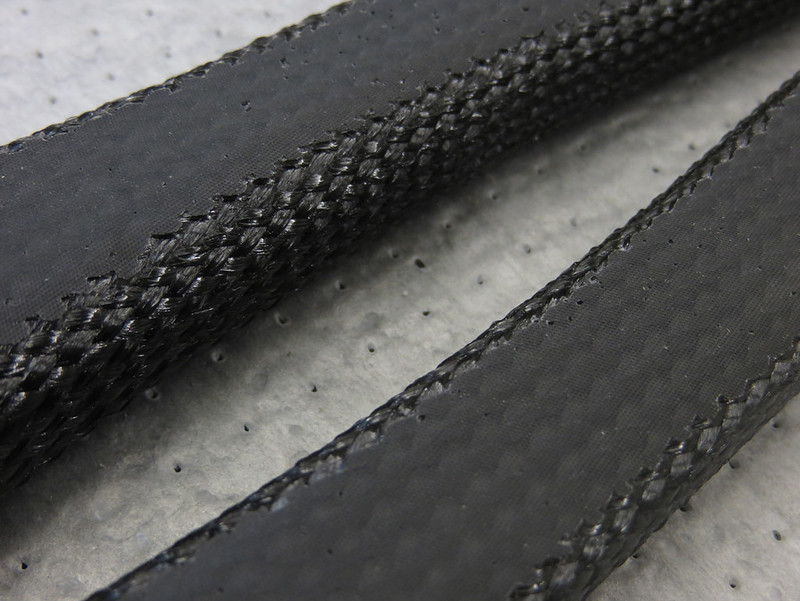
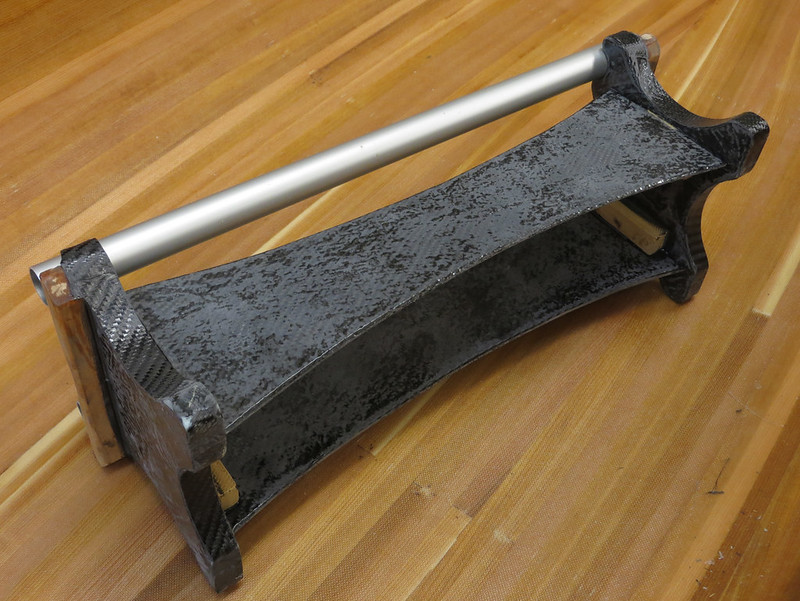
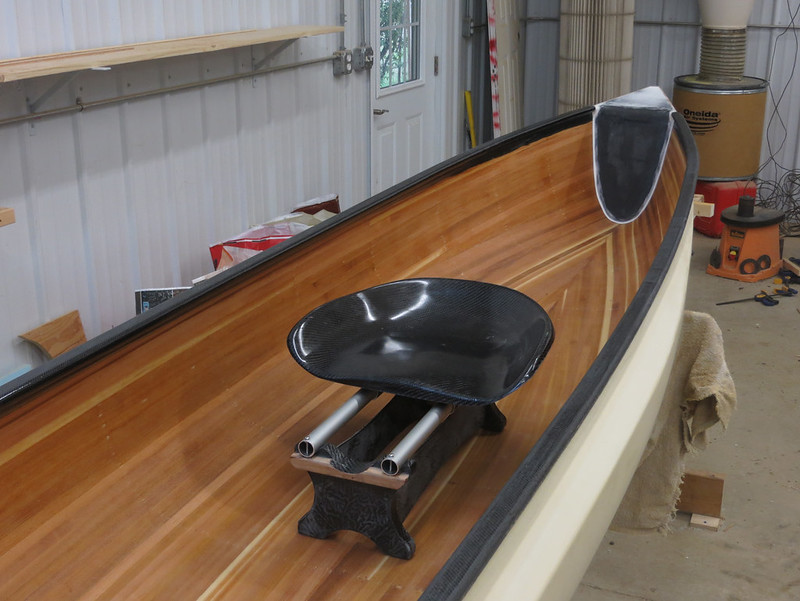
Here's the pedestal itself. The two end pieces are 3/4" foam covered with carbon and the webs are 1/4" carboned foam. I added some small wood blocks so I'd have something to screw into and for backers to attach the webs to the ends. The aluminum tubing is 1"

20150510_008 by Alan, on Flickr

20150510_009 by Alan, on Flickr

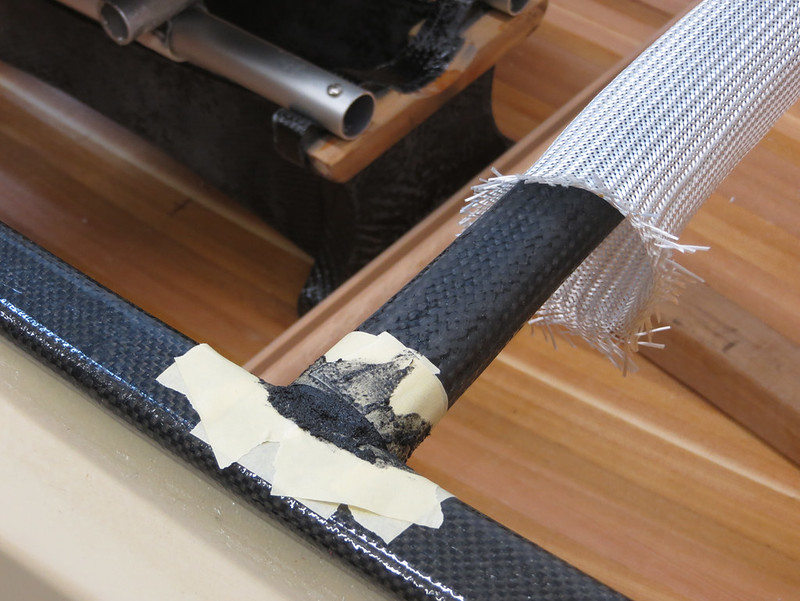
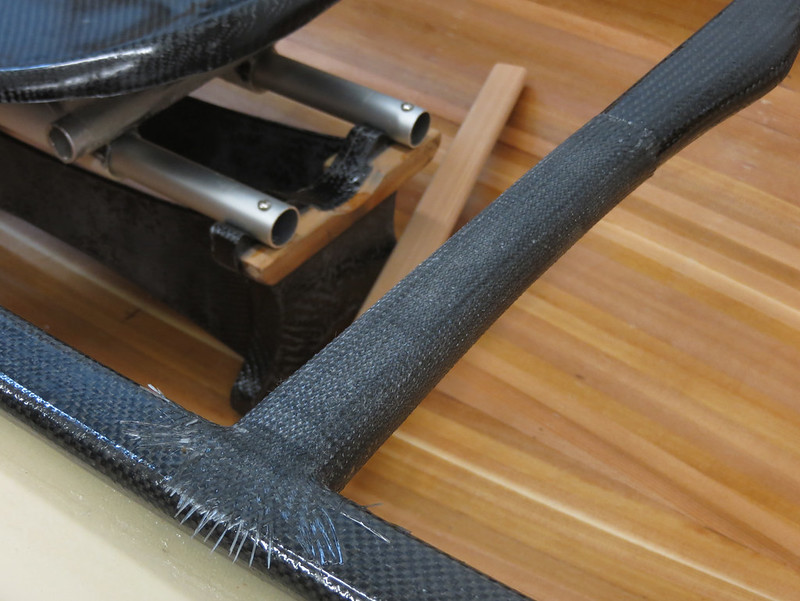
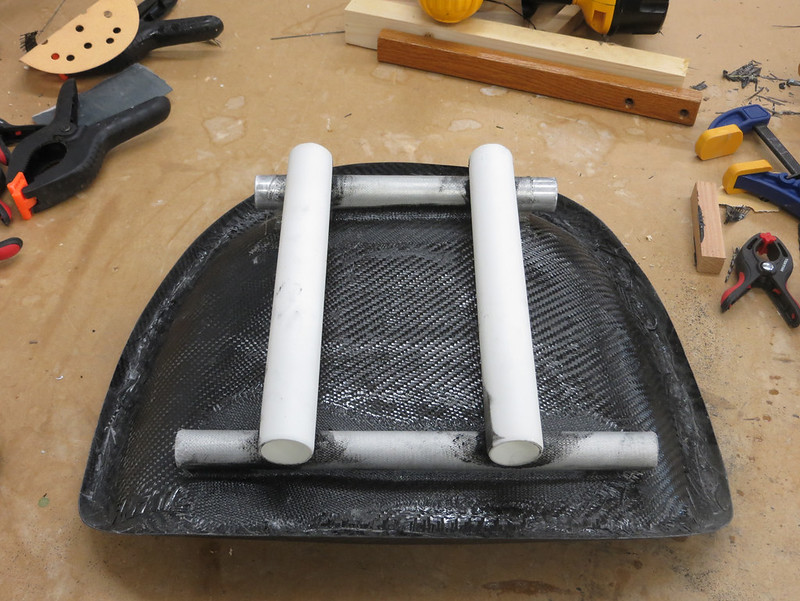
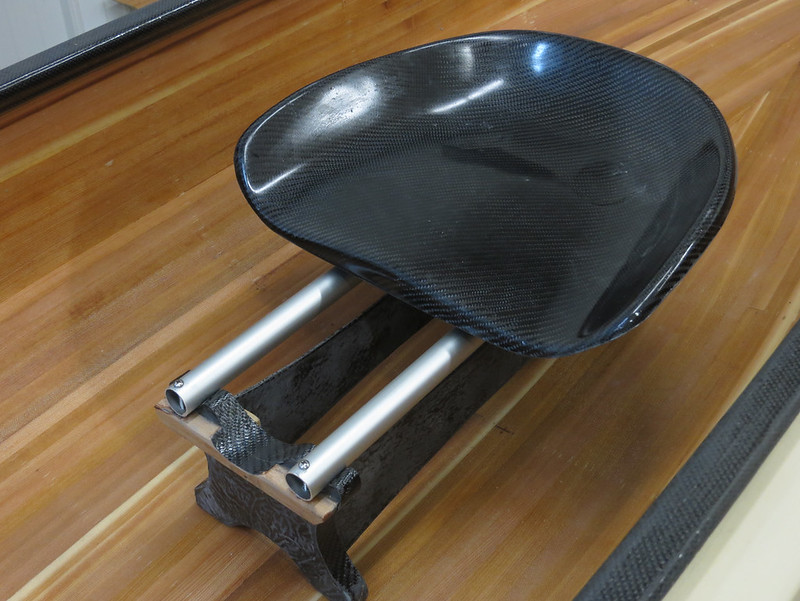
This is the bottom of the carbon seat. The white tubes that will slide over the tubes on the pedestal are 1 1/4" PVC from the hardware store (meant for bathroom vanity drains). I've used this on the last few sliders I've done and it works great. Perfect fit over the 1" aluminum and it's thin walled so light weight.

20150510_010 by Alan, on Flickr

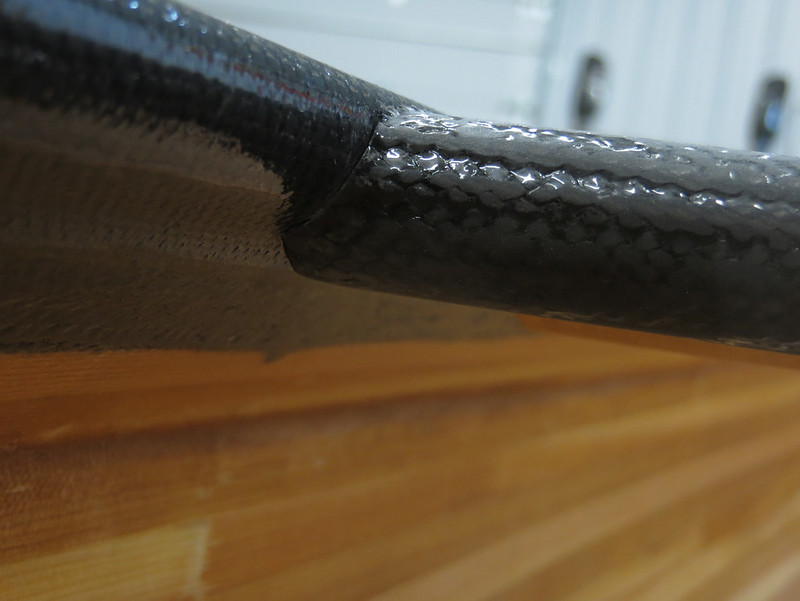
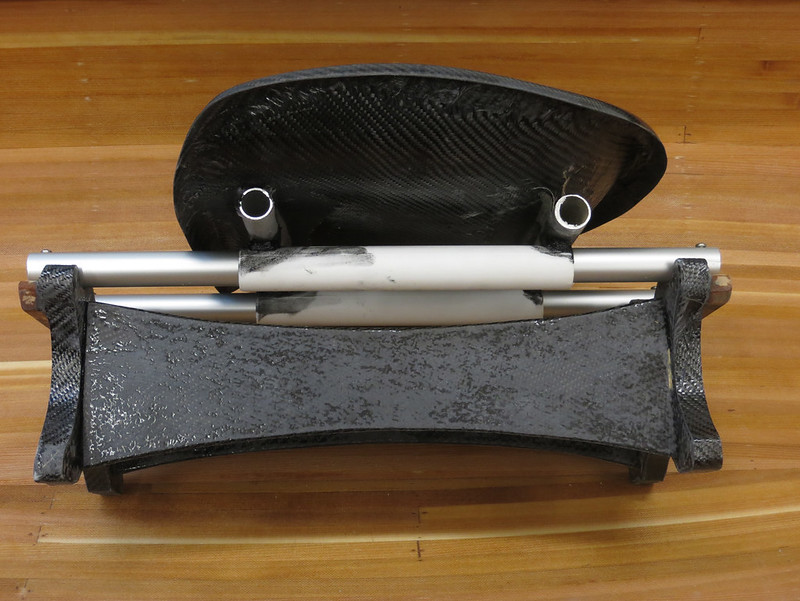
Adding the tubes to the seat is hard. How to hold them in place while you fasten them? The tubes that slide over the pedestal must be aligned perfectly so it doesn't bind. I've had good luck using superglue gel. Mark where the pieces go, add a dab of gel, set the tubes in place, and wait for it to setup. The superglue will hold everything in place while you add a thickened epoxy fillet and then fiberglass. Works great.

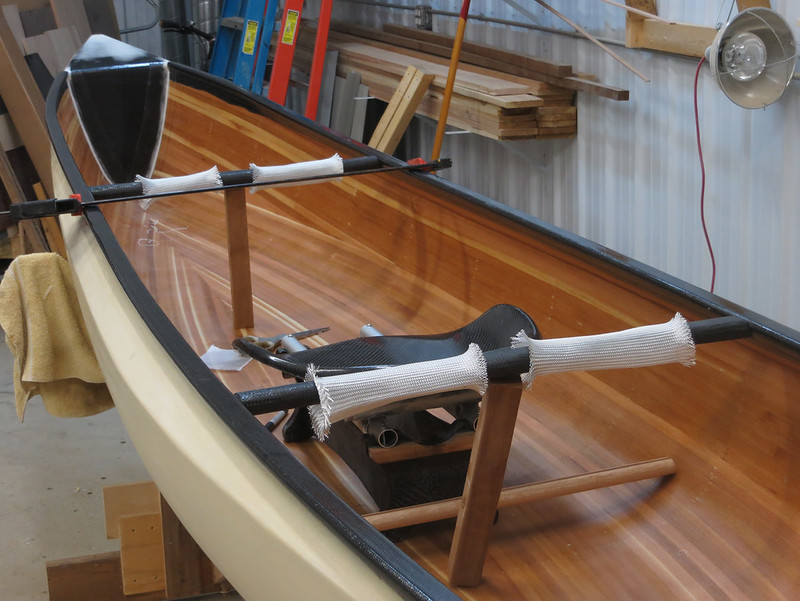
Side view of the whole assembly:

20150510_007 by Alan, on Flickr

Forward position:

20150510_003 by Alan, on Flickr

Rear most position:

20150510_004 by Alan, on Flickr

20150510_005 by Alan, on Flickr

20150510_006 by Alan, on Flickr

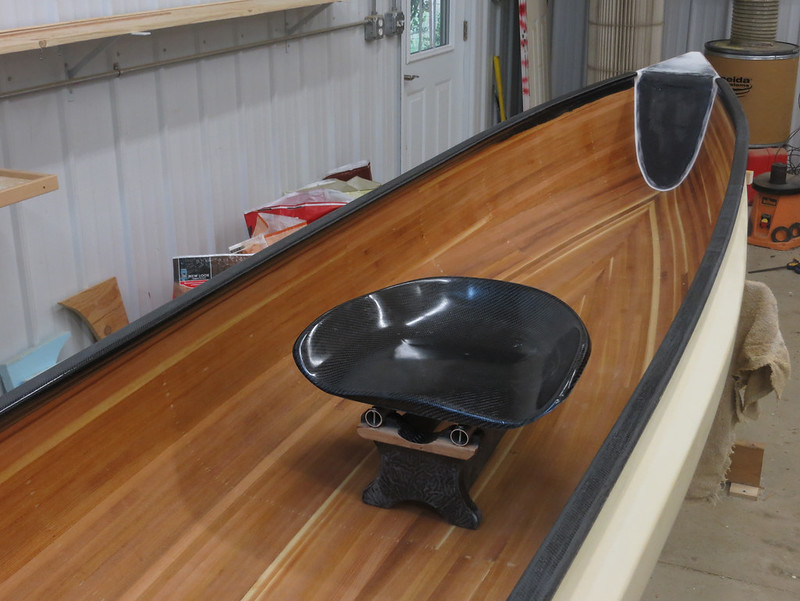
I've got 7" of travel. I'll mount the seat so all the way forward will be my standard seating position, allowing me to pull my legs back for comfort without the pedestal interfering. I'll slide it back when I want to drop down and kneel or if I need to adjust trim on the fly.

It's not a thing of beauty but I think it will get the job done. The whole thing, seat included, came it at exactly 2.5 pounds. I was hoping for under 2 pounds but I'll take it. If I remember correctly the cane seats (ash) I used on my last build were 2 pounds each for just the seat.

Carbon tubing instead of aluminum would have lightened it up but I didn't have the best luck when I tried making my own.

I haven't decided if I'll paint the pedestal to match the outside of the hull or leave it plain.

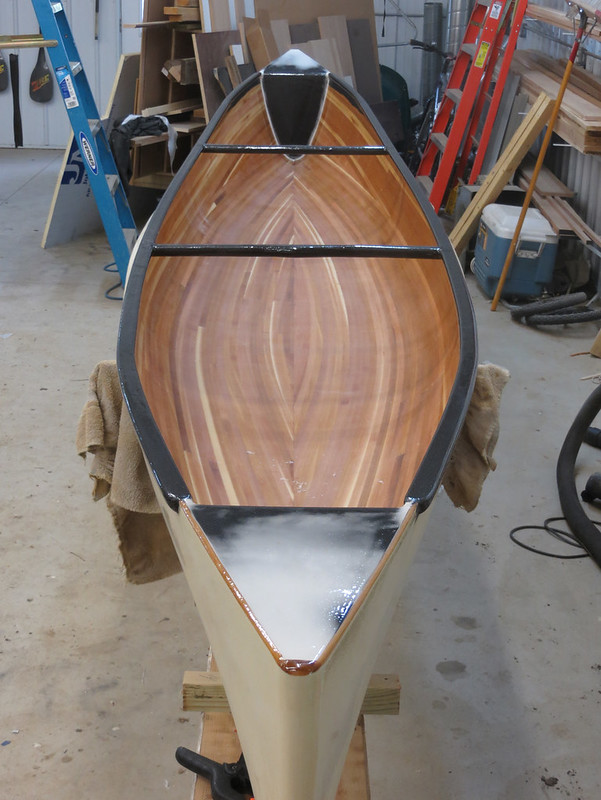
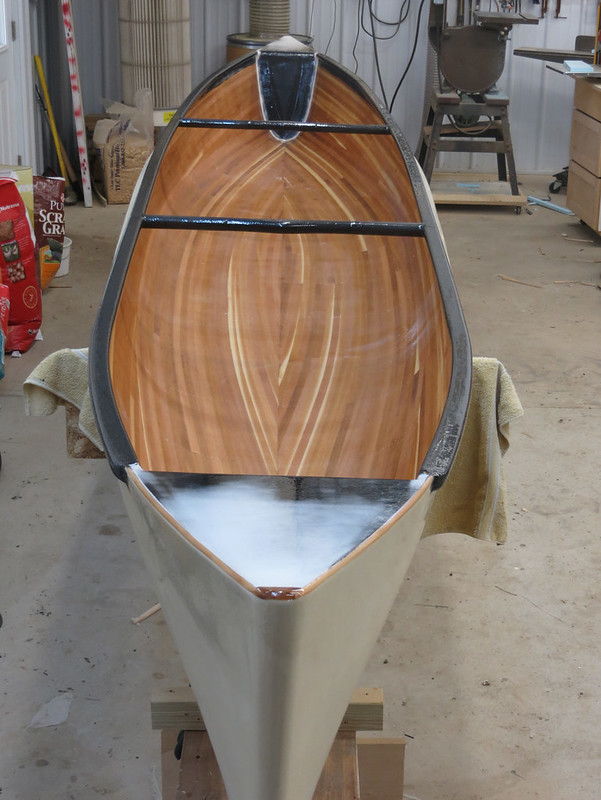
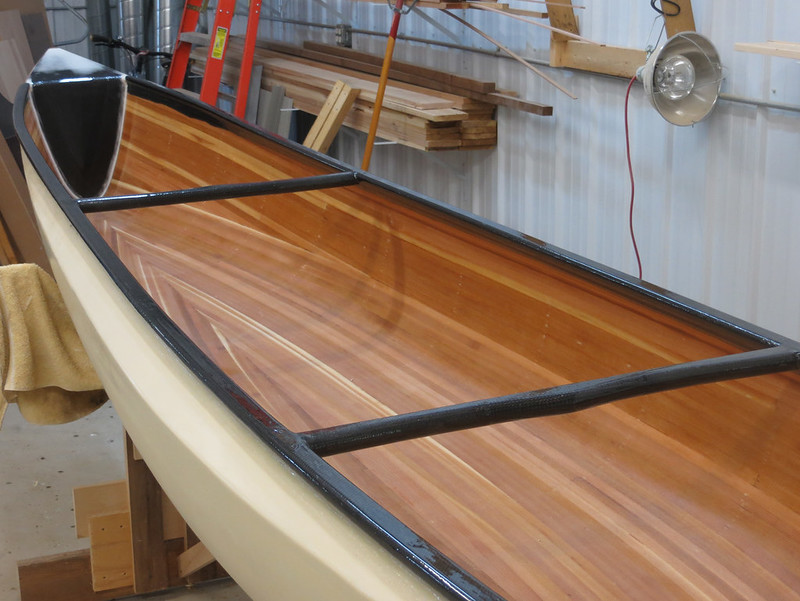
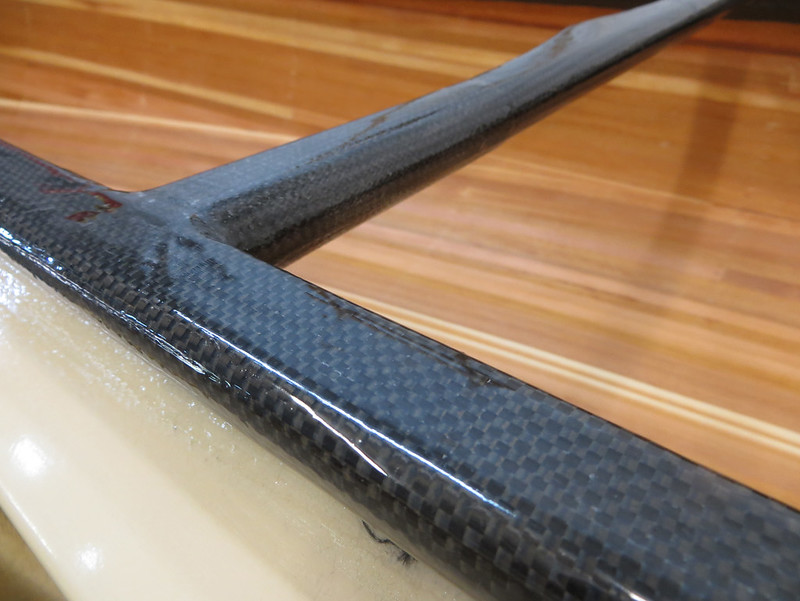
Tomorrow I hope to add some fiberglass tape where the front of the float tanks meet the hull and maybe fiberglass tape over the gunwales if I get really ambitious.

Alan
 
Wow, I'm impressed!!

Maybe one day I will take the time to build some thing like that, a canoe that is!

I have quite a few ideas.... But I don't know if I'm smart enough to actually design some thing that would work...lol
 
Looks Great Alan !
Compact, plenty of adjustment !
I think you will like it !

I'd vote not to paint it. Looks great the way it is !
Plus IF you need to make repairs, the paint won't be a problem.

Jim
 
You know Alan, we only want the best for you. If we didn't spur you on, who would? Like Mem said, glad to see you back at it.

That is one fancy arse seat you've got there. Wow. I'm impressed with the design. It should work like a charm, and give you all the functionality you need.

Did I miss you saying how you will be fastening it to the hull? How did you determine your final seat height?

I think I would just clear coat all of it, and be done. The carbon looks really nice against the wood.

Thanks for taking the time to post and show us all your excellent work.

Momentum
 
That is one fancy arse seat you've got there. Wow. I'm impressed with the design. It should work like a charm, and give you all the functionality you need.

Did I miss you saying how you will be fastening it to the hull? How did you determine your final seat height?

The 4 legs will be fiberglassed to the hull. I determined the height when I test paddled it a little over a month ago. I had a cane seat laying around so I set it on different thicknesses to foam to see how it felt. 8" felt pretty good but a little squirrely. Fine for flattish water but probably not what I want for rougher stuff. 6 1/2" felt very stable so I compromised at around 7".

Been making some more progress. The final layer of fiberglass is on the gunwales and the float tanks are fiberglassed around all the edges as well. Just need to fill the weave and sand.

Tonight I bit the bullet and decided it was time to install the thwarts. They're being tacked into place with thickened epoxy now and after that's setup I'll add a fillet around the edges where they contact the gunwale and finally wet out the fiberglass sleeves to tie it all together. They're a single layer of 18oz (or something close to that) carbon sleeving over XPS foam. They're incredibly rigid and weigh 3oz. each.

I really didn't know how I was going to get a decent fit against the gunwale profile but a 1" tube in the spindle sander made quick and easy work of it. You can see it's slightly below the level of the gunwale in the pic. After I did some more sanding to get it flush the fit wasn't quite so perfect but still good enough.

20150514_002 by Alan, on Flickr

20150514_001 by Alan, on Flickr

Everything being tenuously held in place while the epoxy sets. As soon as I finish this post I need to go check on it to be sure nothing has fallen off or out of place.

20150514_003 by Alan, on Flickr

If I was thinking ahead I would have already made the grab handles for bow and stern but I didn't so I'll have to make those soon and install later. Getting closer.

Alan
 
When I was home for lunch today I added thickened epoxy to the thwart/gunwale junctions to fill in any gaps and to give the fiberglass that would be added later a softer turn to follow. First I taped it to keep the edges neat and then thickened some epoxy with wood dust and blackened it with graphite powder.

After slathering it on:

20150515_001 by Alan, on Flickr

After peeling the tape off I had a nice edge but the epoxy is still very "lumpy". It's so soft that trying to make it nicer would only make things worse so I left it this way and went back to work after making myself promise to run back home in a few hours and touch it up.

20150515_002 by Alan, on Flickr

And amazingly enough I remembered! By 4:00 the epoxy was setting up and it had the consistency of sticky clay, making it very easy to work with and mold into shape. A few minutes with a gloved hand left me nice fillets in the corners.

20150515_003 by Alan, on Flickr

And by the time the sun went down this evening and I came inside it was time to wet out the 10 oz. fiberglass sleeves that will tie it all together:

20150515_004 by Alan, on Flickr

Add a fill coat to everything in the morning, then play outside all day, and back to work in the evening if I have any energy left.

Alan
 
All the fill coats on the gunwales are done. They're all pretty and shiny now. Looks great! One, possibly two, more coats to go on the fiberglass on the thwarts. Cut out and carboned the grab handles tonight.

Foam again. Cut out on the bandsaw, evened it out with sandpaper by hand, and then through the router to round over the edges. Such easy stuff to work with.

20150516_001 by Alan, on Flickr

Heavy weight carbon sleeving over the top. Something like 19oz/yard. This stuff is the coolest. It's woven at 45 degree angles like a chinese finger trap. Push the ends of the tube together and it expands. Pull them apart and it contracts and conforms perfectly to the surface. Soaks up resin like a sponge but still very stiff and light when cured.

20150516_002 by Alan, on Flickr

I'm skipping the vacuum bag, which I used on the thwarts. With the thwarts the bag bunched the cloth a little as it was pulling tight and left me with some extra sanding. Instead I just place peel ply on the tops and bottoms. It won't do anything for the sides but at least the top and bottom will (hopefully) have a filled weave and it will save me some sanding time. And hopefully the cloth will stay tight to the foam until the epoxy sets. I'll find out in the morning.

20150516_003 by Alan, on Flickr

Alan
 
Pretty awesome "ride" your building Alan. I hope to see it in lots of pictures in your TR after the big adventure. Seeing it go from raw materials in the workshop to some iconic scenery settings will be great. Build on, you Canoe Sexual. Dave
 
Last edited:
Love that carbon !
Anxious to stroke my hands across her lines ! :eek:

Jim
 
So, you have what could be a state of the art stripper. You have almost eliminated mechanical fasteners. We are in the latter half of May now, your trip is looming in the not so distant future and I am sure you are thinking about it as well as finishing the boat and getting seat time. No time to design and build a new boat for sure.

Have you given any thought to possible field repairs? If a joint were to pop? Once you point downriver there isn't anything out there until you get to the village 200km away. There will be others out there, but mostly it is just trees, water, wildlife and lots and lots of granite. I'm a worry wart, like to plan. In the past we have taken a fibreglass repair kit and used it to fix the boat. Most likely nothing will happen...
 
Last edited:
Have you given any thought to possible field repairs? If a joint were to pop? Once you point downriver there isn't anything out there until you get to the village 200km away. There will be others out there, but mostly it is just trees, water, wildlife and lots and lots of granite. I'm a worry wart, like to plan. In the past we have taken a fibreglass repair kit and used it to fix the boat. Most likely nothing will happen...

I was thinking the same thing as Myhun09. I'm sure you do a solid job but crap happens.
 
Repair kits are a must ! I purchased a kit, that had a super fast setting hardener. TOO fast ! After 15 seconds of mixing in a cup, you had about 10 seconds to apply before it kicked over ! So either make up your own, or at least test what you buy !

A couple of marked cups with some cloth, and a fairly fast setting epoxy, would be good for starters.

Jim
 
I always bring a repair kit but thankfully haven't needed it yet. I normally have fiberglass but after working with carbon and seeing it's really not any more difficult than working with fiberglass, but much stronger, I'll likely bring it instead. That would allow me to put something like a broken thwart/gunwale/paddle shaft back together with something close to full strength rather than fiberglass which would put me in "limp-in mode" (car repair jargon). A little fiberglass for lighter duty work will probably come too.

I've been thinking about what to bring for resin and how to store it and the best idea I've come up with is syringes. Surely they make syringes with removable handles (is that the right terminology?) and a screw on cap which would go a long way towards eliminating premature evacuation of the syringe in the pack. Multiple syringes with resin and fast and slow hardener would mean I could measure out exact amounts and mix and match the hardeners to get any working time desired. I normally bring the typical hardware store epoxy with the double piston syringe but I don't have a terrible lot of confidence that when I actually need it that it will work as designed or, if there's any left when I'm done, that it won't all leak out or glue the cap in place.

Alan
 
Alan, what you want to look for is a luer lock cap or stopcock. That is the the thread pattern for a syringe. Ask someone in the medical or vet field you know. I could mail you some if you don't have any luck. They're suprisingly hard to come by, but nowhere near as hard as getting an actual needle for a syringe which works great for sucking pesky air bubbles out of a laminate.
 
Alan, the Theisen's farm store near me has all kinds of syringes and stuff. Doe you have a Farm / Fleet store near by?
 
Grab handles look to have turned out well. The cloth stayed stuck to the foam and the peel ply did its job. Fully filled weave on top and bottom. After a couple light fill coats they were nice and glossy. Still a few more coats to go for the sides.

20150517_001 by Alan, on Flickr

20150517_002 by Alan, on Flickr

Been a while since I've shown any pictures of the whole boat itself.

From the stern:

20150517_003 by Alan, on Flickr

From the bow:

20150517_005 by Alan, on Flickr

I think she looks "hippier" in pictures than in real life. Plenty of topside volume though. Even though she looks fat you can see the shear line in the center, especially noticeable in the stern view, is pretty paddler friendly.

The float tanks will be colored the match the outside of the hull. I think they would have looked great left in black carbon but having a sealed chamber, that may also double as storage, with a big flat black surface to suck up heat bugs me too much.

A closer look at the gunwales and thwarts, which will be sanded down, yet again, in a couple days in preparation for the final coat.

20150517_004 by Alan, on Flickr

20150517_006 by Alan, on Flickr

After the pictures were taken I epoxied the seat pedestal in place and after that had set up added a fillet where the feet contact the hull. I'll glass it in tomorrow. By popular demand I left it black. I think that was a good idea.

Alan
 
The more I look at this the more I think I like that narrow band of cedar around the perimeter of the tank. The original plan was to add a black edge to continue the line of the gunwales but maybe I'll mask that edge off when coloring the tanks and leave it as is.

20150517_005 by Alan, on Flickr

Alan
 
Back
Top