• Happy Birthday, Simon Fraser (1776-1862)! 🧭🏞 4️⃣9️⃣

My first Build

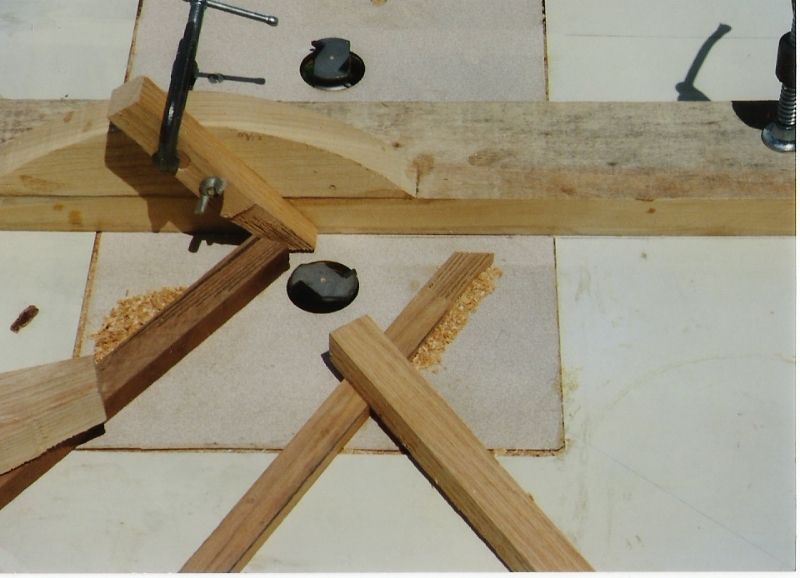
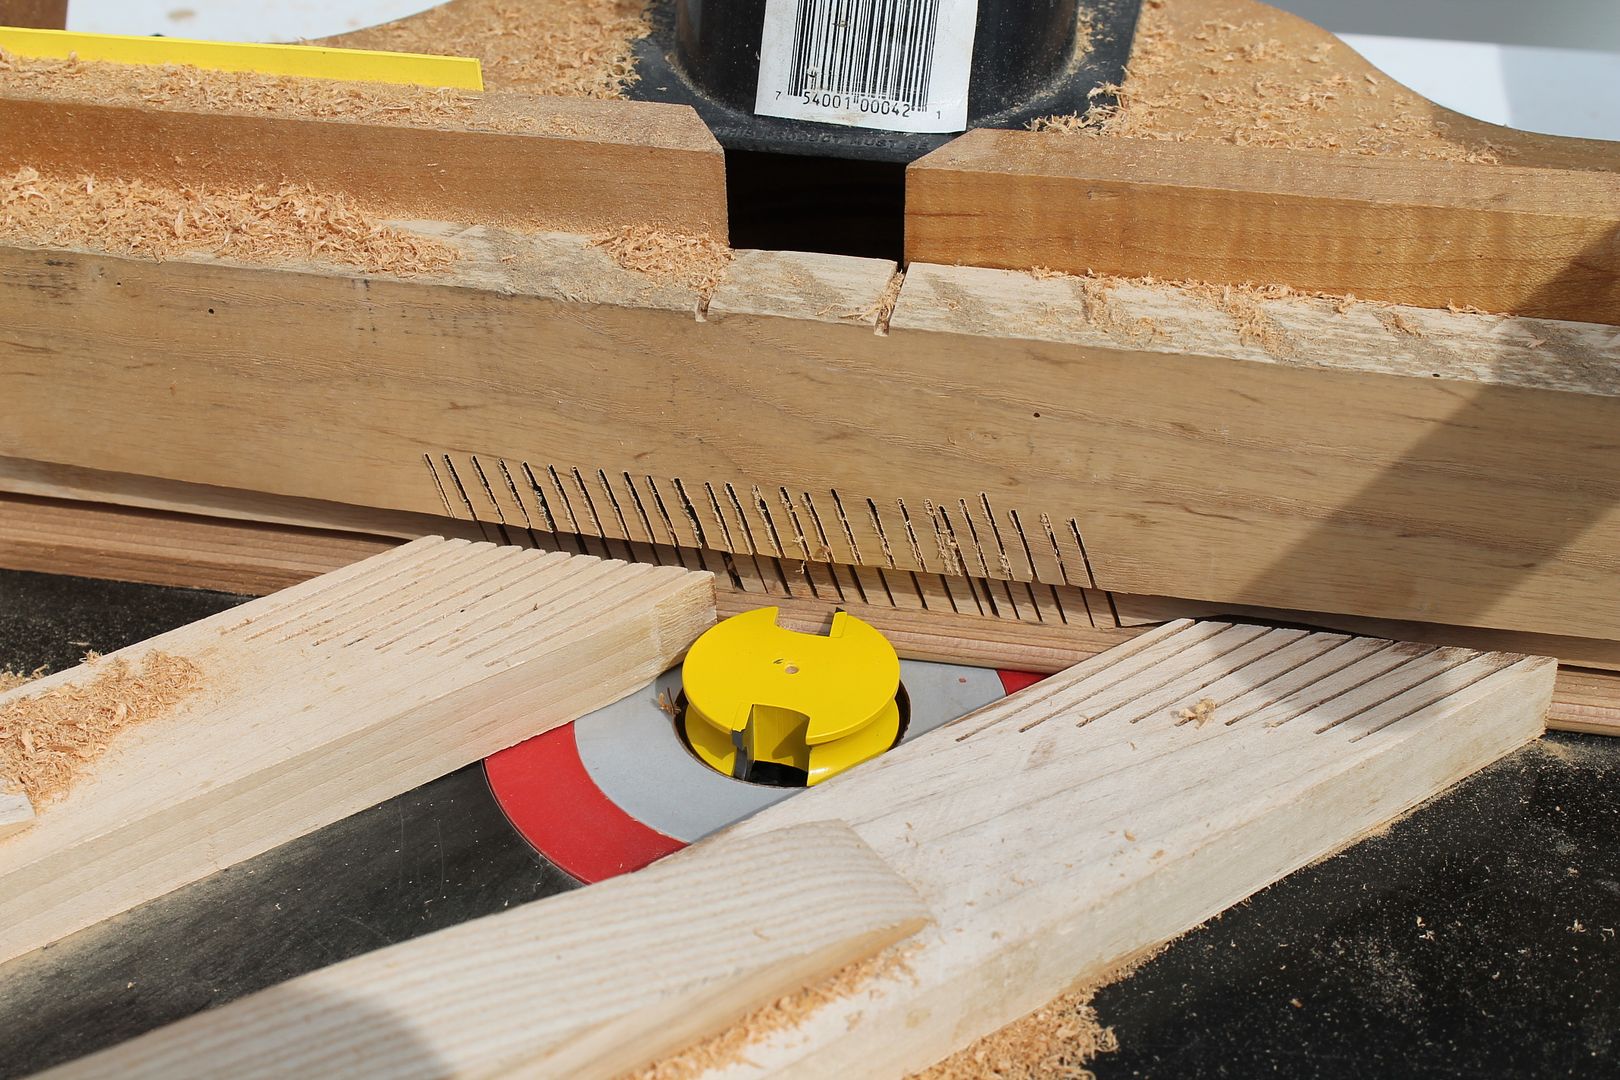
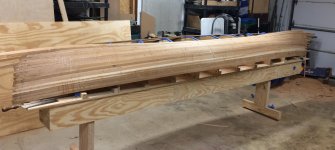
Here's a couple of pics, that I hope will illustrate better what I'm saying !
IMG_1338_zpsqfpyhjcn.jpg

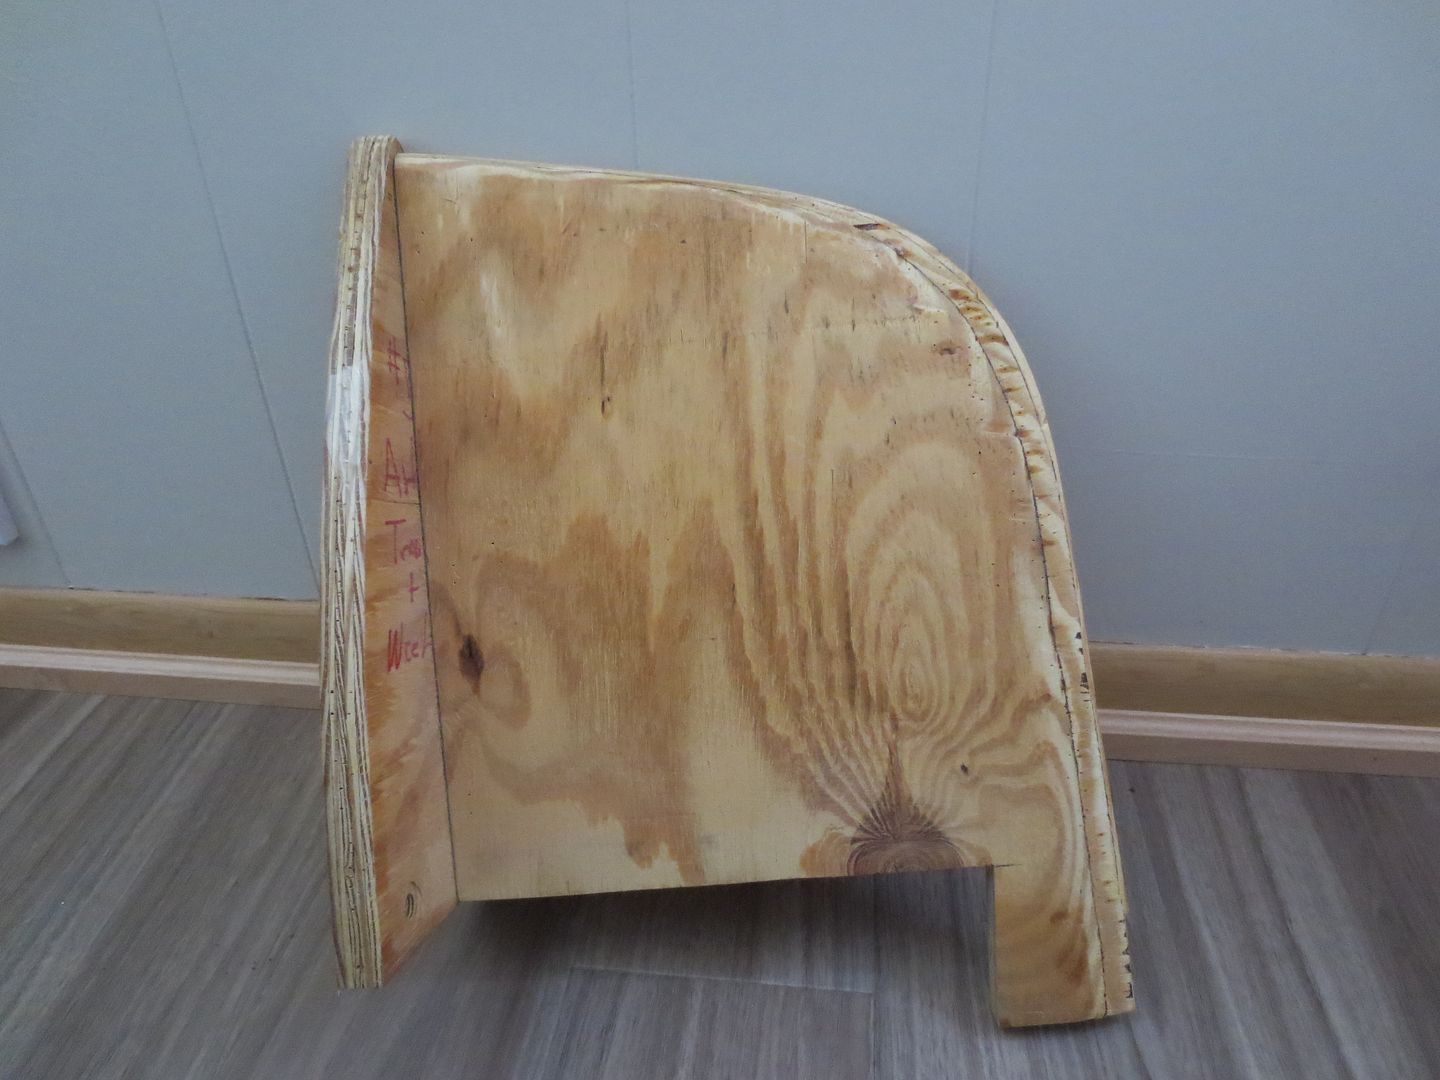
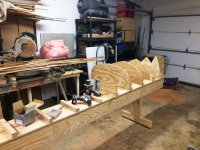
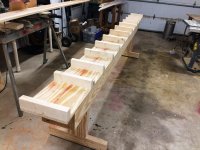
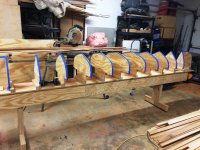
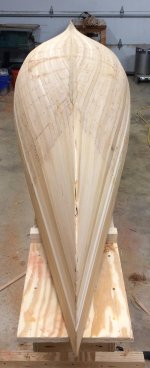
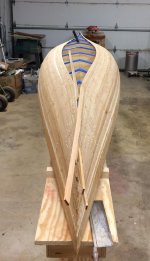
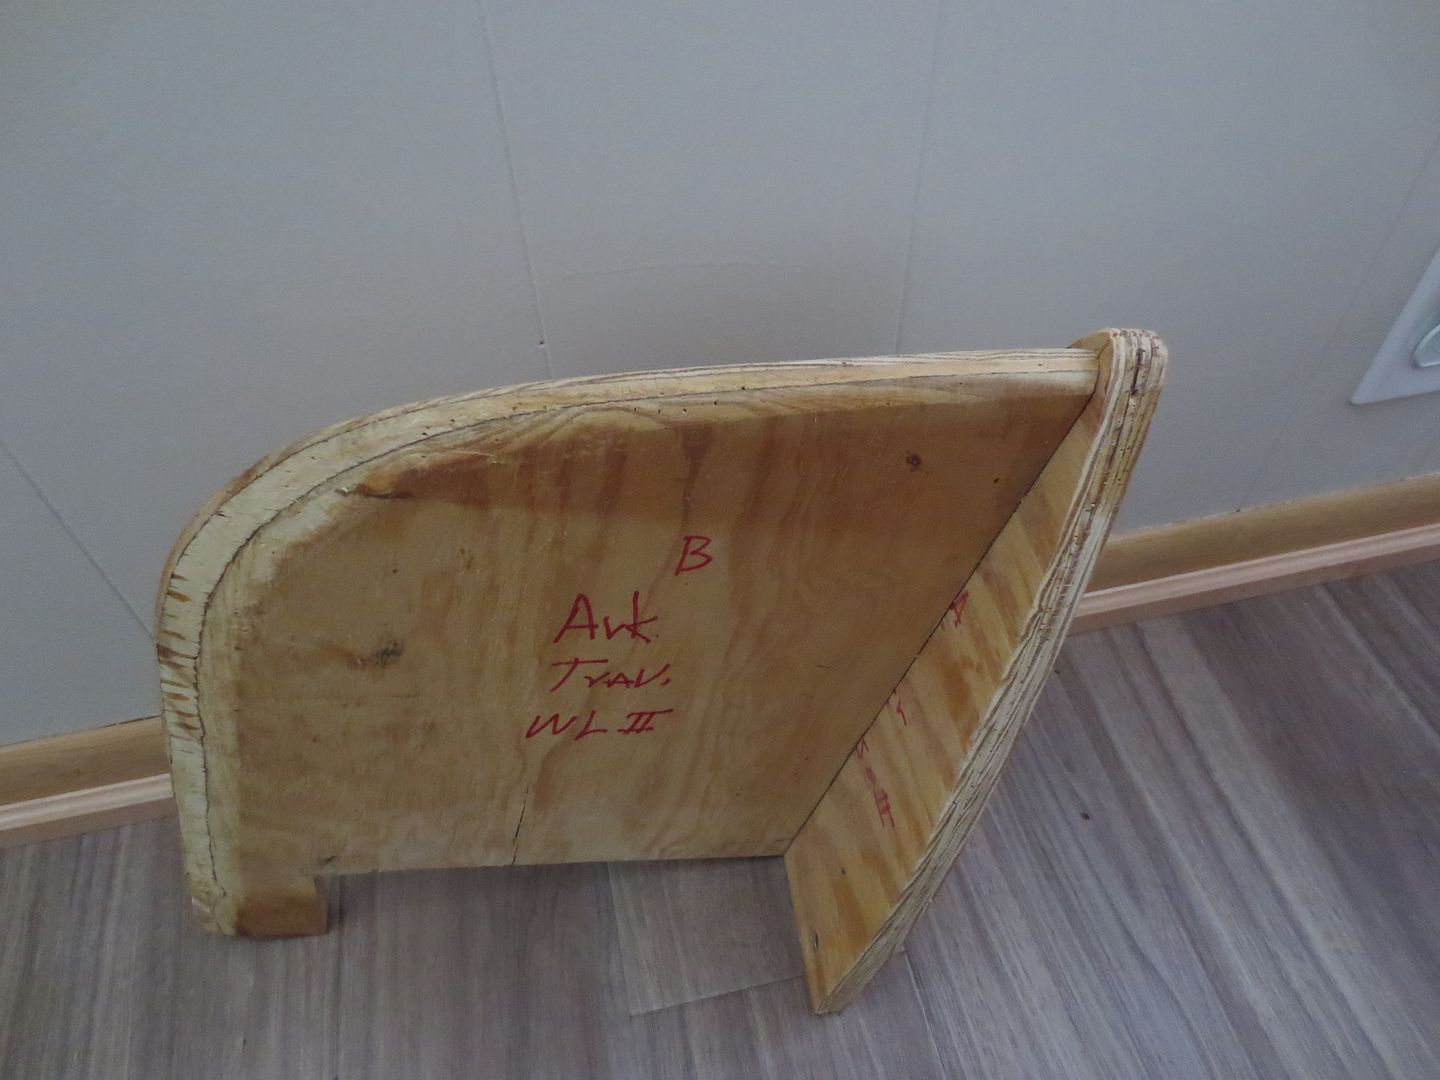
Note the lines on the leading edge of the stem forms. When tapering the forms, these lines, (layers of plys) make a reference point, so you can compare left to right.

​ Another thing I do is I lower my stem forms an 1/8-1/4" On my earlier builds I would always have a high spot on my hull at the stems. To help correct that I lowered my stem forms a little.
​ On this set, the stem form is a little too low, but didn't cause any trouble.
IMG_1337_zps6i08pu0a.jpg


​Again, I hope this helps !

Jim
 
When I do stemless I usually subtract 3/8" from what would be the outside of the finished hull. That should hit it pretty close.

You'll then want to taper the edge of the stem so the strips fit nicely against it. I use a compass to make a pencil like right down the middle running the length of the stem and sand right to the line on either side. Hold a short strip in place so that it lays across the first two forms and check to see how it lays on the stem and take off material accordingly until the bevel angle on the stem matches that of the strip. It might be easier to only sand the bevel 3 or 4 strips wide at time instead of trying to do it all at once. I well remember my first few strippers and how difficult this part seemed. It can be hard to visualize that far in advance so it can be safer beveling for the first few strips, then the next few, etc...

The good news is that it gets easier and the even better news is that even if you don't get it perfect you'll be fine. If some of your strips don't align perfectly and you have gaps at the stems that doesn't matter either. A little epoxy thickened with cedar dust to match the hull will fill those gaps and they'll disappear when it's all said and done.

20140705_012 by Alan, on Flickr

Alan
 
No Title

It has been a few weeks since I started this thread, and much work has been accomplished. The first task was to make space in the shop and unload few things, to make room for the build. Then year end work and cold weather moved in and things almost came to a halt. However, we are now back at it and hopefully the supper cold weather will stay at bay for the weeks and months to come.

Here is the strong back we built. I used the plans in the Canoe Craft book, just shortened it for the shorter boat. However, i did leave provisions to lengthen it for future builds. I also upgraded it with pointy little adjustable feet to level the entire rig and hopefully prevent sliding. The pointy feet were made by sinking a T nut into the bottom of the feet, then pointing a carriage bolt head, yet leaving the square lip, for a 3/8" wrench. It set up quick and easy.

A couple weeks back, and after the strong back was built, i tackled the station molds. This proved to be a bit trickery than I had hoped to make both sides equal from a half mold hand sketched pattern. However, since the canoe is symmetrical there is two of each mold, which I used as a pattern to flip and sand equal. Hopefully it works as intended.

Earlier in the week we made a trip to the local saw mill/lumber yard to sort cedar. They had a fairly good selection and it is all stored inside so it was nice the dry. Last evening, me and the youngest ripped the 1 x 8, down to 3/16" strips using the circular saw and aluminum fence method. Worked pretty good once it was set up. It took a few tries to get the fence set just right. The first strip came out at 1/8".

Today I tried to work from home; however, once the major task were accomplished, I just was not making any progress on the secondary task, so i threw in the towel. I finely convinced the oldest son to come give me a hand routing strips. We were able to to get the bead on all of the strips before evening activities pulled him away. After dinner the youngest two sons and I headed back out to level the strong back and set the molds. We used a laser level on a tripod as Allen showed in a separate thread some months back. I must say, it worked very well and in a matter of about 30 minutes or less, we had all the stations set to plumb and taped to receive strips. Hopefully tomorrow we can get the cove edge cut and run a few strips.

Thanks for reading.
 

Attachments

  • photo5812.JPG
    photo5812.JPG
    235.4 KB · Views: 0
  • photo5813.JPG
    photo5813.JPG
    212.6 KB · Views: 0
  • photo5814.JPG
    photo5814.JPG
    230.3 KB · Views: 0
  • photo5815.JPG
    photo5815.JPG
    240.6 KB · Views: 0
  • photo5816.JPG
    photo5816.JPG
    243.2 KB · Views: 0
  • photo5818.JPG
    photo5818.JPG
    248.8 KB · Views: 0
Last edited:
Nice. You are cooking right along. It does tend to get addictive once you start. Sadly, there is no known cure for this ailment although the domestic female has been anecdotally reputed to be an effective counter, sometimes causing brief periods of remission.

Press on regardless.
 
Bryan,
Congrats! I think you've seen already how infectious the boat building bug becomes.
Pretty exciting seeing the hull shape in real life, isn't it? Just wait until you start stripping, it's hard to stop!
Hope the boys are enjoying the build as much as you, even if they don't say so, they'll remember this for a very, very long time.
Thanks for taking us along...
 
Comparing your forms to Alex's plan. They appear to be a little different. It may just be me ! Your forms look to be more V- bottomed than the plans ?
Also your stem forms appear to be a little too high. As you have them set now, when you get to the top, you will find your hull shape will be high at the stems.. What in the building trade is termed "Hog Nosed" it's like reversed rocker.

A simple fix, is to remove the stem forms, and cut a 1/4" off the base, and put back. I've built many Hog nosed canoes, before I realized my error !

A little tip, mark your center form a little different than the others. I use green masking tape some times. I reference my work off the center form. I start stripping there, and center my strips there. It helps this old guy anyway !

Stay at it, and keep the pics coming !!!

Jim
 
Last edited:
Also your stem forms appear to be a little too high. As you have them set now, when you get to the top, you will find your hull shape will be high at the stems.. What in the building trade is termed "Hog Nosed" it's like reversed rocker.

A simple fix, is to remove the stem forms, and cut a 1/4" off the base, and put back. I've built many Hog nosed canoes, before I realized my error !

A little tip, mark your center form a little different than the others. I use green masking tape some times. I reference my work off the center form. I start stripping there, and center my strips there. It helps this old guy anyway !

Stay at it, and keep the pics coming !!!

Jim

Hopefully it is just an illusion due to the tape ( I did have some young help with it). The stems sit a heavy 1/8" below the station; however, it sounds line more may be better here and they are easy enough to remove and trim.
 
Yes, I'm easily disillusioned ! I 'would think an 1/8" drop, should be OK .
It does look like you have a good start !, if, you are slow like me, you'll be ready to glass, when the temperatures are more agreeable !

Router pics, of my old router set up.
0b7422bc-04de-4f5c-b375-5b5d4f1fdc71_zpshcvu1lzc.jpg

I cut a lot of strips with this rig !

My current rig
IMG_0218_zpsznmot2aa.jpg


Works great .

Jim
 
The haul has been stripped since the first of January; however, the honey due list in anticipation for the baby has kept me busy elsewhere. With the child due any day, and some time off work to assist around the house, I hope to be able to get back to it. Trying to order Epoxy and glass today from RAKA and have a question on how much? For the Glass, I am looking at the 6oz plain weave. I assume it is sold by the running yard, so just round up the length of the boat times two? I am not planing to double layer the football. How about the Epoxy, should 6 qt be enough?

I will post some photos of the stripped haul later.

Thanks in advance
Bryan
 
You've got it. Round up the length and double the amount for inside and outside. You should be fine with the 1.5 gallons total.

Alan
 
Might be too late, but I always ordered double the length + 1 yd. Played it safe !
On top of that I lay my cloth on a Bias as much as I could. Old School thing .

jim
 
When I order the glass and epoxy, I have been going to Noah's Marine ( I believe they also have a US site) and buying a canoe covering kit. When you work out the dollars, it's a good deal.

You may want to shop the US suppliers and see if they have a similar offering, from Noahs, I get the epoxy/glass/squeegees/rollers/dispensers ... basically everything you need to complete the glassing.

Just a thought, from websites it's not always apparent that there is a better deal to be had, if you ask.


Brian
 
No Title

Although old work, photos of the latest progress. Hope to start sealing it this weekend.
 

Attachments

  • photo6335.jpg
    photo6335.jpg
    144.7 KB · Views: 2
  • photo6336.jpg
    photo6336.jpg
    174.2 KB · Views: 2
  • photo6337.jpg
    photo6337.jpg
    207.7 KB · Views: 2
  • photo6338.jpg
    photo6338.jpg
    198.8 KB · Views: 1
  • photo6339.jpg
    photo6339.jpg
    177.7 KB · Views: 1
  • photo6340.jpg
    photo6340.jpg
    175.3 KB · Views: 1
That hull shape looks familiar ! You will love how it paddles !
Wear a good dust mask when scrapping, and sanding as well.
3M makes a good one ! UIt's gray, with a dual filter. I wear this same filter when glassing, if the shop is closed up.

Looks great !

Jim
 
Looks like you spent some time sorting through your strips. I like the lighter strips with the varying pattern on top and the dark strip down below those. I think this will be a great looking boat. I'm really looking forward to seeing the wetout.

Mark
 
Thanks for the comments.

As far as strip selection, we did not have much variation to choose from.

As i am sure with most first builds, it has its moments. We should have taken a bit more time on the details; however, with anything of this nature, i will know where every dent, ding, and imperfection is.

For sanding, i have a good Fien vac, so the dust should be minimal. We tried scraping; however, it seemed like it did more damage than good, so most glue removal was by sanding.

I have read pro's and cons on what to do with glue squeeze out. We set the strips cove up, and had plenty of squeeze out as can be seen in some of the photos. It may have been best to let the squeeze out particially dry and remove with a scraper..?

Are there differences in interface pads? The one I bought was very soft. Are there differences in type quality, firmness?

Looking forward to getting some epoxy and glass applied.

Bryan
 
I have read pro's and cons on what to do with glue squeeze out. We set the strips cove up, and had plenty of squeeze out as can be seen in some of the photos. It may have been best to let the squeeze out particially dry and remove with a scraper..?

The best way to deal with squeeze out is to eliminate it in the first place. I prefer to install my strips with the cove down. Cove up seems like it would be easier for applying the glue but as I'm sure you found out it gets pretty tough after you turn the bilge. If installing cove down you need to apply glue to the loose strip before installing it. This is easily accomplished by placing it in some small wooden blocks clamped to the top of the forms that have a groove cutout that the strip will fit into. Only takes a moment and I find it to be easier, faster, and cleaner to apply glue with this method.

And only apply enough glue so there's hardly any squeeze out, just a little line showing. I like putting my glue in a squeeze bottle with a pointy tip, like you'd find at an old cafe to dispense ketchup and mustard. These are pretty easy to find at the hardware store or supermarket, usually in the kitchen area. Makes it easier to put on just a small bead.

Are there differences in interface pads? The one I bought was very soft. Are there differences in type quality, firmness?

My interface pad is about 3/8" thick and quite soft. But I usually don't use it until the very last pass with the finest grit I'm going to use*. When you're first starting to sand the hull you have a lot of sharp edges that need to be rounded over. You want a hard backed pad that will ride on top of these ridges (and glue drips) and chew them down. An interface pad will deflect over those ridges and put pressure on the flat part of the strips as well, which you don't really want to be sanding until the ridges are gone. My first quick pass with 40 grit takes care of most of these ridges and all the large glue drips. A slower pass with 60 grit finishes off the ridges and gives a pretty nice feeling hull. Another slow pass with 80 grit, feeling with my hand along the way, takes care of any trouble areas. Now that the hull is nicely rounded I'll put on the interface pad for the last round or two of sanding with 100 and maybe 120 grit. Even then I don't know if it's really necessary.

*The one place I do use the interface pad from the get-go is close to the stems where the hull is very rounded, maybe the last 10" or so. I usually don't touch this with 40 or 60 grit and wait until 80 grit on the interface to roughly shape it, followed by 100 and 120 (maybe). On these areas I turn the sander speed down quite a bit. It's such a small surface area that you're working with it's easy to take off too much material.

Sometimes there will be one or two bad strips at the stem that leave a big ridge and these I will carefully sand down before using the interface pad.

Alan
 
As far as the glue cleanup goes, I am in the camp of waiting till the glue skins over , then just use a paint scraper to lift it off. This just makes the sanding part easier for me, as I don't have to fiddle with glue not sanding at the same rate as wood or trying get it off, which always seems to take a lot of wood with it, when it pops.

There isn't any one way to handle the glue, but there will be a way that sort of clicks with the way you work. For me, cleaning up as I go and scraping that glue when it skins just works.


Brian
 
Back
Top