• Happy National Telephone Day! 🔔☎️📱📶

My first build - Bob Special

Sratchypants, how did the robobevel work out for you? I'm planning on buying one for my upcoming build using repurposed canvas canoe planks and I don't want to bother with bead and cove. I've been there and done that.

It worked well enough that I'm using it again - I have a 17' Freedom on the strongback right now. Total cost is a bit dear, but it's a nice tool. A good portion of the strips don't require any beveling - the transition isn't enough to warrant it. A couple of points: 1) when there is a significant longitudinal curve in the strip, the length of the tool will prevent the cutter from making contact. You need to get creative with the angle of attack in those circumstances; 2) the planer can easily nick the masking on your forms - patch as you go.
 
As titled, this is my first build - a stemless, 15' Bob Special from Noah's Marine (a Windsor Boat Works design, I believe). The target weight is 50lbs and I will be taking it easy on myself as far as esthetics go (luckily - you'll see) - zero consideration given to the sorting/matching of strips. This is happening on the 2nd storey of my garage shop - canoe will be leaving through the rear window (which was measured approximately 73 times throughout the build).

The strips are eastern white cedar sourced from a local hobby mill. I bought 22 lengths of 5/4 x 4" x ~9'. I planed them down to 3/4". I pained over strip thickness, wanting to save weight without giving up too much strength. I decided to mill the strips at 0.210" which gave me between 13 and 14 strips per board (thanks to Freud). I stopped after milling 11 boards, and so ended up with enough wood for another boat. I did not bead and cove the strips - I opted to use a rolling bevel and purchased the Robo-Bevel jig from Guillemot Kayaks as well as Lee Valley's micro plane.

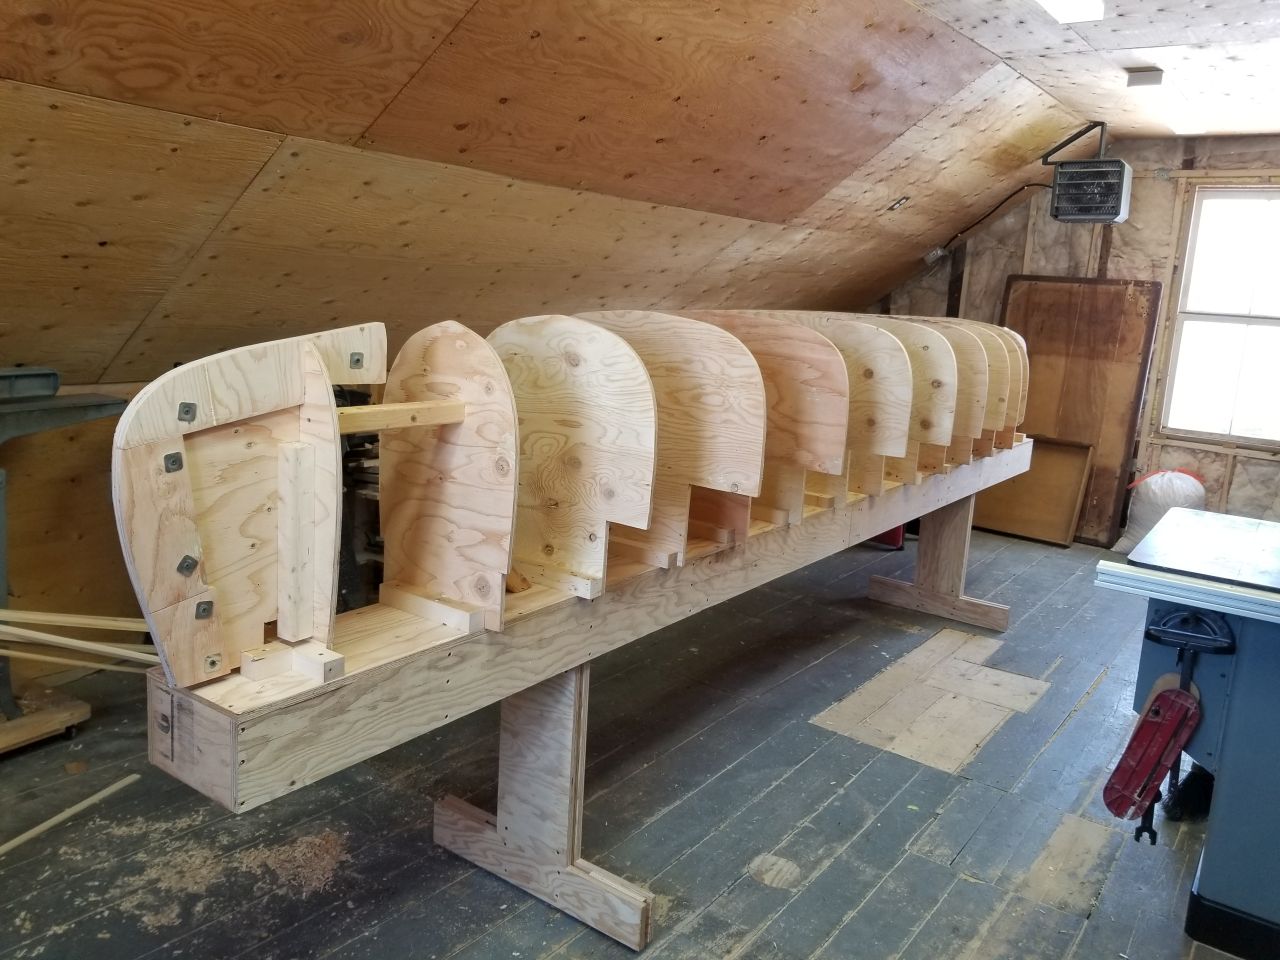
The strongback was made from some industrial plywood that was being liquidated. A weird size - just shy of 11/16" - probably 17mm. Though at $10 a sheet, I loaded as much as I could.

Forms were made from 1/2" plywood and looking back, I should have gone thicker and probably for a different material, but the mdf is terrible here - delaminating and such. I used green painters tape to cover the edges of the forms. This proved to be a rather large mistake - more later.

March 1st, 2020 - Ready to start stripping the hull. Note that the insulation washers on the stem forms are there simply to provide some extra thickness so that my 1" screws don't poke through the other side.

can03.jpg
Hello scratchypants!
liked to read the story of your first build. I bumped into this, since I am at the same point you were approx. 4 years ago. I also want to start with a Bob's Special as my first build. I read that you built yours with strips milled out of 9' boards? Did all of your strips were this length? I want to build mine out of red cedar leftovers, longes planks are +- 400cm (a bit longer than 13'). How many strips did you need tot join?
Thanks for all advice!
Hi Tom,

We all have different styles, expectations, and standards. I did not want to put too much pressure on myself during this first build, so I chose functional/pedestrian. Just keep that in mind lest my approach does not suit your needs.

I bought the cedar from a woodlot owner that was running a bandsaw mill. Our white cedar has quite a few knots and I did my best to sort through his pile to pick out the clearest boards, but I didn't pain over it. Lengths varied from 6' to 10', most being closer to 9'.

After milling, I had roughly 150 strips. Some had knots from edge to edge and these easily snapped in two. If a strip was long enough to span 2 forms, I used it. To join 2 lengths together, I cut them both at 45 degrees so as to allow them to overlap each other. A dab of glue on each miter and then I clamped the joint between to short (5cm) pieces that were wrapped in green tape. I don't know how many joints I made like this, but it was a lot - probably at least 2 joints per row, per side (6 strips total).
 
Thanks for the information!
Your answer assures me completely, I'm only getting more enthousiastic!
Just to understand clear: did you join those parts on the hull itself, or did you join them to form long enough strips upfront?
 
Thanks for the information!
Your answer assures me completely, I'm only getting more enthousiastic!
Just to understand clear: did you join those parts on the hull itself, or did you join them to form long enough strips upfront?
On the hull, as I went. The only care I took was to make sure to alternate the location of the joints from row to row - offset by one form at least.

Feel free with the questions - we are here to help.

Edit: A miter box with a back saw was always close at hand during the stripping process.
 
Back
Top