• Happy Weed Appreciation Day! 🌱🌿🌻

Mad River TW Special Resurrection

“I was able to get the hogging out and slight v shape back with bracing. I don’t have a good before photo, but this is in a much better shape. I am going to run 6oz fiberglass tape and epoxy between the skid plates and roll epoxy on the outside. I don’t expect a miracle, but I am hopeful this helps. I am open suggestions if anyone has any.”

Almost all of the fiberglass tapes I have are E-glass. Some years ago we tried some “experimental” repairs on the bottom of a couple vee bottomed sea kayaks, using E-glass tape, S-glass fabric and Dynel.

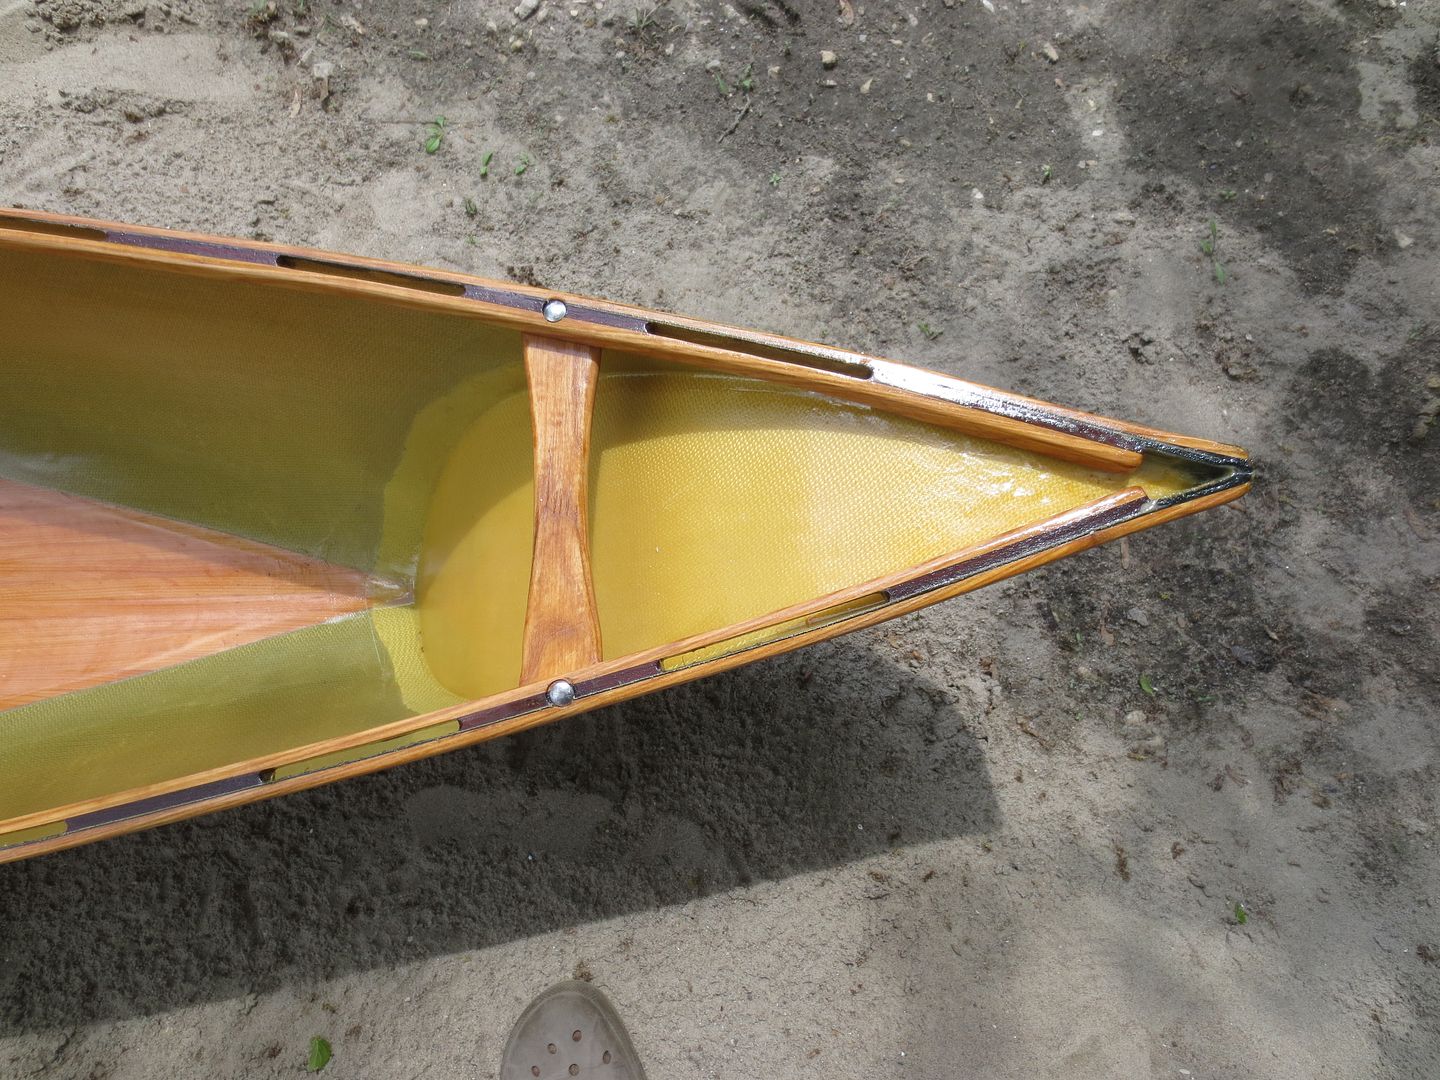
The E-glass and S-glass on the vee bottom were torn up after season’s hard use, the Dynel was still going strong, and still is. This is full length Dynel sleeve on a vee bottomed Caribou sea kayak.

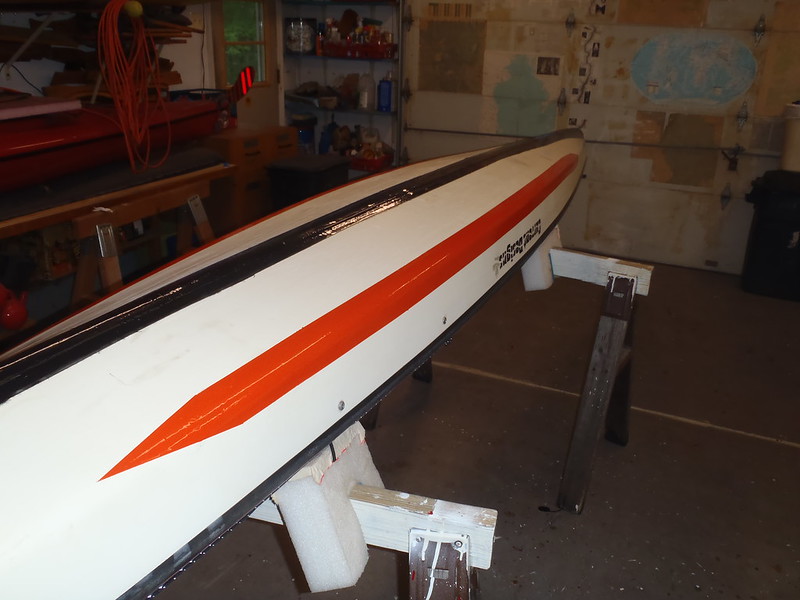
P5290028 by Mike McCrea, on Flickr

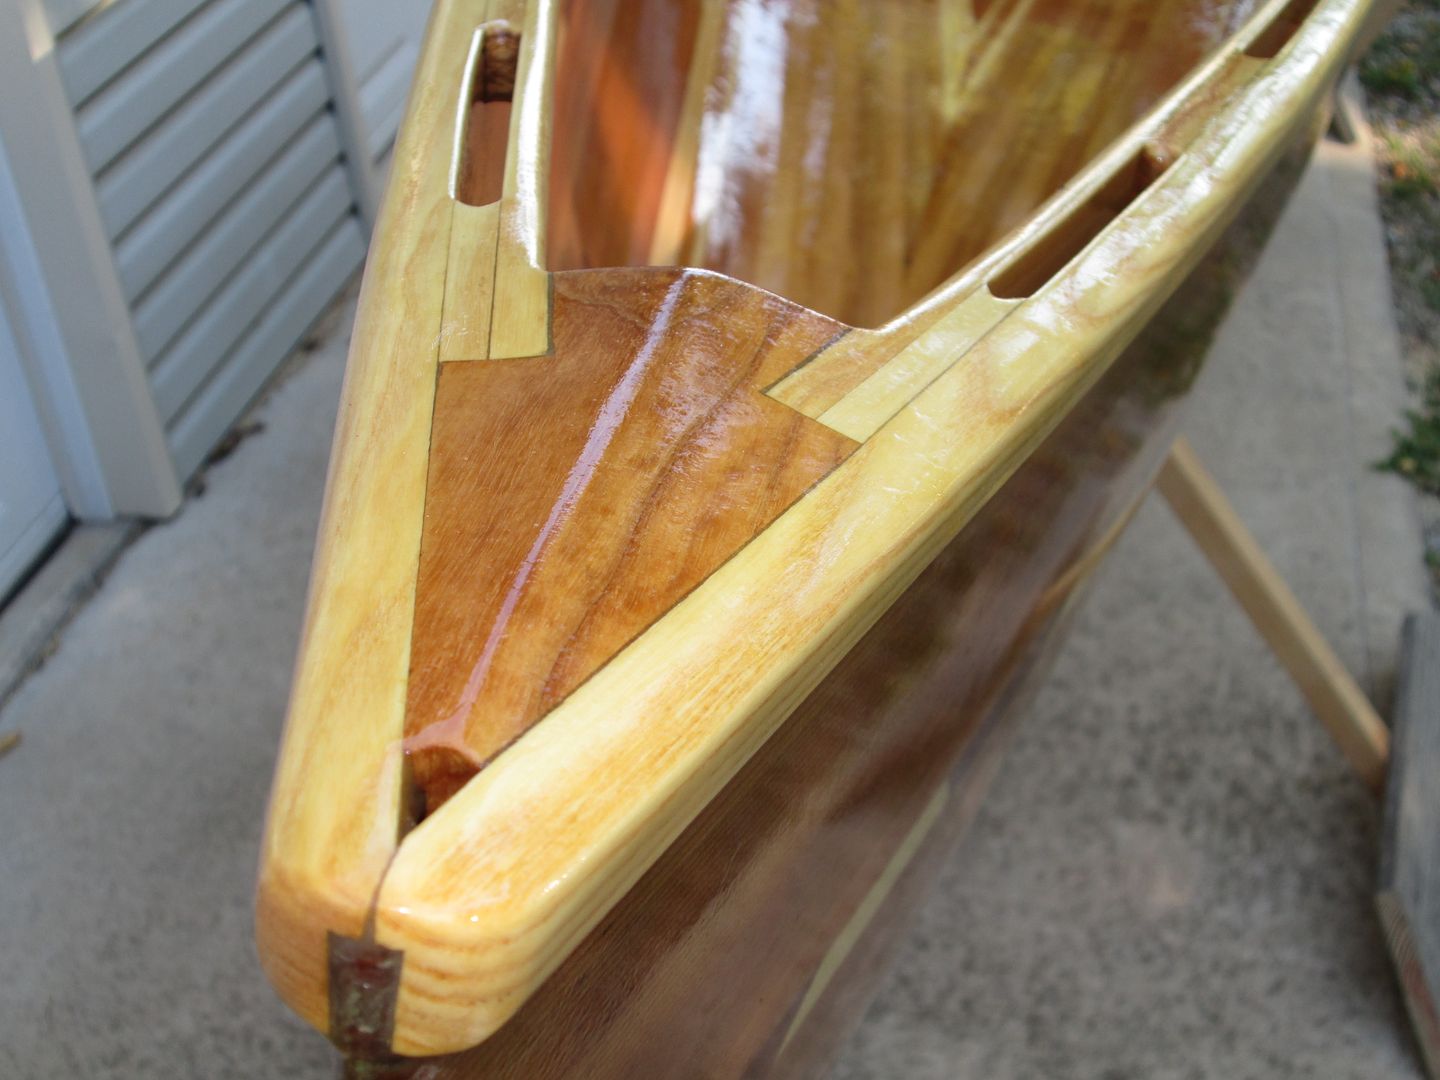
The orange stripes are a Baltimore Orioles homage, covering repairs to the sharp (originally a stitch and glue design) kevlar chines. Of note, those chine cracks were repaired using 2” E-glass. Kinda like the current day Orioles, even those (not bottom-dweller) repairs using E-glass tape were nicked and chipped fugly a few years later, and were kind of a PITA to re-repair.

At least the Caribou looks good. I have no such hopes for the O’s.

For a keel strip spanning nearly stem to stem I’d be use pre-rolled Dynel sleeve, and rolled, release treated peel ply.

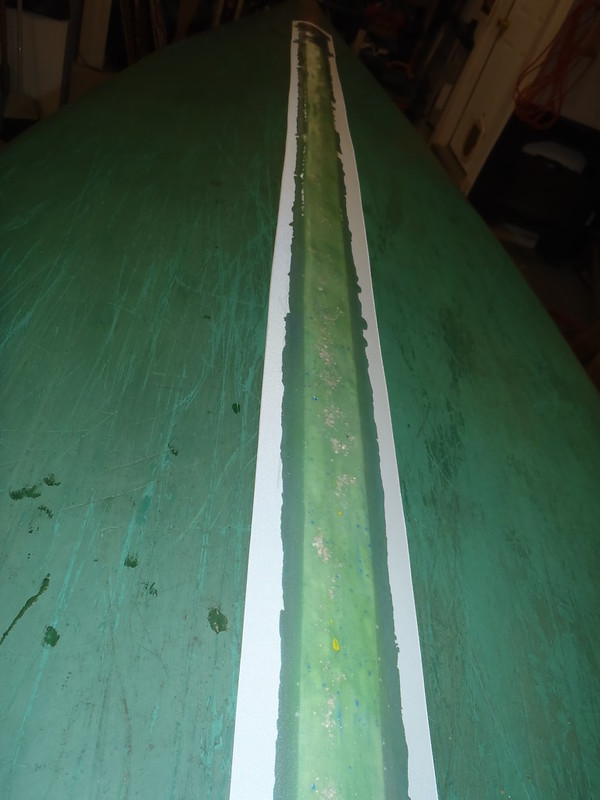
PC290010 by Mike McCrea, on Flickr

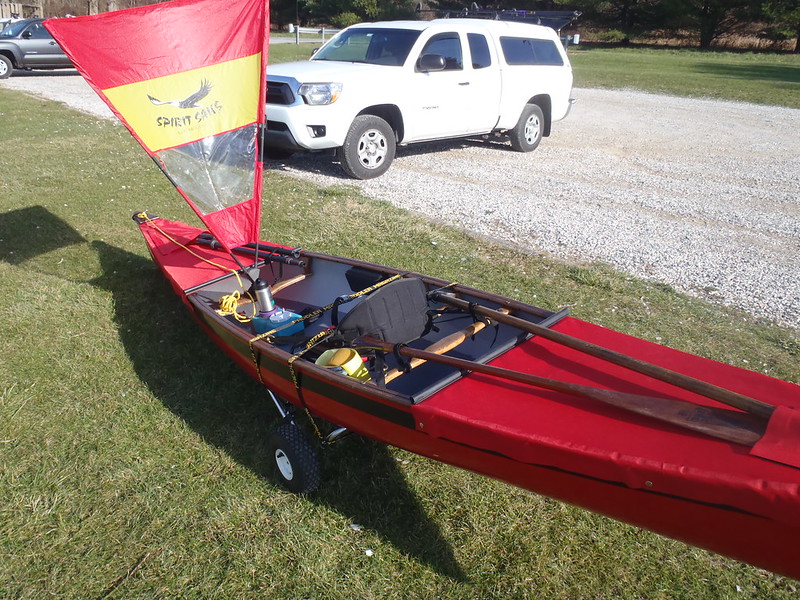
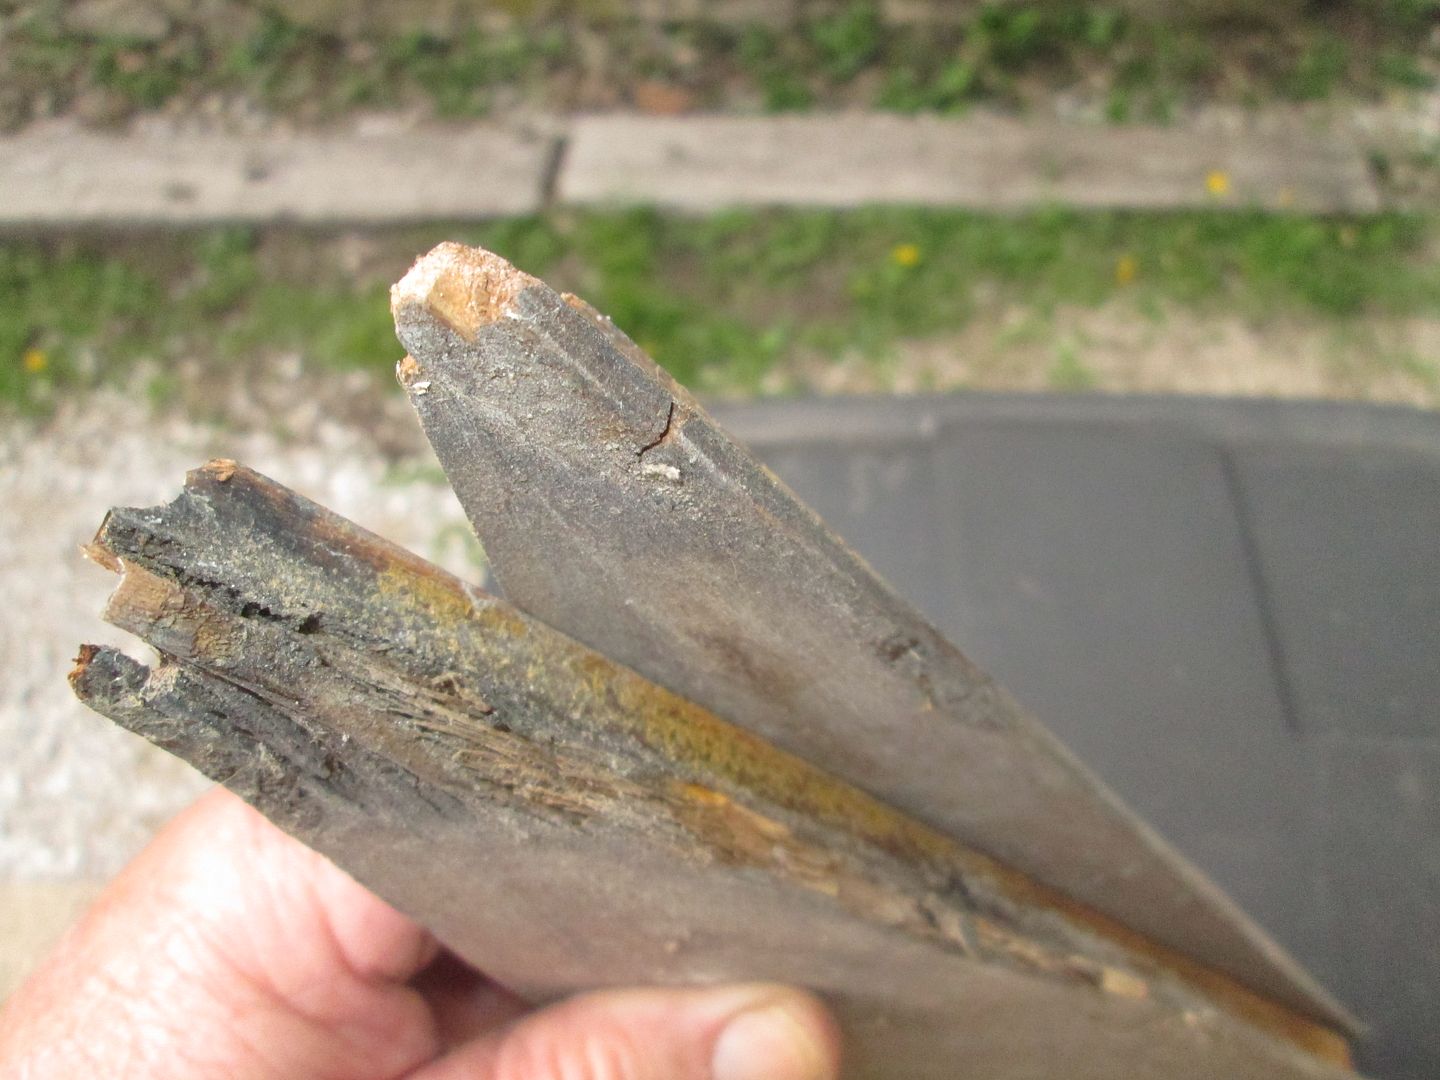
Even with two fabric layers Dynel sleeve stands less tall then the old Kevlar felt skid plates.

20220301_090917 by Mike McCrea, on Flickr

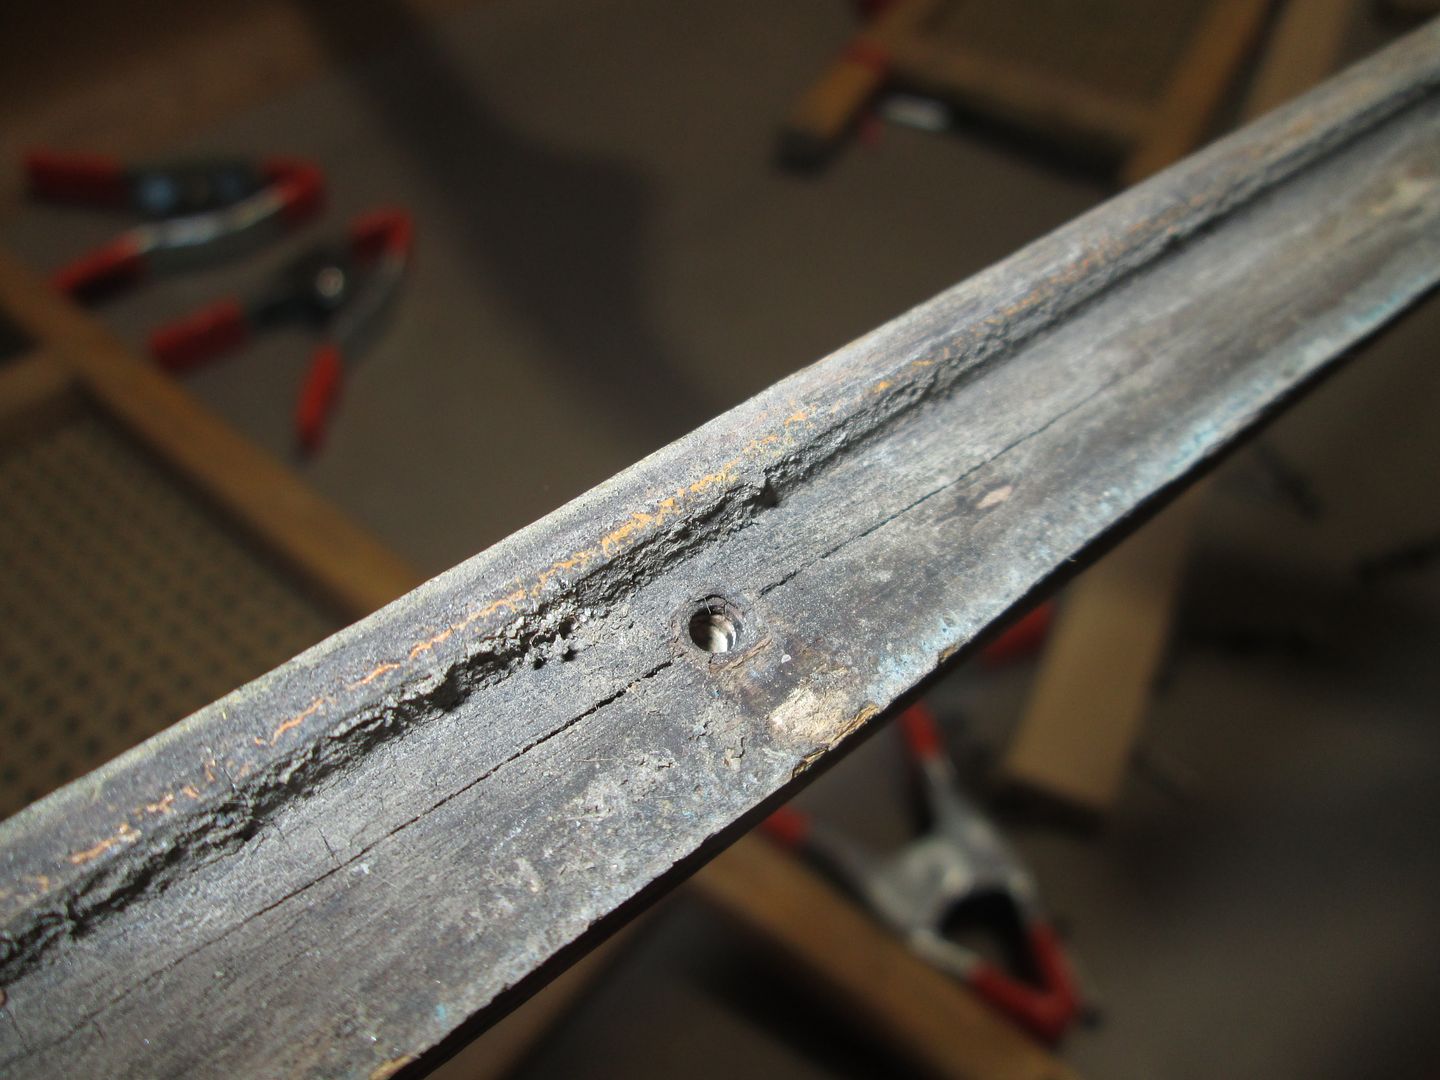
Done properly Dynel sleeve doesn’t stand too tall, ugly or gurgling, and the abrasion resistance of Dynel is far beyond fiberglass. Still my favorite Dynel test, someone who DIY abraded fiberglass and single layer Dynel fabric using a brick.

A 6 pound fire brick held on a 45 degree angle
The test with 6oz fiberglass cloth took 52 strokes to cut through to the wood
The 5.5oz Dynel has more than 250 strokes and is still not through to the wood


Sweet Composites sells Dynel sleeve. Part way down this link:

https://sweetcomposites.com/Polyester.html

The “lightweight” Dynel sleeve is 1 ½” wide, the “standard weight” is 1 ¾” wide.

Sweets has a $25 minimum order or, ordering less than that, a $25 handling charge. What else do you need? There are some hard to find boatwork materials in the Sweets catalog. Oooh, look, graphite sleeve, Dynel cord. . . . oh my, thick, bias woven Twaron and Kevlar tapes.

https://sweetcomposites.com/Fabric.html

Release treated peel ply, used in a long linear application, is easiest done using peel ply in narrow rolls. From Aircraft Spruce & Specialty. That pre-cut rolled peel ply is amazingly handy, I may need to buy more soon.

https://www.aircraftspruce.com/catalog/cmpages/peelply.php

The peel ply doesn’t need to be a lot wider than the Dynel sleeve or glass tape; an inch of overlap on each, in case your unrolling application is a bit off kilter side is fine, and in fact too much peel ply overlap will wrinkle when laid down and compressed, leaving the occasional epoxy crinkle at the edges.

This peel ply is too narrow, and this peel ply is too wide, and a 3” or 4” wide roll is just right for most tapes or Dynel sleeve.

Even if you go with fiberglass tape the rolled peel ply is (beyond) helpful. The selvage edge of glass tapes will set up tall and scraped epidermis bleeding sharp; compressing the tape under the peel ply, by hand or hard roller, will eliminate that sharp selvage edge, and 90% of the sanding.

Easiest installation of a long keel strip, unless you have a sixteen foot wingspan, is to dry fit the sleeve (or tape), sighting it in end-to-end aligned with the center, tape off around the perimeter of the free resting Dynel, and then re-roll the sleeve. Same for the peel ply, cut to length, overlapping the tape box, and re-rolled for later application.

Wet out inside the taped area with epoxy, unroll the sleeve atop that, topcoat generously and wait, and wait some more, until the epoxy has opportunity to fully saturate into the sleeve but is still uncured enough to compress under peel ply.

Then pull the tape and paper mask, unroll the already cut to length peel ply over the sleeve and compress it. Using release treated peel ply, not green pull nylon stuff, you can walk away ‘til the next morning. The peel ply pull is an exciting reveal. Or maybe I’m just easily excited.

And, not to kill your hopes and dreams of resurrecting a prefect hull shape, but if the internal keelson bracing is coming out, a strip of glass tape or even Dynel sleeve will only do so much to eliminate the hog or other odd concavities from the hull’s memory.

But it can’t hurt.

I gotta ask, after reinforcing keel strip and other repairs, is there a painting plan?
 
Thanks Mike- a lot to digest and ponder. Peel ply was always part of the plan. I do appreciate the input.

After everything is as smooth and fair as I can muster I was going to spray 2k epoxy primer and top coat will be reduced enamel- again sprayed.
 
I wound up using 2 layers of 6oz 4” tape. I considered the dynel, but I thought the wider cloth would help with the shape retention I am going after and I don’t see this canoe getting much hard use. I rolled epoxy over the deep scratches and used thickened epoxy where cloth was exposed do to chips and cracks. A few spots were soft where there must have been a significant “redirection” down river (blaming Doug) and used the stiffer fairing epoxy. Joking about Doug of course- I’m sure this canoe has some stories to tell.

The big bummer is the peel ply I ordered weeks ago is still back ordered. So there is more sanding in my future. I am looking forward to seeing this primed and in a solid color. I will have to wait for a good weather day so I can spray the primer and color the same day. Epoxy primer has a curing window before sanding is necessary. It will add some weight, but the finish and blemishes will be much better.

DAAED6BE-B899-4D76-8823-44A9E8200865.jpeg
 
Primer and paint done. It isn’t perfect, but it turned out decent. I am really happy with how the bottom retained its shape.

It was only in the 50s here today so I really had to reduce the enamel and up the air pressure to flow nice. I can get in depth about the painting process if anyone is interested.

I will let it cure a few days and start on the inside.

0FC432CE-A8A1-4A6A-B4AF-98FFEA55F64D.jpeg
069A74E0-6F37-46D9-BCF5-80707C1B5AE1.jpeg
 
“After everything is as smooth and fair as I can muster I was going to spray 2k epoxy primer and top coat will be reduced enamel- again sprayed.”

“It was only in the 50s here today so I really had to reduce the enamel and up the air pressure to flow nice. I can get in depth about the painting process if anyone is interested.”


I am very interested. You had earlier mentioned Rustoleum and spraying, and I thought “Arrggh, rattle cans” but I’m thinking you have both spraying equipment (“reduce the enamel. . . up the air pressure”) and the knowledge of how to use it properly.

Out of curiosity I once asked a local body shop how much to spray a canoe, using whatever paint color they had in their sprayer after paint a car. Yowza and ca-ching, thanks but no thanks.

The paint job looks great, and the deflections in the hull greatly reduced after the temporary interior bracing and keel strip.
 
You had earlier mentioned Rustoleum and spraying, and I thought “Arrggh, rattle cans”
Ouch- that hurts. I couldn't imagine how that would look. Well, yes I can and it’s not good.

Disclaimer- I am not a professional painter and this isn’t a tutorial. Like canoe repair, there are many ways to go about this and get the desired results.

I am currently using a 3m Accuspray gun. It has interchangeable disposable tips and sprays very nice for the price. I have seen really good results from a harbor freight HVLP gun that cost $50, but it had more to do with who was using it.

The nicest part of the professional style guns is that you can use a self contained cup/bag system that holds the paint and allows you yo paint at any angle even upside down.
D8155507-59C2-4E8F-B21E-27F1FFAF4C62.jpeg

There are many videos on gun set-up and spraying technique.

I used a 1:4 tip for this which is about middle of the road. The thicker the paint-the bigger the tip.

I used a 2k epoxy primer as a sealer since there were multiple substrates. This primer sticks to anything and the paint would looked mottled without it. I used a flexible additive as well to prevent cracking. I have used a few different bands of additive and they all work, but seem to lengthen drying time.

The Rustoleum needs to be reduced in order to spray. I used left over BASF reducer I had from the last car I painted. Naphtha works well and even mineral spirits would work. I use mineral spirits when spraying varnish. I did not measure how much I used because I was just looking for the consistency I wanted. I would say it was 10:1. Stir well and filter as you pour it in the cup.

I wouldn’t paint under 50 degrees outside and the colder it is the more you have to reduce. The added air pressure helps to atomize in colder weather as well. There are specific reducers for different temps when dealing with higher end paint.

Automotive paint works well, but I would use singlestage paint opposed to base and clear. Easier to touch up and spray in general for the uninitiated.

The expensive part is the compressor. You need a big tank and decent water trap system. They do sell cheap disposable inline water filters, but they only go so far. Real paint shops actually refrigerate their lines to dehumidify. The big tank helps with the cycle time and eliminates pressure drop. I have a 120 gallon monster, but anything over 40 gallons could be used. I have hard lines through my garage and at every 10’ is a drop down with a water trap.
88D8CA55-67BD-49B4-B1ED-32D99C9FD486.jpeg
C97C9711-6CD4-4501-B589-84F5CD1A2EBB.jpeg
Use large diameter lines too. My tank is set to hold at 180lbs, the main regulator I set to 90lbs and the gauge just before the gun I set 25-35lbs as its spraying- not static. Spraying two coats of primer and two color coats, I think the compressor cycled twice. I don’t notice a pressure drop when it does.

I wipe everything down with grease and wax remover and spray medium coats. Let it get tacky and spray again. You can touch just the tape to check tackiness. I let the primer fully dry before the paint, but epoxy primer needs sanded if you wait more then a day or two to spray the top coat.

This really isn’t that complicated, but you will mess up at first so if you try it paint something you don’t care about. Runs and sags can be sanded out. If junk or bugs fall in the paint use tweezers. Nib files can be used on dried imperfections also.

If I varnished strip canoes occasionally I would seriously consider a spraying system. I never thought I’d spray paint over kevlar, but rolling and tipping would have worked as well.

I would have loved to epoxy and varnish this, but the repairs needed were too extensive.

There are also spraying systems that require no compressor, but I have no experience with them.
 
Nicely done. Even better, properly and skillfully done.

I read this on what I have come to think of as the “Bad-Advice Paddling Board”, regarding painting a canoe:

“Latex porch paint or house paint works fine”. ARRGGHHH, please no. Porch and deck paint goes on thick and weighs a ton, and latex house paint on a canoe? Seriously, WTF? The same poster advised that taping off the gunwales wasn’t necessary. I can only imagine that was some pretty work.

The most catastrophically painted canoe I have ever seen was a wood gunwaled composite Malecite on which the skeezy seller had rolled a coat of thick deck paint, no doubt to hide a plethora of gel coat spider cracks, a not uncommon boat flipper trick. Rolled with battleship grey porch paint inside and out, un-taped, including over the wood gunwales, ruining a perfectly salvageable canoe for all time.

I later met the friend-of-a-friend sucker who bought it; the porch painted wood gunwales rotted from trapped moisture to soggy sponges in short order. To this day I pray that wasn’t a kevlar Malecite encased in deck paint; decent canoes deserve better.

“The Rustoleum needs to be reduced in order to spray”

Out of curiosity what quantity of sprayed paint (and 2K epoxy primer) did the TW Special require? And what the heck is 2K epoxy primer? I presume 2K isn’t the price.

“I used left over BASF reducer I had from the last car I painted”

I had the feeling this wasn’t your first sprayed-paint rodeo. Given the equipment, not to mention the “touch” and technique required, I will remain a roller & tipper outer. Spraying anything requires some tactile touch and learned technique, which I have sag and drip proven to lack.

I have come to appreciate the simplicity and results with rolling and tipping topside paints, from the $17 a quart Rustoleum Topside to the $60 a quart EZ-Poxy.

Some of the various paint test panels are now three years UV and weather exposed.

https://www.canoetripping.net/threa...rustoleum-topside-take-ii.114417/#post-125460

Time for another test panel inspection.

Three year on, much the same; the Rustoleum spray has lost all gloss, and is starting to become “chalky”. I had already foresworn ever again using spray paint, but the proof is in the test pudding.

The rolled and tipped Rustoleum enamel is faring better. The topside paints are noticeably faring the best, and the EZ-Poxy with 3021 Performance Enhancer added the best of all, still glossy shiny.

https://www.pettitpaint.com/product...rt-polyurethane/ez-poxy-performance-enhancer/

Although, given the “Do not breath vapor or spray mist” isocyanates toxicity cautions associated with that 3021 Performance Enhancer, I’ll stick with well ventilated and well PPE’ed rolling and tipping, and vacating the exhaust fanned, doors and windows open shop the instant I’m finished painting.

What if anything is left to do on the TW Special? Seats, yoke, thwarts. Foot brace? Spray covers?

I am envious. When it is finished the least you could be is take Hal down the Kenduskeag Stream race; I think Hal likes it in the stern.
 
I used almost a quart all together of black and red mixed Rustoleum topside marine paint. I wrote down the ratio when I need to touch it up. I used a little less primer, but hard to say as it came from gallon containers. The amount can’t be compared to applying it by hand as some of it is wasted and blows away- literally.

2k just means 2 components- I have no idea who thinks this stuff up. It is commonly used in auto and big boat painting. Pro tip- use dark color primers for dark colors and same goes for light colors.

Yes-PPE is super important. Being outside helps, but I have a fancy respirator and keep covered- eyes too. If I’m painting in a booth I use a full mask that has its own air supply. California only allows water based paints which are crap in my experience, but VOC poisoning is no joke.

Some paint inside and seats with trusses are next. I am thinking bootlace woven style.

Eventually foot rests and a full spray cover are planned. I will be using your heat sealed fabric method. I need to vent the floatation chambers and fashion some lining holes/pass through as well.

I have a lake trip with this planned in late May so just the essentials for now.

It’s nice to have a project. Thanks for the support.
 
Last edited:
“Eventually foot rests and a full spray cover are planned. I will be using your heat sealed fabric method.”

I am still in the experimental stage with DIY spray covers. Had I any sewing skills I would use some durable waterproof fabric instead of the heat sealable material. If using snaps I’d go with nylon for the snap ease stretchability; you can dampen the nylon and it will provide some wetted nylon slop for snap placement. Poly fabric, not so much.

One caveat or caution with the heat sealable stuff. Chip’s snap riveted covers sometimes proved difficult (to impossible) to snap in place. And sometimes not difficult; we discussed this and never came to a conclusion beyond perhaps something to do with hull or spray cover temperatures.

https://www.canoetripping.net/threads/diy-spray-covers-sequential-steps-photos.121322/#post-125084

I do not know if Chip has yet deduced the root cause of the too-taut-to-snap issue, but I’m still curious. Chip, any further news?

I have three DIY heat sealable covers on different canoes. None of those covers are difficult to snap in place in any temperature or weather, so who knows. It may be as simple the shop temperature being cool and my covers not being uber-taut when first installed.

Some options or alternatives in heat sealable spray cover design. Using Dual-Lock, either alone or in combination with a few snaps. Unlike with needs-to-be-precisely-mated bulls eye snaps the Dual-Lock allows for some dimensional slop in the system, and even a little elevation above the sheerline if protruding gear load is necessary.

The heat sealable covers on FreeFire use a combination of snaps and Dual-Lock

PC110013 by Mike McCrea, on Flickr

The Dual-Lock tenacity alone would be sufficient. The three snaps per side, two-ish feet apart, on the bow and stern sections are a lot easier than my-thumb-hurts snaps every 8 inches. 3x easier to be exact. And I like the belt & suspenders aspect of using both.

The FishFinder and Freedom Solo have only snaps, but those snaps are spaced 11” apart, which has proven plenty sturdy for rain, spray and paddle drips.

P3250016 by Mike McCrea, on Flickr

All of those covers work equally well, with the partially Dual-Locked FreeFire covers easier to install.

Or, also as discussed elsewhere, flexible stays would provide some arched elevation and drainage, and also a bit of mated snap slop. I may try Boatman’s flexible sail batten stays next time I DIY a cover.

https://www.canoetripping.net/threa...er-for-spray-deck-cowling.127263/#post-133707

A tandem belly cover with arched stays could dang near be a straight easy-iron rectangle of material.

P6100010 by Mike McCrea, on Flickr

Fore and aft belly cover dimensions for the TW Special determined as seems coverage appropriate.

Maybe a stay arched bow spray shield for when you bury the bowman in a standing wave? I think that’s why Hal likes it in the stern.

PB081340 by Mike McCrea, on Flickr

One (I think) critical spray cover design aspect, I really want some readily accessible paddle/spare paddle storage built into the cover.

IMG020 by Mike McCrea, on Flickr

It helps if the blade-in-paddle-pocket is resting on a thwart or carry thwart. Paddle grip resting on something rigid as well.

And, if the spray covers wrap around the stems, a stem rope loop with some hand kindly toggle; with the deck plates and carry handles spray covered there is nothing to grab hold of at either end.

P1220469 by Mike McCrea, on Flickr

Photo visible hint: Clear tubing gets funky inside fast, at least with something opaque I can’t see the grunge. Bicycle handlebar grips work great and if, the deck plates are already on and the inside stems a too-far, too-tight reach, the knot can go inside the grip.

P4030013 by Mike McCrea, on Flickr

And some double-sided Velcro lash straps to secure the painter lines on the cover.

I am psyched to see the seat, yoke and thwart outfitting, and hear your impressions after an inaugural paddle.

Again, I am envious, and have to keep reminding myself that I have zero interest in an 18’ 6” x 32” tandem canoe. Reminding myself, or at least convincing myself; the TW Special is a piece of paddling history, deserving of best efforts.
 
Thanks Mike. A lot of really good info as usual.

As far as a spray cover, I do agree with the extra paddle and some gear readily accessible. I liked your idea of the bike grip when you originally posted it, but it didn’t occur to me that a grab handle might not be accessible with a cover. I like the idea even more now- clever. I have used dual-lock before (non canoe application) and see how that could be an easy no-holes-in-the-canoe option or at least supplement a few snaps.

I am hoping to get a couple milk crates in it soon with a friend and mark where the seats should go. I am going lower them a bit. I saw in Matt and Doug’s photos there were no drops and Doug mentioned it was a bit tender. I am hoping this helps.

I was planning on making the seats, but I wound up ordering a couple Nova Craft seats. My free time is unpredictable lately and I hate rushing before a trip. I see a back band mounted in my future too.

I received a floatation bag from PaddlingPitt in the last raffle and am anxious to see how it fits and how best to secure it when appropriate as well.

Lots to consider.
 
Sorry ! I'm late to the party.
My advise will mostly be irrelevant.
Me ? I would have pulled that degraded foam out of the stems, and just glassed in chambers, with air.
Decks, as Glenn states are really not needed, especially with a grab handle.

IMG_3008_zpsdc7psjoq.jpg

Unless you add a drain hole ? Your decks may rot prematurely. I always provide a "Weep" hole.
Whoops ! I was looking at Mike's decks. Sorry.

IMG_1261_zpsoiqflllv.jpg

Old Town Decks I replaced a few years ago, along with the gunnels.
IMG_3334_zpsrvo0nv4o.jpg


I hope you applied at least a coat of epoxy to the inside of the gunnel surface, especially if you screwed them on ! Otherwise they will likely look like these in a few years of use.

IMG_3307_zpsasrou221.jpg


The 6 oz strip on the keel line will add abrasion resistance, but not as much support, if it had been added to the inside. It just depends on what you wanted it to do. I would have added cloth to the inside, across the bottom of the hull , up to about the 3" water line. Even if you you used cloth strips, say 6" wide they would help with Oil canning .

Great project ! Enjoy it on the Water !
 
Last edited:
“Unless you add a drain hole ? Your decks may rot prematurely. I always provide a "Weep" hole.
Whoops ! I was looking at Mike's decks. Sorry.”


I drill drain holes in every deck plate or cap, but those are usually plastic.

The photo of the lovely inset wood deck is ALSG’s work, no way I could pull off that kind of woodwork.

His accented deck plates do not have drain holes; instead he drilled the drain hole through the tip of the Royalex stems. With the slight recurve of the hull those drain holes work just as well.
 
Hi Jim thanks for the input.

Decks, as Glenn states are really not needed, especially with a grab handle.

No decks.

I hope you applied at least a coat of epoxy to the inside of the gunnel surface, especially if you screwed them on ! Otherwise they will likely look like these in a few years of use.

No epoxy was used. Thankfully I have covered storage and haven't had any replacements rot out on me yet. Who knows though, in 20 years I may say "dang, Jim was on to something." If so, I will include it in my memoirs.

The 6 oz strip on the keel line will add abrasion resistance, but not as much support, if it had been added to the inside.

My original thought was a football shaped cloth on the inside, but couldn't figure out how to get the hogging out first. Bracing the bottom from the inside and glassing the V with two strips seemed to do the trick. When I take it out for a test paddle I will see if it oilcans or not. It seems pretty solid now. Fingers crossed - I hate to add any more weight.
 
Yeah, How a canoe is stored, is big for how long the gunnels survive !
I just put license stickers on all my strippers, the oldest was built in the early 90s. It's dirty but dry. No need to refinish. Stored in an unheated garage.
The Last Old Town, I regunneled, was 12 yrs old. Not cared for obviously !
Let me know it 20 yrs how they hold up ! ;)
 
Looking for advice- what are your thoughts on seat drops on this hull? 4” trusses in the stern and my big feet won’t fit under the seats.

D5F66F51-FEED-4848-8A97-F76486FB5587.jpeg

The front has more depth so I could get away with a few inches. I don’t believe this hull had drops out of the factory. Doug mentioned it was a bit tender so I was thinking this would help mitigate against that especially when empty. I weigh 210 and my most frequent bowman weighs 170. Gear is probably 150lbs. We are headed to a large lake on the next trip with a large crossing so it would be nice to kneel if need be. Forgo the trusses and give it a test? Drop the front a few and bolt the stern seat directly to the inwales?

Testing isn’t easy as most friends aren’t readily accessible.

I don’t plan on running this in any serious whitewater either for what it’s worth.

I appreciate the input.
 
Looking for advice- what are your thoughts on seat drops on this hull? 4” trusses in the stern and my big feet won’t fit under the seats.

That looks like a Nova Craft seat. I found the seats in my Nova Craft Bob Special to be set too high—i.e., the spacers too short—so I bought two of these sets of 4" spacers from Essex Industries, which were less expensive than the identical products from Nova Craft itself or from edscanoe.


4" actually turned out to be a little long for my kneeling comfort and foot extraction, so I just shortened the spacers a bit. I found the spacers to provide pretty rock solid seats, and that bulkier and heavier trusses not to be necessary.
 
Testing isn’t easy as most friends aren’t readily accessible

Beyond, or before, on water testing, you can at least put the canoe on the shop floor on foam pads and see how easily you can extract your kneeling-stuffed clodhopper footwear from beneath the seat.

Seriously, I have older, less agile but WW accomplished friends who are likely to plead “Come hold my gunwale” capsize when going back to seated in a calm run-out pool than while actively surfing waves.

That shop floor seated exercise might help determine the seated stability vs kneeling and foot extraction sweet spot to some degree. If it is wobbly on a shop floor pad it will be harder bobbling about afloat.

And, uh, you can always cut seat drops shorter. Making a truss drop deeper is a start over pain.
 
I believe I framed my question fairly lousy. How much stability is really gained by dropping the seats 1”, 2”s etc. At some point the paddling position is compromised, but that aside how much does a couple inches matter?

The pads on the floor is a fine idea as far as getting my boots out- thanks.

Something tells me I won’t find my answers without getting it in the water.
And, uh, you can always cut seat drops shorter.
😐
 
I believe I framed my question fairly lousy. How much stability is really gained by dropping the seats 1”, 2”s etc. At some point the paddling position is compromised, but that aside how much does a couple inches matter

In a solo canoe, 1" is a definitely noticeable increase in stability and 2" is a significant increase. Both would probably be less noticeable in a heavy tandem canoe with two paddlers.

I am a kneeler and would set seats the same way in both a tandem or solo canoe. That is, at the level where the most likely paddler is comfortable on his/her knees and for reasonably easy foot insertion and extraction, which for me in a flat water canoe is about 9" from the floor to the bottom of the seat. (I'll go closer to 8" in a whitewater canoe.) That will almost always yield good enough stability for me when I shift to a seated position.

Your positional preferences, canoe stability curve, and balance tolerance may vary. Starting with the lowest reasonable position possible and trying it on the water will allow you to cut down the spacers/trusses and raise the seats.
 
Back
Top