• Happy International Mermaid Day! 🧜🏼‍♀️

Knife making

Joined
Jan 3, 2015
Messages
1,360
Reaction score
786
Location
Mid coast, Maine
I thought I’d start a thread on knife making and try and share at least what I do. Please feel free to add your own experiences to the thread. I’ll try and answer questions as best I can. So far I have not done any bladesmithing but maybe someday. For now I buy my blades from Norway, either in person the last time I was or through contacts. The blade in this knife came from Finland

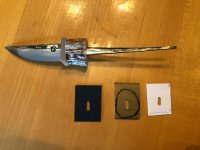
The first step is to make their bolster. I am using bronze because I have a lot of scrap pieces from past big boat work. Drilled a couple holes in decreasing size to match the tang.
.C674EE83-D7F5-4A5D-82A4-4739D32640AF.jpeg
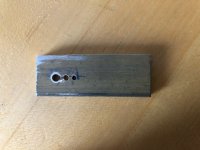
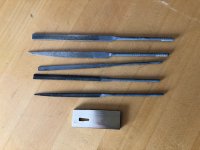
Then with needle files I enlarge and connect the holes.
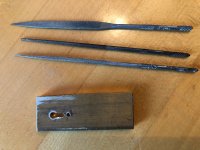
3291788A-CC67-4BCC-8616-CB9001B50A13.jpeg

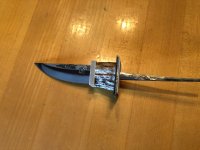
Then larger files still and careful work to fit it to the blade.
469DBD4D-C8FF-48BF-8D08-DFAB43AA1C0B.jpeg

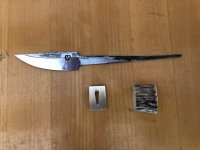
Finally it is cut down closer to final size. It is easier to hold onto while it is bigger. Next was to cut a piece of antler and the next piece of the handle. I only have a general idea of what I want when I start so things can morph a bit as they progress.
1047B374-FC5C-4CD8-95AE-E912E3ECBE45.jpeg

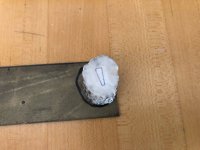
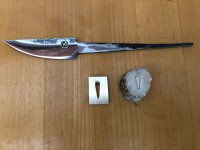
Then I trace the hole in the bolster onto the antler.
52F3BA03-32D5-4558-A95D-DB4B0CF86884.jpeg

More to come obviously.
Jim
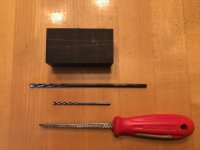
 
So moving along, when I said I drilled some holes I did use a small vintage craftsman drill press but it all can be done with hand tools.

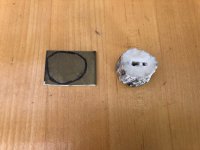
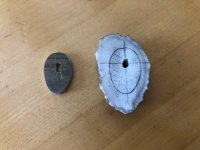
So before I drilled holes in the antler I traced its shape onto a piece of brass.
AFBF56CE-127C-436D-8EE4-D9C1BF9DB0D5.jpeg

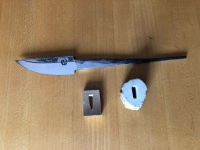
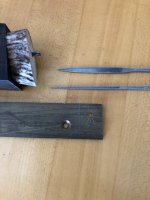
The holes are now drilled in the antler and the brass piece was cut down with a hacksaw.
7DBAF101-5FD8-4A92-AB0F-2165895A8E41.jpeg

Using the same set of files as before the holes are connected and enlarged to fit the tang.
1B69E389-8D05-4D44-AECD-FE12222710F5.jpeg
08BC34D5-1E48-4088-8BA1-FF5FC1F11350.jpeg

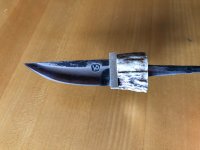
I decided to put a black and white spacer on either side of the brass to make it stand out a bit. The wood I’m using on this one is ebony so black spacer by the antler and white spacer by the ebony.
AA672E5F-C40C-461D-BFF2-7CBB815571A5.jpeg
5A0744AC-6CEF-4357-B1E1-18E39A040C0B.jpeg

That’s all for now.
Jim
 
Another installment before dinner chores.
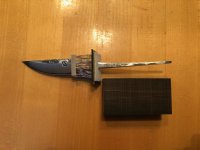
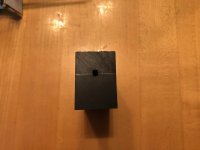
I dug out a piece of ebony and cut it down to just short of the end of the tang. Then traced the shape of the tang onto the side of the block. I think you can see the lines.
1700EDDA-DE33-4466-915F-EA8C280C8D96.jpeg
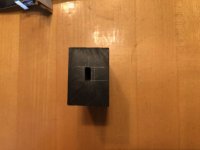
Then because the shape is tapered, on the wide end I drilled two holes at the appropriate angle and went about half way. Then I swapped ends and drilled a hole to intersect the two from the other side.
CD073288-91E8-49B9-A3EF-59D331770F0C.jpeg
36491A1A-0DF3-49C4-A46B-BEAEB91BDDE8.jpeg

Then I used a long drill bit in a battery drill to smooth the transitions of the holes in the middle of the block. Finally I used a knife makers float to enlarge the hole and give it square edges. Hopefully just the right size. Some people heat the tang and burn the tang through for the final fit, I don’t do that.
CC820AE6-F27D-4531-B17E-C905AFA61255.jpeg

A nice fit.
995BBE76-4DB2-4292-A0B0-4DEFE70558AB.jpeg

Jim
 
That is how I do it too. When I get the booster close to fitting with needle files, I heat it red hot then drive it down the tang of the blade, that is held firmly (protected from scratches with leather) in a bench vise, to it’s final resting spot, with a big hammer and piece of pipe or piece of wood with a tang shaped hole drilled in it. Booster is protected being mis-shapened with a heavy duty iron washer. This gets a really tight metal to metal fit. I then silver solder the bolster to the blade, to prevent any blood, guts or whatever from getting up into the handle (don’t really feel this is necessary but still….). I could never seem to file the bolster good enough to get a good fit. Heat and hammer was my answer to that problem.
Those blades by Antti Makenen with the makers mark of YP from his maternal Grandfather Yrjo-Puronvarsi are some really good blades that take and hold a good edge. I am working on a sheath for a 230cm YP Leuku I made this winter. Handle making is a good indoor hobby for fighting cabin fever.
I am enjoying your tutorial very much.
 
Last edited:
Thanks Boreal Birch. Please share pics of the knife and sheath you are working on. I would like this to be a community thread where all can share their knife projects.
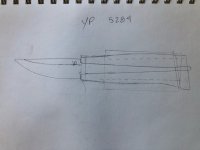
Back to my build. I forgot to mention before I started anything I traced around the the blade on a drawing pad so I can sketch out handle ideas. So taking that sketch I laid the knife with the various wood and antler pieces in place back over the sketch and traced those. Now I knew the parameters of materials I had to work with. Initially I was thinking the handle would have a square end to it. But after looking at the drawing I was afraid the handle might again be too short for my grip. So I drew in an angle sketched in another piece of antler and was able to lengthen the grip at least by the fingers.

9CC49D85-D1BD-456D-A427-57F4BD3F3D85.jpeg

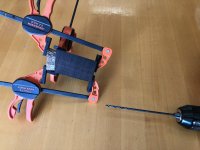
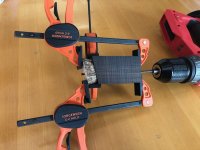
Now I had to drill an angled hole in just the right place to have everything centered. I clamped it up to keep things from sliding around and with the long drill bit in a battery drill the task was done.
C9CCABEA-F260-4961-B74F-167D56D032EB.jpeg
2D7789DE-9D4D-4C0B-A950-D485D6E271A1.jpeg
At this point I was thinking (I am new at this) that even with the tang poking through the antler it might be tricky to glue everything up just right. So I glued everything but the last antler piece.9534FB49-FD9D-4263-BEF8-A40E846CE414.jpeg
While that was curing I made and fitted a small oval washer to peen the end of the tang onto and like the last knife I recessed it into the antler.
D18E5F91-3464-40B1-BC1B-A307C9E3FD1F.jpeg
7DCAB0E8-CBD4-40CD-AACA-5846DCC33744.jpeg
I’ll leave this here for now. I didn’t mention it but I use T-88 epoxy for gluing the handle pieces together. Some people on YouTube seem to be happy with 5 minute epoxy but I’m not in any hurry and the T-88 is not a brittle epoxy.
Jim
 
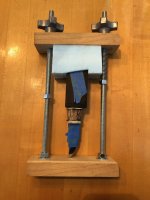
Thank you for posting this. I find it very interesting. I like your purpose built, homemade, threaded rod clamp. Nice work!
 
Jim……
I’m too old and set in my ways to want to learn digital photography. Haven’t taken a picture in years, don’t have or want a digital camera. I have read various posts about how to post pictures, most all the directions don’t make any sense to me. Tonight my wife is teaching me how to use my iPhone 13 Pro Max. In a few days I should be able to send pictures via email or text. If you want to see my Leuku or Puukko’s, PM me your contact info, I can maybe send you something. Not much hope on my part, having a spouse teach a male anything is not going to end well. Works the other way also, I failed at teaching my bride canoe strokes, fly casting, fly tying, and cross country skiing etc. I was however successful with teaching those same skills to complete strangers as a instructor at BOW (Becoming Outdoors Woman) in Alaska.
Having said that, I have learned how to make knives from reading posts on a internet site that is called,
nordiskaknivar.wordpress.com
There are many really good knife makers presented on this site, most are builders of Finnish Puukko’s, others are Scandinavian along with some builders of some other nations. Some give fantastic instructions, with pictures.
Your old Marbles knife still goes on my hip whenever I take my Marbles Gamegetter Combination gun bird hunting along with other old Marbles products like, Safety Axe, Pin on Compass and Match Safe. In my Nessmuk style pack I also bring a coffee/tea pot with a lunch of some sort.
 
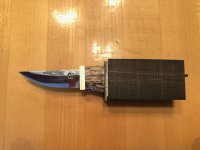
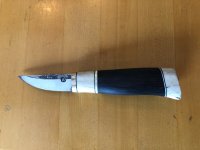
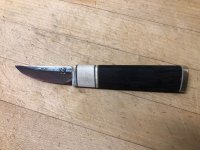
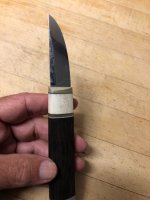
So, I’m catching up on a bunch of threads tonight. This knife is not quite finished, as with the first one I stop at a certain point and handle it, use it, feel the balance, etc.

1C67164F-24CC-4E0C-B90B-90192E1BF7BC.jpeg
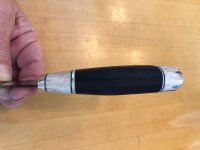
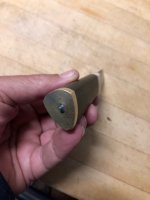
I sloped the end of the handle a different direction this time to allow for a longer grip.
FE271606-3EA8-48F8-8166-43442FE5F13C.jpeg
Still a little chubby.
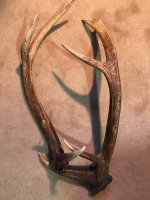
The real excitement, my friend in Idaho sent me some elk antlers, for the next knife already underway. Cold rainy weather is a good time to work on a knife.
C6B16CC5-67FD-4412-AFE6-C65311470BBE.jpeg
I told Joe I almost didn’t want to cut them up, but he said don’t worry about it he can always get me more.
Jim
 
Good to have a friend like Joe. I have a friend that works with reindeer herders l, another that is a meat hunter, occasionally he gets a moose or caribou close to his boat, so the antlers come home from those critters.
I have trained my eyes to subconsciously look for birch burls that also make nice knife handle parts. Birch trees also a root burls that have eyes like birds eye maple.
I do like your style of knife. Thanks for showing us the process. I personally feel that hand forged Puukko’s from Finland are the best general purpose knife I’ve ever used.
 
All the knife a canoeist needs right there.
I have put handles on knife blanks and made sheaths and belts for them, but have never tried to forge a knife blade.
My brother is really good at it and makes Damascus steel.
 
Thanks ppine, it’s definitely a fun hobby. I’ve long thought of forging (and I’m not dead yet) and I’m known to heat things up and shape them on my anvil but forging a decent blade, that’s a road I don’t need to go down when so many great blades are available for purchase.
Jim
 
Back
Top