• Happy Premiere of Superman TV Series (1952)! 🔫🚂🏢

Kite +6%

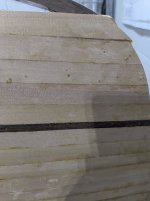
Those accent strips are gonna look great, and blend well to your stems.
When I paddled my first strip built canoe (1978!) I expected it would be a cool head trip. What I didn’t expect was all the questions and comments. I could have made cue card responses, the questions were so consistent.
What brand canoe is that?
Did you build that?
Was that a kit?
Then a myriad of detail questions, what kind of wood, what does it weigh, how long did it take, what did it cost and so on.
I still take the time to explain, especially to those folks that want to build their own.

I firmly believe that we, as canoe builders, have a responsibility to share our knowledge and encourage would be builders in order to preserve the art.
 
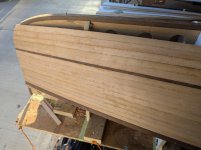
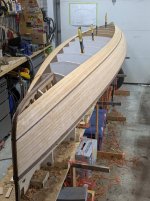
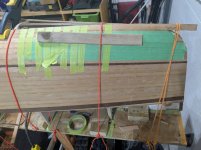
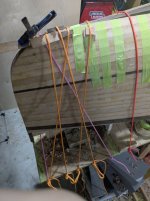
A few more strips today, frustrating pace. Used the heat gun to put some twist on the strips. Reached the point that I need to start more shaping on the stems. Jim's stemless method keeps looking better.

A closer look at you stems ?
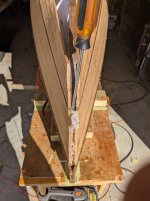
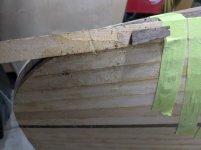
I believe either your two piece forms, attached to the stem, are too low, or your inner stems are too high ?

Someone more familiar with the Kite build, can tell you more ?

It looks to me like you will be building a bump, or what they term " Hog Nose" on the stems ?
The inner stem, should be below, your first full form. ??

Again those with more experience with the Kite, can chime in on what it looks like to me !

So when I set up my forms ? I take a Strip ( it's called a Fairing strip ), and lay on the hull, to check for any irregularities .
The Fairing strip should make contact with all forms, or very close to it.

Your inner stem, needs a lot of shaping, to make it Fair, with the rest of your forms.

Other than that ? Your hull looks great .

Yup ! Stemless Rules ! :)


Jim
 
Last edited:
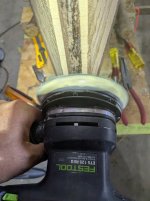
The inner stem is fine, it should be flush with the top of the station. The channel for the outer stem is carved from the covering cedar, so the outer stem is only about a 1/4 inch when planed down close to the stem, and then gradually gets thicker as one approaches the turn. Once you have done a few of them, shaping the inner becomes a very fast process, I usually use a small block plane and a rasp, takes about ten minutes to do the whole thing. Keep in mind, only the back of the inner stem is visible, so wood butchery is in order for shaping.
 
I went off script when it came to the stems because the walnut I have for the outer stem is only 1-1/4". I believe the plans call for 1-5/8" to taper. The inner is currently too proud like you say Jim. I will be shaving it down and covering it with hull. I will try to bring the outer stem laminations as far down as I can while attempting to maintain the stem profile to the plans.

The idea of cutting a channel sounds a bit tricky. Do you guys have a tool suggestion/method for this?
 
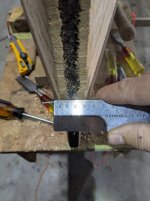
Cleaned the glue out of the ends took the strips down to the stems. Put a strip on each side after pre-twisting with some heat. Noticed I had small gap under the clamp after it dried unfortunately.

For the ends I'll fit the strips up to the inner stem as if it were a 1 piece stem. Then I'll laminate the walnut on top before final shaping.
52.jpg50.jpg51.jpg54.jpg55.jpg56.jpg
 
Back
Top Bottom