• Happy Weed Appreciation Day! 🌱🌿🌻

​Hubba Hubba 1st vs 2nd generation

G

Guest

Guest
Closeout 2013 Hubba Hubba on the REI Outlet site. Including a gear shed, which is a $170 accessory. Plus an extra 35% discount for orders over $150.

And the order automatically deducted the 20% off REI.Outlet discount I’d forgotten to use that came with my member dividend back in March.

It didn’t take me long to pull that trigger, and if the poles/fly/footprint from my 1’st generation Hubba Hubba fit I'll have spare parts.

The 2[SUP]nd[/SUP] generation Hubba Hubba (HP) arrived. Time to play in the yard.*

The tent dimensions, symmetrical shape, poles and hub system of the HP version are identical to the original Hubba Hubba. The only difference is that the bathtub floor at the tent head-and-foot ends and corners are higher, with less mesh. That seems a good idea for increased waterproofieness, as the rainfly covering the ends doesn’t allow much ventilation in those locations anyway. The footprint from the worn 1[SUP]st[/SUP] generation fits perfectly. **
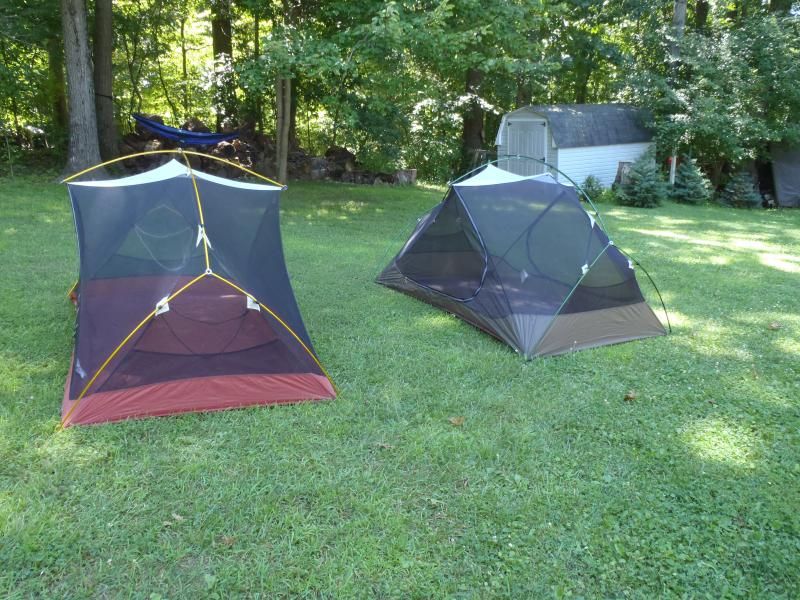


The Gear Shed is not especially intuitive the first time installed, and the instruction tag MSR attaches to the Gear Shed stuff bag omits some details. One hint – it is best to unzip the fly door on the gear shed side before flopping the fly atop the tent. Another hint – look at the various on-line gear shed photos before befuddlement sets in.

http://www.cascadedesigns.com/msr/tents/experience-series/hubba-gear-shed/product

Once figured out the Gear Shed is easy to install. It does have a single 10’ shock corded pole and (ugh) sleeve, but the sleeve is an easy slider, and much as I hate pole sleeves I see no other design method as simple and effective.
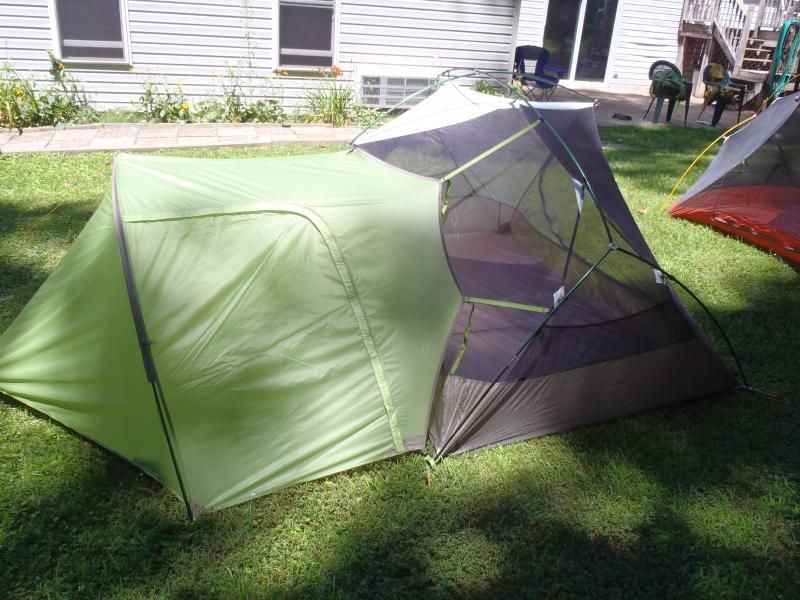


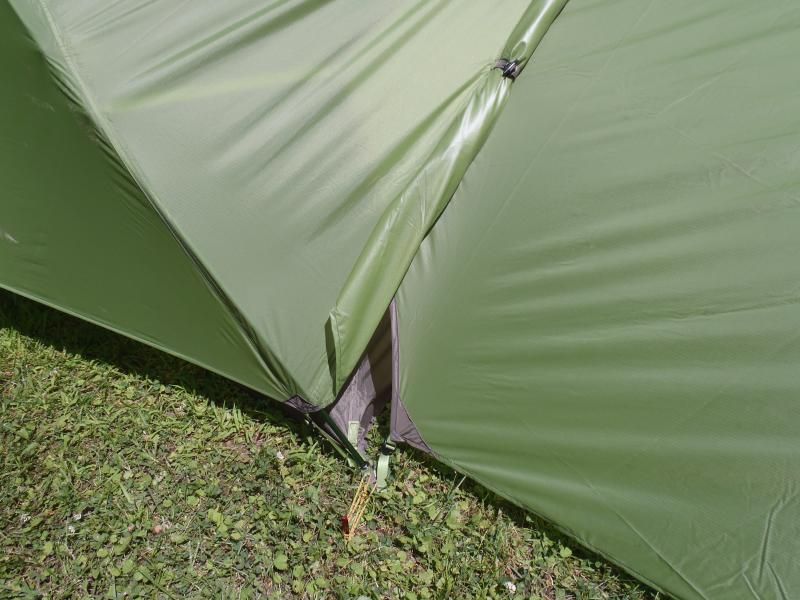
I’m not thrilled with the corner openings left with the vestibule doors unzipped and the Gear Shed in place, but the higher floor material on the ends and corners should help. The first hard, blowing rain will tell.


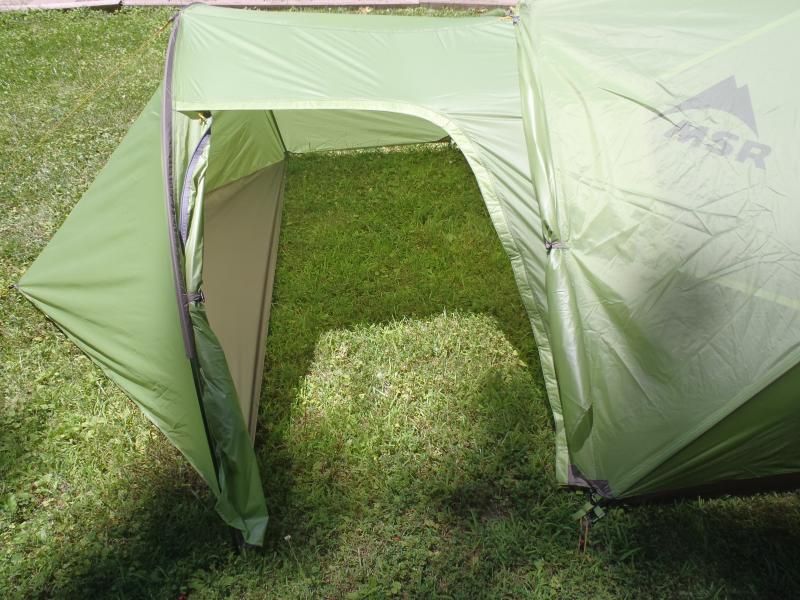
The Gear Shed would be ideal for folks who trip with their dog. I expect that in a risky pinch tarp-less folk could light a stove under that high awning, or at least shelter there outside the tent. The gear shed is 35” high at the roofline, so a little butterfly chair would fit. It will certainly make it easier to stash the bulk of my extraneous gear out of sight and rain protected.


Once set up with gear shed and fly there are still various bits and pieces to add. Or Subtract.***

On the initial backyard set up I am surprised that MSR does not provide the stakes and reflective cord for the four tent end guy lines. Or not; I know what and how I prefer things in the way of stakes and guy lines on the fly ends. Still, they could include the four additional stakes and some cord for owner installation. The stakes MSR now includes are mini-groundhogs, but they lack the pull cord loop through the eye hole on the ends, and those groundhogs are tough to extract without the cord. One more thing to add.
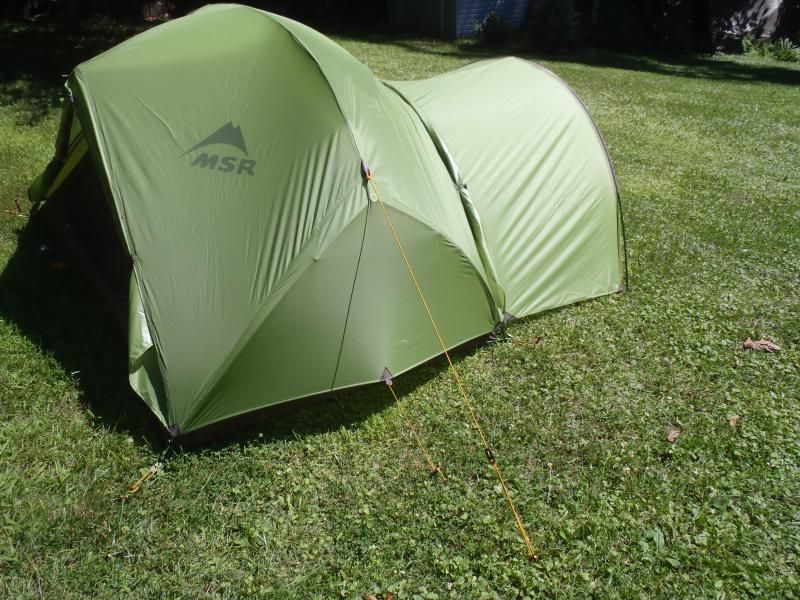


Beyond adding end stakes, pull cords and reflective guy lines to the fly ends the interior needs some personal comfort and function additions.

As in an adjustable reading lantern hanger line with cord lock at either end.
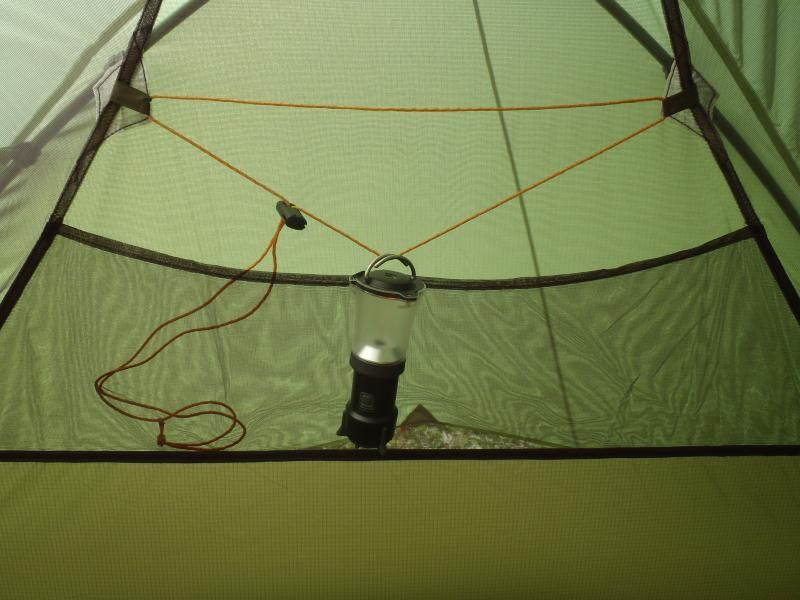


And an adjustable roof line cord, twisted to better hold wet dirty socks drying in the tent so they don’t fall on my face in the middle of the night.
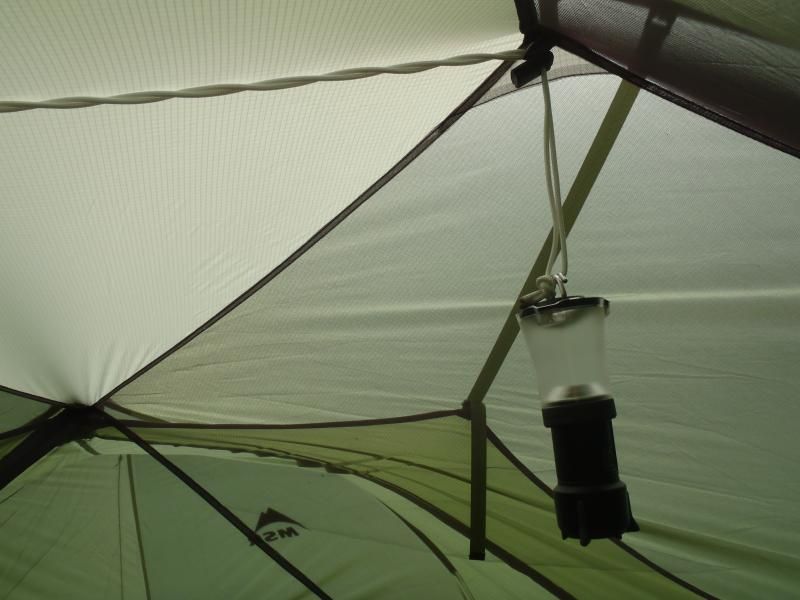


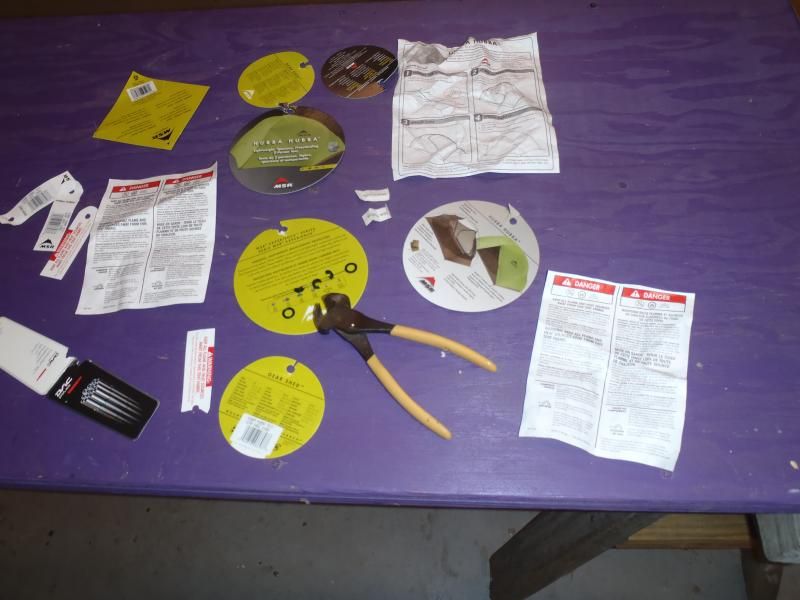
*I much prefer to perform that initial tent outfitting, addition and subtraction at home than the first time setting up in the field, where I discover that, dang, I need four more stakes, some additional reflective line, a couple of cord locks, where are my nippers to cut the superfluous plastic-grommeted tags off the stuff bags and gawd dammit the wind keeps blowing out my lighter before the cut ends of the new guy lines melt.

**The zippers on my 1[SUP]st[/SUP] gen Hubba Hubba seem to have recovered with some thorough cleaning and silicon spray TLC, and I’ll keep it as a spare/loaner. But, having used the old footprint for the new tent, but I can’t bring myself to drop $40 on another footprint. It may be time for a Tyvek, duct tape and grommet kit DIY groundcloth.

http://www.cascadedesigns.com/msr/t...ootprints/hubba-hubba-nx-hp-footprint/product

***The subtractions. There was a ridiculous quantity of tags, tabs, instructions and disclaimers attached to every stuff bag and tent piece. Some of them so extraordinarily attached via plastic grommets that I had to cut them off with nippers.
 
Gee thanks for posting something I didn't know I needed and now I want... Total weight of the whole thing including Gear Shed?

I like vestibules and the two on the original HH just don't cut it. The vestibule on my currently more used North Face Tadpole 23 is huge and capacious but lacks the height of Gear Shed. Plus the NF is an end door tent .

Where can I buy for $200 total?
 
It took me 2 years of humming and hawing before I bought our HH. M demanded 2 vestibules. She was fed up with crawling over doorway junk. I showed her the gear shed and it looked like the best thing since sliced bread. I paid full price for everything. (Ouch) I wasn't happy with how the shed floppily fit the tent. The first time I set it all up in the basement was a test of my intuitive engineering skills and patience. I failed at both. I practiced till I'd mastered it. No problems in the field. The shed-tent marriage requires a truly taut set up. Any slight sags result in frustration in rainstorms. Trust me. I still love this tent though. We place a carpet in the shed for dryer exits and gear. Great post Mike.
 
Gee thanks for posting something I didn't know I needed and now I want... Total weight of the whole thing including Gear Shed?

I like vestibules and the two on the original HH just don't cut it. The vestibule on my currently more used North Face Tadpole 23 is huge and capacious but lacks the height of Gear Shed. Plus the NF is an end door tent .

Where can I buy for $200 total?

The tent weight on the Hubba Hubba (2013 “HD” model) is listed as “4lbs total trail weight” and “4 lbs 8oz packaged weight”. Maybe the extra 8oz was all those dang tags.

The Gear Shed weight is listed as 1lb 12oz (or 1lb 15oz packaged).

I may have gotten the timing right with REI outlet; when I ordered there was a 35% discount for orders over $150, and it took another 20% off from an unused member discount for the outlet.

$226.73 delivered to my local REI.

Now if I could just find the same kind of discount on that stupidly pricey footprint.

$40 – seriously? I’ll just try to duplicate the one from my first gen HH, including the scalloped shape, corner tabs and pole foot grommets using Tyvek, Gorilla tape and a grommet kit.
 
The first time I set it all up in the basement was a test of my intuitive engineering skills and patience. I failed at both. I practiced till I'd mastered it

OK, I have a really embarrassing confession regarding my initial attempt at Gear Shed installation.

I had been eyeing the HH Gear Shed for a couple of years, but couldn’t bring myself to drop $170 on just to augment one of the HH vestibules. I was pretty excited to try setting it up when it arrived.

In my defense, before I go any further, I will add that I have in the past used both the vestibule and awning accessories on our Eureka Timberlines and Alpine Meadows tents, so I was experienced with setting up a couple of different gear shed type designs. I got this.

I will further offer that I may have had a beer to two before playing in the yard with the tent and gear shed.

And, well, you see, while the vestibule and awning accessories for the Eureka tents go over the doors (duh)…those tents are end-door designs, not side door entry like the HH.

Guess where I first tried to install the Gear Shed.

I would prefer not to reveal how long it took me to realize that mistake. Maybe it was more like 3 beers.

I will say that after the trying to put the gear shed on the wrong end of the tent I was extremely familiar with every possible arrangement of webbing strap, clip and pole end grommet, and installing it over the door was comparatively easy.
 
I was wise enough to practise my spanking brand new tent and shed set up totally dry, so to speak. The fact that my beer fridge was empty had nothing to do with it. Assuming I'm one of those gifted guys who can multi-task was a tad overoptimistic. I never shoulda had the TV on. Didn't matter, Gunsmoke or baseball, my attention was divided between the idiot box and an idiot's task. I'd like to go on record and say that both chewing gum and walking is vastly overrated. Who needs to do both at the same time? What's the hurry?
I did have moisture seeping up from the floor one night during a rain storm. I'm still unsure what that was about. The ventilation is rather poor, but that may've been my shortcomings in setting up. ie not enough tautness in the fly, keeping it away from the tent. I still love this tent. 4lbs is a big improvement over my previous 14lb 3-man. I figure so long as no-one has a TV on while I'm setting this HH up in the backcountry, we'll be okay.
 
14 pound 3 man! :eek:

Our Wanderer 4 is less than that even with the extra vestibule.

I really like that gear shed. The vestibules are nice on our tent but I like the extra height of that. $359 just for the tent here though.
 
14 pound 3 man! :eek:

I may have confused things in the way I listed the weights REI provides. They list both the “trail” weight and the packaged weight (presumably with cardboard box to help calculate shipping costs).

The actual weight of the tent and gear shed is a little under 6 lbs (tent 4lbs, gear shed 1b 12 oz).

Edit - Er, never mind, I thought you were talking about the Hubba Hubba.
 
Last edited:
14 pound 3 man! :eek:

Our Wanderer 4 is less than that even with the extra vestibule.

I really like that gear shed. The vestibules are nice on our tent but I like the extra height of that. $359 just for the tent here though.
Yeah, the 3 man was an emergency last minute purchase for a trip. Car camping trip that is. I don't remember whatever happened to our other lighter tents. I still don't know how our kids could afford travel, school, apartments, but never a freak'n tent or sleeping bag. Our tents and bags would wander out of house and out of our lives, to end up who knows where? Anyway, I went downstairs to the storeroom to find ourselves tentless. A quick trip to the Cdn Tire and we hit the road. Poor planning on my part, but this heavy tent is still indestructible. After my wife convinced me of the beauty of 2 vestibules (and gear shed) I don't know how I ever lived without this. The weight and bathtub floor really sold me on the HH. And the ease of setup. Yeah, with the shed and footprint, my foggy and painful memory conjures up $300+++. It might've been more, and some endorphin fueled forgetfulness is saving me from even greater credit card pain. Some evenings in front of the campfire, I envision rolling myself in a woollen blanket and sleeping right there. I roll over and see my $$$ tent amongst the trees and think "No, I'd better get my money's worth.I'll go sleep in the tent."
 
I did have moisture seeping up from the floor one night during a rain storm. I'm still unsure what that was about.

There are a lot of things I really like about the Hubba Hubba design. I’m a very warm sleeper, and appreciate the abundance of mesh.

Mostly I like that the symmetrical design is easy and intuitive to set up; stake out the footprint, assemble the spidered poles, hook on the tent body and make one full circuit with a pocket full of stakes. Toss on the rainfly and make another full circuit with the rest of the stakes. Done.

There are some things on the HH I wish were different.

Mostly the weakness of the floor, which on the 1[SUP]st[/SUP] and 2[SUP]nd[/SUP] generation HH was low on the mm of waterproofieness scale. That seems to be one improvement on the 2014 Hubba Hubba NX, as well as having much less mesh (me no like) and a burrito-style stuff bag with compression straps (me like a lot).

There are a couple of persnickety little things beyond MSR not providing end stakes and guy line.

The mini groundhog stakes have no pull cord, and they are a finger biter to extract. Easily rectified, if you happen to have 3mm cord around.

The webbing ties on the tent interior are teensy and are sewn as a flat loop, which can be difficult to thread anything through. Other webbing loops on the HH are at least sewn with the ends offset, so the loop is easier to access. But better still would be a half-twist loop of webbing, providing an always-open eye through the webbing.

While I’m getting picky the lateral pole that holds out the top of the tent and fly vestibules can be a huge PITA to get free of the pole end webbing grommet, especially if the weather is hot and dry. After some pole bending, grunting and bad words I’ve dang near given up getting that pole end out at times and just stayed another night.

That attachment point needs a ladder lock adjustment on the webbing, as MSR includes with, well lookee there, every other tent/fly to pole connection.

Now that I have the original HH as a semi-worn spare I can try altering the fly on that one to include a full perimeter sod cloth that could be rolled up and secured the bottom of the fly when not needed. That would keep it warmer in the off-season, and I could lay it out to fend off blowing sand or dust.

Dang I wish I wasn’t scared of sewing machines.
 
Pull Cords on Stakes

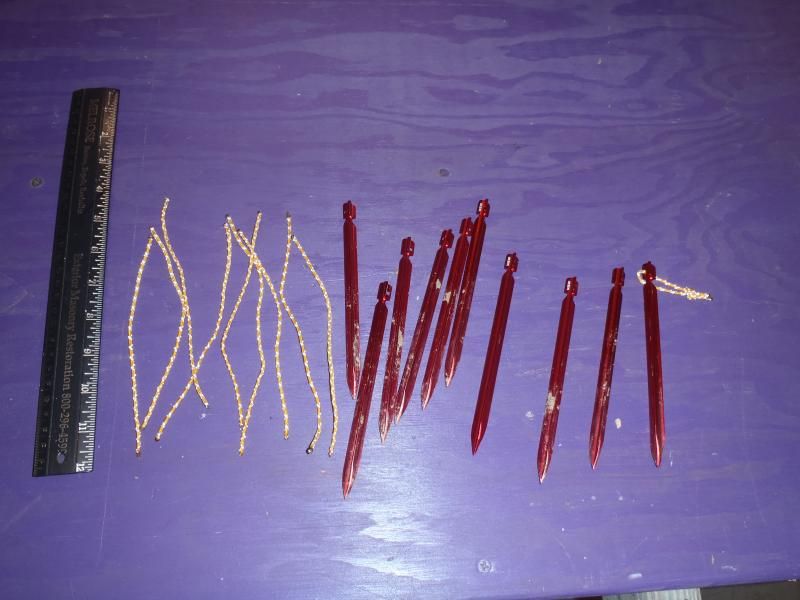
I had done the initial set up of the Hubba Hubba using the mini groundhog stakes as they came with the tent. Without a pull cord on the end of stake they were tough to extract, even from a nice soft lawn.

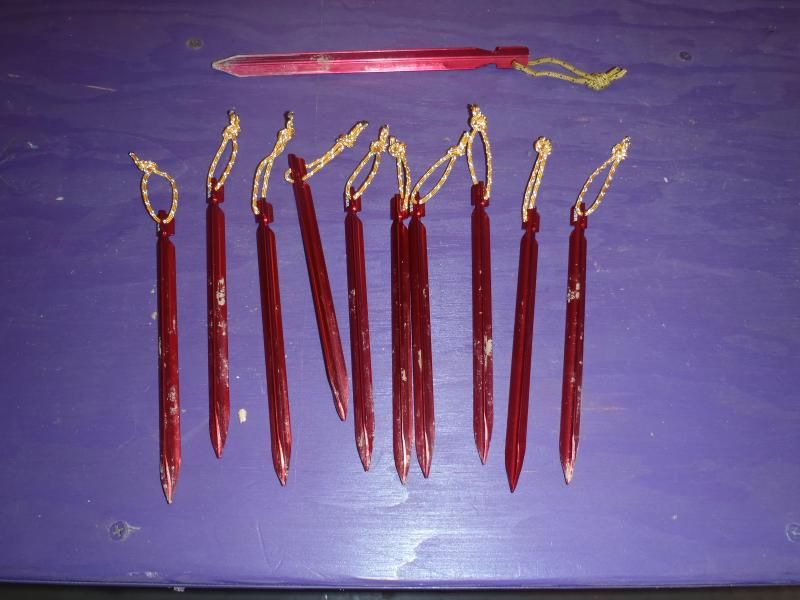
Time to add pull cords. Reflective pull cords. The reflective line not only helps at night, it makes it easier to find overlooked and errant stakes when taking the tent down in the daytime. Actually, please don’t use reflective cord; I’d like to better my chances of finding lost stakes on established sites.

The cord hole on the mini groundhog stakes is teensy. Fortunately I have some small diameter (3mm) reflective cord left. This stuff:

http://www.kelty.com/p-136-triptease-lightline.aspx

It just barely managed to thread through the hole, and even then I had to melt the ends and roll the still hot cord between my fingers for a threadable point.


Lengthwise the shortest piece I could get away with and still be able to knot a finger-sized loop was 6 ½”. I needed 10 pieces. I had 70” of reflective TripTease cord left. Sometimes you get lucky.

Mini groundhogs with reflective pull cords, and a full sized groundhog for comparison:

 
I'm full of bad habits, so why stop now? I just pull my stakes up with the tent/fly cord still looped around the top. I know I'm just asking for trouble, but there ya go. I like the reflective cord loop idea Mike. I'm gonna do it. I've also used another stake as a tool to pull the sunken stake up with. It makes me feel clever. Especially effective if you've got the wire type stakes. But again, your idea makes the most sense. BTW, I love these HH stakes. Mini Groundhogs you call them? They're the James Bond 007 of the special equipment tent stake world. Okay, that's a poor analogy, but you know what I mean. Practical and sexy. (I've got to get out more.)
 
Odyssey they are not really the James Bond of the stake world

http://www.mountaingear.com/webstore/Gear/Tent-accessories/_/N-1h1.htm#

I have no idea why the wacky pricing. Regular Groundhogs are longer, heavier and cheaper per unit. Sold singly at our local store but in sets of 8 in many places. The minis are almost the same price and in sets of six.

Now if you are looking for sexy and curvaceous the MSR Cyclone stakes would fit my definition.
 
I just pull my stakes up with the tent/fly cord still looped around the top. I know I'm just asking for trouble, but there ya go

I do the same when faced with a stake sans cord pull loop, but I always feel a little guilty about possibly stressing the tent corners instead of sacrificing a cheap and easily replaced piece of cord.

The shape of the groundhog stakes, especially the mini groundhogs, is really hard on the fingers to extract, and there is not a convenient J-shape or etc to hook another stake through.

BTW - I think Wallyworld sells a Coleman knockoff of those MSR groundhog stakes.
 
Try a basic wire stake for a groundhog remover. Lots of campsites have them left behind. Or leatherman with the needle nose pliers. I have not tried the first..have the second.
 
I needed to replace some J stakes from other tents with Groundhogs. The WallyWorld clones I found are Coughlans, not Colemans. And they are huge – 9” long. But they do have a pull cord attached. $3 for a set of 4.
 
The Hubba Hubba and gear shed is on sale again at REI outlet. $250, plus an additional 25% off.

http://www.rei.com/outlet/deal-of-the-day


$186. and change.. I knew I needed to stay out of this topic. I really don't NEED another tent... aargh... But how can one resist??? I don't like jewelry and my birthday is tomorrow..


Happy birthday to me.. happy birthday to me.....:rolleyes:
 
Kim, as you know that is a helluva nice tent (and gear shed!) for that price.

REI outlet’s “Deal of the Day” occasionally has some very good gear. Most of it is clothing I don’t need, want or would wear, but occasionally something appears that is a steal. Much of the gift shopping for my wife and sons happens when I see something they need or would like.

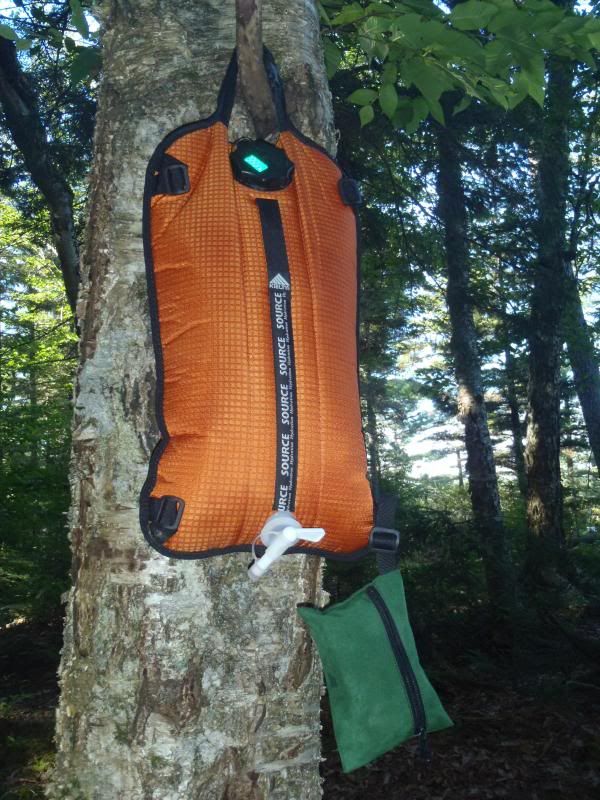
Best deal ever on the REI outlet site was 10-liter Kelty “Insotainer” dromedary bags. These things:


A friend sent me an e-mail link one morning essentially saying “Move fast on this, I just bought five”.

I don’t know if REI had mispriced them on the outlet, but they were something like $3 each. With a retail upwards of $30.

I bought 10 and gave half to friends. The “You saved…” e-mail from REI alone was worth the cost.

If anyone needs a tent, or a spare tent, or a tent as a gift that Deal of the Day on the HH and gear shed will be hard to beat.

Maybe we can carry this forward on Canoe Tripping – if someone sees a gear steal on an outlet site (REI, Sierra Trading Post, etc) post a link. Well, order first if you like or need, then post.
 
Back
Top