I mostly need the thwart to hang stuff from. Not a mast step. Also it needs to be sturdy enough to resist upward force for our chickee snugging system where we lash next to the ladder and stand on the closest gunwale
Sometimes the bottom rung of the chickee ladder is a couple of feet above the gunwale if we have the misfortune to arrive at low tide
Utility thwarts, another peculiar subject near and dear to my tinkerer’s heart.
To the point where I have installed one on all of our solo tripping boats, both open and decked canoes. Installing a utility thwart between the gunwales of an open boat is much easier than fitting one to the cockpit coming on a decked boat, but the decked boat version is still easy enough, it just takes longer waiting for epoxy to set and cure. Think a week to 10 days, start to finish.
On the decked boats our utility thwarts are all installed with the ends of the thwart epoxied to the vertical sides of the cockpit coming, so that they provide as much clearance as possible below, to better enable pushing gear under them and up into the bow. Having a thwart there does occlude the arm’s reach bow storage some, and I have to tie a retrieval string to the tapered dry bag way up in the bow.
Ours are installed with the top edge of the utility thwart nearly level with the top of the cockpit coming. Installed that way the utility thwart in the Monarch is only 1 inch lower than the tall peaked foredeck, and I wouldn’t want to lose any more slide-in storage depth than that.
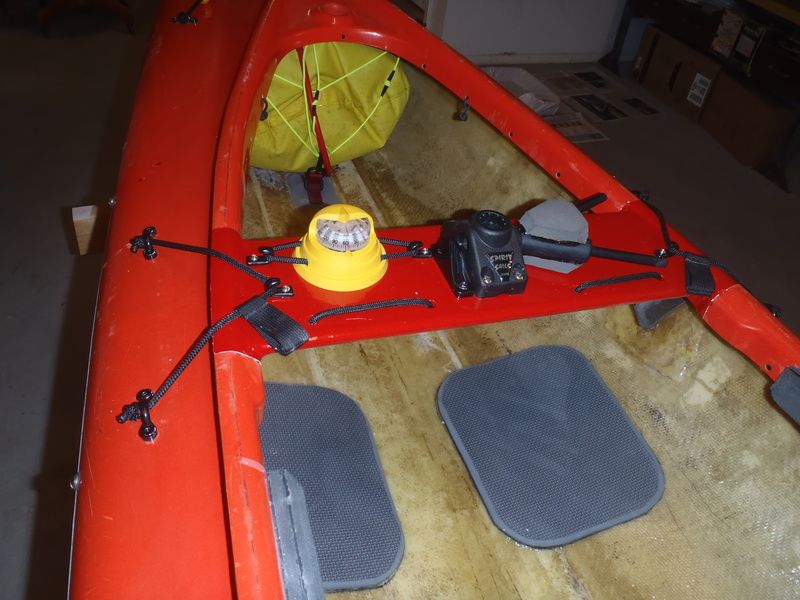
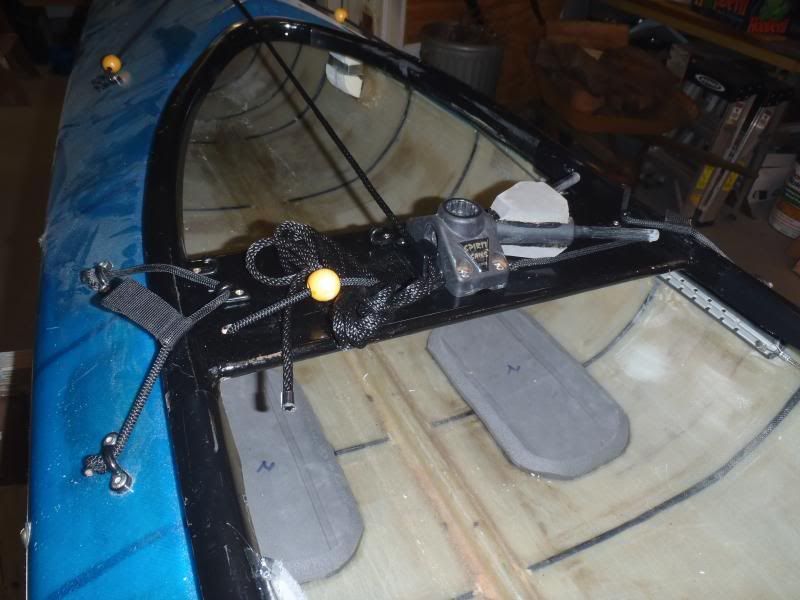
Beyond the mast step, which you don’t need, I get a lot of other utility out of those thwarts. My standard utility thwart desires now include a couple of J-hooks to bungee a deck compass between, an open cam cleat to keep the bow line within easy reach and a lateral run of over-under-over bungee to secure miscellaneous stuff like sunglasses and hat.
Perhaps akin to the mast step, and something else you maybe don’t need, but I really like having a vee of bungee that hooks onto that thwart to secure my paddle and spare paddle when not in hand. That functionality is so beneficial that I have some version of a paddle restraint bungee on every decked boat utility thwart.
We put that simple vee of paddle bungee on Doug’s Optima and I was gratified to hear that when he muckles up with friends he is the envy of all; the only one with a place to secure his paddle in a loaded boat. A true muckle with friends needs to be a two-hands free experience. Hand me a beer and pass the Longbottom weed.
Muckles aside, when launching or landing any canoe, especially in wind or wave, I want a place to quickly secure the paddle, grab the painter line, control the boat and get in or out without getting steamrolled.
Without the mast step or other assorted doodads your utility thwart would not need be as wide, but the installation process could be much the same.
I first figure out where I want the utility thwart placed, typically accessible if I lean forward slightly. That is somewhat dictated by my need to position the sail out of paddle stroke range. When I have the location marked on the hull I first cut a test template from a piece of Lauan or other scrap plywood
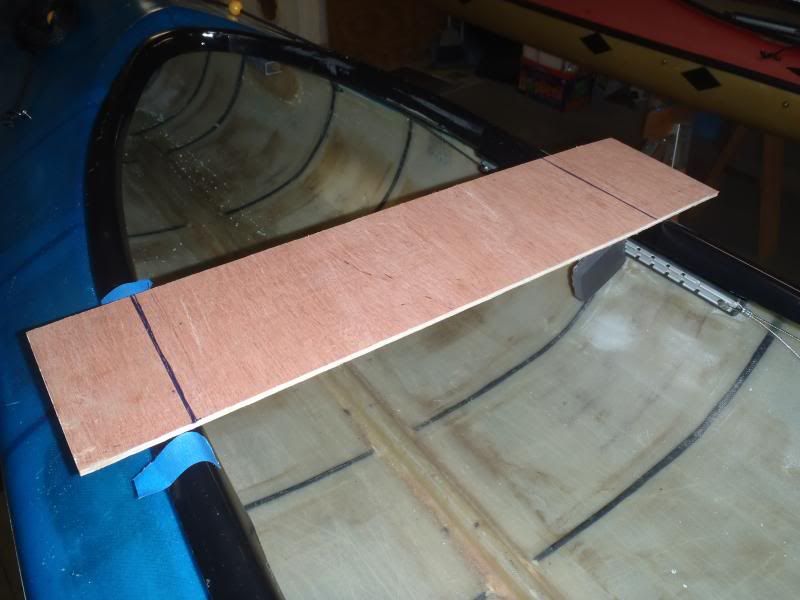
Once I have that rough cut, and butt-end sanded so that scrap piece so that it fits precisely between the cockpit coming edges, I transfer the fitted template to a piece of dimensional lumber, cut it out, rout the edges and sand a little on the ends, test fit, sand a little more on the ends, test fit and repeat until the ends match the angle/slight curvature of the inner cockpit coming.
Test fit that final utility thwart, maybe sand the ends a little for a precise fit. Sand, test fit, sand a little more. . . .
For the initial installation I build a temporary platform (I use an old Xerox box) in the hull and add some additional 2x4 scraps and wedges to build up that elevation platform until the thwart fits level and even between marked locations on the coming edges.
Then just staple a strip of kevlar felt to the butt ends, saturate that with epoxy, slide the thwart into place and walk away for a day.
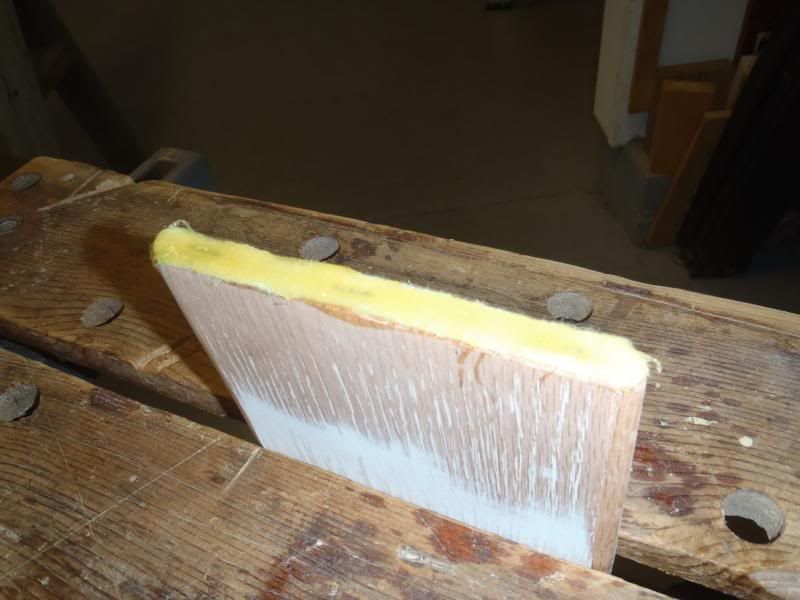
The thick kev felt stapled to the ends takes up any slight void space between the end of the thwart and the coming, and epoxies the thwart in place for the fiberglass and resin that provides the real strength. BTW, I have a yard of kevlar felt I will never use for any other purpose. Enough to last me a lifetime. PM me an address and I’ll mail you more than enough.
I paint a little bead of thickened epoxy or G/flex into any visible ooops voids and build up a little ( bevel on the edges, so the next-step fiberglass doesn’t need to make a right angle L bend.
Cut pieces of fiberglass cloth (and peel ply) to span the ends of the thwart and up onto the coming edge and lay them in place (covered with the peel ply). Both sides of the thwart, top and bottom. I do the topside first, wait a day and invert the hull to do the bottom of the thwart. I add the same thickened epoxy ( fillet to the bottom edge of the thwart before installing the glass on that sde.
I have more hull area to work with on the bottom of the thwart. On the top I have only the cockpit lip to work with, but on the bottom that area is hidden from view and I have the sides of the hull down to (or across) the deck seam, so those pieces of glass are both larger and beefier oz cloth.

Lightly sand the faint peel ply weave and topcoat with epoxy if necessary. Drill the thwart for the bungee and any accessory bits, then take them back off.
Wait a week +, and then paint the utility thwart to match either the hull or cockpit coming.

Between the epoxy saturated kev felt on the butt ends, and fiberglass layers across the thwart and hull top and bottom, those glassed in place utility thwarts have proven uber sturdy and should work for your chickee snugging system and ladder lashing. There might even be opportunity atop that thwart for some customized ladder base.
A hockey stick might not provide a lot of area at the ends for overlapping fiberglass. Something shaped like a traditional thwart would provide a wider middle section (deck compass, I love having a deck compass lashed right there next to the map) and wider flared ends to better butt and glass against the edges of the cockpit.
I shaped and install a couple like that, with Dr. Seuss-ish exaggerated thwart curves, but came to find that having a bit more level platform in front of me was helpful. 5 inches wide rectangle isn’t too much for my crowded uses, and all I need to do is rout the edges. YMMV.
Not that it is an issue with the kevlar Monarch, but having a thwart there also provides a lot of lateral stiffness with a big open cockpit. The cockpits on glass and nylon boats like the Optima and Vagabond stiffened up nicely with the addition of that thwart.


