• Happy Launch of Lewis & Clark Expedition (1804)! 🧭🏞🏞️

Freedom 17 Strip build

Well from a canoe building perspective I've good news. It's not an allergy, unfortunately my son has scarlet fever from undiagnosed strep throat. He'll be better after a round of antibiotics.
Yes the shop vac is mandatory with the ROS.
 
Put some fiberglass down last night! One full 4oz layer, still have a second layer to do up to the waterline and at the stems. So far used about 10oz of epoxy for the seal coat and 15oz for the wet out.
 

Attachments

  • image.jpg
    image.jpg
    353.3 KB · Views: 0
  • image.jpg
    image.jpg
    397.2 KB · Views: 0
I had to use all of the heat sources I coud to get the basement warm. With everything on I got it up to 75. I cut out the football shape first, I was going to put it down first but decided a full layer first made more sense. Last picture shows it all done.
 
Good call on putting the smaller second layer ON TOP of the main layer ! Many do this the other way, and end up sanding through the main cloth layer to level the surface.

Glad to hear your son's illness wasn't due to your boat building !!!

Jim
 
I learned this from one of the Kayak forums, I thought it might be helpful for anyone doing epoxy work.

When I epoxy I use a squeegee and I sometimes have a little ripple left behind from the side of the squeegee. Instead of sanding I use a razor blade as a scraper. It works much better, I can control how much epoxy I take off perfectly and I never damage the surrounding fabric that has only been wet out like I would with sandpaper.

15%2B-%2B1.jpeg
 
I put the second layer on a yesterday along with two layers on the stems. I really should have put a fill coat on but I couldn't wait to see how much it weighed. With a full 4oz layer and another to the 4" WL it came in at 20.3#. Hopefully I can stay around 35# all done. The inside looks OK some gaps but nothing too huge. Hopefully I'll sand out the inside tomorrow and fiberglass during the week.
 
Dave,
Congrats on your lightweight build!! If you can really hold it to under 35 lbs that would be great!
I had a 17 ft tandem that weighed 37 lbs, it was a little skinnier than your design but I had full decks and bulkheads.

Any special plans for the initial launching?
 
The lightweight part is a little scary it's like picking up an eggshell. Still pretty floppy I know it will stiffen up a lot with the inside fiberglass and the gunwales but right now it's scary.

No big plans for launching but I am getting more excited to get it wet. probably stay local for the time being but I might be able to get to your neck of the woods around bug season.
 
For the seats I was thinking about playing with foam backer rod and wrapping it with 8oz fiberglass I have. Basically I want to make a lightweight simple truss. I'll draw a picture when I get some time.
 
Wow, great weight so far! I know what you mean about them feeling delicate. My last two fast solos were both sub-20 pounds when they came off the forms and they felt like picking up a wet noodle. Amazing how much better they felt with the inside glassed.

What are you planning for gunwales and other trim?

Looking forward to your seat design. Do you have a form you'll be using and you will be vacuum bagging them?

Alan
 
For the gunwales I'm thinking a 3/16 strip on the inside and about 1/2 to 3/4 on theoutside. Probably going to leave a gap on the upper surface that I'll fill with black epoxy. I'll either use redwood or cedar not sure if I'll fiberglass or not. For the decks I'm thinking about using strips with a pretty veneer and fiberglass.
I want to put in floatation mostly for the strength it'll add. Probably do strip panels to match the hull. I'll incorporate a handle and an access/inspection door.
I don't think I'm going ta vac bag the seat parts. I was actually thinking about using shrink tubing instead.

Where's the best place for the painters. I'm thinking a few inches above the water line will be good. Any opinions?
 
For the seats I'm thinking of going pretty unconventional. At each seat location I'm going to have two cross rails made from black fiberglass on backer rod. I'm going to add buttresses underneath to help distribute the loads to the hull. Onto the rails I'm going to add a back joy seat. I used this seat in one of my kayaks and is the most comfortable I've ever used. I going to hinge the seat on the front rail and tie it to the back rail with a bungee so it can pivot forward when I kneel. I hope all that makes sense!
 
Sanding stinks. I probably have 4hrs of scraping and sanding so far and still have ten to go. The inside joints don't look too bad, a few gaps where I over beveled but most of them seem to be on the dark strips so hopefully they will hide well. Here are a couple of pictures.
 

Attachments

  • image.jpg
    image.jpg
    332.9 KB · Views: 0
  • image.jpg
    image.jpg
    335.2 KB · Views: 0
Looking good, and you're right, sanding the inside is probably the most unpleasant task. It really does stink! Your thoughts on painters reflect the common ideas for best practice, but I can never bring myself to drill through the finished hull, so I just run them through my decks. I have very small but substantial decks, usually made from some type of hardwood.
 
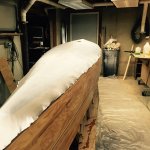
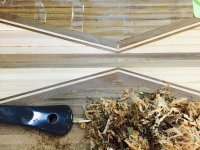
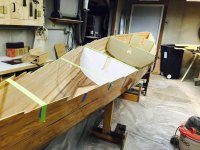
Sanding the inside sure isn't very fun and I bet it's a real pain with that floppy hull and having to leave forms in to keep it in shape.

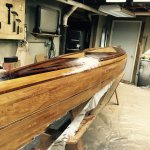
I'm pretty picky about the outside of the hull but play it a little loose with the inside. I make it a point to get all the glue drips and everything is sanded to the same grit but getting the contours perfect I don't worry about too much. I get what I can relatively easily and make sure there are no sudden transitions the fiberglass won't be able to bridge (which I sometimes solve by adding thickened epoxy rather than sanding away cedar). In the center of the boat, where things are more visible, I shoot for a smooth curve but closer to the bow, where it's a sharper turn, it's never perfect. And I'm ok with that because the only way to tell is by feel, to the eye it looks fine. Those inside curves, and fiberglass with the weave showing, can hide a lot of sins.

Alan
 
Well that makes me feel better. I have this French curve looking scraper that in using in the chine area, seems to be working ok. After scraping I'll quickly hand sand and say good enough. Good observation on the forms, they are a pain in the neck.

Mem kayak folks always drill through the hull for lifting handles. Just fit a block of wood and epoxy in place first before drilling the hole. Then follow up with epoxy to seal it. I guess I'll do it. I hope the drill doesn't grab and rip my hull in half!
 
I also bought some interface pads for my 5" ROS. Basically they're 1/2" soft foam with velcro on either side and go between the sanding pad and paper disc, allowing the sandpaper to conform much better to curves. I've used it on my last two hulls and it's really sped up the inside work. I normally use only one interface pad at a time but have doubled them up for sharper inside corners. I prefer to let the ROS do the roughest material removal and then go over it by hand with a scraper just to touch up. Then back to the ROS with finer grits for the final sanding.

The soft interface pads work well on the exterior as well when shaping the rounded stems.

The interface pads won't chew off a high ridge like a solid pad will, they tend to conform around it, so if you're not careful you can create a low spot on either side of a high spot you're trying to get rid of. But for helping to smooth and shape curves they're very handy.

They work nice for hand sanding too, easier than trying to hold just the paper.

My interior finishes probably aren't good enough for some but they are for me and I think they look pretty nice.

Alan
 
Back
Top